How to cook a sausage ..

I’m very bossy and opinionated on the subject of sausages.

I buy mine in natural casings and from a butcher who loves making them – and that’s important.  Sausages have always been a ‘suspect’ product.  The Victorians called them ‘little bags of mystery’ because there was no way of knowing what might have been put inside.

Sausages 1

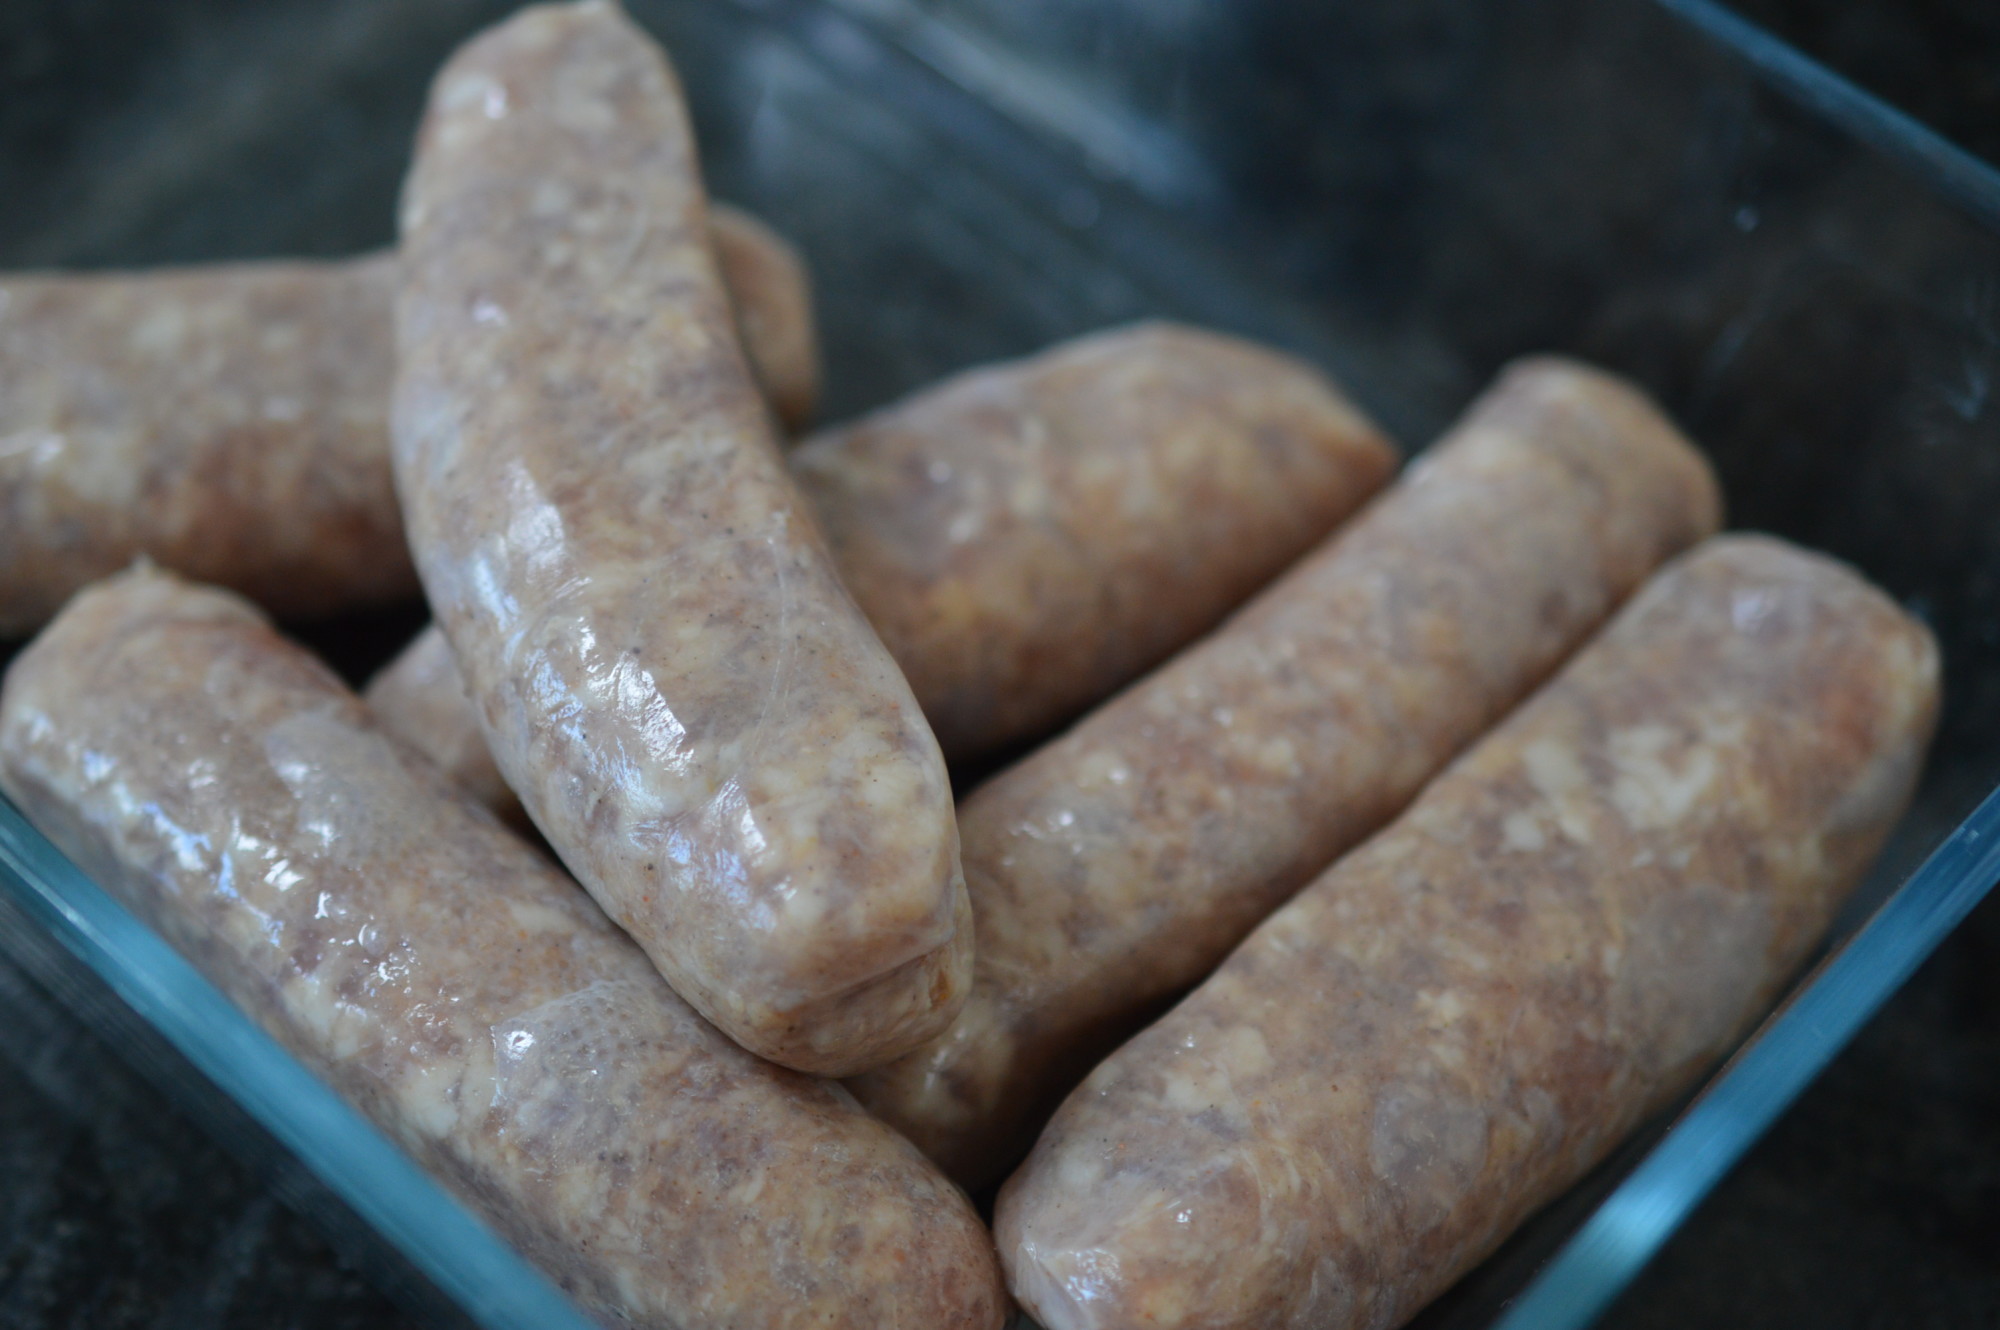
What there will be, in a great sausage, is fat.  Yes, I know.  Fat makes you fat, but you should know this isn’t a healthy eating option and there’s not a lot of point in pretending it is.  For me, that means I buy quality sausages and I eat them occasionally.  There really are few pleasures in life to compete with a sausage sandwich – cooked properly.  (Told you I am bossy on this subject.)  I don’t want to risk my arteries on a dried up/burnt/suspiciously undercooked/greasy sausage.

Sausages 2

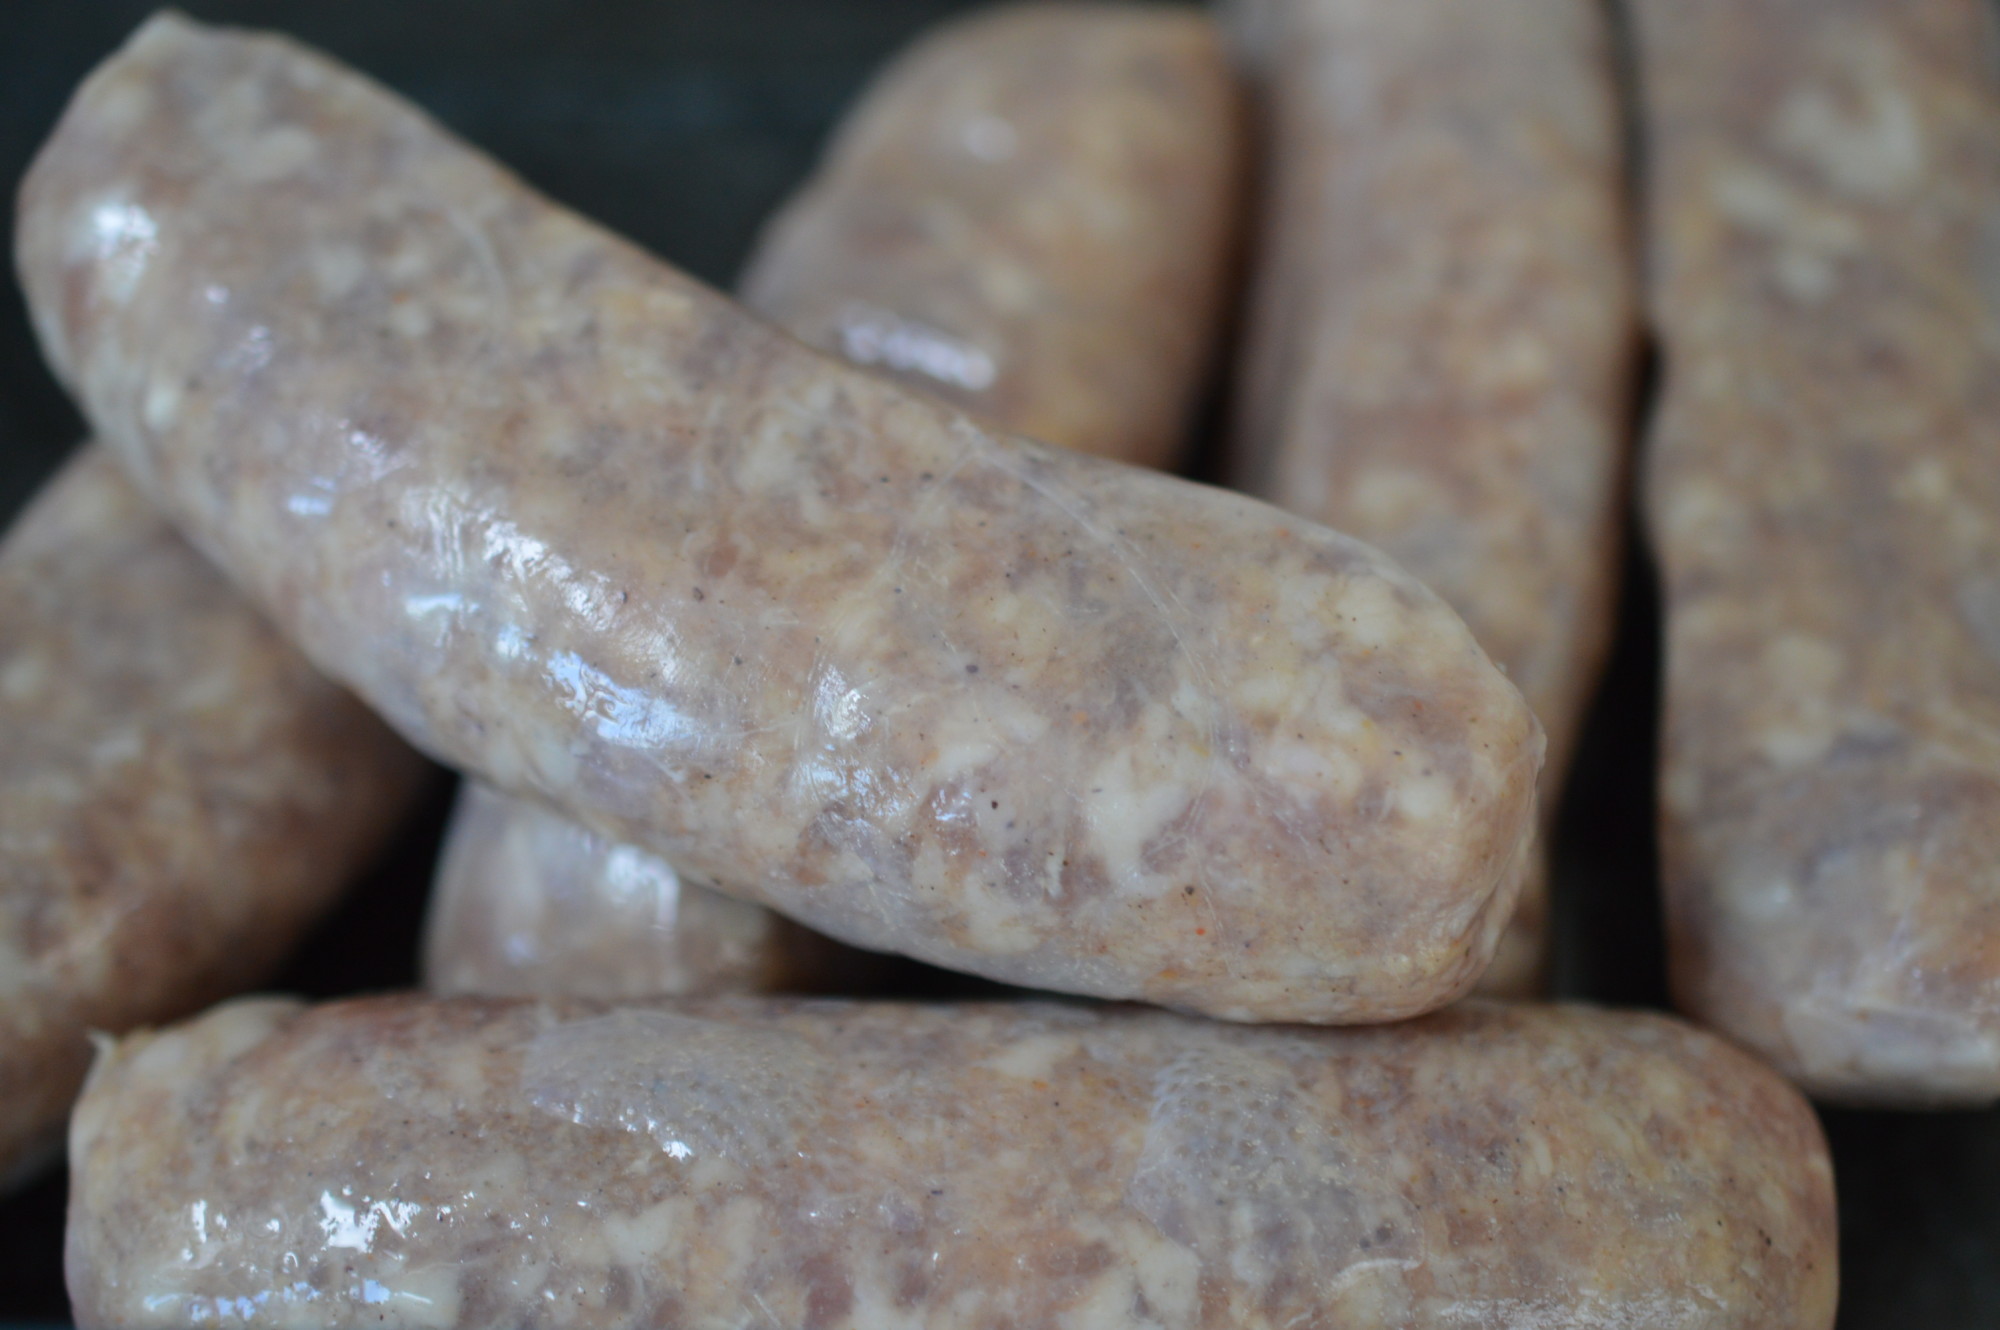
If I’m going to eat it – and I am – it’s got to be good.  Having selected a good quality, well seasoned sausage with a nice balance of meat and fat .. don’t prick it.  There’s absolutely no need to do it and every reason not to.  If you pierce the skin all those wonderful juices will end up in your frying pan and you’ll be left with a dry sausage.

The whole ‘first prick your sausage’ came about after the outbreak of the first world war.  With meat in short supply sausages were stuffed with whatever scraps were available.  To that was added cereal and water to bulk them out.  When the soldiers cooked them on shovels set over open fires they spluttered and burst.  They no longer do that, but ‘banger’ is still slang for sausage.

Beans, bangers and mash

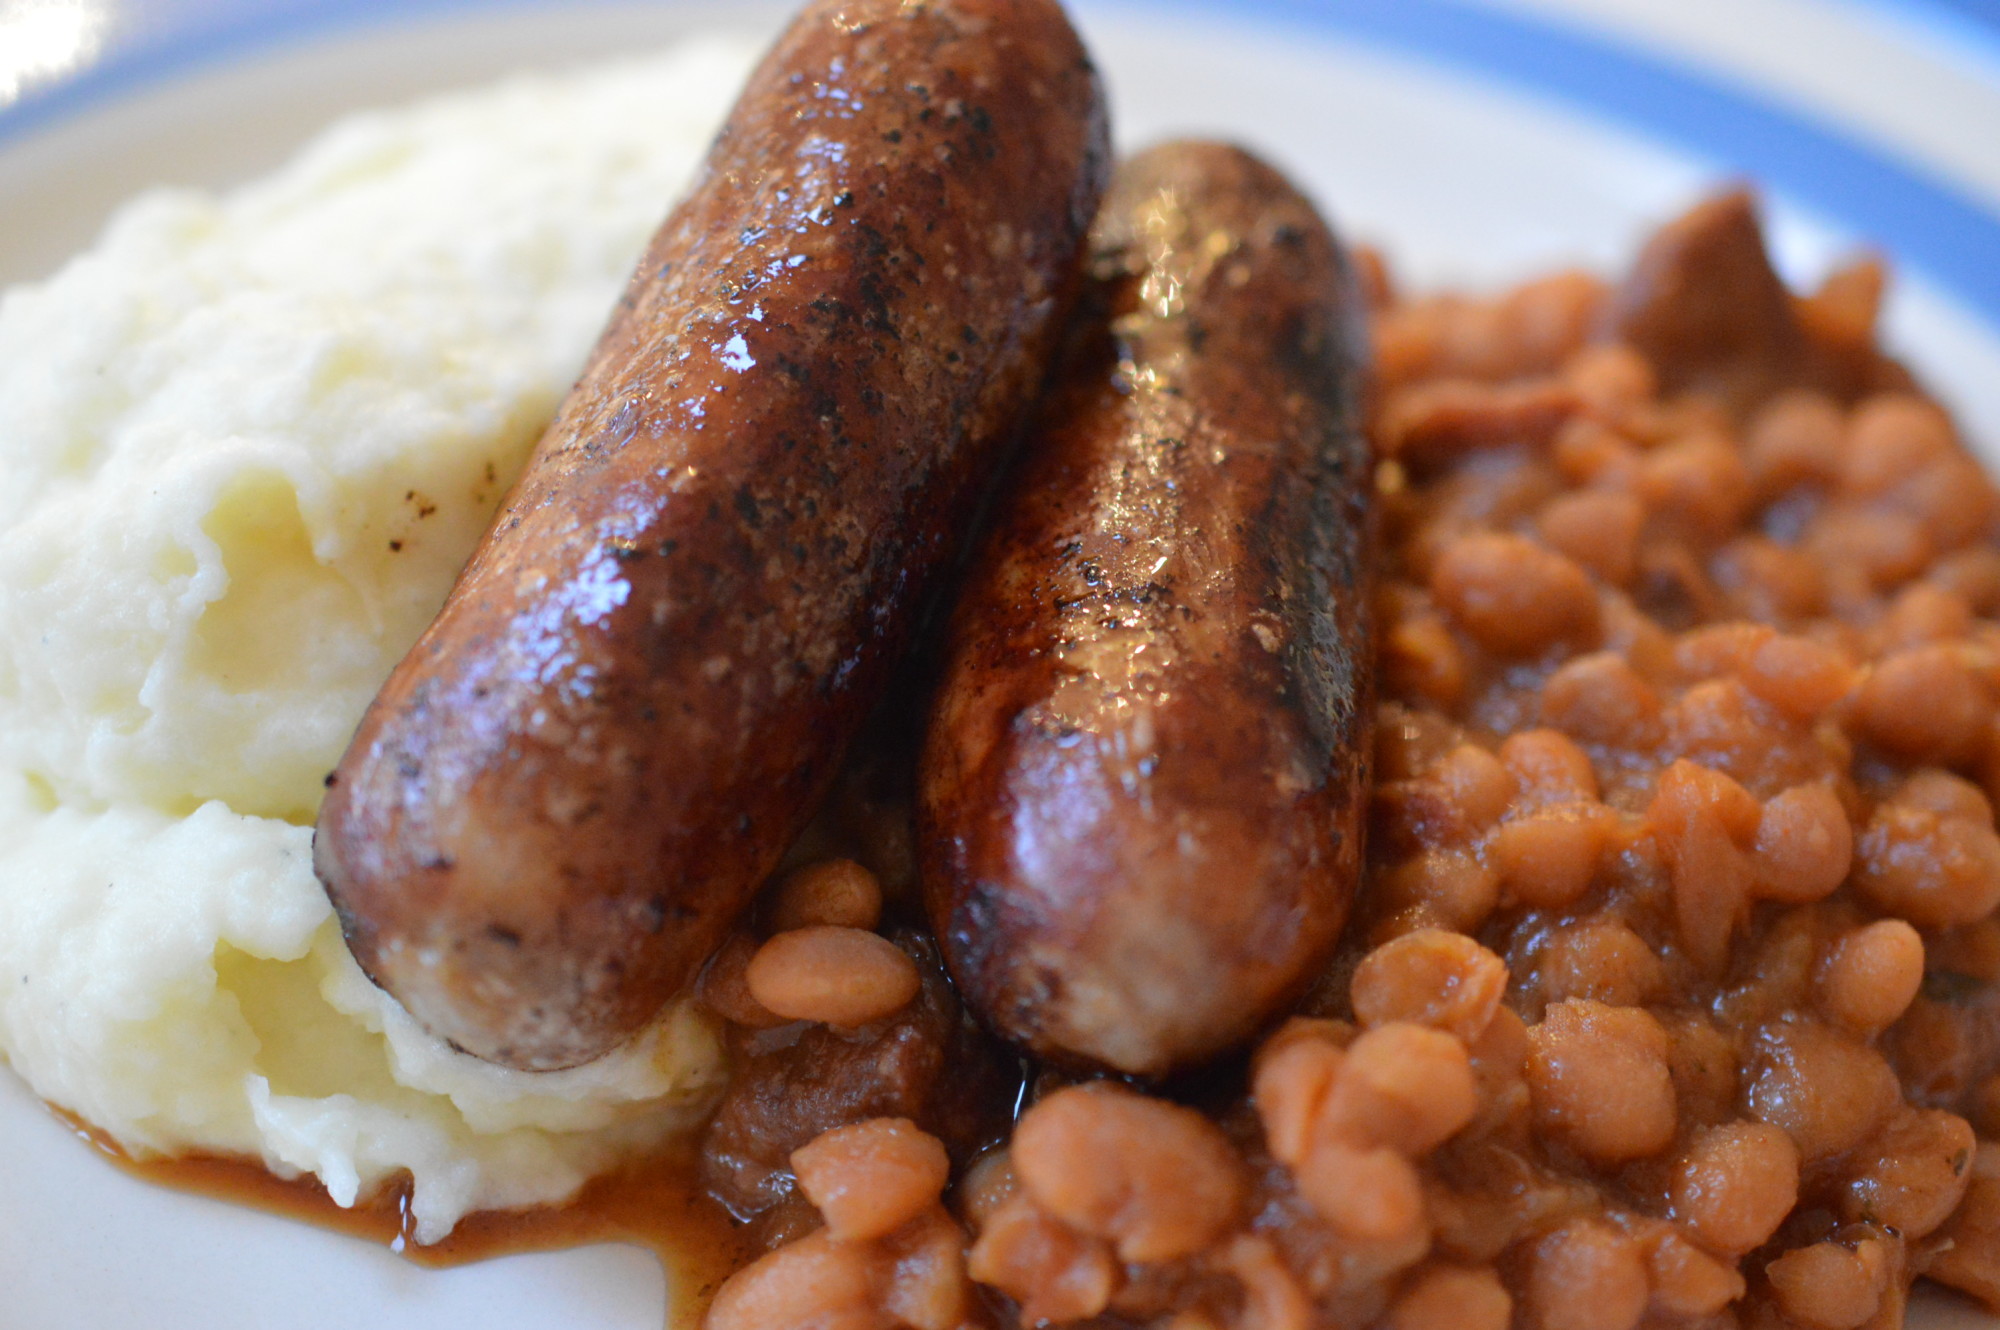
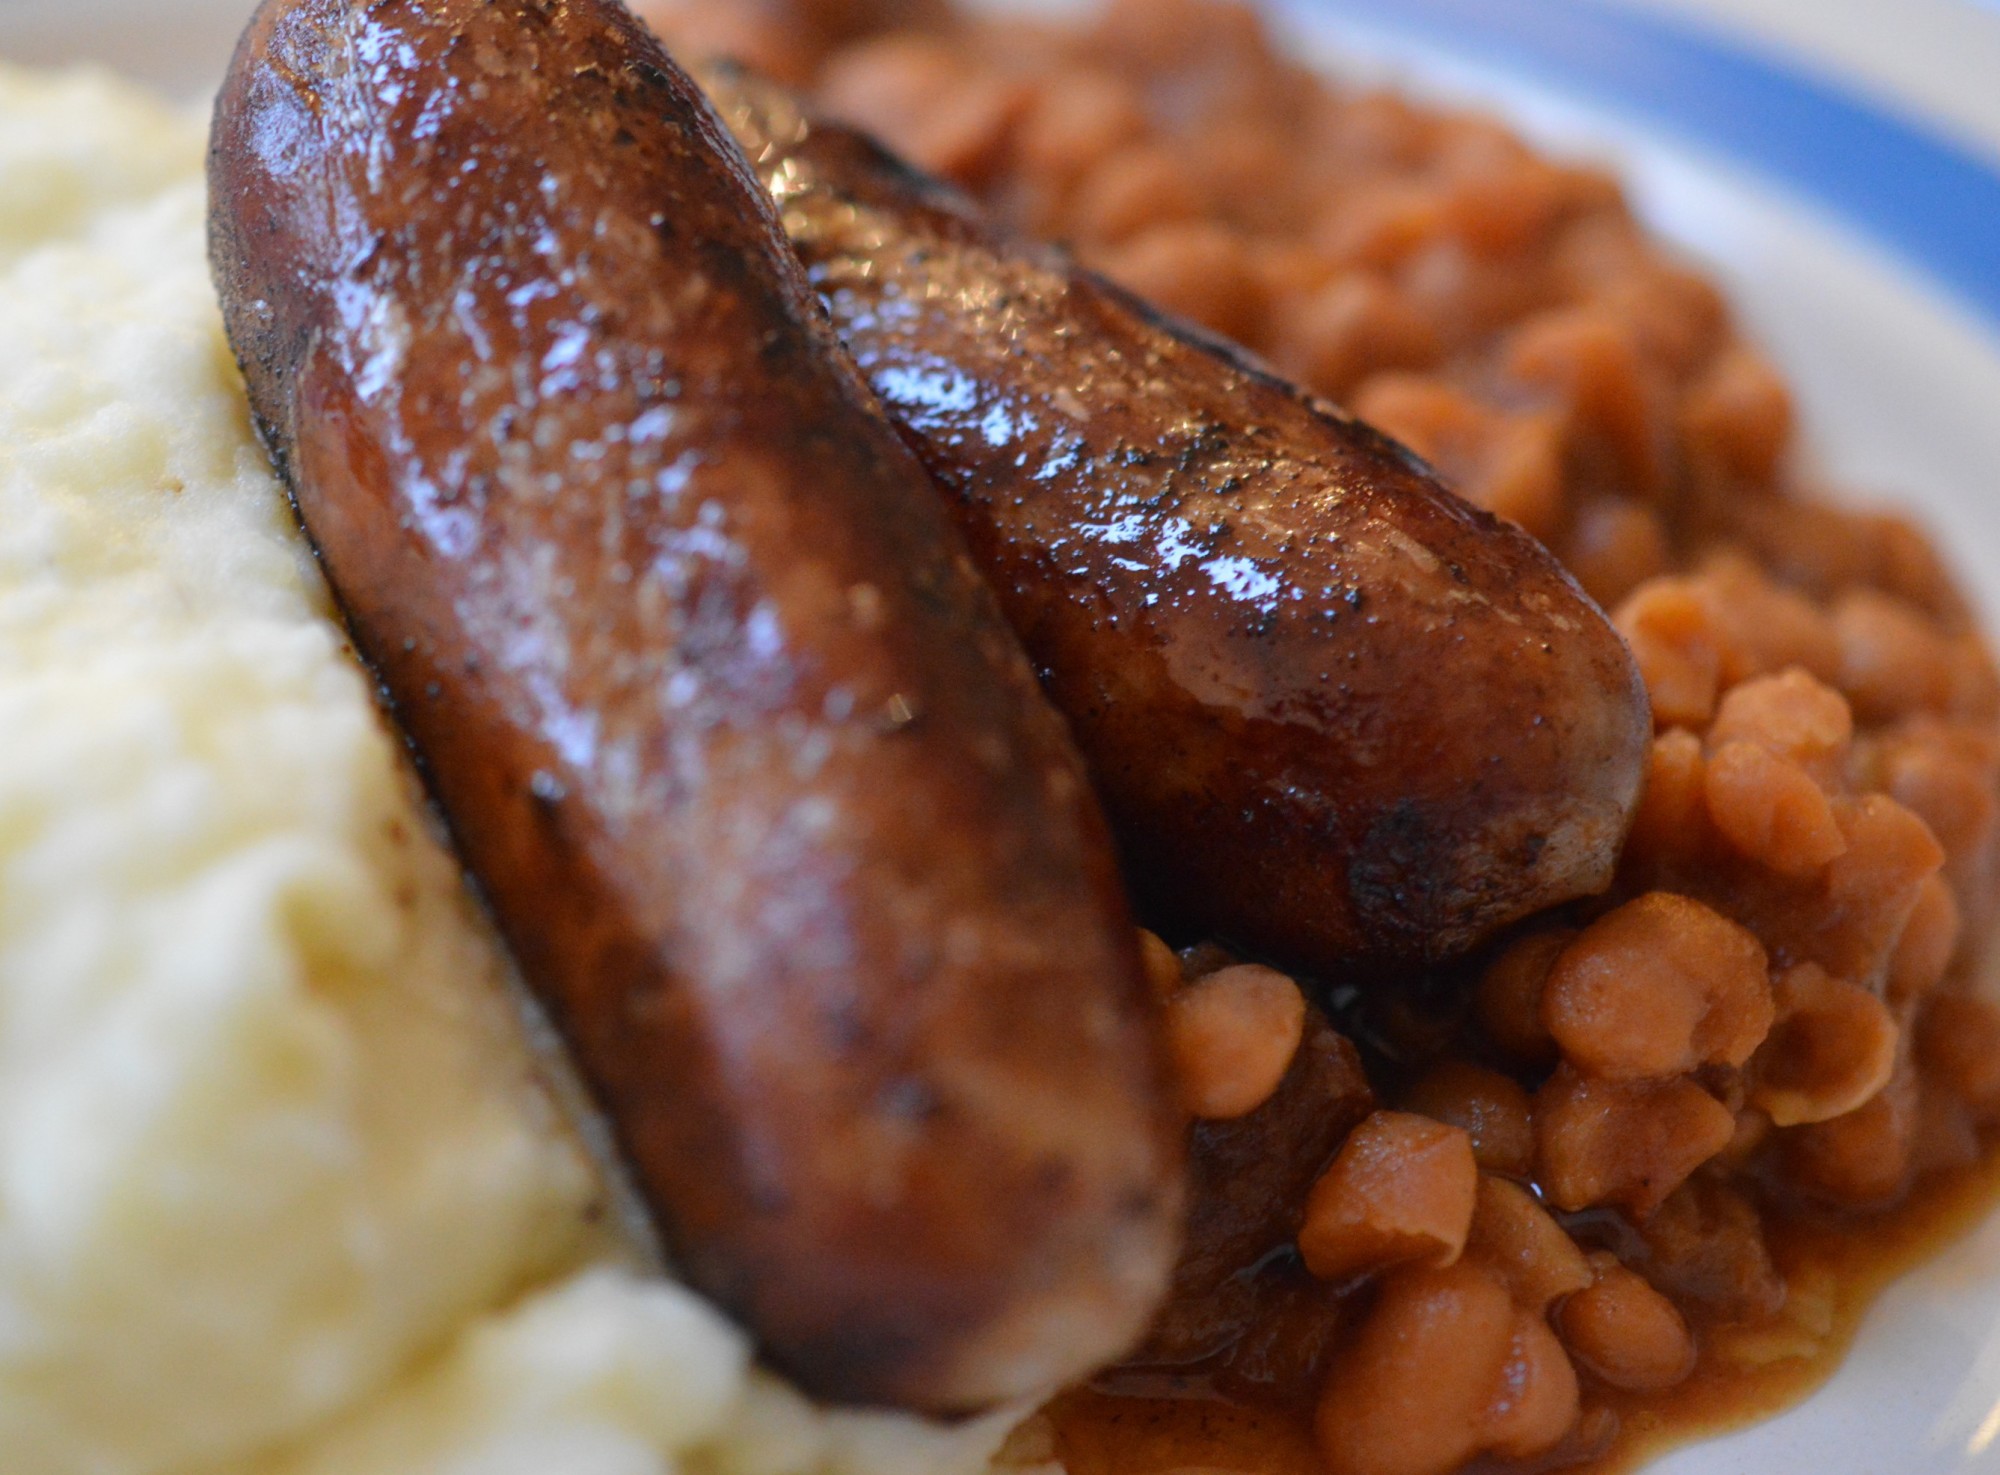
Beans, bangers and mash being a staple of British culinary life .. and where I was headed today.  ‘Beans’ being my homemade baked beans which I slow cooked overnight.  ‘Mash’ being the buttery mashed potatoes and the ‘bangers’ meaty pork sausages.  My youngest has a heavy cold and this is medicine on a plate.  Pure comfort food.

Sausages 3

In my very opinionated opinion, there are two ways to cook a sausage.  The first is s-l-o-w-l-y over the lowest of low heats.  Put some groundnut/sunflower oil in a frying pan and set it on a low heat.  You’ll need to watch it and constantly turn the sausage so it cooks evenly.  There’s no rushing this – a fat sausage will take between 25 and 30 minutes.

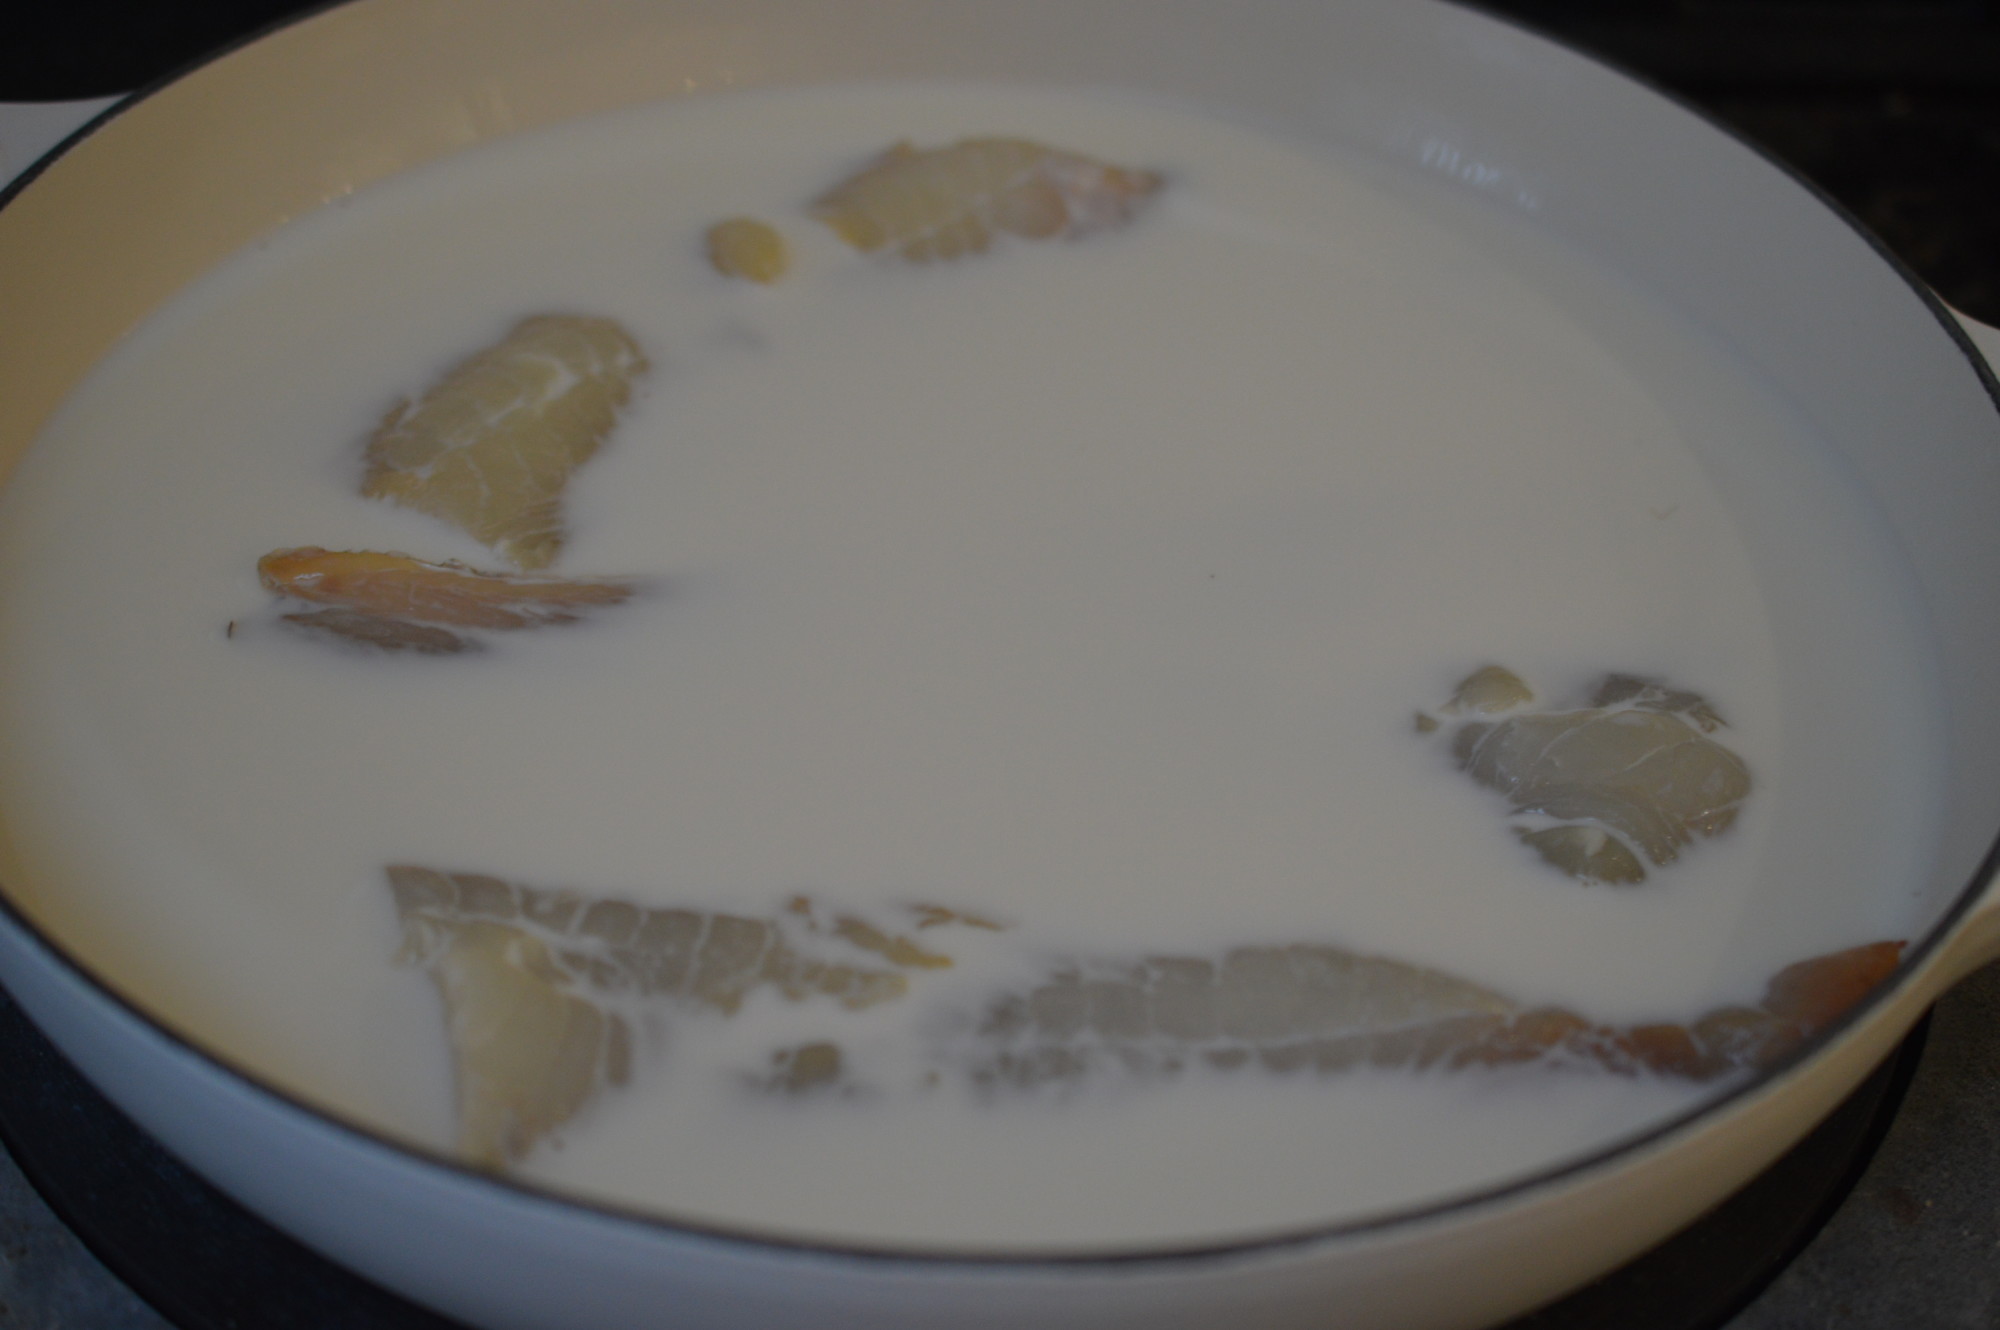
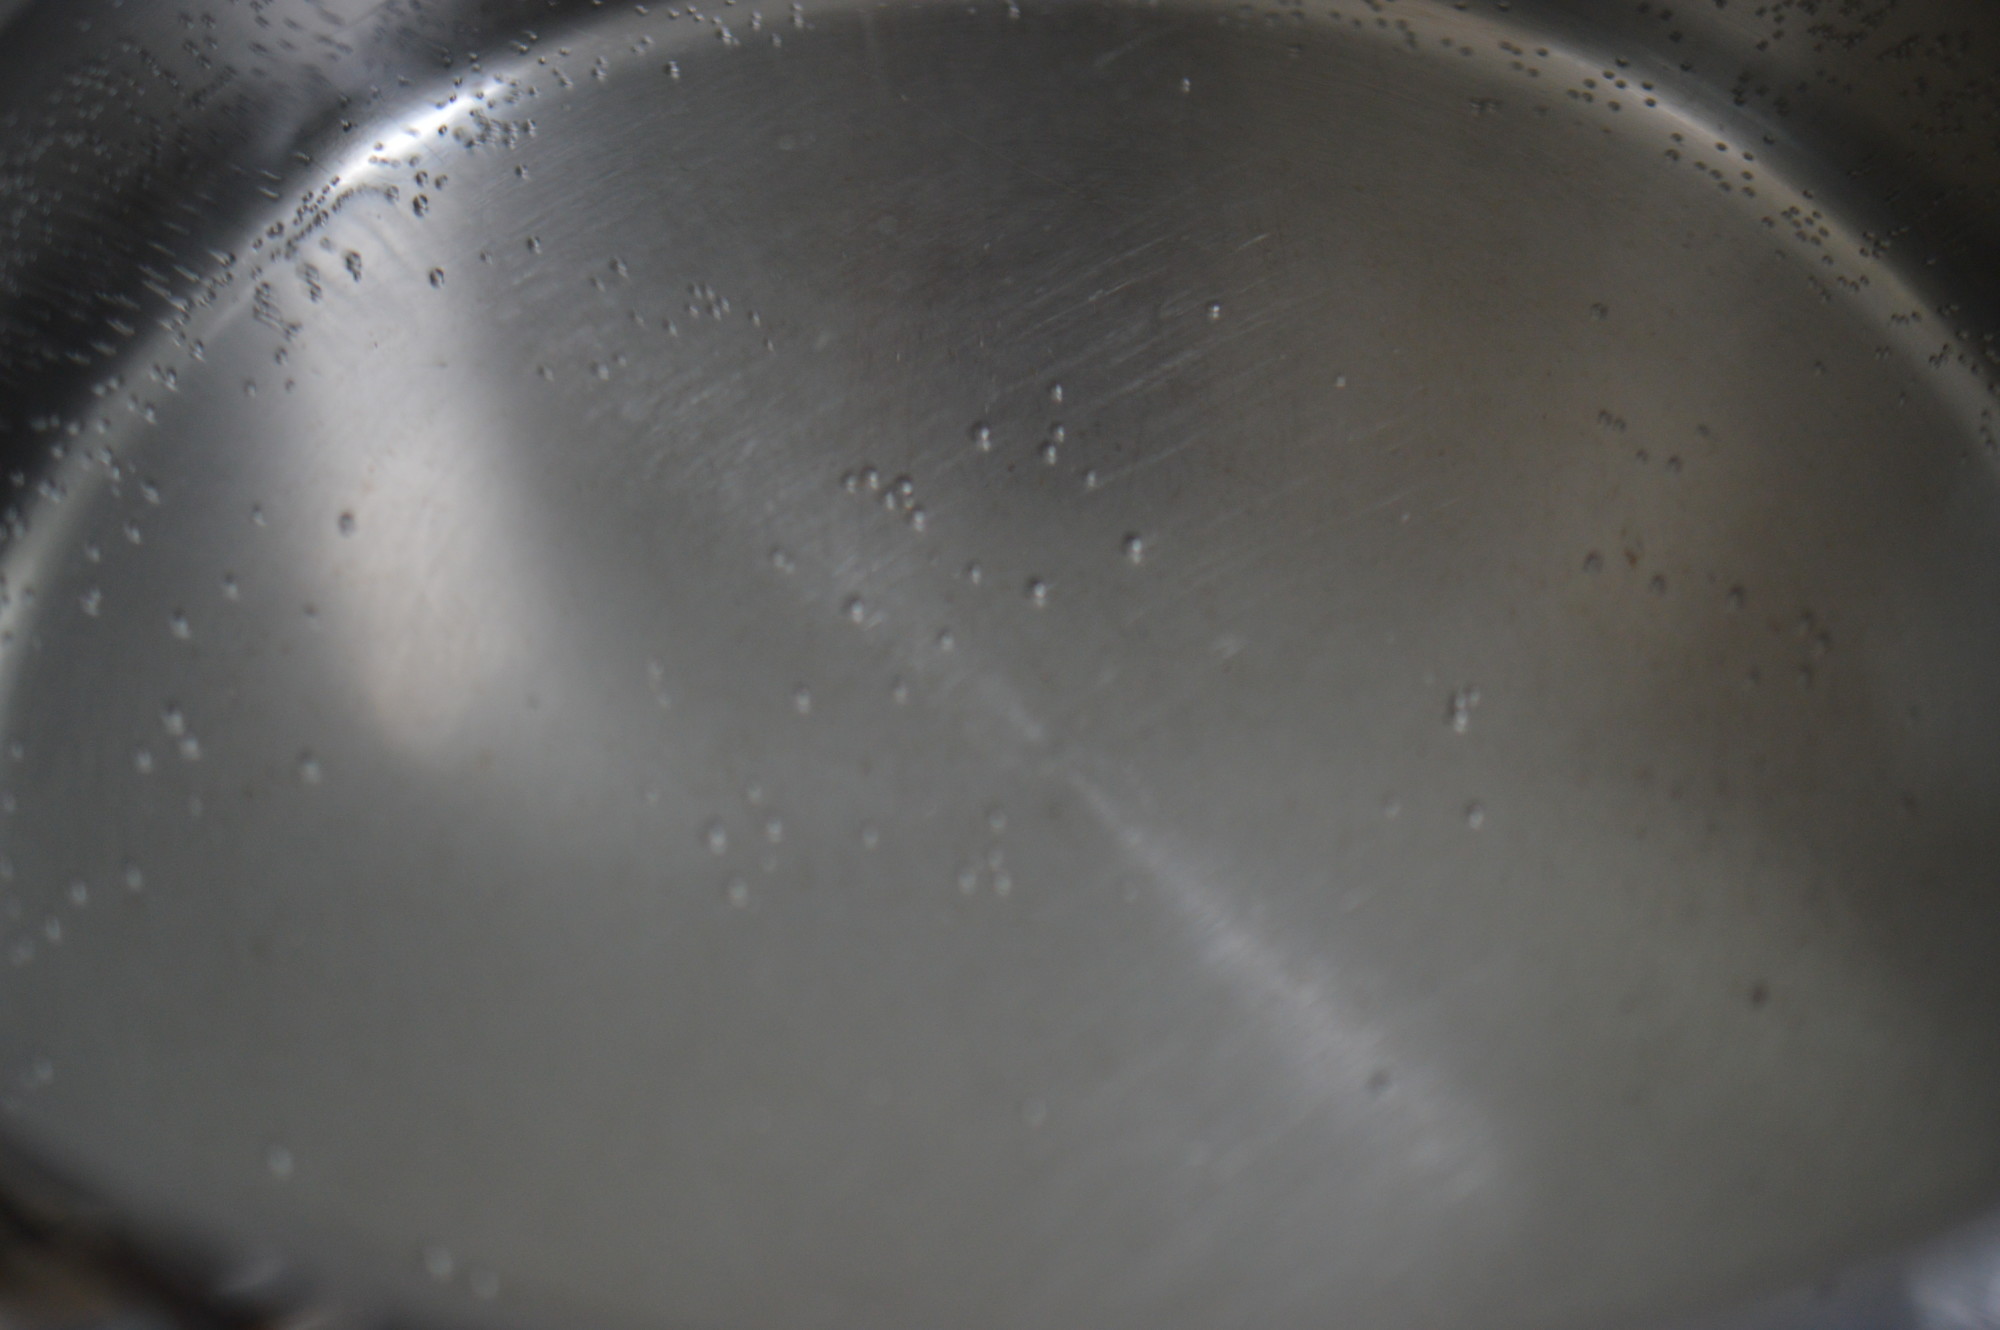
My preferred method is to first poach my sausage.  Set a pan of water over a high heat and bring it to a boil.

Sausages 4

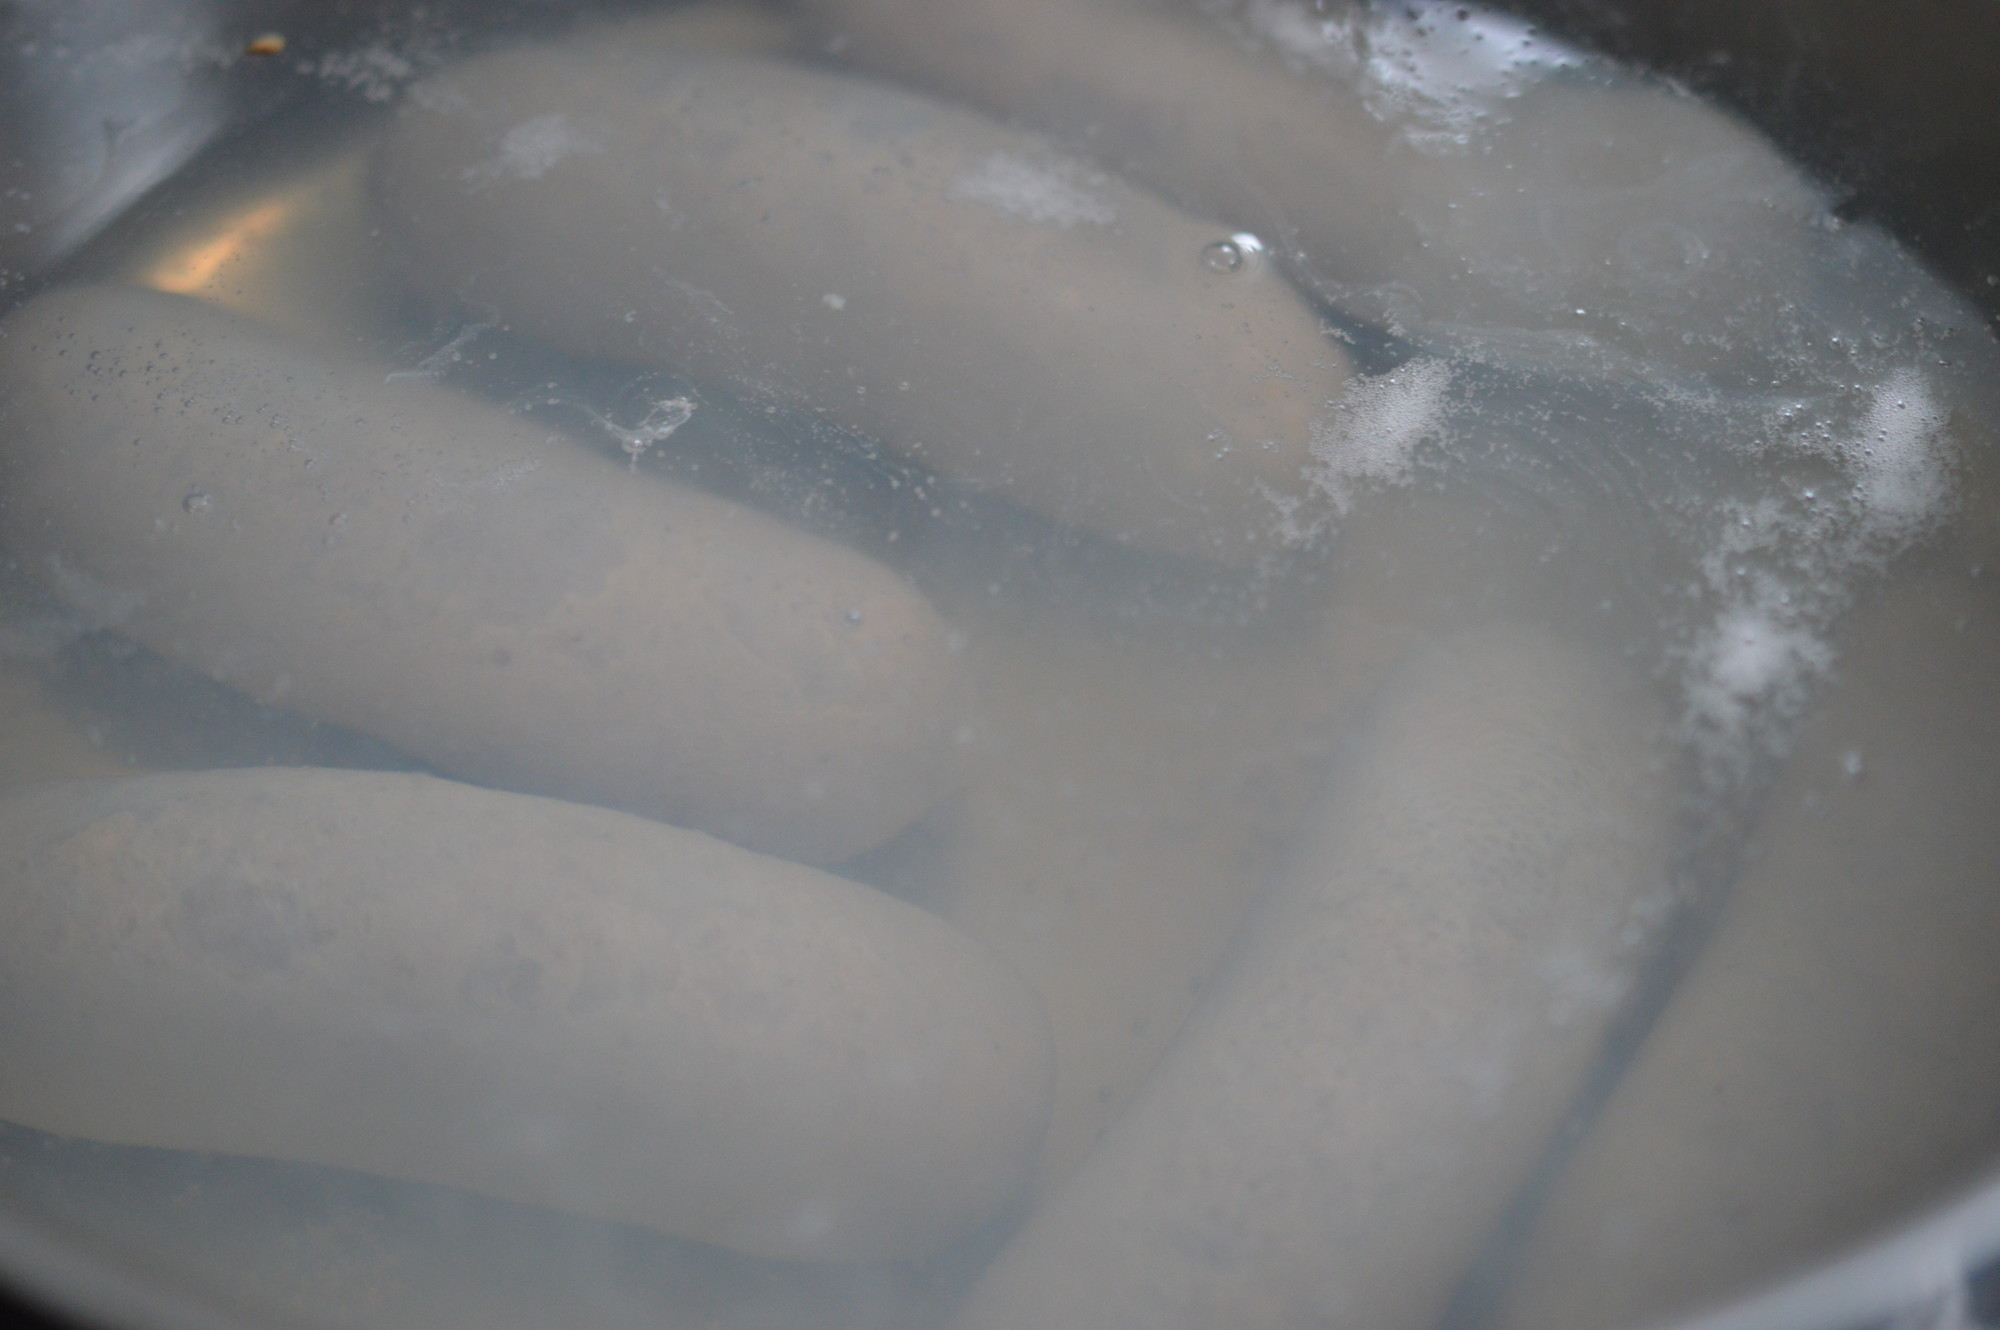
There is really no way of making this photogenic.  Put the uncooked, separated sausages in the water.  Reduce the heat and let them poach at a gentle plop for 10 minutes.

Sausages 7

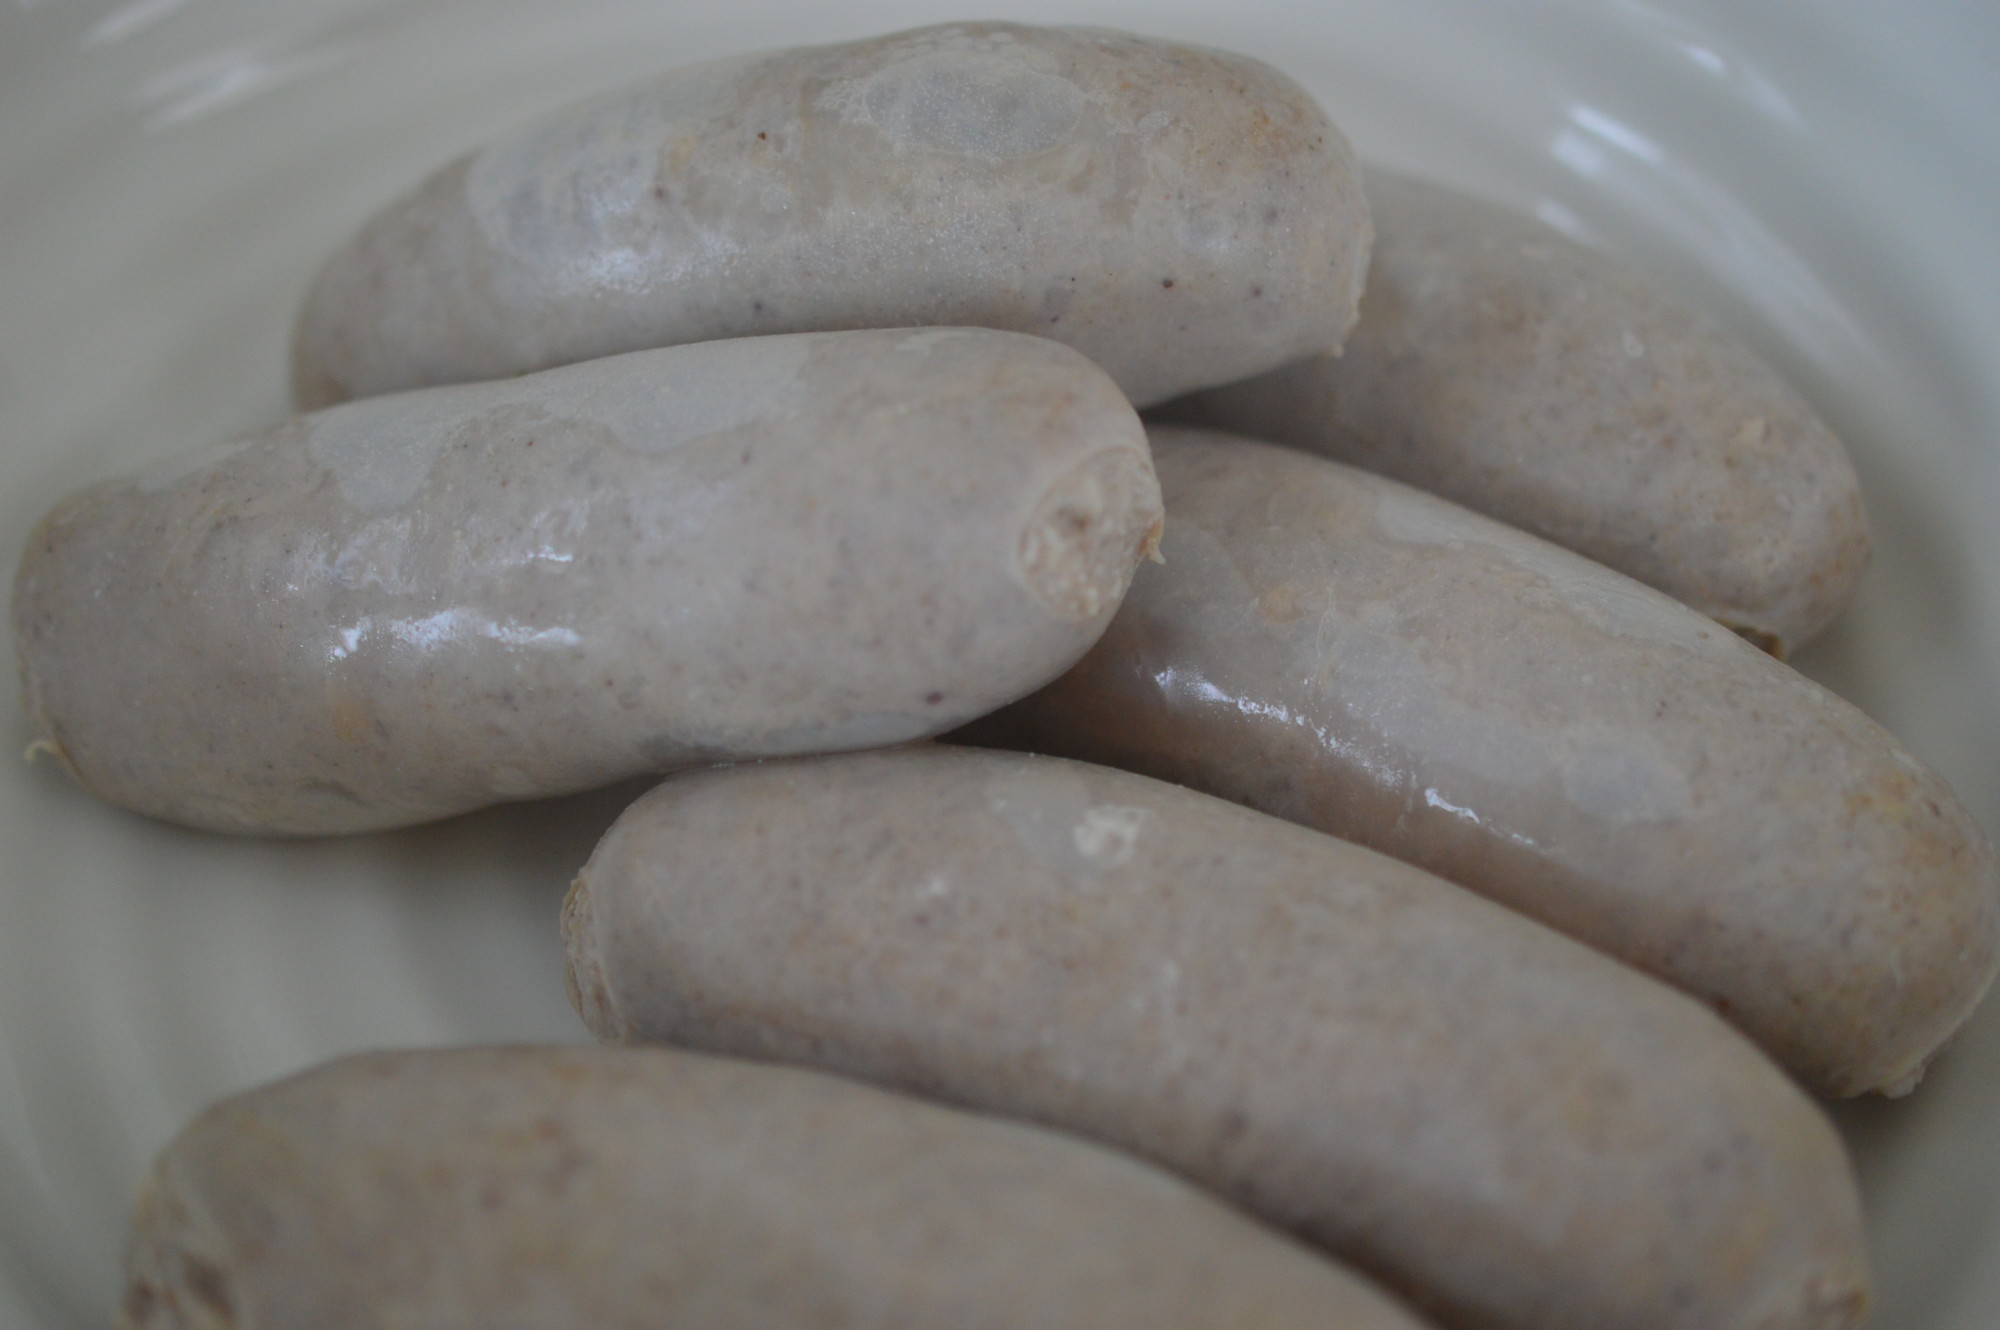
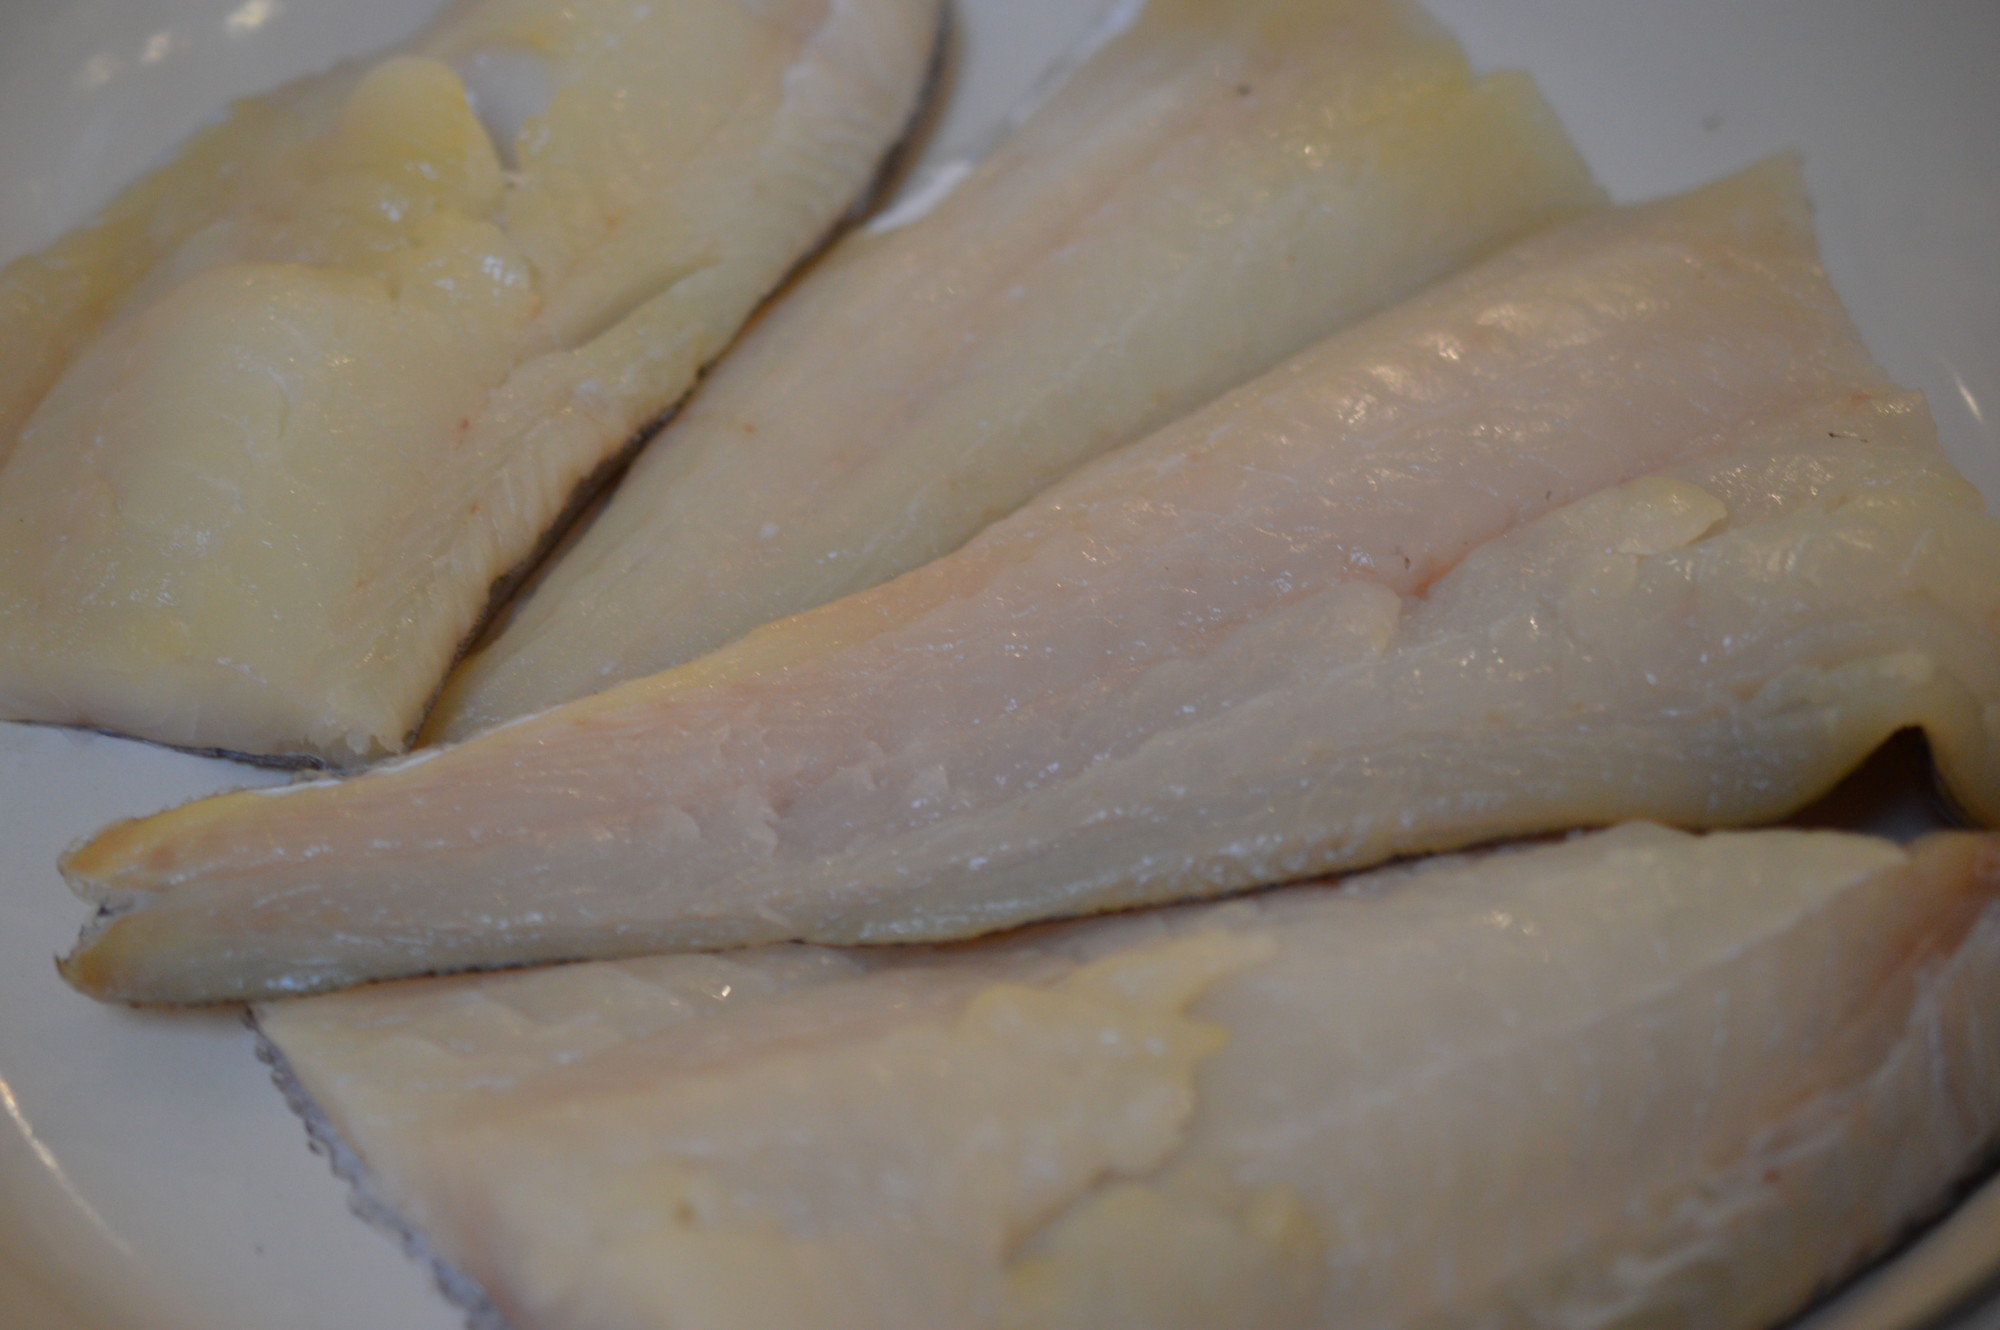
When their time is up, remove them to a plate.  What you have now is a cooked, but visually unappealing, sausage.

Sausages 8

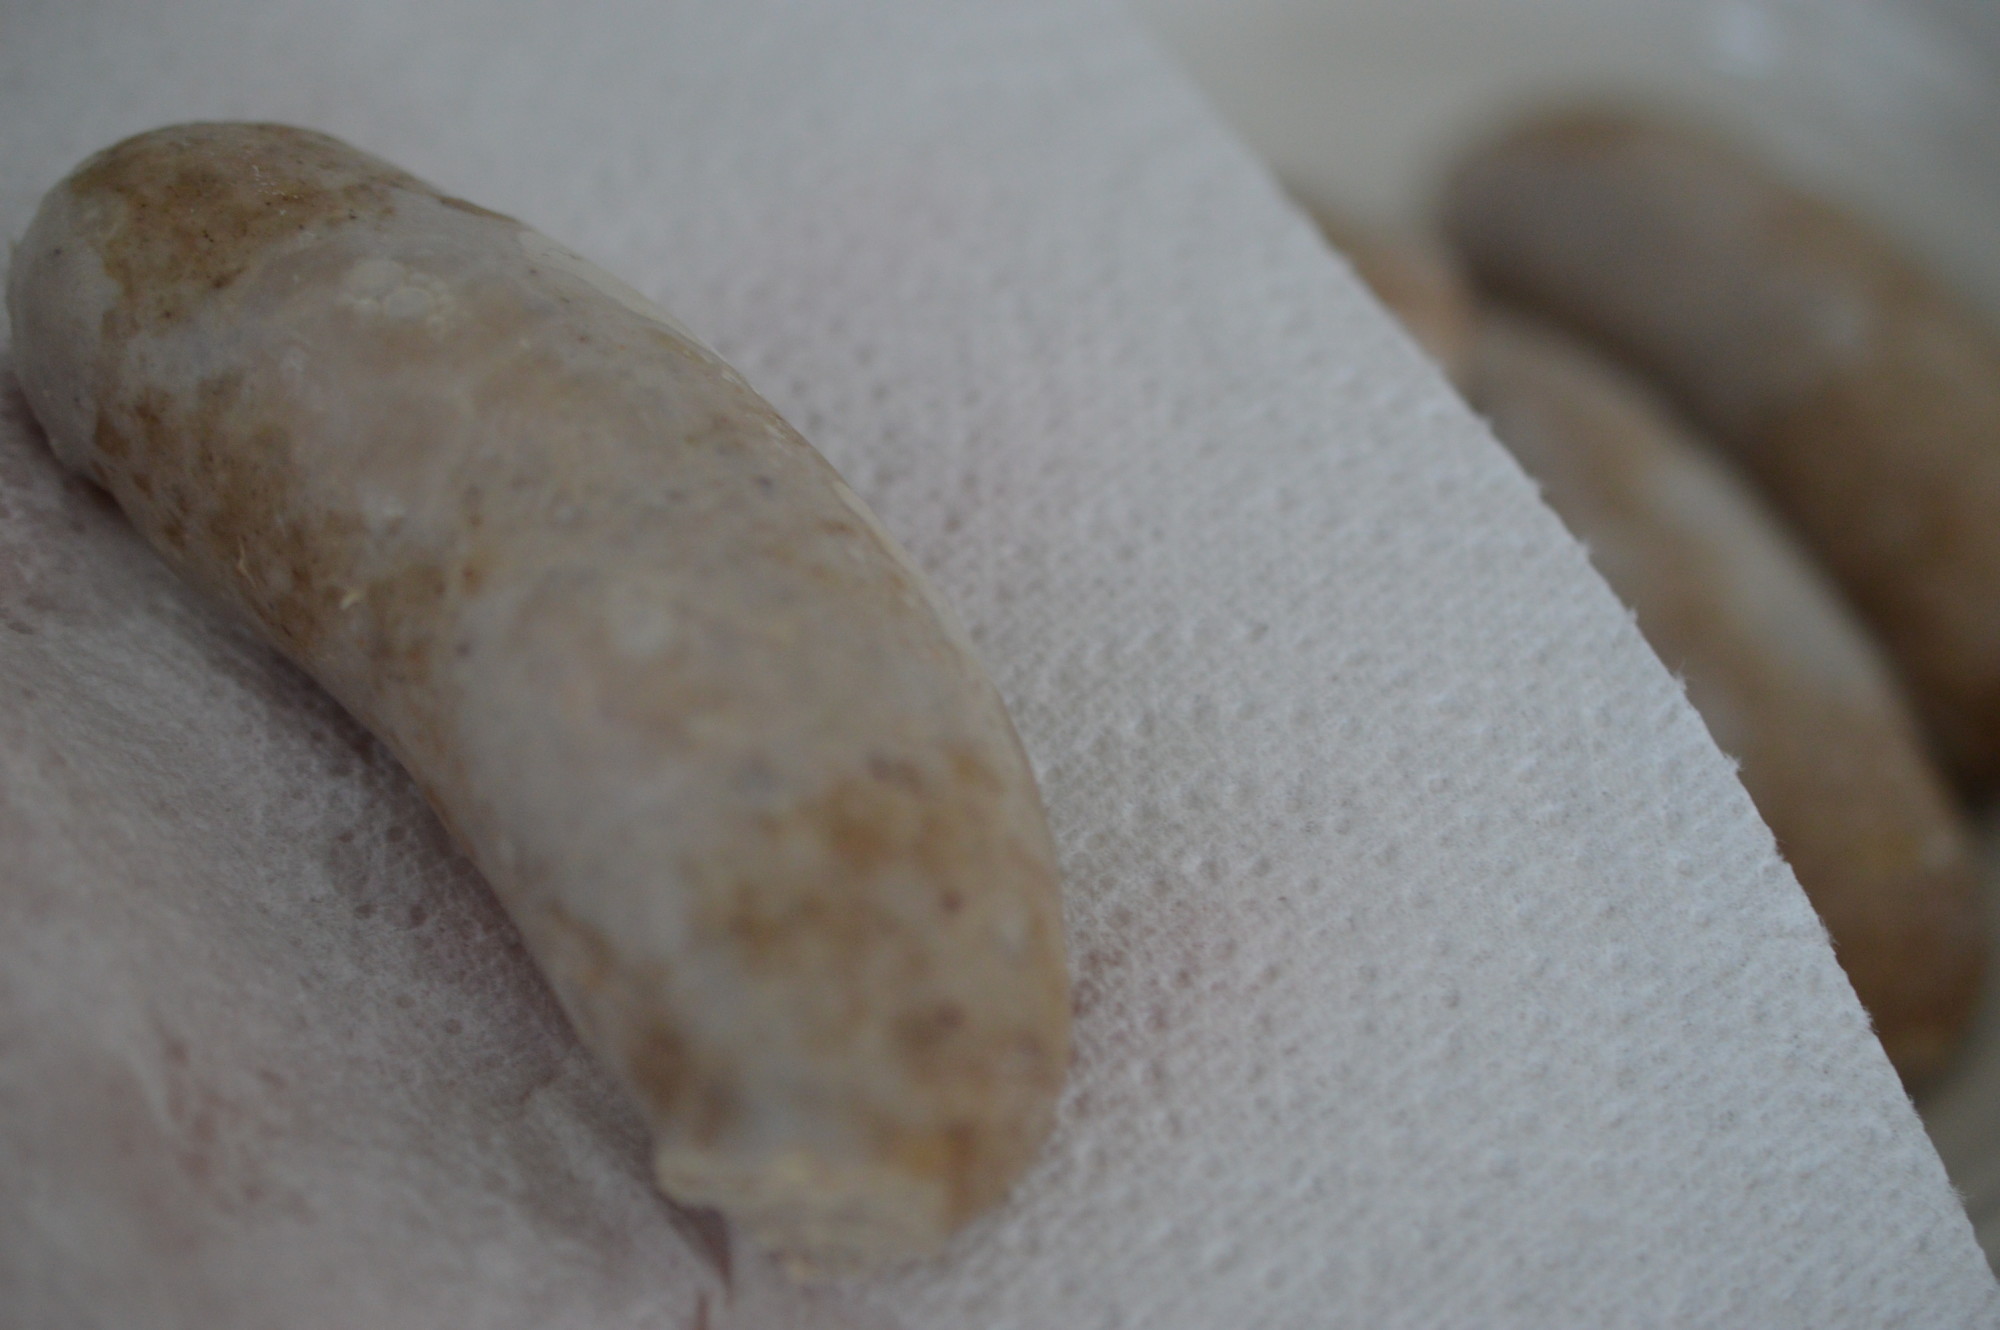
Pat it dry as water will spit when it comes into contact with the oil in the frying pan.

Sausages 9

Put some flavourless oil in the bottom of the frying pan.  (No, you can’t grill them.)

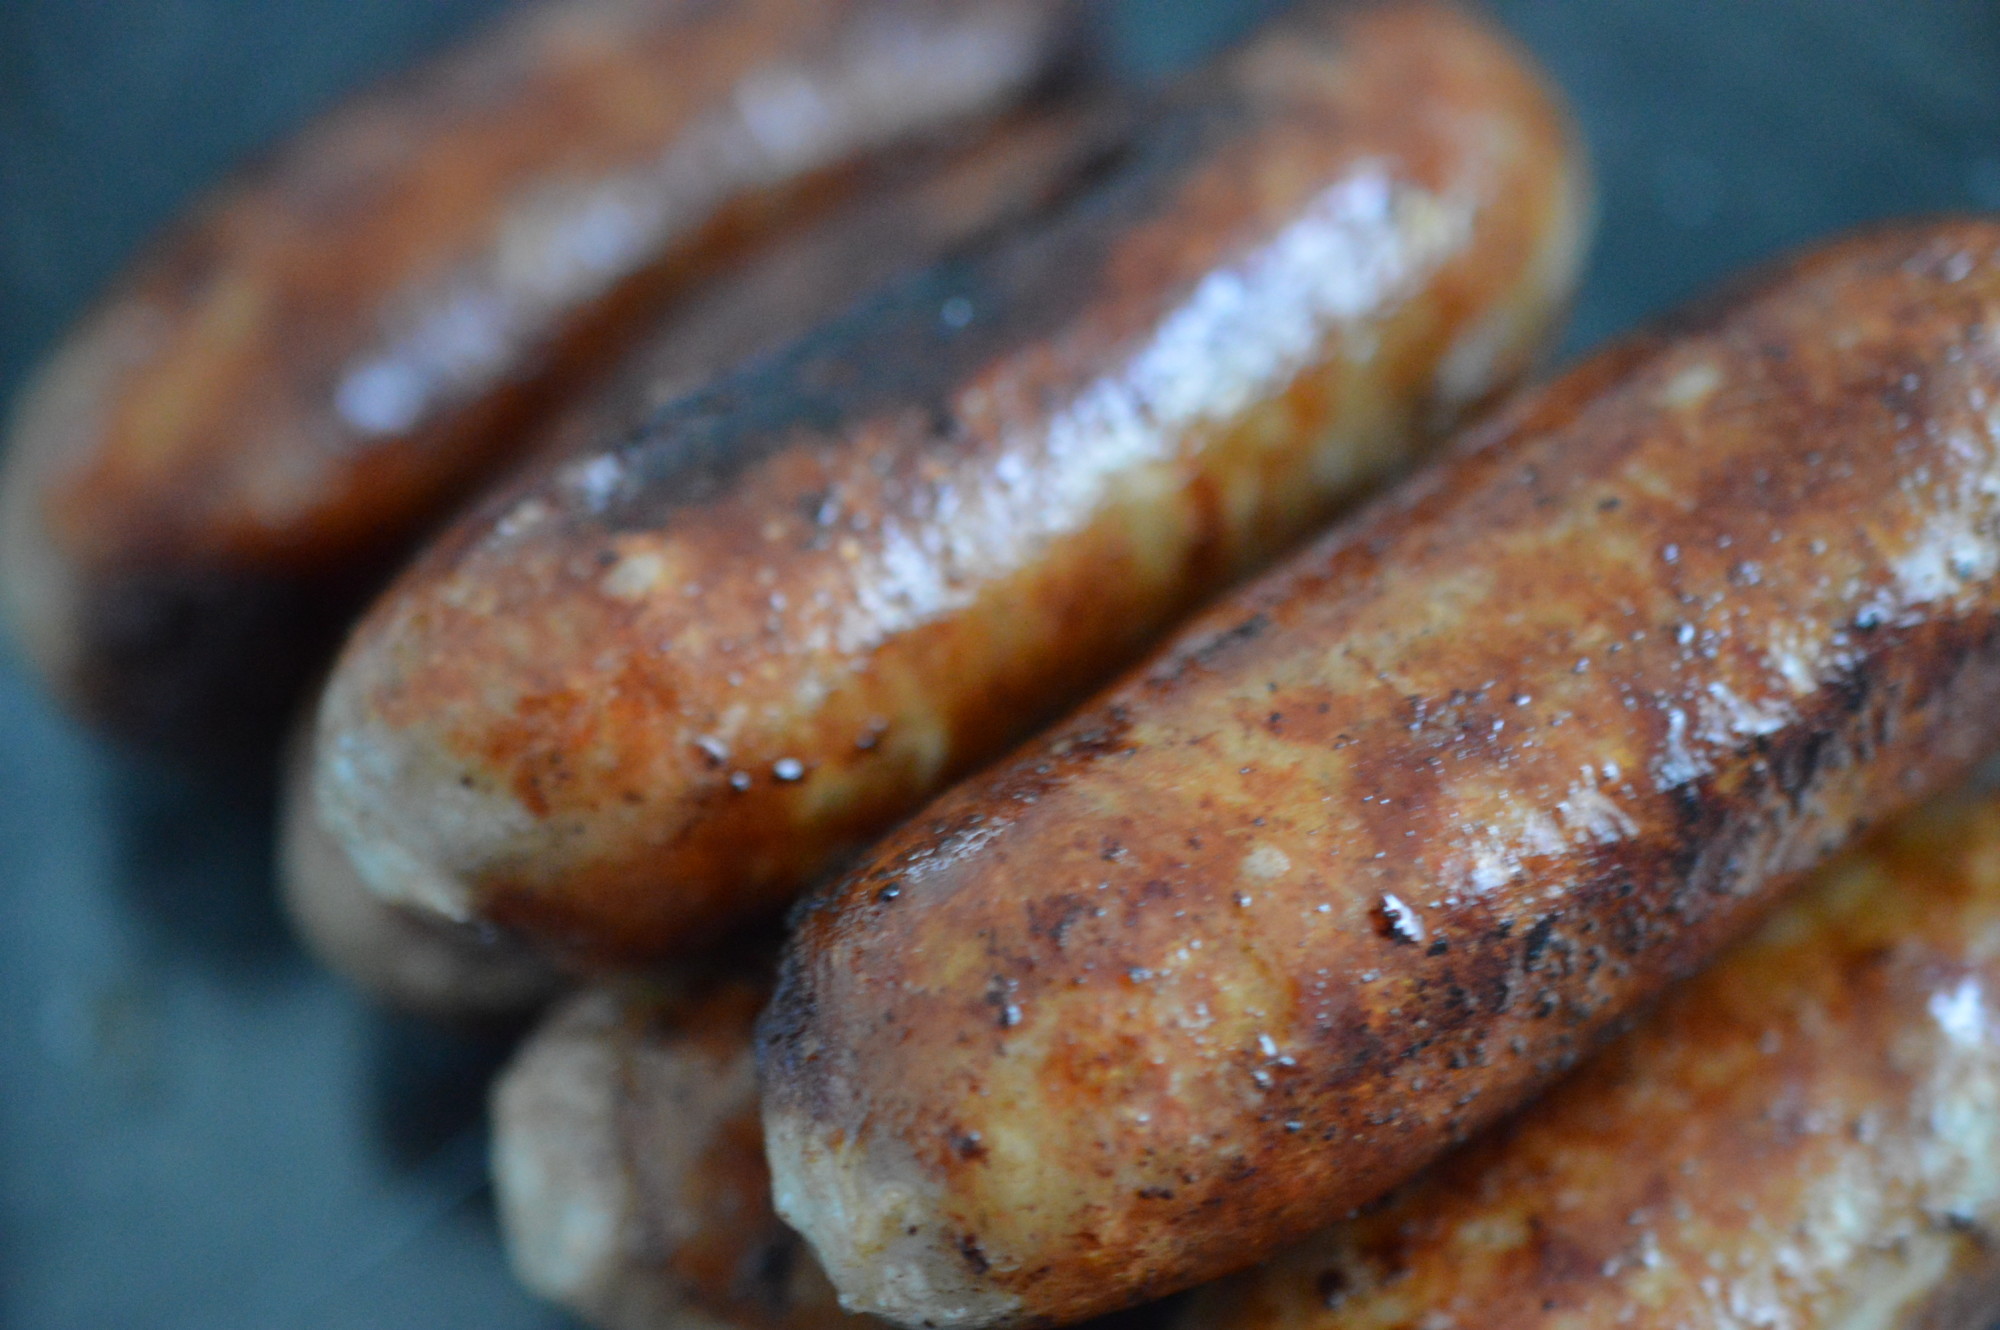
What you are doing now is browning the outside.  There’s no risk of the outside being done before the inside is cooked so this method allows you to turn the heat up.  I fry mine over a medium to high heat.

Sausages 10

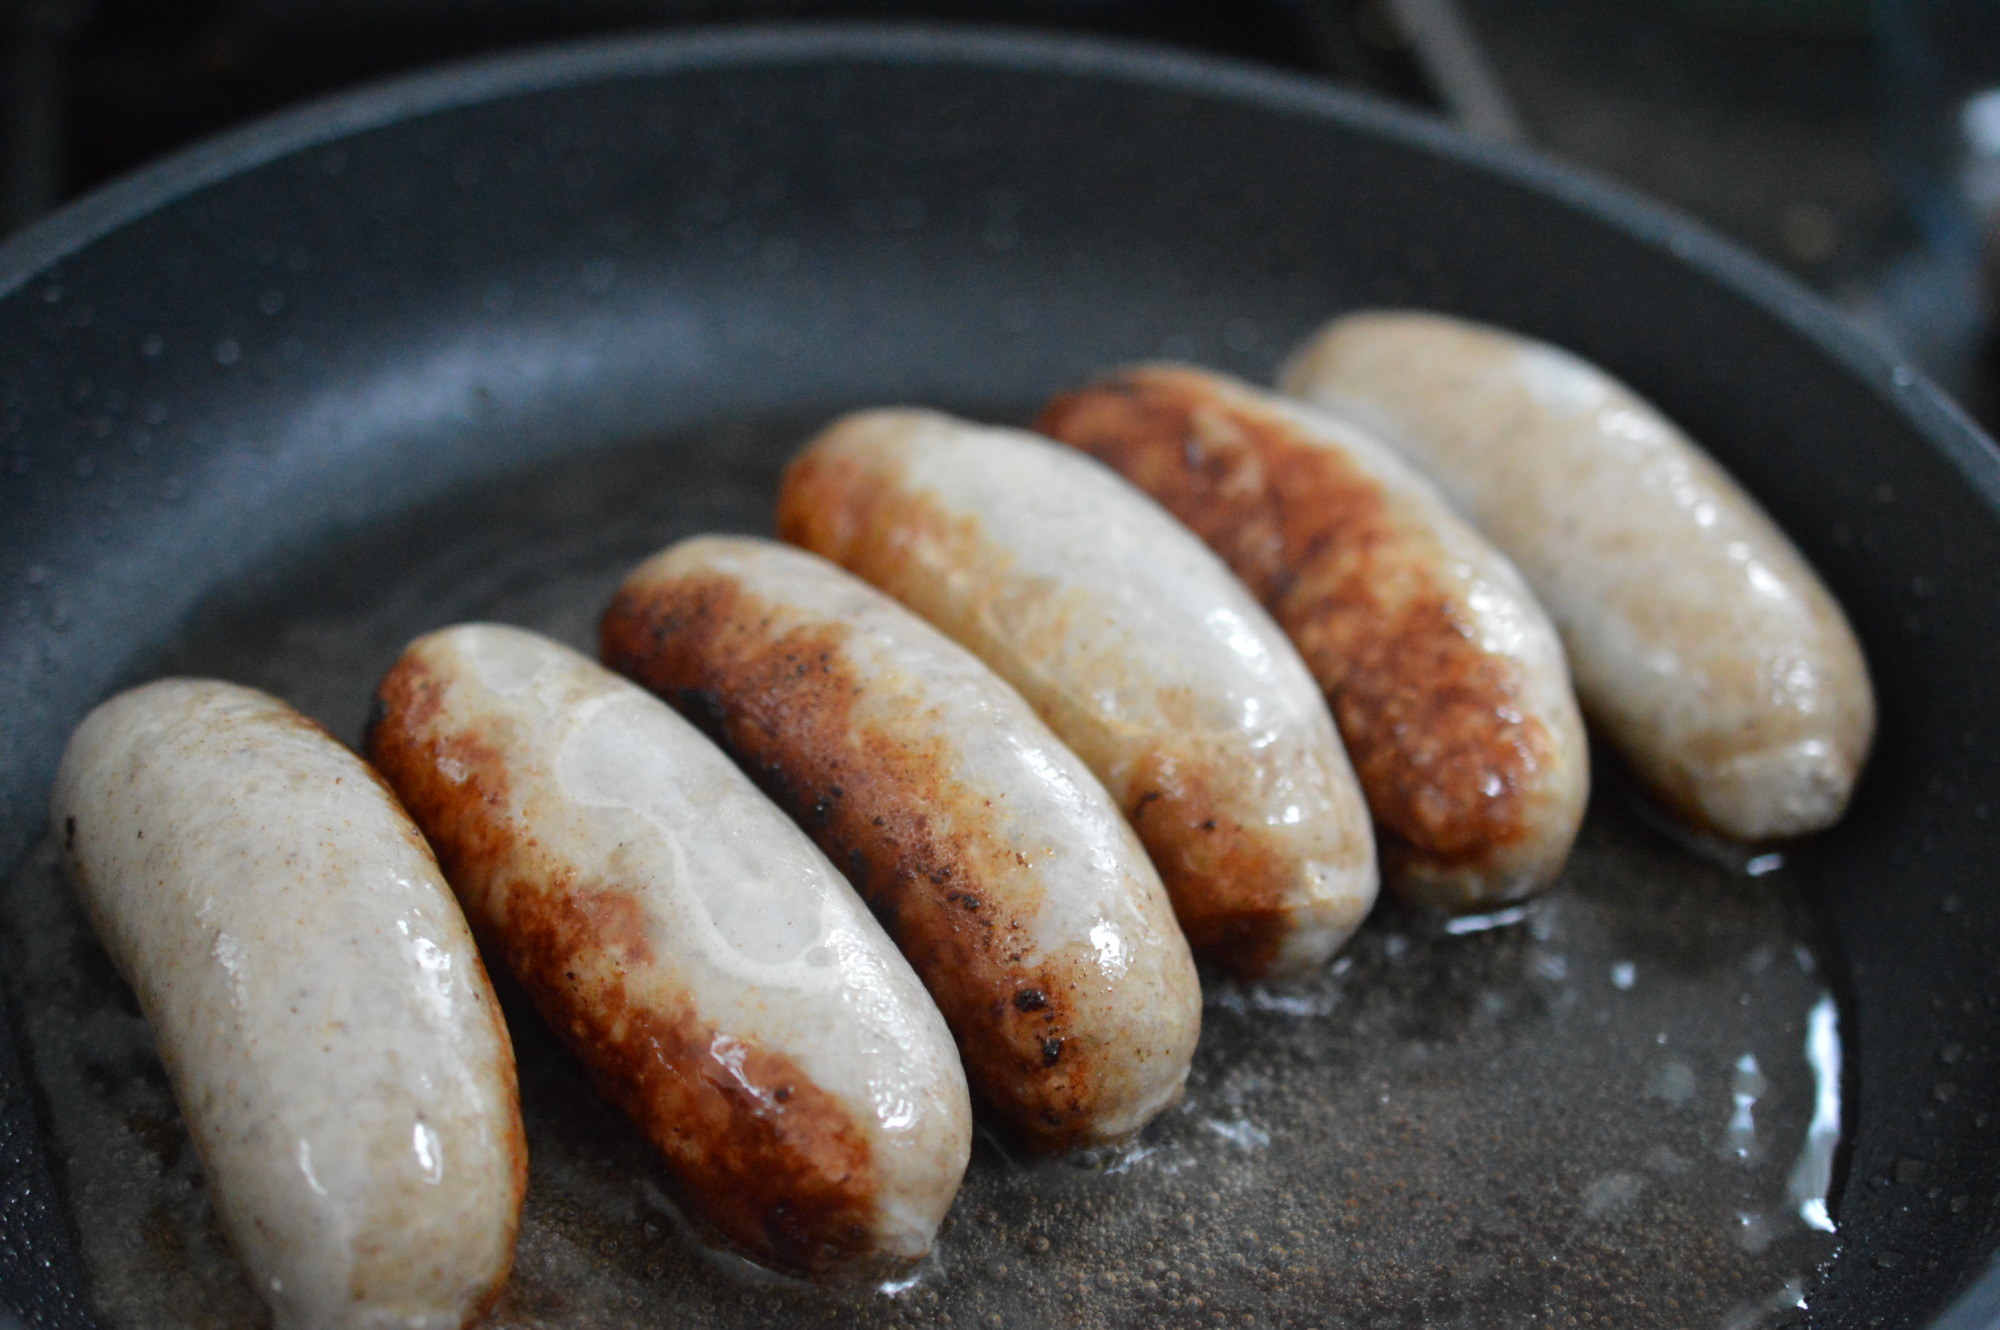
Turn in the oil so all sides colour evenly.

Sausages 11

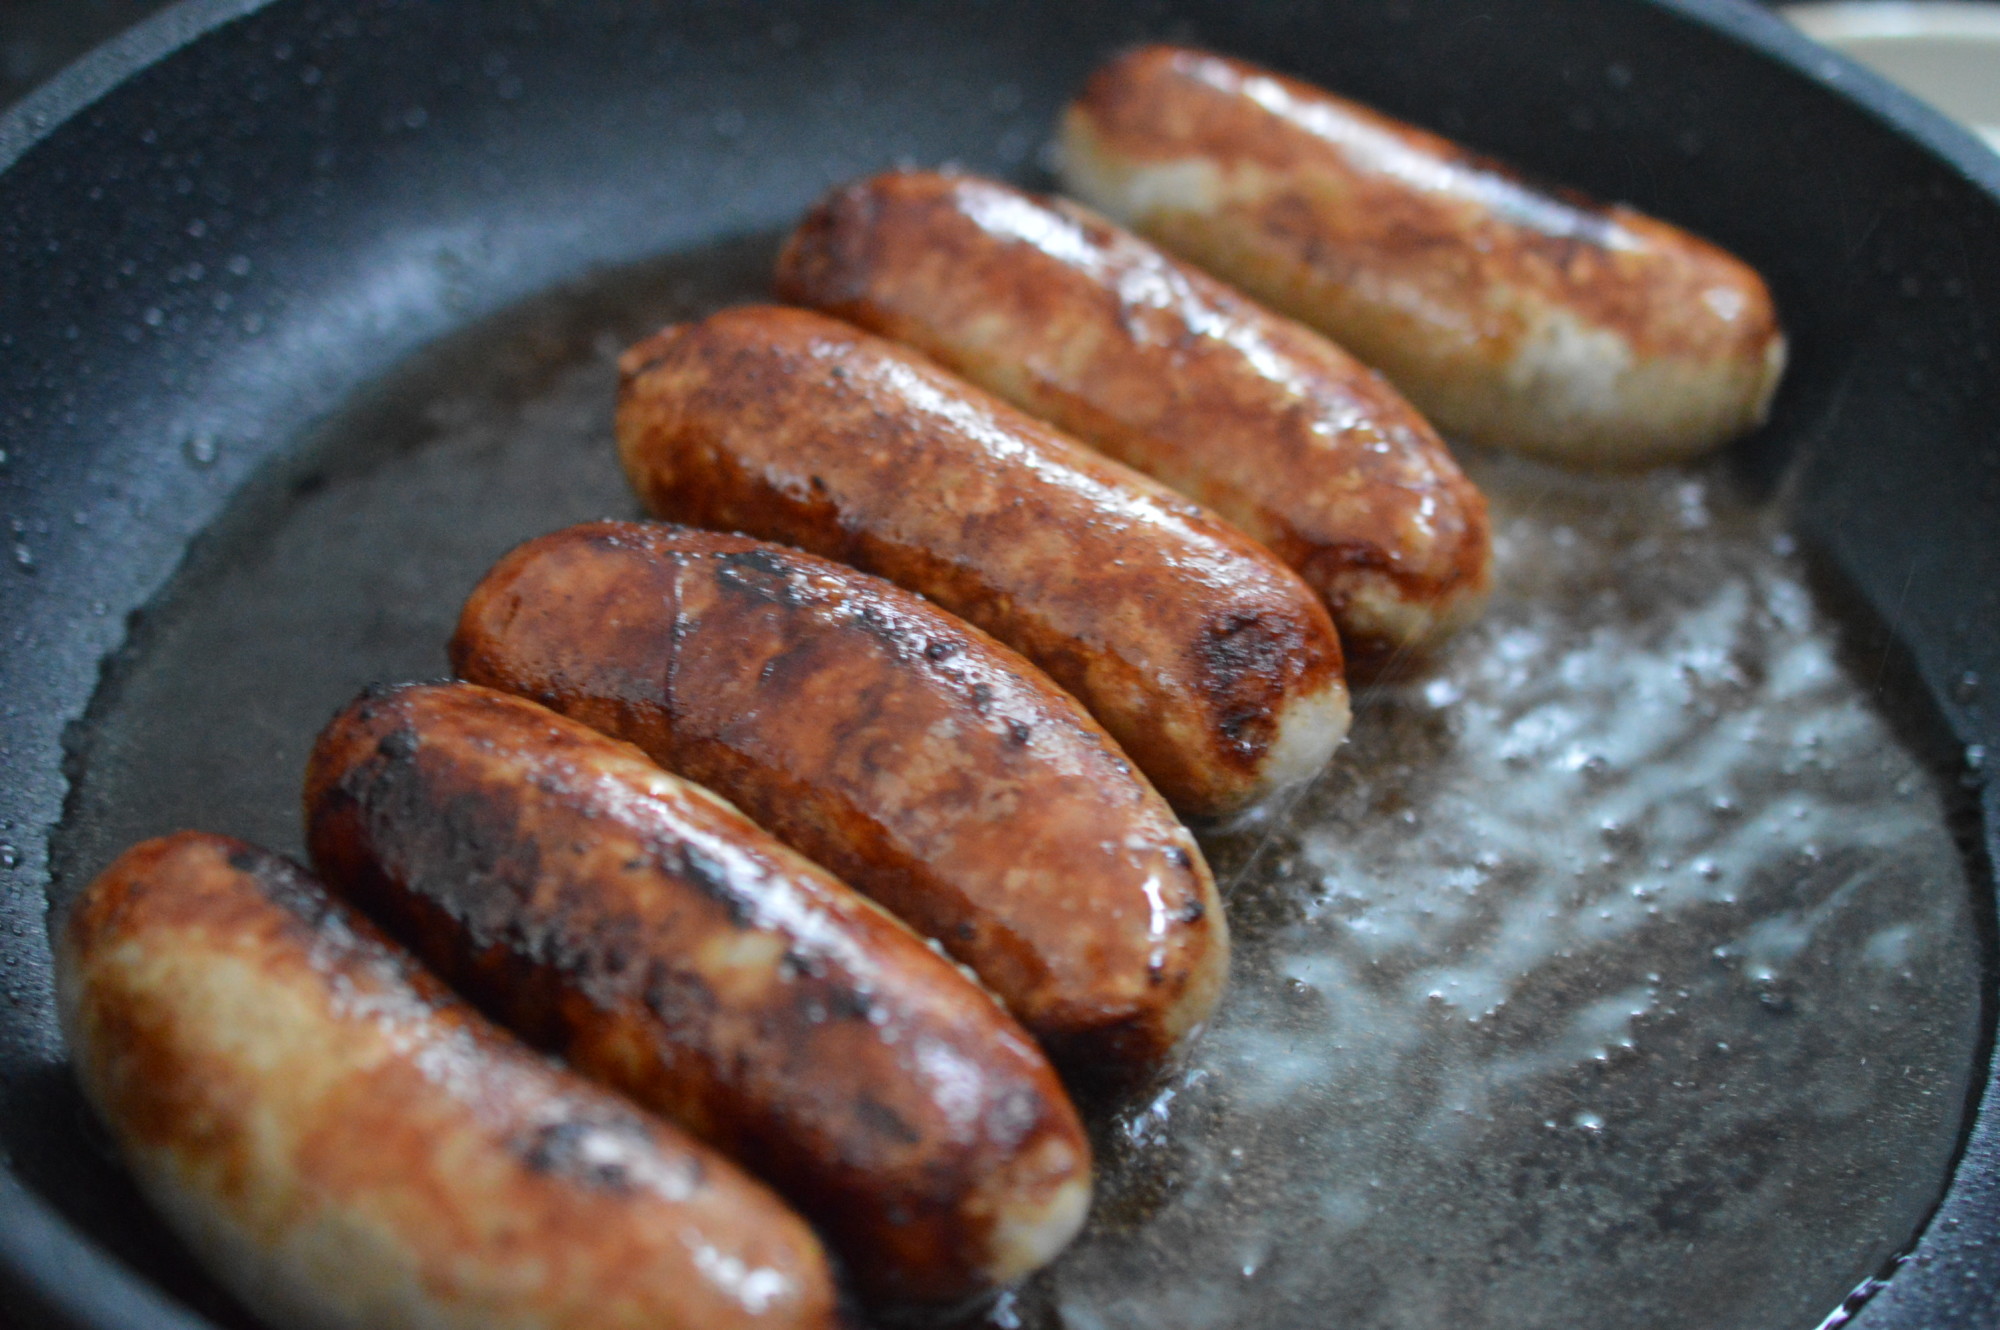
Never again will you allow anyone to cremate a beautiful sausage on a barbecue.  When it’s coloured to your liking, lift out of the frying pan and drain on kitchen paper.

Sausages 12

And, that’s it.  How to cook a sausage.

Sausages 13

Eat.

Sausages 12How To Cook A Sausage

  • Sausages – the best you can find and from a supplier you trust.

Bring a saucepan of water to a boil.  Reduce the heat and add the raw sausages.  Poach at a gentle simmer for 10 minutes.  Remove the sausages from the water and allow them to cool slightly.

Put some flavourless oil in a frying pan and place over a medium-high heat.

Pat the sausages dry with kitchen paper.  Then, add them to the frying pan.  Fry until all sides of the sausage is coloured to your liking.

Remove from the frying pan and allow excess grease to drain away.

Eat.

Print.


Home-Made Mayonnaise

Home-made mayonnaise is another of those life enhancing things I prefer not to live without.  It tastes so much better than anything you can buy, but this recipe comes with a warning.  Much like Hollandaise Sauce, making it means you can no longer hide from yourself the amount of oil that goes into it.  That’s all to the good, really.  Just knowing it’s ‘naughty’ only adds to the deliciousness.

Mayonnaise in parfait jar

Since it contains raw egg, UK guidelines recommend ‘at risk’ people use pasteurised eggs to avoid the possibility of salmonella poisoning.  The at risk groups are the very young, the elderly, pregnant women and anyone who is already unwell.  If you decide to take the risk, you can minimise it by buying eggs from a reputable source, rinsing the shells before you crack them (UK eggs are sold unwashed by law) and washing your hands once you’ve finished handling them.

Considering we are a ‘living with cancer family’ it may surprise you to know we do take the risk.  Life is for living, after all.  Personally, I wouldn’t use it in a sandwich which was going to sit in a hot car for a few hours, but it keeps perfectly well in the fridge for 5 days or so and I’m very fussy about the eggs I use.

Mayonnaise Ingredients

The choice of oil makes a difference to the taste of your mayonnaise and you can play about with it.  A mix of extra virgin olive oil or cold-pressed rapeseed oil and a lighter sunflower or groundnut oil makes the mayonnaise I prefer.  All olive oil mayonnaise can taste bitter.  I tend to use a ratio of 2 parts rapeseed oil and 6 parts sunflower, but a 1:7 might be better with some olive oils.

One glance at the side of a jar of commercially produced mayonnaise and you’ll wonder why they feel the need to add colouring and fructose syrup.  The ingredients list is short – and, if you’re comfortable using fluid ounces, it’s super easy to remember.  2 eggs for every 8 fl oz of oil.  In metric it’s a less memorable 225ml of oil.

Mayonnaise with mustard

A freestanding mixer takes the physical effort out of it and it’s how I make mine.  Making it by hand does push the boundaries of my foodie mantra ‘if I’m not prepared to make it, I’m not allowed to eat it’, but it’s entirely possible.  If you’re making this by hand, put a damp j-cloth or tea towel beneath your bowl to keep it steady.  You need one hand to whisk and the other to drip the oil.

Have everything at room temperature.  Mayonnaise is an emulsified sauce and fridge cold eggs increases the risk of everything curdling.

Place the egg yolks in a bowl, together with a dollop of Dijon mustard and a pinch of salt.  I add my ‘acid’ now and it usually takes the form of white wine vinegar.  Lemon juice is a nice alternative, particularly if you’re intending to serve your mayonnaise with fish.

Mayonnaise - stage 1

Give everything a mix together.

Mayonnaise - stage 2

I’d no hands left for this bit – but’s it’s time to set the whisk going and gently drop in the oil.  Set the mixer going and start with the sunflower oil.  Start slowly and whisk well between each addition.  If the sauce is struggling to absorb the oil, slow down.  After the first 2 fl oz of oil, mine looked like this.

Mayonnaise - stage 3

And, after 4 fl oz.

Mayonnaise - stage 4

6 fl oz – it’s getting thicker and you can add the oil more quickly.

Mayonnaise - stage 5

The final 2 fl oz.  In my case, the rapeseed oil.

Mayonnaise whisked

Beat until it’s smooth and shiny.  And, that’s it.  Check for seasoning, add a little pepper if you like.  A dessertspoon of boiling water stabilises the mayonnaise and thins it down slightly.  Some times I do, and some times I don’t.  If you fancy making a saffron infused mayonnaise that’s the way to do it.  Add the stamens to the boiling water and mix through your mayonnaise.  It has a fabulous colour.

It won’t split if you begin with room temperature ingredients and don’t rush adding the oil .. but …

If you run into difficulties there are things you can do.

Place an egg yolk in a clean bowl and gradually whisk in the split mayonnaise.  Or, add a dessertspoon of boiling water to a clean bowl and whisk in the split mayonnaise.  Both will work to stabilise your mayonnaise, although the extra egg yolk adds richness.

Dill Mayonnaise

It can be a base for all kinds of wonderful things – here I chopped a couple of tablespoons of dill and stirred it through to serve alongside some smoked trout ..

Suppertime

I also made a basil mayonnaise, another flavoured with tomato and basil.  A few tablespoons went to make a celeriac remoulade which I love with ham .. and prawns.  Pâte, too …

Mayonnaise in parfait jar

.. but it’s lovely as it is.

Eat.

Mayonnaise whiskedHome-Made Mayonnaise

Makes 350ml/12 fl oz

  • 2 organic, free range egg yolks
  • ¼ teaspoon of fine salt
  • ½ teaspoon of Dijon mustard
  • 1 dessertspoon of white wine vinegar (or lemon juice)
  • 225ml/8 fl oz oil (use a ratio of 6 parts light oil like groundnut or sunflower:2 parts rapeseed or olive oil)

Have everything at room temperature.

Place the egg yolks, the salt, Dijon mustard and white wine vinegar in a bowl.  Whisk together, then s-l-o-w-l-y add the oil, starting with the light oil and finishing with the heavier rapeseed/olive oil.  As you whisk you will see and feel the sauce thicken and the sauce will absorb the oil faster.

Keep refrigerated and use within a few days.  Add herbs .. or not.

Eat.

Print.


Seedless Raspberry Jam

Seedless is the key here.  This is my jam of choice for filling doughnuts and what would life be without the occasional doughnut?  I have a real weakness for doughnuts hot from the fryer.  Can you tell I’m eating super healthily at the moment?  

In actuality, I made this batch almost a month ago – before I was sucked into relocating three of my children to their university cities.

Seedless raspberry Jam on spoon

I know this is a post which is going to get ‘lost in translation’ between English English and American English – and goodness knows what’s happening elsewhere.  Anyone reading from Australia?  So … in this kitchen:

  • Jam = a cooked mix of sugar and fruit which has been mashed, chopped or squished.
  • Jelly = a cooked mix of sugar and fruit which is strained to give a clear liquid.
  • Preserves = jam which has big bits of fruit in it.
  • Conserve = jam with added extras, such as nuts or mixed fruit.

Then, there’s fruit curds, marmalade, fruit butters, chutneys, pickles – but I’m thinking they’re for another day.

Raspberry Jam without seeds 2

Here I’m squishing my fruit and not straining it which makes it ‘jam’.  This batch began with a large trolley of discounted raspberries.  15p for 170g.  Irresistible.  The truth is, it’s really better to make jam with fruit which is slightly under-ripe because the pectin levels (which is what gives you the ‘set’) are at their highest, but ‘beggars can’t be choosers’ ..

Raspberry Jam without seeds 3

Raspberry Jam rather divides people into those who claim it as the ‘jam of all jams’ and those who can’t get past the seeds.  Undeniably raspberries are a pippy fruit and I’m sandwiched between a parent who avoids seeds (it’s a teeth thing) and a couple of children who refuse any jam with ‘bits’.  This means I rarely make a ‘classic’ raspberry jam because I will eat it and I’m the one who probably shouldn’t.

I could have turned these berries into a raspberry jelly which removes the seeds, but we’re in ‘bramble’ season now and I’ve already got a shelf full of bramble and apple jelly.  Or raspberry curd, which I love but those doughnuts were seducing me …

Discard any fruit showing signs of spoilage and give them a light rinse.  Place the raspberries in a heatproof bowl and place in a low oven for 40 minutes to an hour.

Raspberry Jam without seeds 5

There’s not a lot to see – but warming the fruit makes the next bit  so much easier, particularly if you’re using a sieve as opposed to a mouli.

Raspberry Jam without seeds 6

My weapon of choice is a ‘Good Grips’ food mill.  Sieving is your other option.  I would suggest trying to utilise any available child labour if you’re going that route.

Raspberry Jam without seeds 7

After a period of energetic squashing …

Raspberry Jam without seeds 8

What you are left with is smoothish raspberry pulp.

Raspberry Jam without seeds 9

Preserving is a bit like bread making in that you can, if you wish, make it incredibly complicated and ‘scientific’.  I could, at this point, check the pectin levels in my fruit …

Or .. you can just make the jam.  You might miss a certain level of perfection, but ripe fruit waits for no cook and I’ve only got a small window of time to get this done.

I re-use glass jars without any qualms and I buy new lids.  Clean, rinsed jars and lids go into a low oven for 30 minutes.

Raspberry Jam without seeds 10

Traditional jam-making law adds the same weight of sugar as fruit, but you can tweak that depending on how sweet you like your jam and how naturally sweet your fruit is.  Sugar is the preservative so don’t go mad.  I weigh the fruit pulp and add three quarters of that weight in white granulated sugar.  It’s a trade-off between a softer set and a fresher taste.

I use a maslin pan because I own one, but it isn’t essential.  They’re the pan of choice because they give a large surface area which reduces the time you will need to boil the fruit/sugar to reach a set.  The quicker you reach a ‘set’ the cleaner tasting.

Warming the sugar merely speeds things up.  If you’ve planned ahead – great.  But it doesn’t actually matter.  Over a low heat, let the sugar dissolve.

Raspberry Jam without seeds 11

Keep stirring until you can feel no undissolved sugar on the bottom of the pan.

Raspberry Jam without seeds 12

I add lemon juice to raspberry jam.  It’s high in pectin and helps with the set.  Redcurrants would be an alternative.

Raspberry Jam without seeds 14

Bring everything up to a boil.  It’s reached a ‘set’ when a sugar thermometer reads 105ºC and it’ll take about 5 minutes.  Mine was a fraction under but I made the decision not to add any more lemon because I’m happy with a ‘soft set’.  If you boil for too long the jam will have a caramel tang.

Raspberry Jam without seeds 15

Turn off the heat.

Raspberry Jam without seeds 16

Now is the moment to remove the scum.  Just scoop it off.  You’re unlikely to get everything.

Raspberry Jam without seeds 18

A knob of unsalted butter deals with the little that is left.

Raspberry Jam without seeds 19

Stir, clockwise, until the butter has melted and the jam is crystal clear.

Raspberry Jam without seeds 20

Take the jam jars from the oven and pour the hot jam into them.  You need to take it to the top of the jar and immediately screw the lid on top.

Raspberry Jam without seeds 23

Leave to cool.  Then label.

Seedless Raspberry Jam

Eat.

Seedless raspberry Jam on spoonSeedless Raspberry Jam

  • 1.5kg fresh raspberries
  • 1kg granulated sugar (adjust when you weigh the fruit pulp)
  • 1 lemon

Check over the raspberries and discard any with signs of spoilage.  Give the fruit a rinse and place in a heatproof bowl.  Warm the fruit in a low oven for an hour.

Wash the recycled glass jam jars and new lids.  Let them dry in the low oven.

Meanwhile, sieve out the seeds.  A food mouli makes easy work of it.  Weigh the fruit pulp and adjust the amount of granulated sugar.

Place the fruit and sugar in a maslin pan and heat gently.  Stir until the sugar has dissolved.  Add the juice of a lemon and bring everything to a boil.

After about 5 minutes a sugar thermometer will read 105ºC (or thereabouts).

Skim off the scum.  A small knob of unsalted butter, stirred through in a clockwise direction will deal with any remaining.

Pour into the sterilised jars, taking the jam to within a few millimetres of the rim. Immediately cover with the sterilised lids and lightly screw on.  Tighten when cool.  Then label.

Eat.

Print.


Mint Sauce

Growing up, roast lamb and mint sauce was such an established pairing ‘mint sauce’ even became the nick-name of a wool coat I once owned.  Long story which probably wouldn’t be funny in the re-telling ..

Mint Sauce is also a ‘by request’ recipe, if recipe you can call it.  It’s unbelievably simple to make – which makes it so strange how much those jars cost in the supermarket.

Mint Sauce 8

Sunday lunch today was slow-roast lamb.  The kind cooked long and slow so it falls away from the bone.  Roast potatoes, of course.  Mint Sauce, naturally, and I’m under orders to post it here.

Mint Sauce 1

It begins with mint.  Spearmint is my choice.  Chop it finely.  My mum used to have a gadget for this.  A kind of mouli with super sharp spikes.  I have absolutely no idea what’s happened to that ..!

Incidentally, if you are ending up with green smears across your chopping board it’s because your knife is too blunt.  For my family I make Mint Sauce in industrial quantities.  You may need to scale down.  Here, I’ve put 6 tablespoons of chopped mint in a bowl.

Mint Sauce 3

Mint is a bitter herb which is why it’s such a brilliant partner to sweet, fatty lamb, but in sauce form it needs a little sweetening.  You can use honey, but my mum always used granulated sugar.  It’s a ‘to taste’ thing.  I’ve added 2 tablespoons.

DSC_0012

This is the point at which I deviate from my training.  My mum used to dissolve the sugar in a dash of boiling water before adding malt vinegar to give a sauce of the consistency she wanted.  My brother loved it so much he’d drink it from the jug if she wasn’t watching.

I like my Mint Sauce to taste a little more of the mint and less of vinegar.  It’s a choice.  I add a couple of tablespoons of white wine vinegar.

Mint Sauce 6

For me, adding boiling water is a visual thing.  Today, as a once in a life-time event, I measured it.  4 tablespoons.  Ish.  Taste it.  Adjust with a little more water or a little more vinegar, depending on your preference.

Mint Sauce 7

Stir until the sugar has dissolved, then set it aside to get acquainted.  Give it at least an hour.

Mint Sauce 10

This jug is important.  Throughout my entire childhood Mint Sauce was always, absolutely, never-not served in a jug like this.  The story goes …

As a little girl my mum used to visit her maternal grandma once a week.  They caught the bus back into Fulham (an area of London they’d left when their house was bombed) and went to tea.  ‘Nanny Carey’ owned the Mint Jug and my mum admired it so often her grandma said, ‘you’d better take it, girl’.

Fast forward a few decades …

My brother and I both wanted future custody of the Mint Jug.  Graham argued it was his by rights because he was the one who ate Mint Sauce to excess and I reckoned it should come to me because I actually knew how to make it.

Mint Sauce 12

One day, she discovered a duplicate at an antiques fair.  In monetary terms it’s not valuable.  Just carnival glass, I gather.  So, she bought a duplicate.  Almost.  One has a slightly raised centre on the bottom.  She set them side by side and asked Graham and I which was the original.

Sadly, he won.  On the up side – mine has a smooth bottom!

It’s one of the things I’d save in a fire, but who is going to inherit it ..???

Mint Sauce 13

With or without a mint jug, Mint Sauce is delicious.  Eat.

Mint Sauce 8Mint Sauce

Serves 4

  • 3 tablespoons of finely chopped mint, spearmint for preference
  • 1 tablespoon of granulated sugar
  • 2 tablespoons of white wine vinegar
  • 4 tablespoons of boiling water, straight from a kettle

Remove the mint leaves from the stalks.  Discard the stalks and finely chop the leaves.  Place 3 tablespoons in a bowl.

Add 1 tablespoon of granulated sugar and 2 tablespoons of white wine vinegar.  Pour over 4 tablespoons of boiling water.  Stir until the sugar crystals have dissolved.  Taste and adjust to taste with either a little more vinegar or a little more water.  Set aside to allows the flavours to harmonise.

Eat.

Print.


Kedgeree

And .. this is why I’ve been posting about curry powder, crispy fried onions and hard boiled eggs.  I made Kedgeree for Sunday brunch.

Kedgeree served

I must apologise for the lack of mahogany buffet-serving dresser and Victorian silver chafing dish in my photographs …  Standards have slipped since the days of the Empire.  Not that my antecedents seem to have ventured much beyond 100 miles of London and, sadly, there is no family silver to inherit.

But .. Kedgeree.  In the normal run of things, this is more likely to be supper in my house.  I doubt even my grandparents would have whipped up a batch for breakfast … although, thinking about it, my Dad’s mum may well have done as she was in service.

This was a lazy day Sunday brunch.  One of those magical mornings.  The seven of us all together, home from church by 9am and no-one pushing to be anywhere but a friend’s barbecue in the afternoon.  That day.

DSC_0058

Truthfully, there is no definitive recipe for Kedgeree.  It’s generally accepted as being a fusion between khichdi and pilau brought back from India and given an anglicised spin.  The smoked fish and the hard boiled eggs being the British contribution.  I suppose that replaces the protein of khichdi’s lentils.  Some people add peas.  Others mushrooms.  You can make a looser, creamier version or something drier.  If you’re a follower of fashion you might want to top it with a softly poached egg and mix the smoked haddock with salmon et al.

It’s all fine, particularly since ‘Khichdi’ literally means hodgepodge and has just about as many variations.  Khichdi is often served with crispy fried onions on top and that’s why I put some on top of my Kedgeree.

Fried onions 16

If you don’t have a stash of these sitting in your freezer they’re the first job.  What you don’t use with this will sit happily in the freezer.

Kedgeree Haddock

For the Kedgeree itself.  The first step is to poach the haddock.  For the seven of us, I used 2 fillets of undyed smoked haddock which weighed 0.735g.  A little bit more, a little bit less, isn’t going to matter.

Kedgeree Haddock in milk

My Mum always poached in milk and so do I.  Pour over some full-fat milk, enough so it almost covers the smoked haddock.

Bring to a gentle simmer, put the lid on and simmer for 4 minutes.

Kedgeree Pot

Take off the heat and leave to ‘steam’, lid on, for a further ten minutes.

Kedgeree onions

Chop a couple of onions.

Kedgeree 2

Bash 7 green cardamom pods.

Kedgeree 3

Crush about 20 fresh or freeze-dried curry leaves.  I can get fresh curry leaves at my weekly market.  I give them a wash and careful dry and store in my freezer.  My local Morrisons stocks Swartz freeze-dried curry leaves.  Break a long cinnamon stick.

Kedgeree soften onoins

Heat 5 tablespoons of ghee, or sunflower oil, in a sauté pan and add the curry leaves, cardamom, cinnamon and onions.

Kedgeree brown onions

Unlike most European recipes, get some colour on your onions.  You are looking for soft and golden rather than the more usual ‘translucent’.  Stir often and take it as dark as you dare.  It all adds flavour.

Haddock keep warm

By now your fish will be cooked.  Lift out and keep warm.  (Place them on a plate and cover with foil.  Rest the plate on a saucepan of simmering water.)  Sieve the milk and add enough water to make up to 900ml/1½ UK pints.

Kedgeree curry powder

Now the onions are golden, add the curry powder.

Kedgeree cook spices

Give everything a stir and cook for a couple of minutes.

Kedgeree coat rice in spices

Add the rinsed basmati rice and give everything a stir.

Kedgeree cook rice

Add the milk/water mix and bring to a boil.  Let it simmer, covered, for ten minutes.

Kedgeree cooked rice

It’ll look like this.

Kedgeree 17

Cream is an option, but I prefer butter.  Lay cubes of cold unsalted butter over the rice.

Kedgeree add fish

Place the cooked smoked haddock on top and cover with a lid.  Let it all sit and ‘steam’ for ten minutes or so.  While that’s happening, it’s time to boil the eggs.

Kedgeree lightly combine

By now the rice will be fully cooked.  Lightly fork the fish into the rice, leaving nice big fishy pieces.

Kedgeree Garnish

Stir through some chopped parsley and decorate with the hard boiled eggs.

Kedgeree plated

Top with some crispy fried onions.  Hot or cold.  Eat.

Kedgeree finishedKedgeree

Serves 6-7

  • 750g/ undyed smoked haddock
  • ¾ UK pint full-fat milk
  • 5 tablespoons of sunflower oil or ghee
  • 1 large cinnamon stick
  • 20 fresh or freeze dried curry leaves, crushed
  • 7 green cardamom pods, crushed
  • 2 onions, finely chopped
  • 1½ tablespoons of curry powder
  • 450g basmati rice, rinsed under running water until the water runs clear
  • 75g unsalted butter
  • 3 hard boiled eggs, to serve
  • Handful of fresh parsley, to serve
  • Handful of crispy fried onions, to serve (optional)

Place the smoked haddock in a single layer in a sauté pan and cover with the cold milk.  Bring to a boil, cover, and let it simmer for 4 minutes.  Remove from the heat and let it sit and finish cooking for a further 10 minutes.

Heat the sunflower oil (or ghee) in a shallow casserole dish.  Add the curry leaves, cardamom, cinnamon and onions.  Let the onions become soft and golden.

Remove the fish fillets from the milk and keep warm.  Strain the milk and add enough water to make 900ml/1½ UK pints.

Add the curry powder to the onions and cook over a gentle heat, stirring, for a couple of minutes.

Add the rinsed basmati rice and stir to coat.

Add the milk and water mix.  Bring to a boil and then lower the heat to a simmer and cover.  Cook for 10 minutes.  The rice should have absorbed the milk and be al dente.

Dot over the cubes of cold butter and lay the warm fish fillets on top.  Cover with a lid and let everything sit for a further 10 minutes.

Lightly fork the the fish into the rice and serve with chopped parsley, hard boiled eggs and crispy fried onions.

Eat.

Print.