Pimm’s and Strawberry Ice Lollies

We’re in the second week of tennis at Wimbledon.  I can’t in all honesty say it’s something I really get involved with other than I notice it’s all that’s on the BBC.  I suspect it’s the scars of my childhood – my mum, sporty to the core, followed avidly from Queens onwards and I found it very annoying.

On the other hand, I’m very fond of strawberries which seems to be inextricably linked with the event.  And cream.  And love a glass of Pimms.  Or two.

Pimms Lolly in garden

I read the other day that Pimms is now hopelessly uncool.  Since I turned fifty on Tuesday I’m mentally preparing myself, as Jenny Joseph’s poem suggests, for the wearing of purple and the spending of my pension on brandy.  I’m starting with drinking Pimm’s without shame and reclaiming the ice lolly.  It was a short step to my putting the two together.

Why should the children have all the fun?  Grown-ups need ice lollies, too.

Pimms Lolly 1

These three strawberry specimens are mine.  Mine, in that I grew them.  I would like you to know I treat all my strawberries with an equal lack of attention and have absolutely no idea why they show such individuality.  When they’re particularly small they are very ‘seedy’ and this is a brilliant way of making sure they don’t go to waste.

Pimms Lolly 2

Chop the strawberries into pieces and let the lemonade go flat.

Pimms Lolly 3

Put the chopped strawberries in a blender and some mint leaves.  For some reason I’m growing micro mint and I used a couple of sprigs.  If you have a usual sized mint leaf – about 8.

Pimms Lolly 4

Give it a whiz.

Pimms Lolly 5

Pass the purée through a fine sieve to remove the pips.

Pimms Lolly 6

Then add the flat lemonade.

Pimms Lolly 7

Pimm’s!  Don’t go overboard.  Too much alcohol will stop the lolly freezing well.

Pimms Lolly 8

The sugar …

Reduce that at your peril.  Sugar is a lubricant between the ice crystals.  Not sure I entirely understand what’s going on, but it’s how you get a smooth lolly.  Stir until all graininess has disappeared and then transfer to a jug.

Pimms Lolly 9

Pour into your ice lolly moulds.  Mine don’t have a top, so I freeze for an hour before I try and insert the lolly stick.

(You can use any freezable container – paper cups, yoghurt pots …  The only thing you should watch out for is that the top is wider than the base or you’ll meet with disaster when you try and unmould it.)

Pimms Lolly 10

After that initial freeze, I cover the mould with tin foil and push the lolly stick in.  The foil just gives the stick a little more support.

Pimms Lolly de-moulded

When it comes to unmoulding my lollies, I wrap a warm tea-towel around the mould to loosen the lolly.  Being as mine are silicone, I then push up from the bottom.

Pimms Lolly by vine

Eat.

Pimms Lolly in gardenPimm’s and Strawberry Ice Lollies

10 x 80ml lollies

  • 500g/1lb 2oz strawberries, hulled and cut into pieces
  • 8 large mint leaves
  • 50ml/2fl oz Pimm’s
  • 250ml/9fl oz lemonade
  • 100g/4oz caster sugar

Measure out the lemonade and allow to go flat.

Put the strawberries and the mint leaves in a blender and whiz to a purée.  Sieve to remove all the pips.

Add the lemonade, the Pimm’s and the sugar to the smooth strawberry purée.  Stir until the sugar has dissolved, then transfer to a jug.

Pour the mixture into the ice lolly moulds and freeze overnight.

If using a lolly mould without a lid, freeze for an initial hour before inserting a stick.  Foil placed over the top will give the lolly sticks more support.

To serve, wrap the mould in a warm tea-towel until the lolly has loosened.

Eat.

Print.


Gooseberry and Elderflower Cake

I wasn’t fond of gooseberries as a child and I told everyone the reason for that was because they made me ‘blink’.  I was right.  They can be lip pursing-ly sour and even the sweetest need sugar.  What’s more, they are spiteful to pick, with thorns like spears.

Gooseberry Fool was the only way I was prepared to eat them.  Now, I’ve branched out but it’s still important to treat them with love – which is probably why they’re not so easy to find.  If you don’t grow them yourself you’re more likely to find gooseberries at farm shops and farmers’ markets than at the supermarket.

Gooseberry and Elderflower Cake 15

(Please note the artistic positioning of gooseberries and elderflowers in this photo.)

The parent recipe of this cake features in my mum’s recipe collection as ‘Apple Cake’ and I suspect it will have entered my mum’s life via a ‘parish cookbook’; the kind that’s produced by fantastic home cooks in aid of their Grade I listed 12th bell towers and my mum would always buy when on holiday.  Warm from the oven, it’s lovely with cream or custard and eaten as a pudding.  Cold, it’s perfect picnic and packed lunch food.

Gooseberry and elderflower is an early summer switch away from apple.

Gooseberry and Elderflower Cake

It’s a wonderfully simple cake and easy to scale up or down.  It’s the same weight of flour and fruit, in this case gooseberries.  Half the weight of the flour in sugar and the same of butter.  A little baking powder and milk to mix.  That’s it.

No eggs – which is useful if you’re baking for someone who reacts to the protein in eggs.

Gooseberry and Elderflower Cake 2

14oz/380g plain flour, mixed with 2½ tsp baking powder.

Gooseberry and Elderflower Cake 3

7oz/190g butter ‘rubbed in’.  Using just the tips of your fingers you lightly ‘rub in’ small cubes of butter.

If you aren’t as washing up phobic as I am you could blitz the flour, sugar and butter together in a food processor.  Breadcrumbs is the usual way to describe the result you are hoping for but I think sandy rubble is closer to what I aim for in this kind of cake.

Gooseberry and Elderflower Cake 4

Stir through the sugar.

Gooseberry and Elderflower Cake 5

There is no escaping this bit.  Topping and tailing.  Pinch off the top and the tail with your fingers.

Gooseberry and Elderflower Cake 6

You are left with what looks like veiny grapes.  In order to prevent the gooseberries sinking you need to cut them in half or quarters, depending on their size.

Gooseberry and Elderflower Cake 7

Stir the prepared gooseberries through the flour mixture.

Gooseberry and Elderflower Cake 8

Now for the elderflower cordial.  If you haven’t made this, there are commercial versions available.

Gooseberry and Elderflower Cake 9

I melt butter to lightly grease the sides and bottom of my cake tin.  In an ideal world (the kind where days are longer than twenty-four hours and university student children didn’t want their washing done) I would line the sides.  Truthfully, I rarely do for a cake like this and I have pre-cut bake o’ glide to fit my tin collection.

Gooseberry and Elderflower Cake 10

Now, it’s the liquid.  75ml/2½ fl oz of undiluted elderflower cordial.

Gooseberry and Elderflower Cake 11

You’ll need a little milk.  Go careful.

Gooseberry and Elderflower Cake 12

You want a dry mix rather than a more usual cake batter.  The gooseberries will release lots of moisture.

Gooseberry and Elderflower Cake 13

Level out the top.  To get a nice flat top, I use the back of a spoon.  If you dunk it in water first, so much the better.

Gooseberry and Elderflower Cake 14

An 20cm round cake tin cooks in the Aga Baking Oven (rack on the floor) in 1 hour.  Conventionally, it’s 180ºC/Gas Mark 4/350ºF.

Gooseberry and Elderflower Cake 16

If you want you can sprinkle the warm cake with a little caster sugar.

Gooseberry and Elderflower Cake 17

I forgot.  Since we were eating this warm with pouring double cream I don’t know that it mattered.

Gooseberry and Elderflower Cake 18

Eat.

Gooseberry and Elderflower Cake 16Gooseberry and Elderflower Cake

Makes 1 20cm/8″ round cake or a 20cm x 25cm tray bake.

  • 380g/14oz plain flour
  • 190g/7oz butter
  • 190g/7oz caster sugar
  • 2½ tsp baking powder
  • 380g/14oz gooseberries, top and tailed, then halved or quartered depending on their size
  • 75ml/2½fl oz elderflower cordial
  • A drizzle of milk, as needed

Pre-heat the oven to 180ºC/Gas Mark 4/350ºF

Add the baking powder to the flour and whisk to combine.

Rub the cold cubed butter into the flour, then add the sugar and prepared gooseberries.

Drizzle over the elderflower cordial and use a knife to stir through.  Add a drizzle of milk to make a dry mix, remembering the gooseberries will release lots of juice as the cake cooks.

Bake for 1 hour, turning halfway if necessary.  (Aga:  Baking Oven with the rack on the floor – 1 hour.)

Sprinkle with caster sugar, if desired.  Allow to cool in the tin for 5-10 minutes before transferring to a wire cooling rack.  Serve warm with cream or custard or cold.

Eat.

Print.


Pain Perdu

Or ‘Eggy Bread’, Gypsy Toast, French Toast .. take your pick.  There are so many names for eggy soaked bread which is then fried in butter.  The French ‘Pain Perdu’ literally translates as ‘Lost Bread’ which has exactly the right feel for Brioche that’s been drowned in a milk/egg mix.

Pain Perdu 7

There are English recipes for this going back to the fifteenth century.  It may have been conceived as a way of using up stale bread, but this isn’t what’s happening here.  This was last night’s ‘sinful-and-entirely-unnecessary supper’ and I bought a Brioche Vendéenne deliberately.  That’s the Brioche which has the protected geographical European status.

Pain Perdu 17

It began with a good deed.  I decided to pick Liddy up from work and there they were …

Raspberries.

Reduced.  Give-away reduced.  It would have been criminal not to have picked them up.  Then, I spent the money I’d saved on the raspberries I hadn’t intended to buy on the Brioche I wouldn’t have needed if I hadn’t bought the raspberries.  There’s logic there somewhere.

Everything else I had.

Pain Perdu 16

There were five of us eating this, so I used 3 eggs and a 150ml/5fl oz of full-fat milk.  Then a squirt of runny honey.

Pain Perdu 15

Whisk everything together.

Pain Perdu 14

Lay out slices of brioche in a dish.  Fit them in snuggly.  Then pour the eggy mix over the top.

Pain Perdu 13

Think ‘lost’.  The brioche needs to be absolutely sodden.  Slightly stale bread holds together better than fresh, but I persevered.  Give everything a good prod.  Let is soak up all that lovely eggy goodness.

Pain Perdu 12

Then it’s a knob of salted butter in a non-stick frying pan.

Pain Perdu 11

And fry over a medium heat.  This is best straight from the frying pan ..

Pain Perdu 10

It’s less than 2 minutes a side.  Have a peak.  When the underside is golden brown flip it over with a spatula.

Pain Perdu 8

Meanwhile, lightly whisk some double cream.  There’s no point holding back now.

Pain Perdu 9

It’s traditional to cut across the bias.  If you want to eat together, this will keep warm in a low oven.

Pain Perdu 2

Then it’s onto a plate.

Pain Perdu 3

A few of those raspberries, a dollop of double cream and a dusting of icing sugar.

Eat.

Pain Perdu 5Pain Perdu

Serves 5

  • 3 eggs
  • 150ml/5 fl oz full-fat milk
  • 1 tablespoon of runny honey
  • 5 x 1.5cm/½” slices of brioche
  • 5 tablespoons of butter
  • To Serve: Double Cream, Fresh Raspberries and Icing Sugar

Break 3 eggs into a bowl and add 150ml/5 fl oz full-fat milk.  Then a squeeze of runny honey to sweeten.  Whisk together.

Lay your brioche slices in a dish, fitting them together snugly.  Pour over the eggy/milk mix.  Flip and prod to ensure the brioche has sucked up every last drop and is entirely sodden.

Add a tablespoon of butter to a small non-stick frying pan.  Once the butter is bubbling, add one of the soaked brioche slices.  Fry until the underside is golden brown.  This will take less than 2 minutes.  Flip and repeat.

Serve that slice immediately – with fresh raspberries and a dollop of lightly whipped double cream.  Or keep the Pain Perdu warm in a low oven until you have finished frying all the slices.  A dusting of icing sugar makes everything perfect.

Eat.

Print.


Vanilla Butterfly Cakes

Butterfly Cakes are a little piece of nostalgia for me.  I was thinking .. I’d never seen them outside of a home kitchen when I decided to make these on Friday, but there’s clearly something in the air at the moment.

On Saturday, Nigel and I happened upon a new-to-us garden centre/food hall.  There they were.  Butterfly cakes (£3.00 for six), along with the first of the English strawberries and asparagus.

Butterfly Cakes plate

Then, this Sunday, one newspaper stated ‘Jamie Oliver slams schools who let pupils get away with making fairy cakes’.  I imagine he’s being taken somewhat out of context since, of course, you want people to cook healthily but with tight school budgets and a chronic lack of equipment I think they’re a good starting point.  Anything that builds confidence in the kitchen.  Besides, I think balance is worth teaching too.  A life of unremitting self-denial would be extremely dull .. and not achievable for most of us.

Butterfly Cake Icing Rack 2

Butterfly Cakes are probably the first things I learnt to make.  My brother had the disgusting habit of always eating the wings first and then licking out the buttercream.  Is that over-sharing???  It’s an image which haunts me.

Butterfly Cakes - weighing eggsButterfly Cakes 1

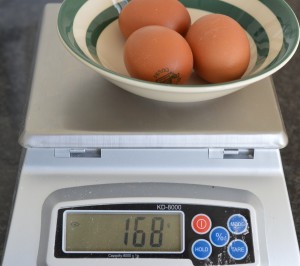
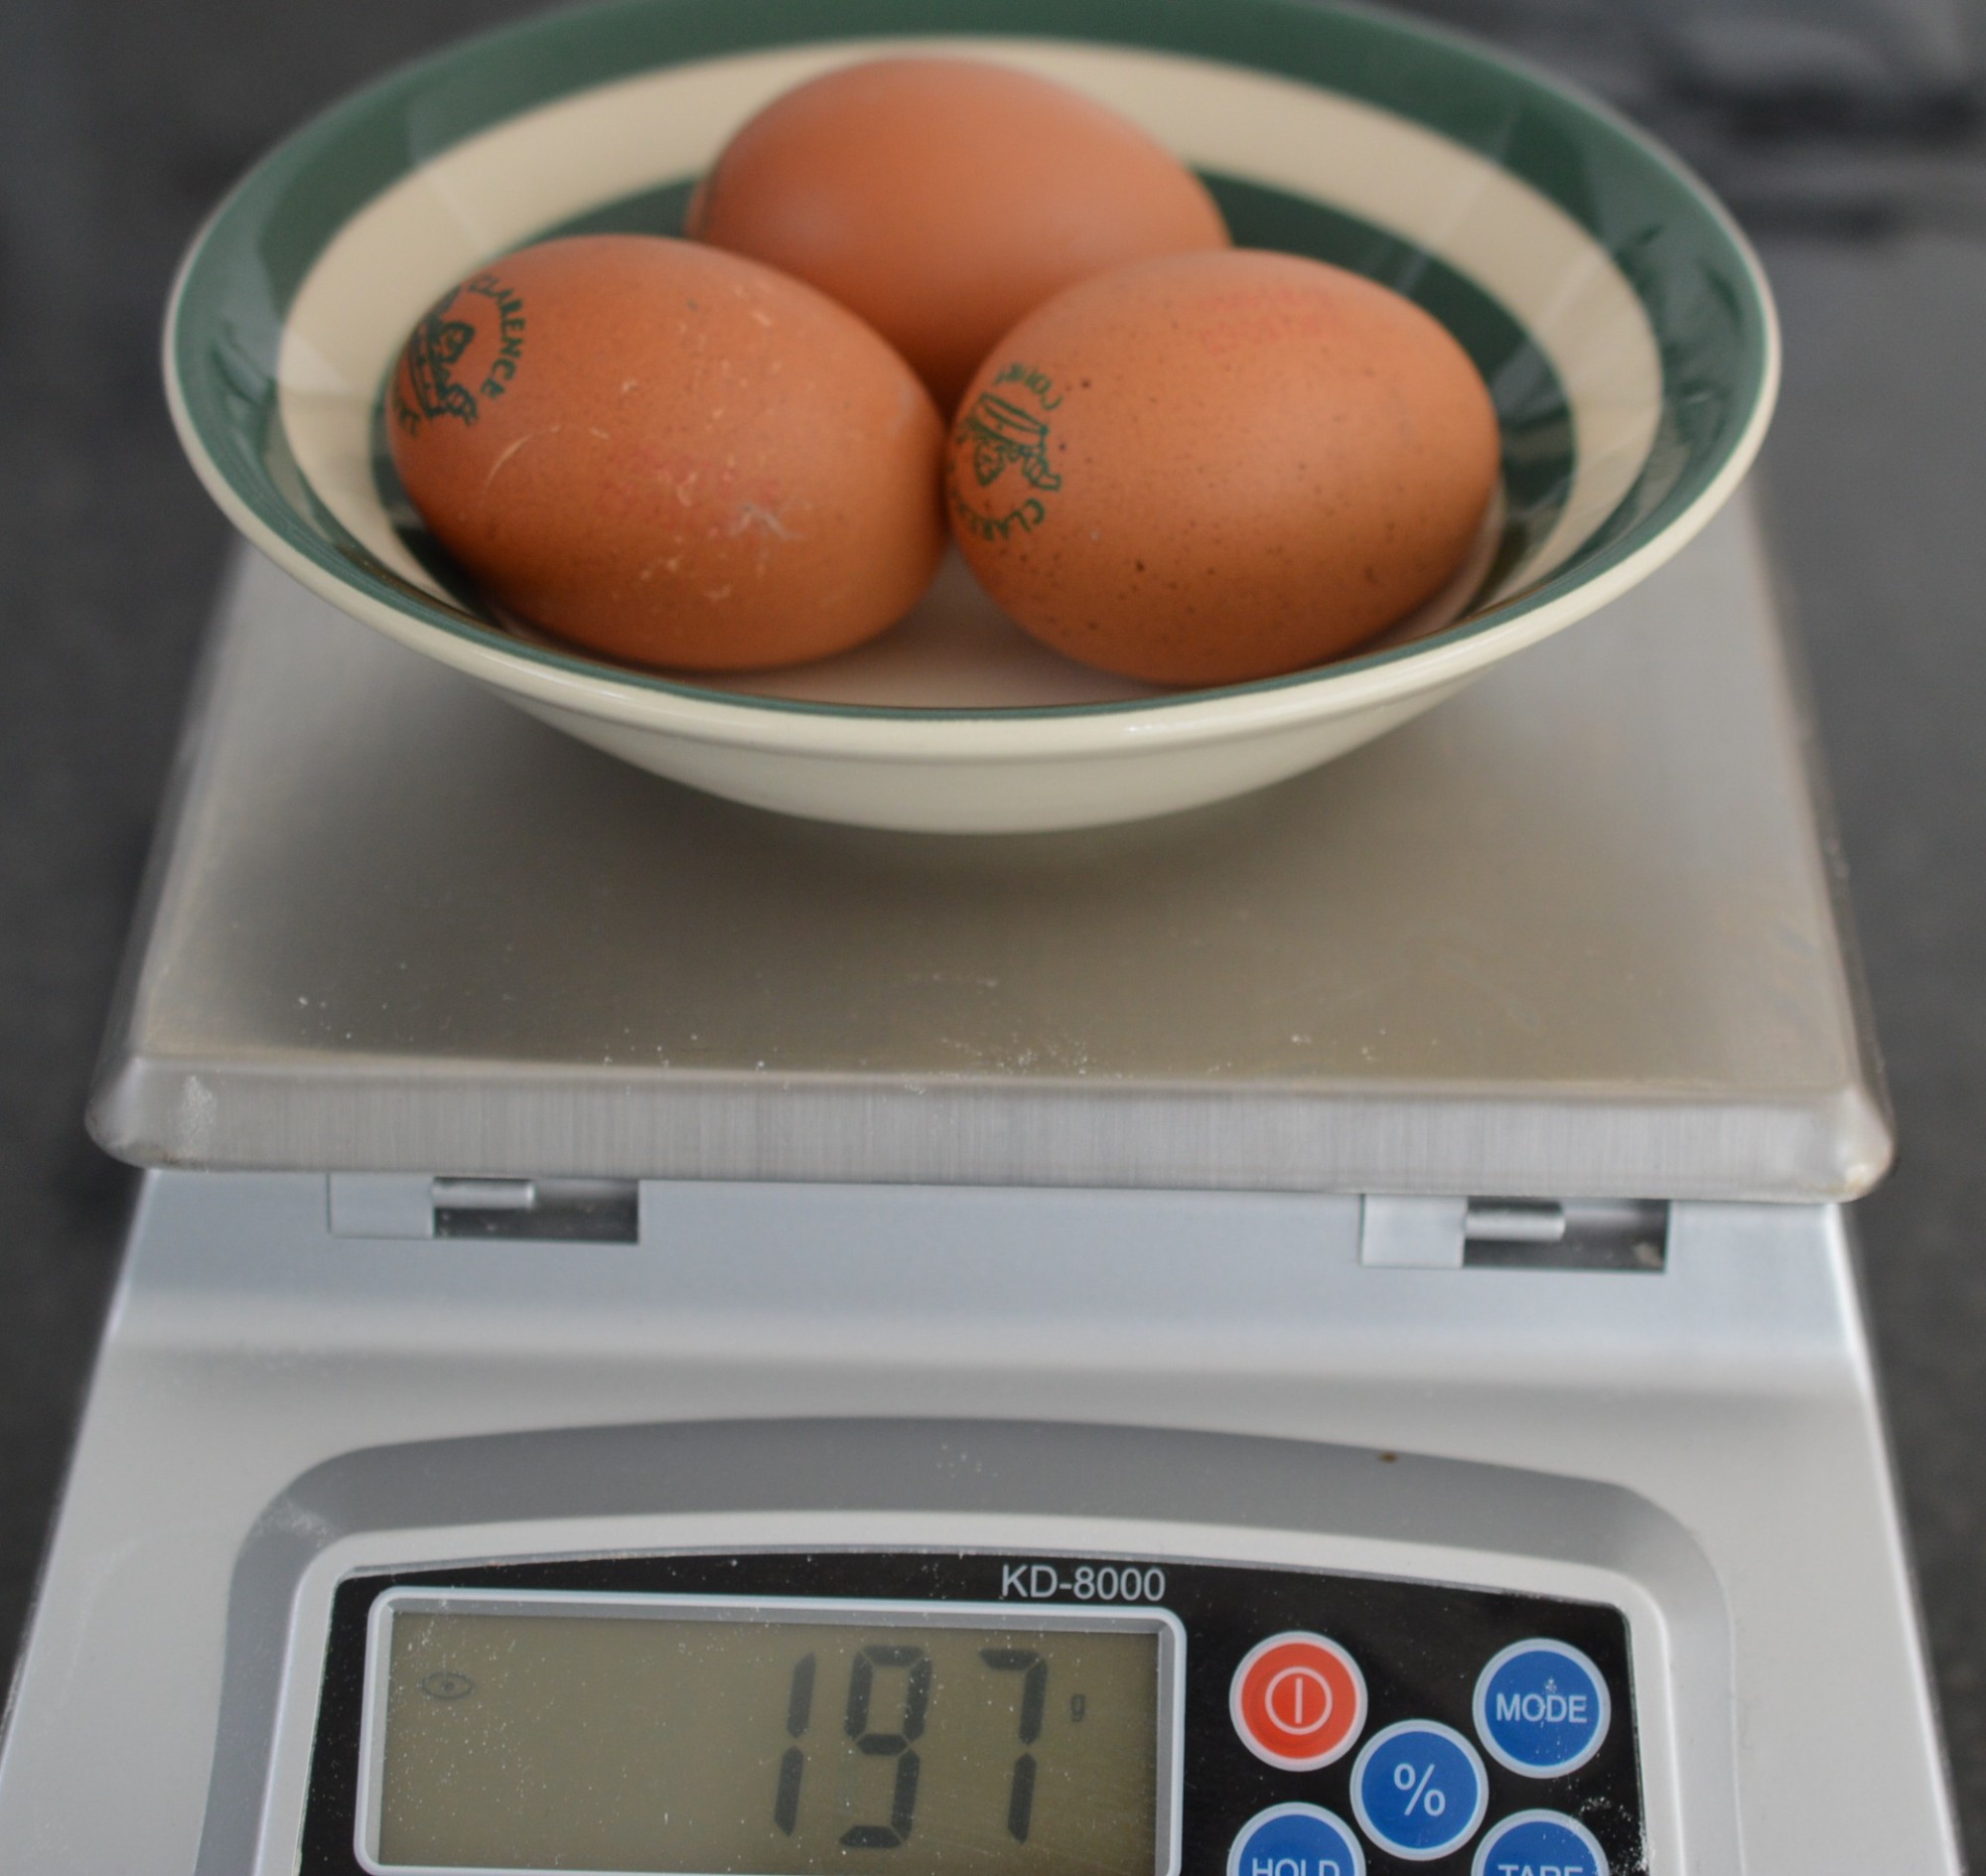
The cake batter is a Victoria sponge ‘sandwich’ cake mixture.  That’s an equal quantity of butter, caster sugar, eggs and flour.  Most recipes ask for 3 eggs for a ‘Victoria’ sponge which is only possible because supermarket eggs come ‘sized’.  Even so, there can be significant differences.

I always weigh my eggs – in their shells.  It doesn’t matter if you prefer imperial or metric – just stick to the same unit of measurement.  You want the eggs at room temperature and not fridge cold.  A fresh egg will give you better results than one that’s been hanging around.

Butterfly Cake - softened butter

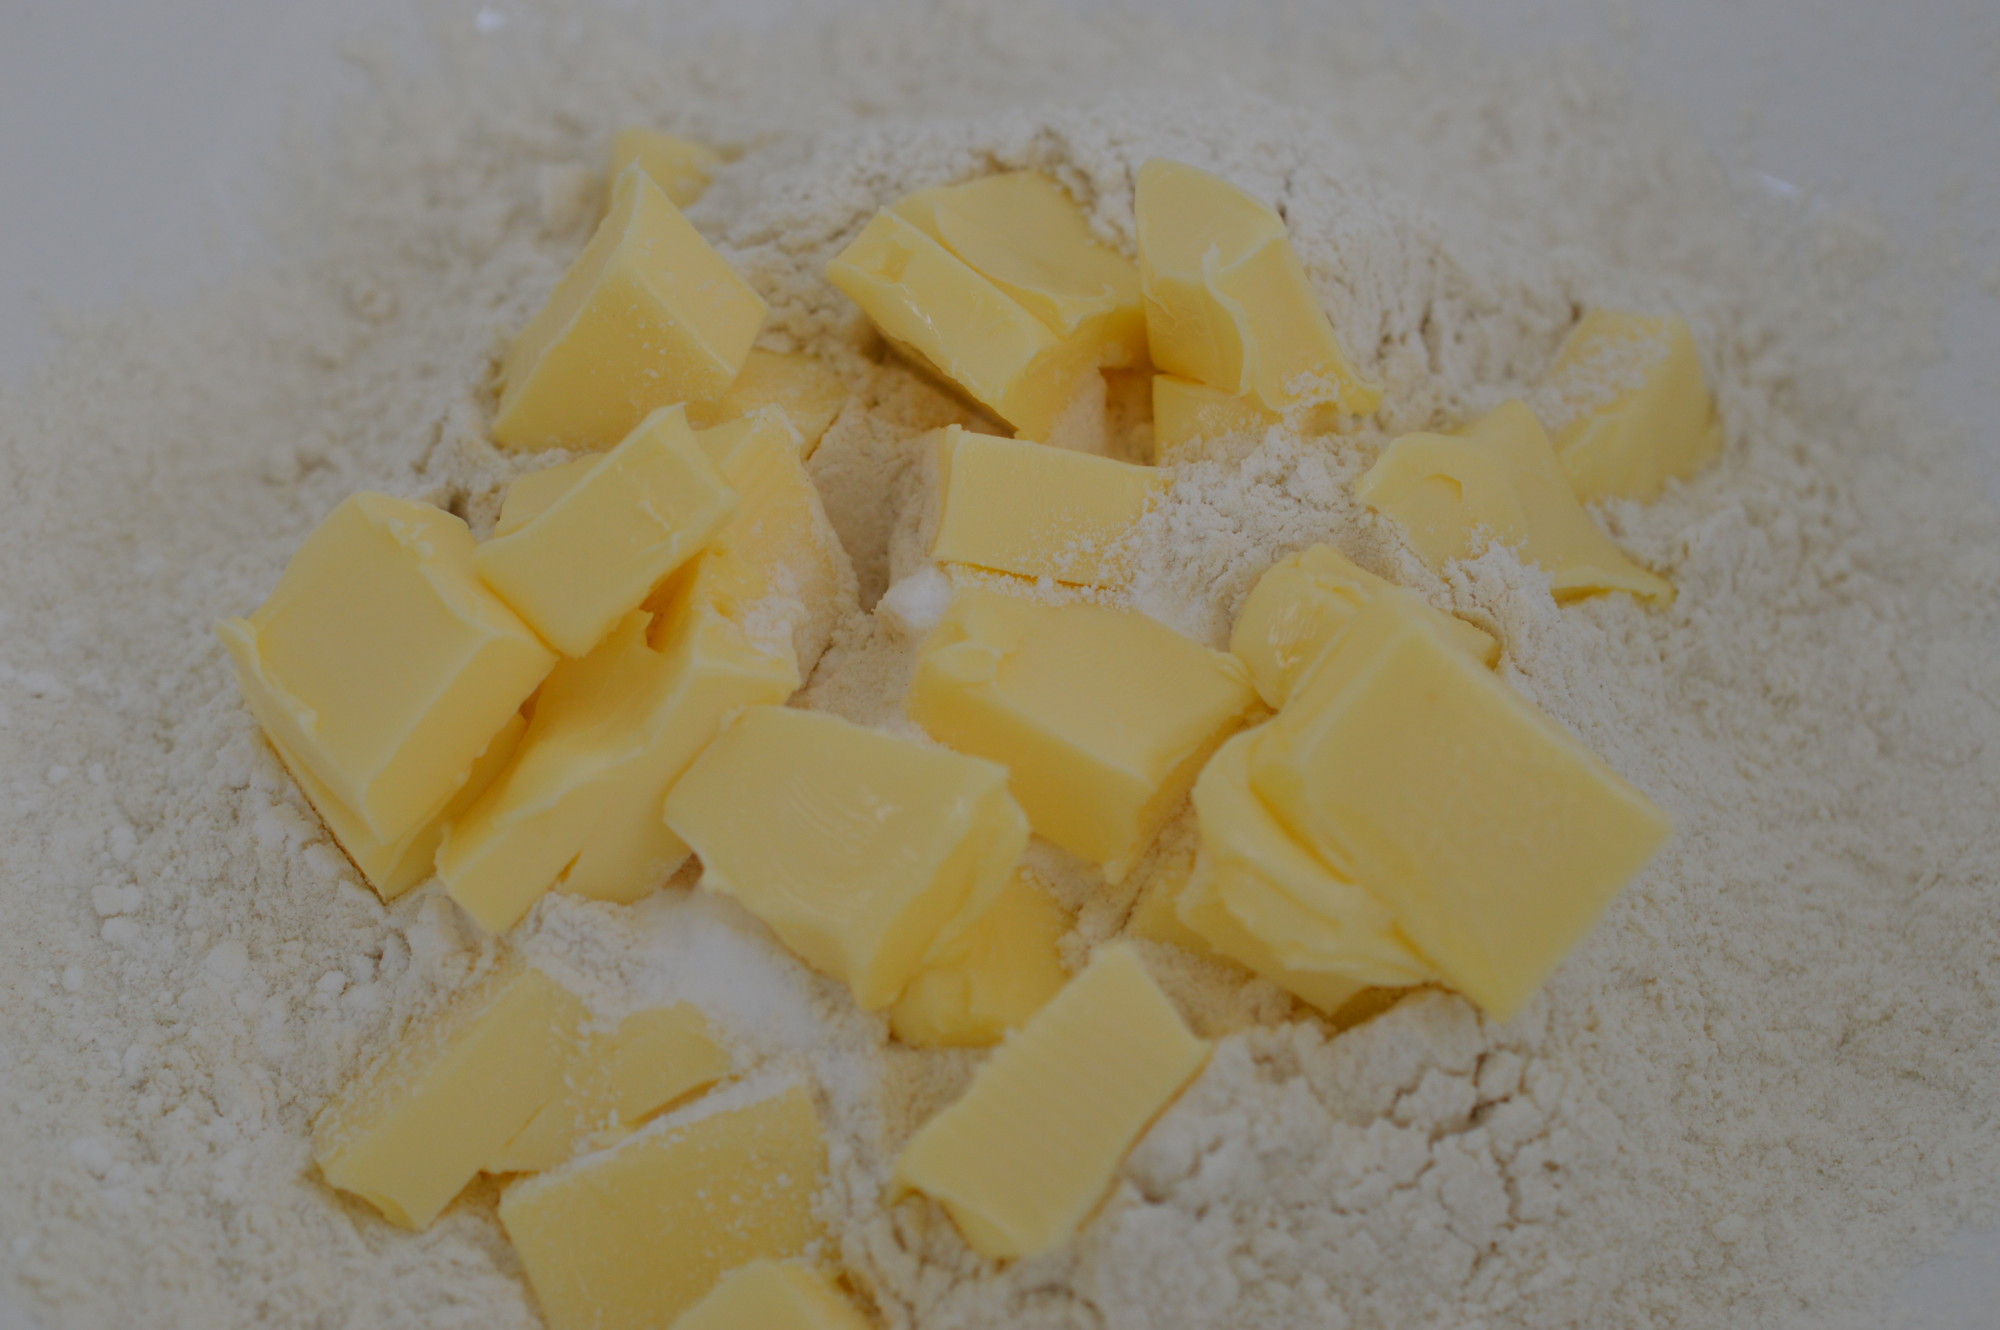
Then it’s that weight in softened butter.  Imagine you are going to cream your butter and sugar with nothing but a wooden spoon.  It needs to be soft.  Even with the help of an electric mixer, cold butter will result in a ‘heavier’ cake.

DSC_0065

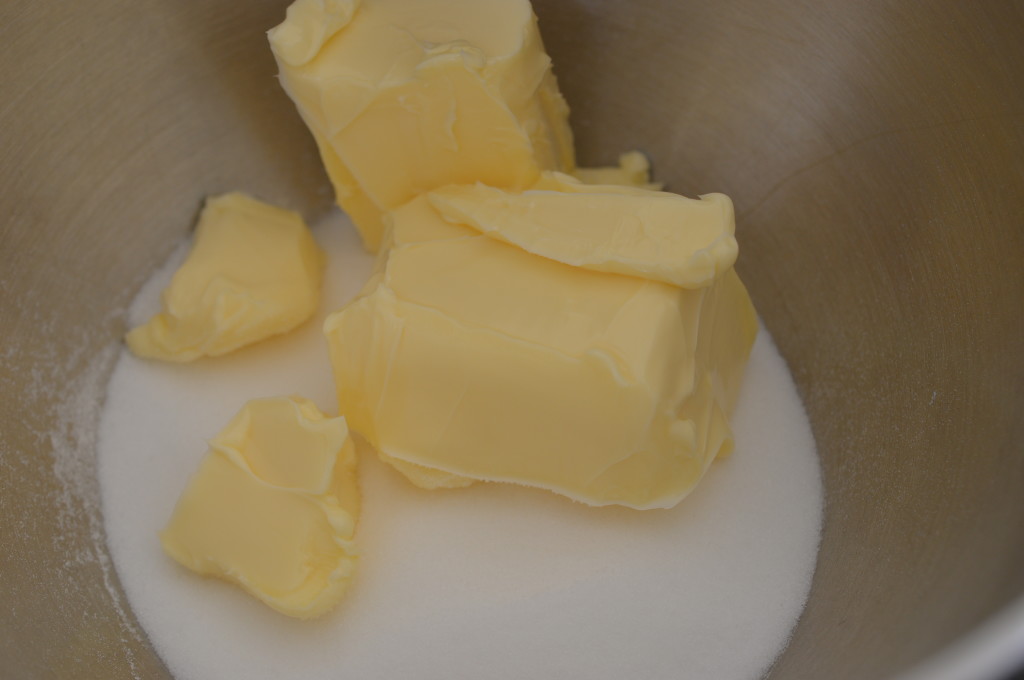
Put the butter and the same weight of caster sugar in your bowl.  With an electric mixer it’s entirely possible to use an all-in-one method.  That’s everything into the bowl and mix.  Or a food processor.  By hand, you have to separate out the stages.

Is there a difference in the finished cake if you separate out the stages?  Yes.  I think there is, but it’s tiny.  If I were challenged to a blind tasting I might look like a twit.  Do what seems easiest to you.  Just don’t pay £3.00 for six!

Butterfly Cake - mix 1

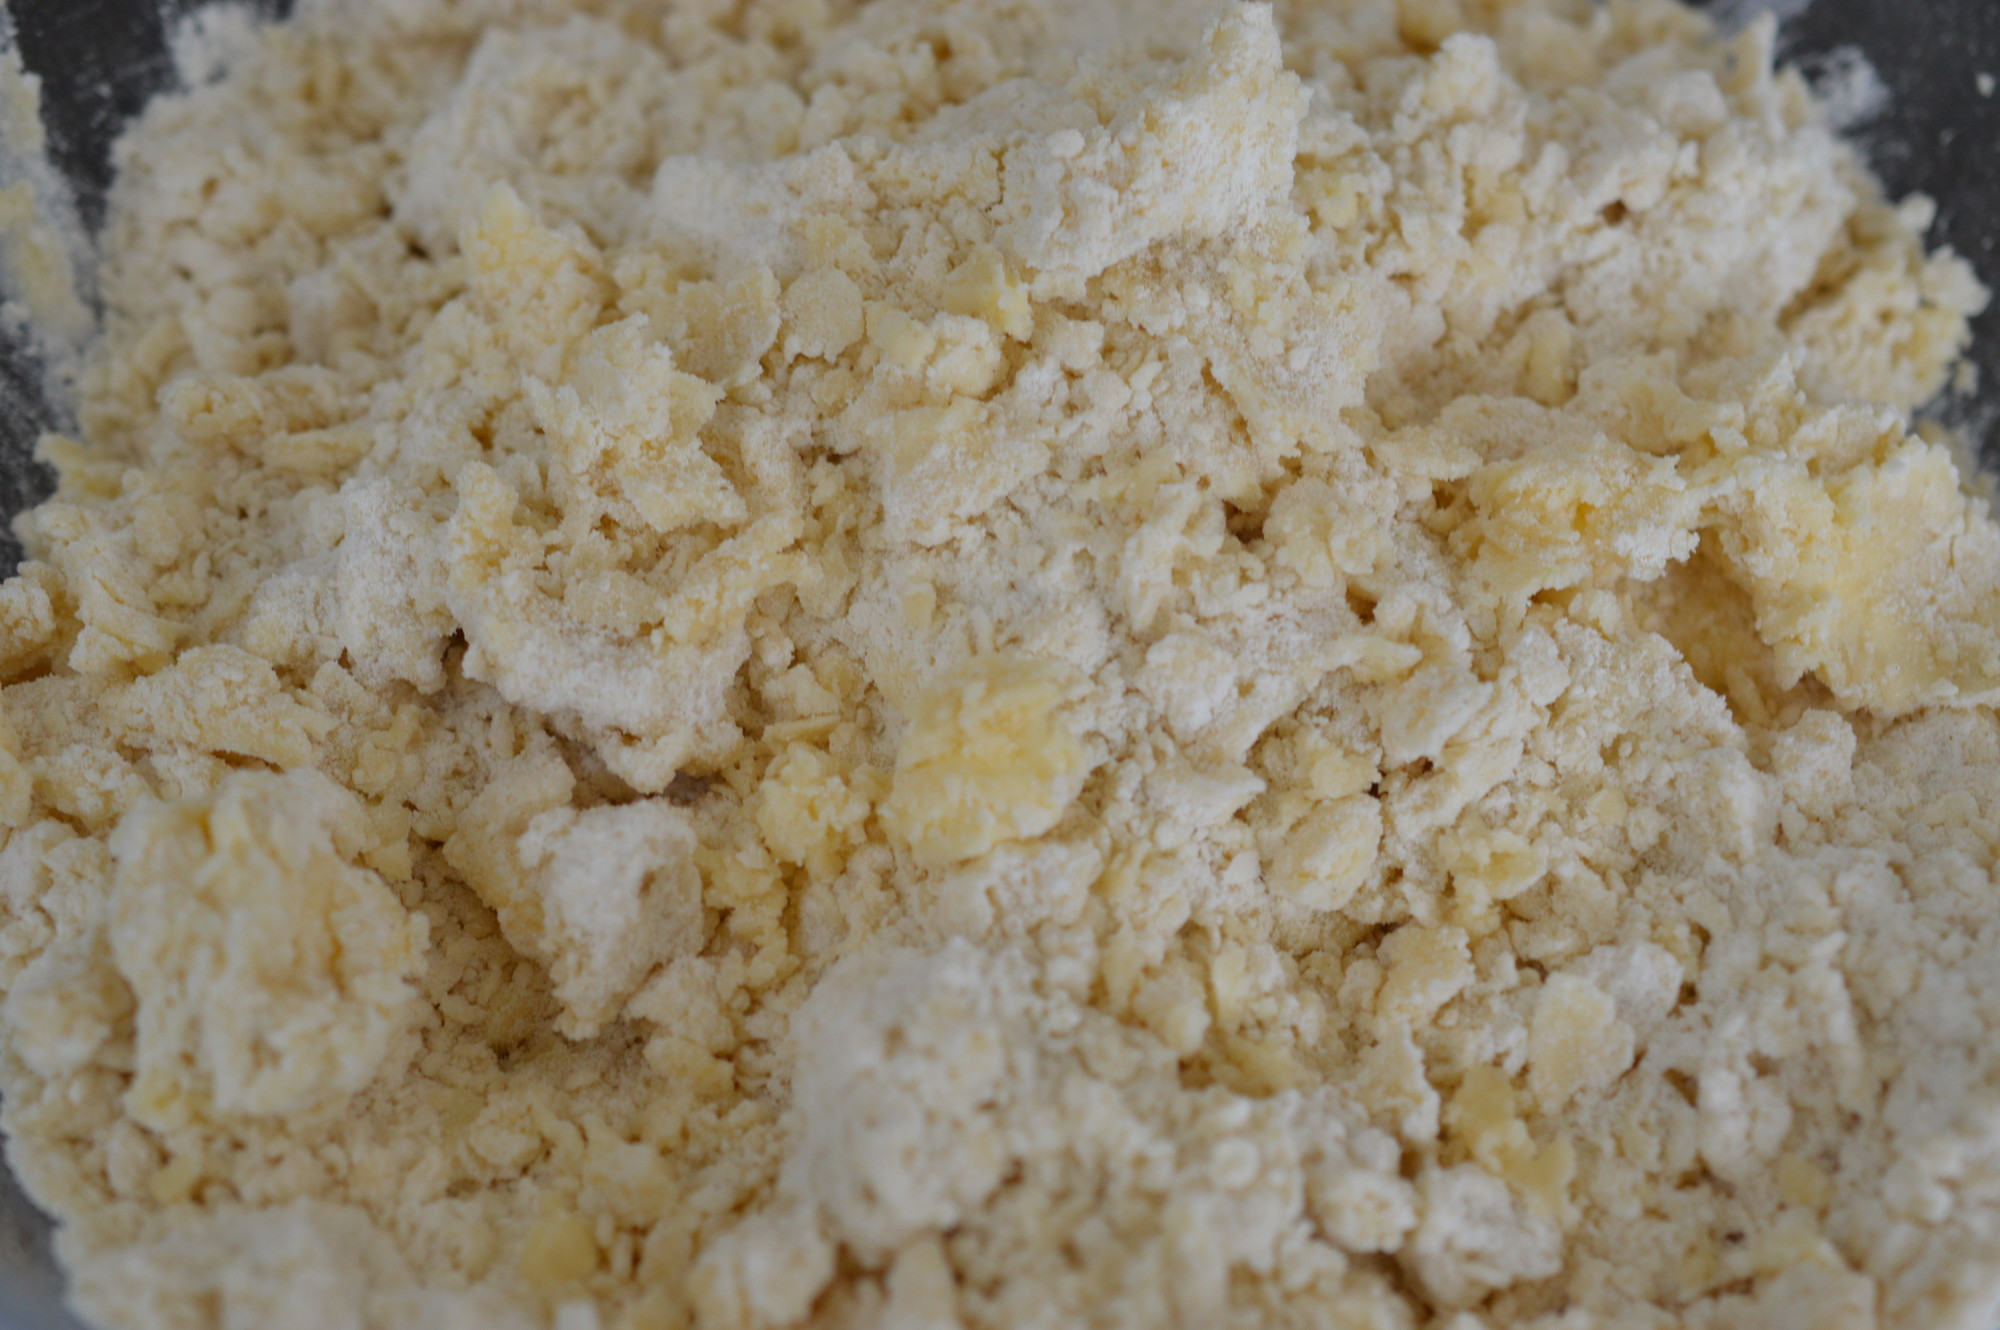
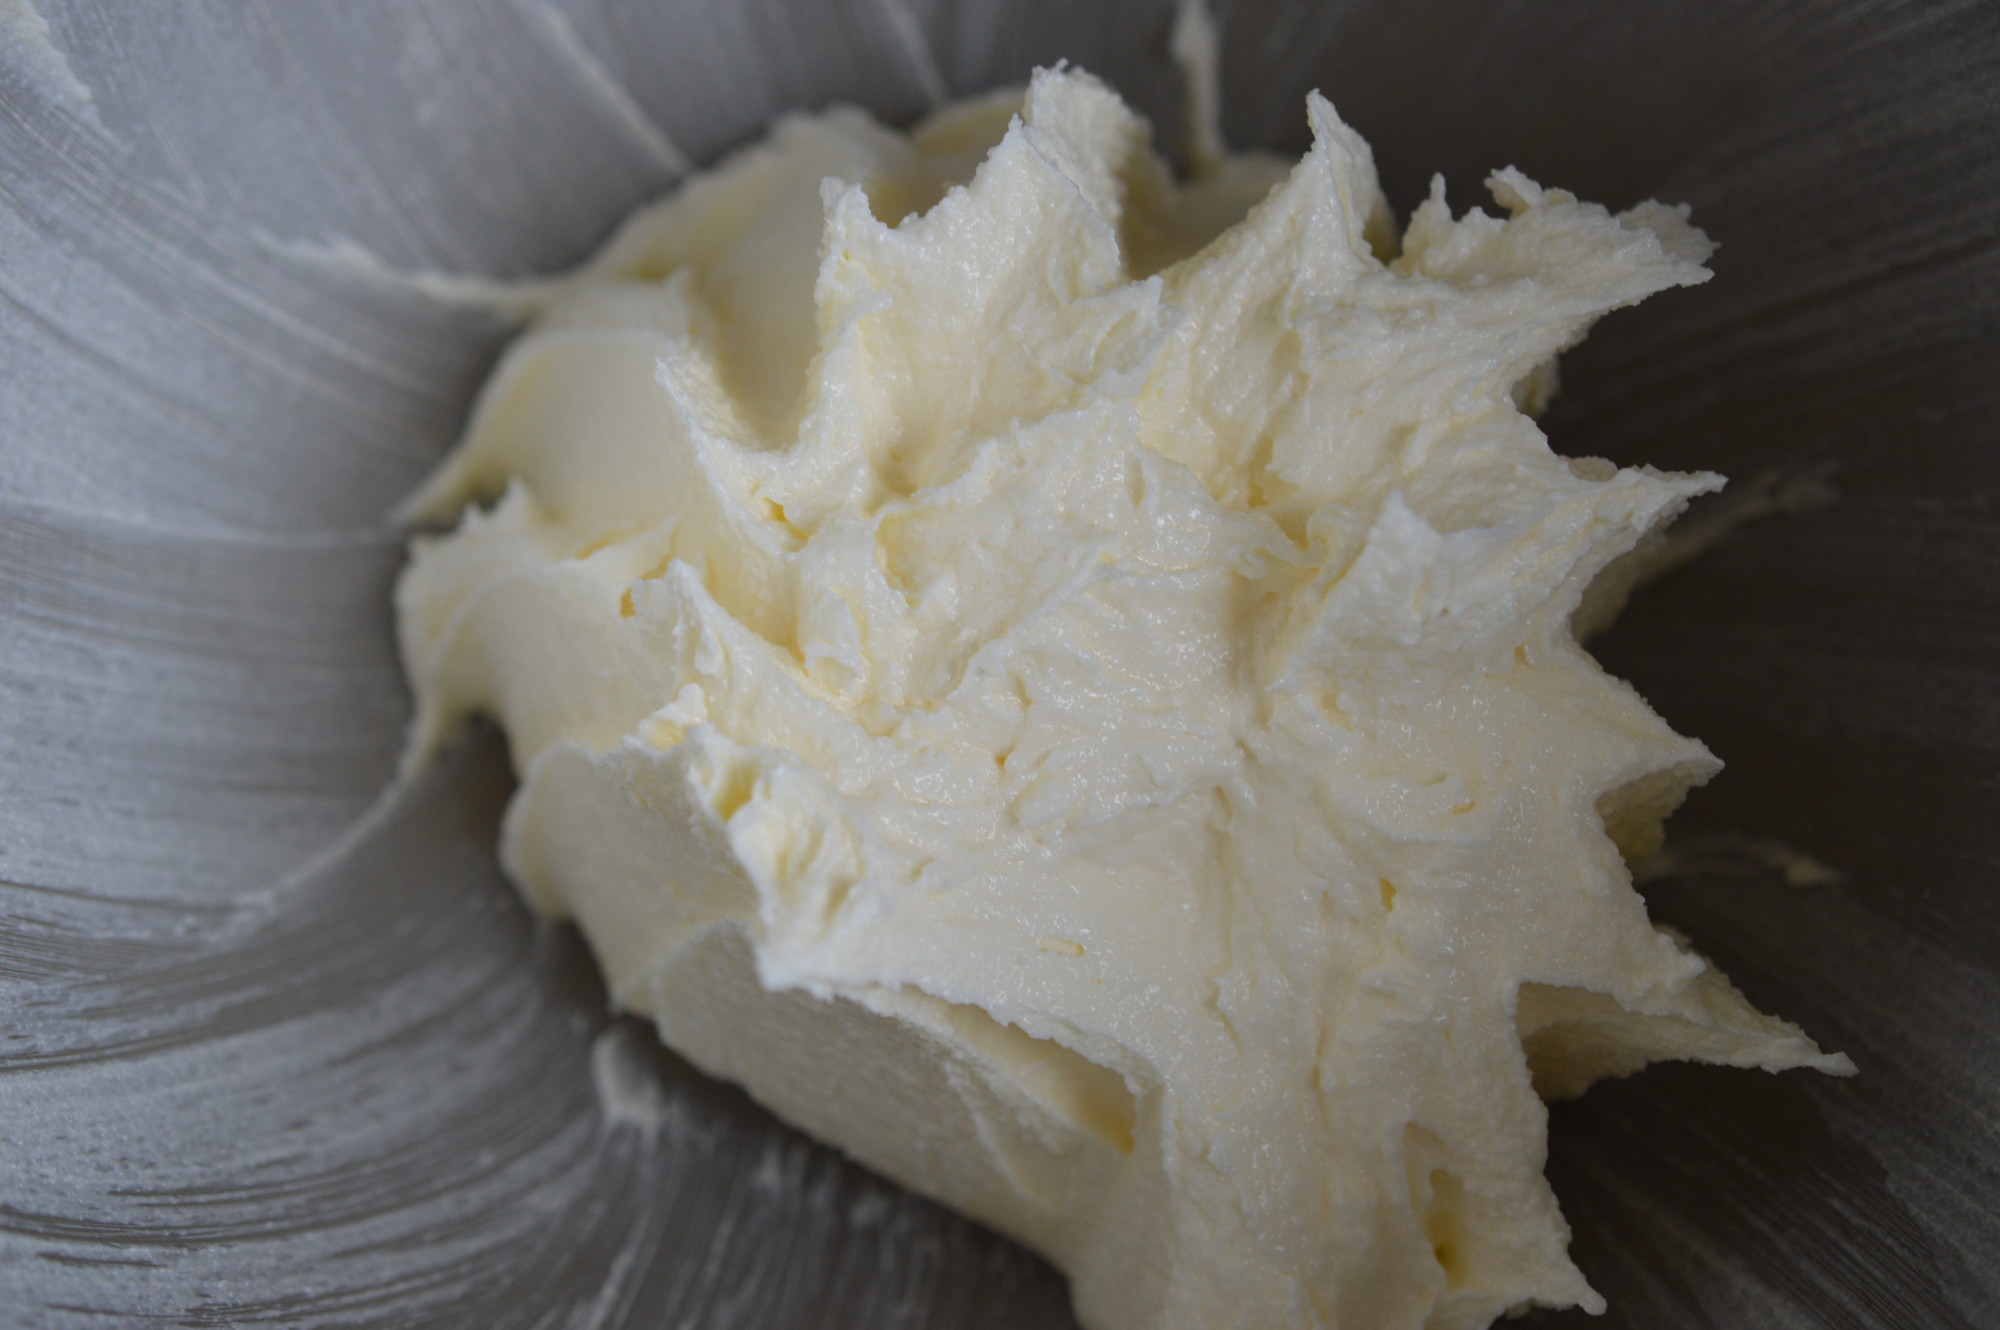
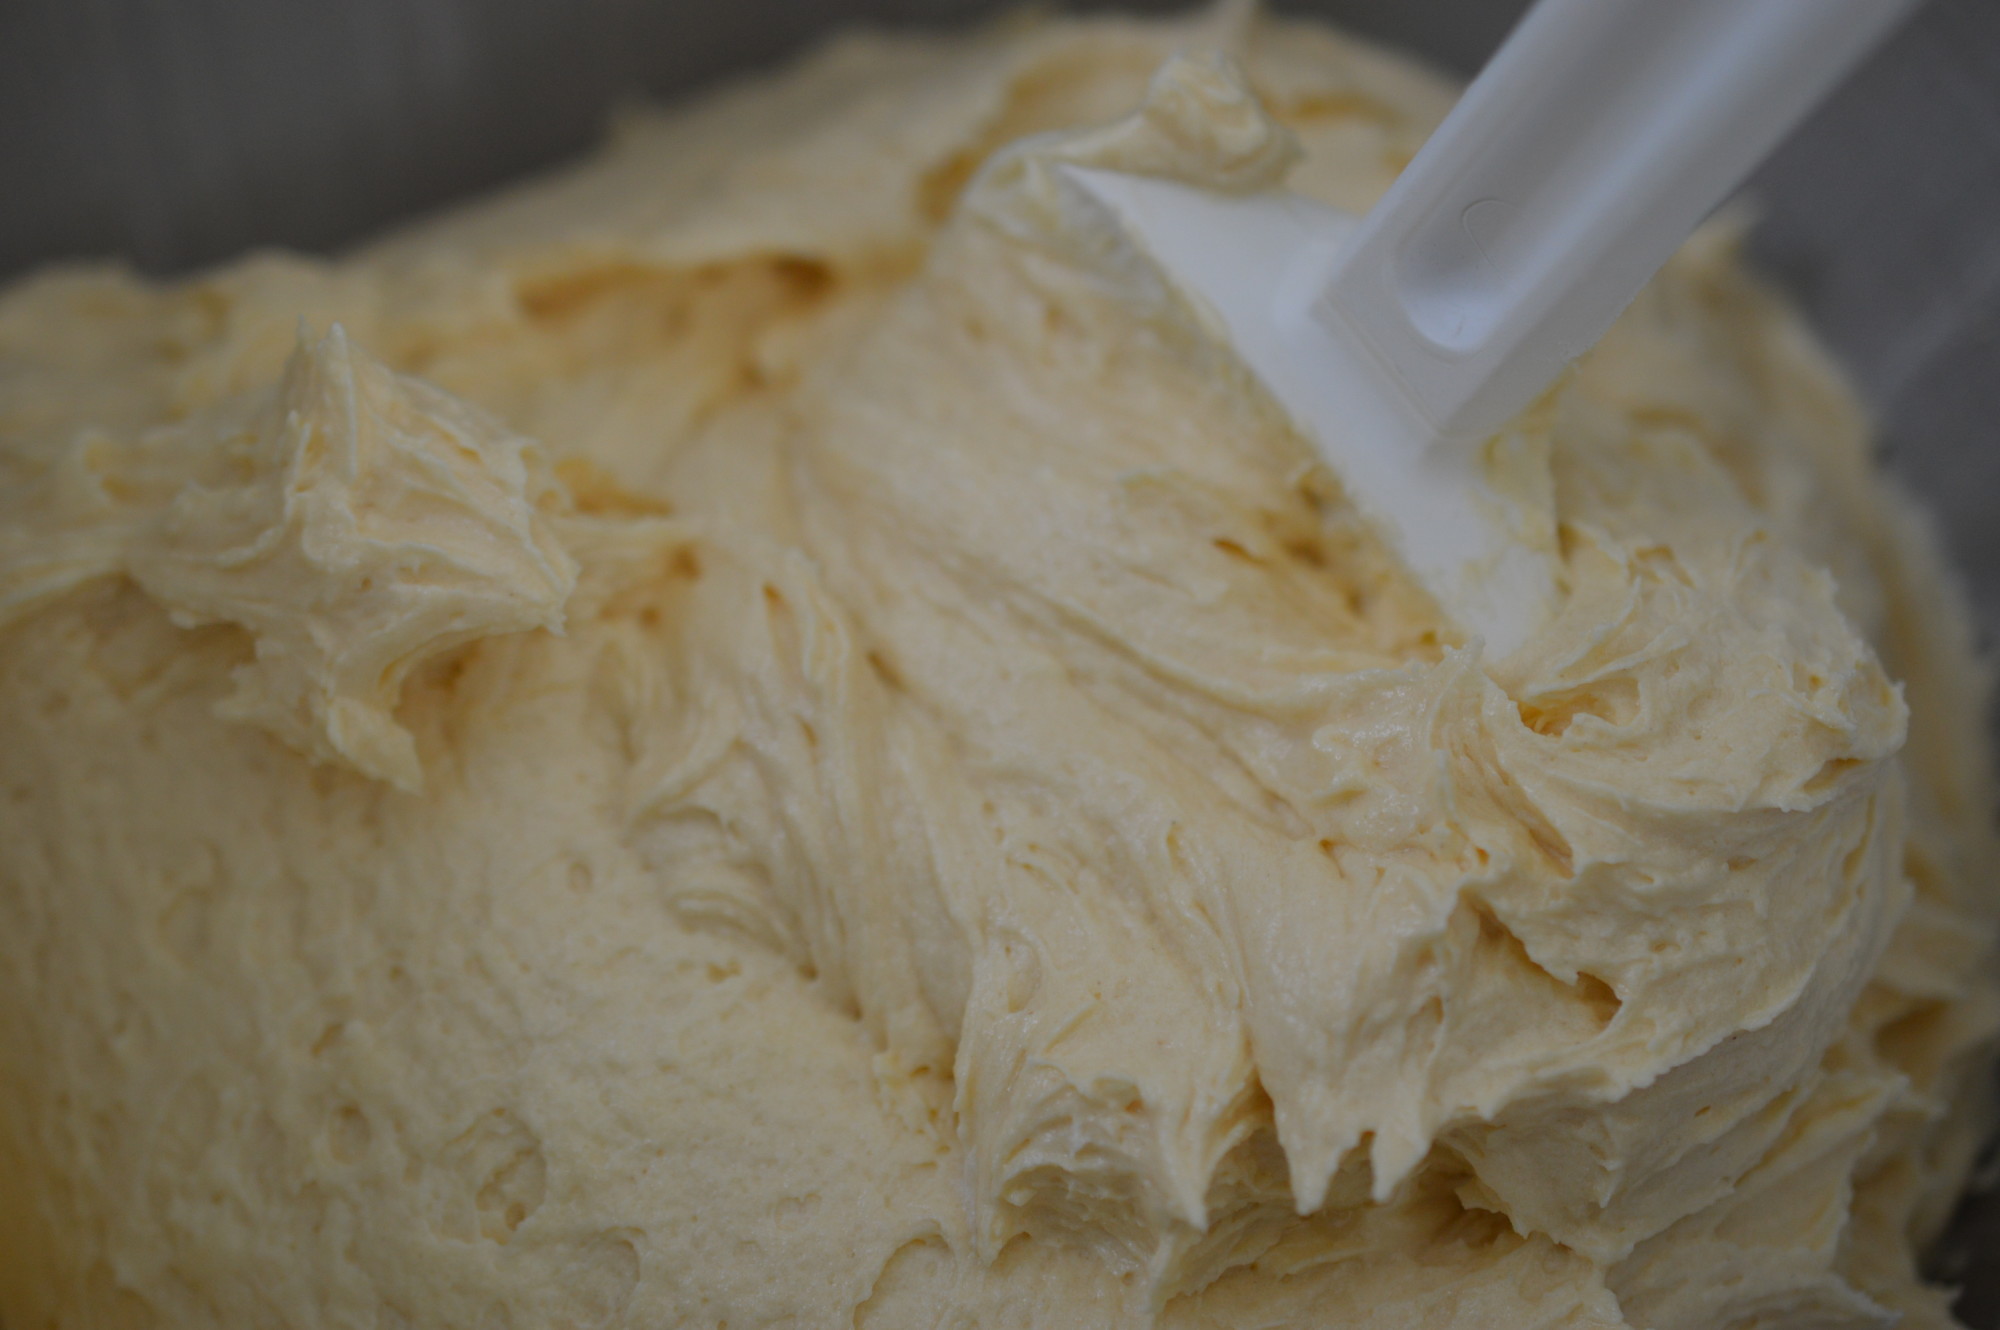
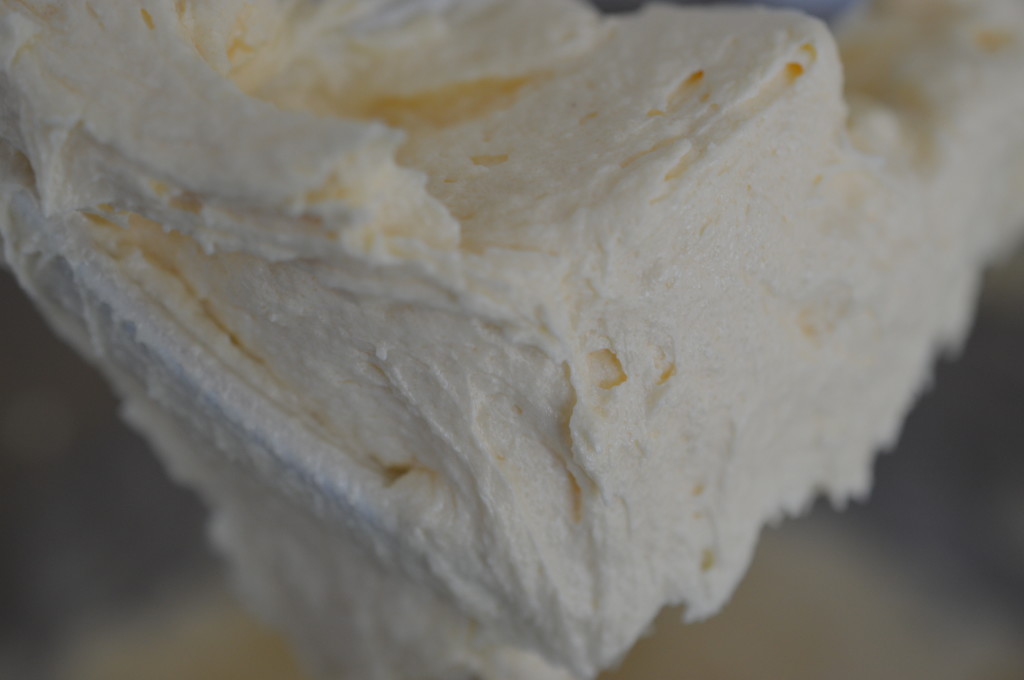
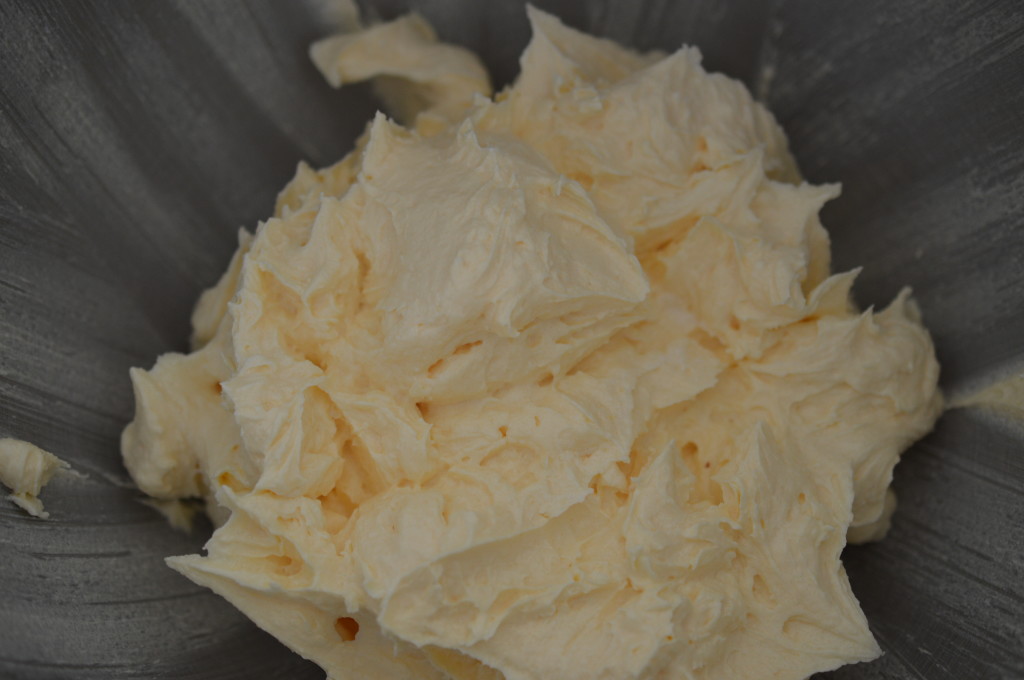
I ‘cream’ the butter and sugar together.  You can’t overdo this stage.  You want pale, light and fluffy.  It will also increase in volume.

Butterfly Cake - mix 2

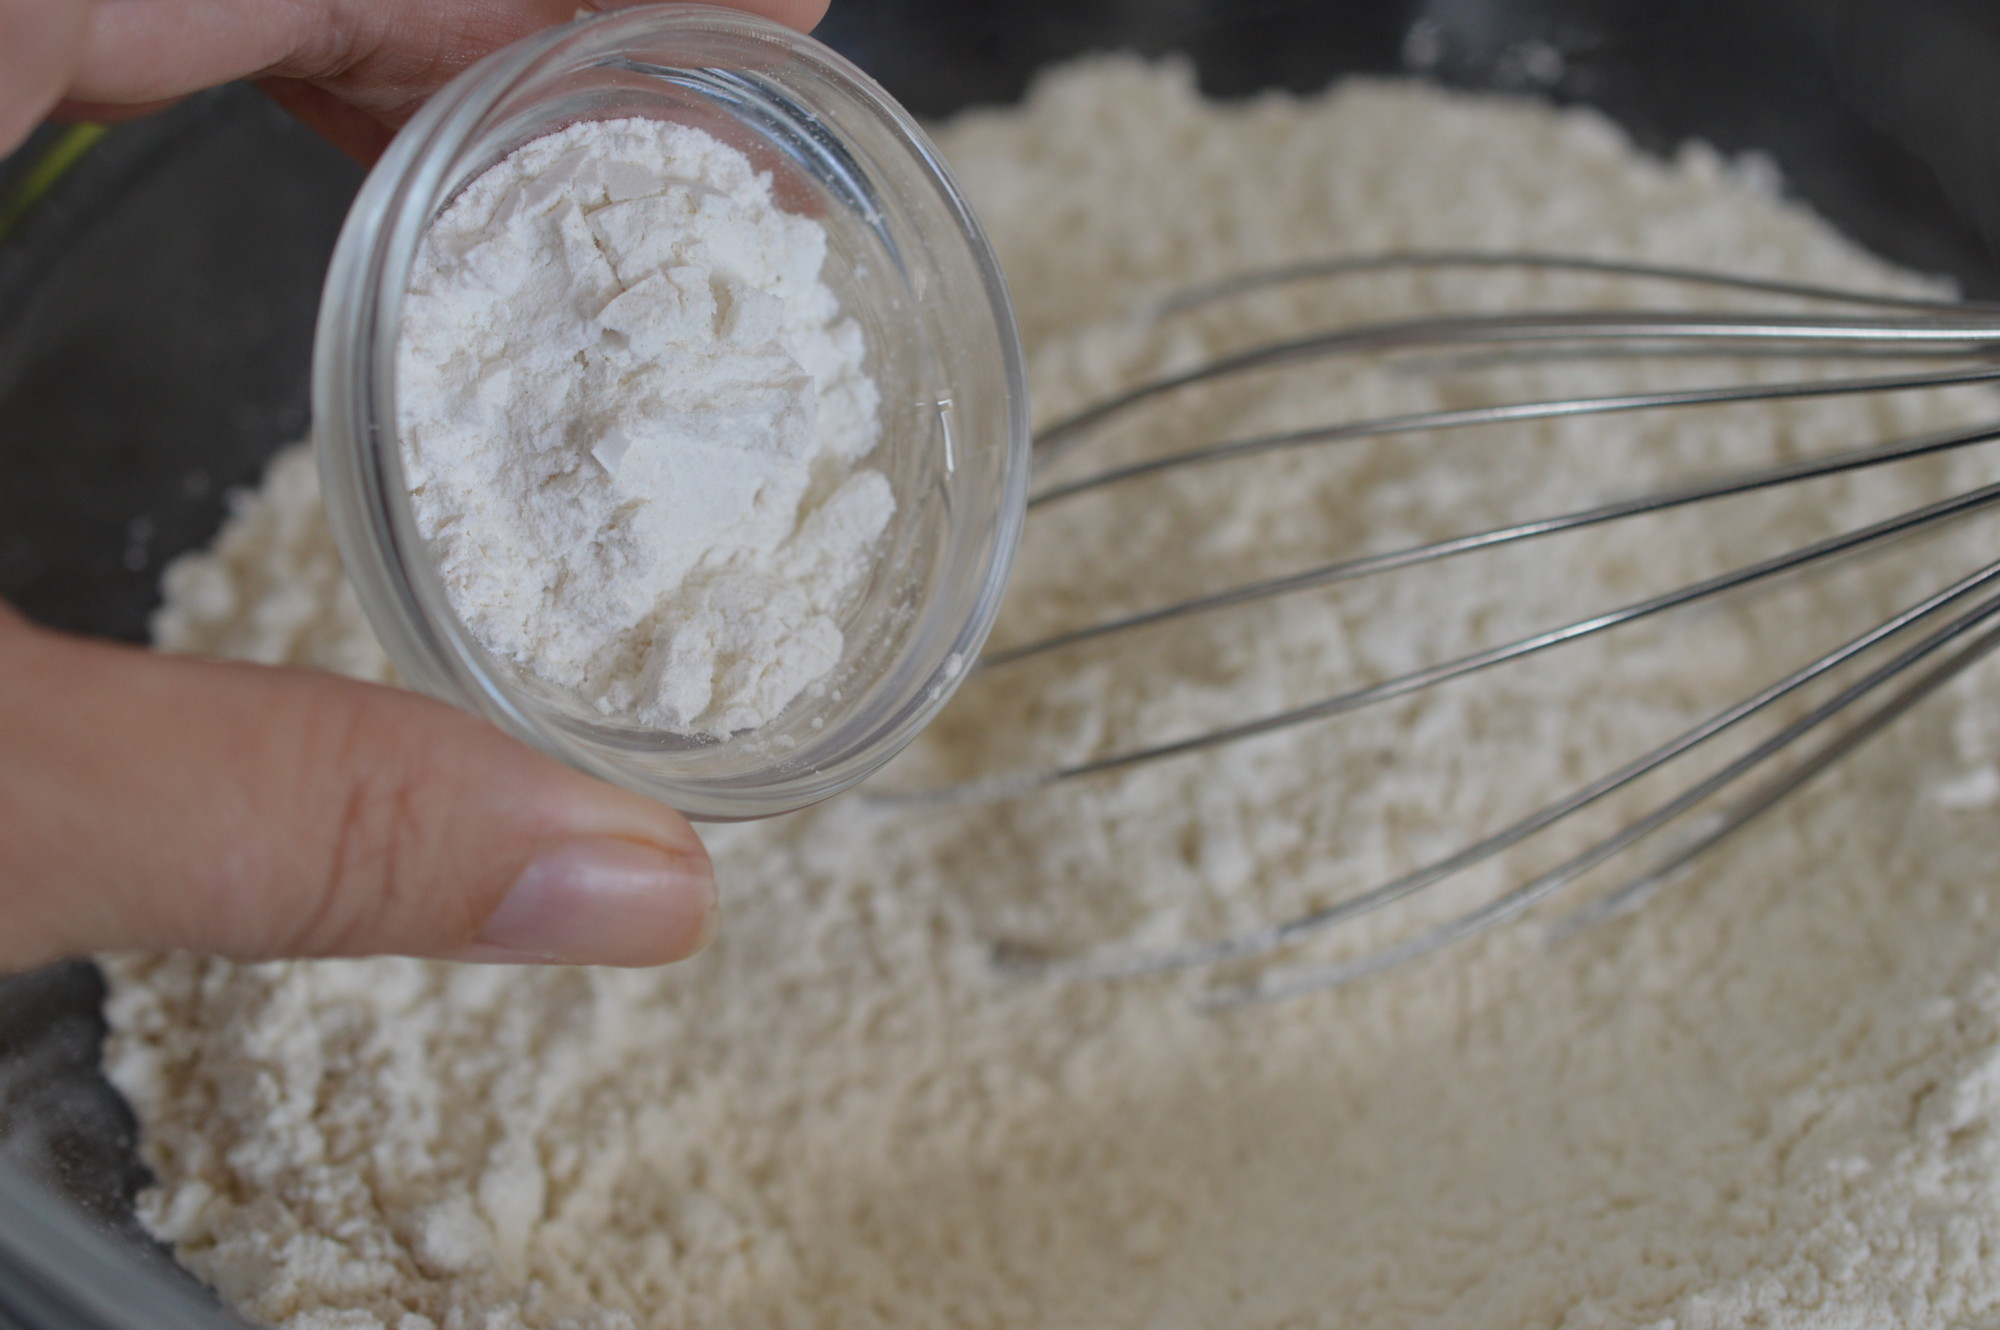
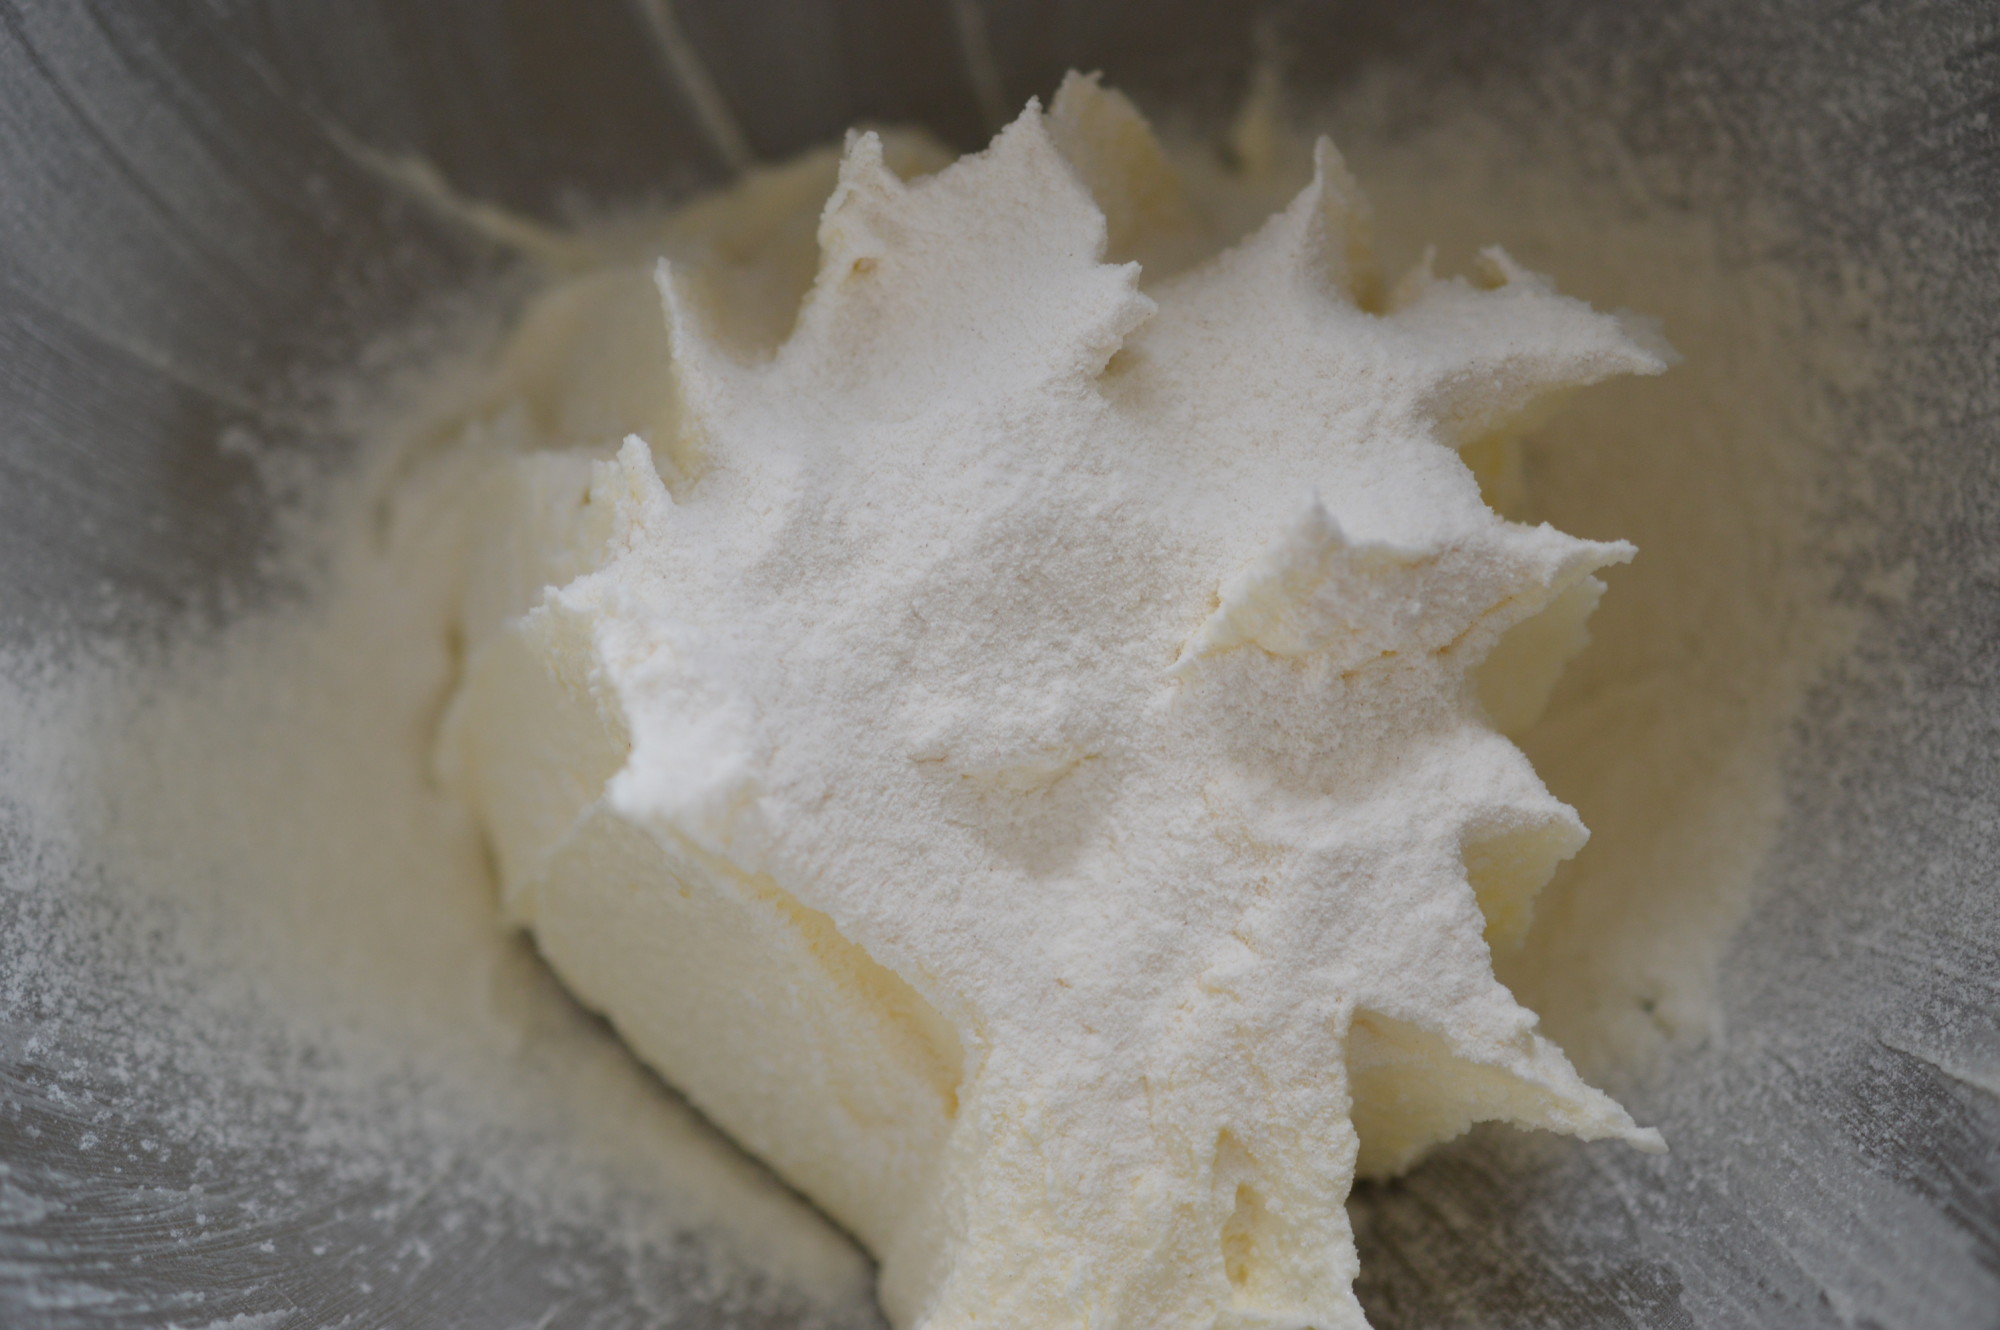
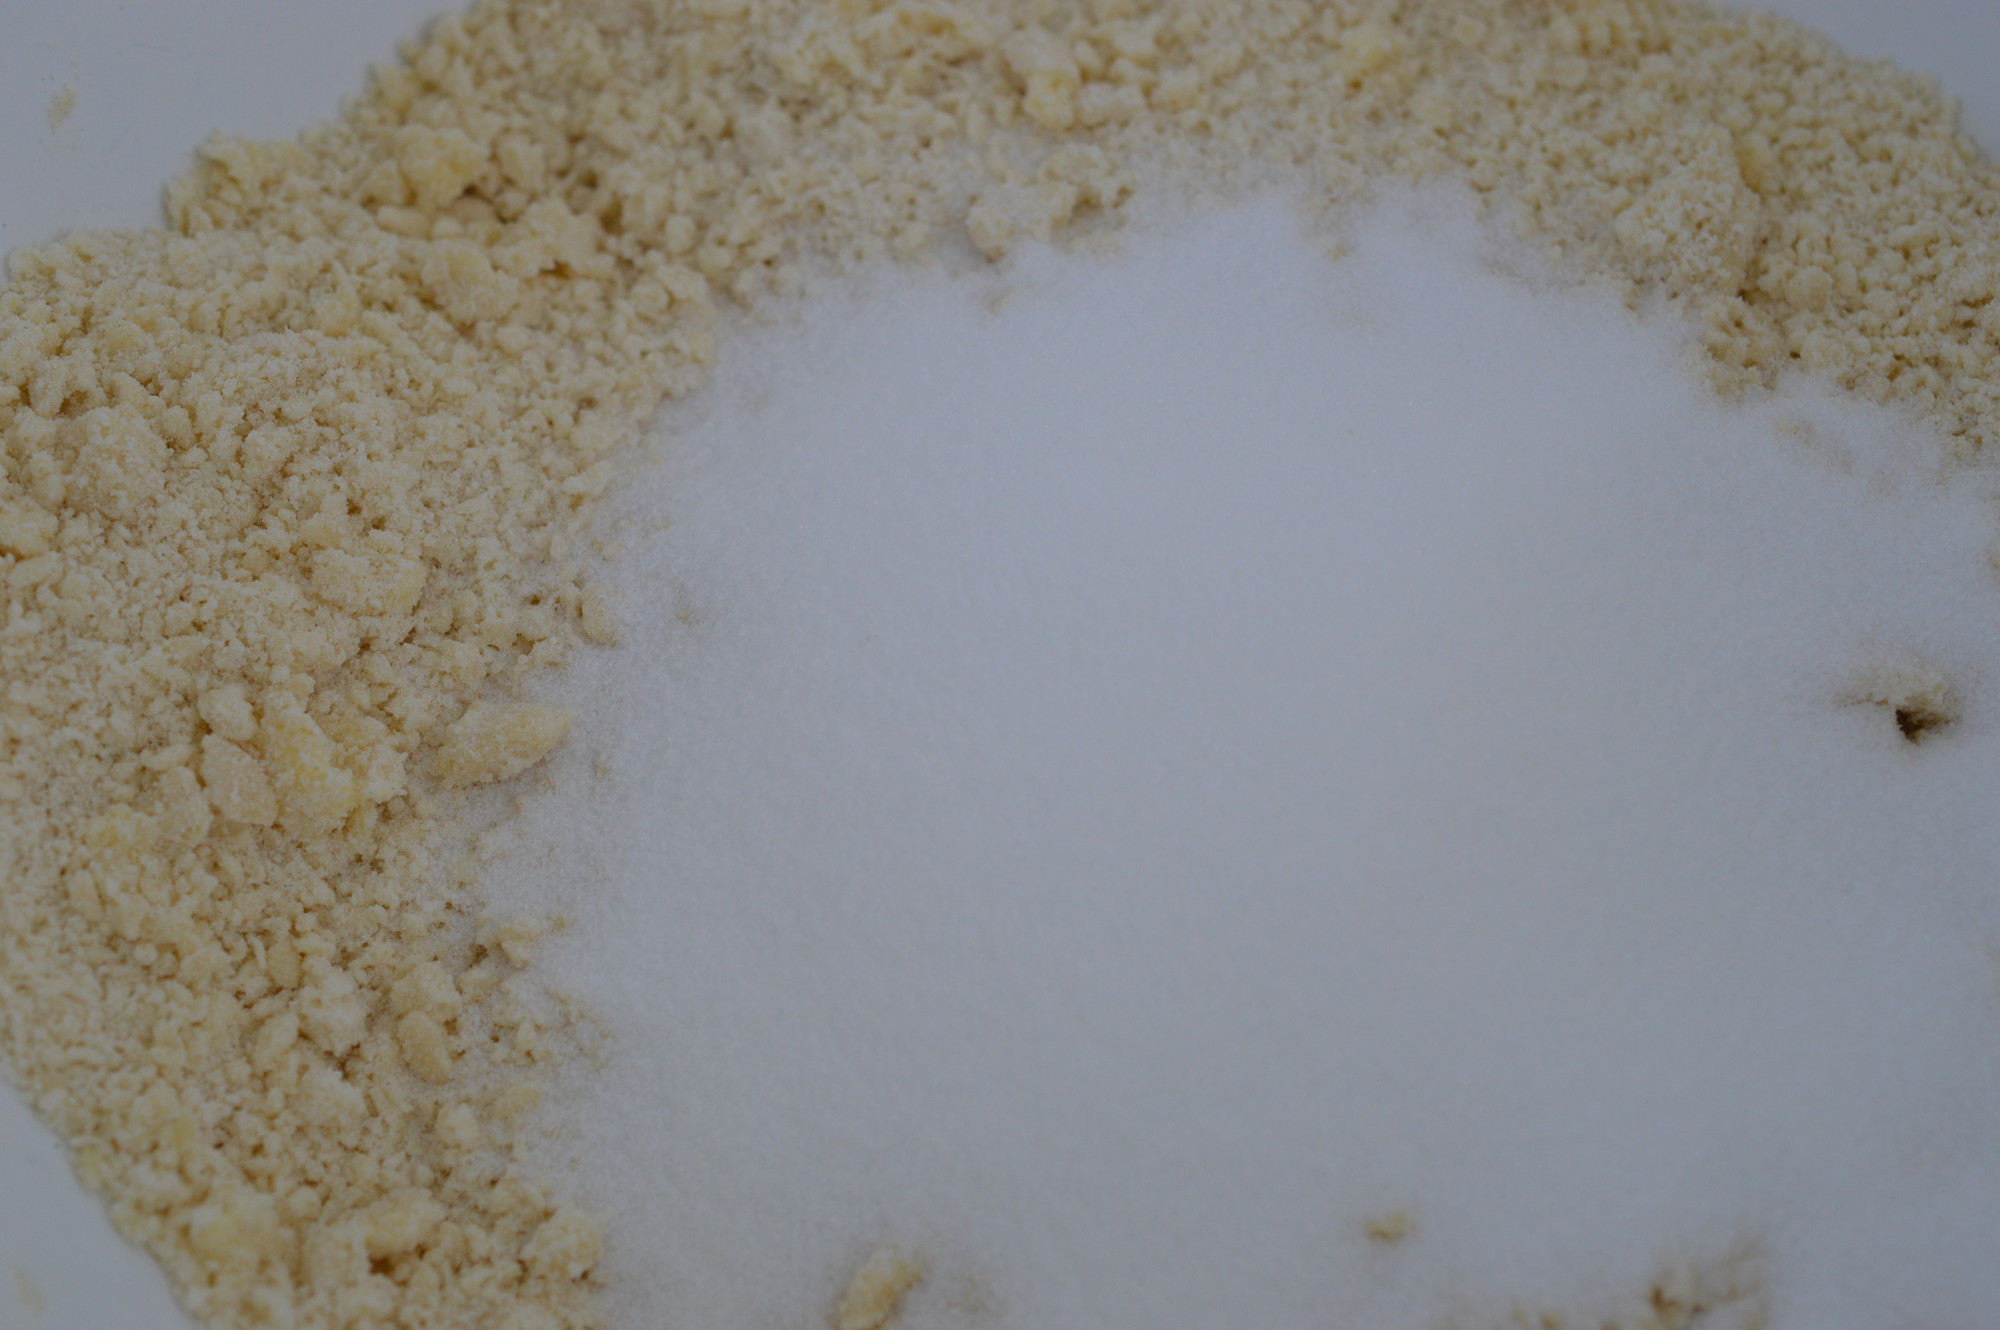
The same weight of self raising flour, whisked or sieved, will be waiting in a bowl.  I sieve over a couple of tablespoons of that before adding the eggs.  It’s my insurance policy against the mixture curdling.  That’s when the eggs have given the butter/sugar mix the appearance of cellulite.  The reason will be not ‘beating’ an egg in sufficiently well before adding the next one and/or your ingredients not being at room temperature.  If it happens, just add a little bit of your flour and ‘beat’.  Your cake won’t be as light as it might have been otherwise, but ….  Really, it’s just cake!  Let’s not worry.

Butterfly Cake - add eggs

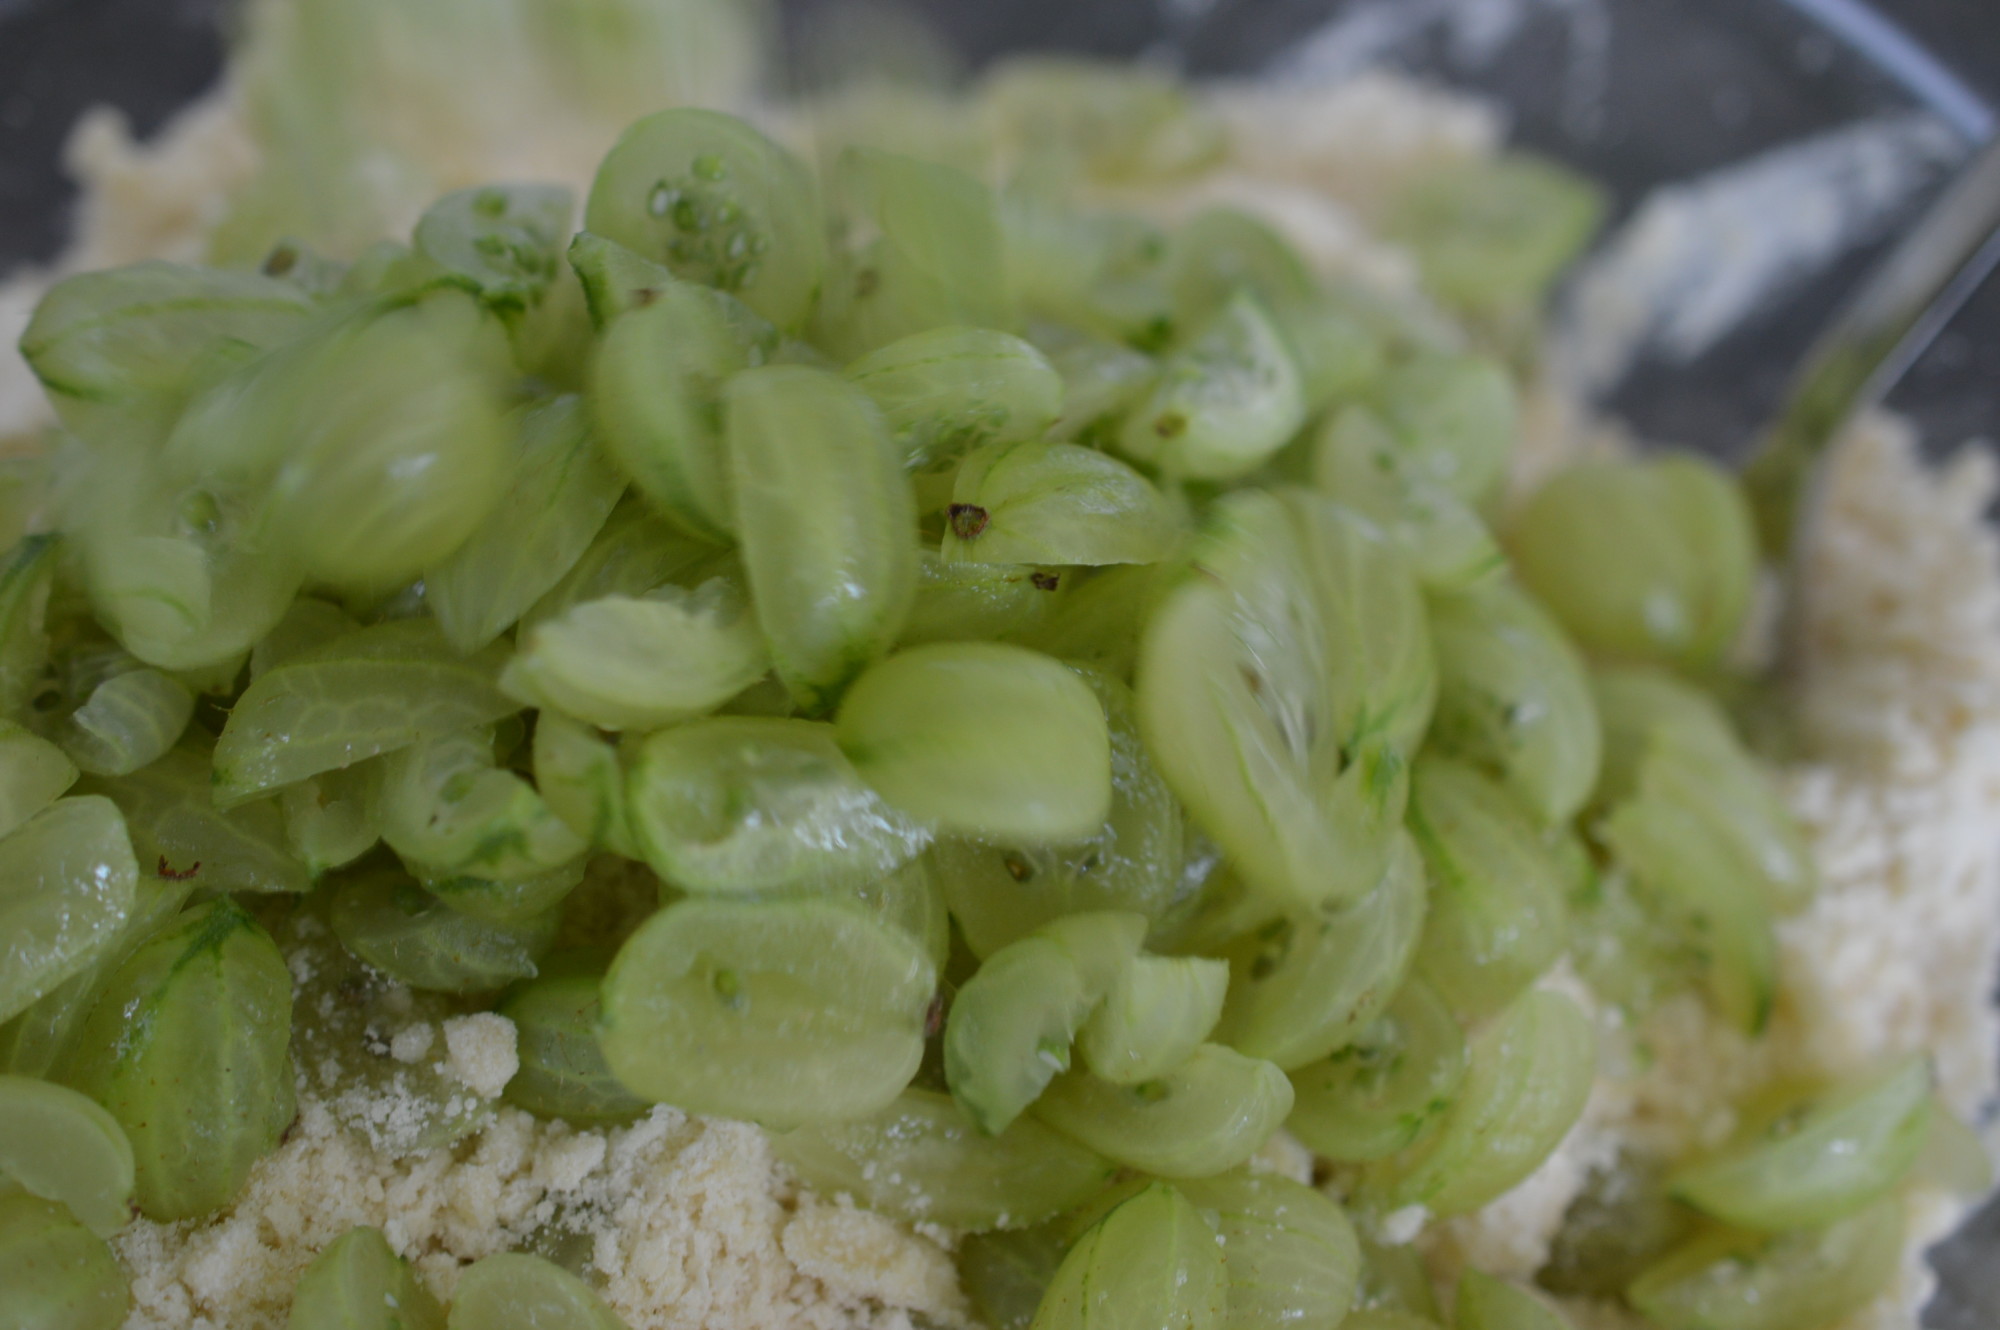
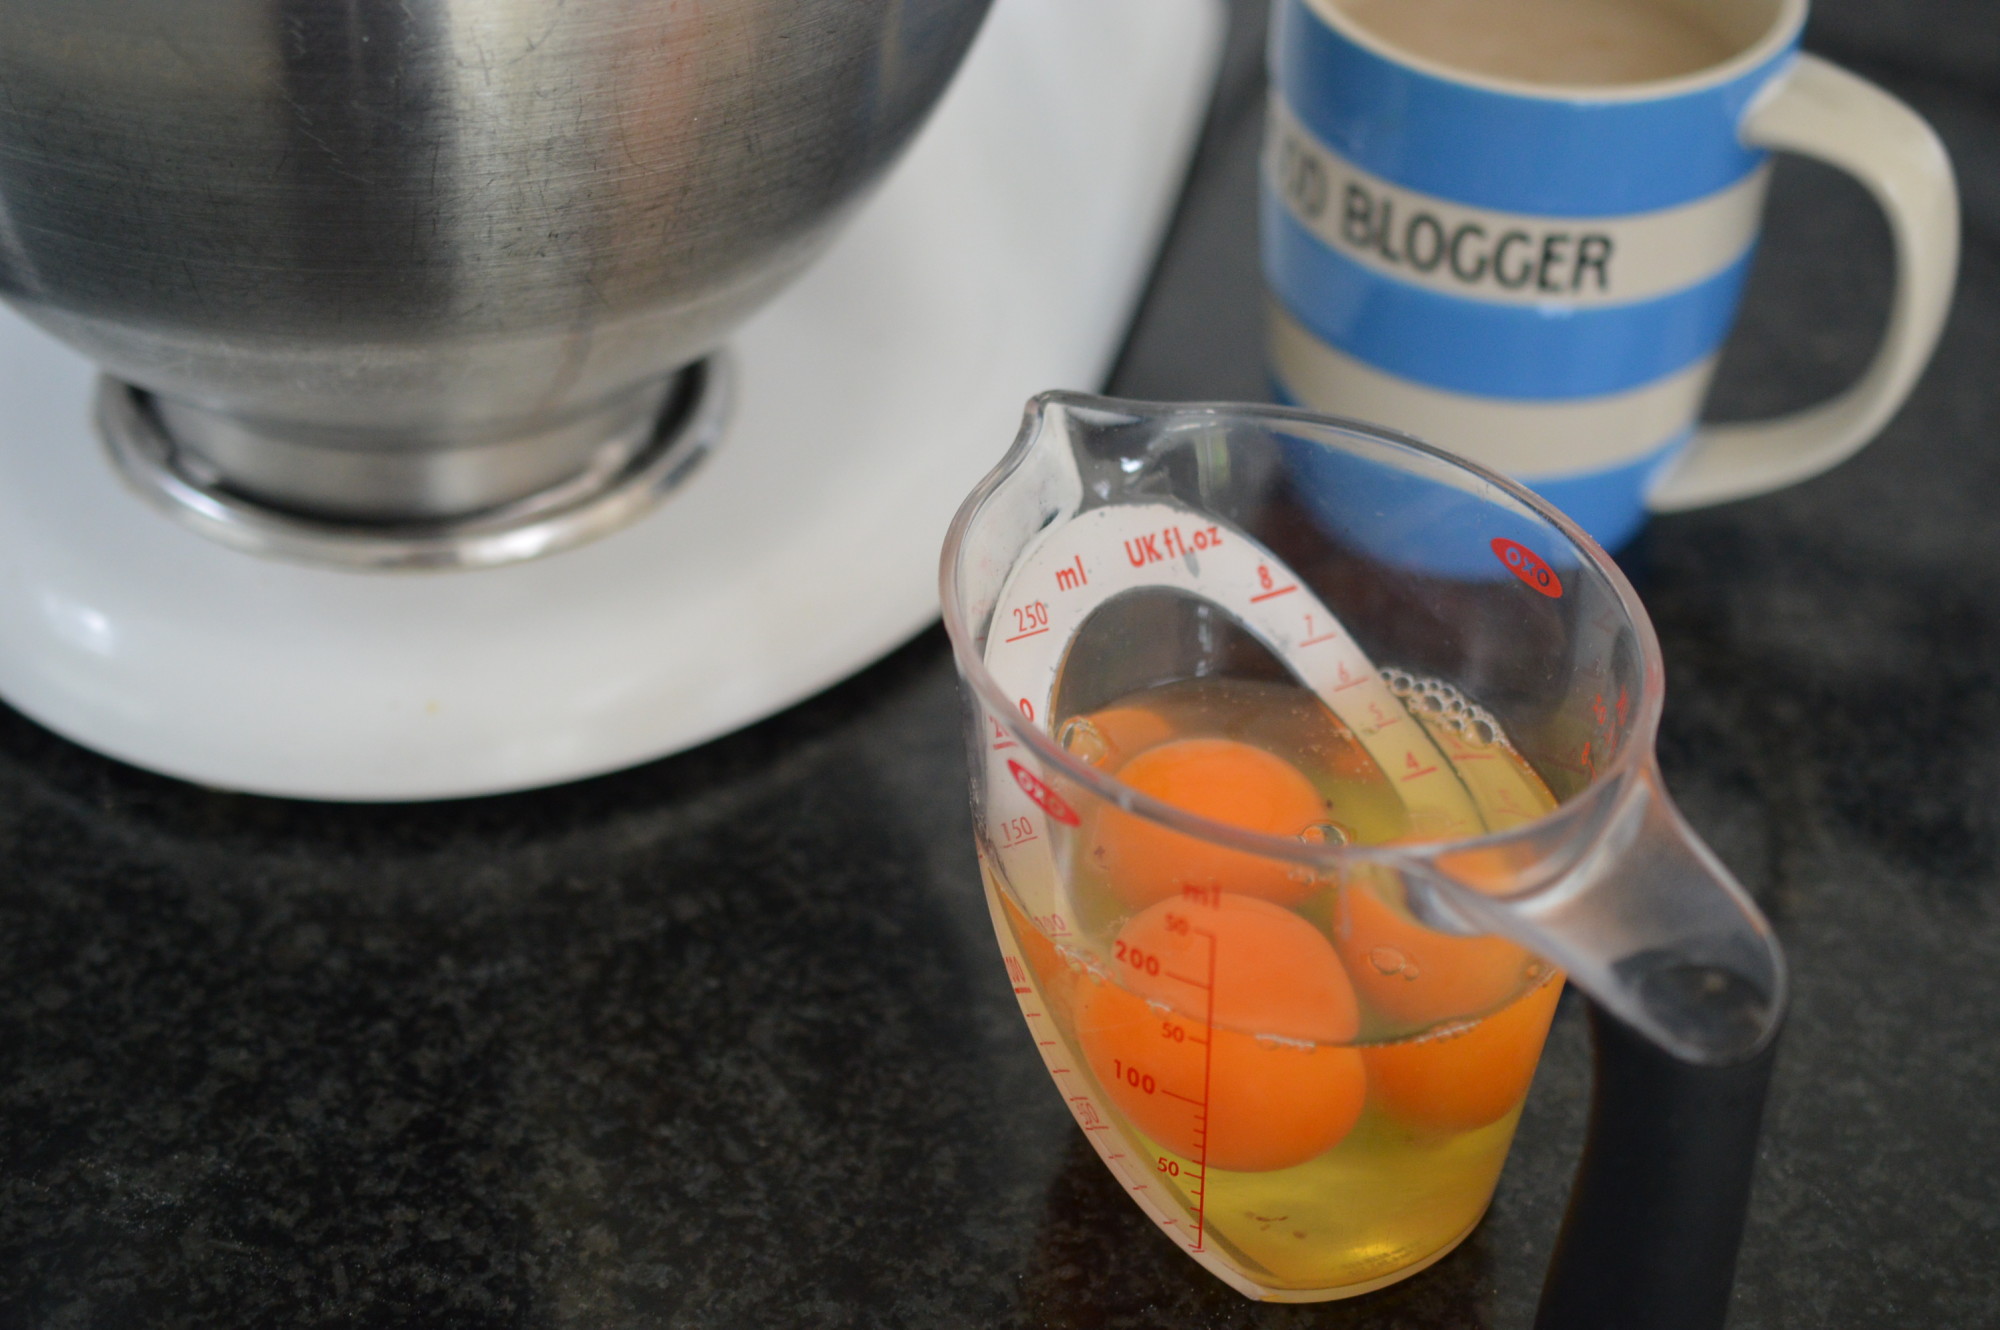
Then it’s the three eggs – one at a time.  I find it easiest to break the eggs into a jug.  In the normal run of things (i.e. when you aren’t trying to take sequential pictures) it means you don’t have to stop the mixer.

Butterfly Cake - egg 1

Beat the first egg in thoroughly before adding the second.

Butterfly Cake - egg 2 mixed

Then add the second.  Beat.  And then the third.  Beat.

Butterfly Cake - vanilla extract

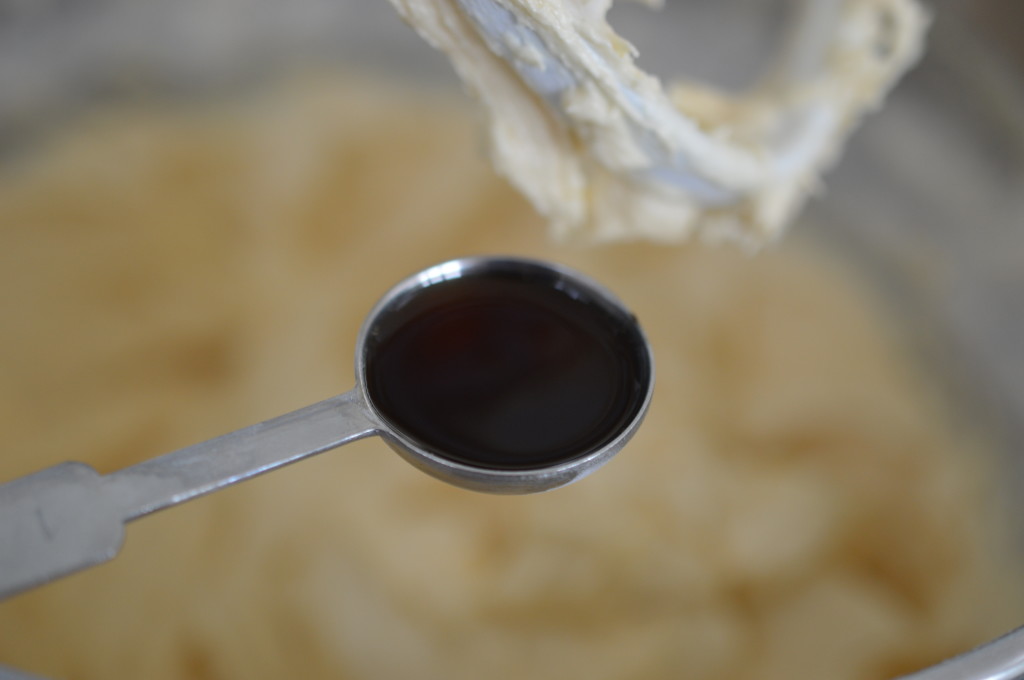
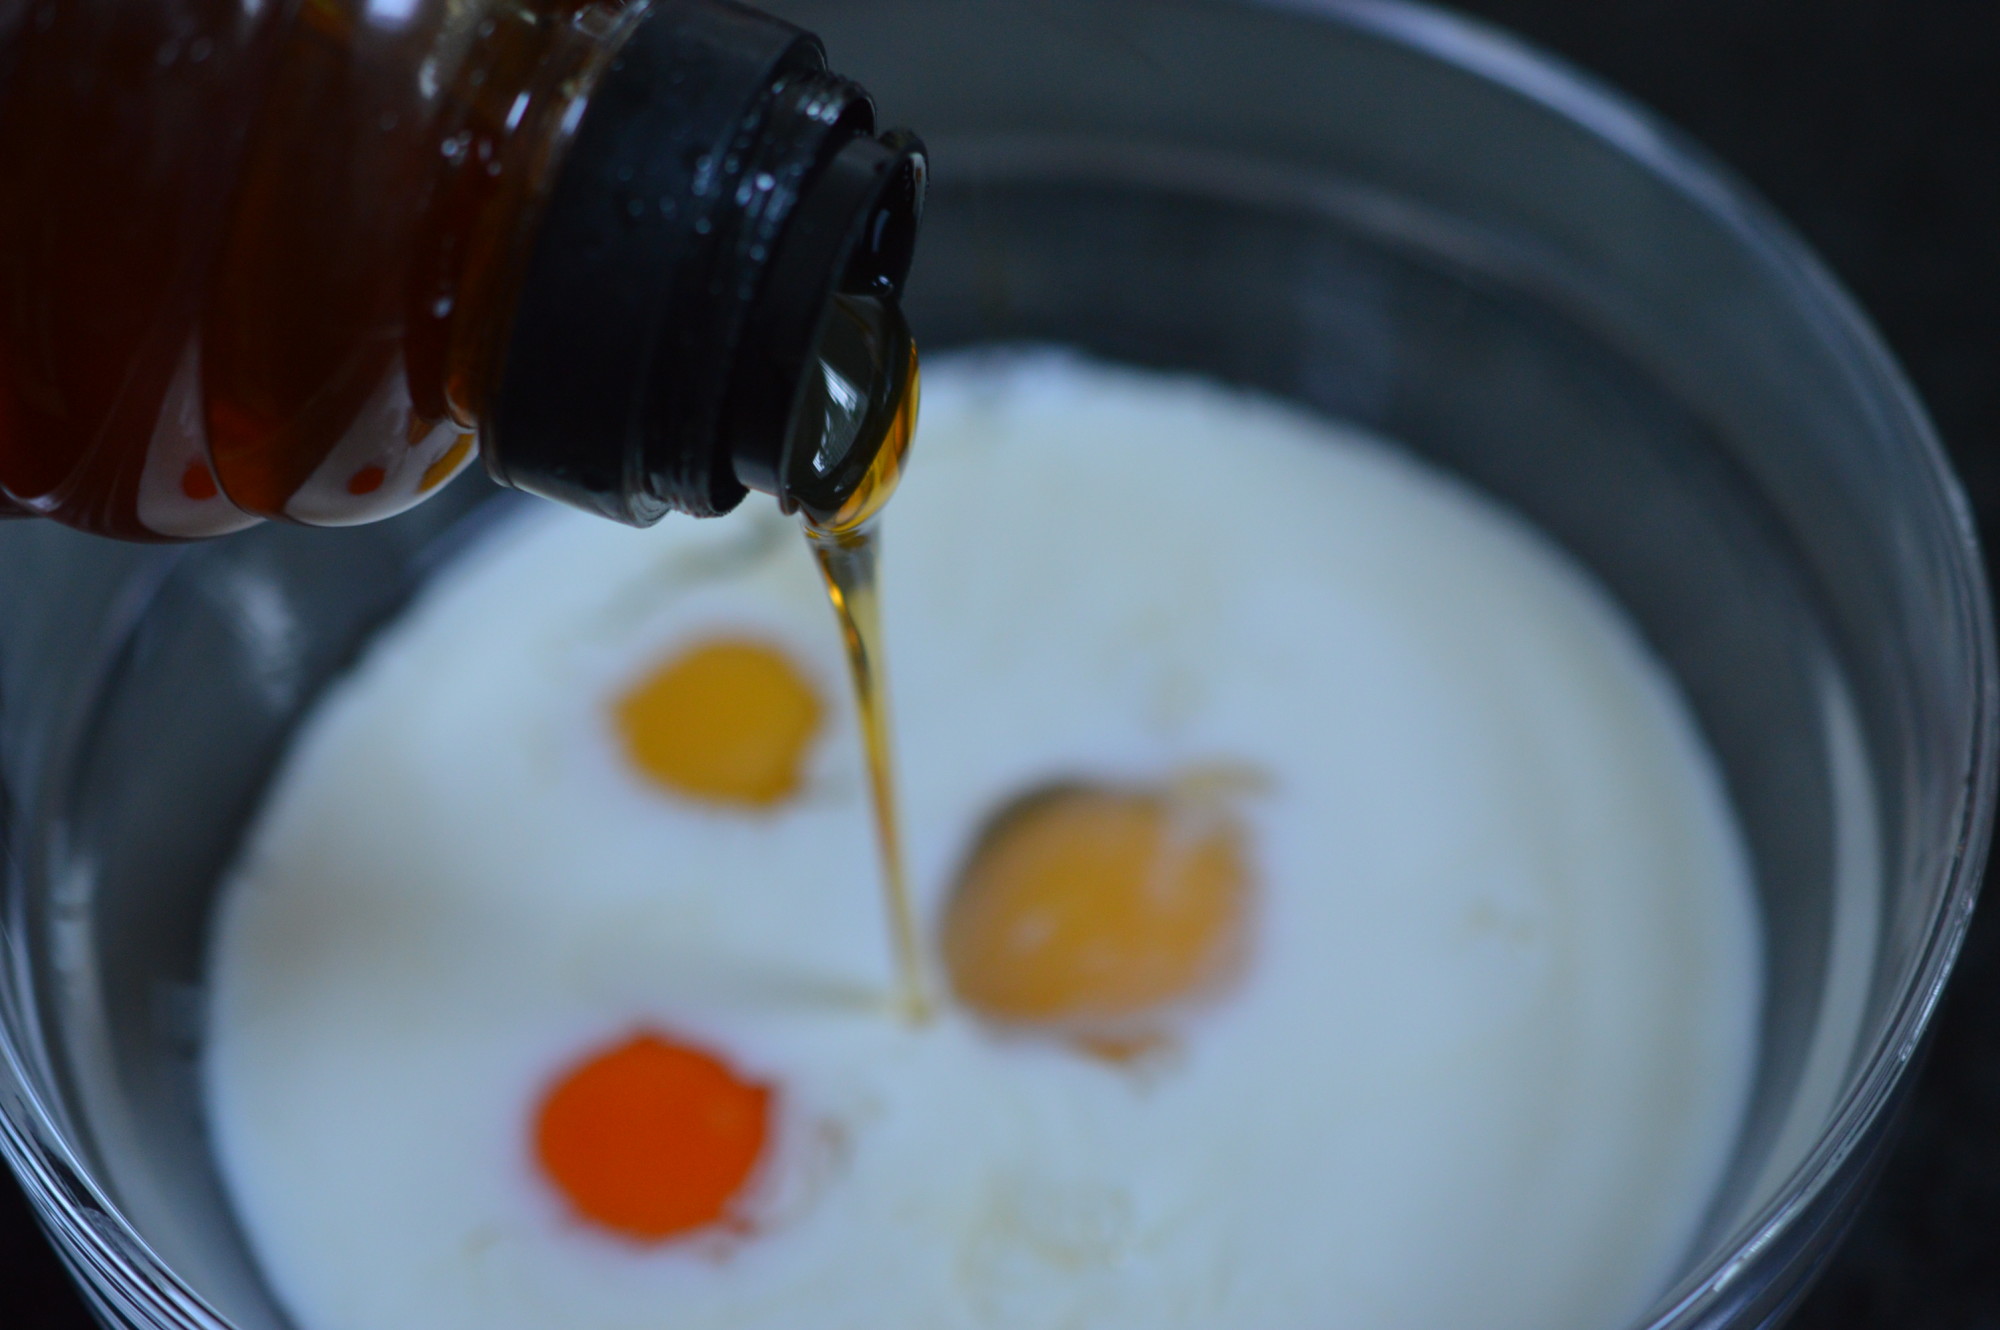
Now it’s the vanilla.  1 tsp of good vanilla extract.

Butterfly Cake - finished mix

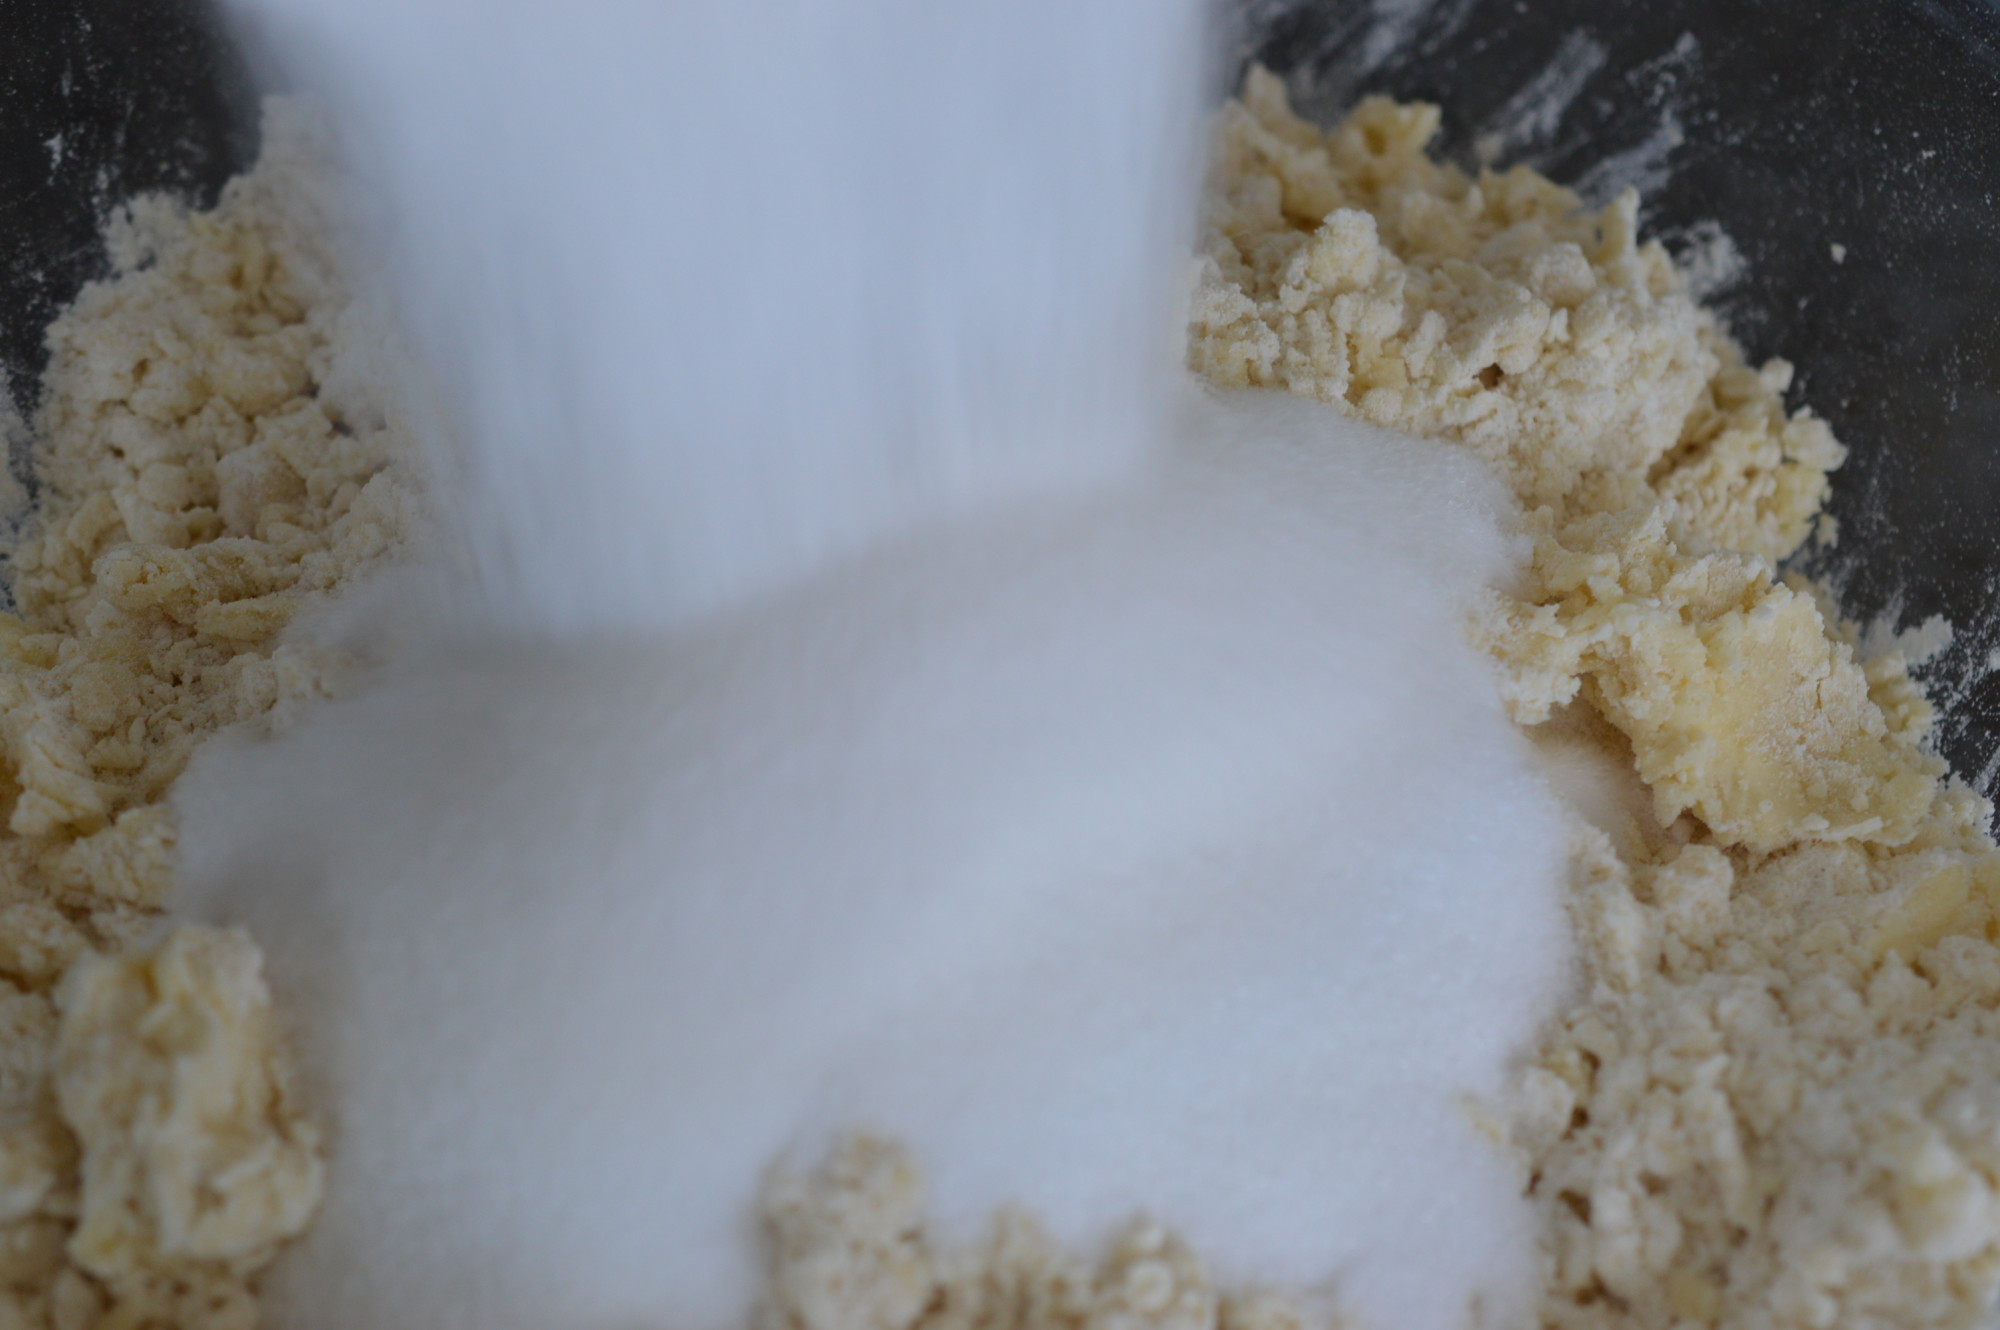
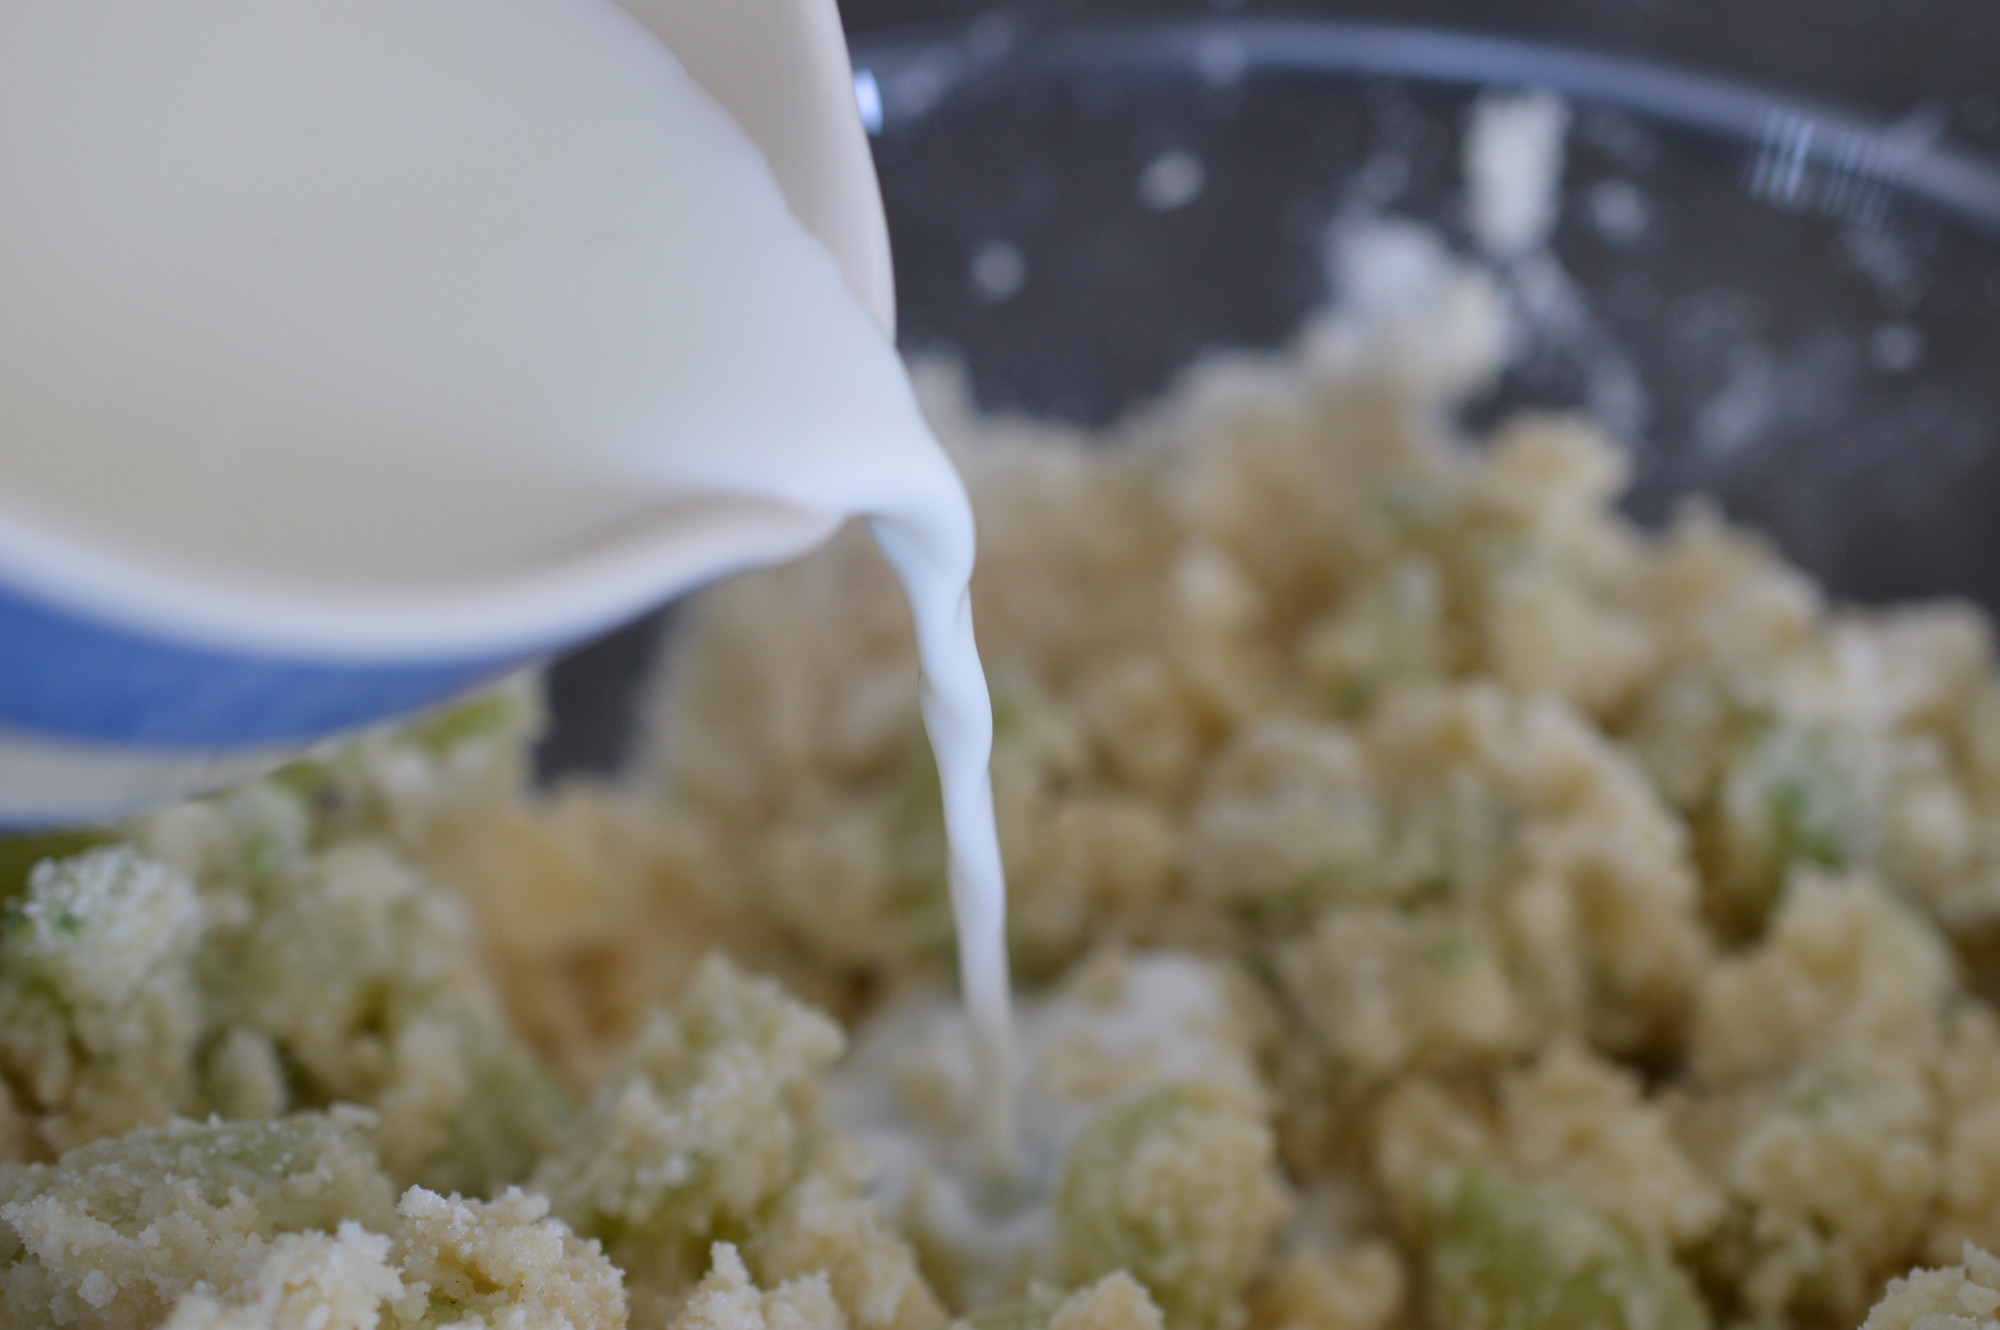
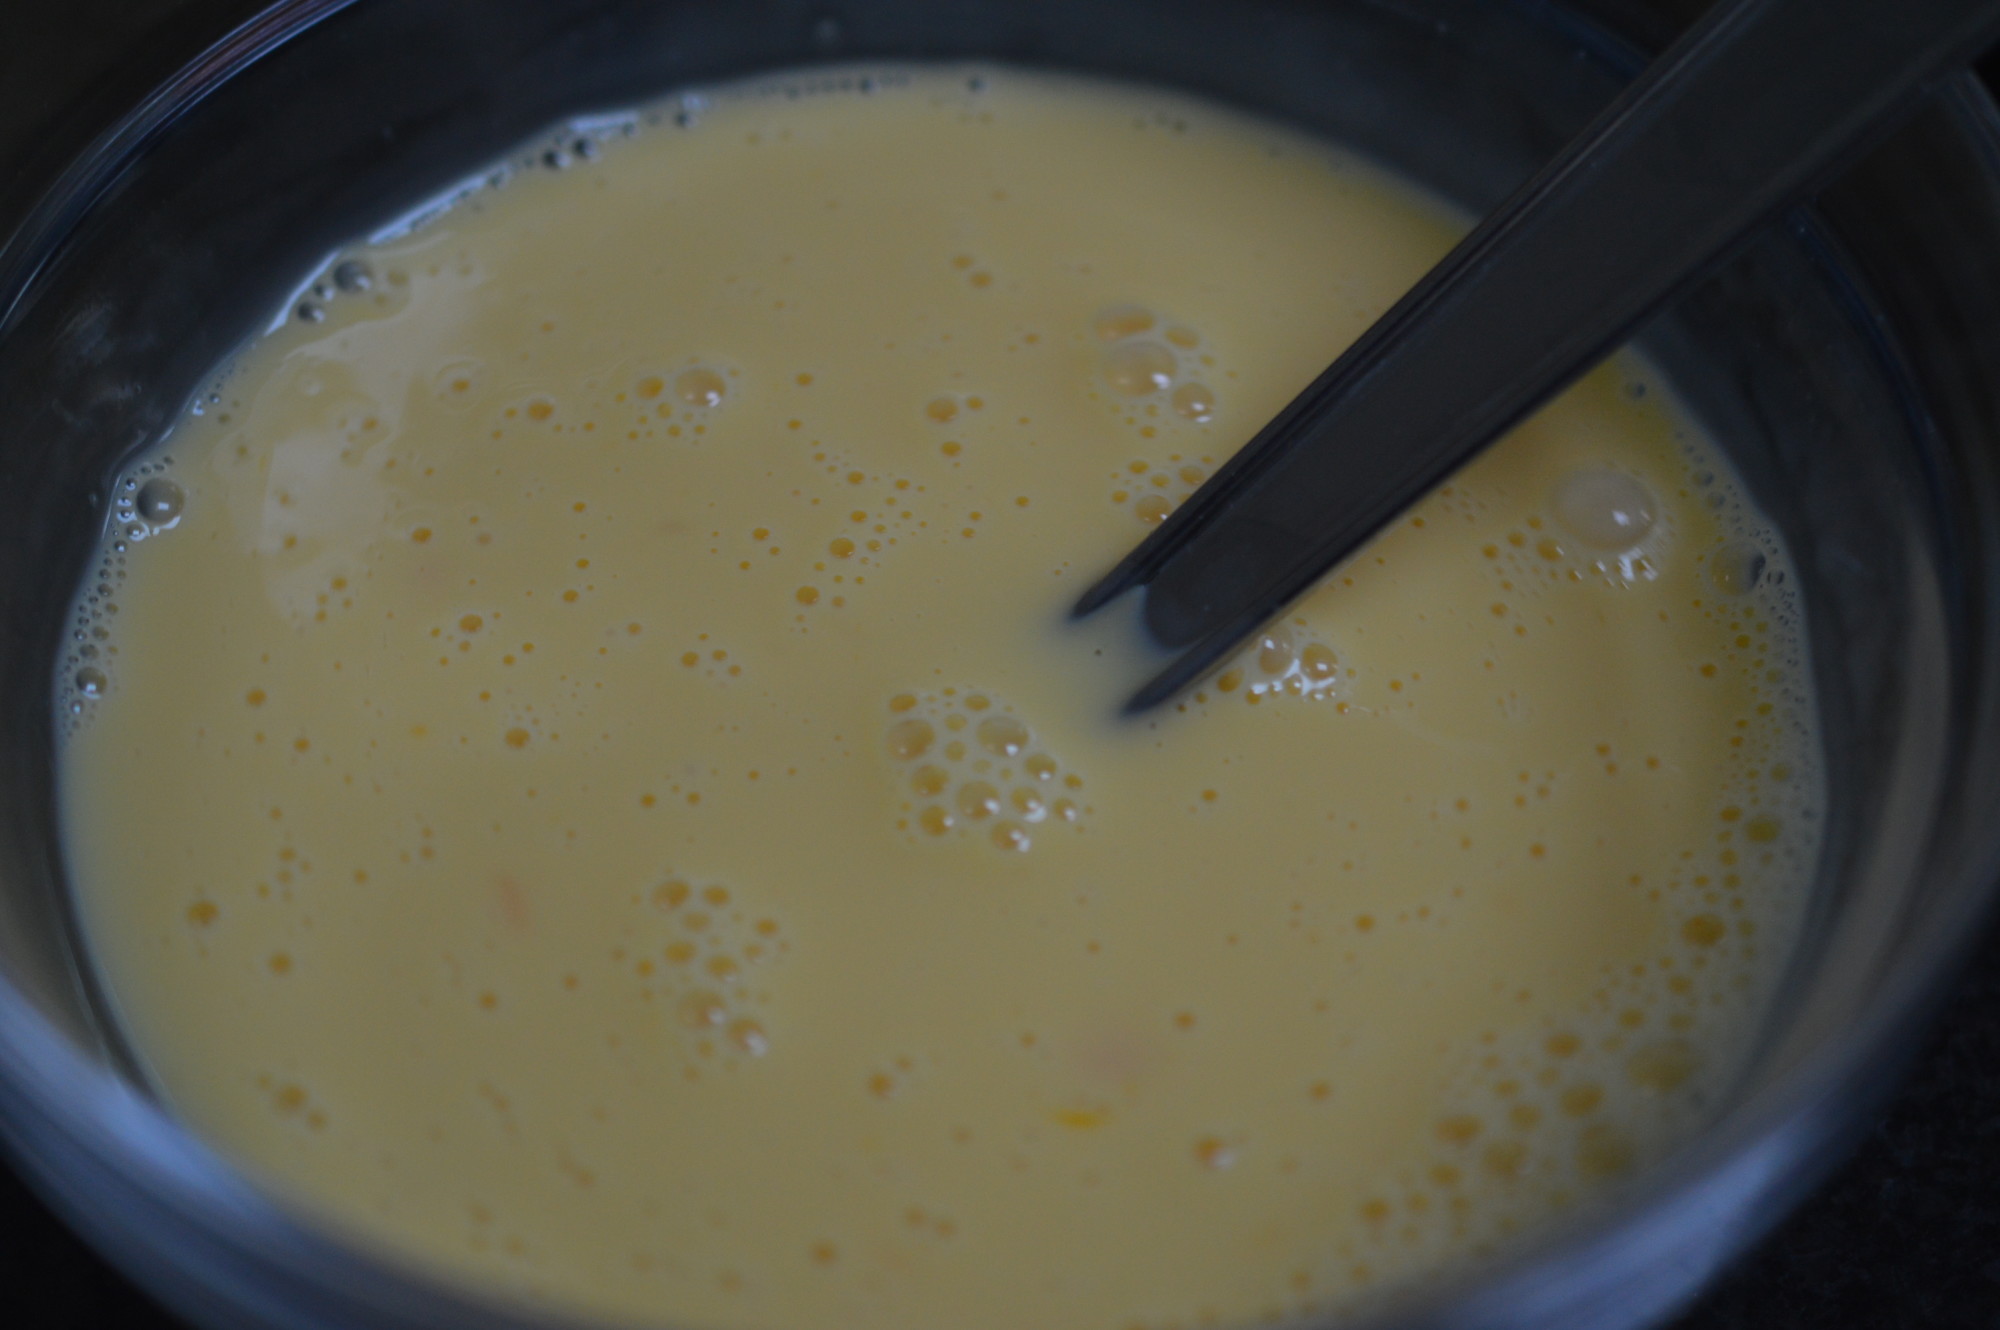
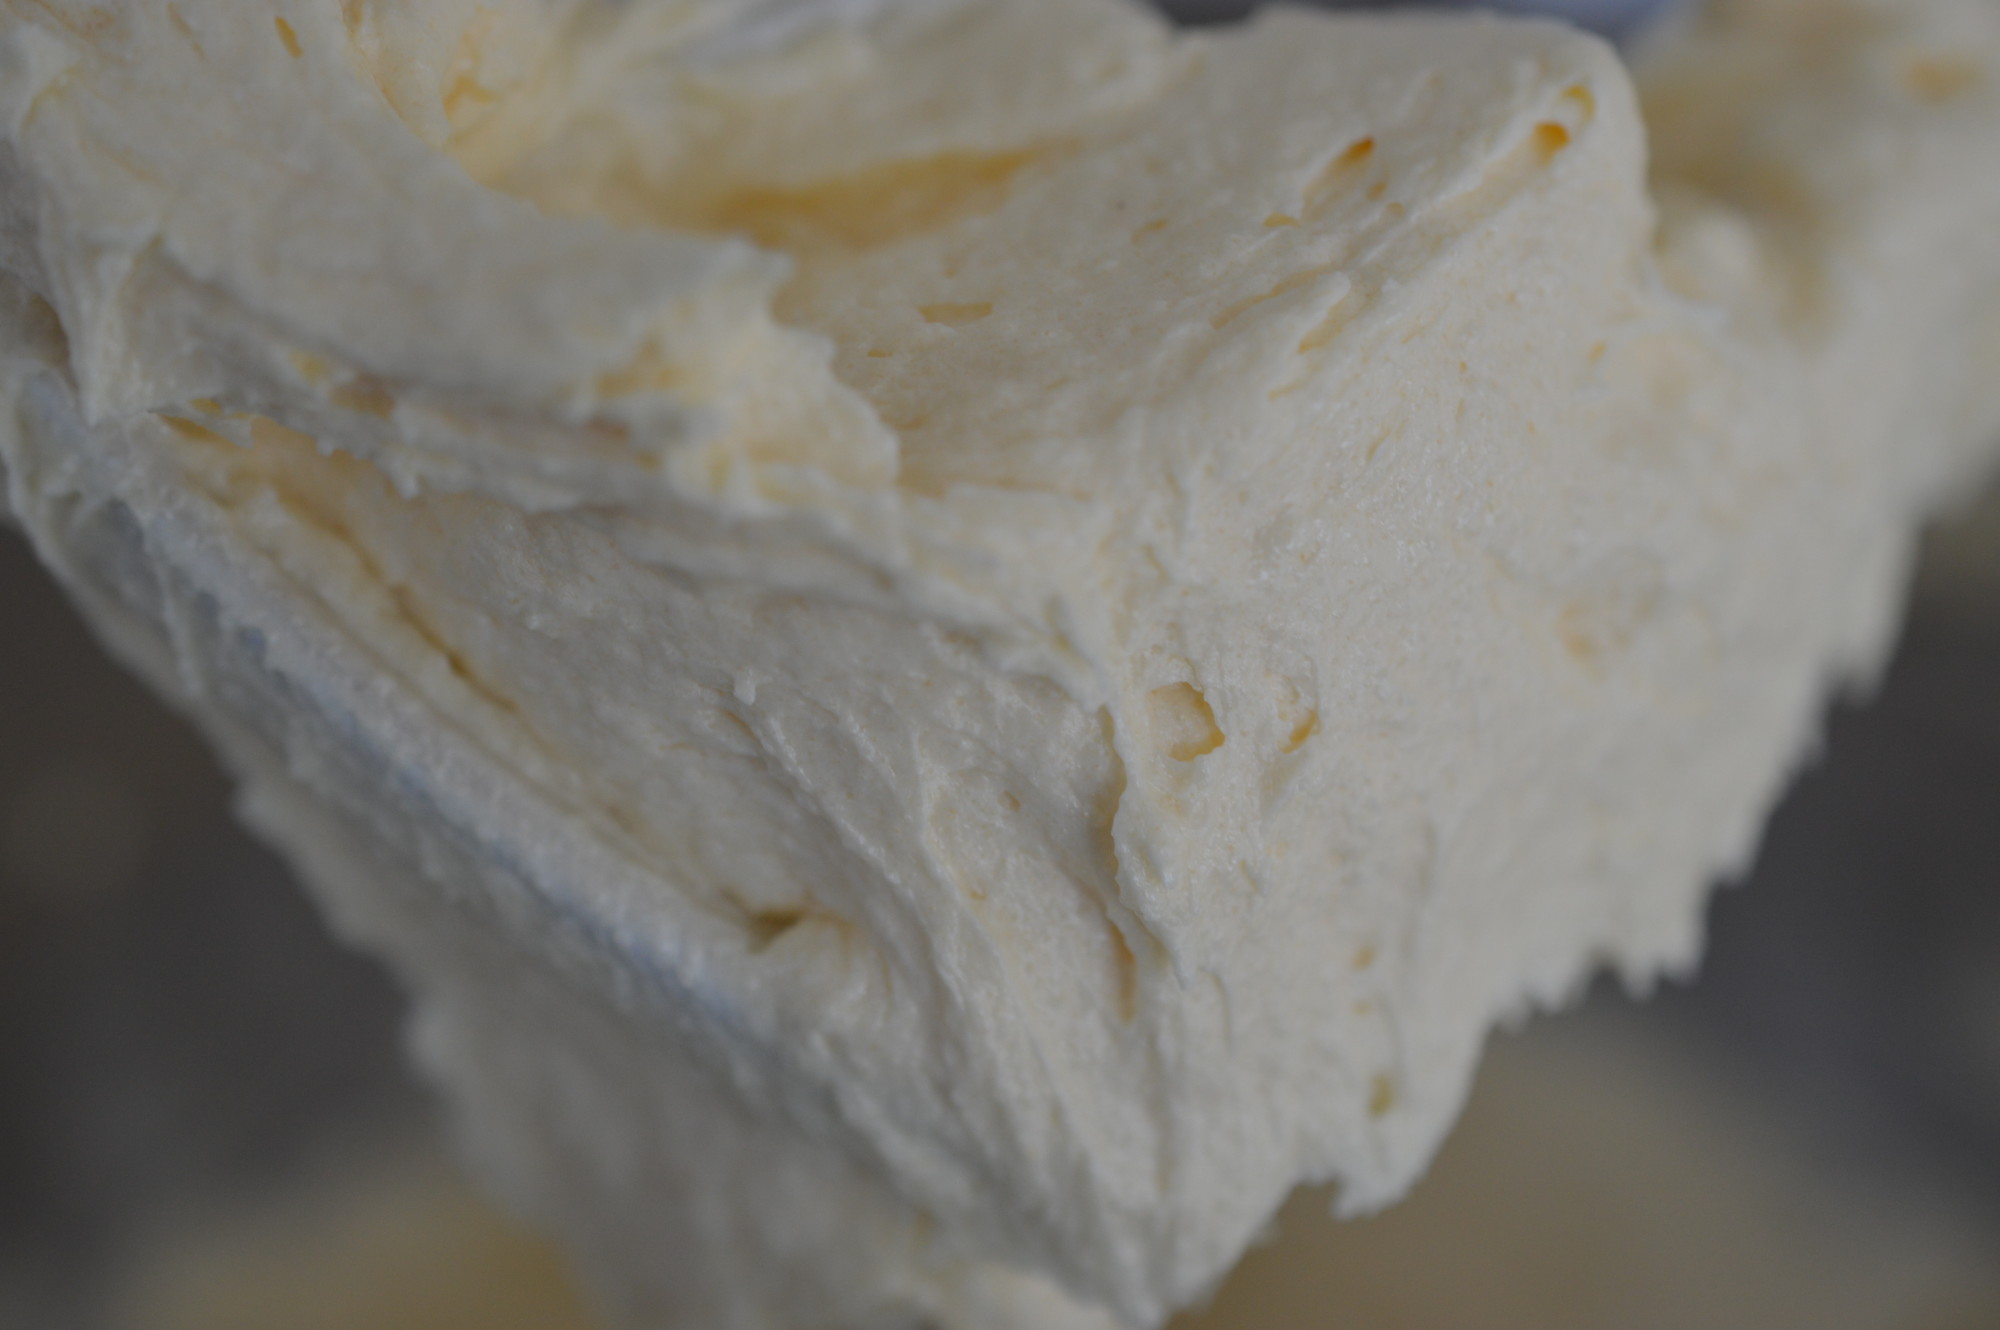
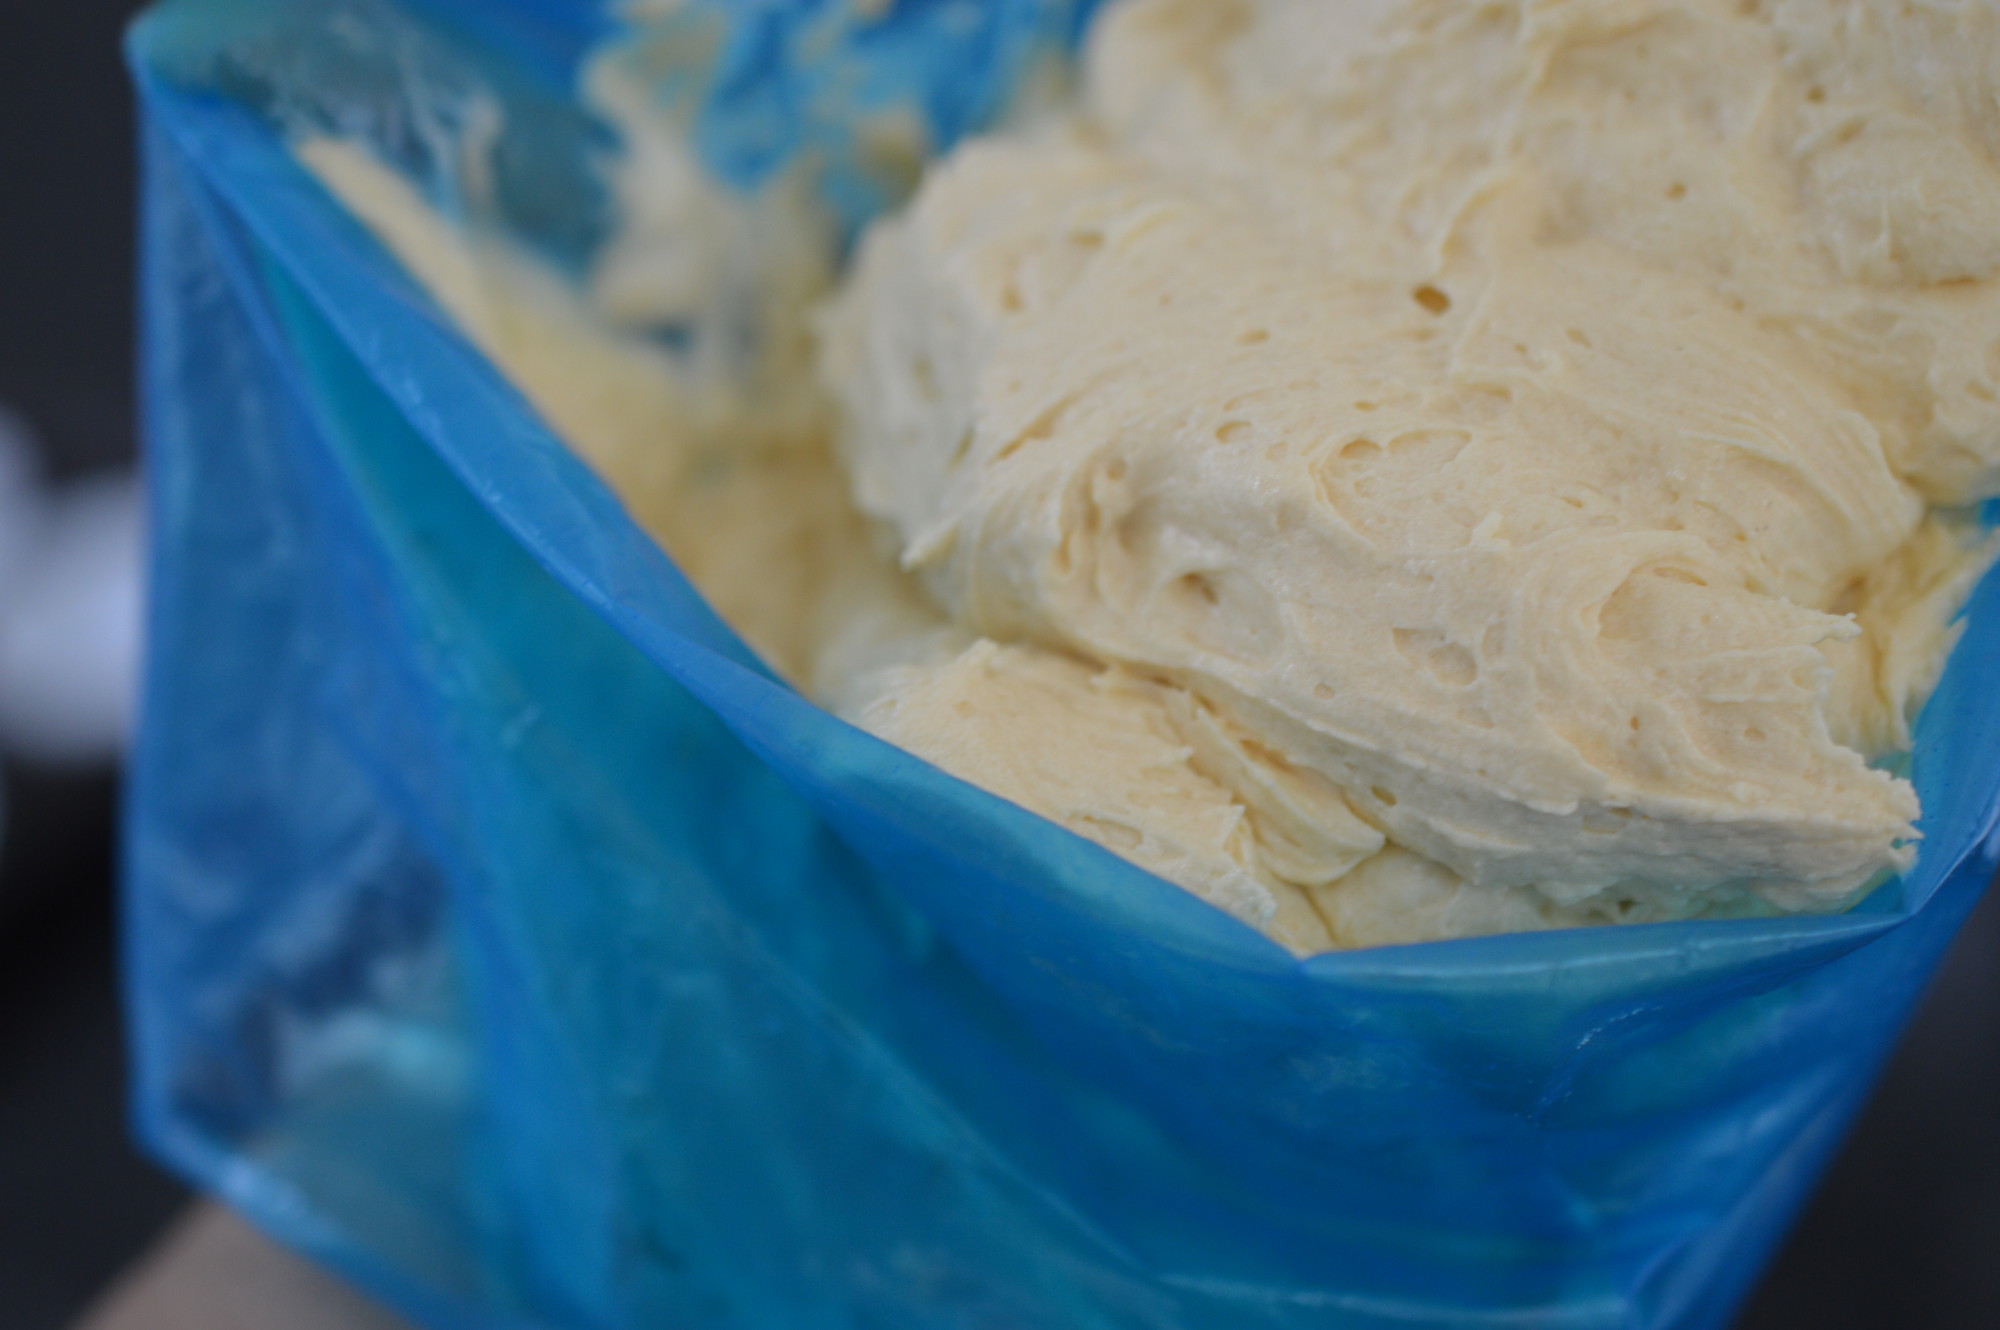
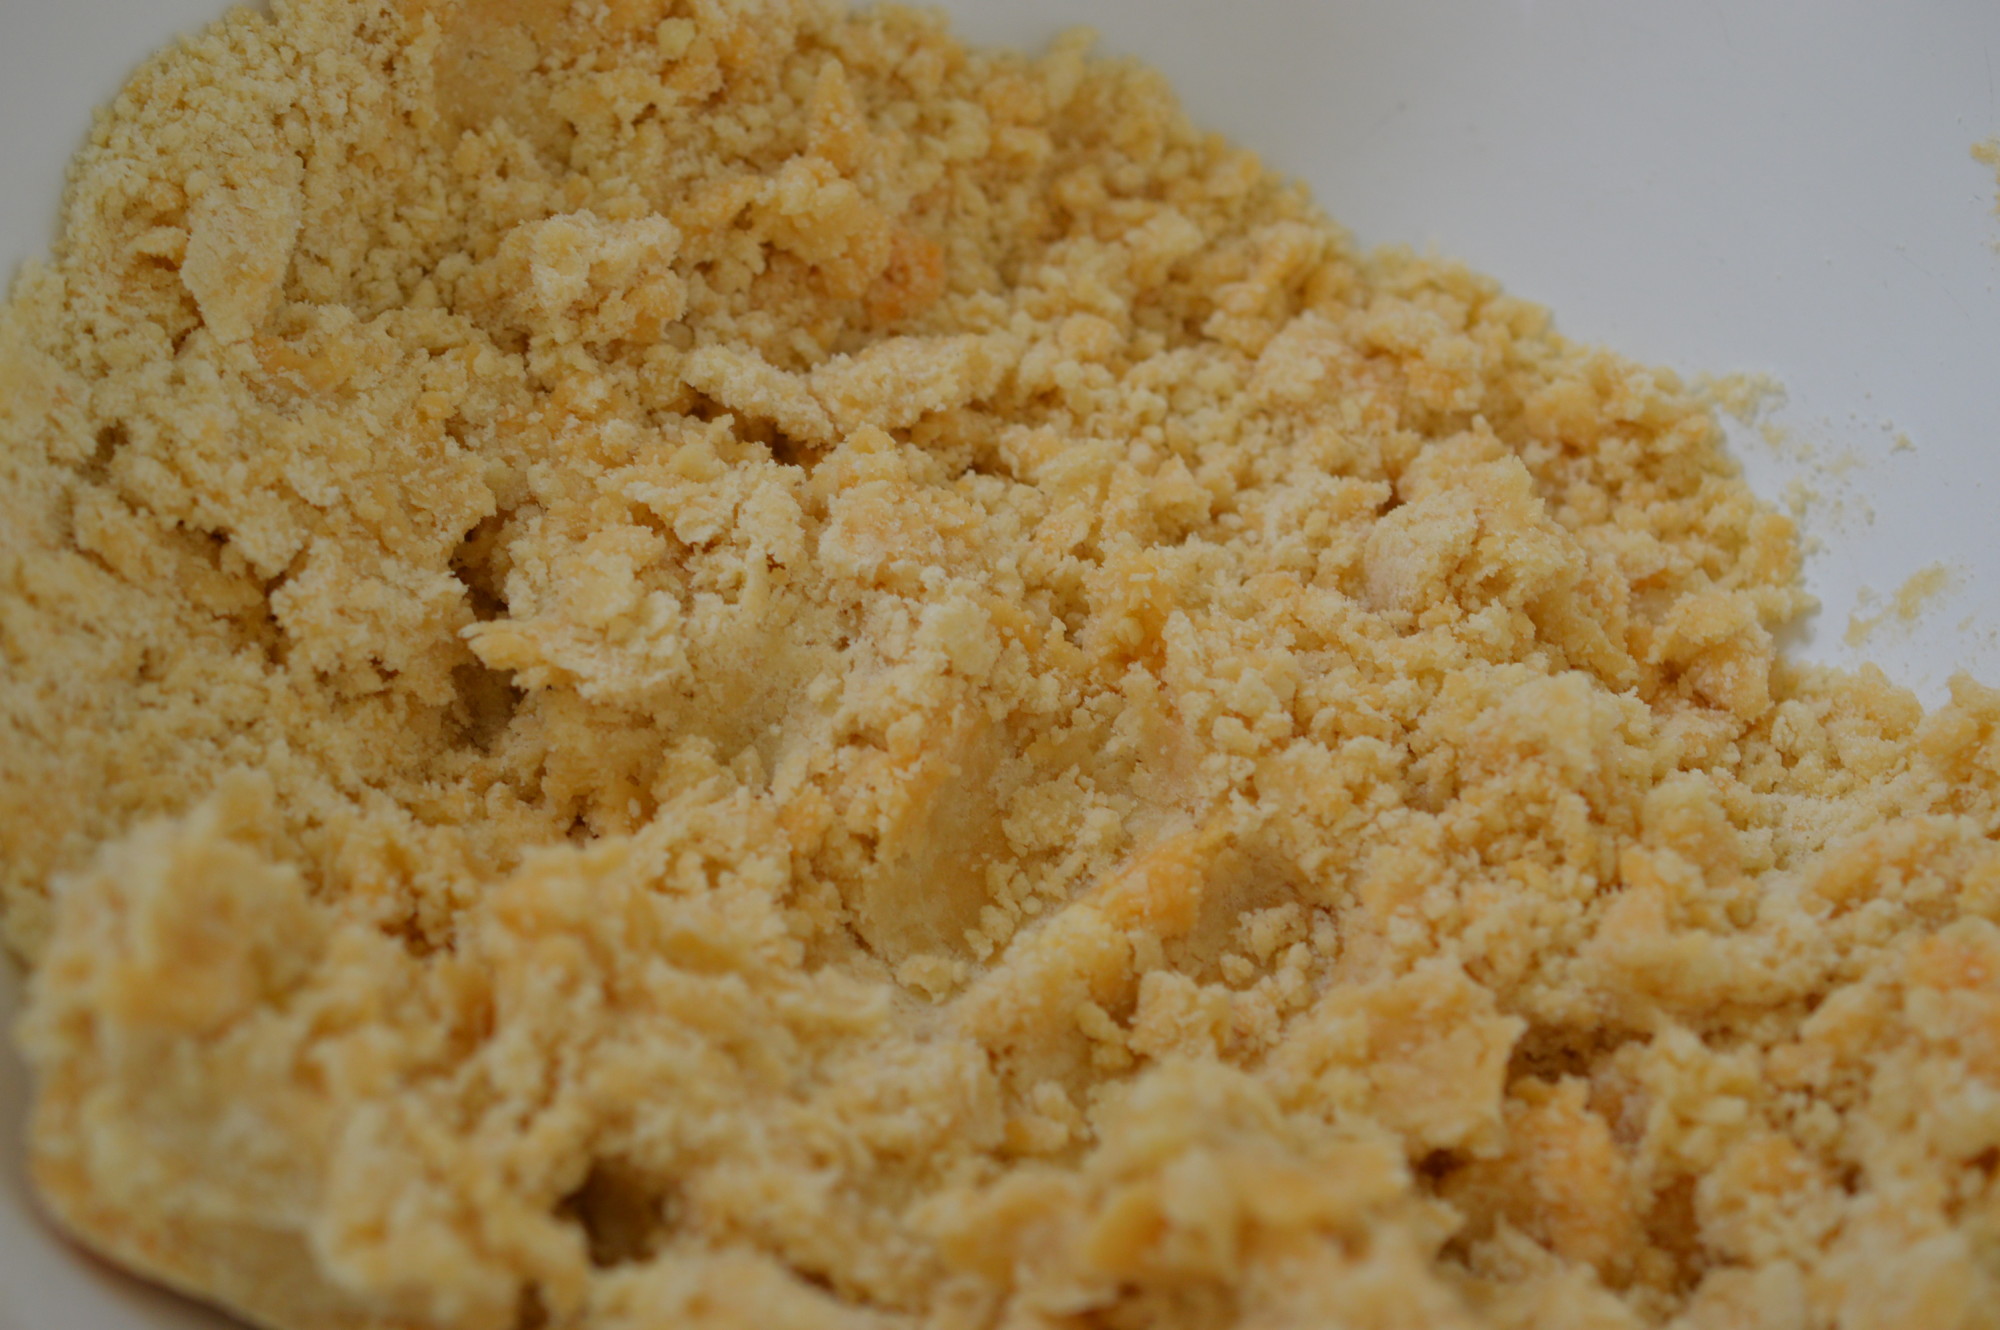
And then the flour.  At this point you don’t want to over-mix.  I continue with my paddle attachment and beat just enough for everything to be incorporated.  Traditionally, it’s a metal spoon and a light folding.

Butterfly Cake - milk

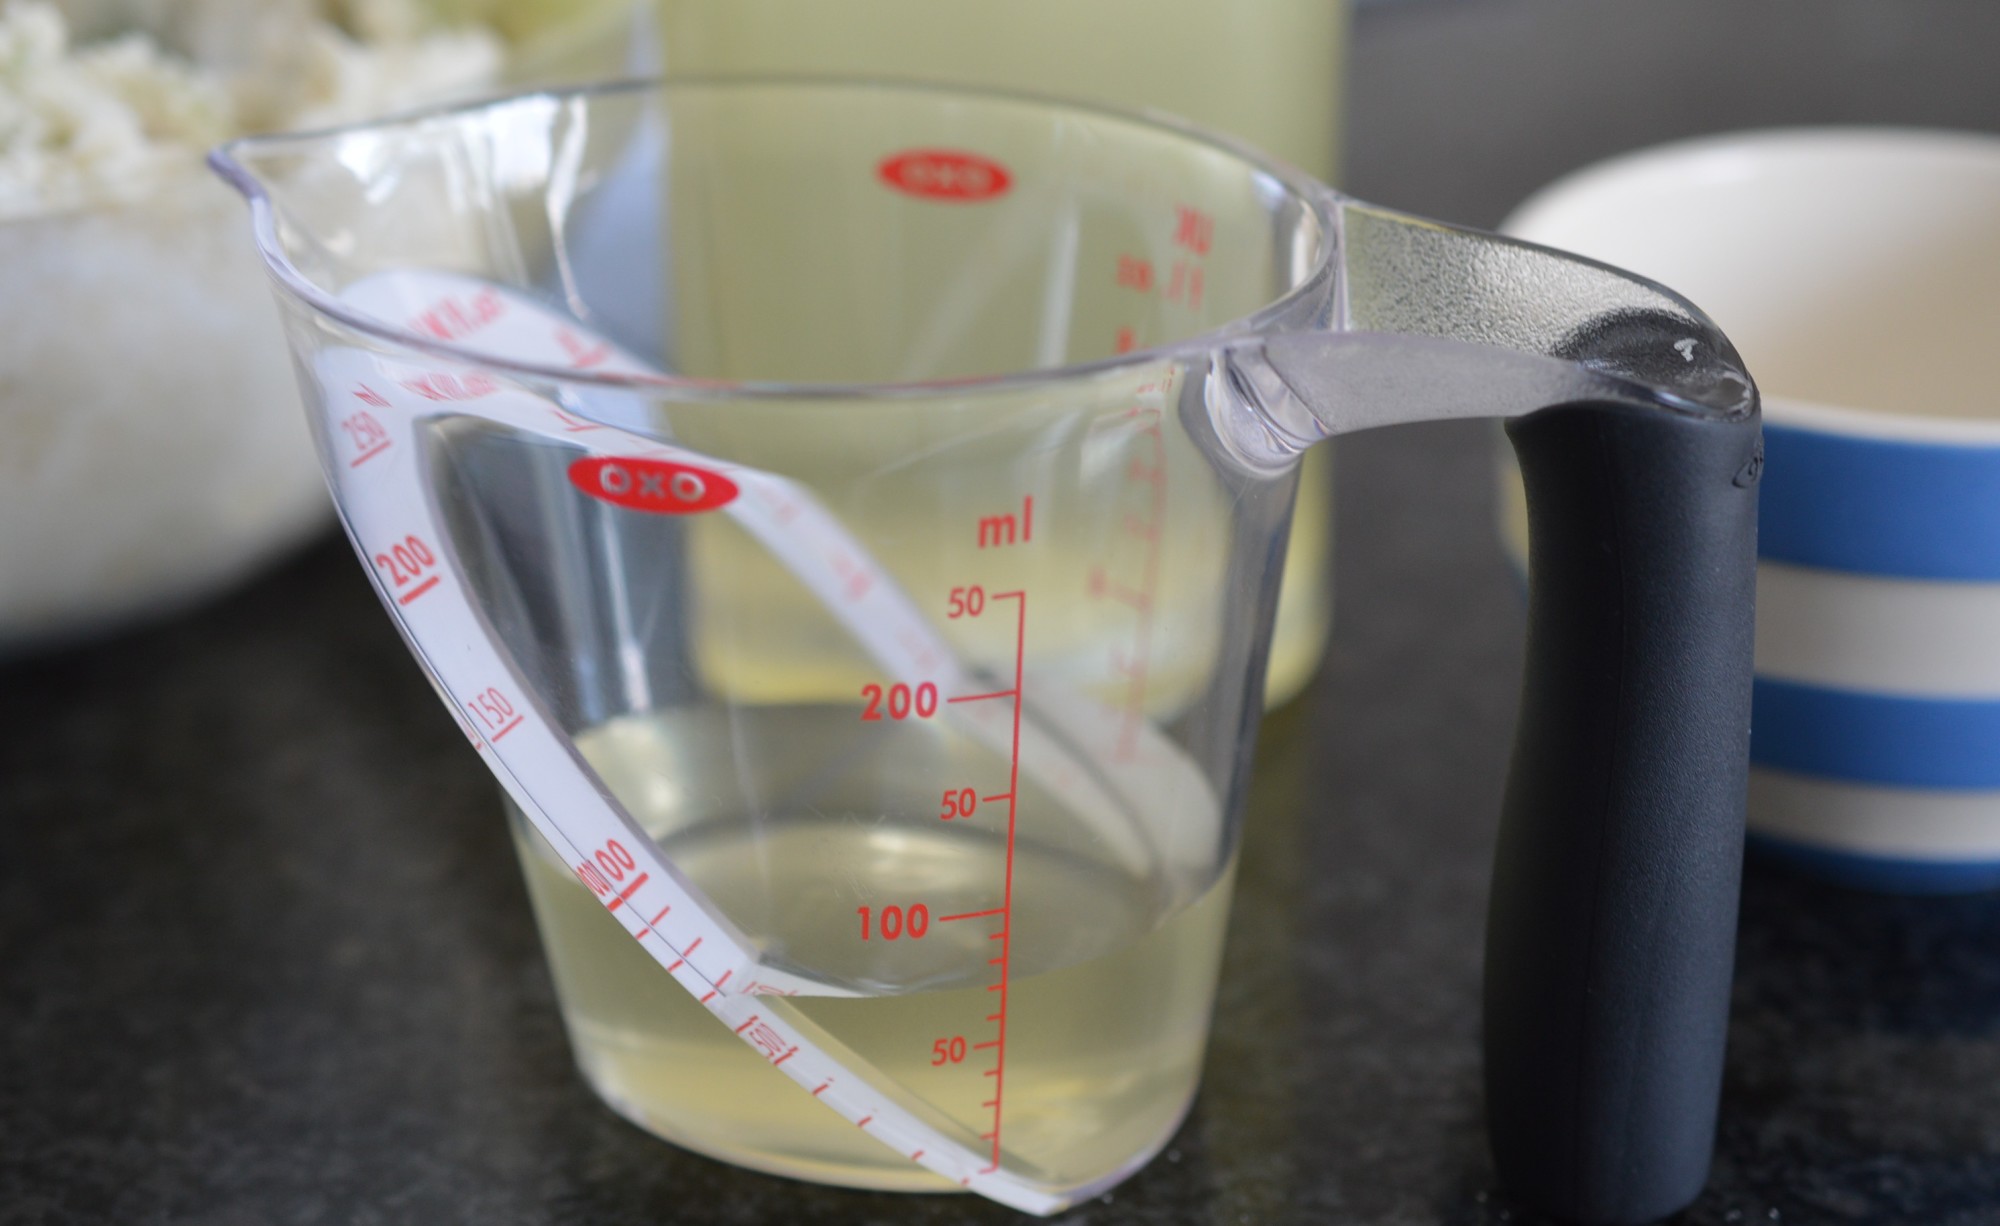
Loosen with a couple of tablespoons of milk.  You are looking for ‘dropping consistency’.  That’s when the mixture will fall off your spoon with a sharp tap on the side of the bowl.

Butterfly Cake - into piping bag

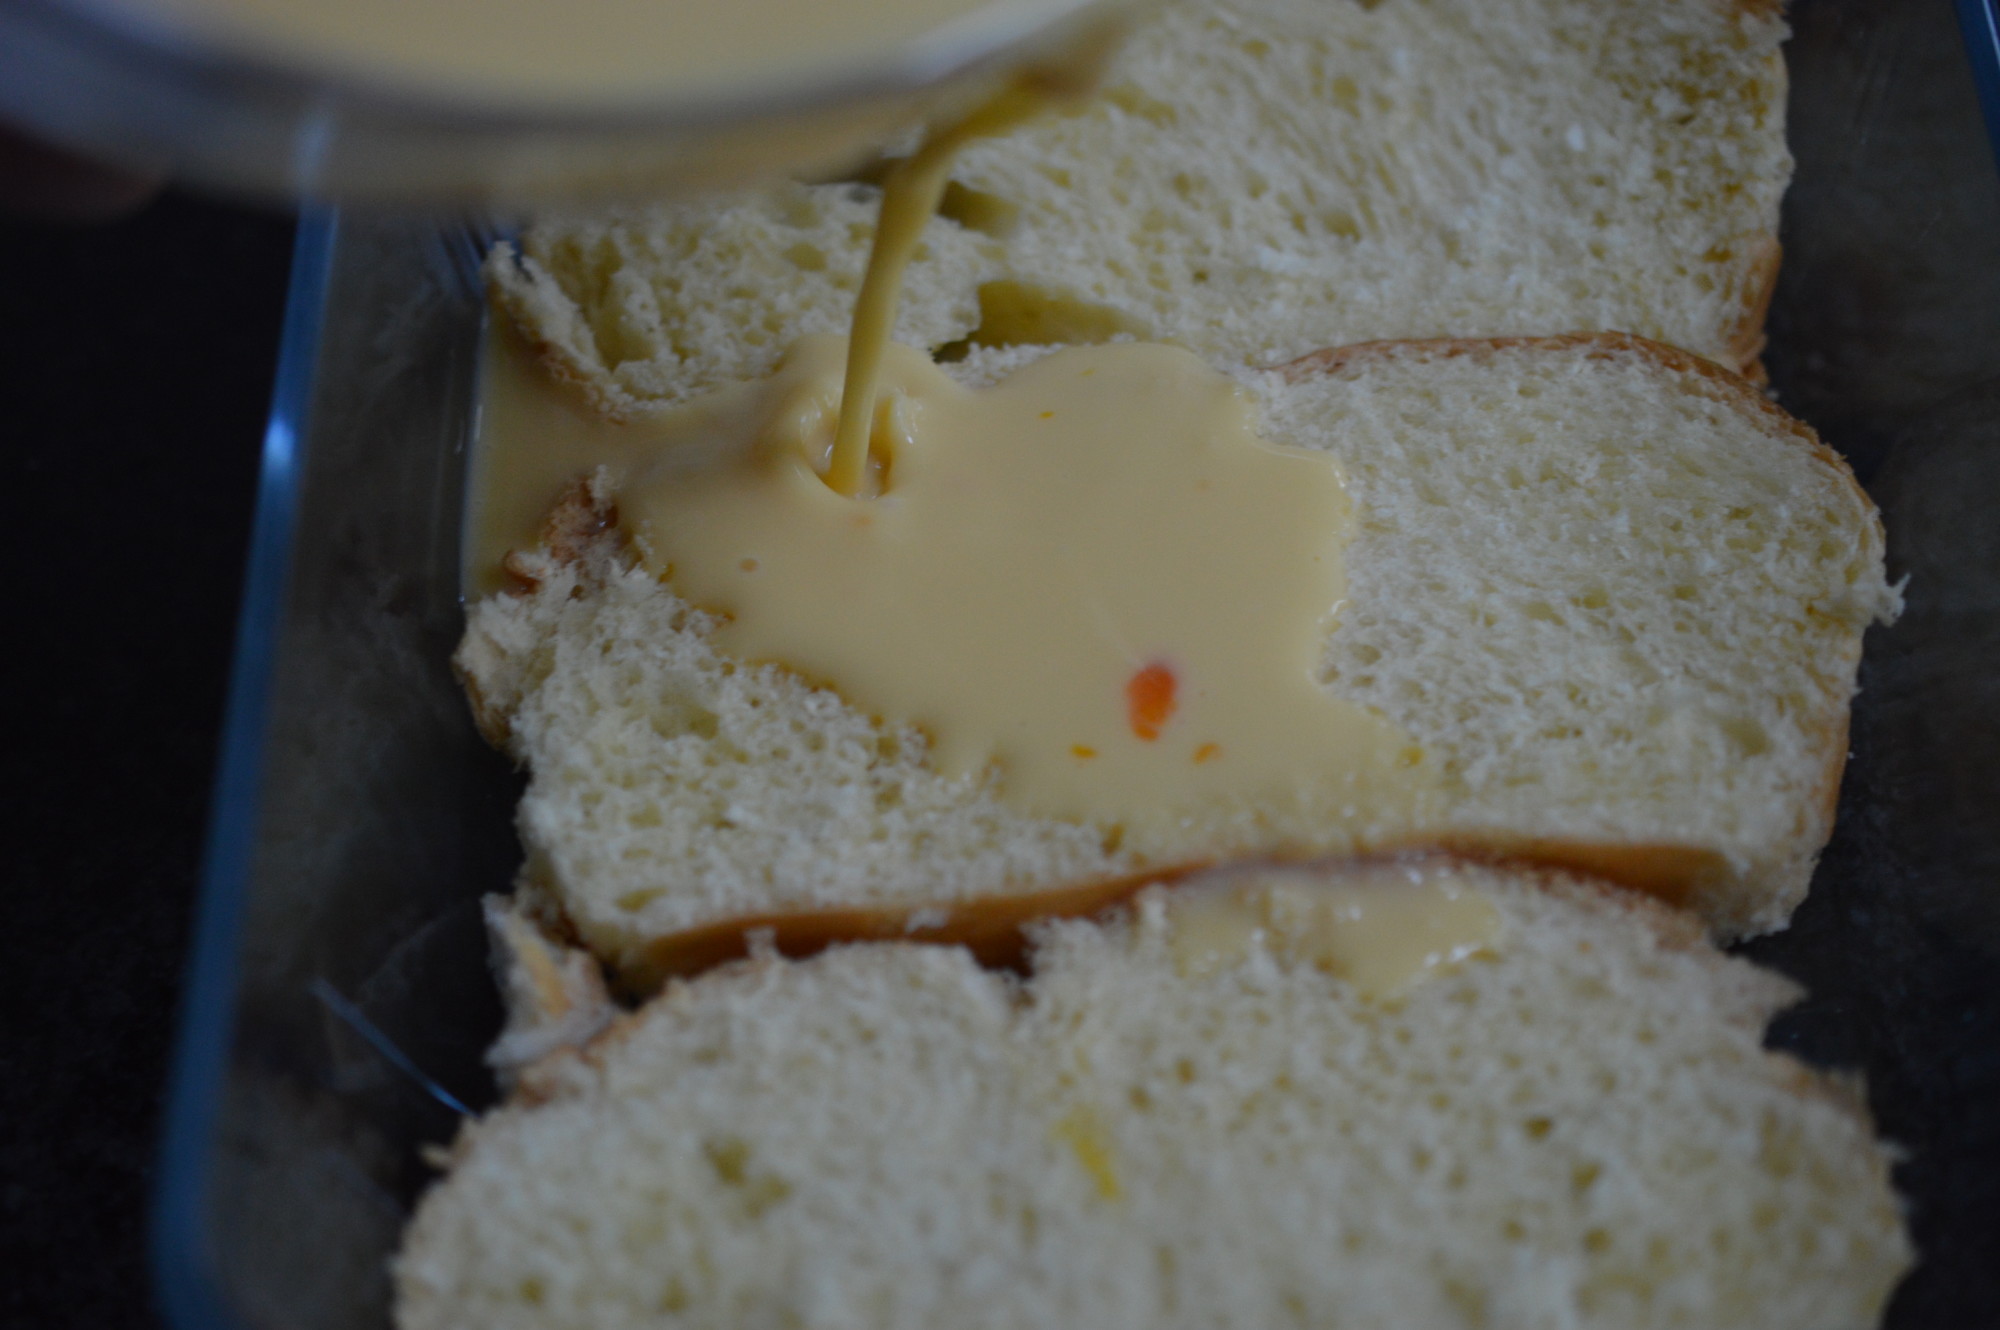
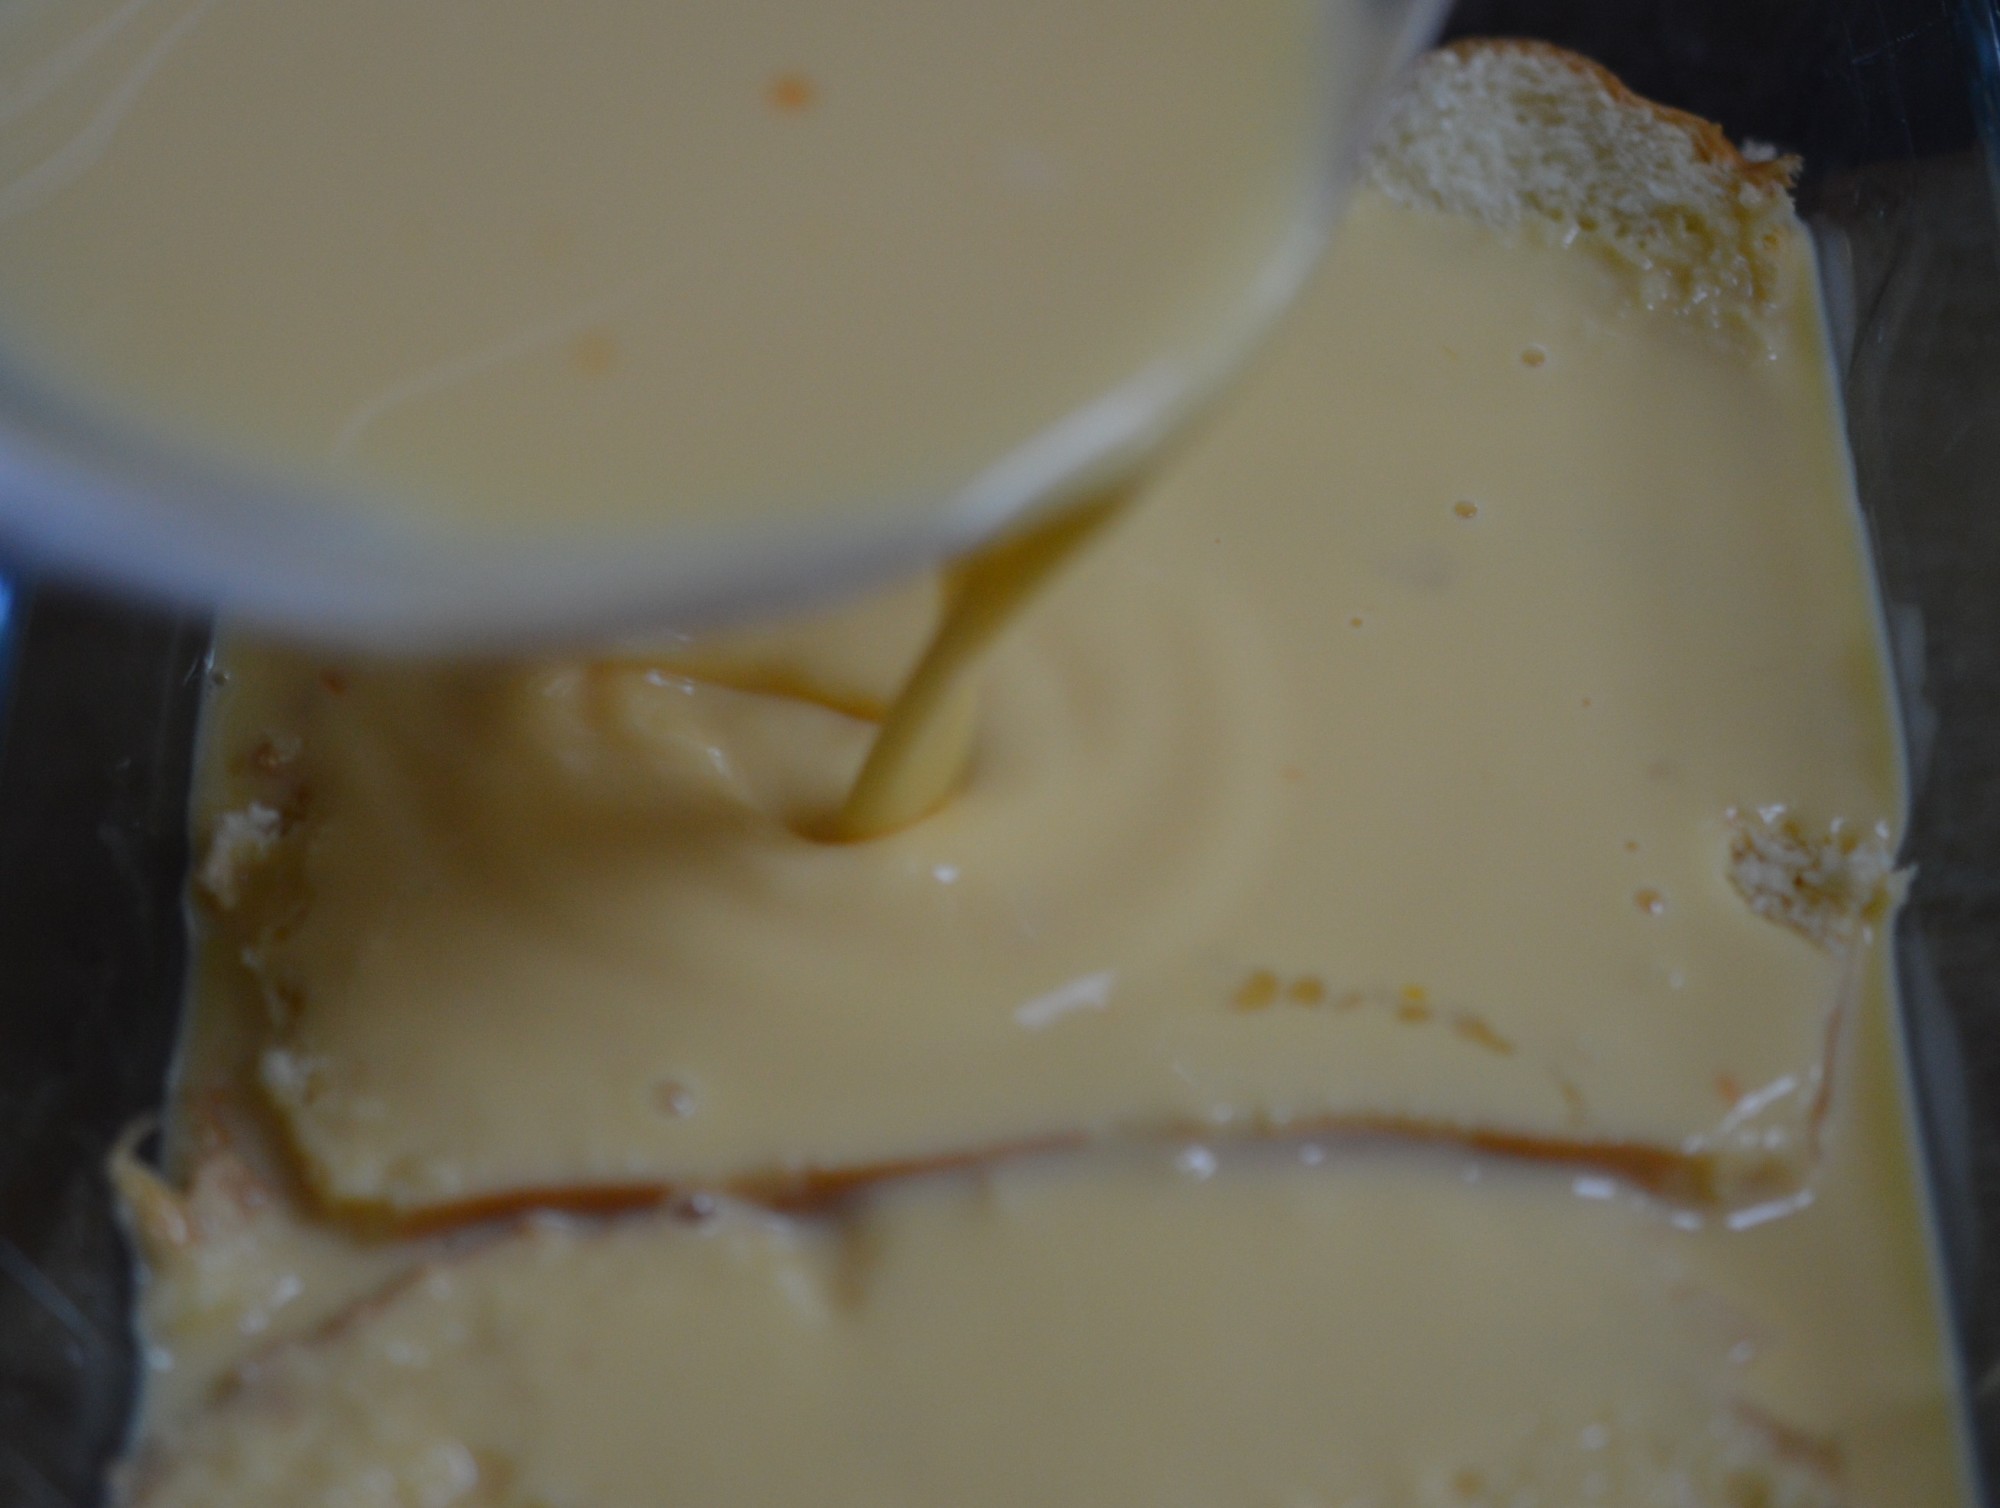
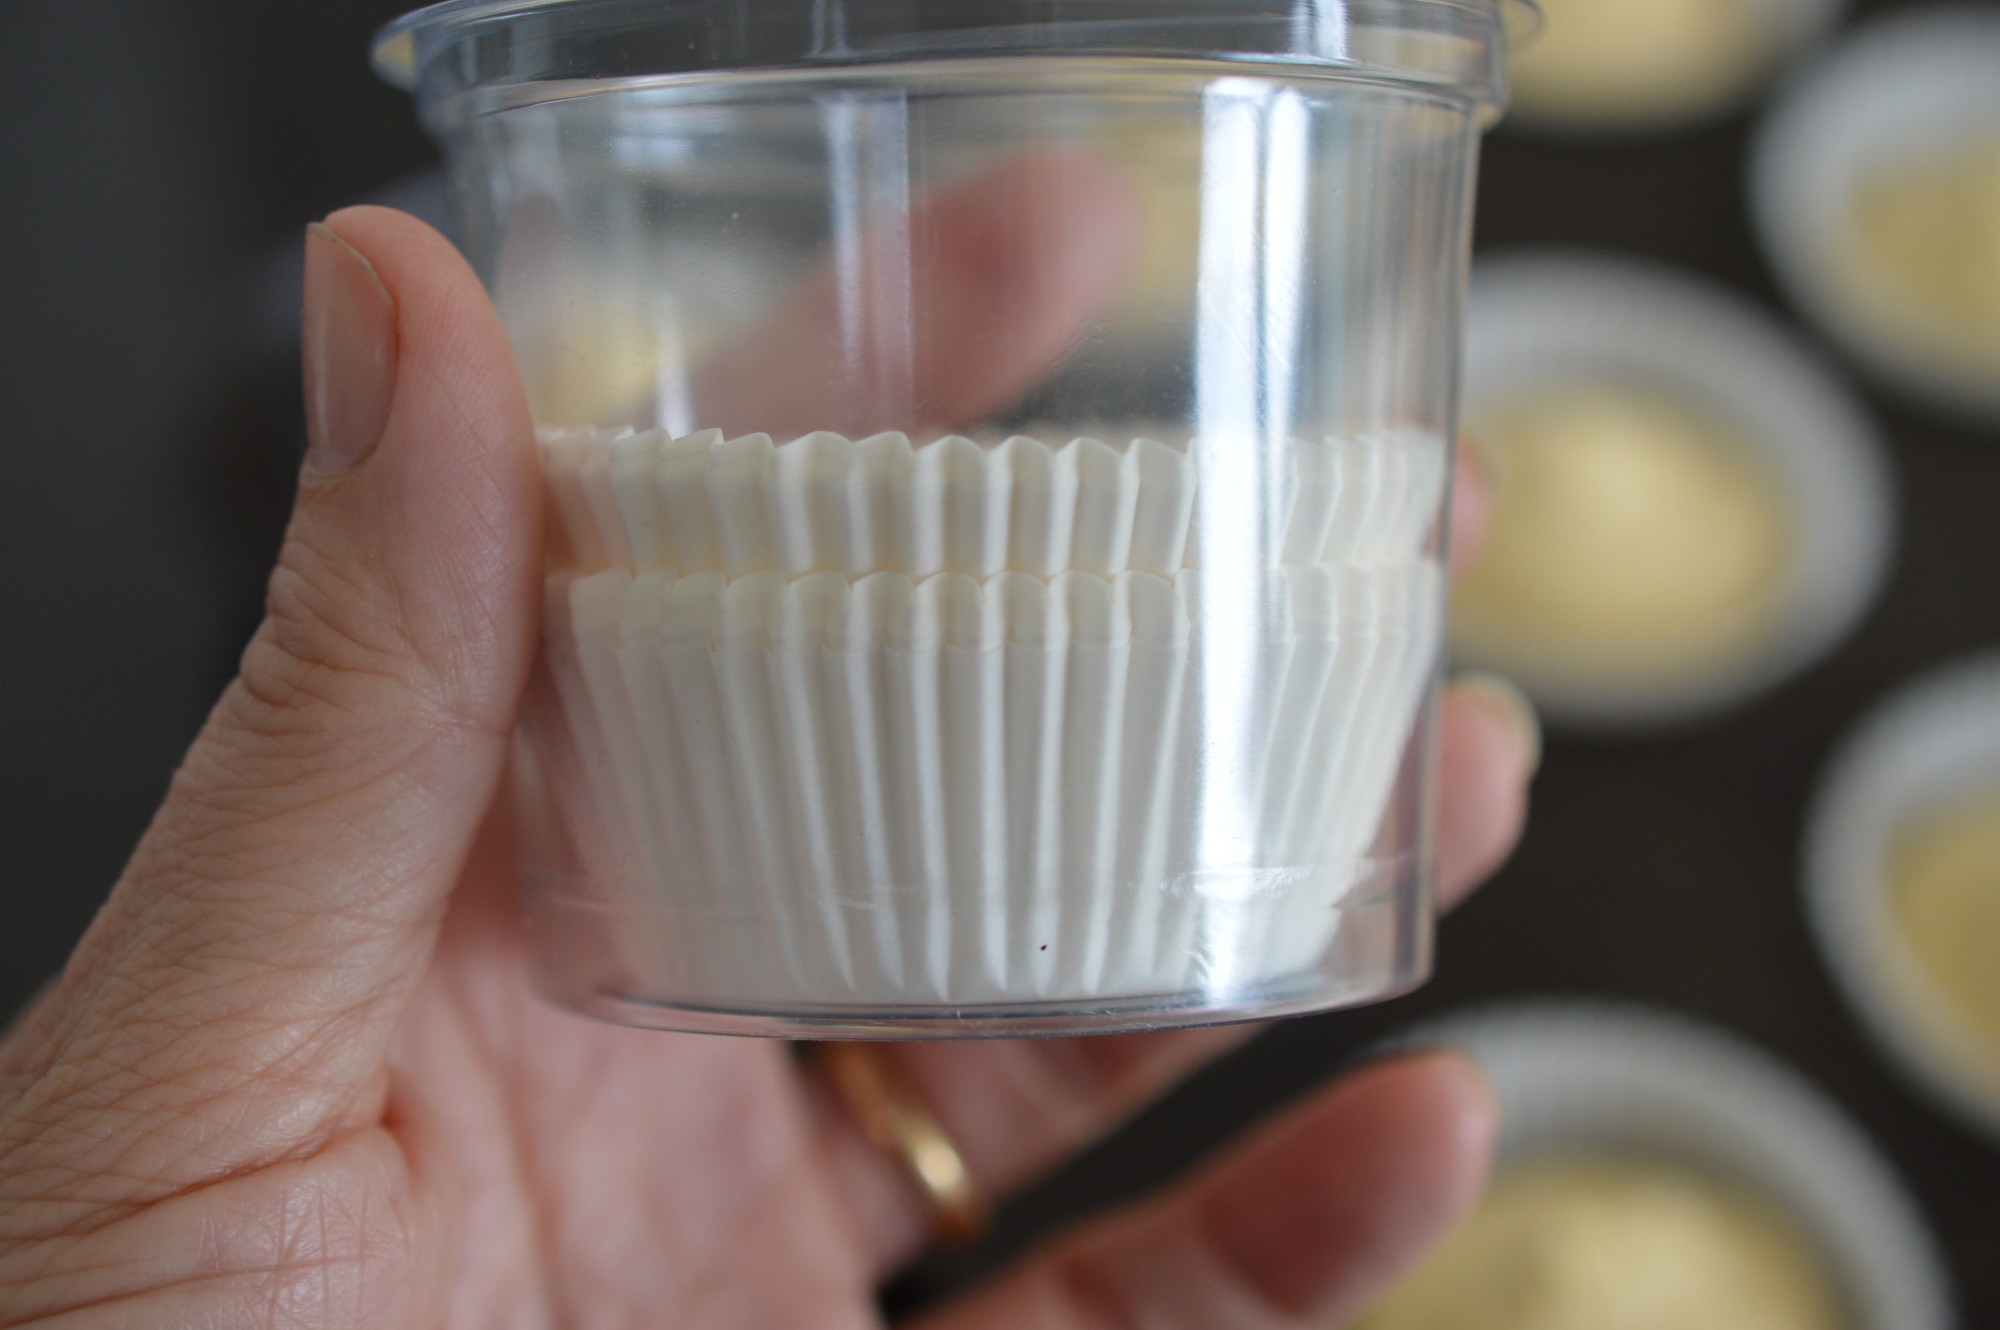
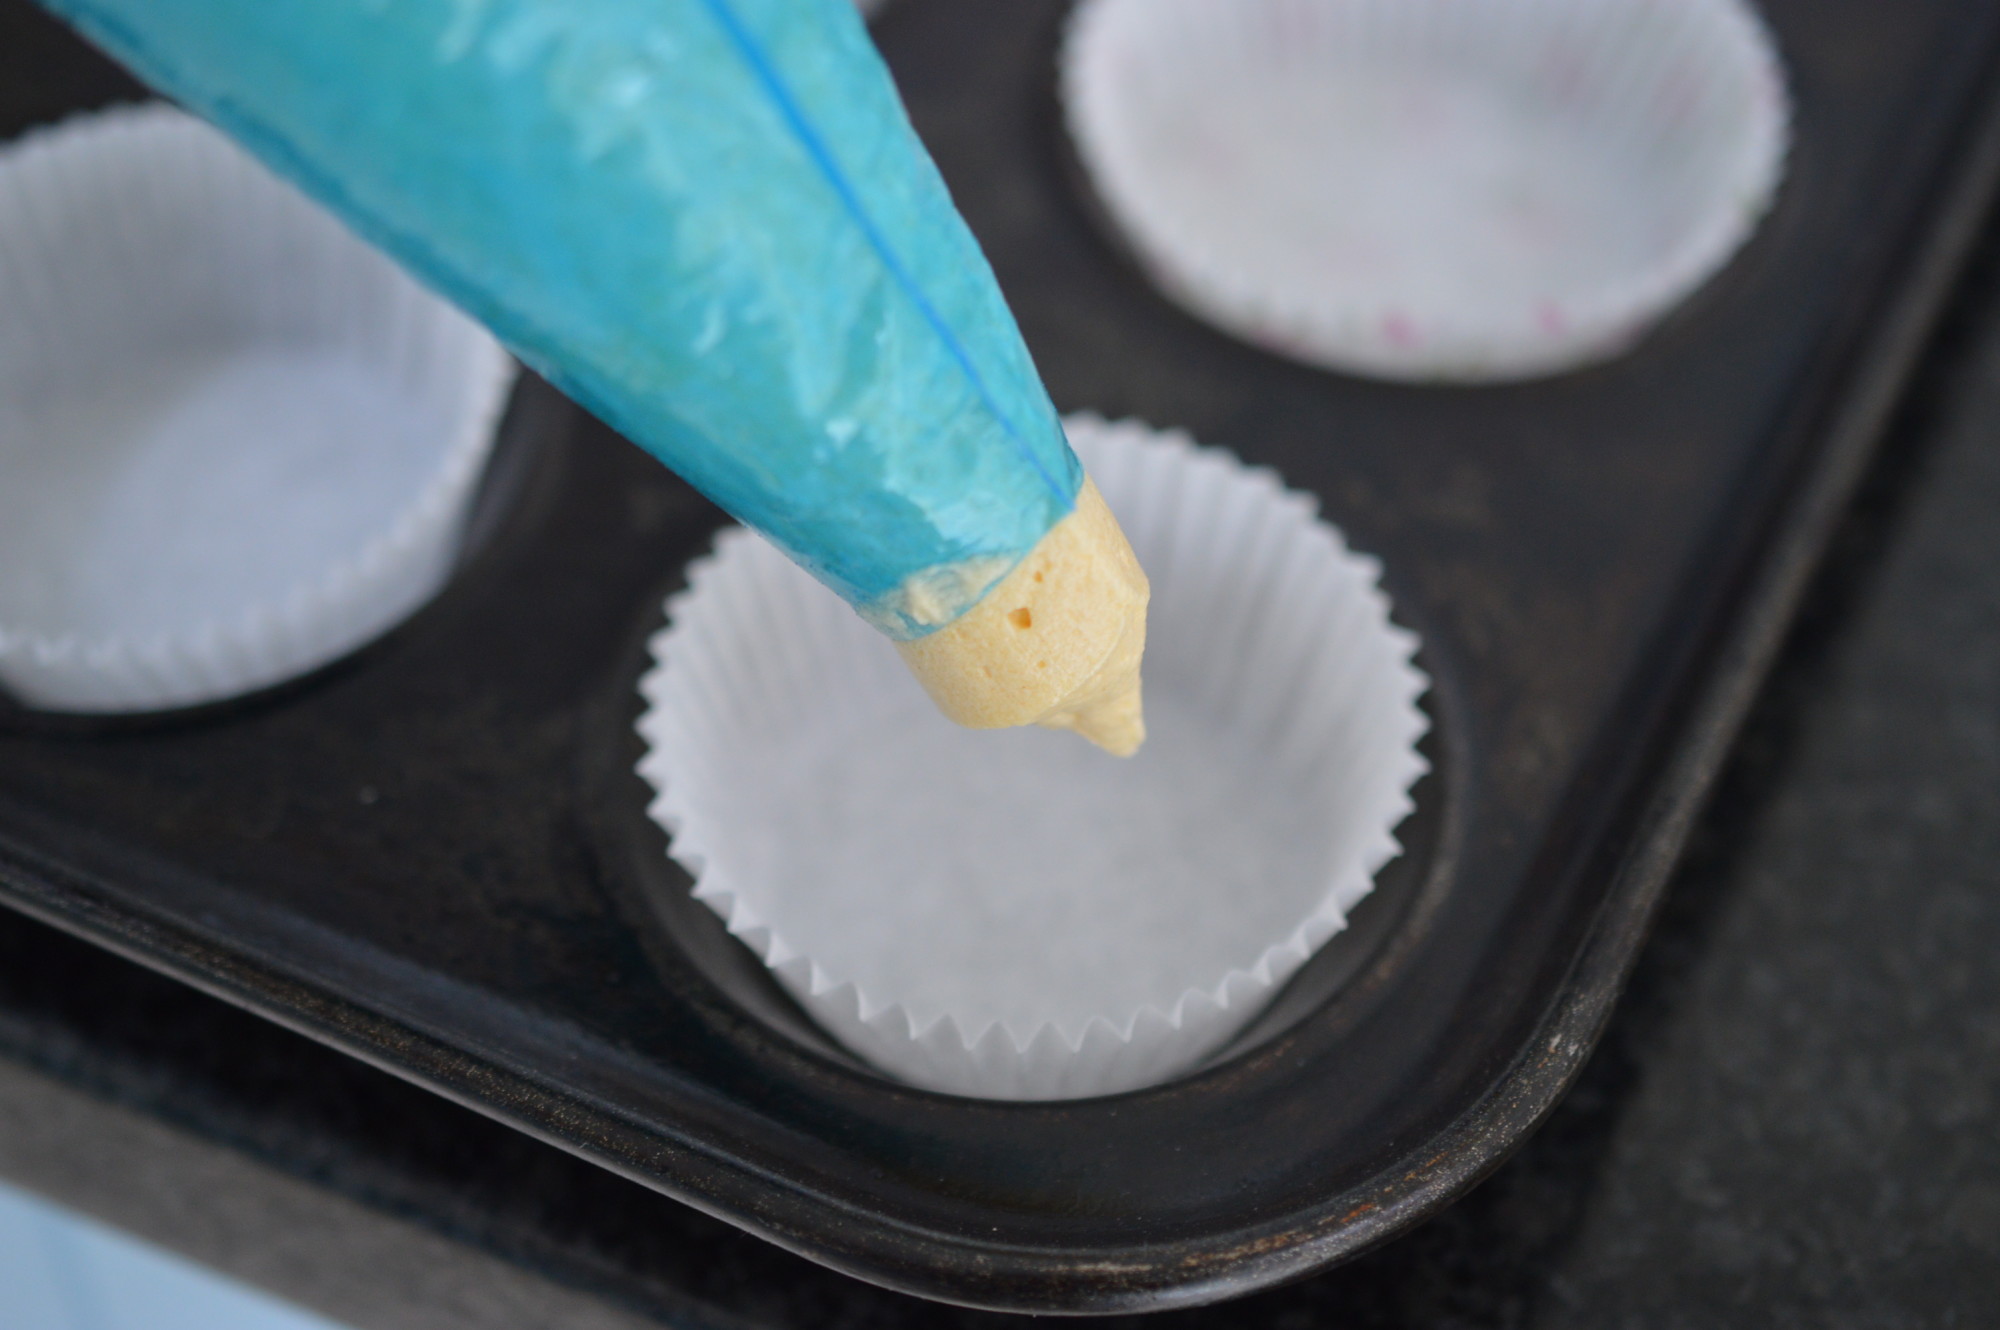
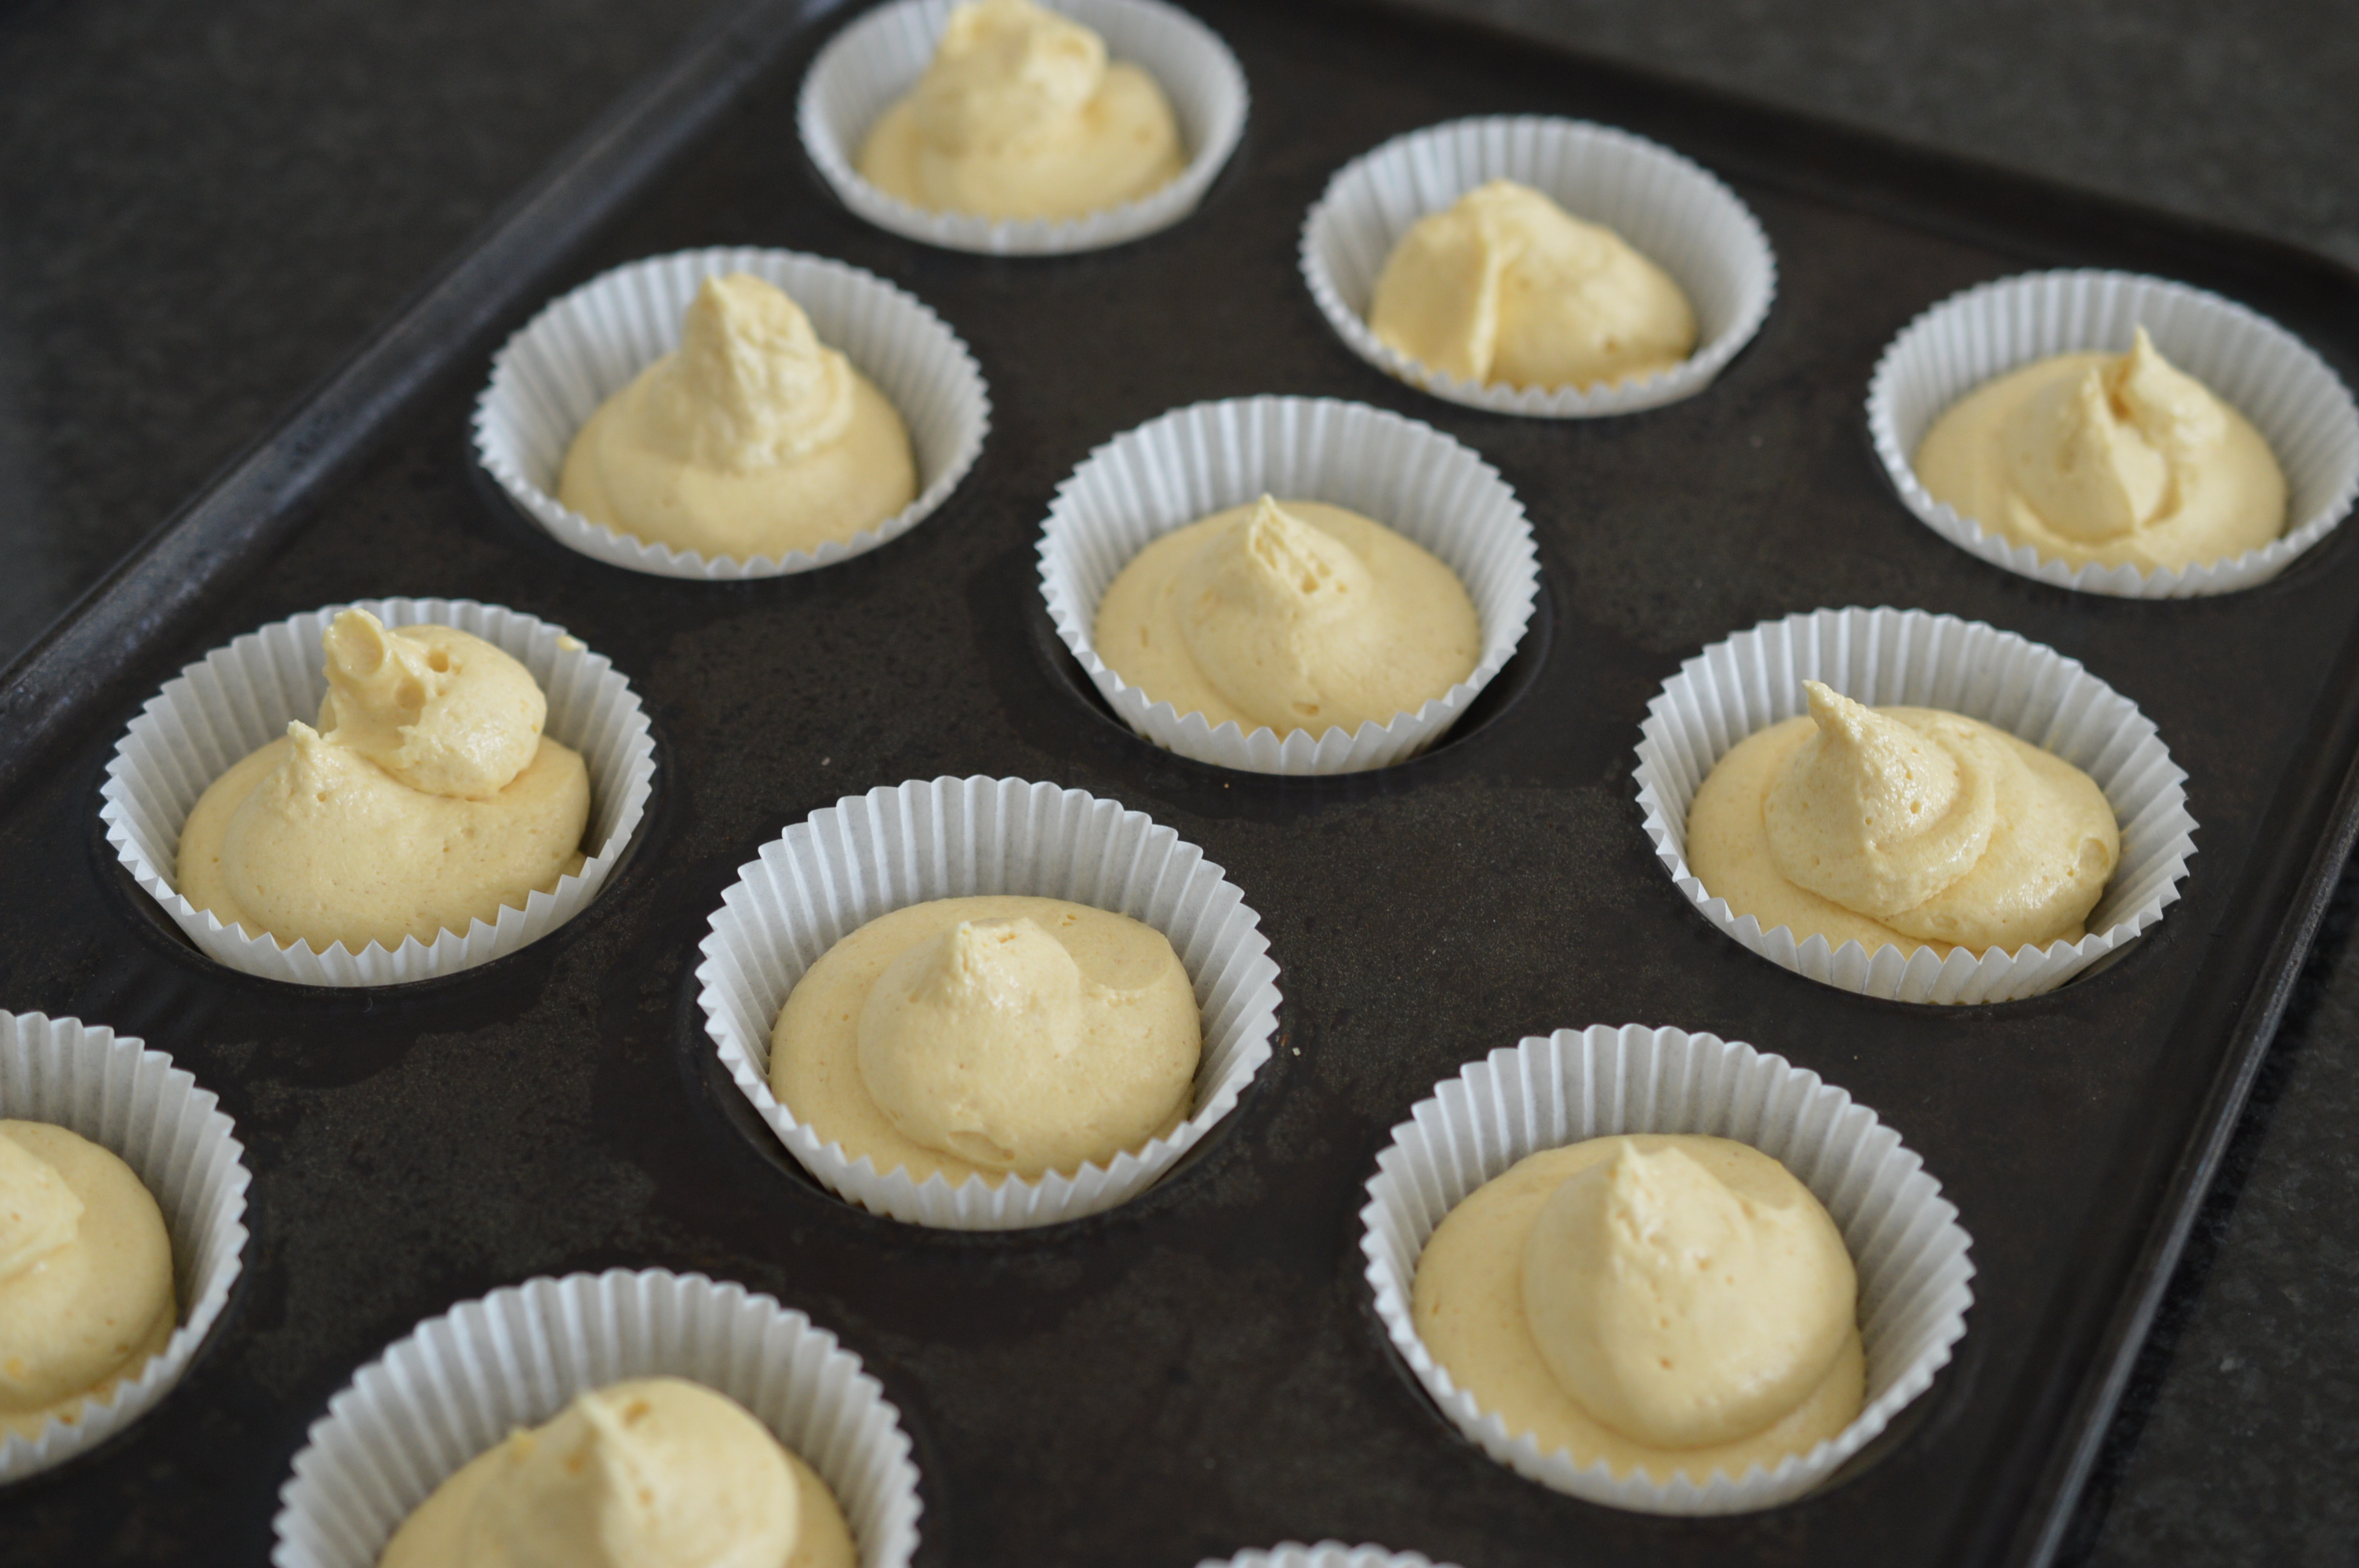
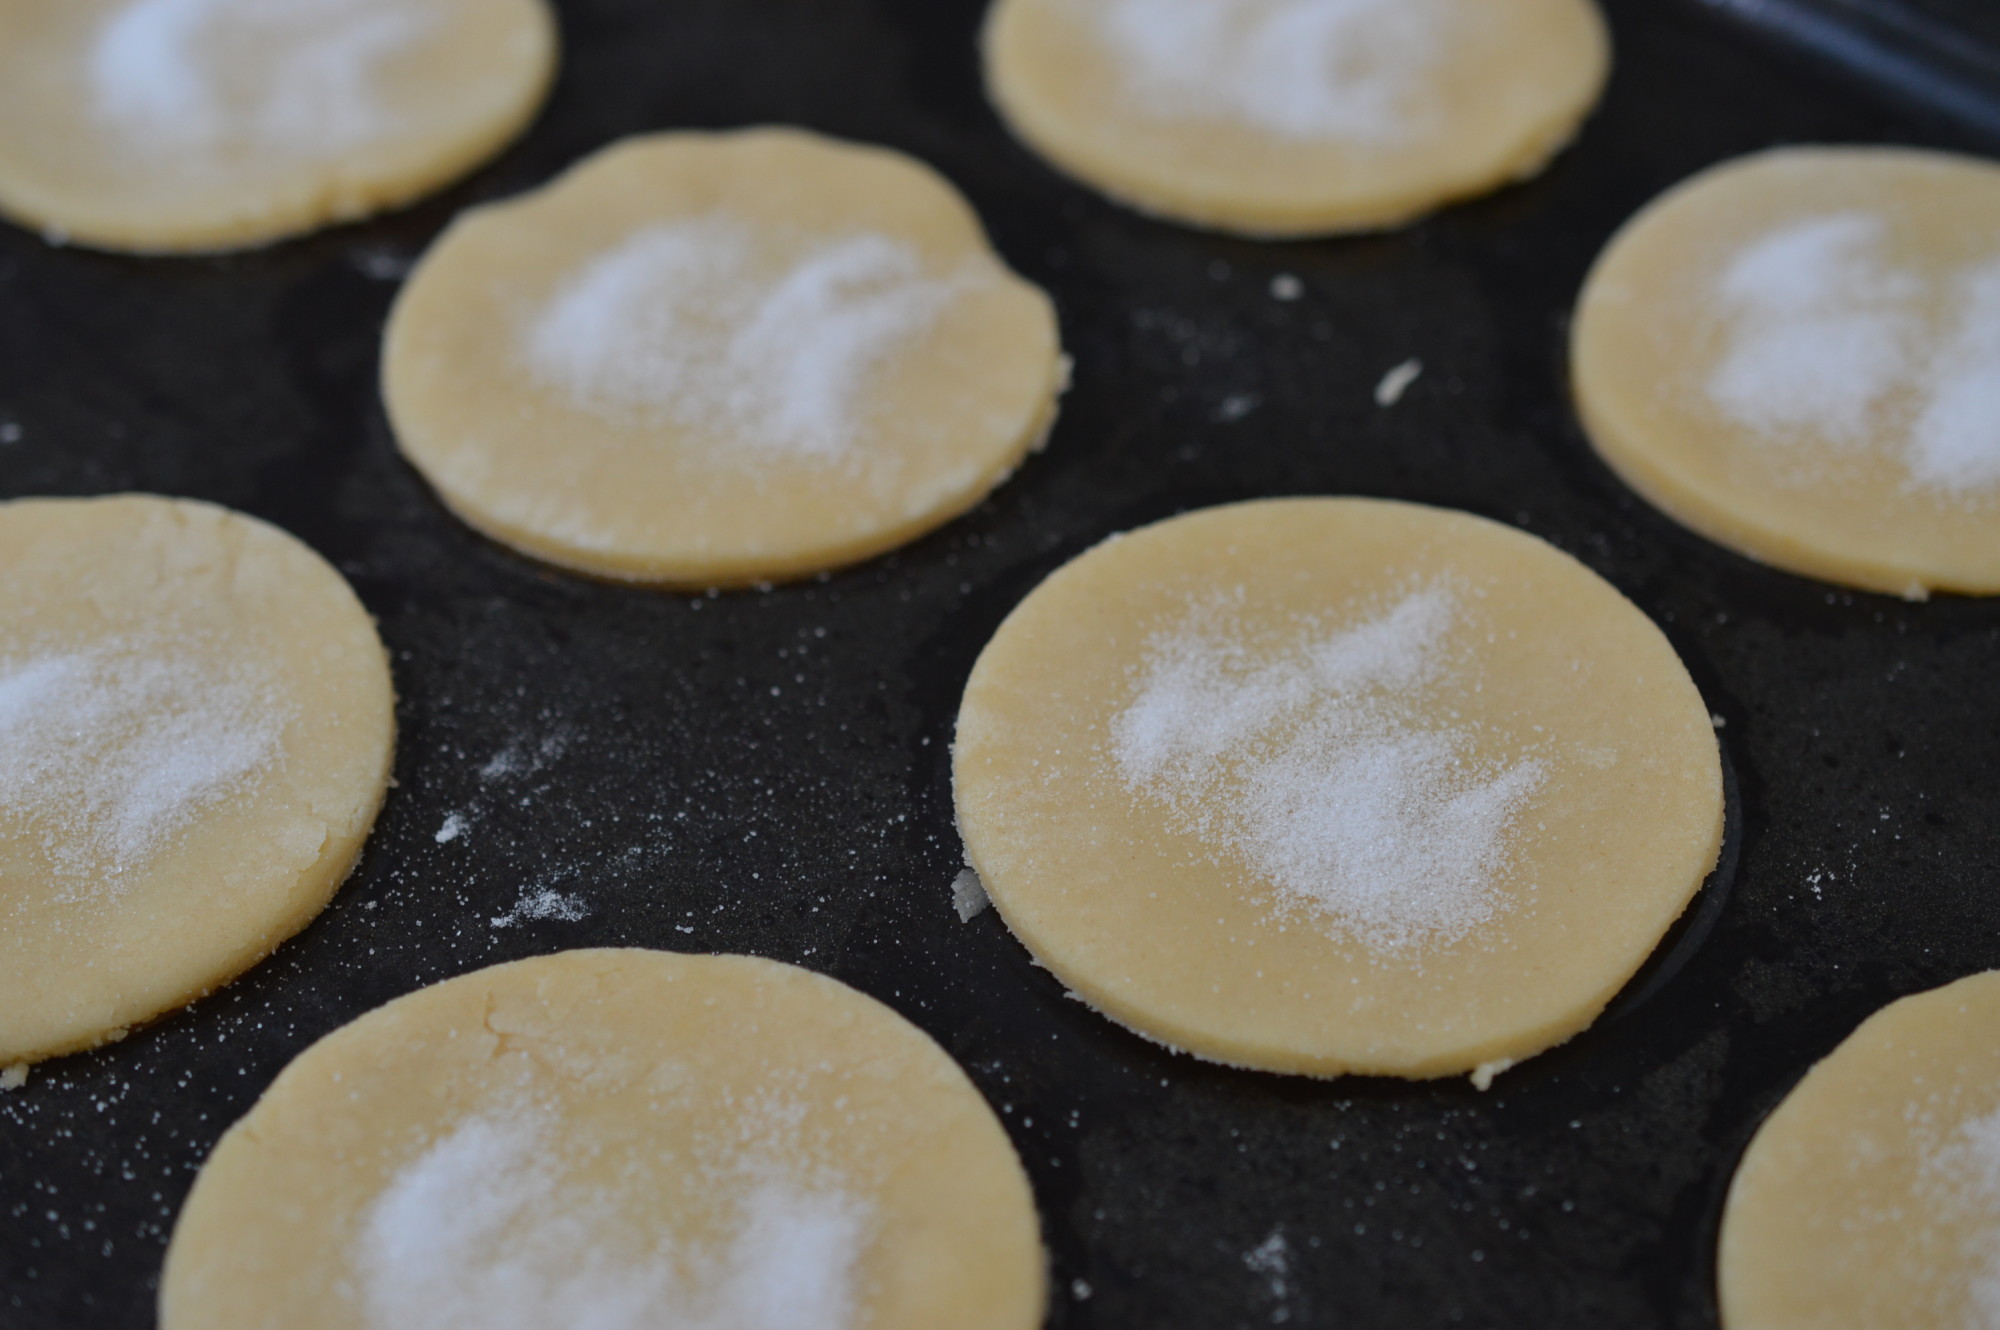
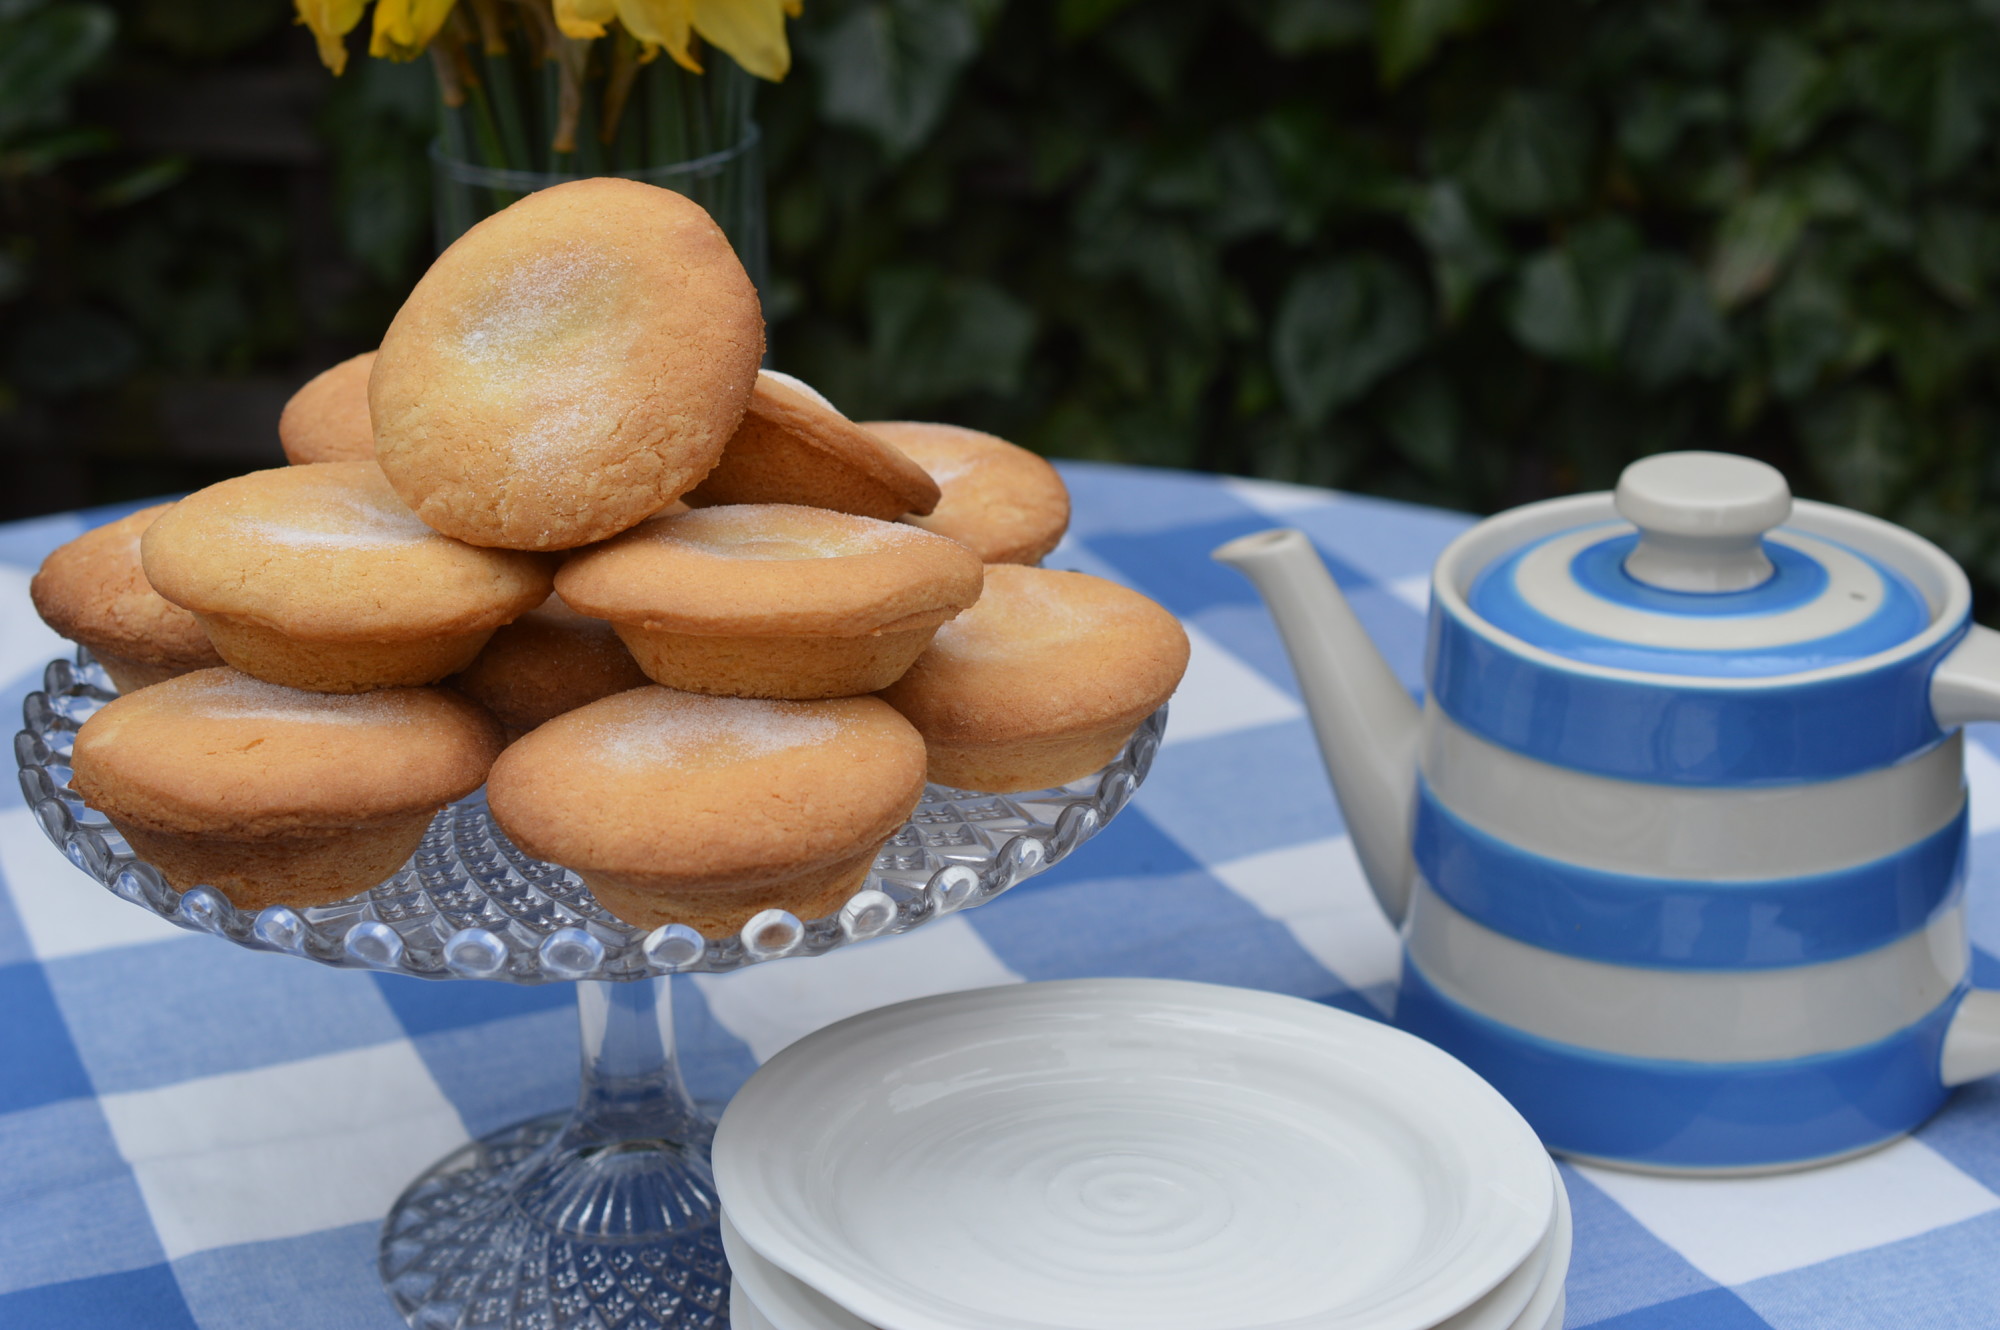
Older recipes will ask you to place two heaped teaspoons into each paper case, but I prefer to pipe mine in.

Butterfly Cake - cases

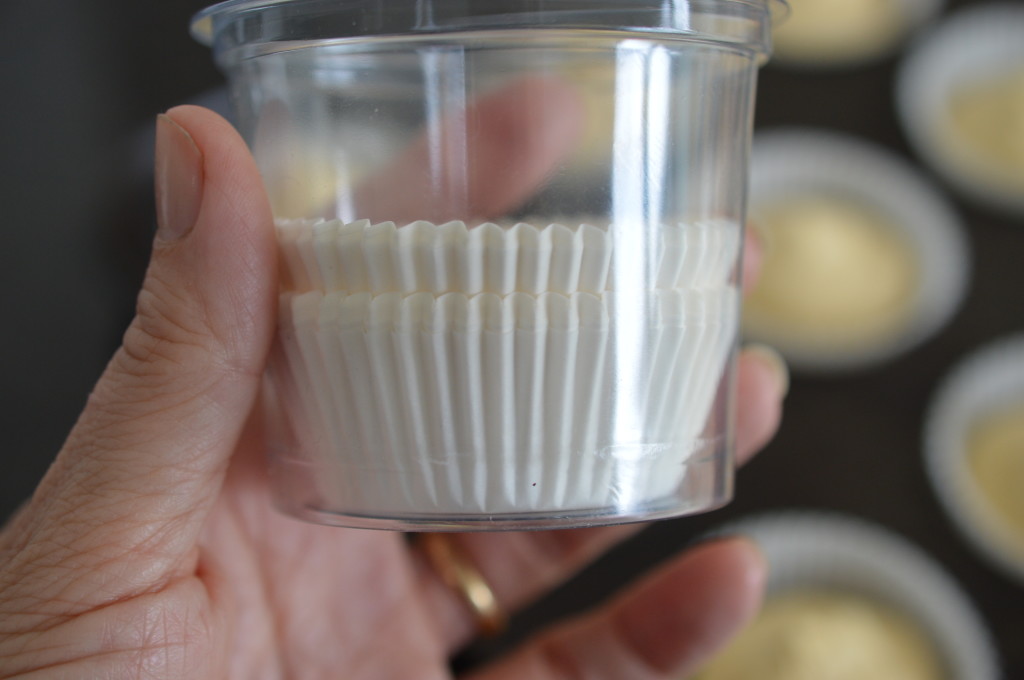
The cases you need are labelled ‘Fairy Cases’ in the UK and they fit neatly into a shallow bun tin (patty tin).  It’s worth buying good quality cases because the paper used is thicker and will hold their shape better.  Also try and get them in a protective tube as a mis-shapened case means it’s already flattening out and ultimately likely to pull away from your finished cake.

Butterfly Cake - pipe

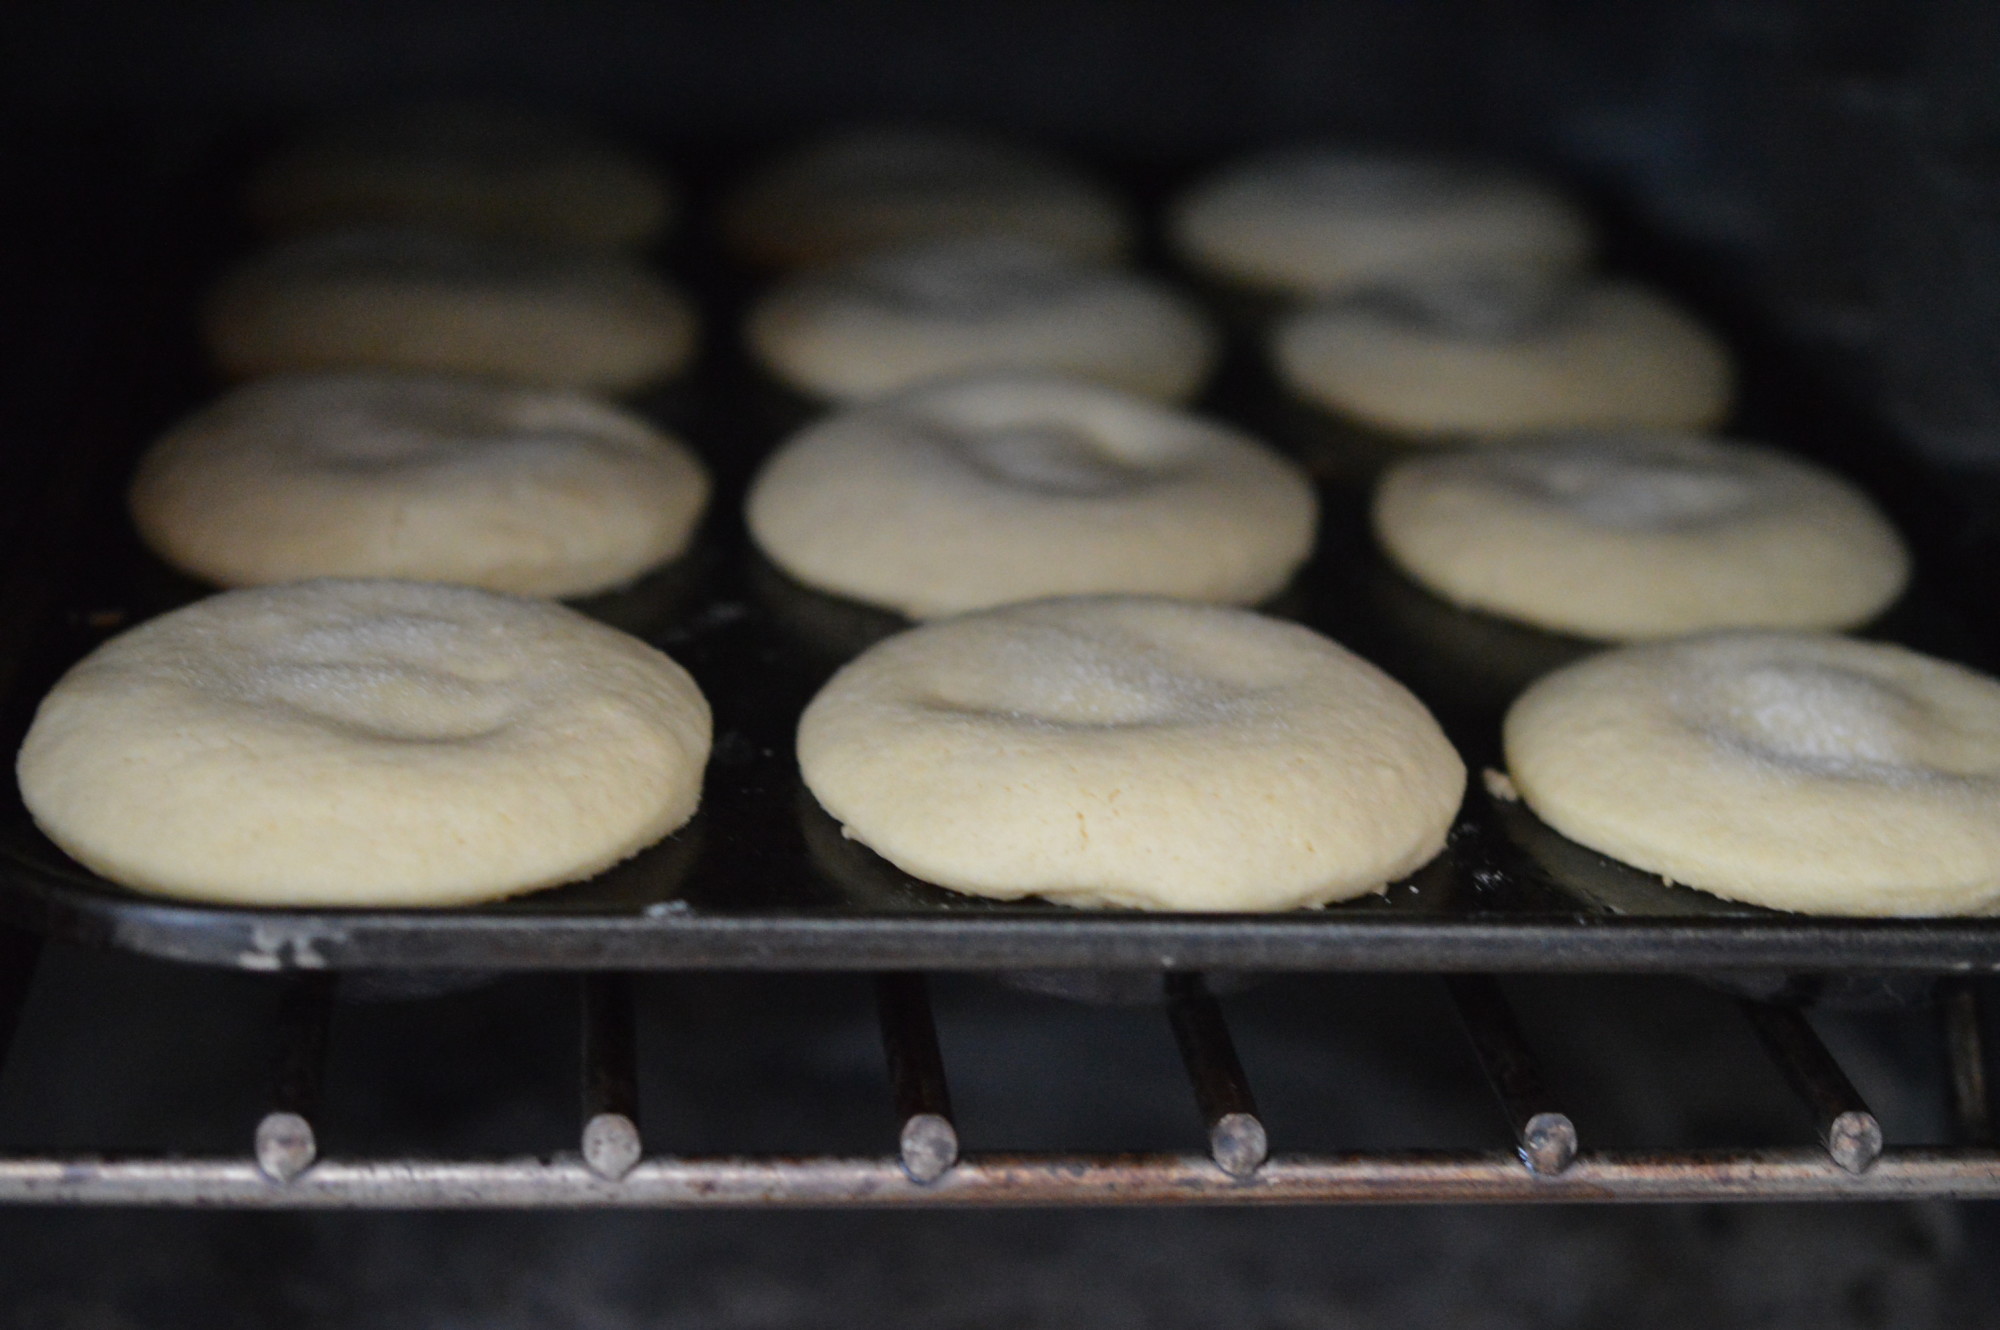
Pipe the mixture in.  You’ll get between 18 and 24, depending on the size of the eggs you’ve used and whether or not you want a flat or peaked top to your cakes.

Butterfly Cake - piped in cases

This amount – halfway – and you end up with a flatter top.  Two-thirds full gives a slight ‘muffin’ top which is prettier if you are serving your fairy cakes plain.

DSC_0114

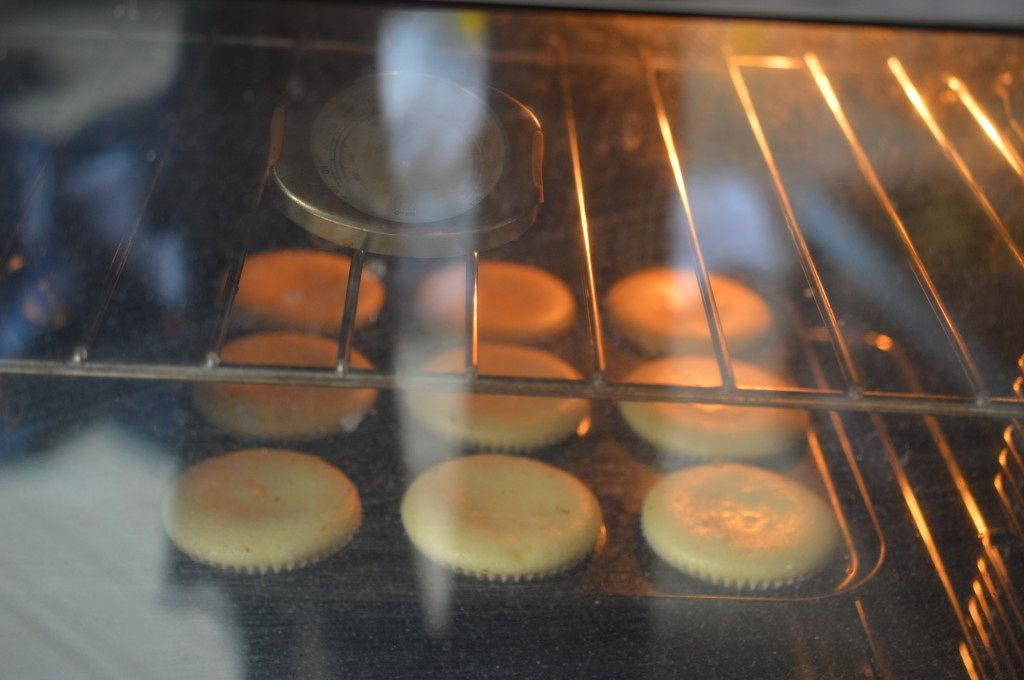
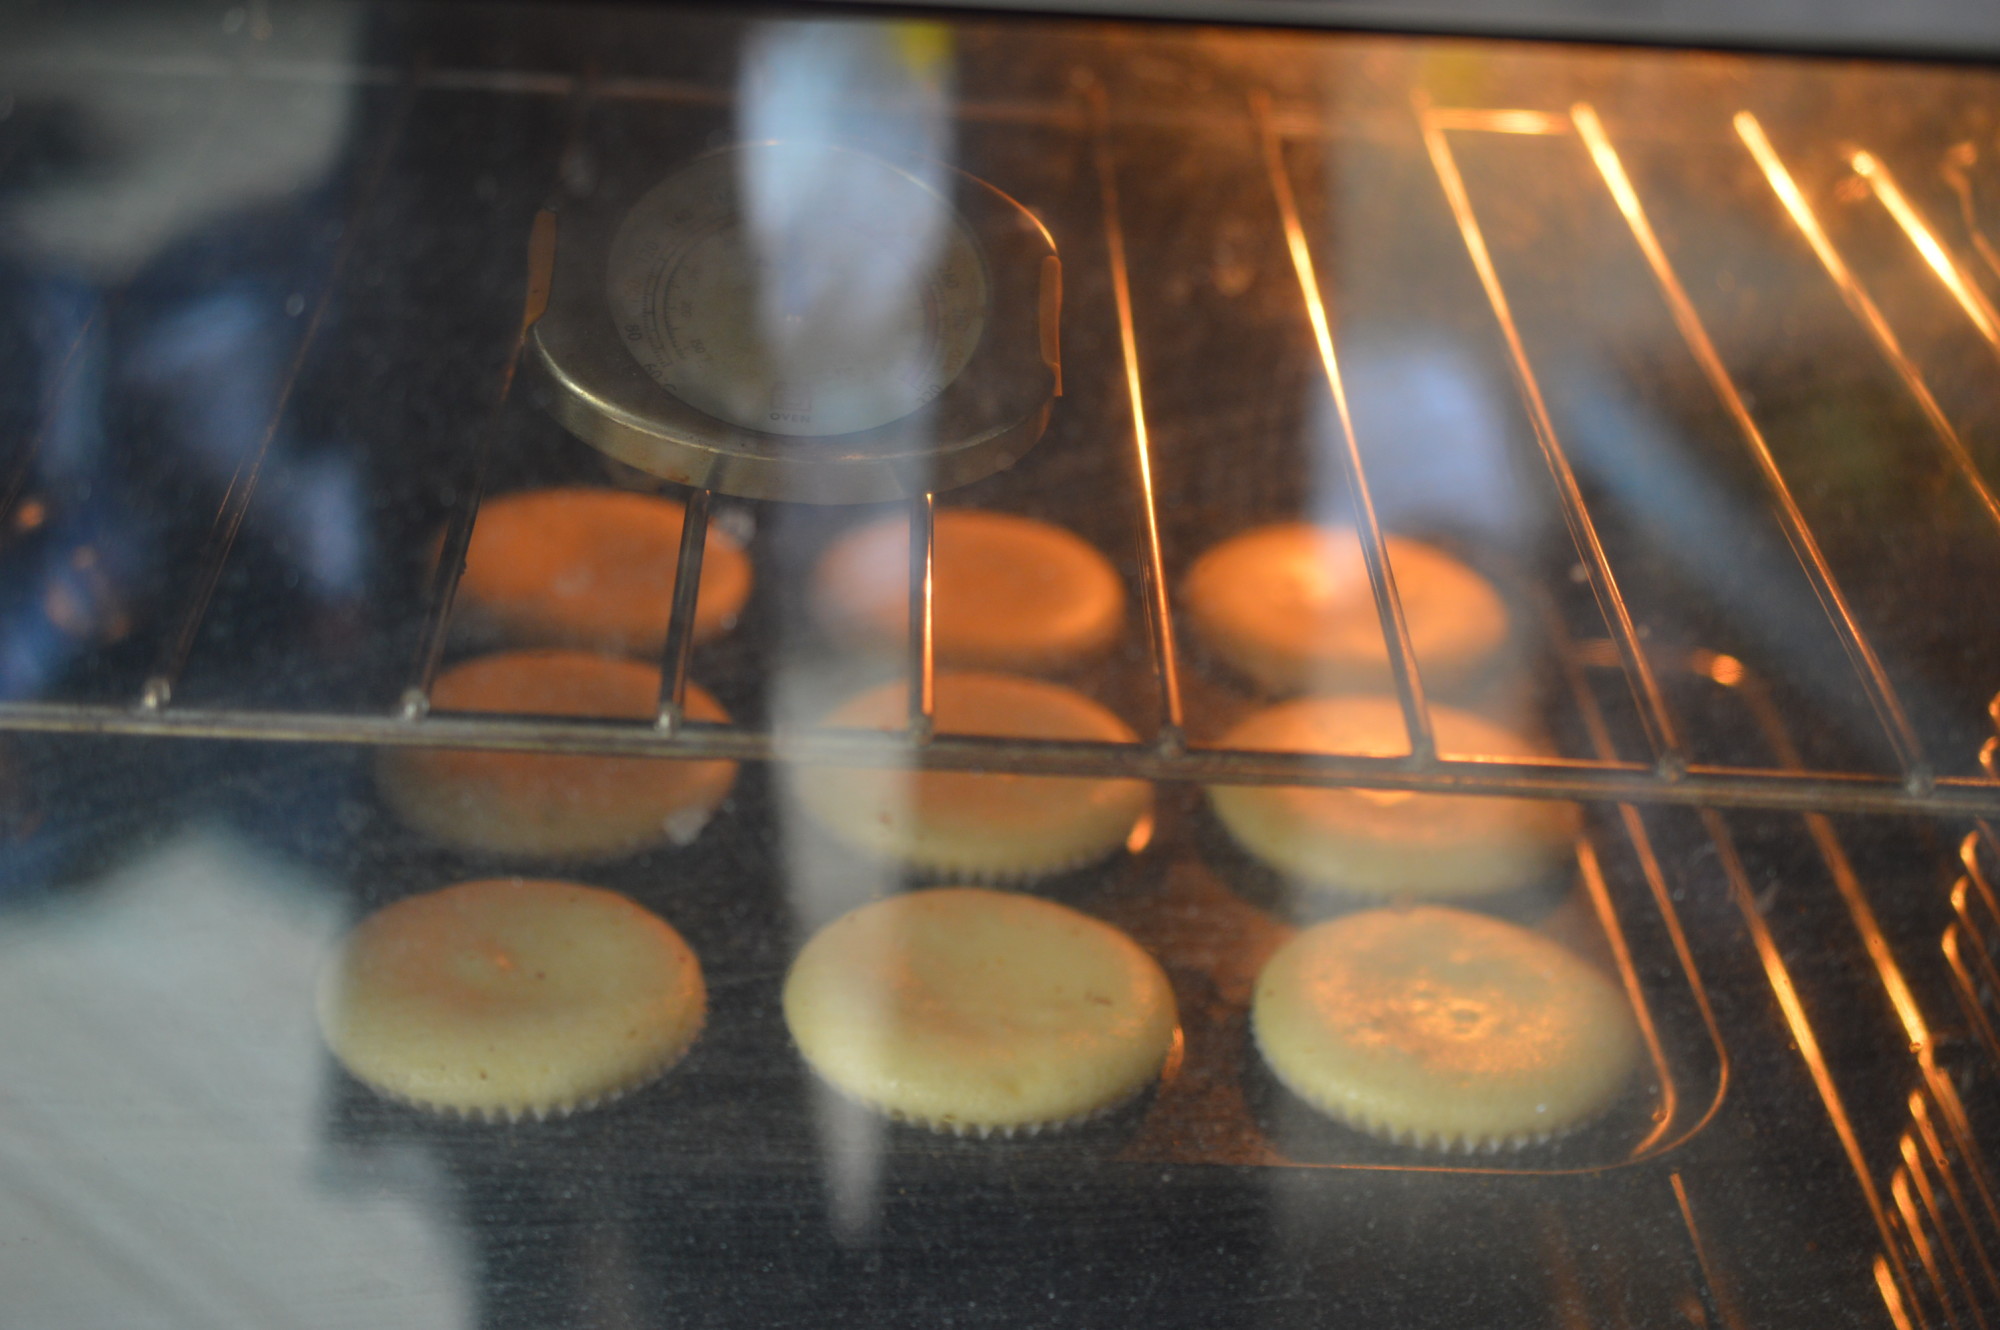
Victoria ‘sandwich’ cakes are notoriously temperamental when it comes to oven temperature.  They are the perfect thing to test a new oven with.   Fairy cakes are supposed to be more resilient but, oddly, I find the Aga doesn’t do them well.  That and 2 lb loaf cakes.

You’d think with all the technological advances it would be possible to manufacture conventional ovens which heat, evenly, to the temperature it says on the dial, but no.  They all vary and there is no way round it – you are on your own with yours.  Even the best of them will vary depending on how old a model and how much you have cooking in it at any one time.  My conventional oven is a disaster.  They only way to come close to my desired temperature is to use an oven thermometer and there’s no hope of getting good results if I put two trays in at the same time because the variation top-to-bottom is ridiculous.  Plus I also have to turn anything two-thirds through the cooking time as it’s hotter on the left-hand side.  This breaks the cardinal rule of ‘do not open the oven door whilst your cake is cooking’.  The rush of cold air causes the cake mixture to deflate.

(You can put it’s presence in my life down to the fact I was focussed on convincing my husband it was worth buying a cooker which cost the price of a small car (Aga) whilst still needing a back-up …!  It was a tough sell.)

Navigate it all as best you may.

Butterfly Cakes - cooked

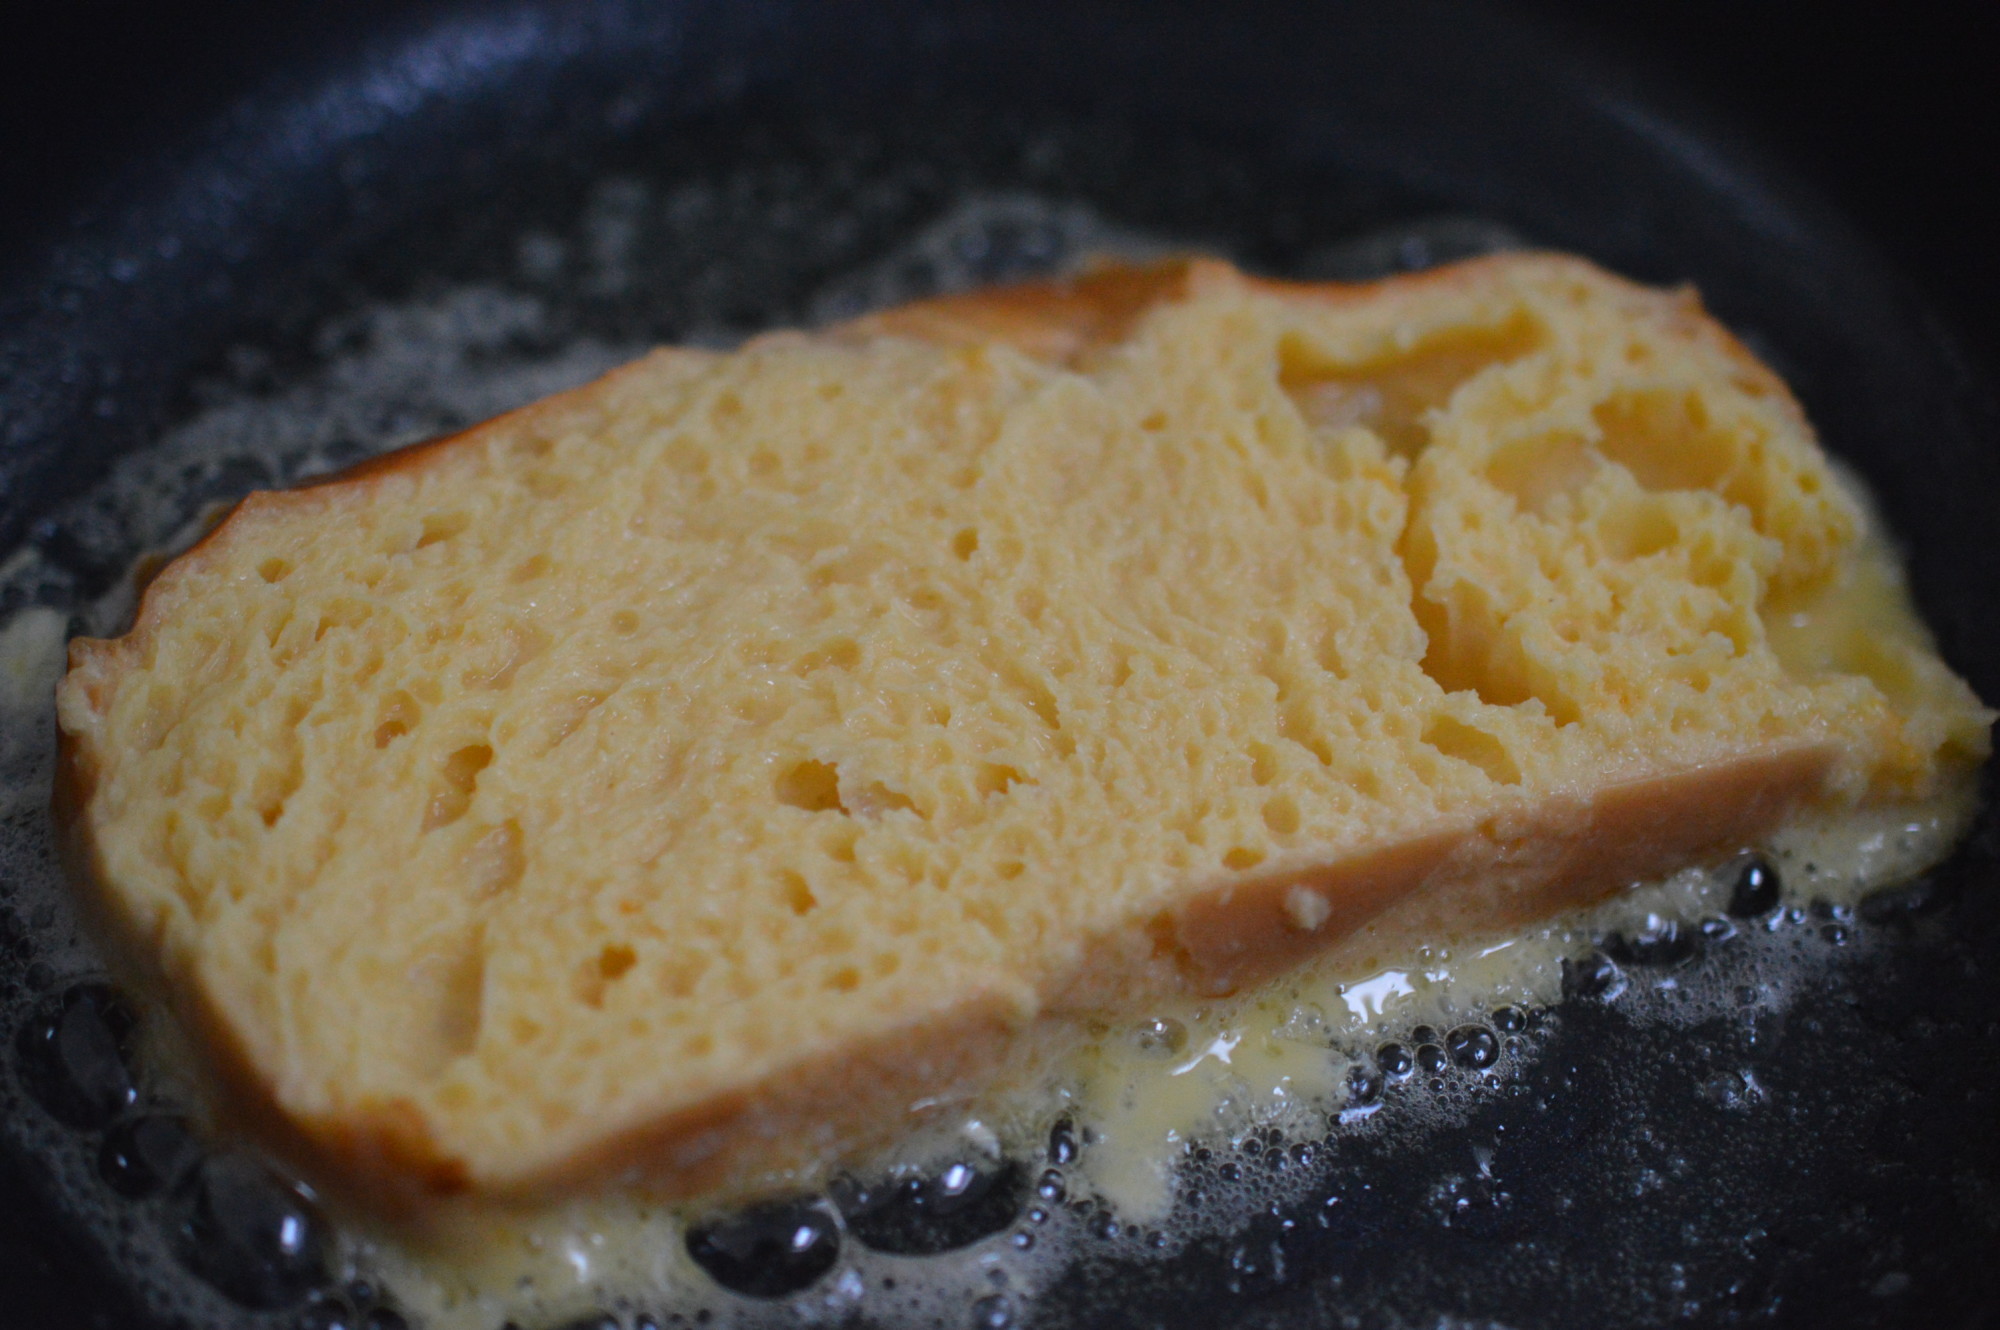
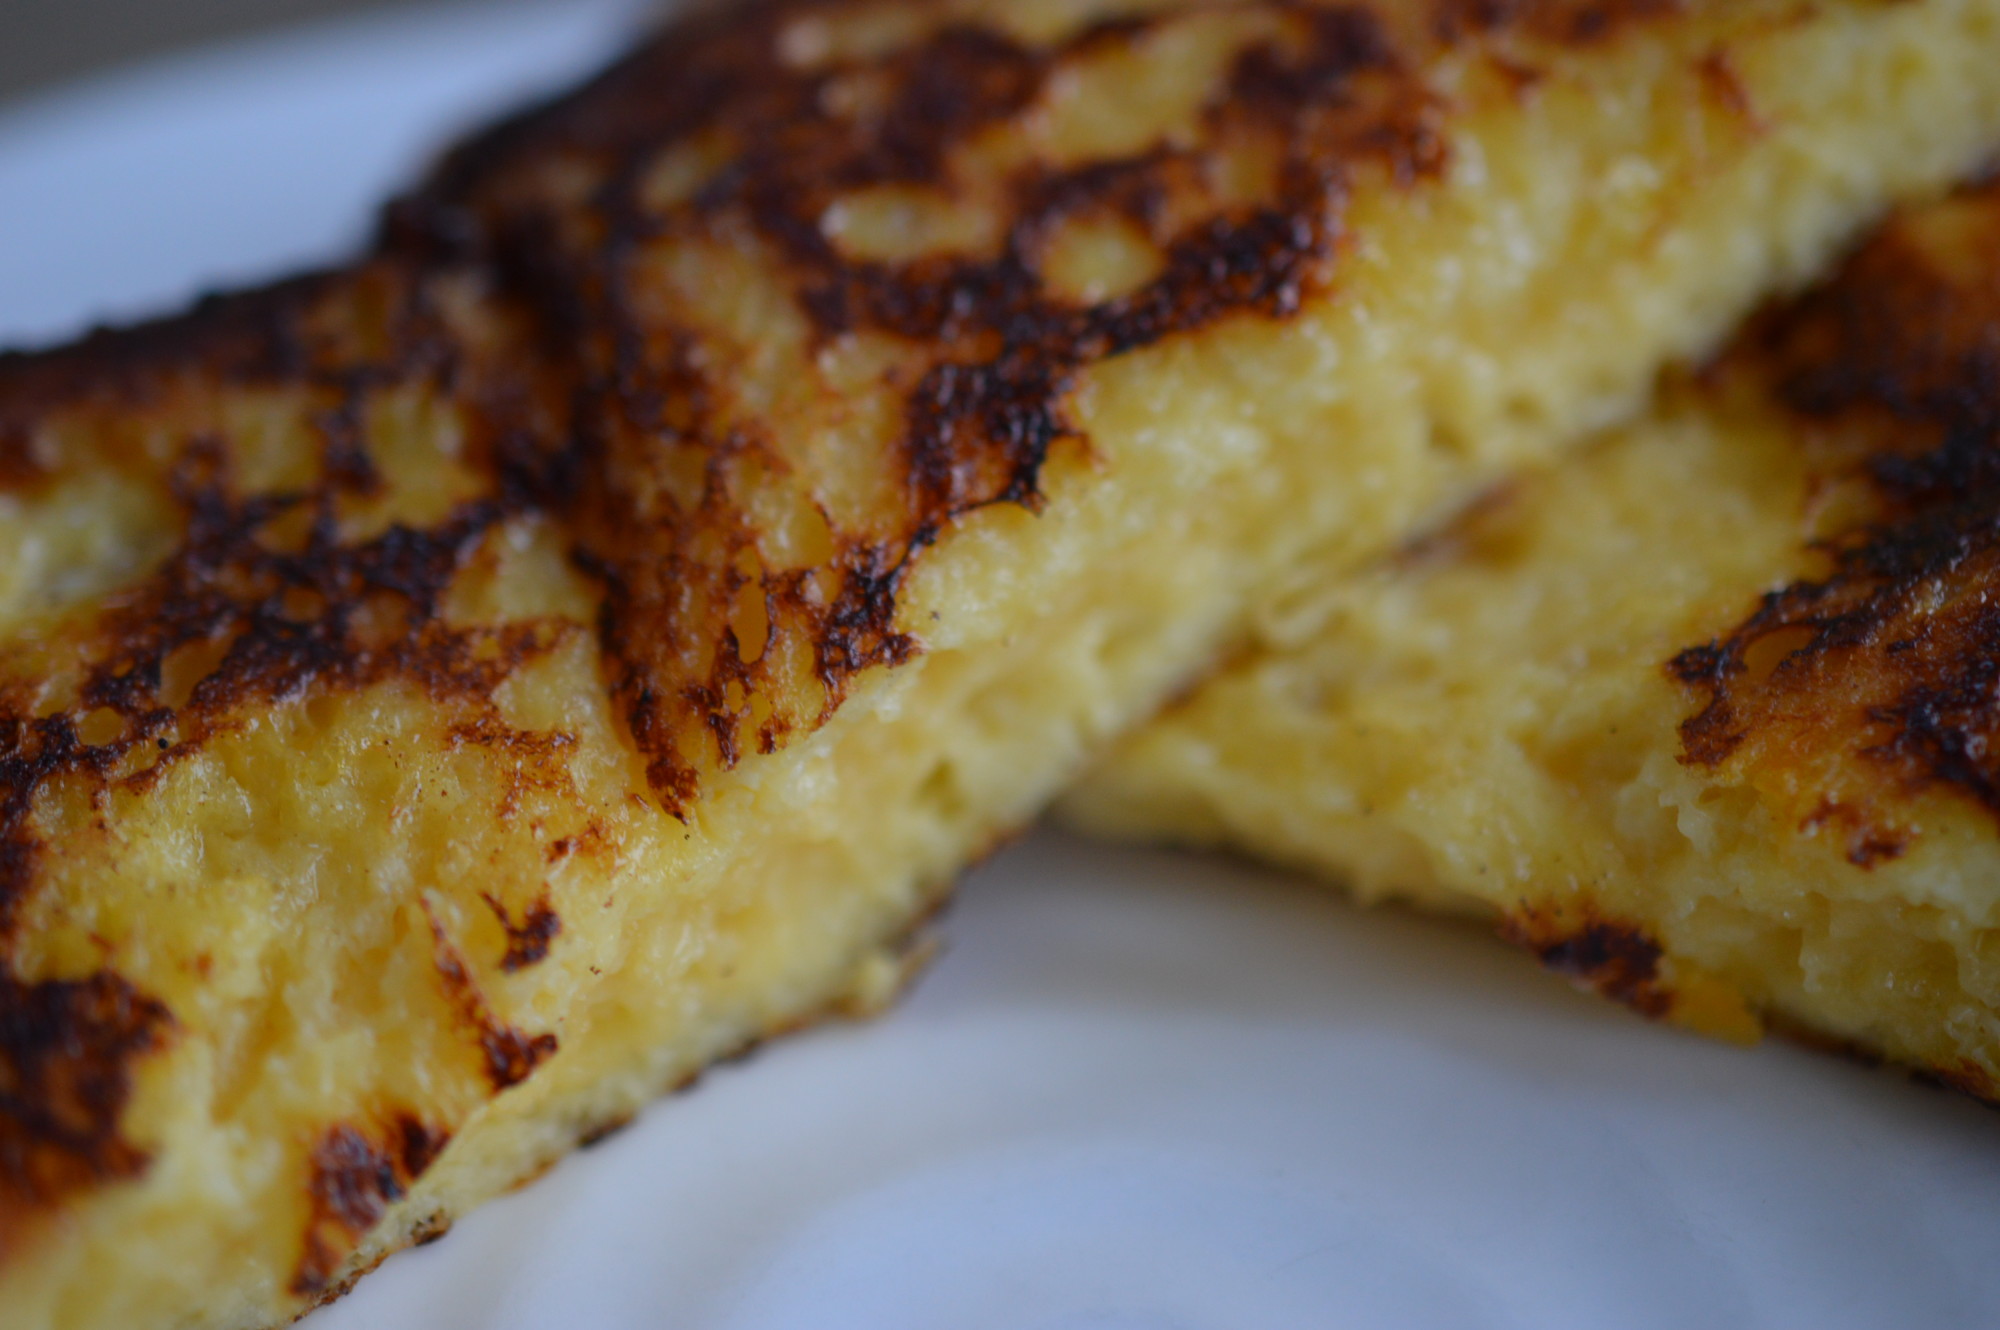
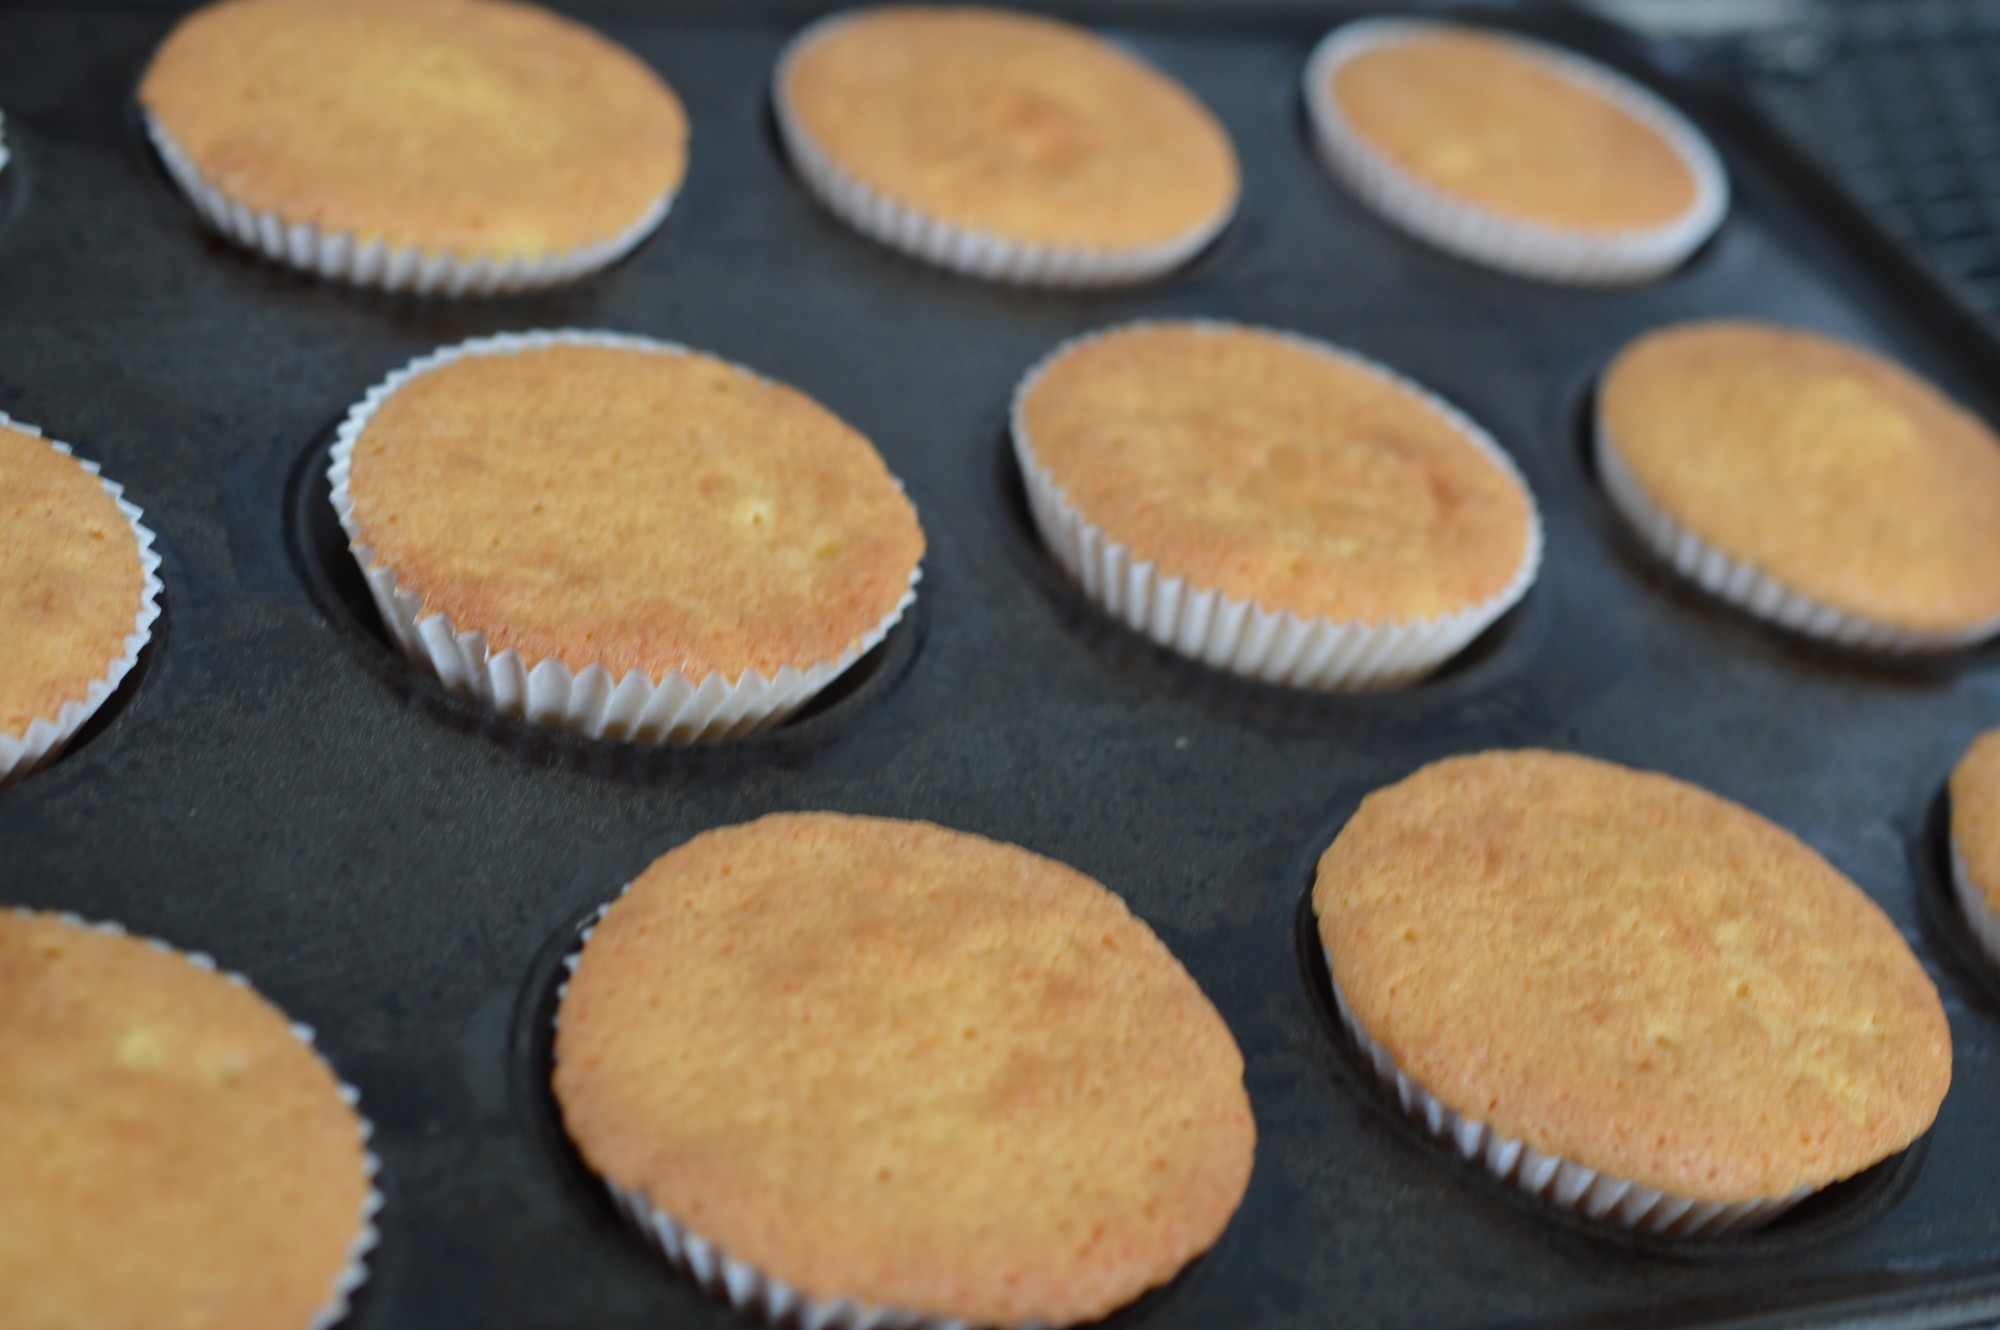
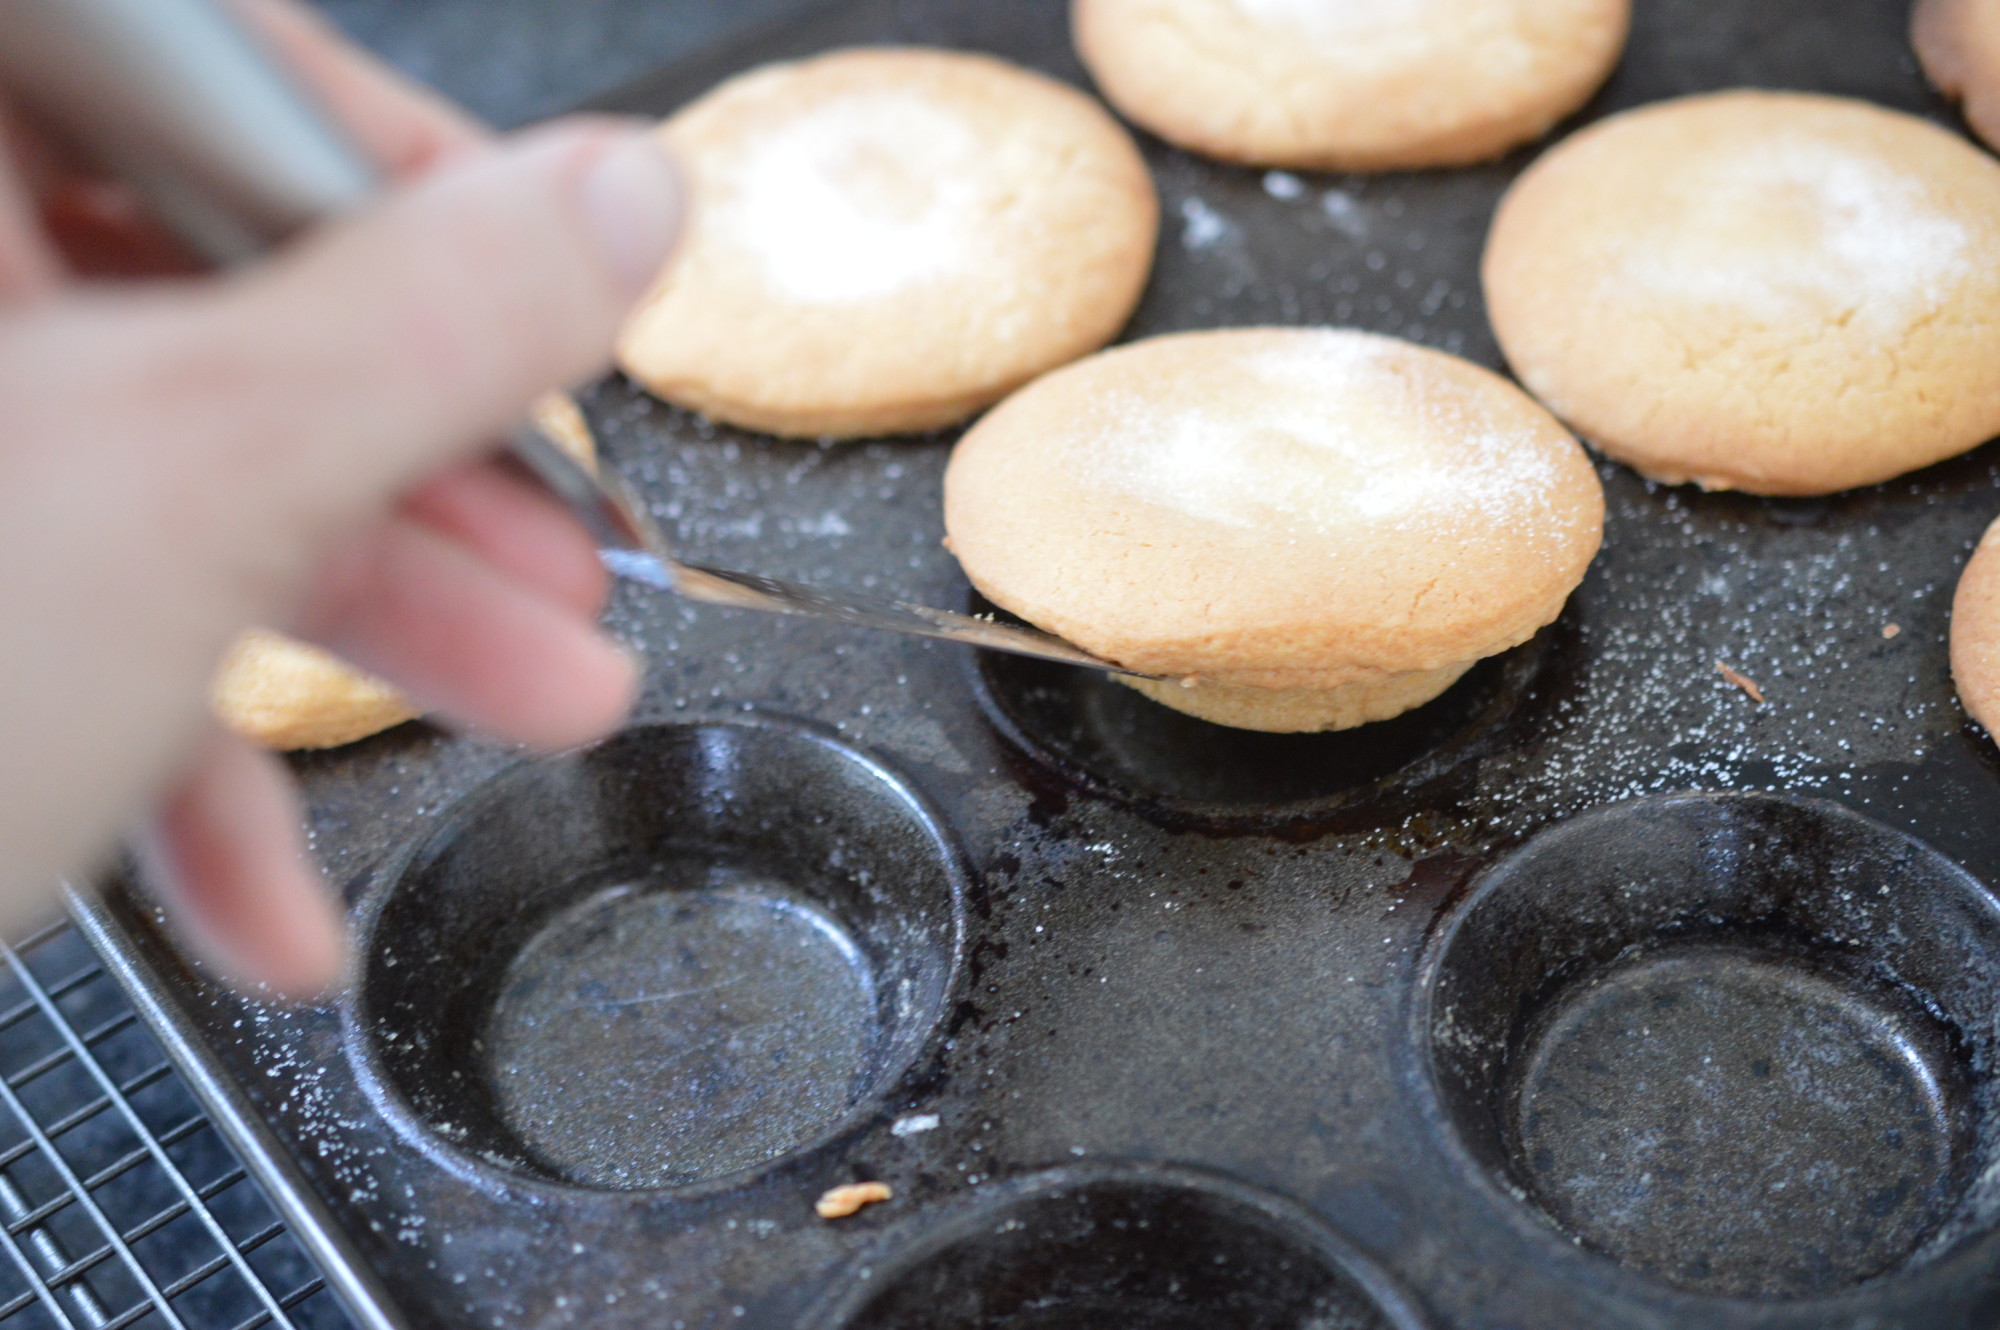
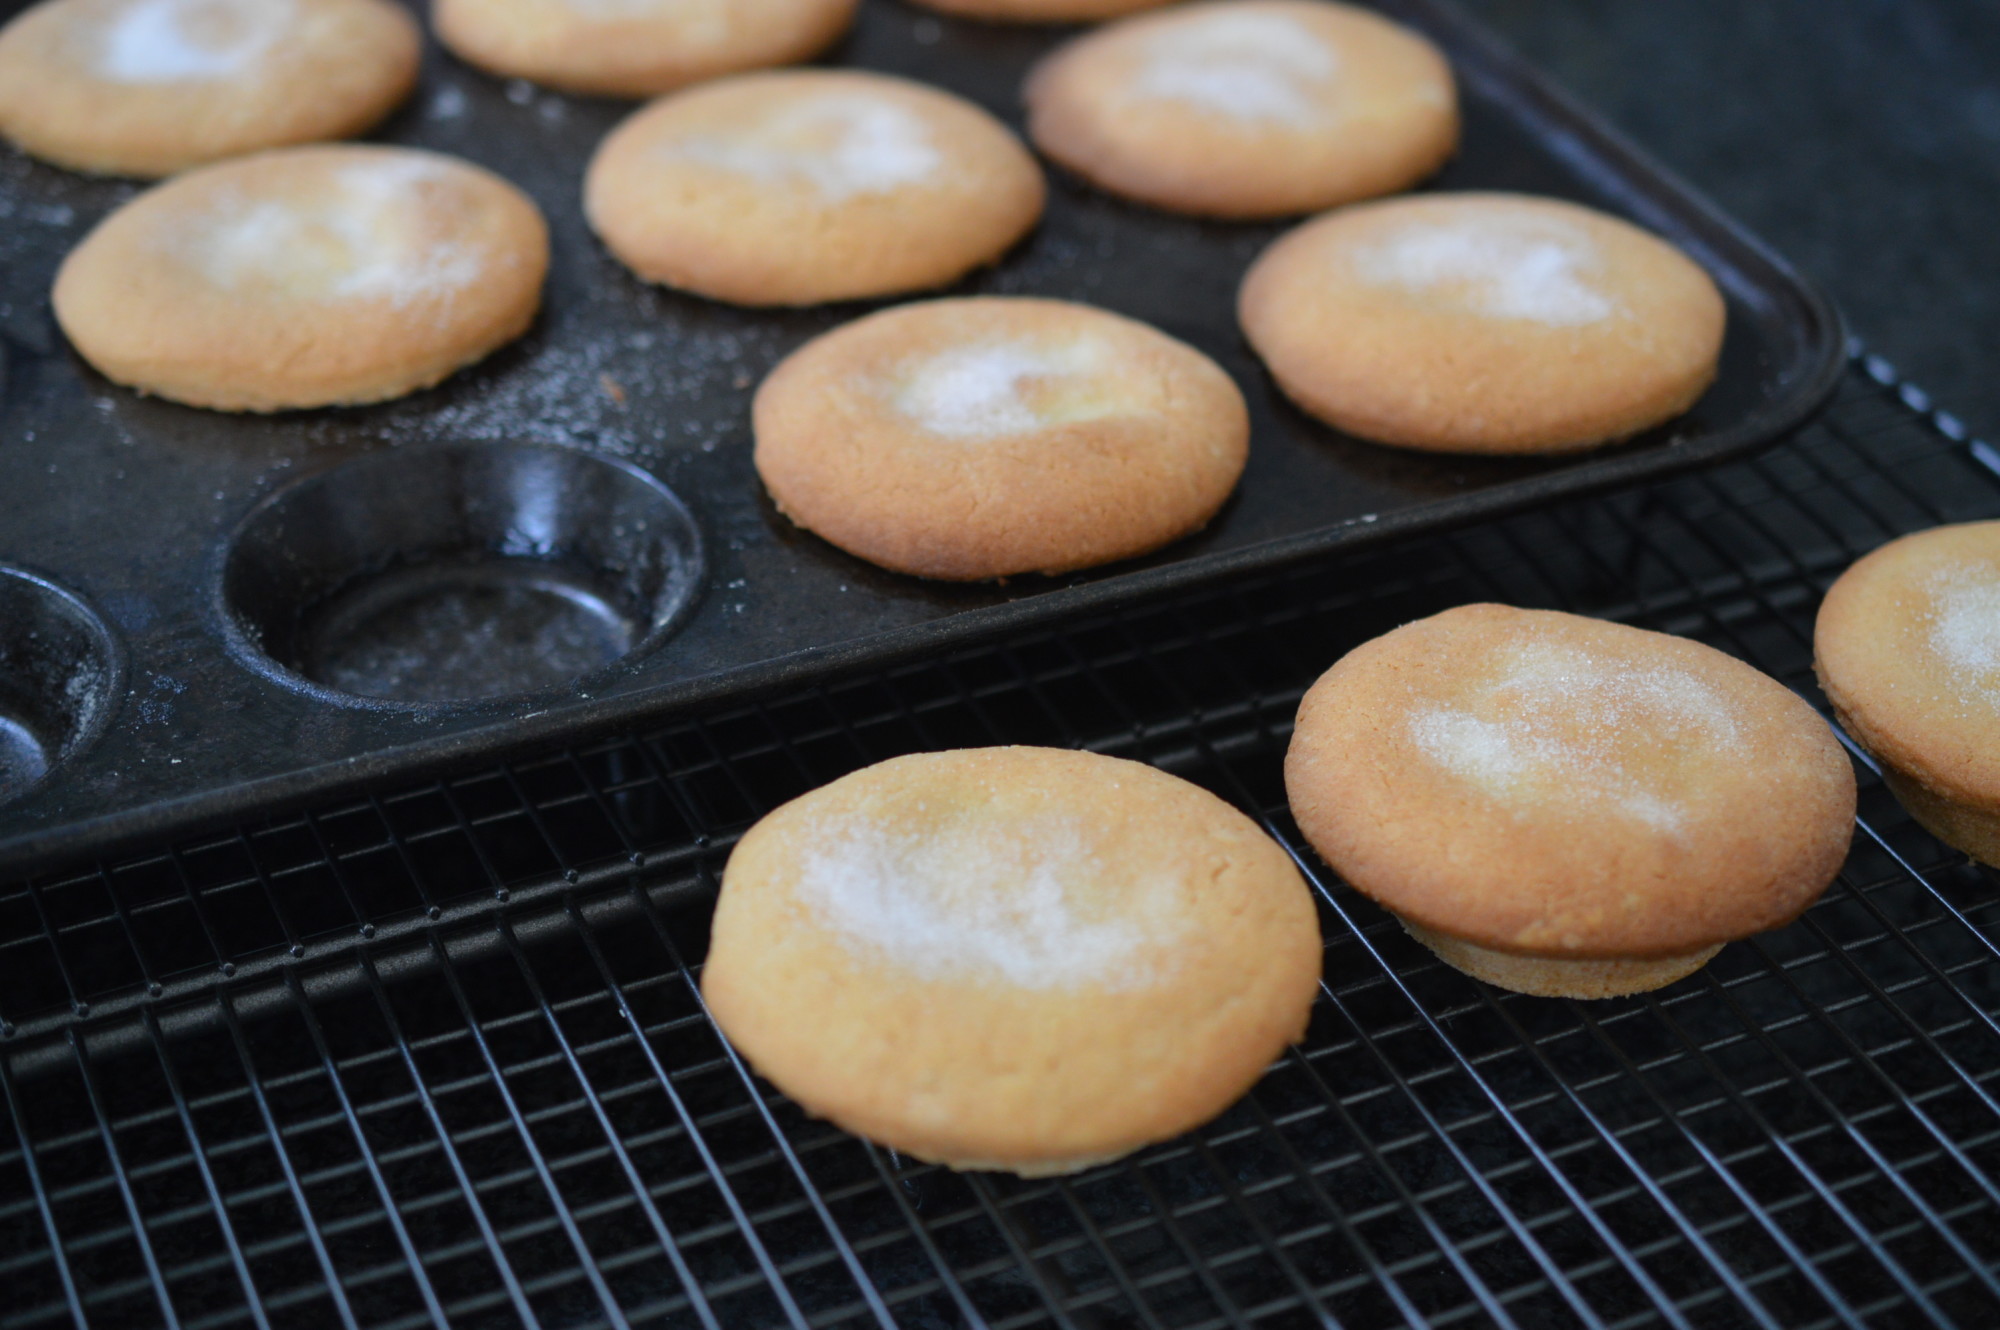
Fifteen minutes later, having done battle with the blasted thing, I have this.  If you’re in any doubt they are cooked, a wooden cocktail stick will come out clean.

It’s really important to take them out of the shallow bun tin immediately you remove them from the oven. Transfer them to a cooling rack.  If you leave your fairy cakes in the tin the cases will start to peel away as the steam flattens out all those pleats.

Butterfly Cakes - Icing Sugar

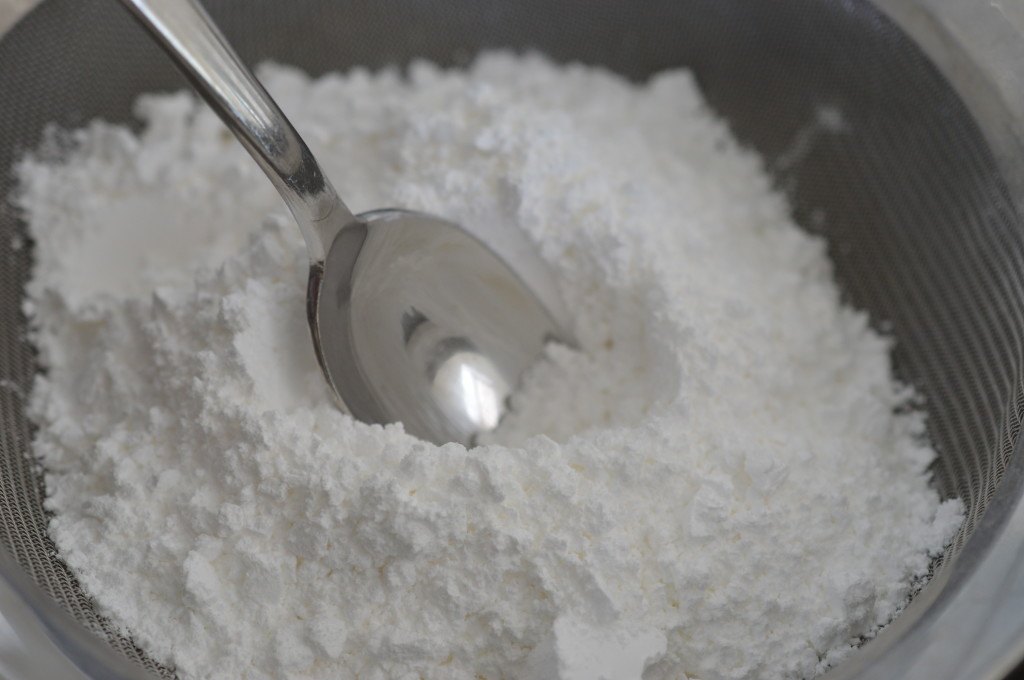
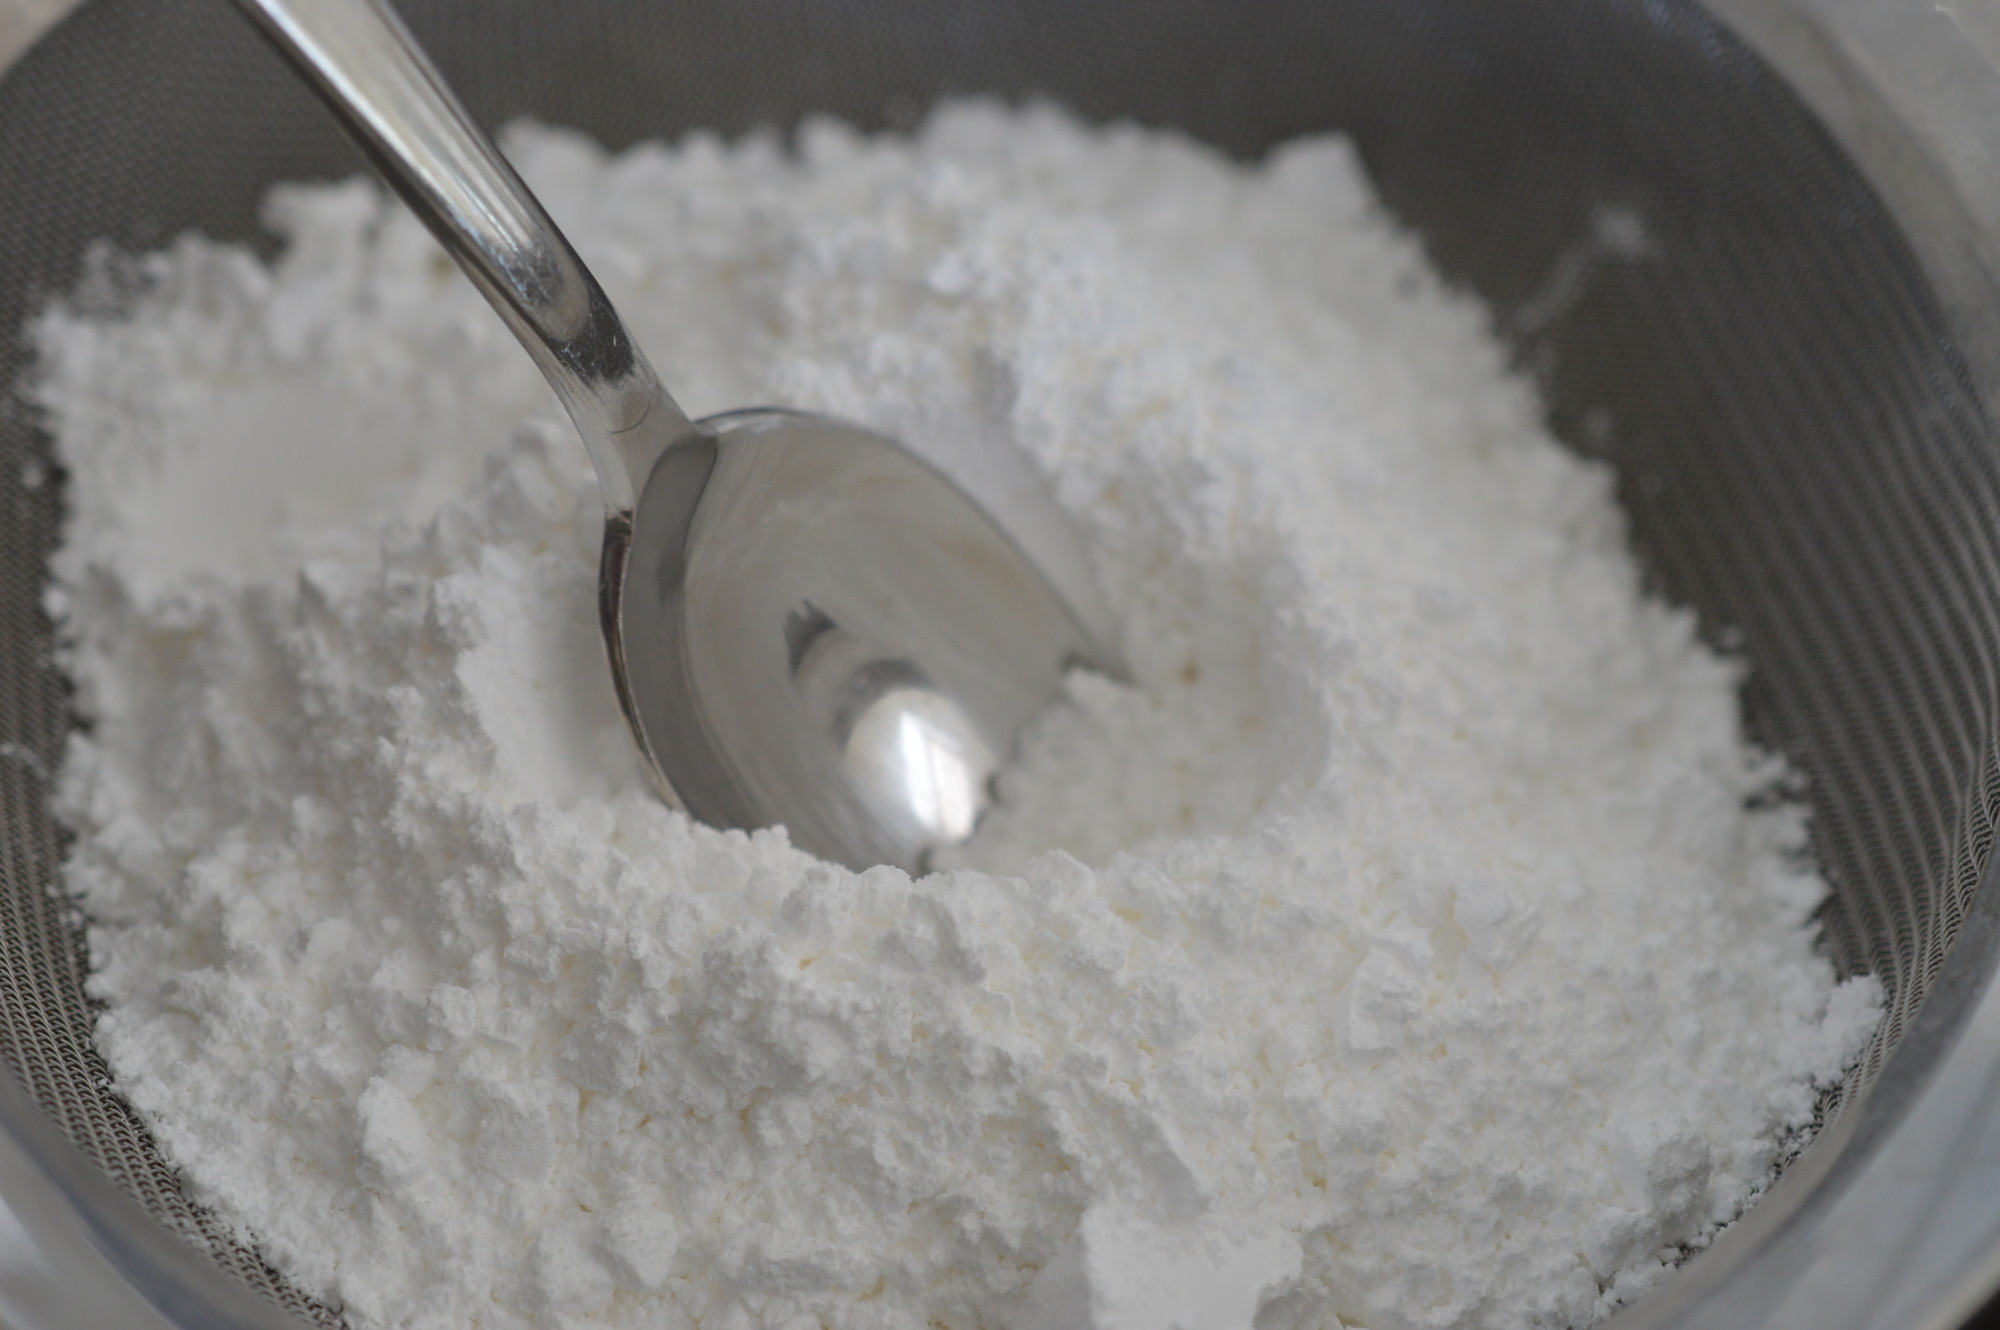
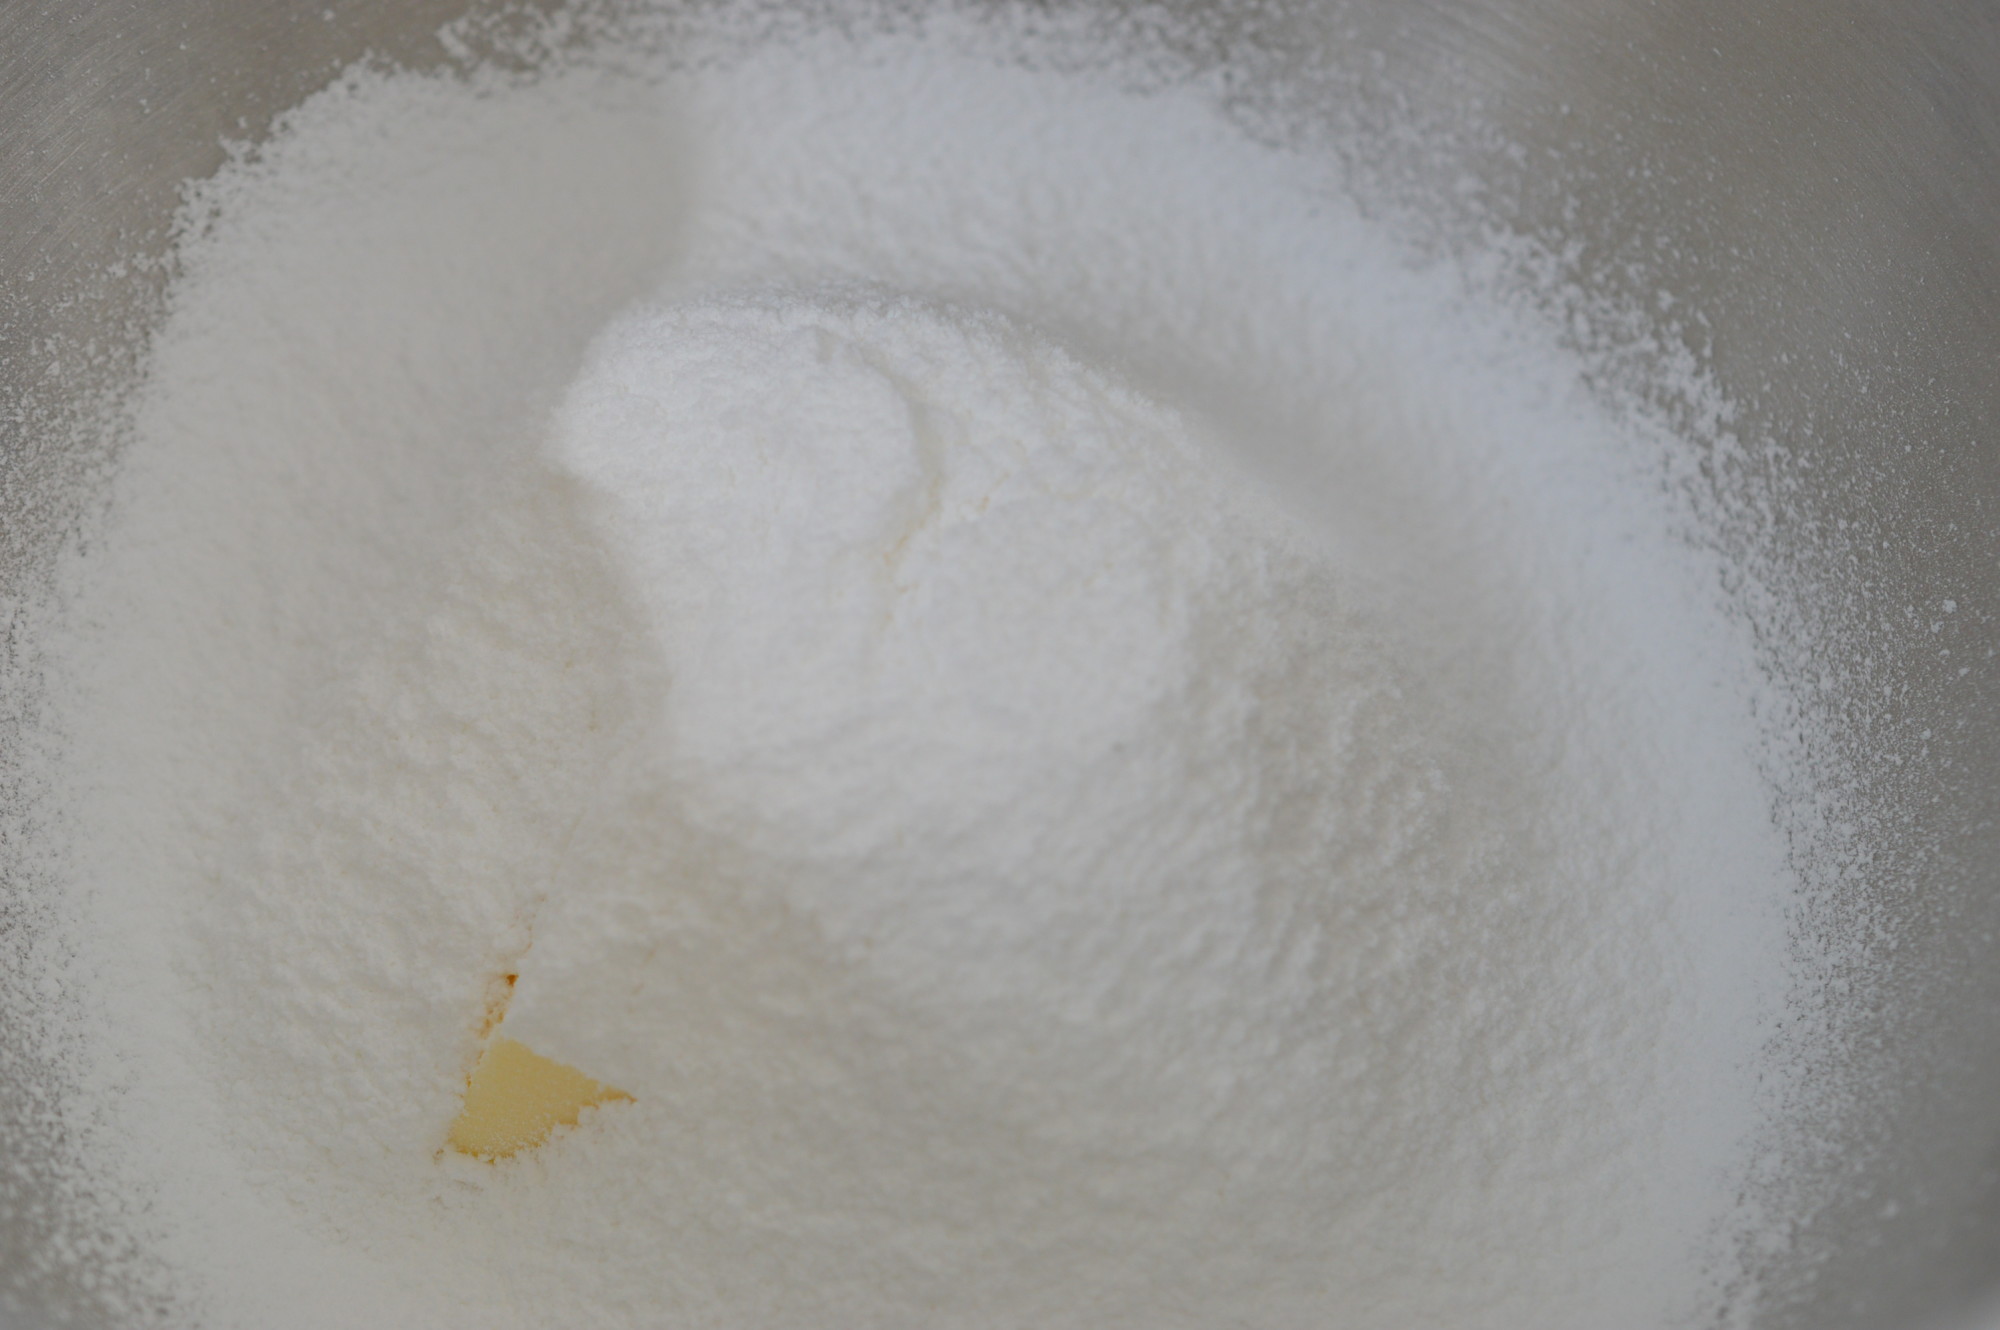
Now the buttercream.  This is the traditional ‘English’ buttercream.  That’s one part unsalted butter to two parts icing sugar, with milk to loosen.  The icing sugar needs sieving to get rid of all the lumps.  No airy wafting or you’ll be covered in sugar.  Push it through the sieve with the back of a spoon.

Butterfly Cakes - Sieved Icing Sugar

If you are making your buttercream by hand – beat the butter until it is soft and add the icing sugar a couple of tablespoons at a time.

Butterfly Cakes - mixing buttercream

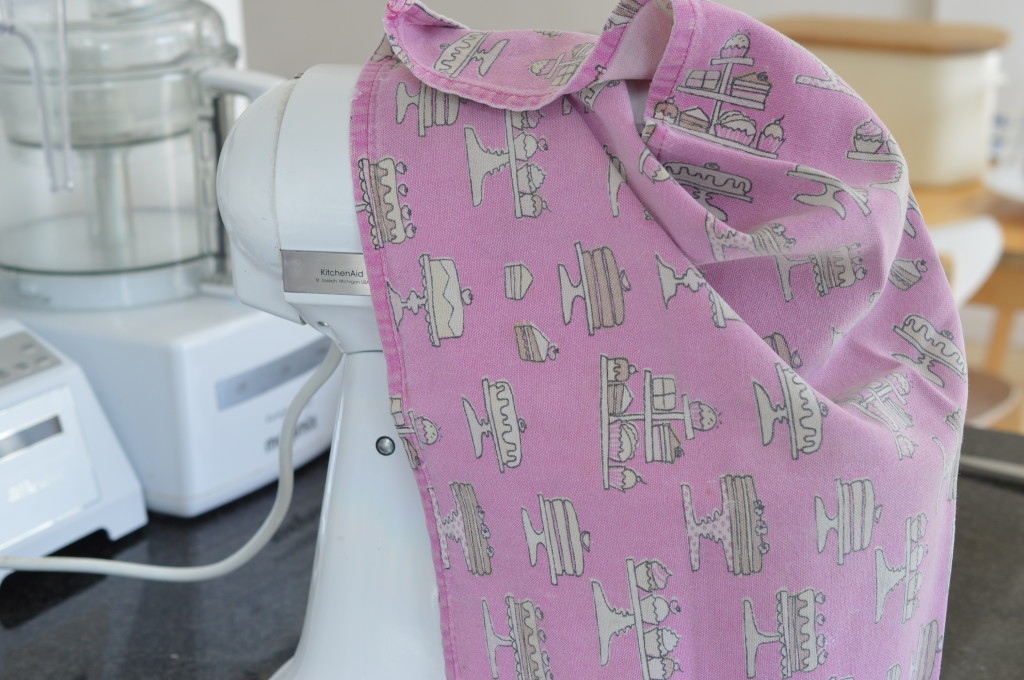
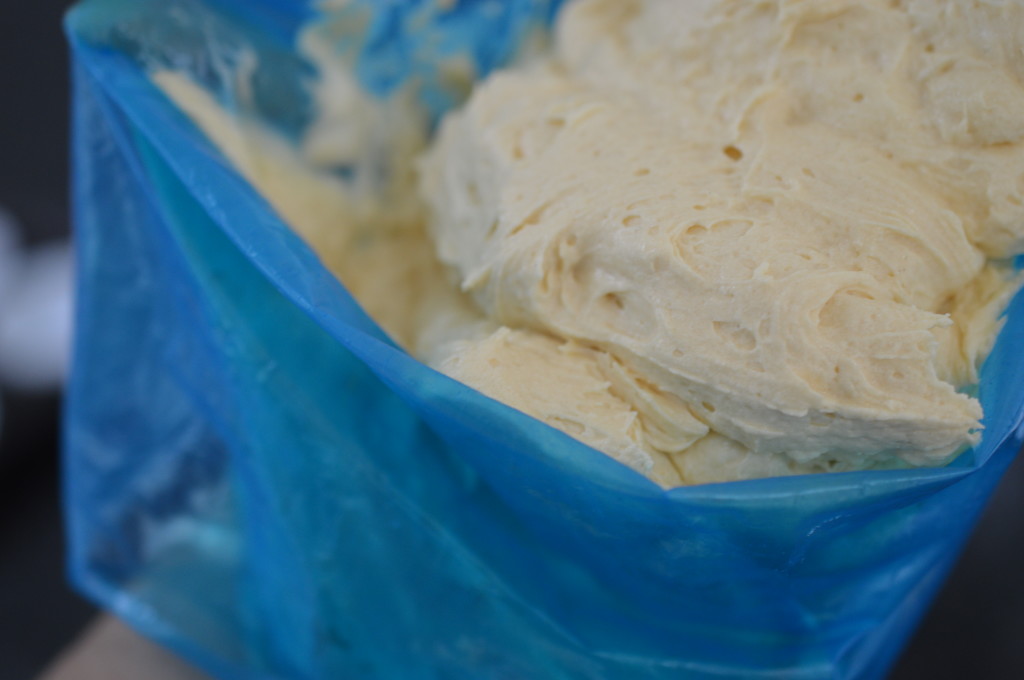
If you are using a stand mixer … this is my top buttercream tip – wrap your mixer in a clean tea towel and you can keep everything in the bowl.  Resist the temptation to peak or you will be engulfed in a white cloud.

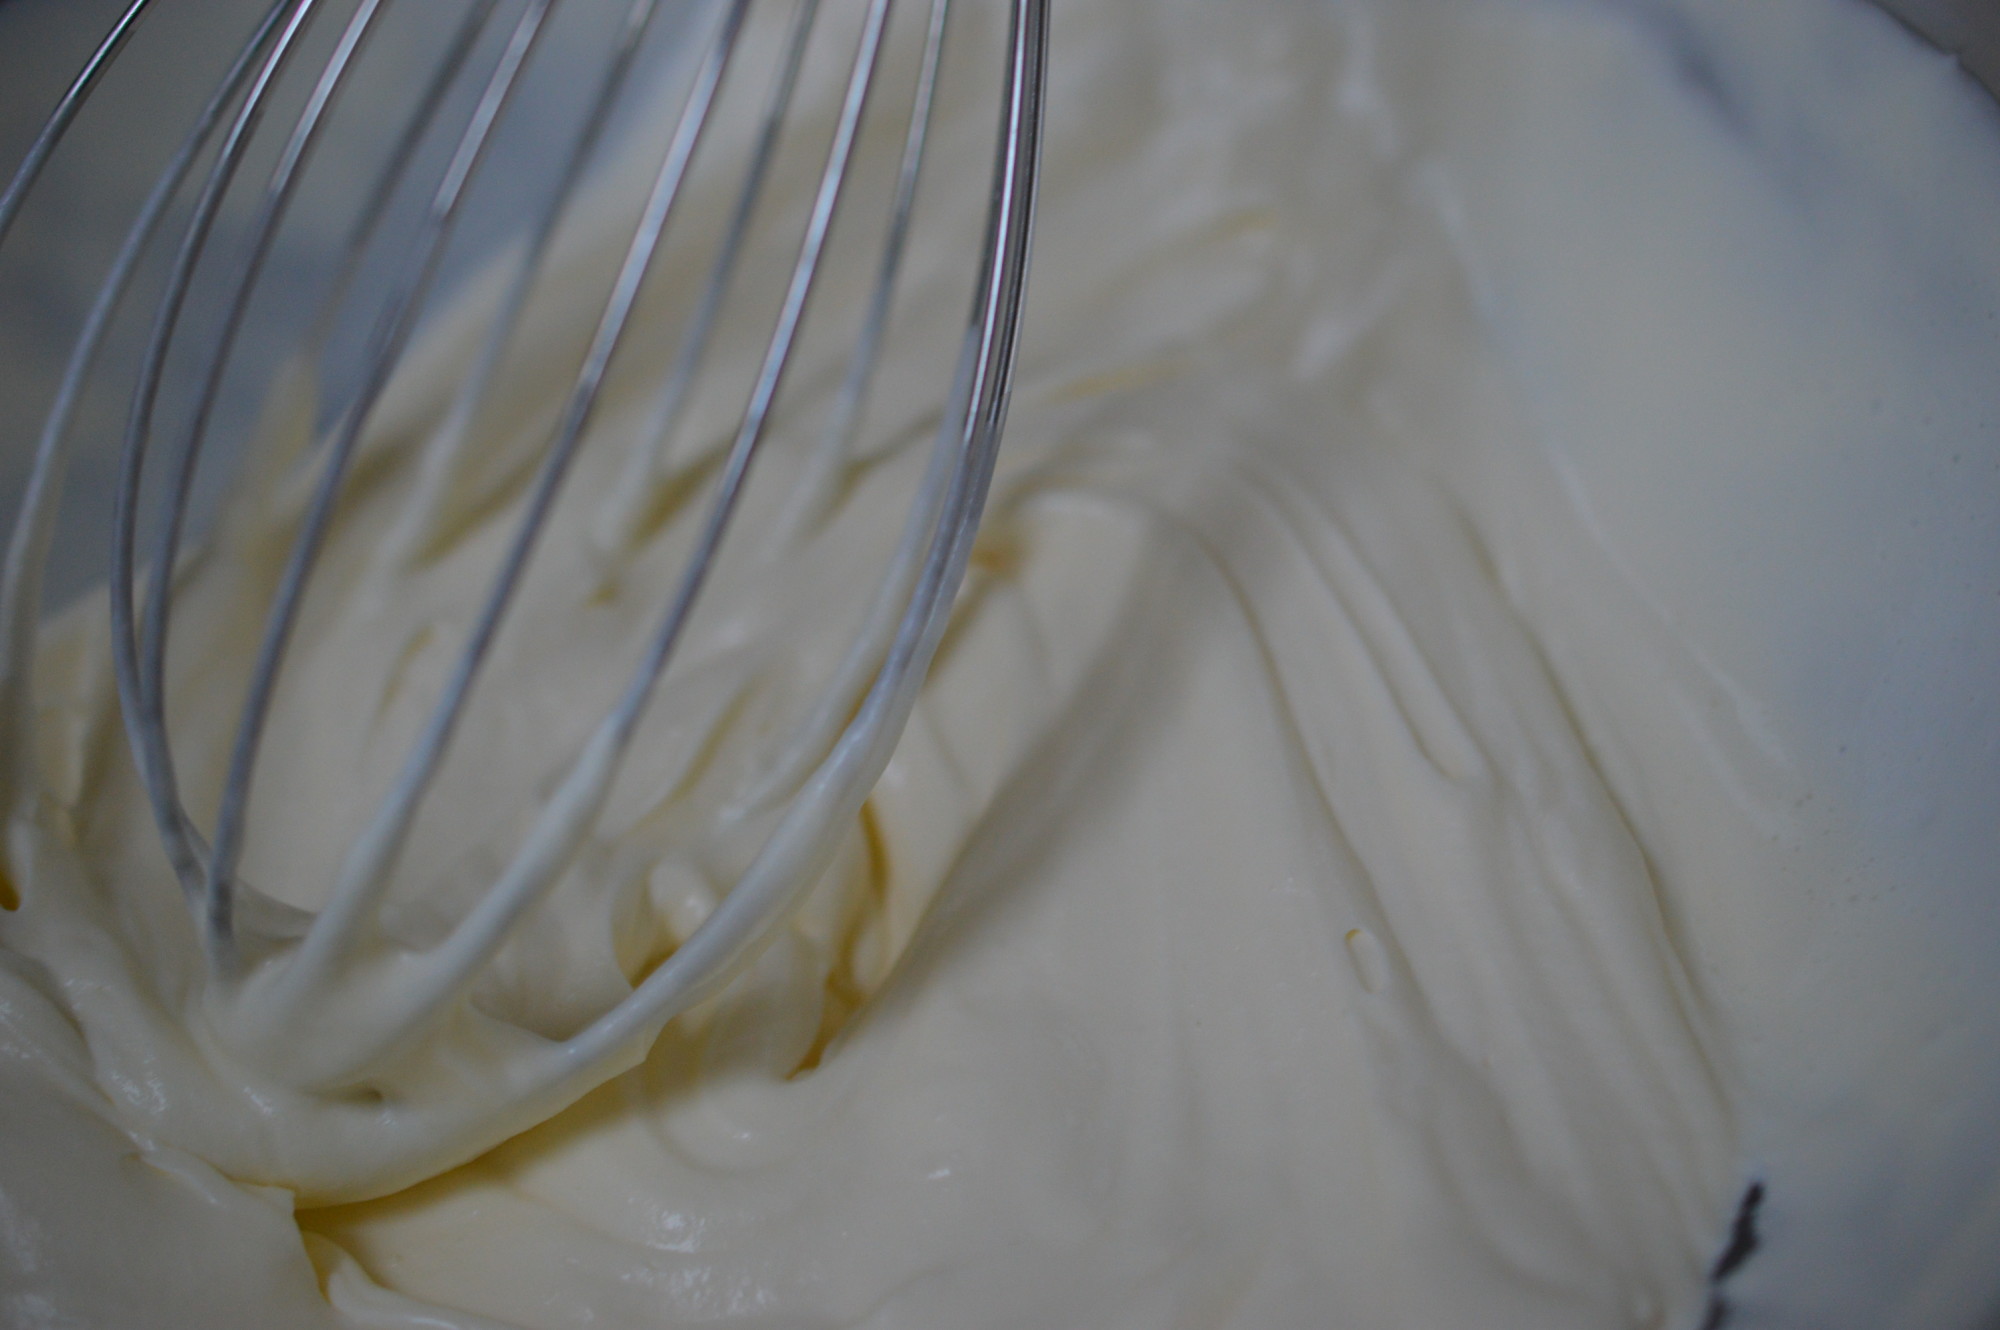
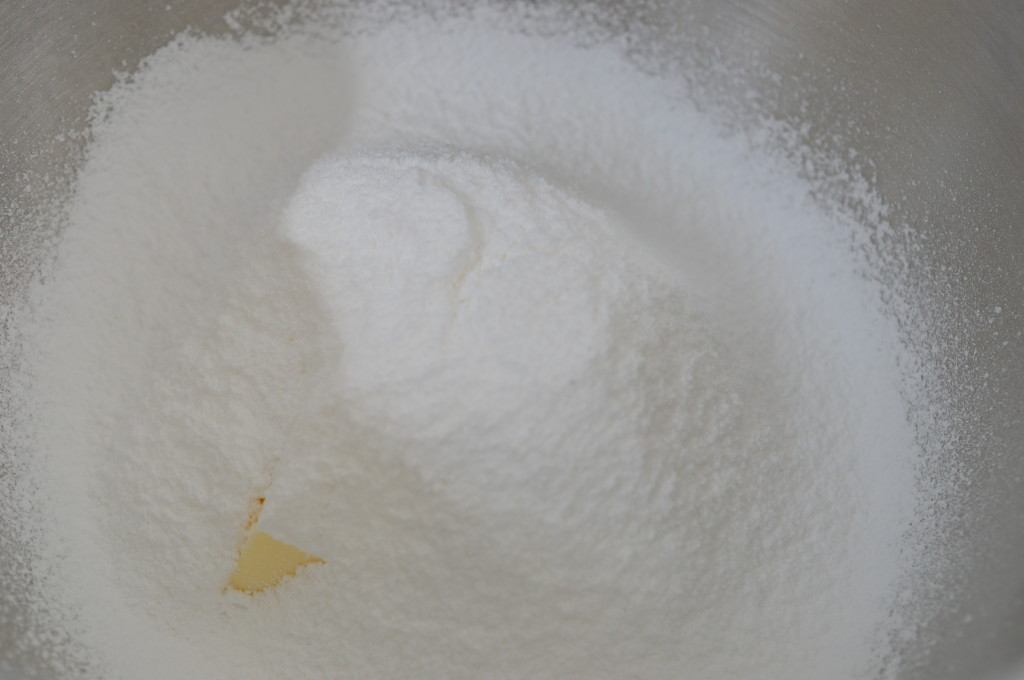
You want super-smooth buttercream.  Beat far longer than you believe necessary.  Once everything is together, you can add any colour or flavouring.  For my Vanilla Butterfly cakes I’ve added .. vanilla.  It’s nice to have the flecks of vanilla so I’ve used a teaspoon of vanilla paste.  The seeds from a vanilla pod is the more expensive option.

The consistency is something like whipped double cream.  Transfer it to a piping bag (Wilton IB tip) if you want to play.

Butterfly Cake Take off Lids

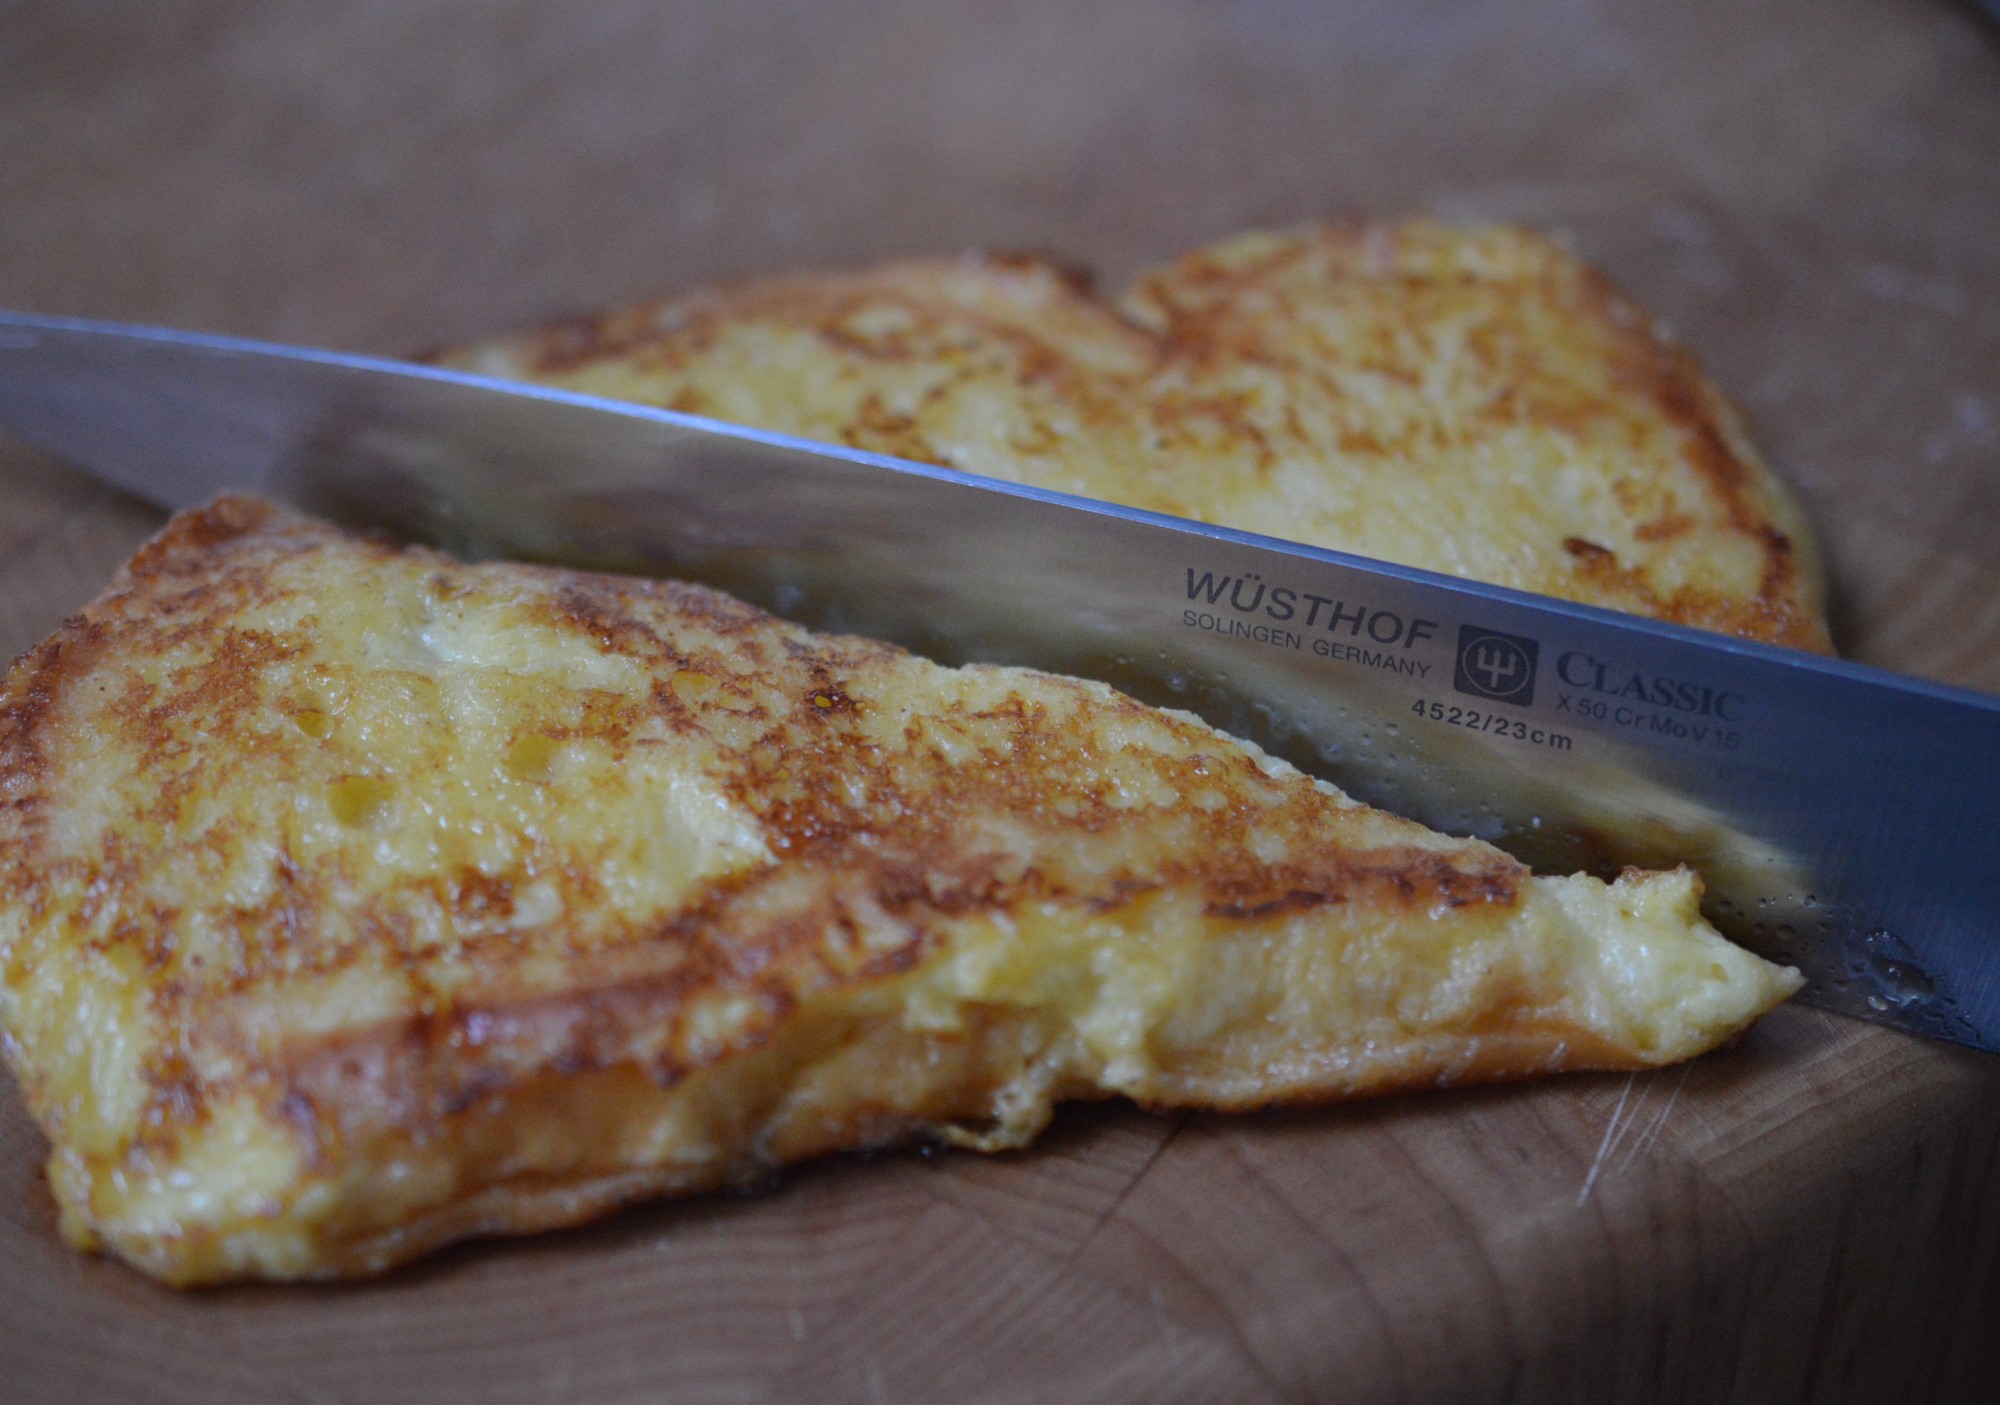
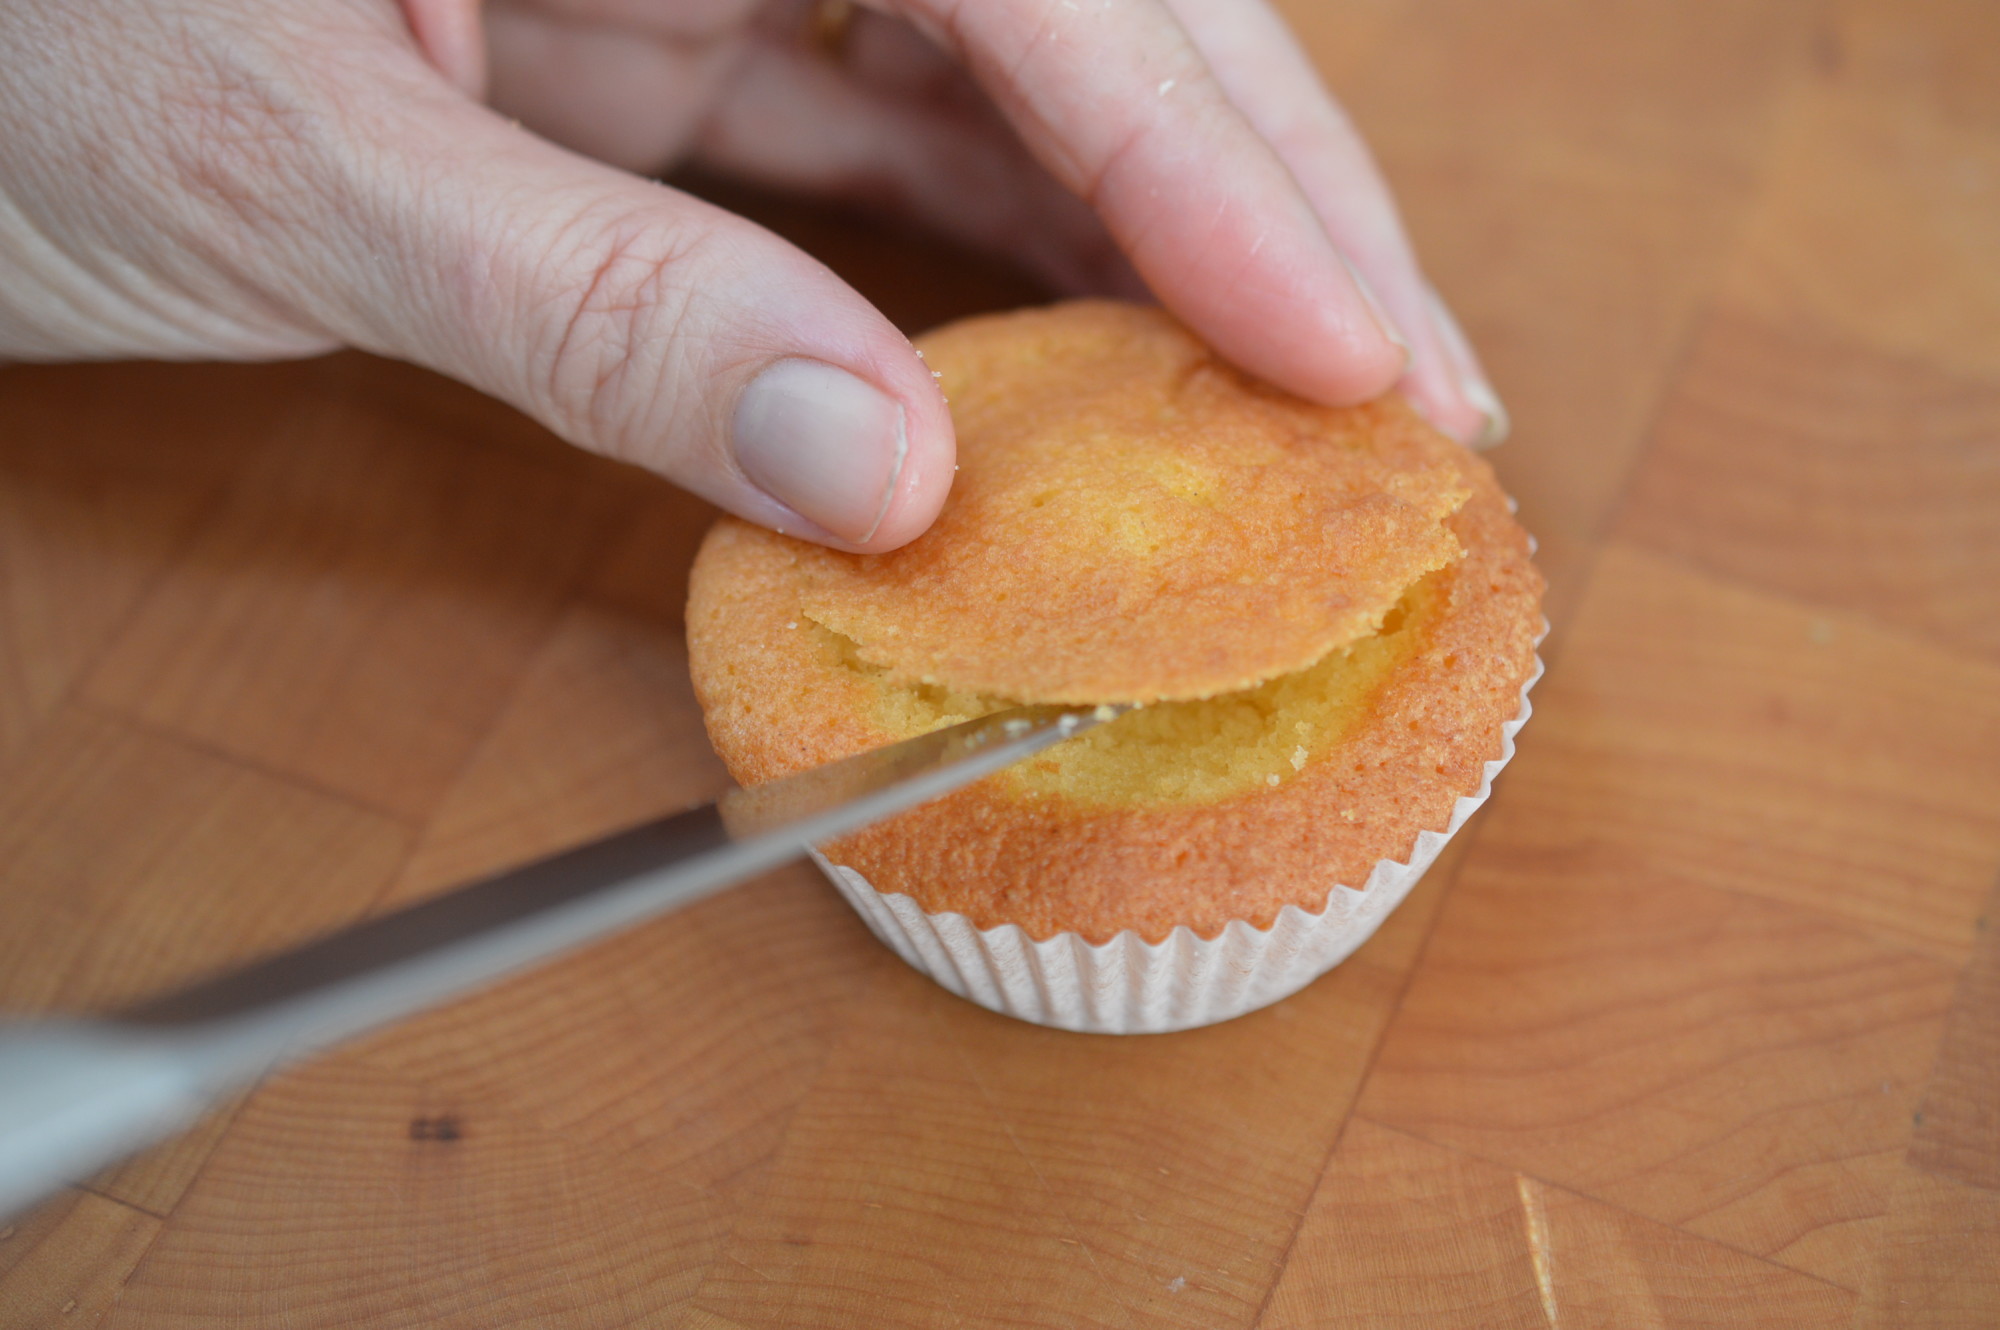
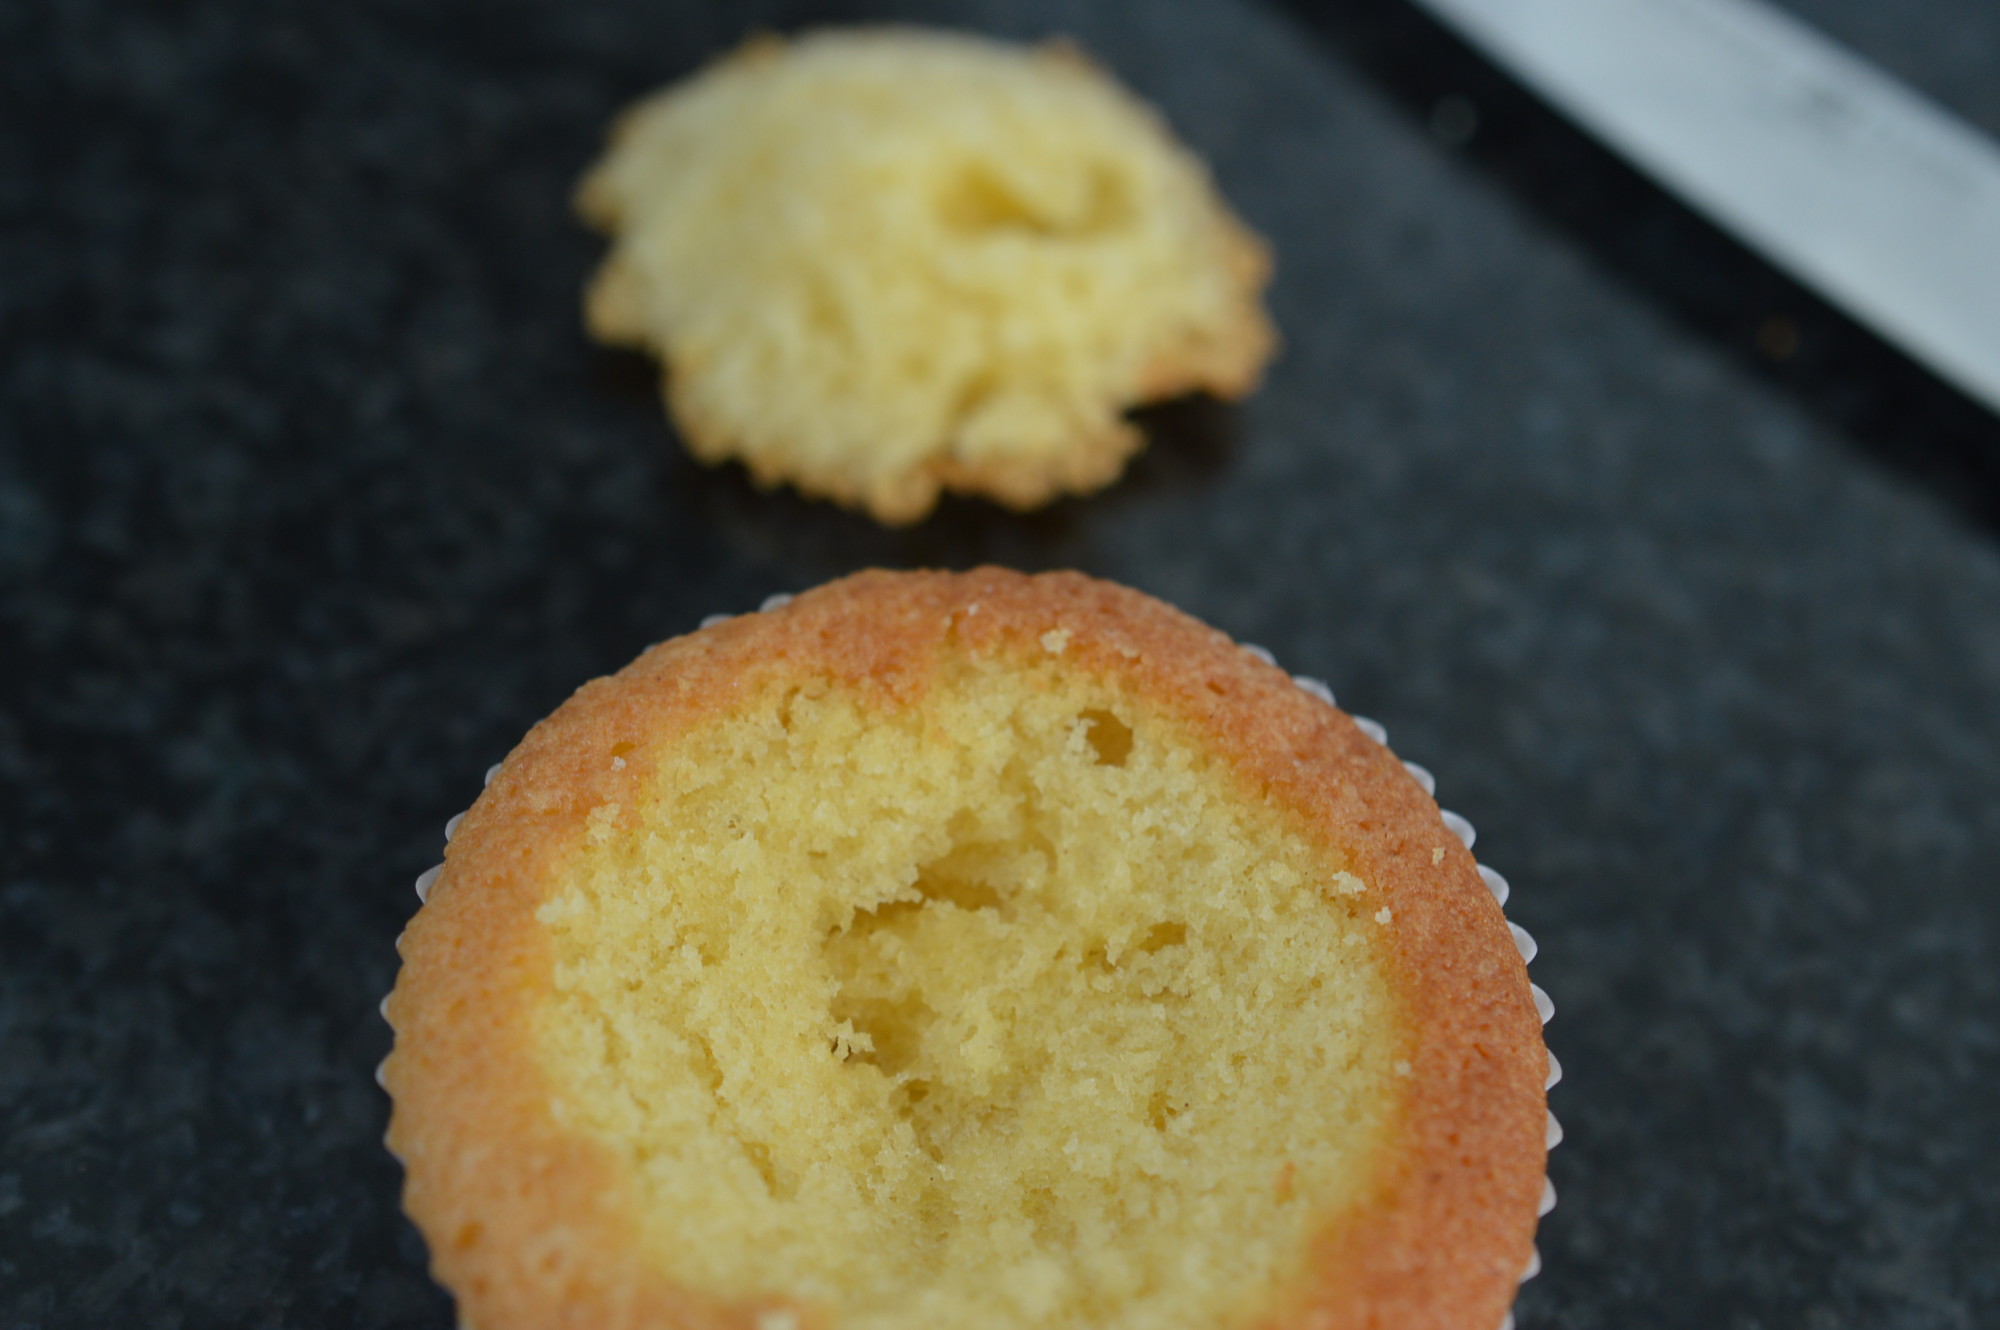
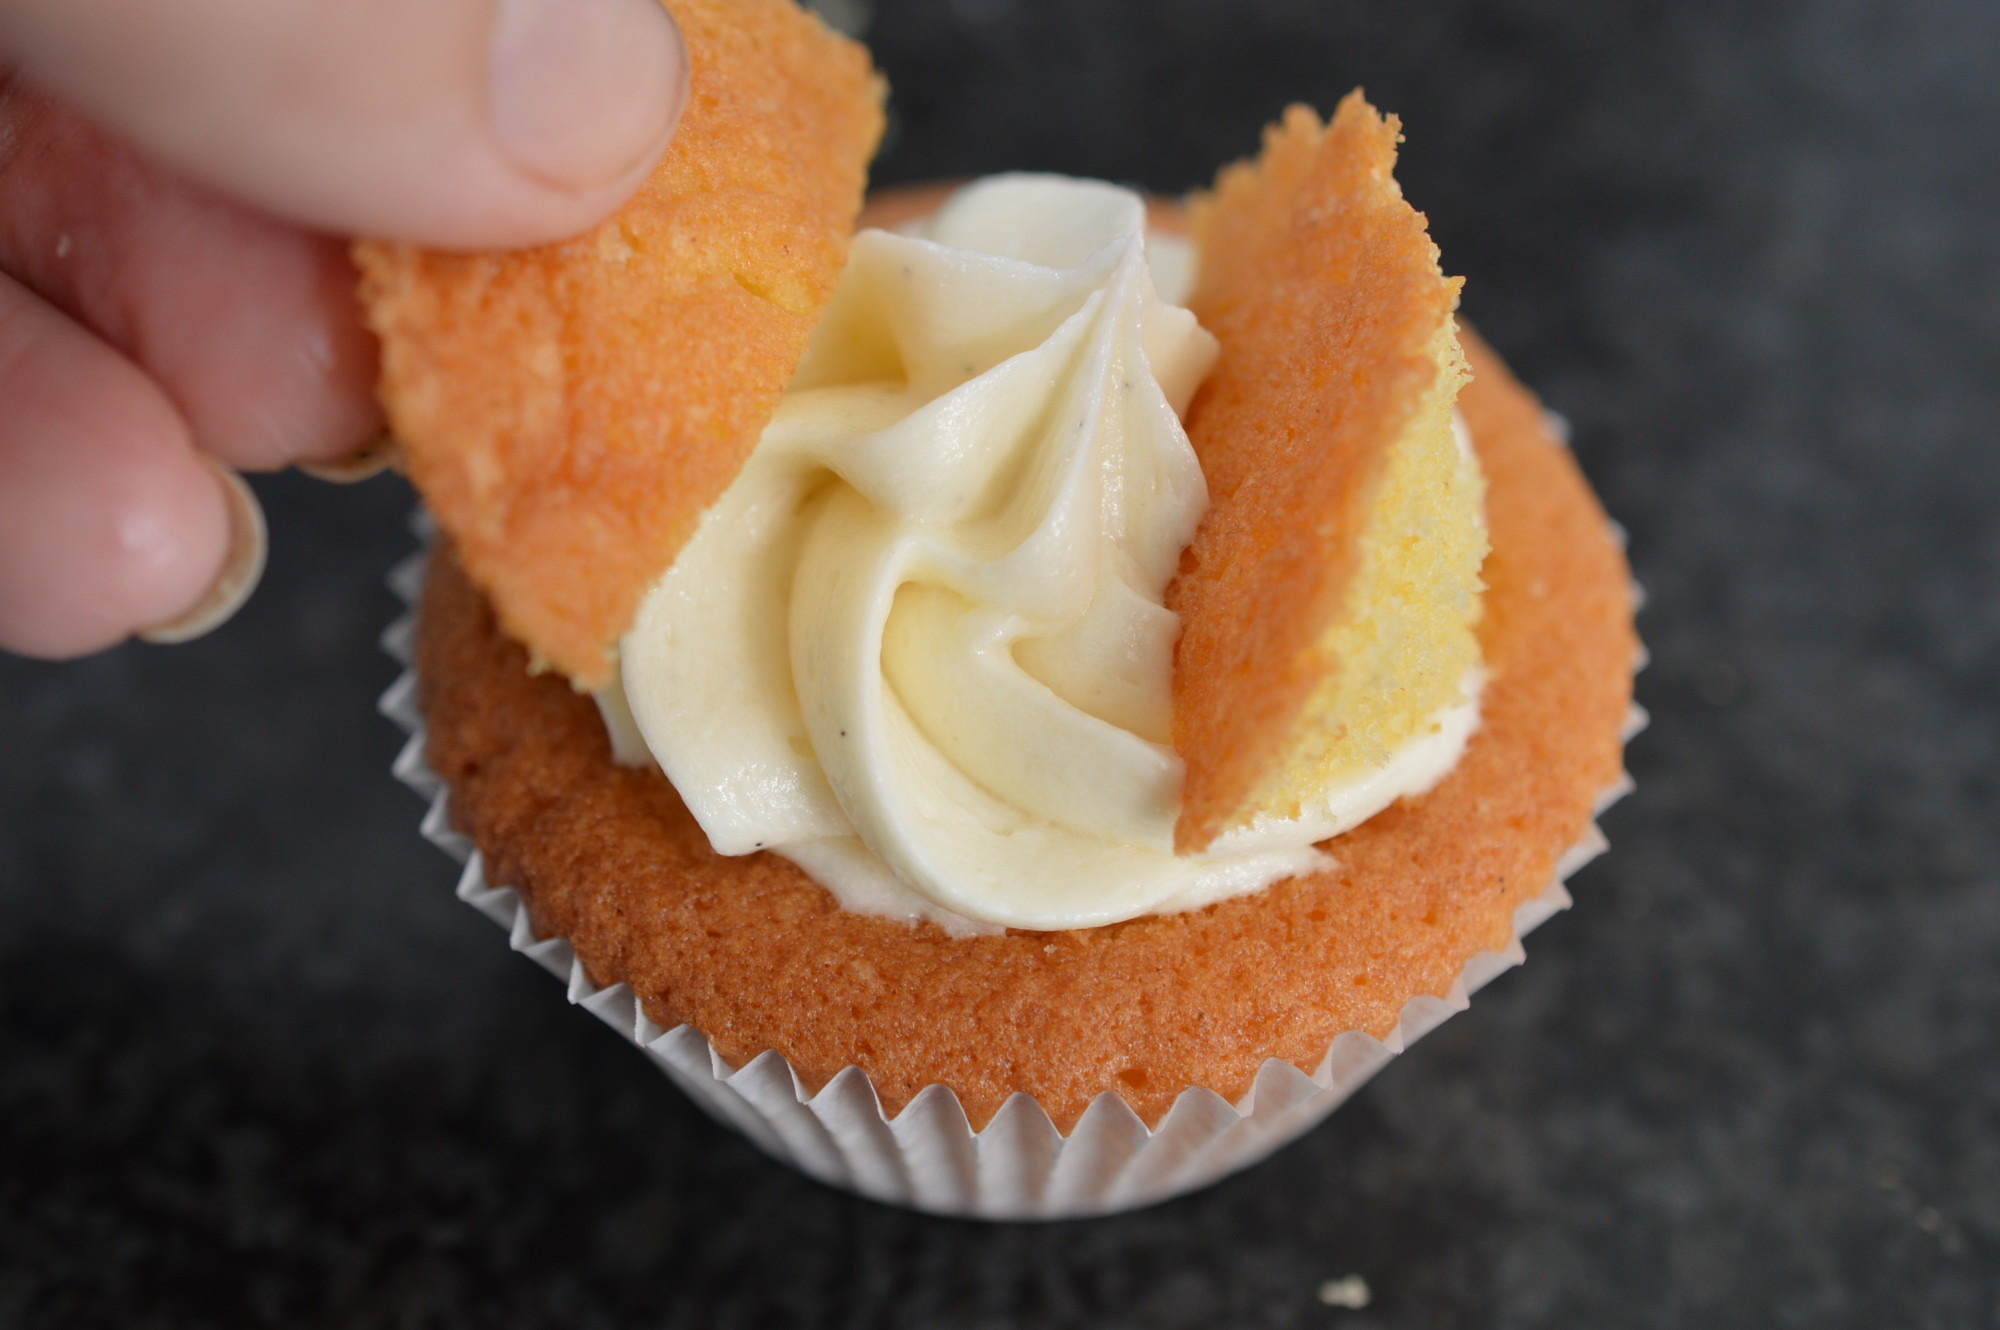
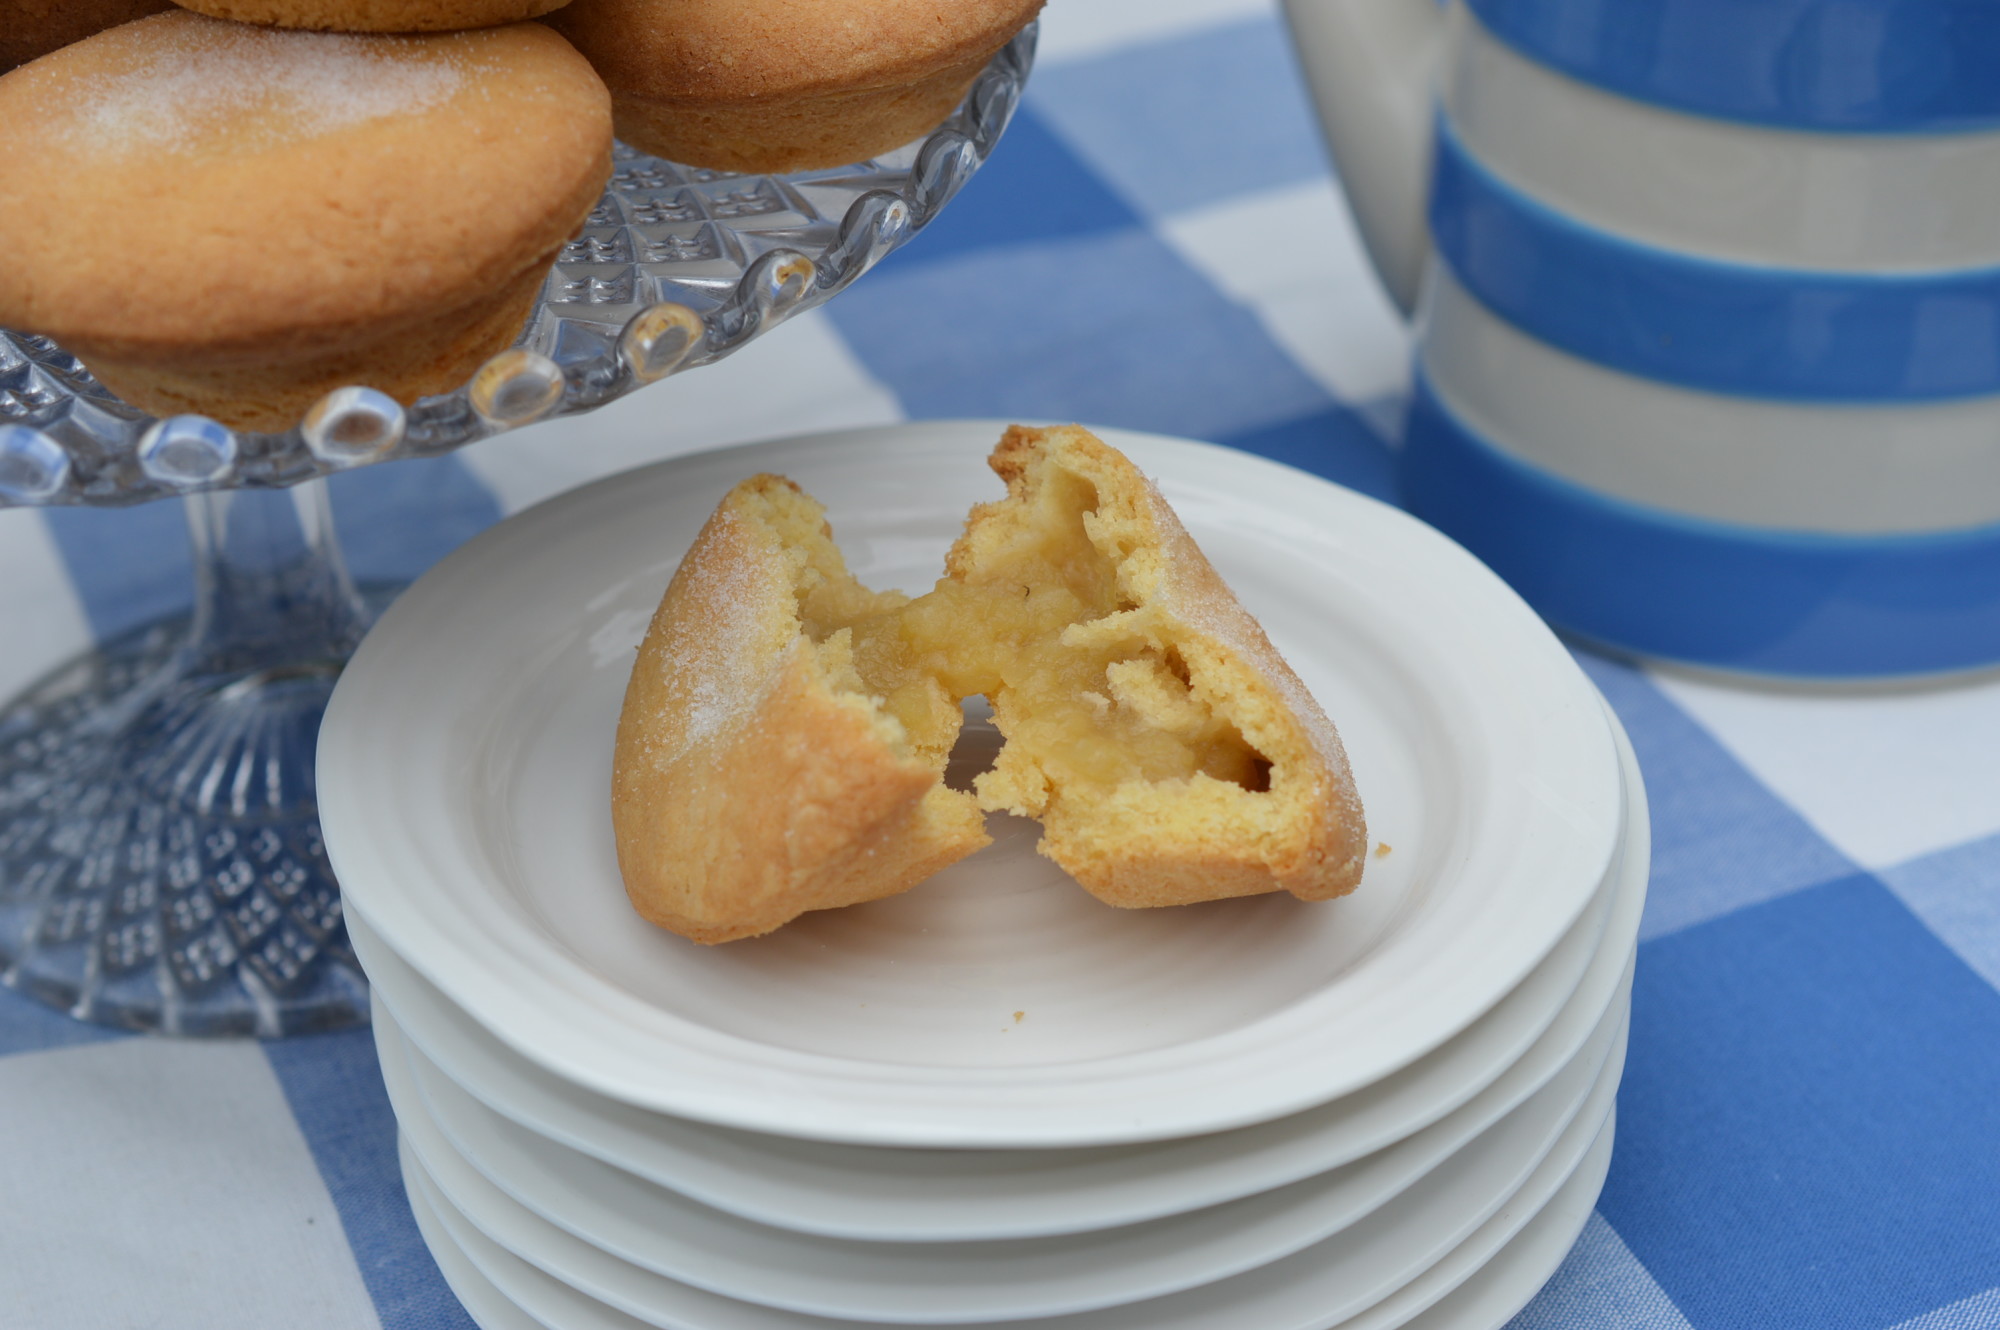
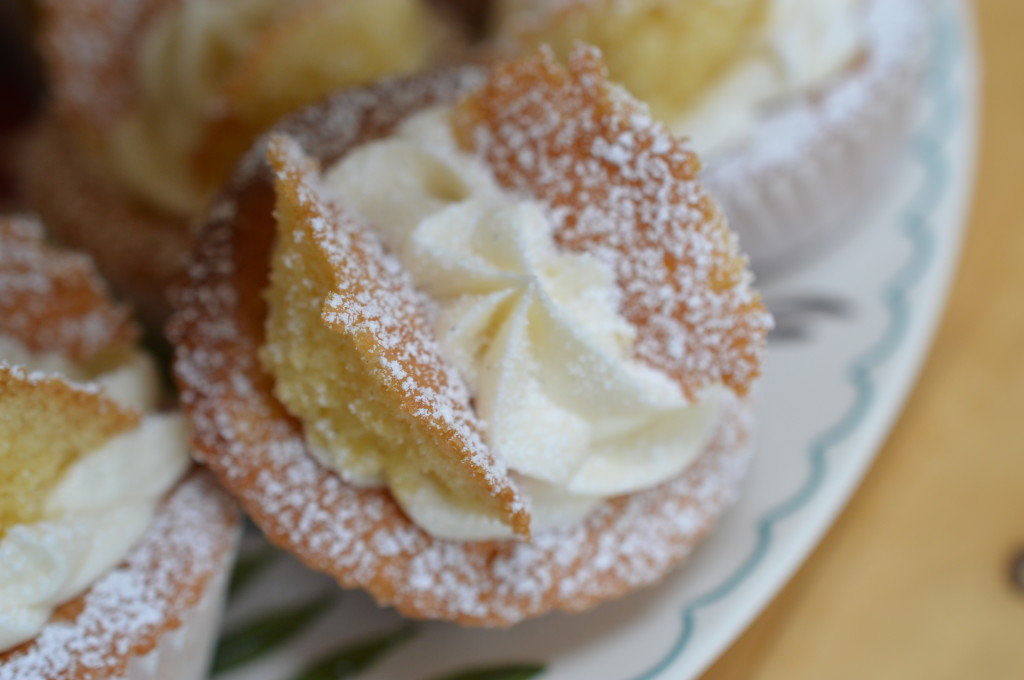
Returning to the cooled fairy cakes, you need to cut a circle out of the top.

DSC_0124

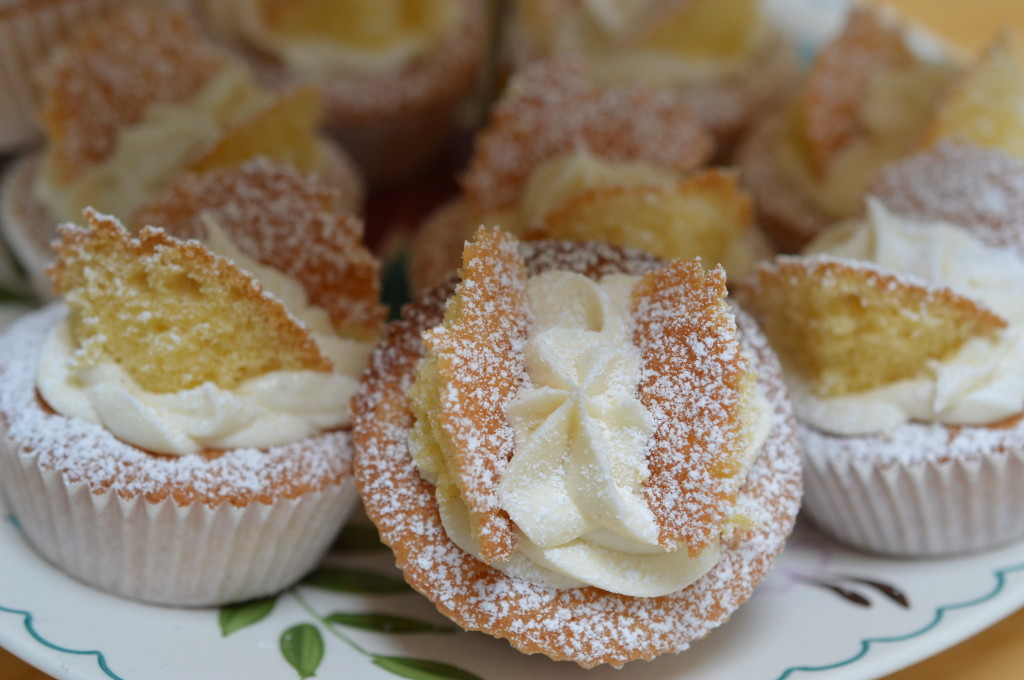
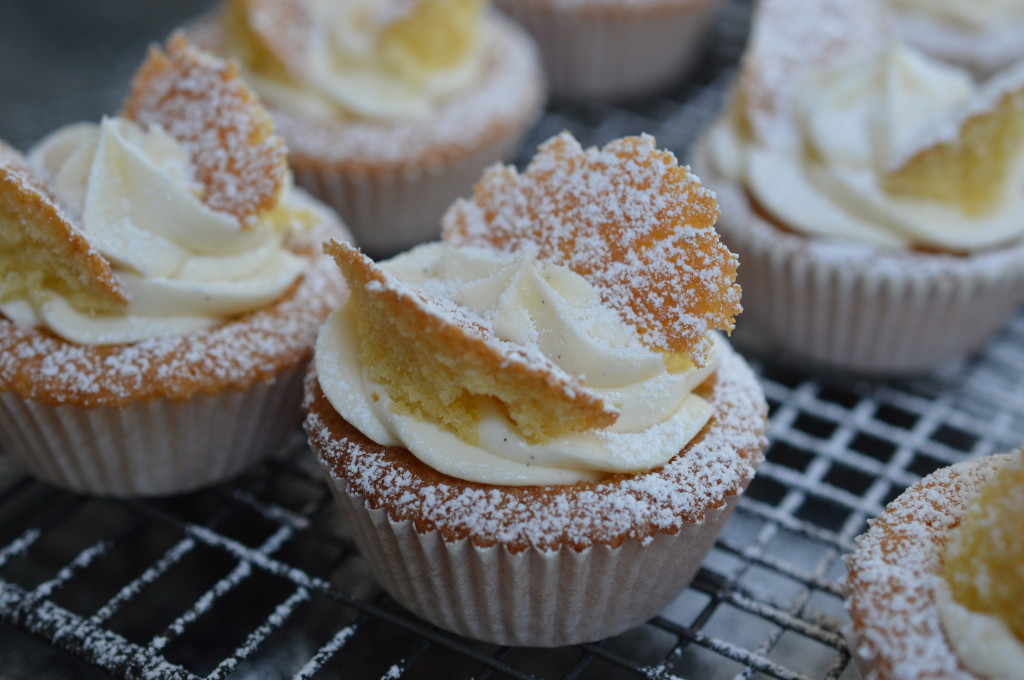
Which leaves room for the buttercream.  Pipe in a swirl.  Or simply spoon in a blob.

Butterfly Cake cut wings

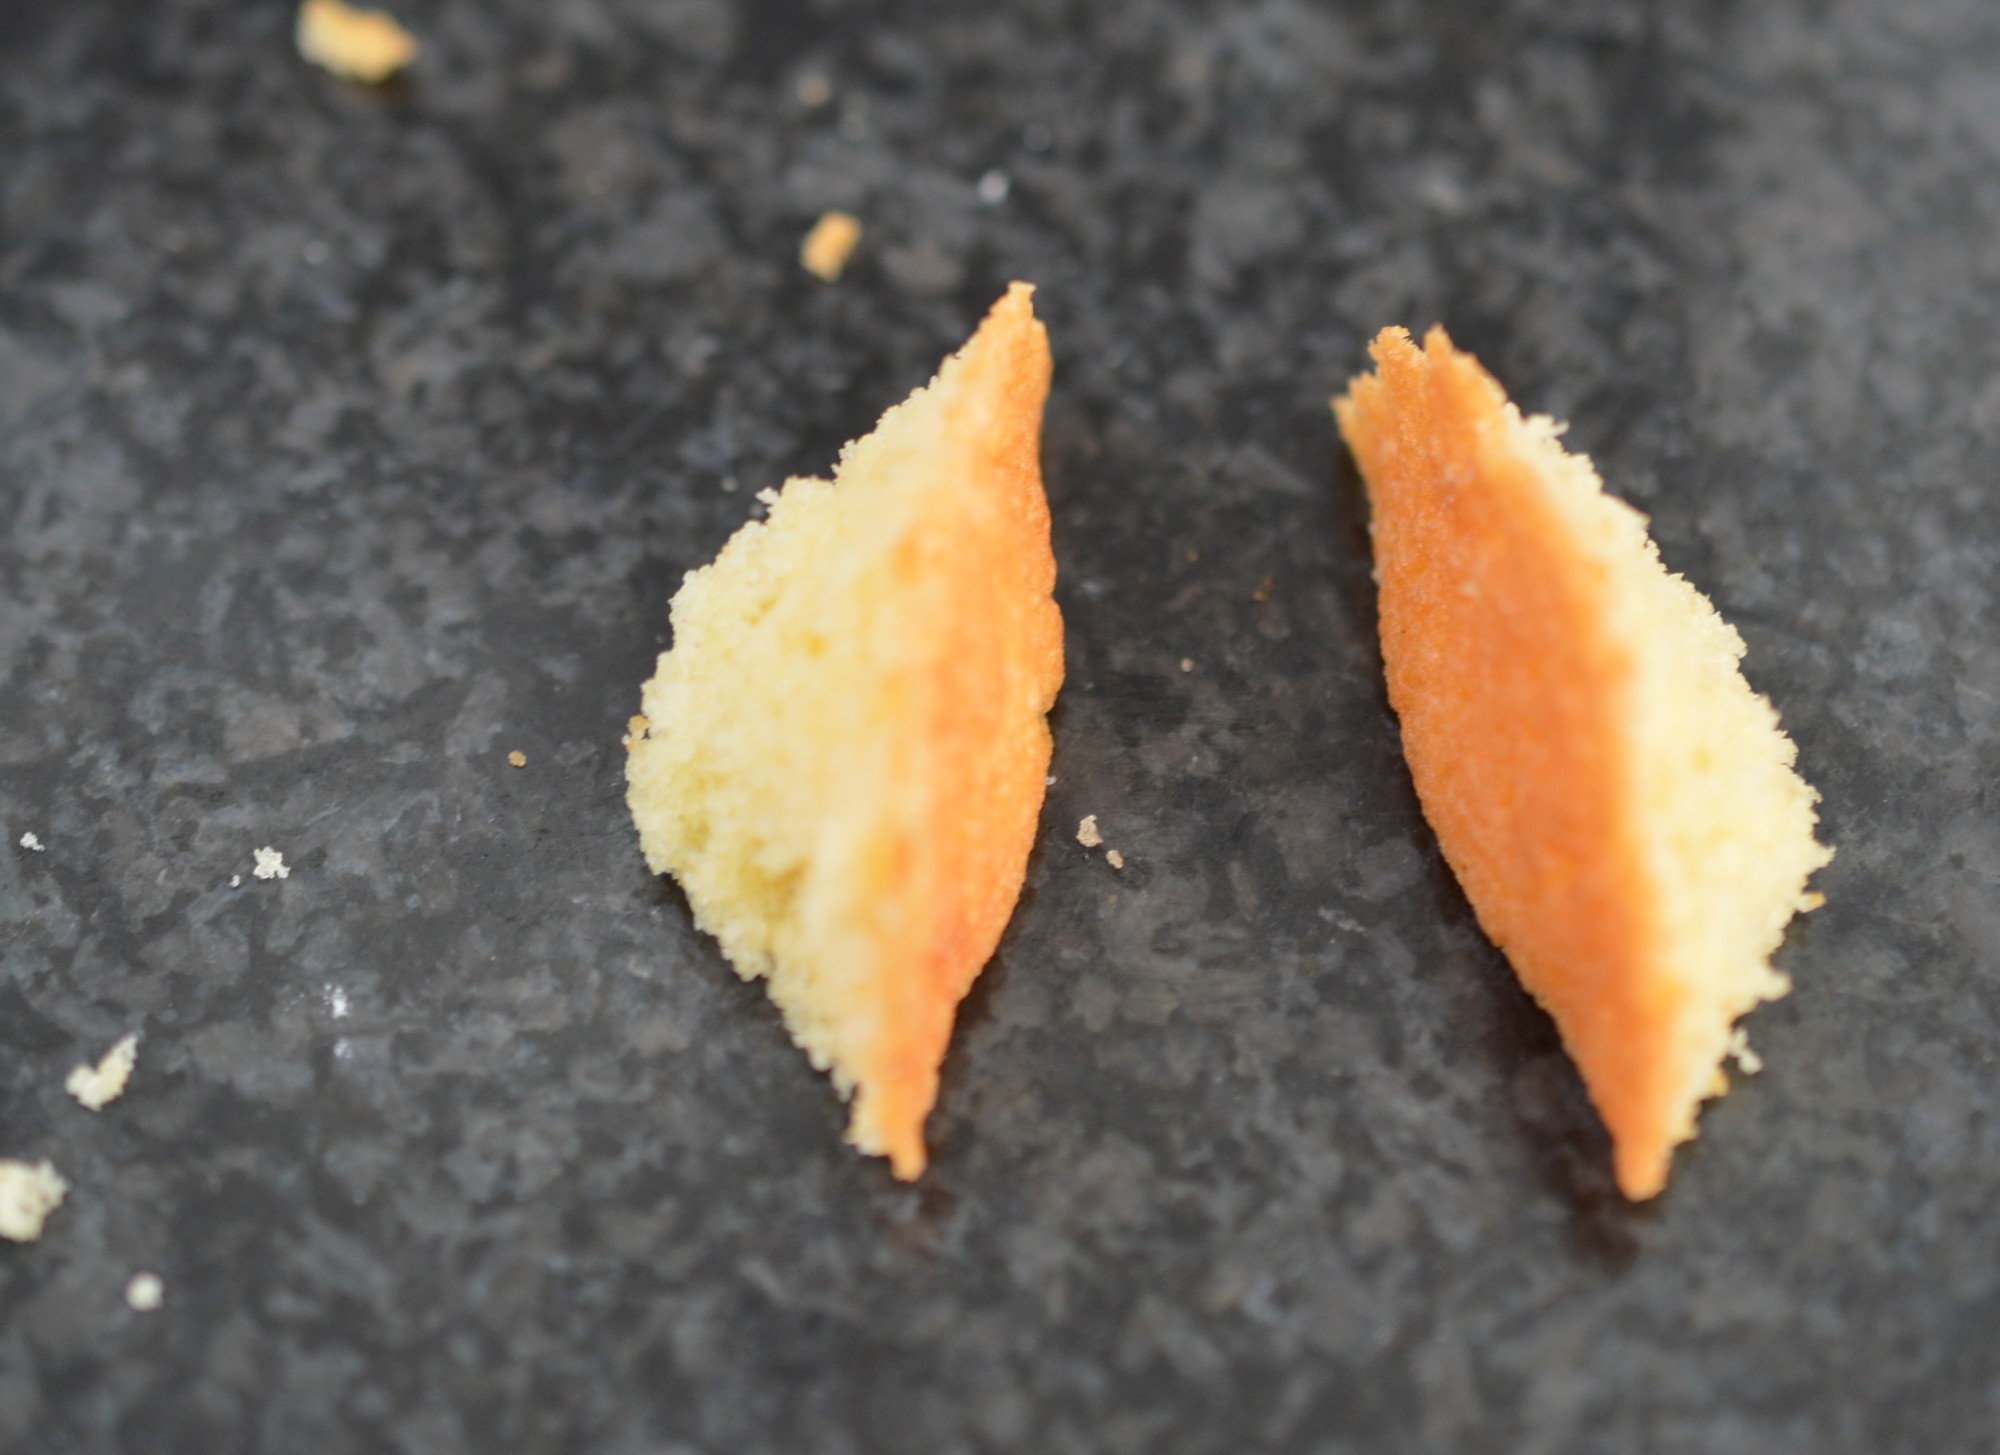
Cut the circle lid in two.

Butterfly Cake wings

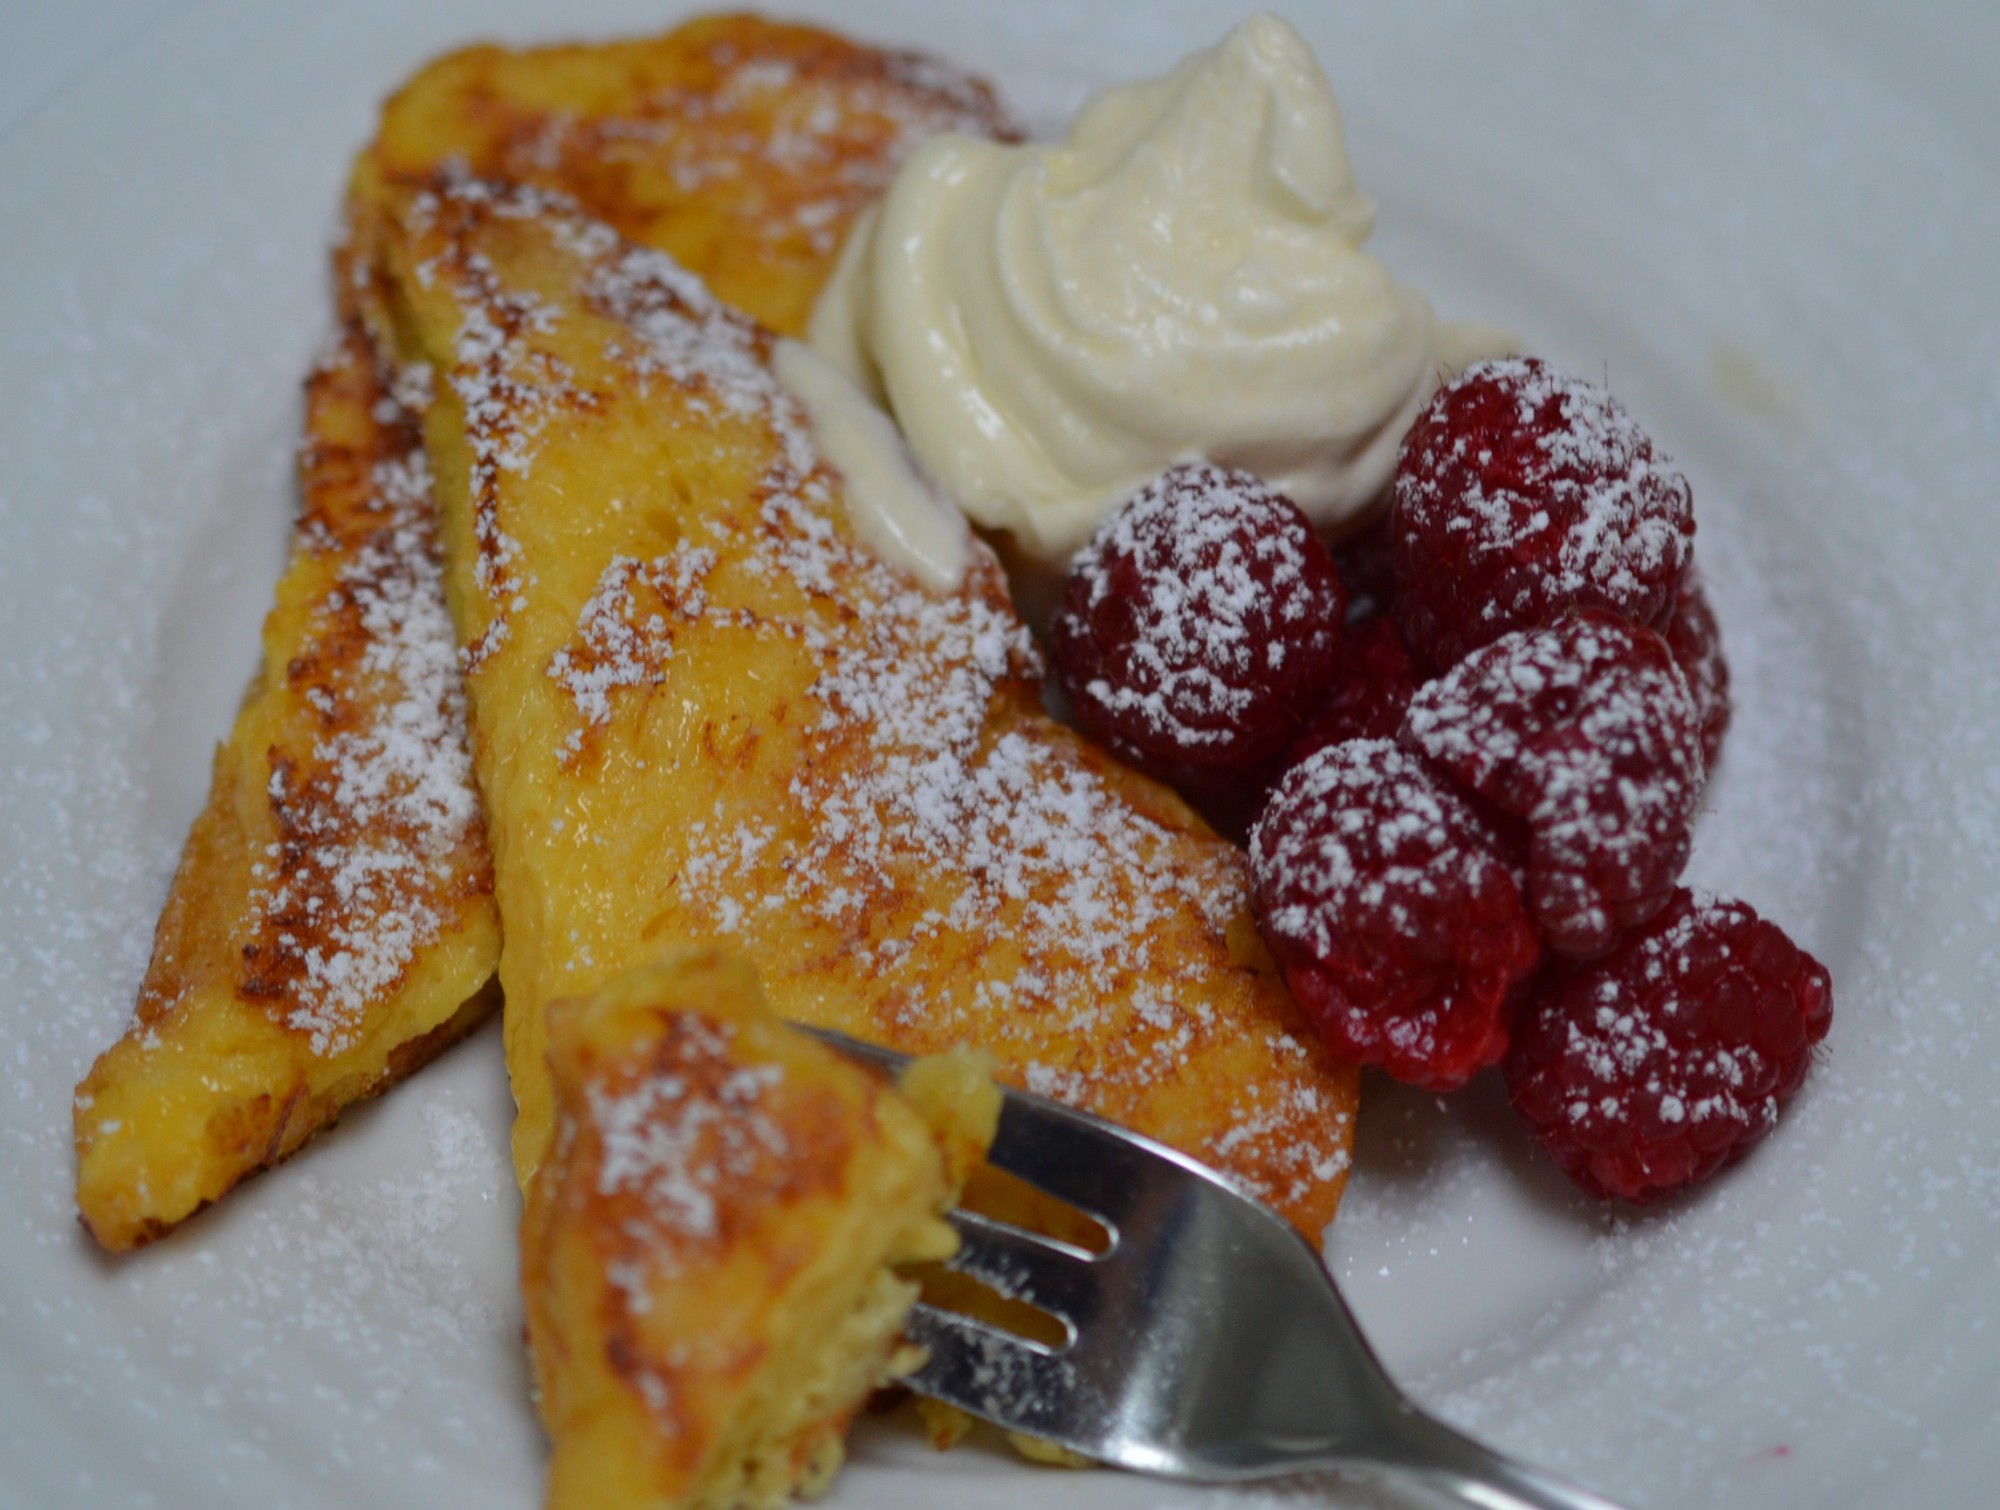
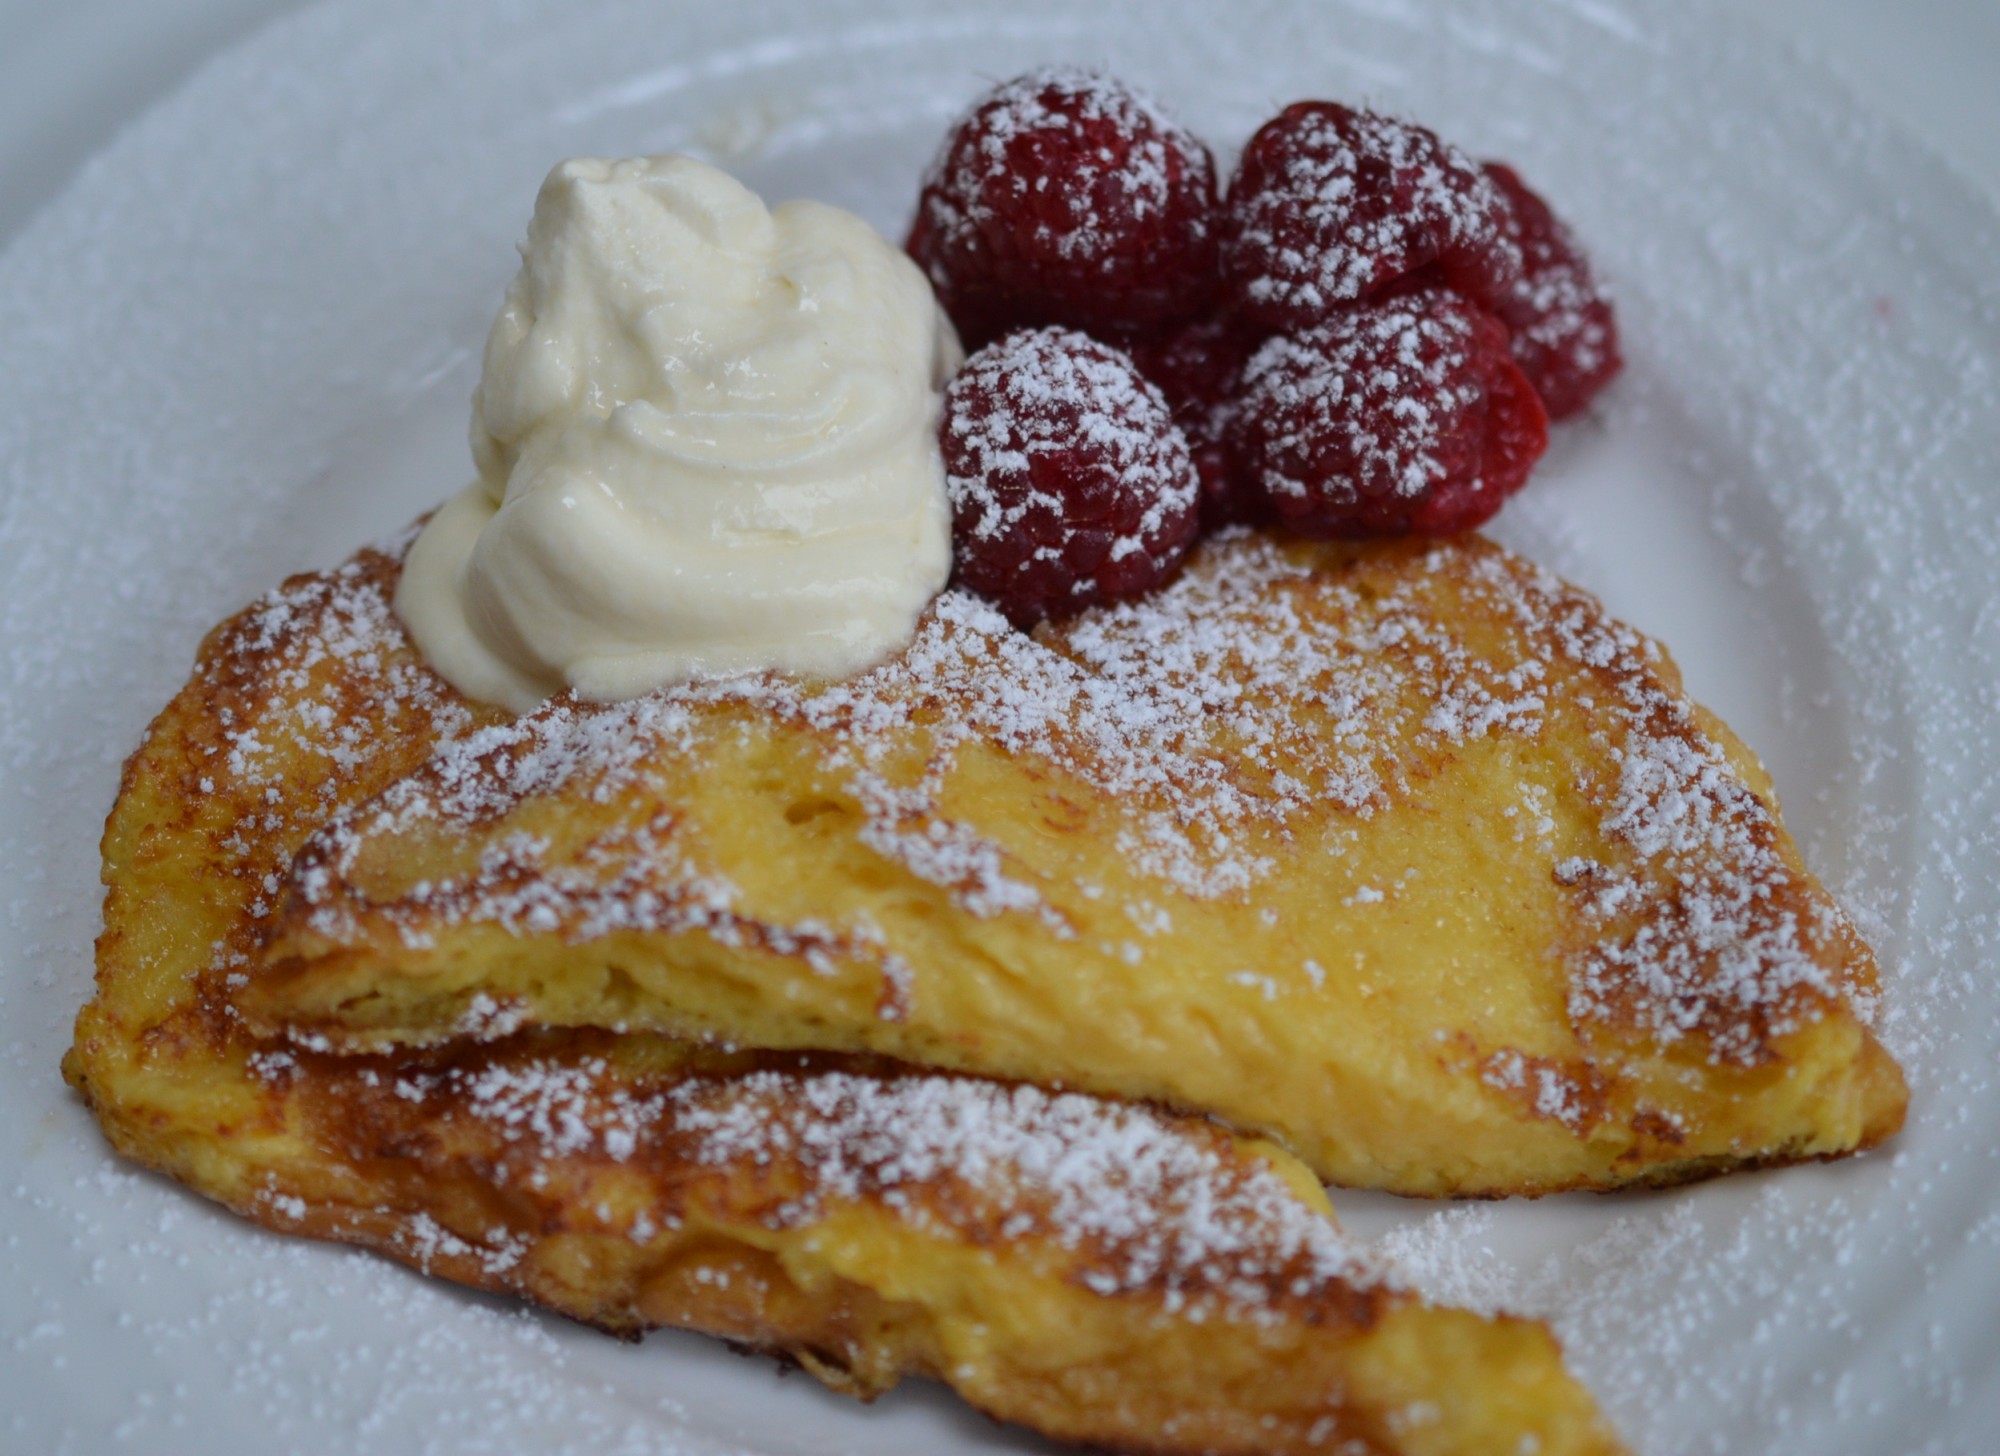
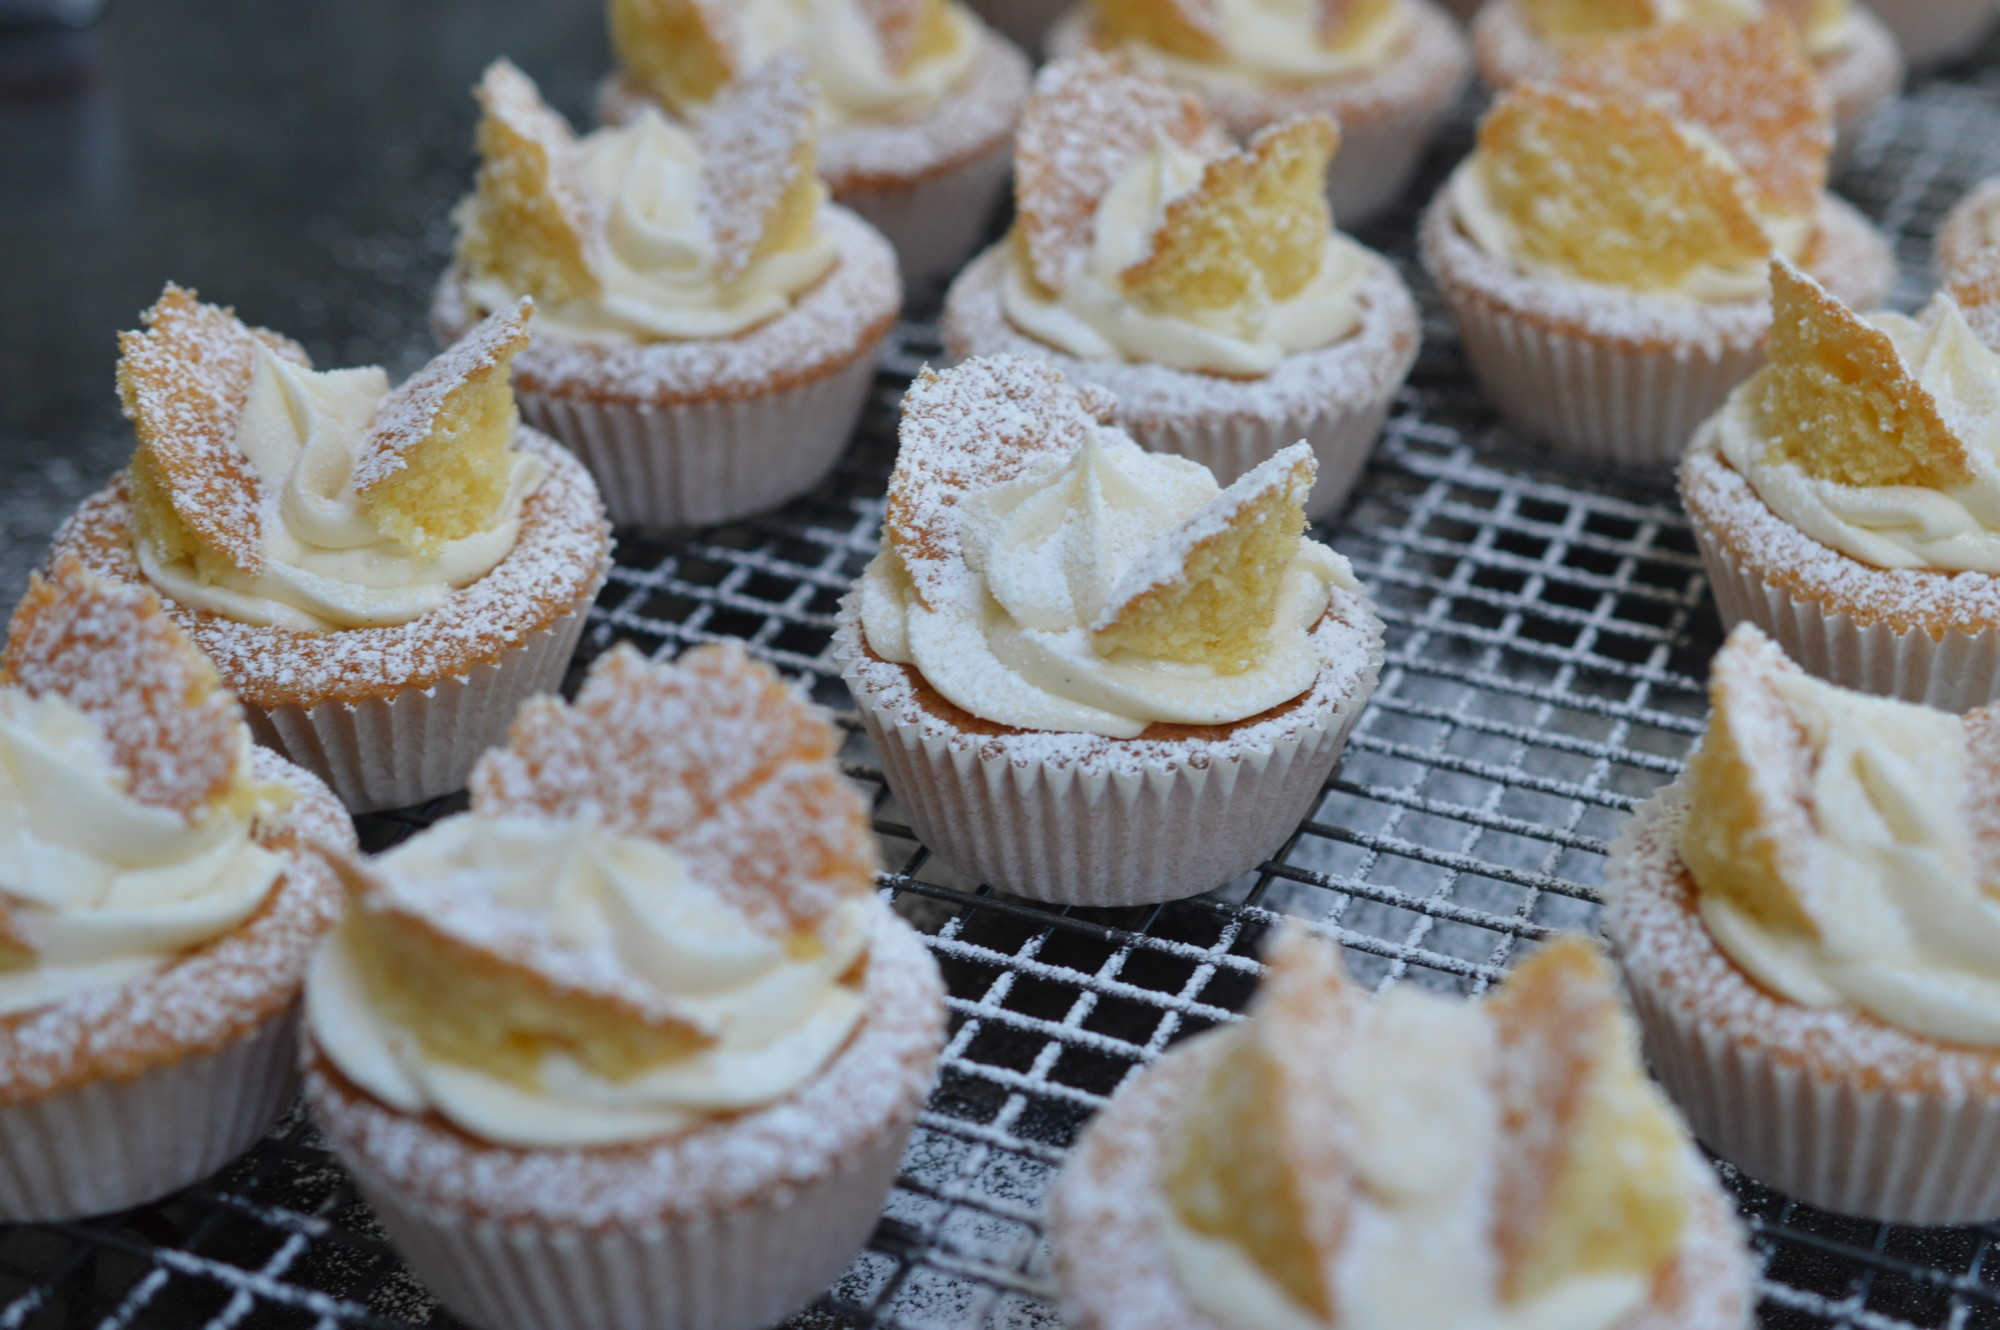
And place like butterfly wings on top of the buttercream.  They are best eaten ‘fresh’, but will store for a couple of days.  Use a non-airtight tin or the moisture in the cakes will have the paper cases peeling away.

Butterfly Cake icing sugar

Just before serving, dust with icing sugar.

Butterfly Cake close-up

Eat.


Butterfly Cake Icing Rack 2Vanilla Butterfly Cakes

Makes 18-24

For the Fairy Cakes:

  • 3 eggs at room temperature, weighed in their shells
  • unsalted butter, softened – preferably the same weight as the eggs.  Default 175g/6oz.
  • caster sugar – preferably the same weight as the eggs.  Default 175g/6oz.
  • Self-raising flour – preferably the same weight as the eggs.  Default 175g/6oz.
  • 2 tablespoons milk
  • 1 tsp vanilla extract

For the English Buttercream:

  • 88g/3oz unsalted butter, softened
  • 175g/6oz icing sugar, sieved
  • 1-2 tablespoons milk
  • 1 tsp vanilla paste (or the seeds of one vanilla pod)

Pre-heat the oven to 200ºC/180ºC Fan/Gas Mark 6/400ºF

Line shallow bun tins with good quality ‘Fairy Cake’ paper cases.

Weigh your eggs, sugar, butter and flour.

‘Cream’ the unsalted butter and caster sugar together until smooth, pale and fluffy.  Then sift over a couple of tablespoons of the flour.

Break the eggs into a jug and add one at a time, beating well between each addition.

Sieve over the rest of the flour and incorporate it into the mix.  Scrape down the sides of the bowl and loosen the mix with a couple of tablespoons of milk, if necessary, to give a ‘dropping consistency’.

Pipe or spoon the mixture into the paper cases.  Bake for around 12-15 minutes until risen and springy to the touch.  Immediately transfer to a cooling rack.

Weigh the butter for the buttercream into the mixer bowl and lightly ‘beat’.  Then sieve over twice the weight of icing sugar.  Beat until super smooth, then add the vanilla paste.  Beat again.  Finally, beat in a little milk.

Cut off the tops of the fairy cakes, leaving a well for the buttercream.  Pipe or spoon into the cavity.  Split the ‘lids’ in two and arrange the ‘wings’ on top of the buttercream.

Just before serving, dust with icing sugar.

Eat.

Print.


Apple Cakes

It’s just as well I am a woman without much blogging ambition because this will not get pinned, Tumblred or tweeted.  Apple Cakes aren’t flashy to look at, but you will love me for sharing this recipe.

Apple Cakes - 20

And, I suppose, that’s where my ambition lies.  I’m imagining you giving these a go and smiling.  They are lovely.  I made these on Saturday morning and they were gone before lunch.

Apple Cakes - 4

Like my Mum’s Lemon Meringue Pie, the recipe comes from my mum’s wonderfully be-splattered 1973 edition of Readers’ Digest ‘The Cookery Year’.  You can tweak it.  A few sultanas and sprinkle of cinnamon are all reasonable additions, but I like it best with the smooth apple sauce filling of the original.

Apple Cakes - 1

For me it all begins with Bramley Apples.  That’s a cooking apple.  The kind that turns to mush when cooked and is unpleasantly sharp if you try to eat one raw.

Until I sacrificed my apple tree for an extension to our kitchen ten years ago I’ve always lived in a house with a Bramley apple tree in the garden.  It’s an old variety, first grown in Mary Ann Brailsford’s garden in Nottinghamshire.   Matthew Bramley bought the cottage in 1846.  In 1856, Henry Merryweather asked if he could take cuttings from the tree and sell the apples.  Matthew obviously gave his permission and the apples still bear the name ‘Bramley’.  And that original tree ..?  Still bearing fruit.

You’ll need about three.

Apple Cakes - 2

Peeled, cored and chopped.  Later in the year, windfall apples are fine.  You just cut out all the bruised bits.

Apple Cakes - 3

Two tablespoons of light brown muscovado sugar.

Apple Cakes - 5

Then, over a gentle heat, soften to a purée.  Once smooth, it needs to cool before you can use it to fill the Apple Cakes.

Apple Cakes - 6

It’s an old fashioned recipe and asks for Plain Flour, Bicarbonate of Soda and Cream of Tartar instead of Self Raising Flour.  I rather like that about it.  Sift everything together, including the salt, to get it all evenly mixed.

Incidentally, if you bake infrequently you might want to consider using Plain Flour and adding your own raising agent as a matter of course – just like Grandma did.  Baking Powder works well for anything that doesn’t need a ‘fluffy’ rise (like biscuits) but if you want an airy sponge it’s one part Bicarbonate of Soda to two parts Cream of Tartar.

Apple Cakes - 7

The original recipe calls for margarine, but I can’t bring myself to do it.  Old fashioned, maybe, but I’m still a creature of my time.

Unsalted butter, cut into smallish cubes.  Then, rub in.

What you’re actually doing by ‘rubbing in’ is coating tiny bits of flour with fat – before you add any liquid.  Think of it like a raincoat!  It’s to stop liquid penetrating the flour.  Liquid + flour =  gluten proteins.  And gluten proteins give you tough pastry.  Roughly!!

Or you can pulse in a food processor.  Whichever method you choose – you are looking for something that resembles ‘fine breadcrumbs’.

Apple Cakes - 8

Add caster sugar and mix.

Apple Cakes - 9

Then one beaten egg – and mix with a round bladed knife.

Apple Cakes - 10

It comes together into a ball of dough – ish.  The last bit you’ll need to squish together with your hand.  Since I’ve still not managed to do that while holding a camera …

Apple Cakes - 11

The original recipe suggests you roll out the dough between sheets of ‘waxed paper’ as it crumbles easily.  Oddly, considering I have a fondness for rolling pastry between sheets of cling film, I don’t.  Until today I haven’t looked closely at the recipe and my mum never did so it never occurred to me.  I expect she’s have thought it a waste of waxed paper ..

Apple Cakes - 12

Grease “16 patty tins”.  I’m quoting.  I haven’t heard anyone call a shallow bun tin a ‘patty tin’ for years.  16 is a bit annoying, I know, when a standard baking tray is 12.

Cut out 32 circles with a 2½ inch (7cm) cutter.  Knead the trimmings back together and continue cutting until you have 32.  Tops and bottoms are the same size.  Use a palette knife to transfer 16 to the prepared tins.

Apple Cakes - 13

And add a generous teaspoon of the cold apple purée.

Apple Cakes - 14

Then cover with the ‘lid’.  It’s self sealing.  You don’t have to do anything but lay the remaining 16 circles over the top.

Apple Cakes - 15

Sprinkle with caster sugar.

Apple Cakes - 16

Want a peek mid bake?

Bake in a pre-heated oven at Gas Mark 6/400ºF/200ºC for 15 minutes.  That’s a moderately hot oven in ‘ye olde speake’ – so I bake on the fourth set of runners in the Aga Roasting Oven for a reduced 10 minutes cooking time.

Apple Cakes - 18

Leave to cool for a couple of minutes before easing out with a palette knife.

Apple Cakes - 17

Leave to cool on a wire rack.

Apple Cakes - 19

The pressed glass cake stand is optional, but it feels right.  What is important is to eat them ‘fresh’ as they go stale quickly.

Apple Cakes - 21

Eat.

Apple Cakes - 20Apple CakesMakes 16

(Recipe taken from the 1973 edition of Readers’ Digest ‘The Cookery Year’)

  • 1lb/450g cooking apples
  • 2 tablespoon of soft brown sugar
  • 8oz/225g plain flour
  • 2 level teaspoons of cream of tartar
  • 1 level teaspoon of bicarbonate of soda
  • Pinch of salt
  • 40z/115g unsalted butter
  • 4oz/115g caster sugar
  • 1 egg
  • Caster sugar for dusting

Peel and core the cooking apples and place in a saucepan with 2 tablespoons of soft brown sugar.  Cook over a low heat until you have a smooth purée and leave to cool.

Pre-heat your oven to Gas Mark 6/400ºF/200ºC.

Grease your ‘patty tins’ – that’s a shallow bun tin – with melted butter.

Sift together the flour, cream of tartar, bicarbonate of soda and salt.  Cut the butter into pieces and rub into the flour until you have something approaching fine breadcrumbs.

Stir in the sugar.

Using a blunt knife, mix in the beaten egg to form a soft dough.  Knead lightly and roll out on a floured surface to an eighth of an inch (there is no symbol for that!)/3mm.  Cut out 32 2½”/7cm circles.

Lift the bases into the greased tins and add a generous teaspoon of the apple purée.  Place the remaining 16 circles on top.  It’s self sealing so you have to do nothing but lay them over the purée-filled bases.

Sprinkle with caster sugar and bake for 15 minutes.  (Aga – Roasting Oven – fourth set of runners for a reduced 10 minutes.)

Leave to cool briefly before, using a palette knife, removing to a wire rack.  Serve on the day you bake.

Eat.

Print.