Pain Perdu

Or ‘Eggy Bread’, Gypsy Toast, French Toast .. take your pick.  There are so many names for eggy soaked bread which is then fried in butter.  The French ‘Pain Perdu’ literally translates as ‘Lost Bread’ which has exactly the right feel for Brioche that’s been drowned in a milk/egg mix.

Pain Perdu 7

There are English recipes for this going back to the fifteenth century.  It may have been conceived as a way of using up stale bread, but this isn’t what’s happening here.  This was last night’s ‘sinful-and-entirely-unnecessary supper’ and I bought a Brioche Vendéenne deliberately.  That’s the Brioche which has the protected geographical European status.

Pain Perdu 17

It began with a good deed.  I decided to pick Liddy up from work and there they were …

Raspberries.

Reduced.  Give-away reduced.  It would have been criminal not to have picked them up.  Then, I spent the money I’d saved on the raspberries I hadn’t intended to buy on the Brioche I wouldn’t have needed if I hadn’t bought the raspberries.  There’s logic there somewhere.

Everything else I had.

Pain Perdu 16

There were five of us eating this, so I used 3 eggs and a 150ml/5fl oz of full-fat milk.  Then a squirt of runny honey.

Pain Perdu 15

Whisk everything together.

Pain Perdu 14

Lay out slices of brioche in a dish.  Fit them in snuggly.  Then pour the eggy mix over the top.

Pain Perdu 13

Think ‘lost’.  The brioche needs to be absolutely sodden.  Slightly stale bread holds together better than fresh, but I persevered.  Give everything a good prod.  Let is soak up all that lovely eggy goodness.

Pain Perdu 12

Then it’s a knob of salted butter in a non-stick frying pan.

Pain Perdu 11

And fry over a medium heat.  This is best straight from the frying pan ..

Pain Perdu 10

It’s less than 2 minutes a side.  Have a peak.  When the underside is golden brown flip it over with a spatula.

Pain Perdu 8

Meanwhile, lightly whisk some double cream.  There’s no point holding back now.

Pain Perdu 9

It’s traditional to cut across the bias.  If you want to eat together, this will keep warm in a low oven.

Pain Perdu 2

Then it’s onto a plate.

Pain Perdu 3

A few of those raspberries, a dollop of double cream and a dusting of icing sugar.

Eat.

Pain Perdu 5Pain Perdu

Serves 5

  • 3 eggs
  • 150ml/5 fl oz full-fat milk
  • 1 tablespoon of runny honey
  • 5 x 1.5cm/½” slices of brioche
  • 5 tablespoons of butter
  • To Serve: Double Cream, Fresh Raspberries and Icing Sugar

Break 3 eggs into a bowl and add 150ml/5 fl oz full-fat milk.  Then a squeeze of runny honey to sweeten.  Whisk together.

Lay your brioche slices in a dish, fitting them together snugly.  Pour over the eggy/milk mix.  Flip and prod to ensure the brioche has sucked up every last drop and is entirely sodden.

Add a tablespoon of butter to a small non-stick frying pan.  Once the butter is bubbling, add one of the soaked brioche slices.  Fry until the underside is golden brown.  This will take less than 2 minutes.  Flip and repeat.

Serve that slice immediately – with fresh raspberries and a dollop of lightly whipped double cream.  Or keep the Pain Perdu warm in a low oven until you have finished frying all the slices.  A dusting of icing sugar makes everything perfect.

Eat.

Print.


Vietnamese Style Fresh Spring Rolls with Peanut Dipping Sauce

Fresh Vietnamese style spring rolls scream summer-time to me and the late May Bank Holiday weekend feels like the start of summer.  This year is somewhat blighted by exams, but that’s all the more reason to take pleasure in food.

They’re fiddly to make, so they’re the kind of thing to make when you feel like pottering in the kitchen.  Don’t make it a chore.  I put a bottle of dry white wine in the fridge and turned on my latest audible.co.uk purchase.

vietnemese style fresh spring rolls 30

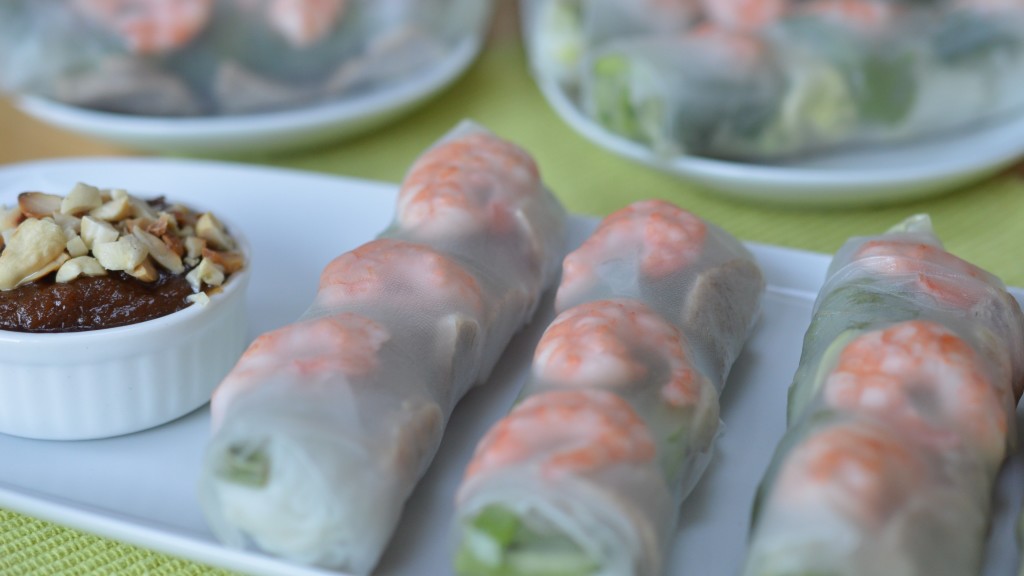
Without the peanut based dipping sauce they’re not even a guilty pleasure and two of my brood, quite genuinely, prefer them that way.

Vietnemese style fresh spring rolls 1

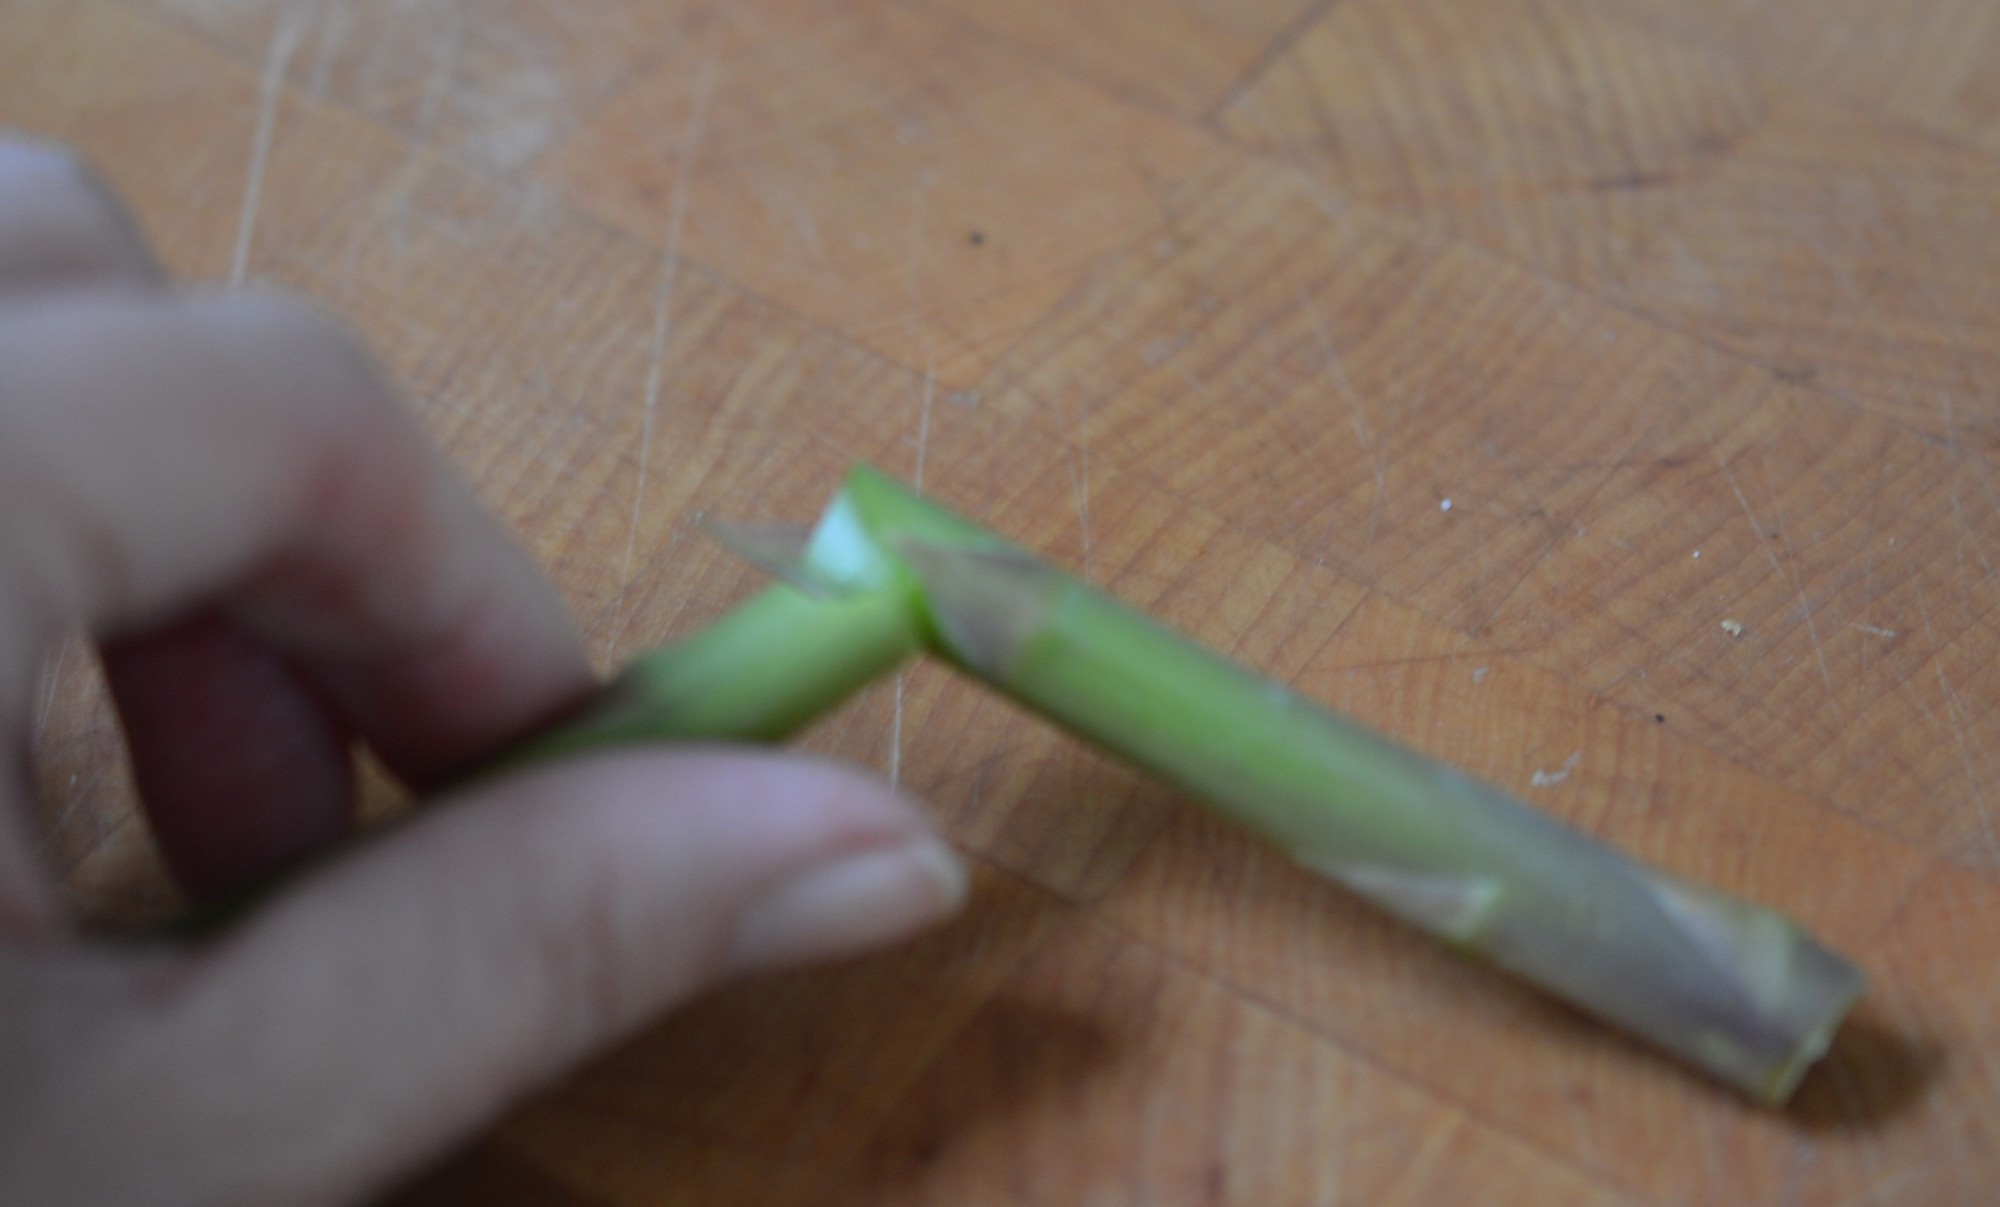
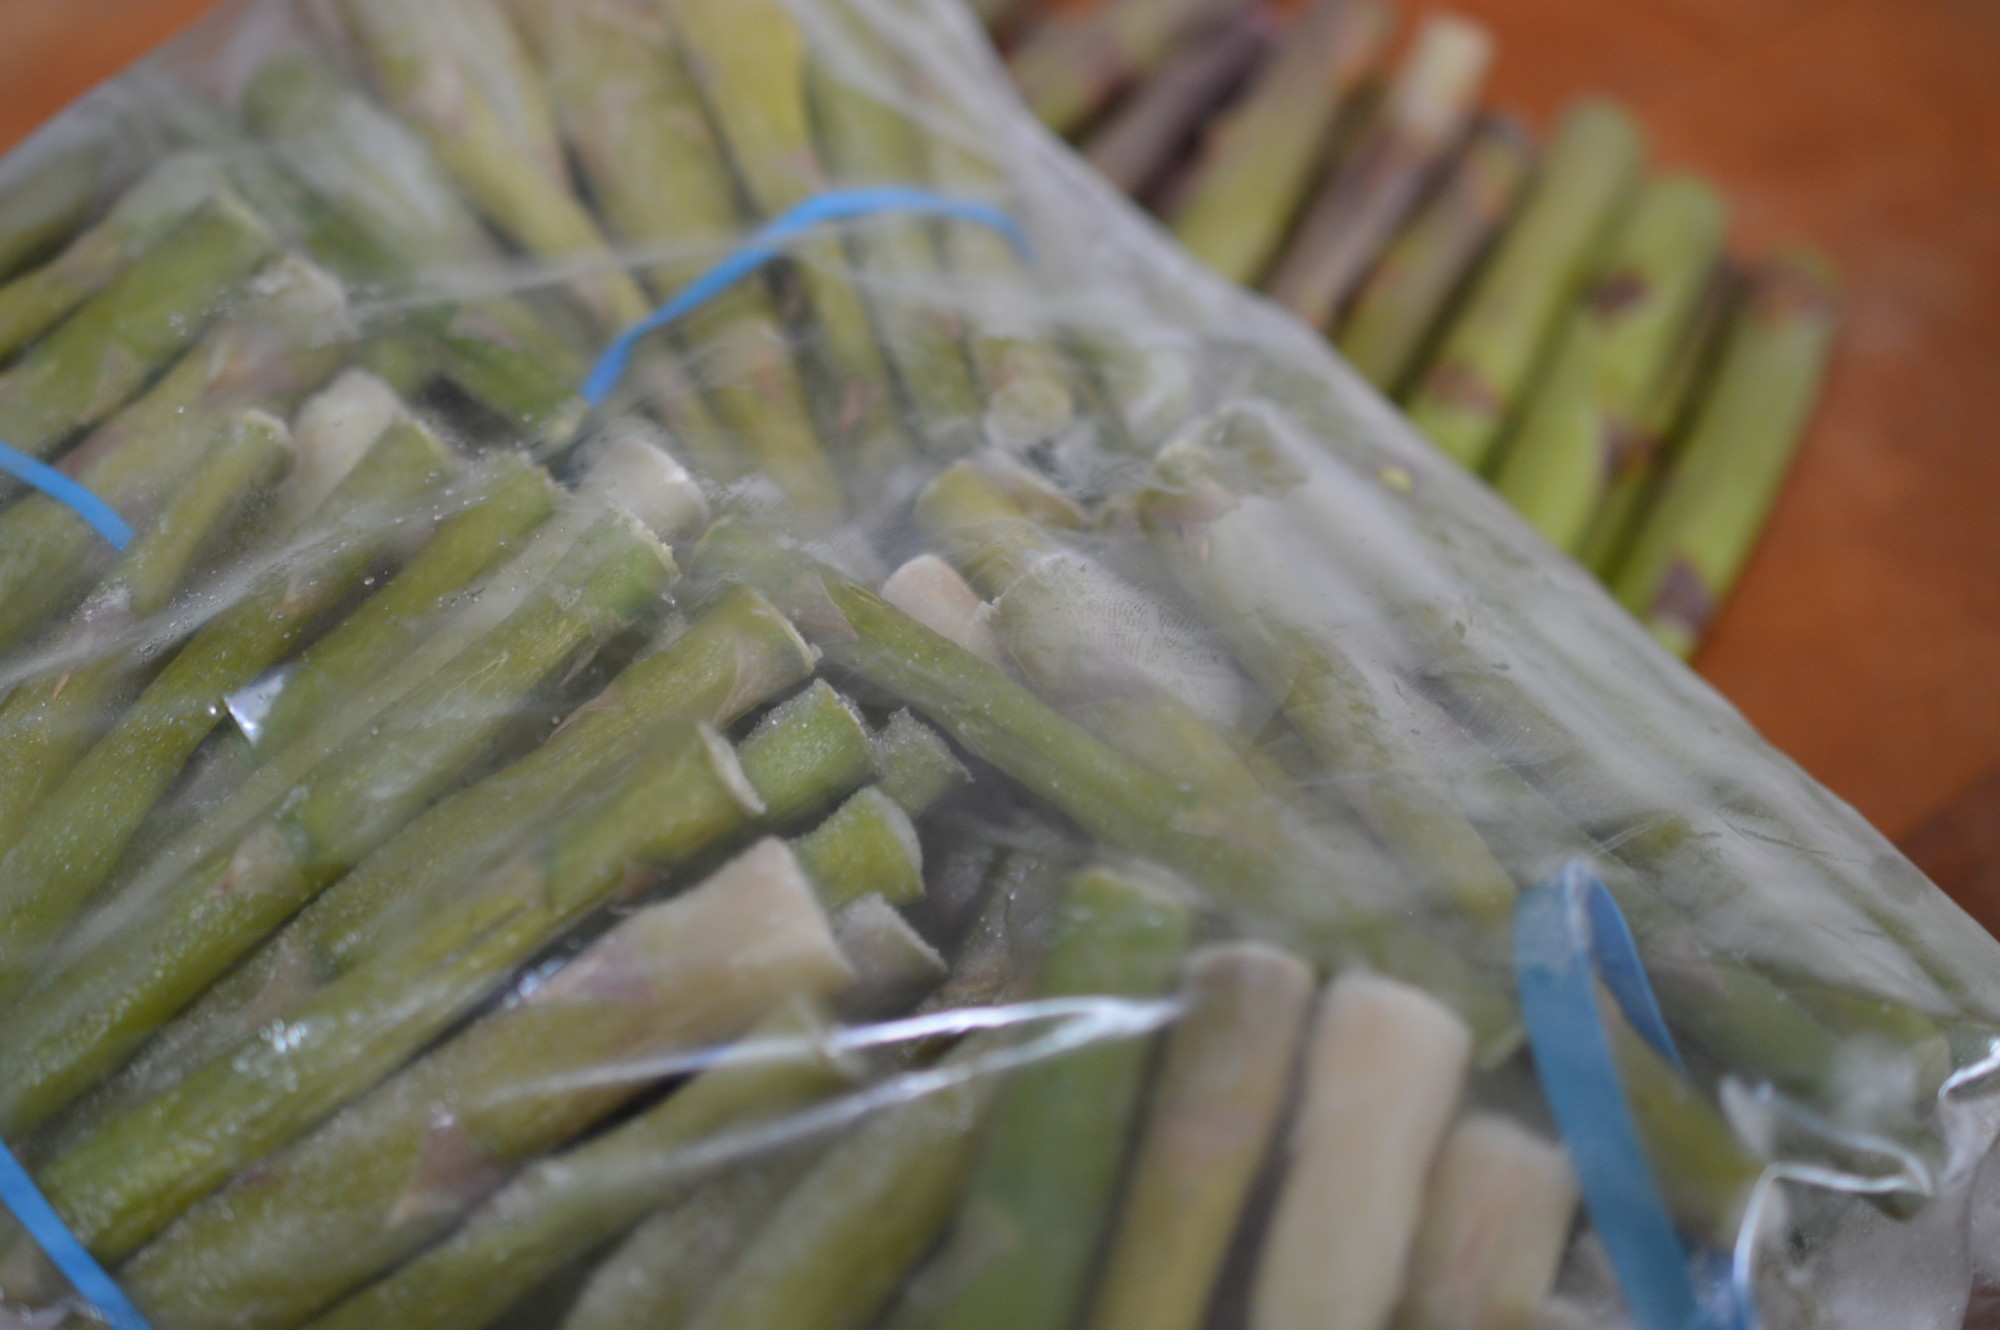
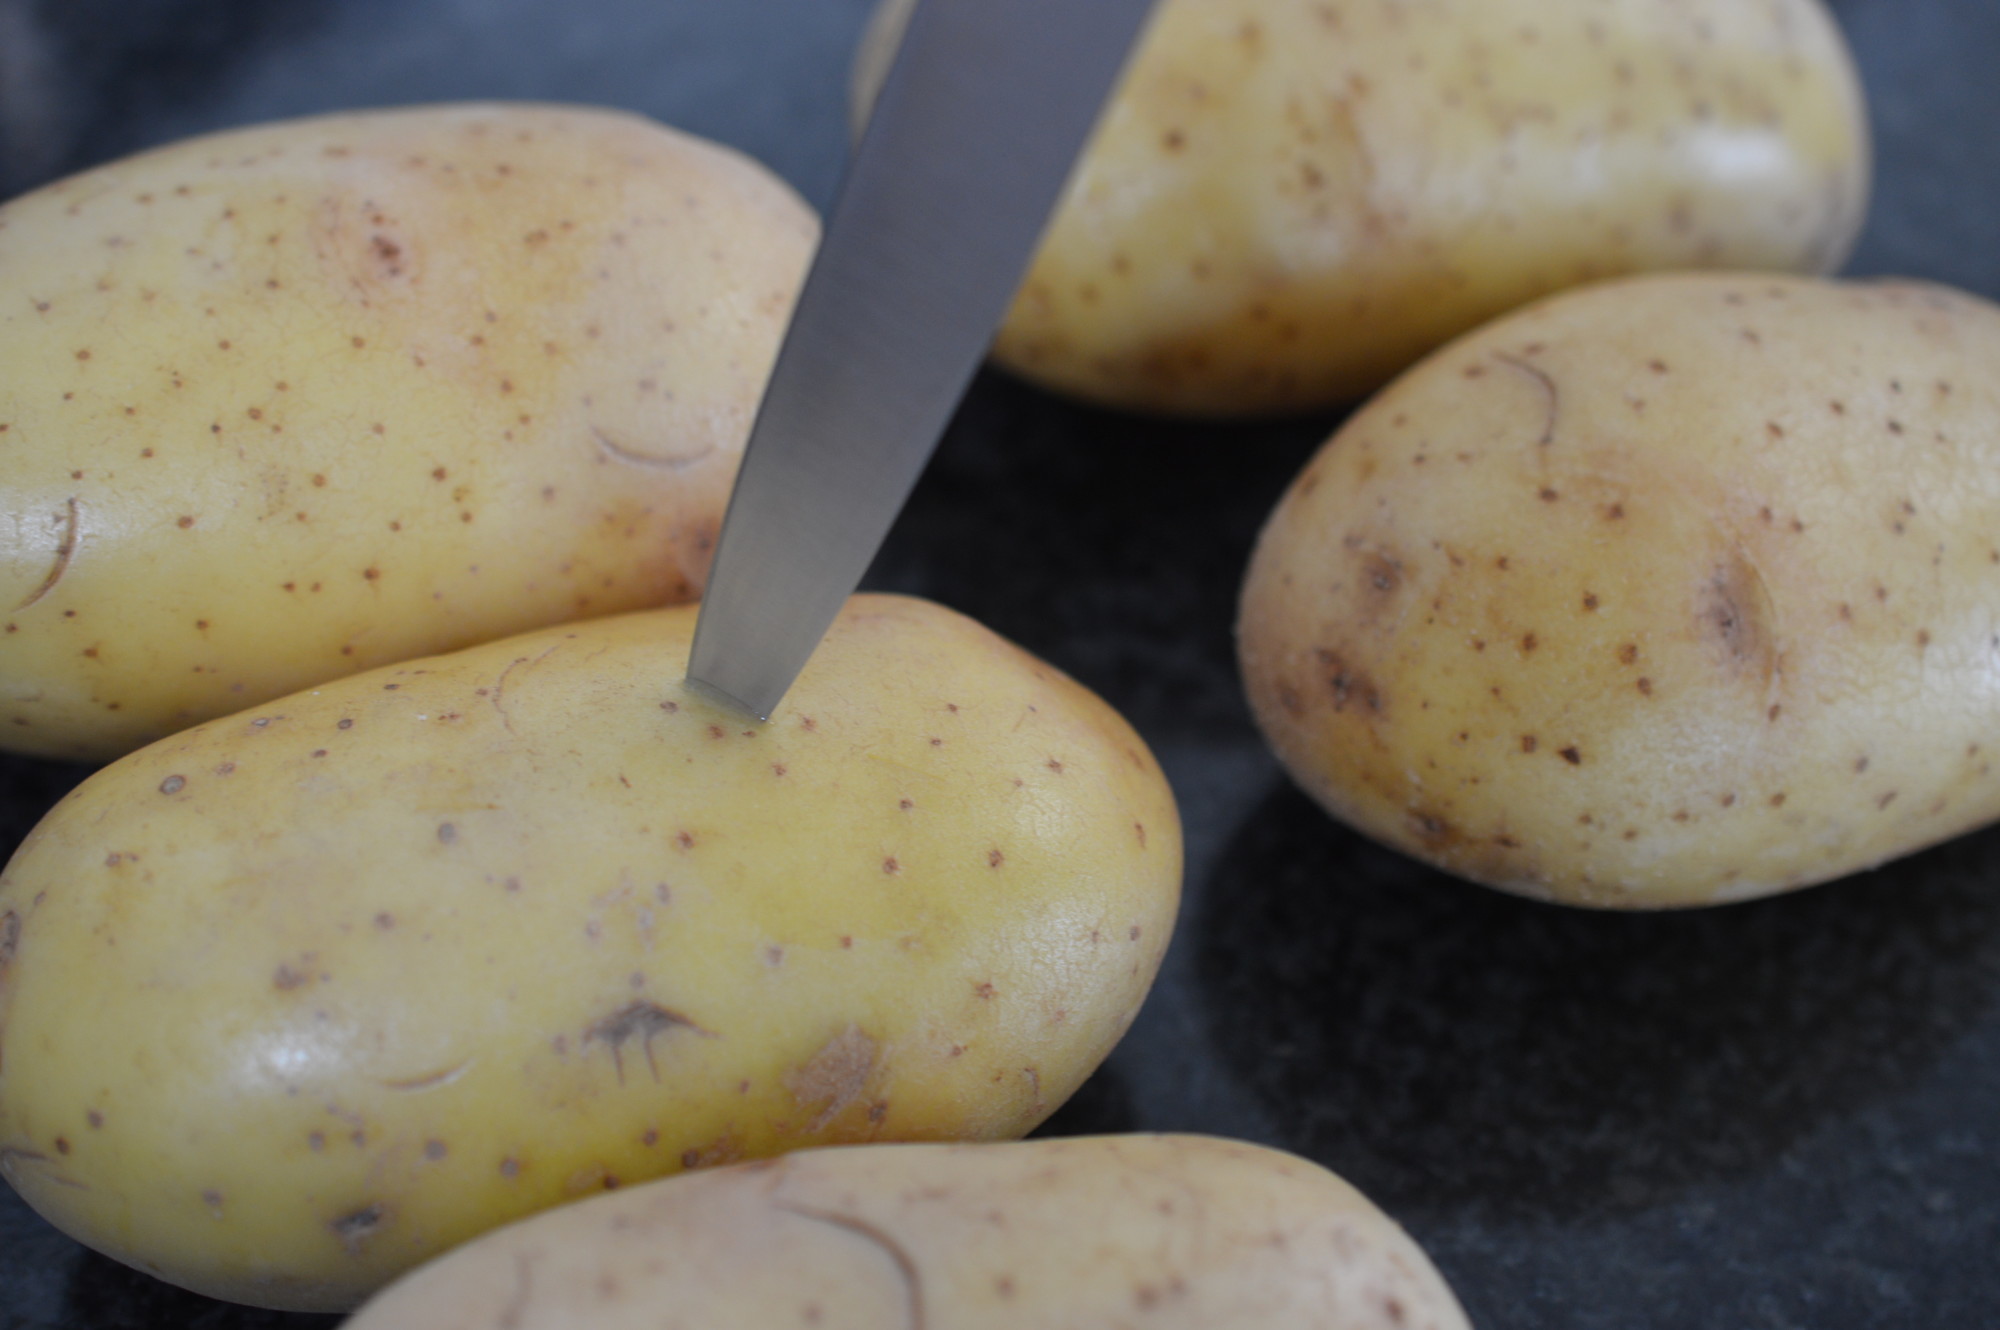
Ethical prawns are fairly difficult to get hold of.  Personally, I avoid tropical prawns, both farmed and wild.  I watched a TV documentary and that was that.

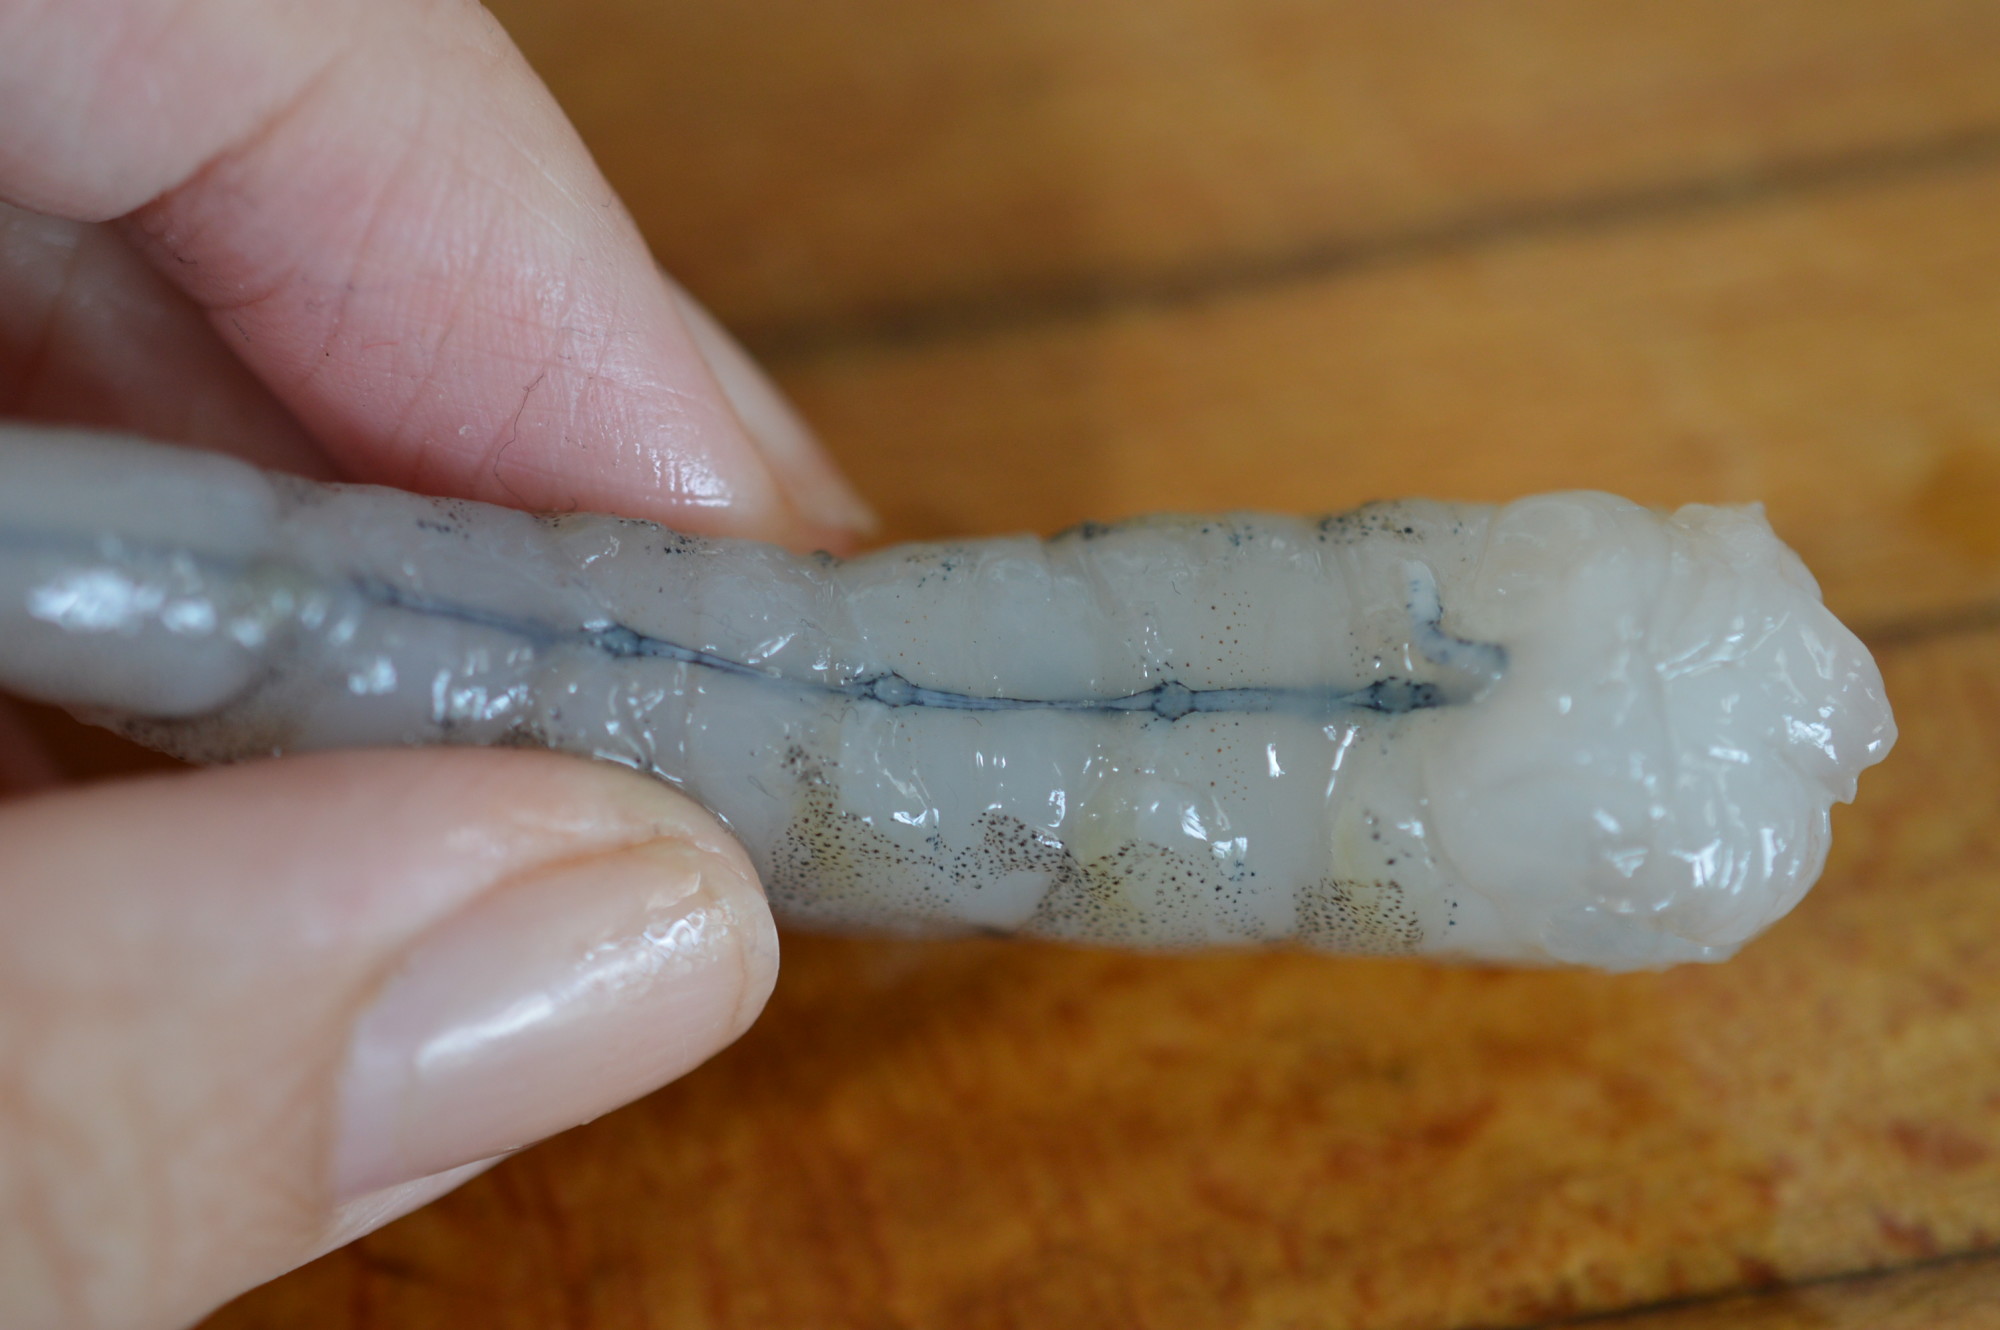
Atlantic prawns are expensive and, for some reason, I can only find them peeled.  You’d think that if you buy ready peeled raw prawns they’d also be de-veined, but they’re not.

Vietnemese style fresh spring rolls 3

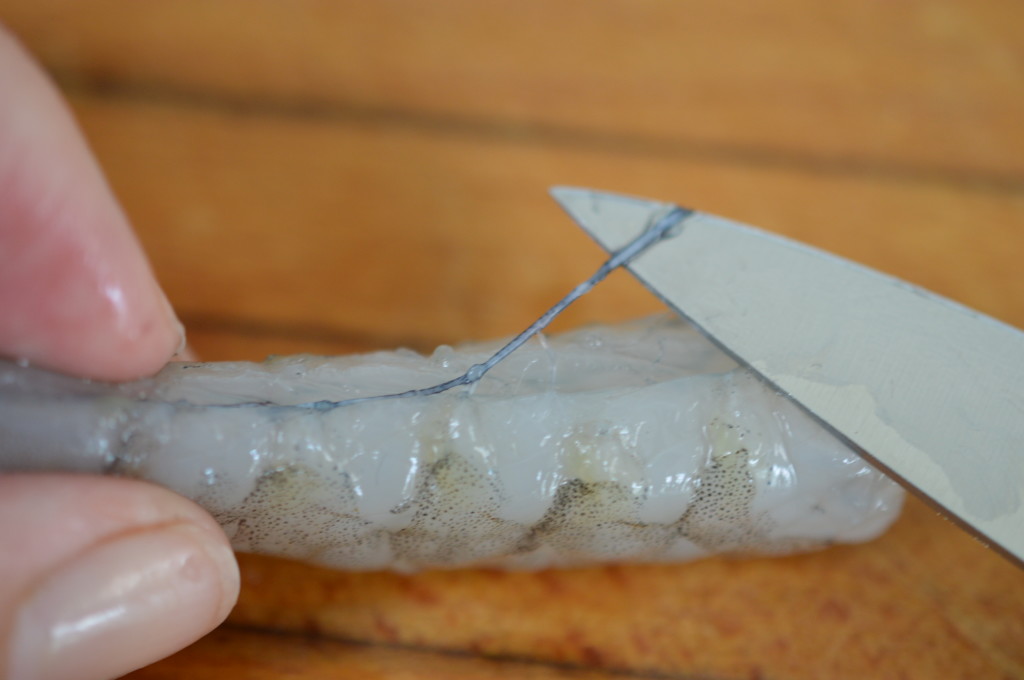
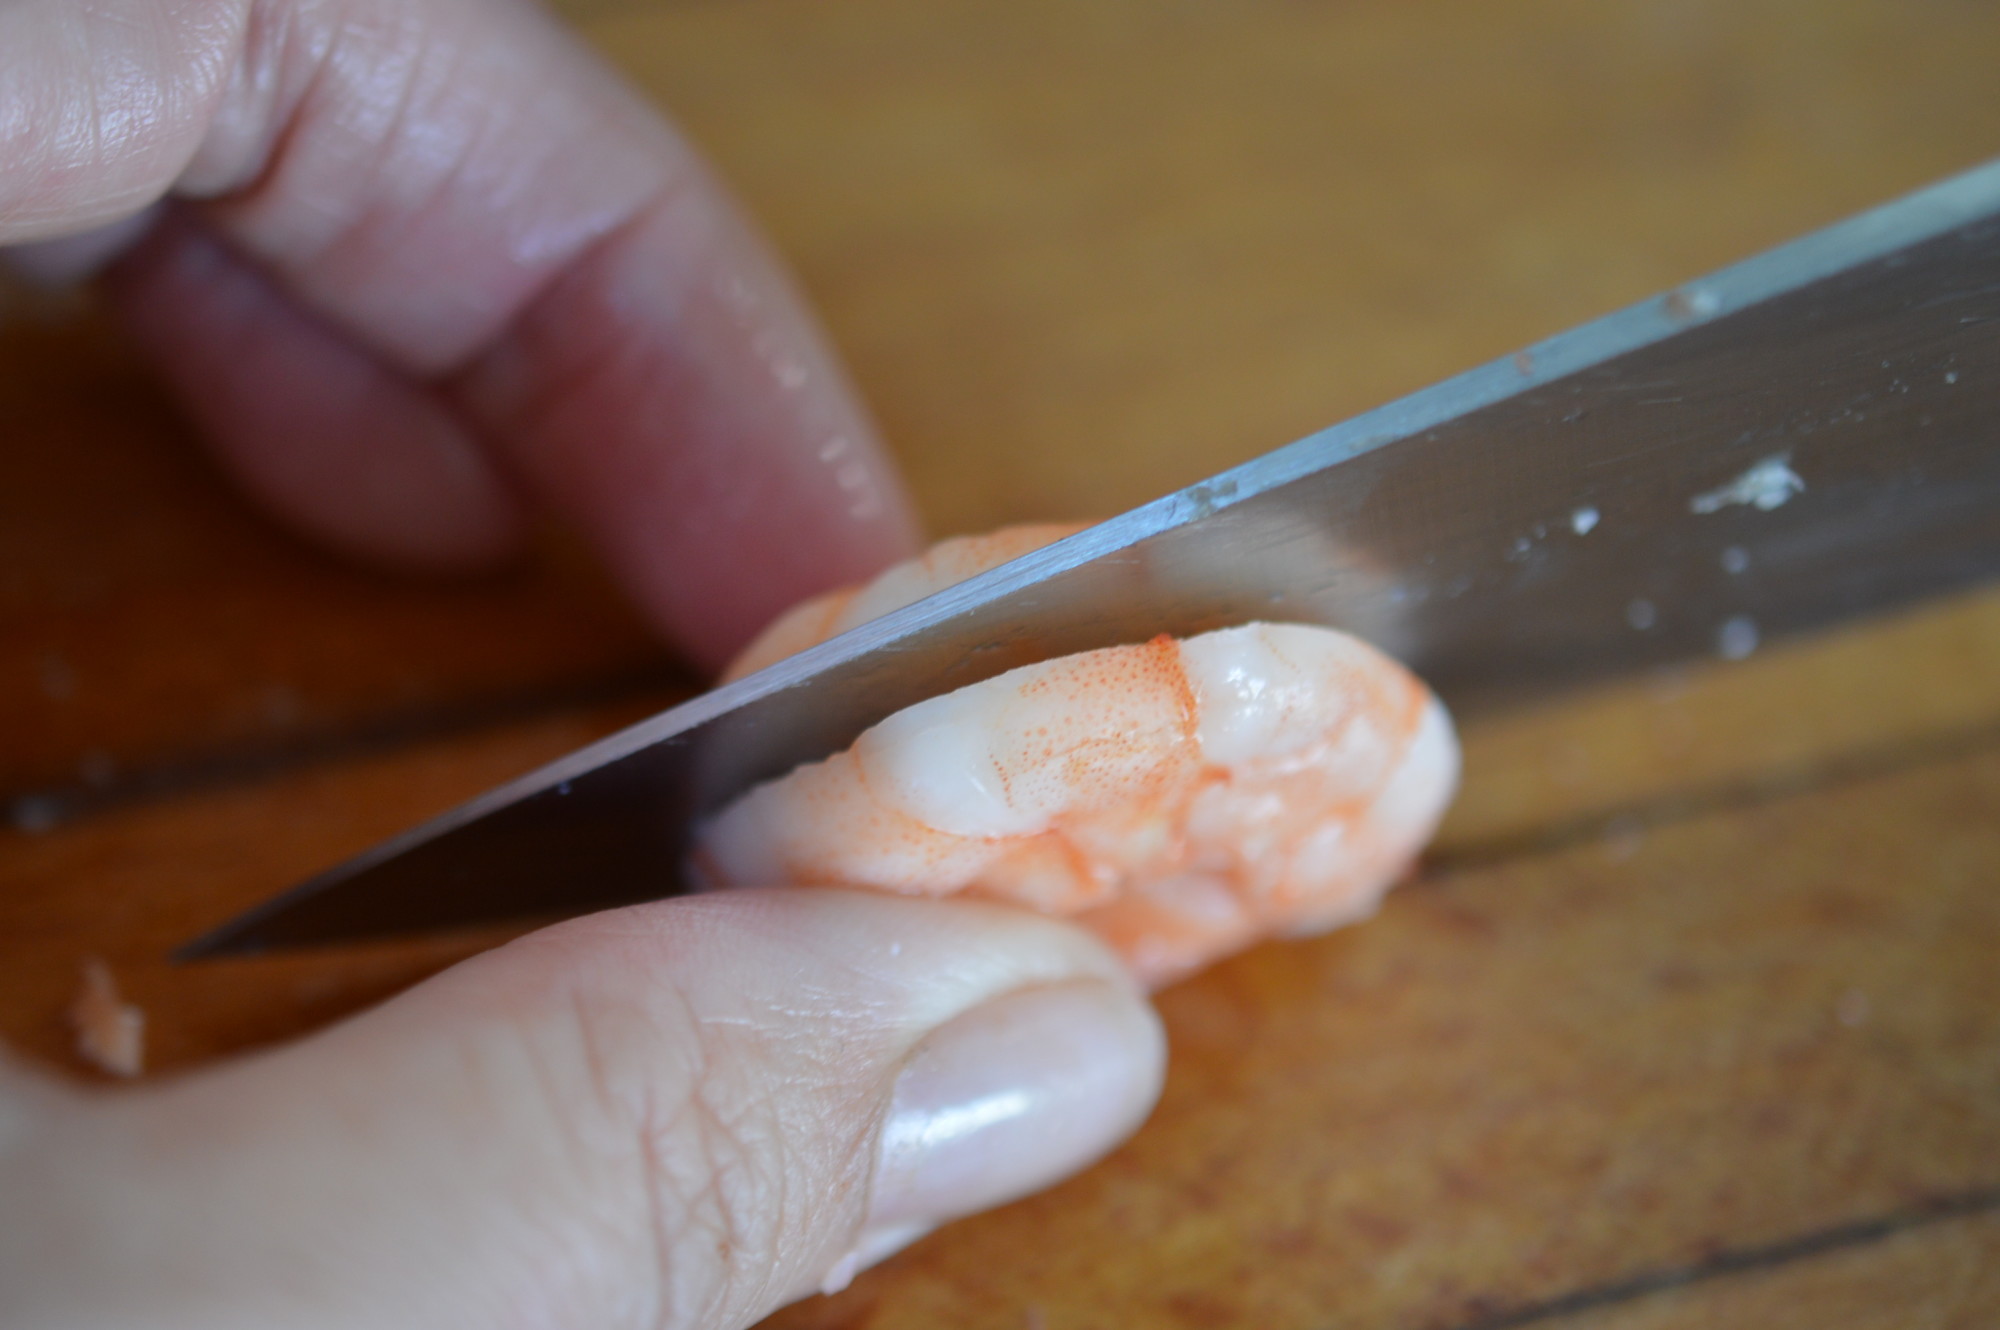
It’s easy to do.  Cut along the back line and lift it out with the point of your knife.  Bit gruesome but what you’re removing is the dirt sack.  If you cook it with it still in place it will taste ‘gritty’.

vietnemese style fresh spring rolls 5

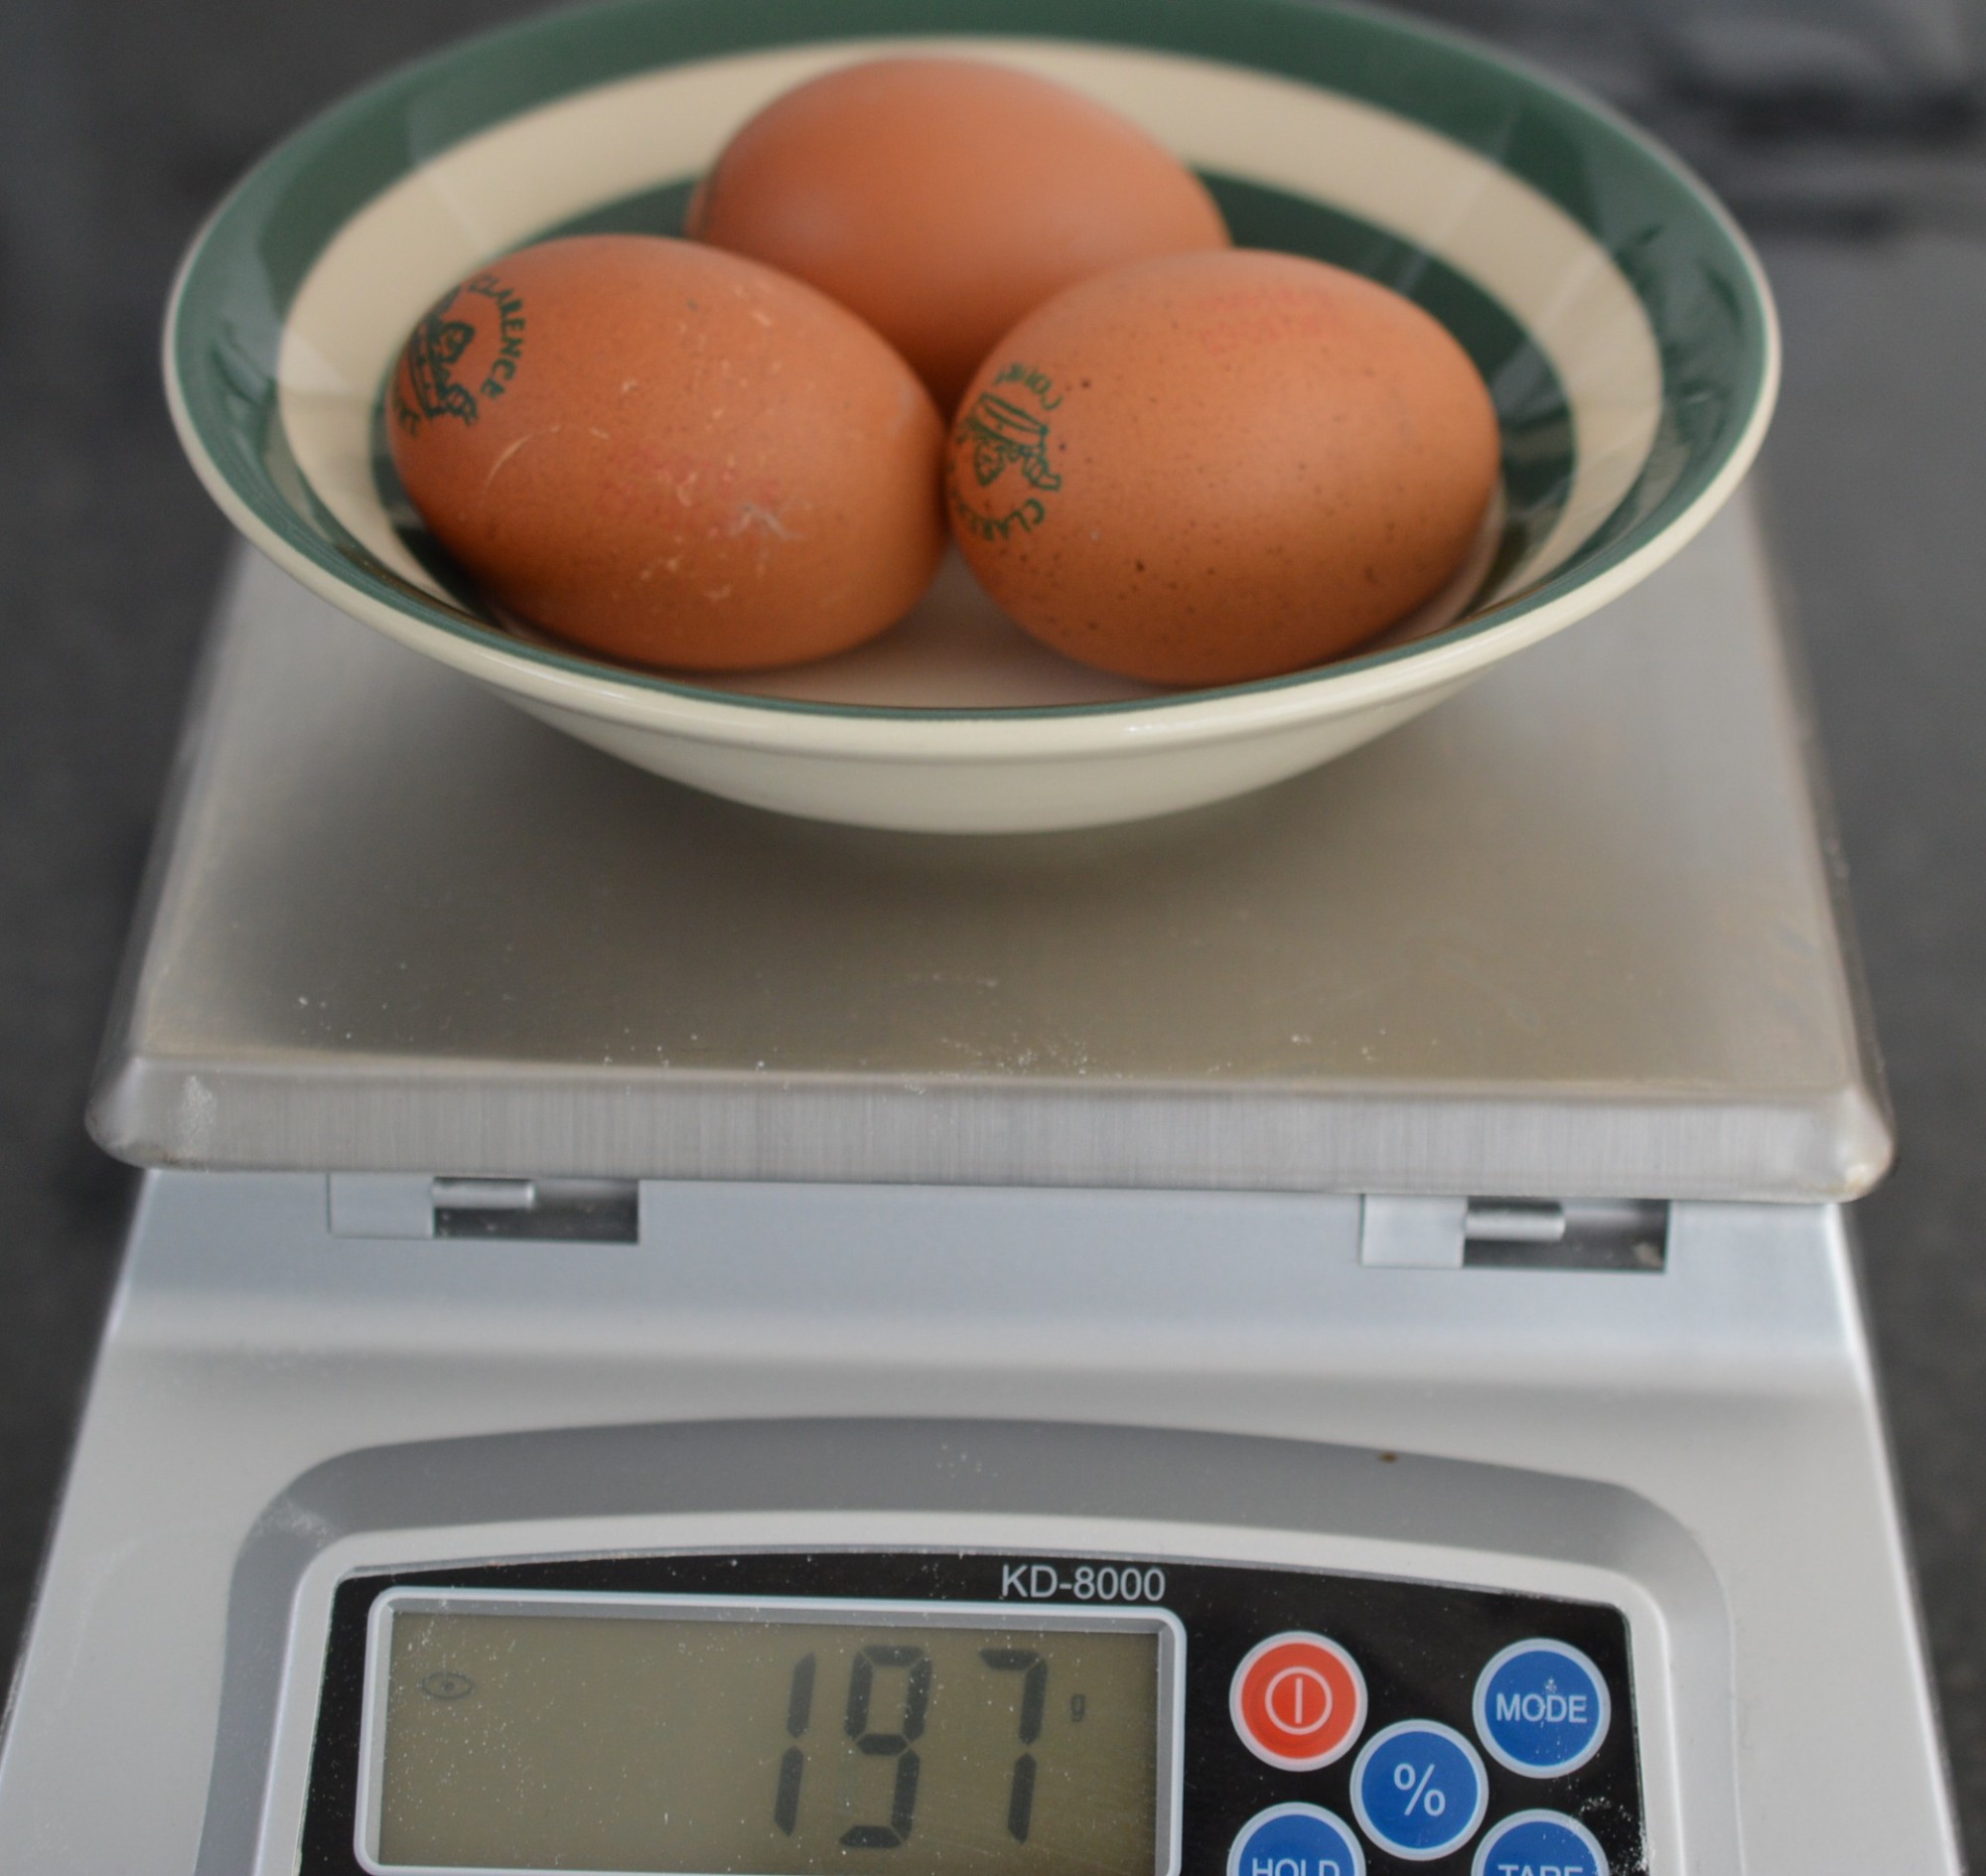
I’m using a little over 300g.

vietnemese style fresh spring rolls 4

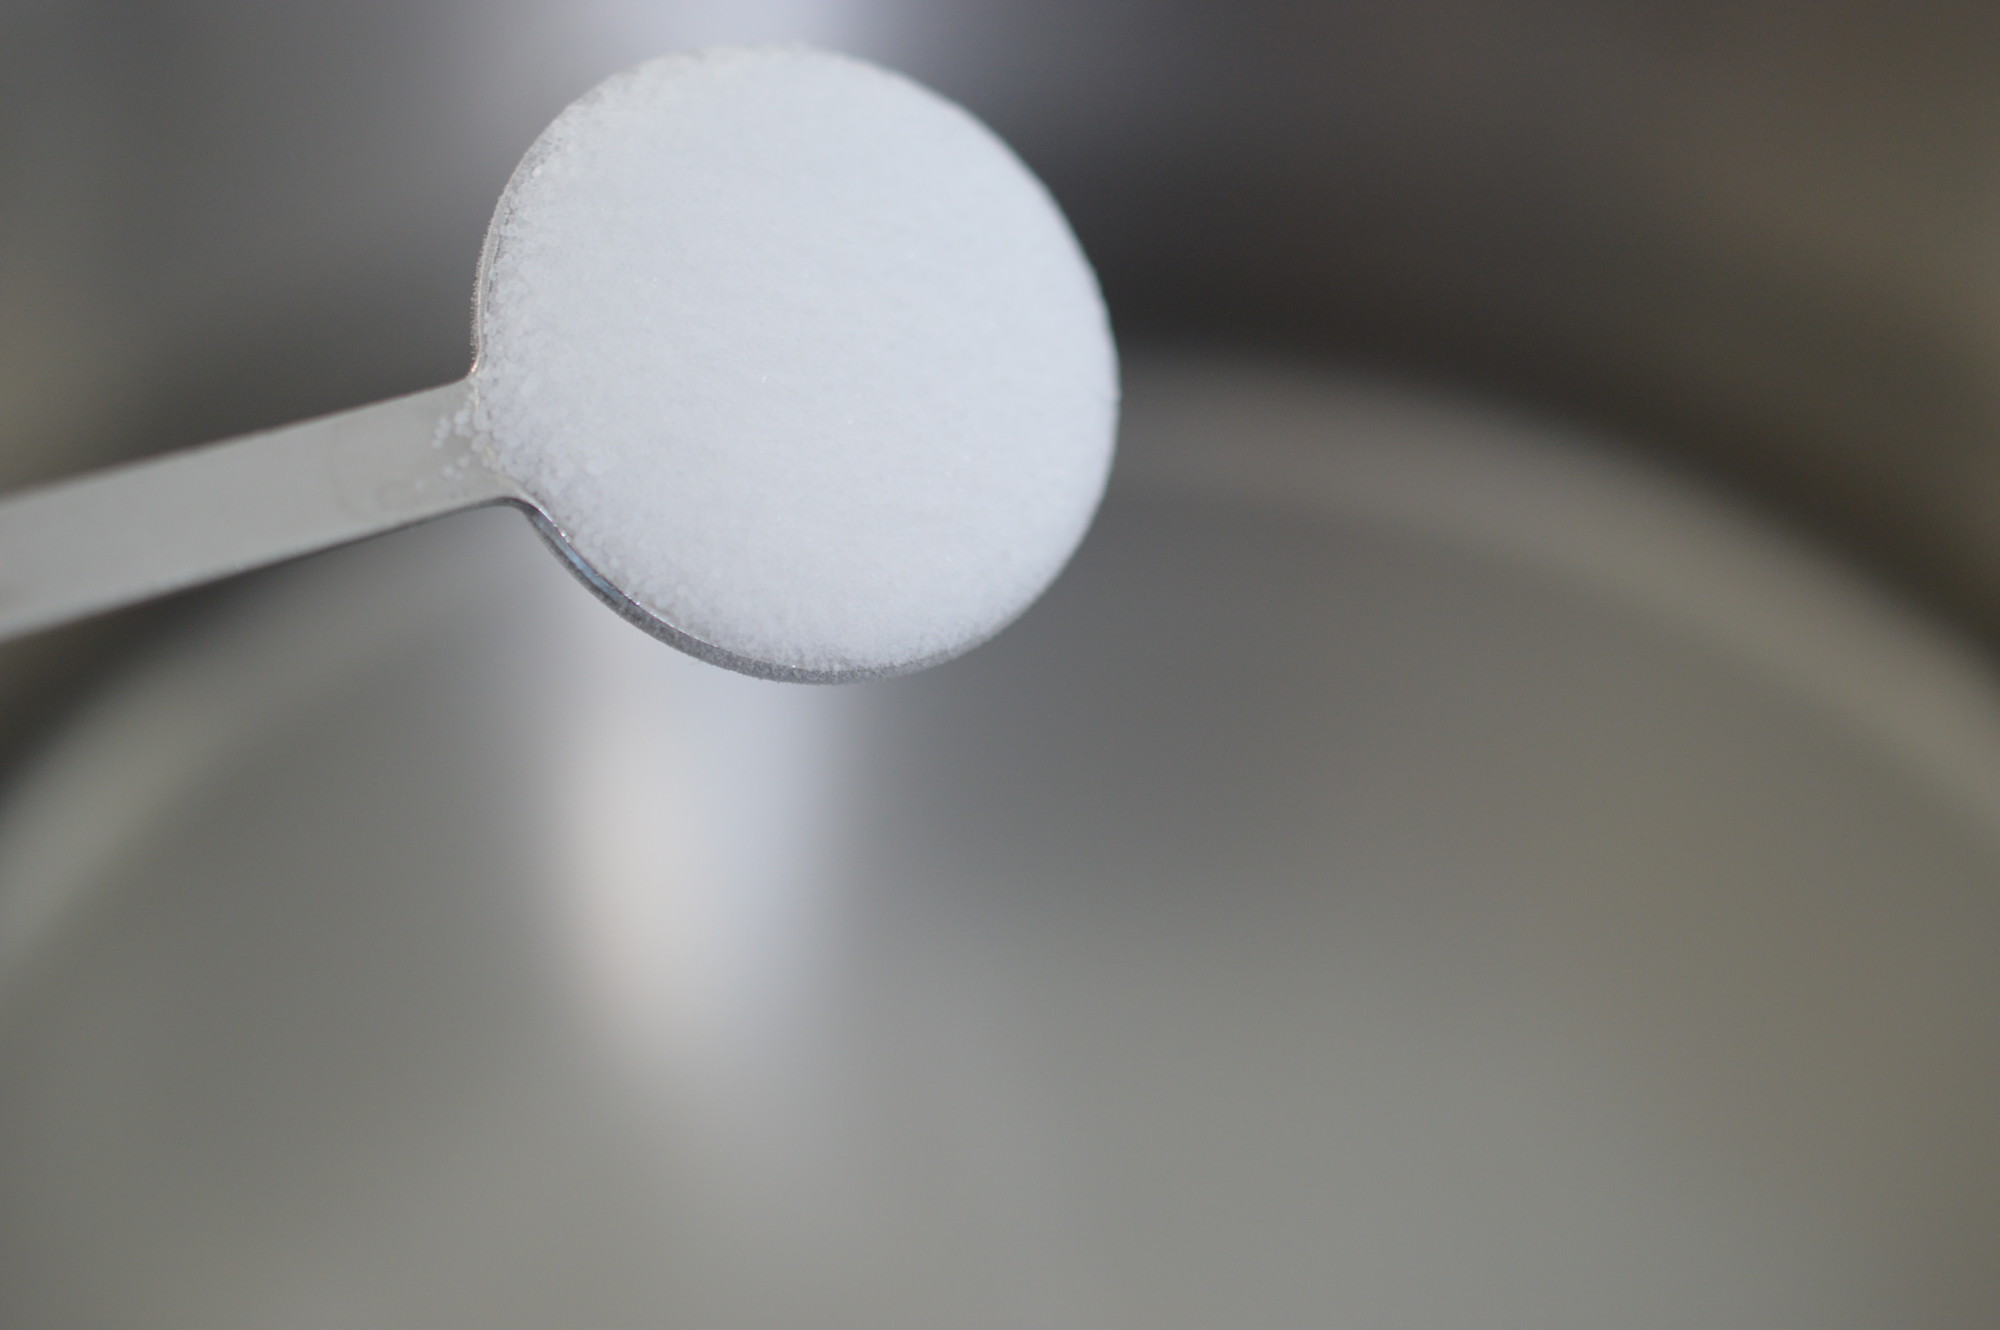
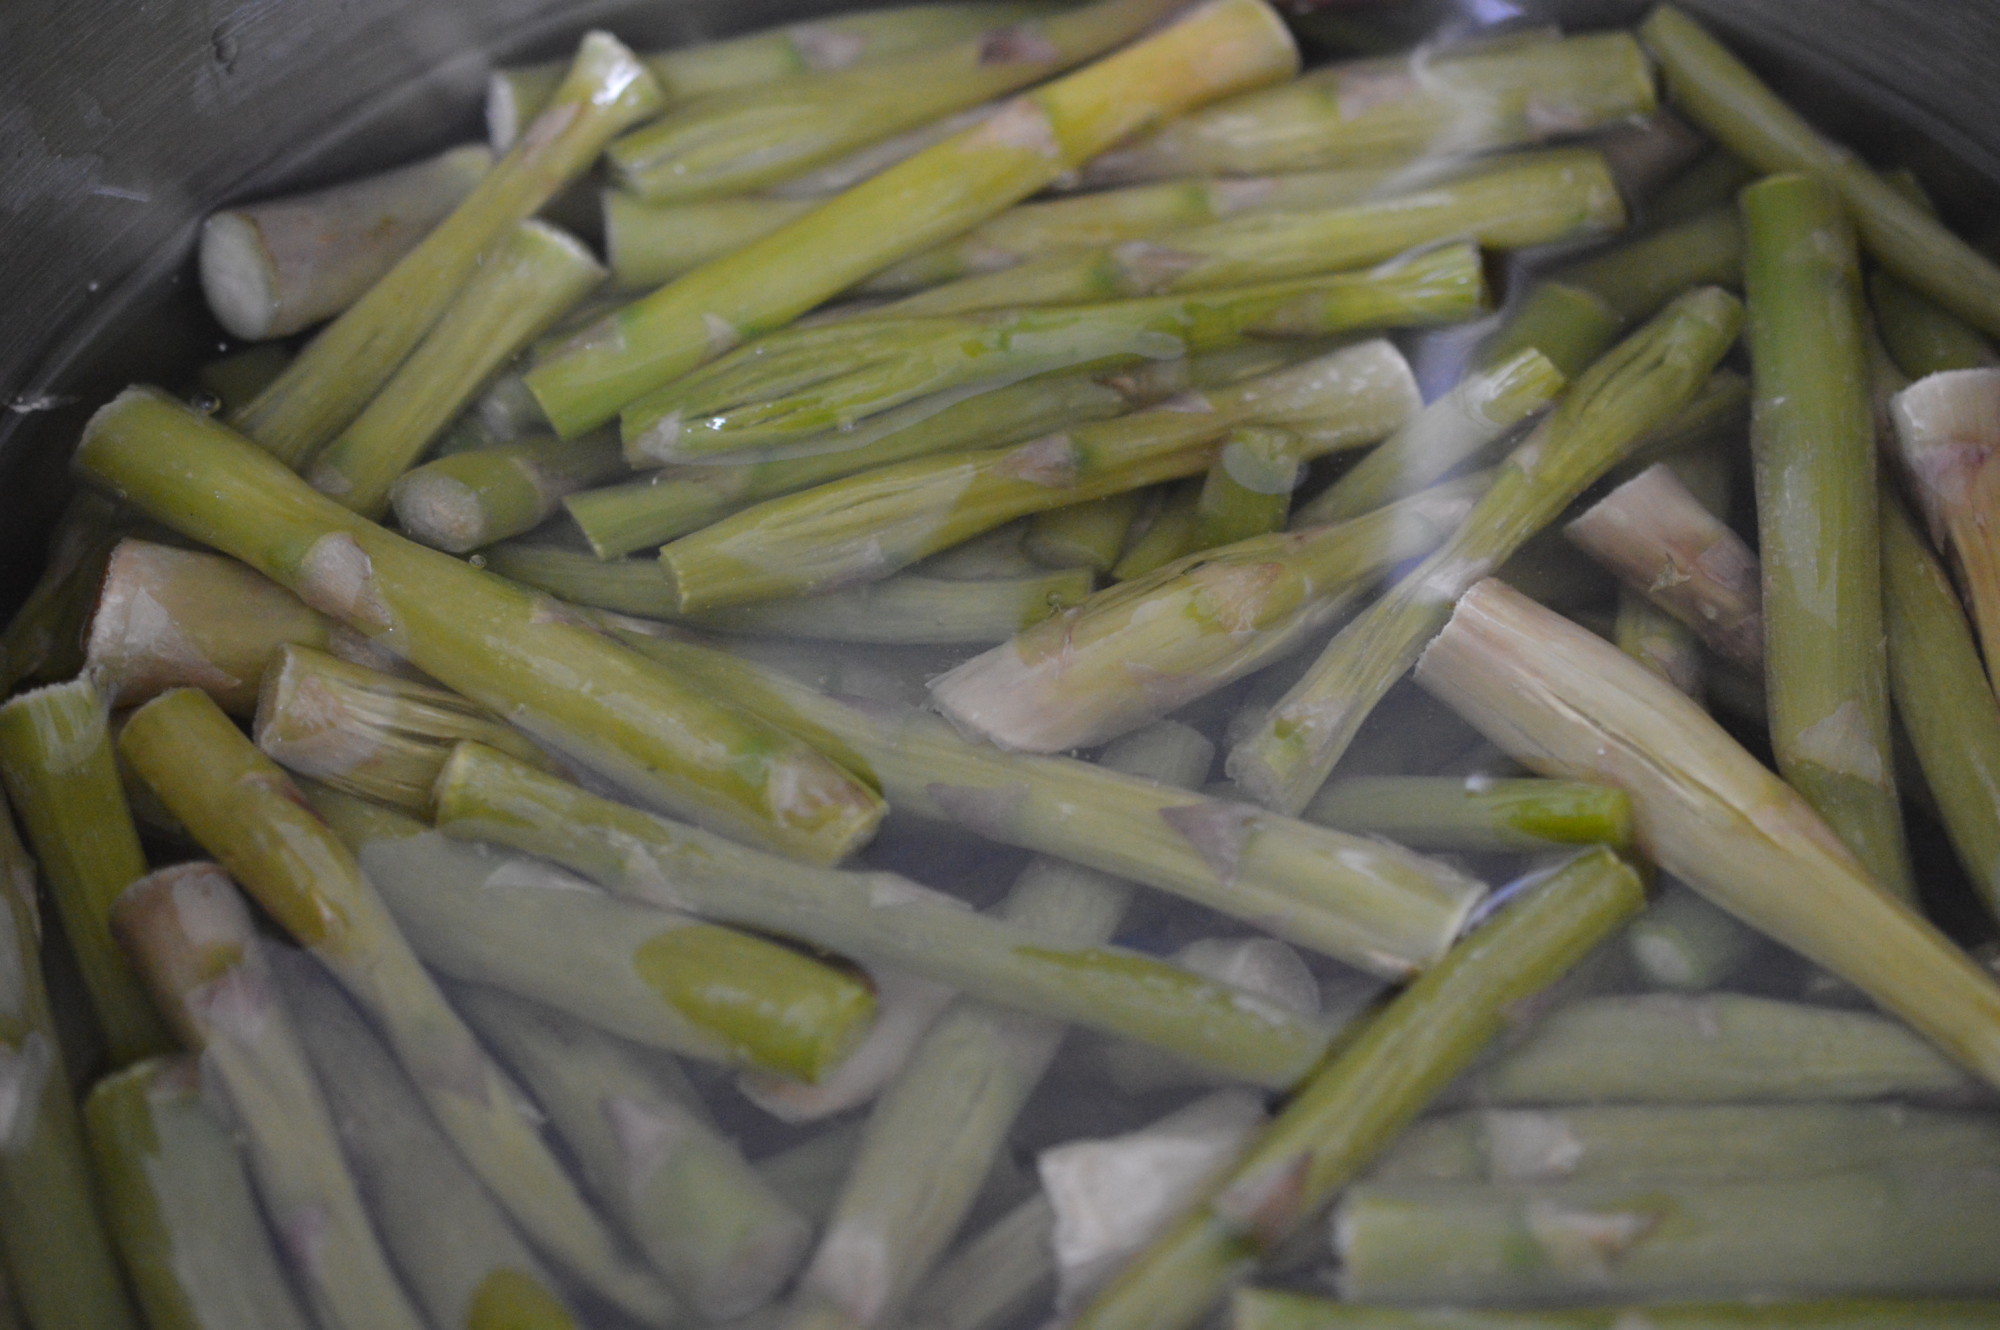
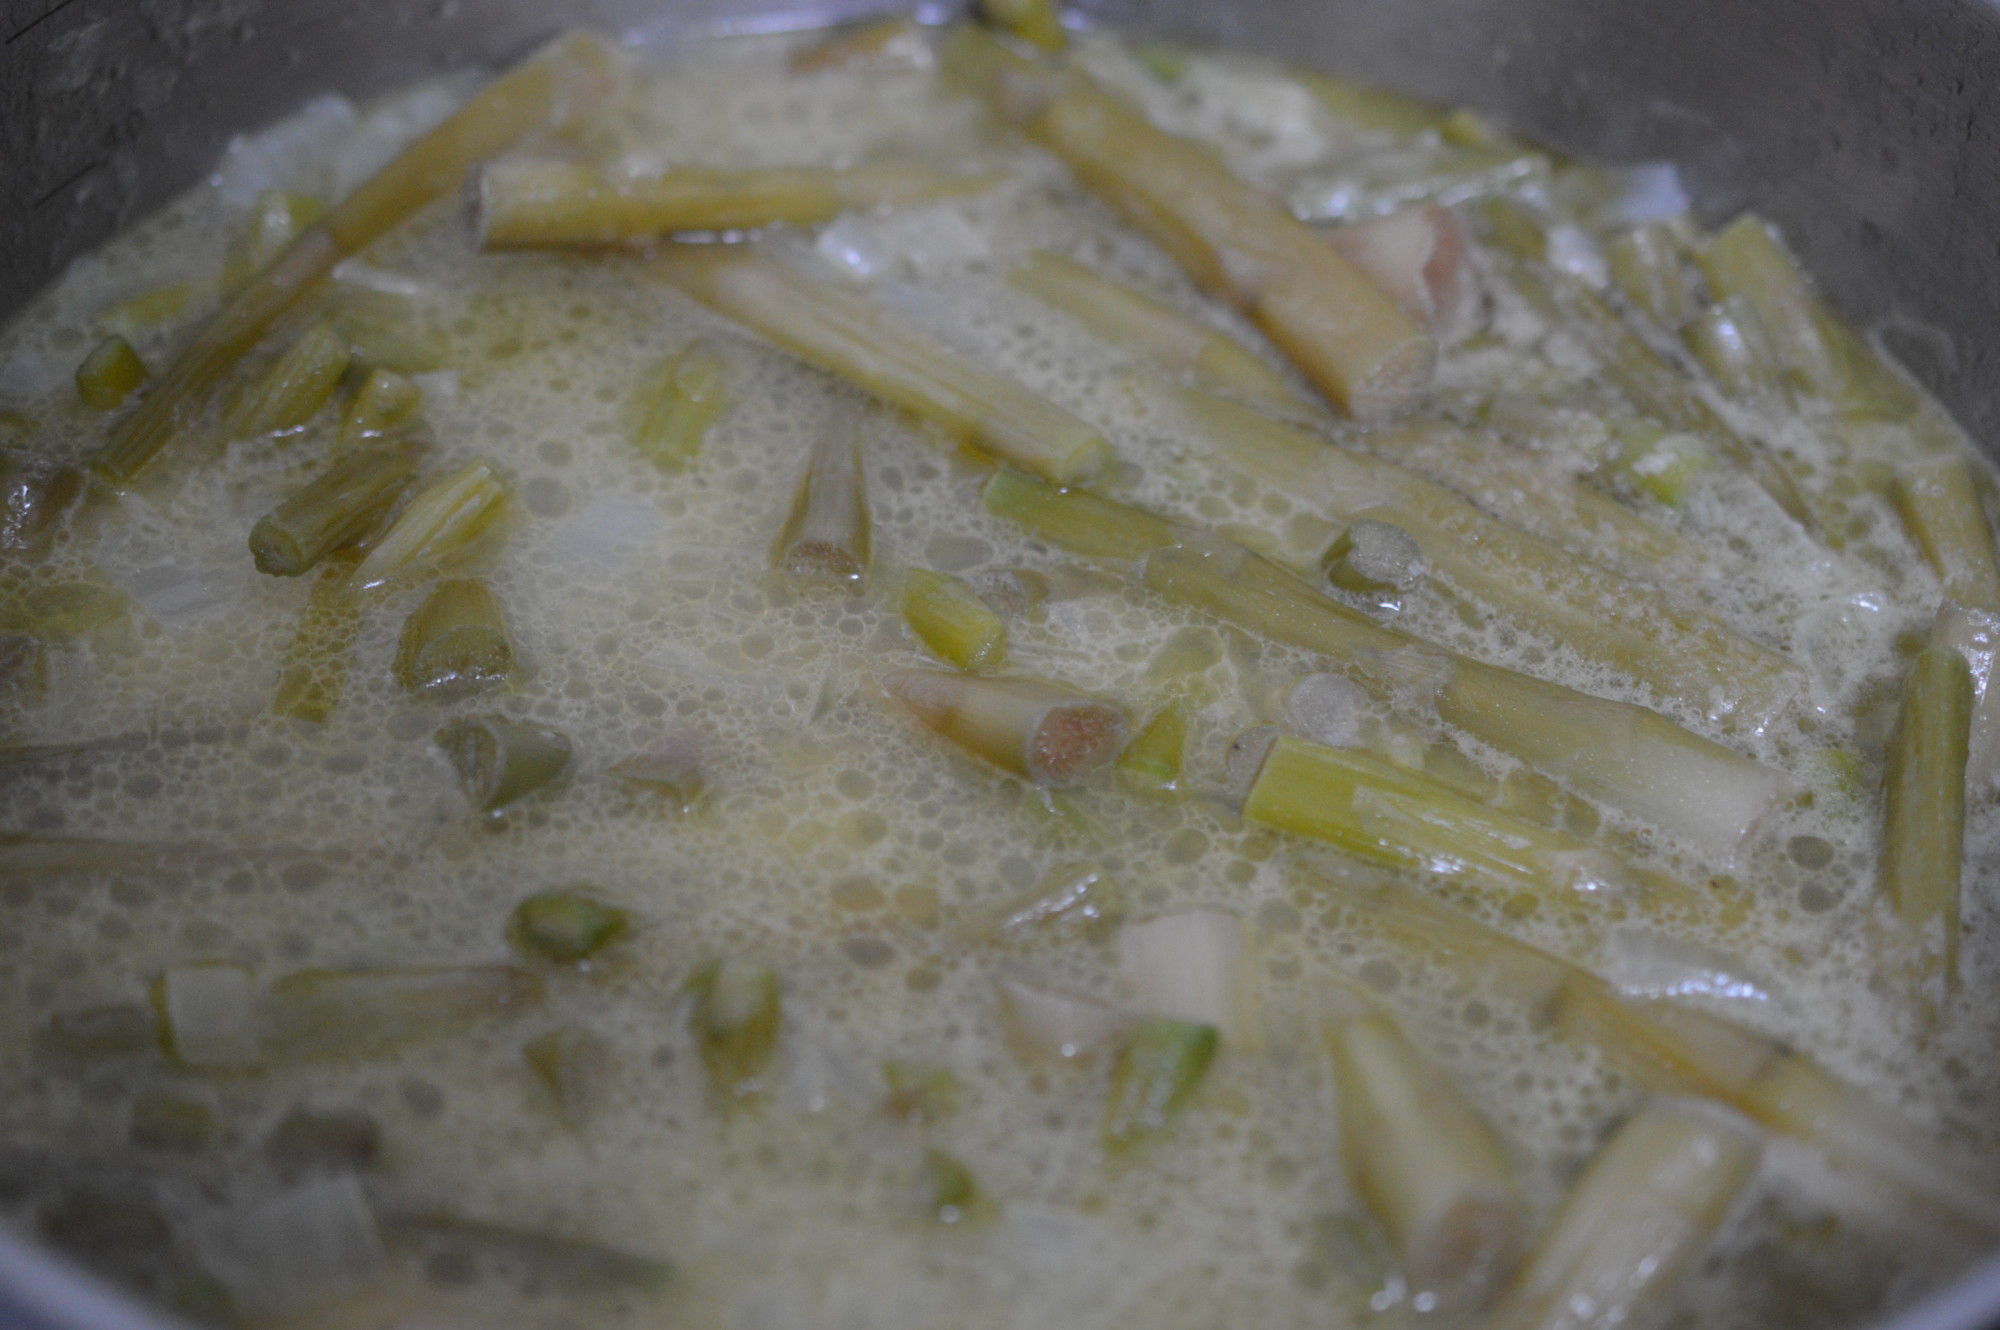
If I had them in their shells, I’d dry fry them.  Like this, I poach them.  You need about 3 litres/5 pints of fresh water.  Bring to the boil and add 2 teaspoons of salt.  Reduce the heat to medium.

vietnemese style fresh spring rolls 6

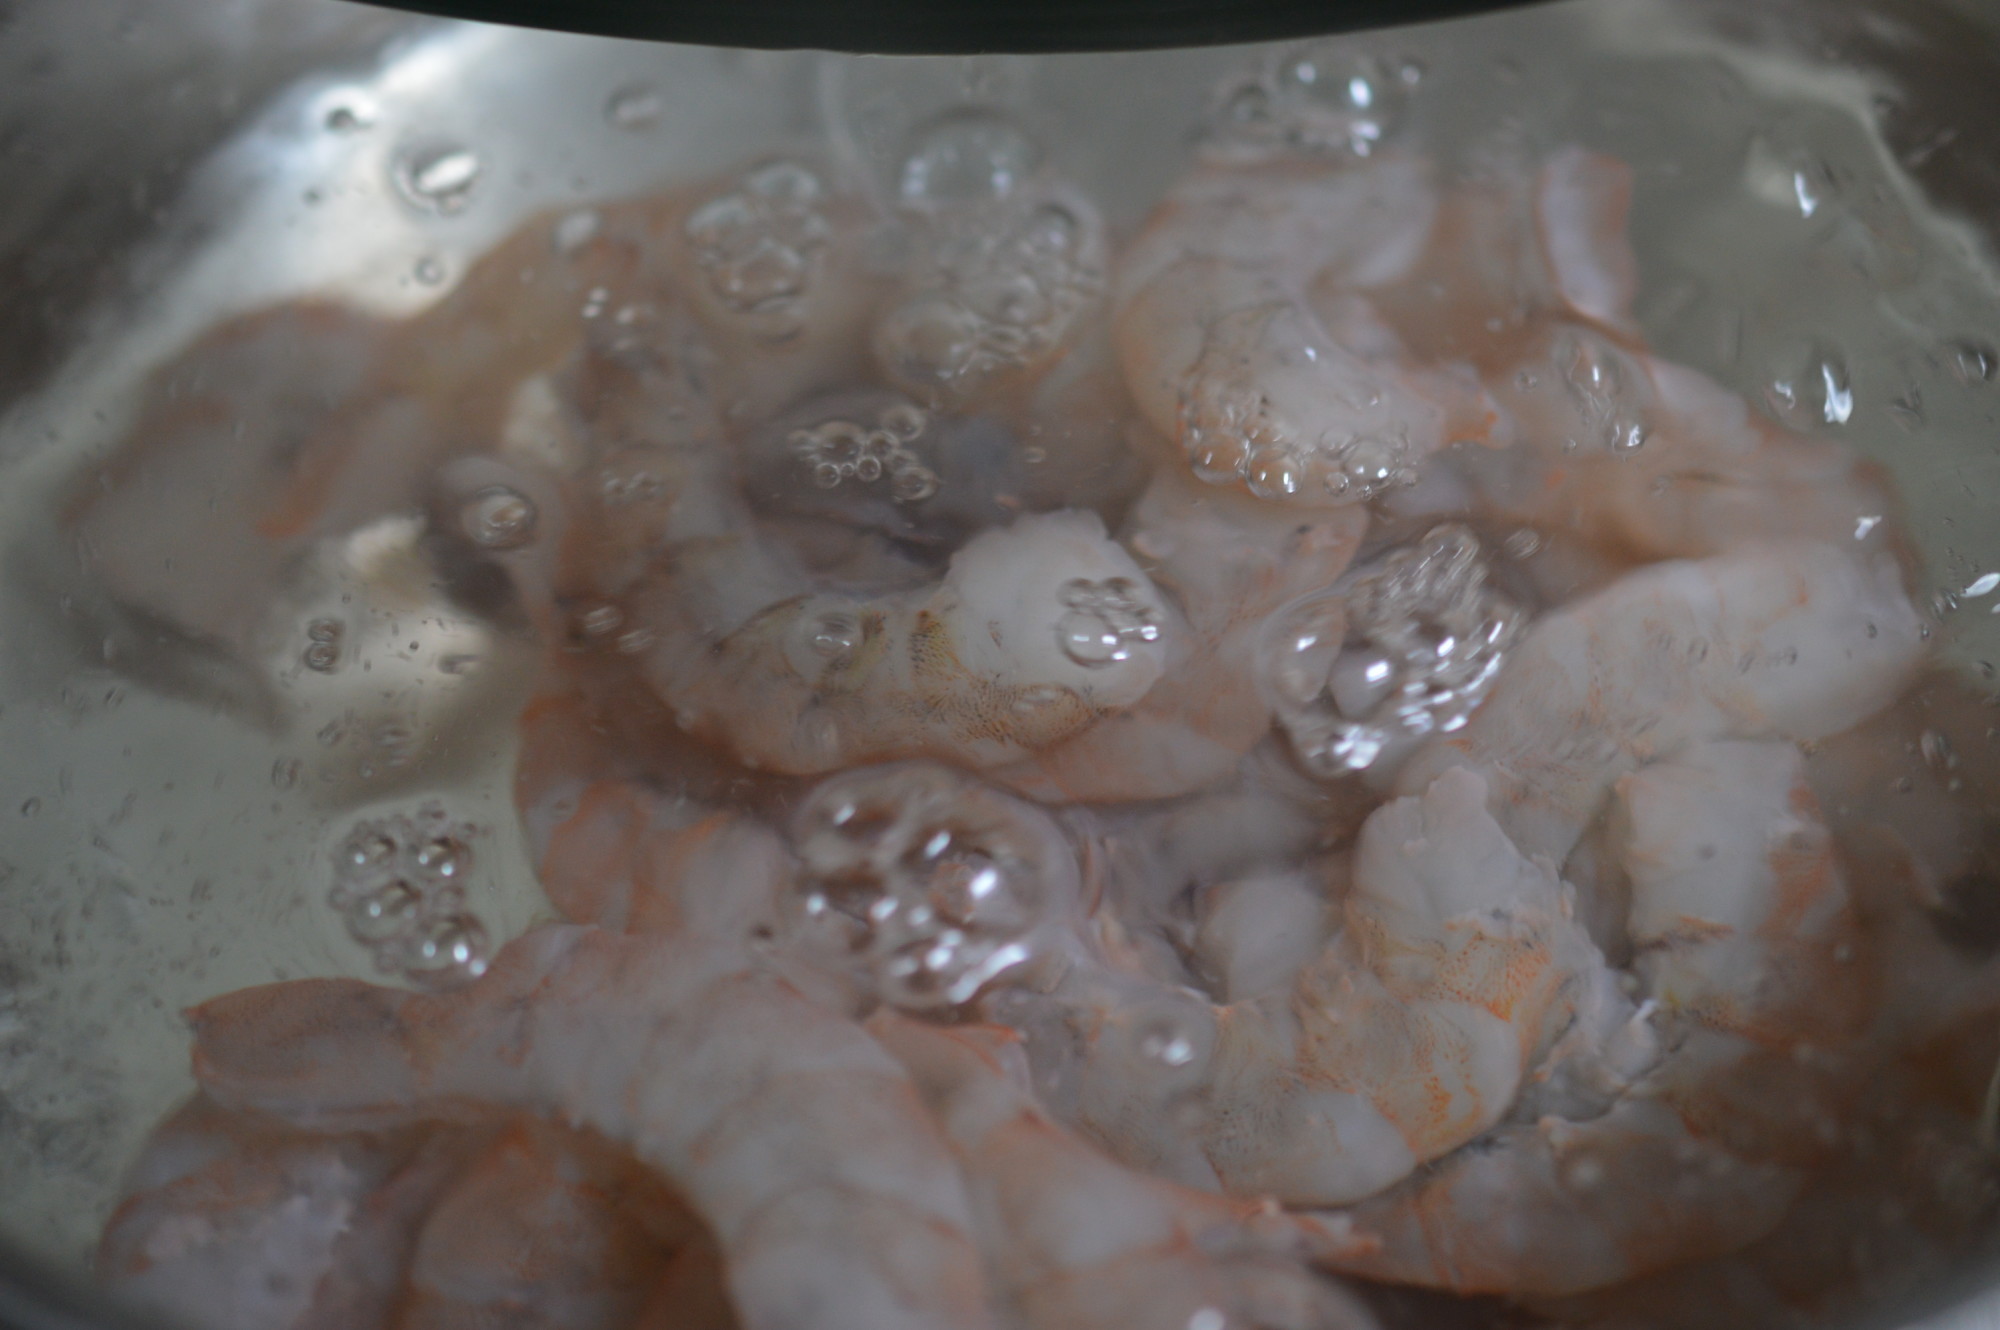
Simmer for about 2-3 minutes.  They start turning pink almost immediately – and they take far less time to cook than you would ever imagine.  Don’t over do.  Over-cooked prawns taste rubbery.

vietnemese style fresh spring rolls 7

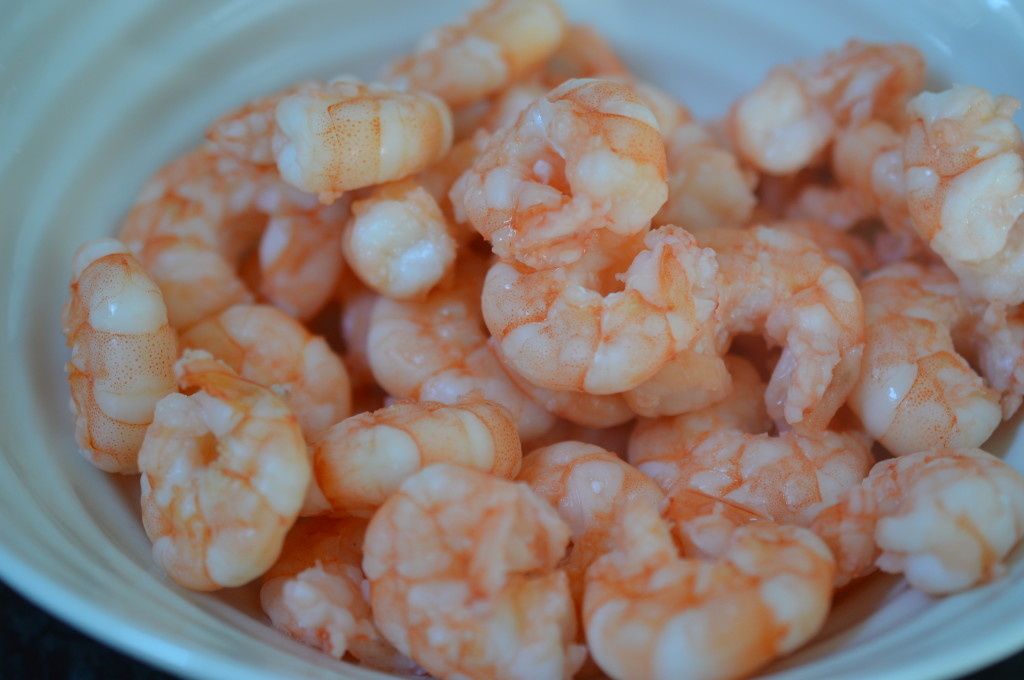
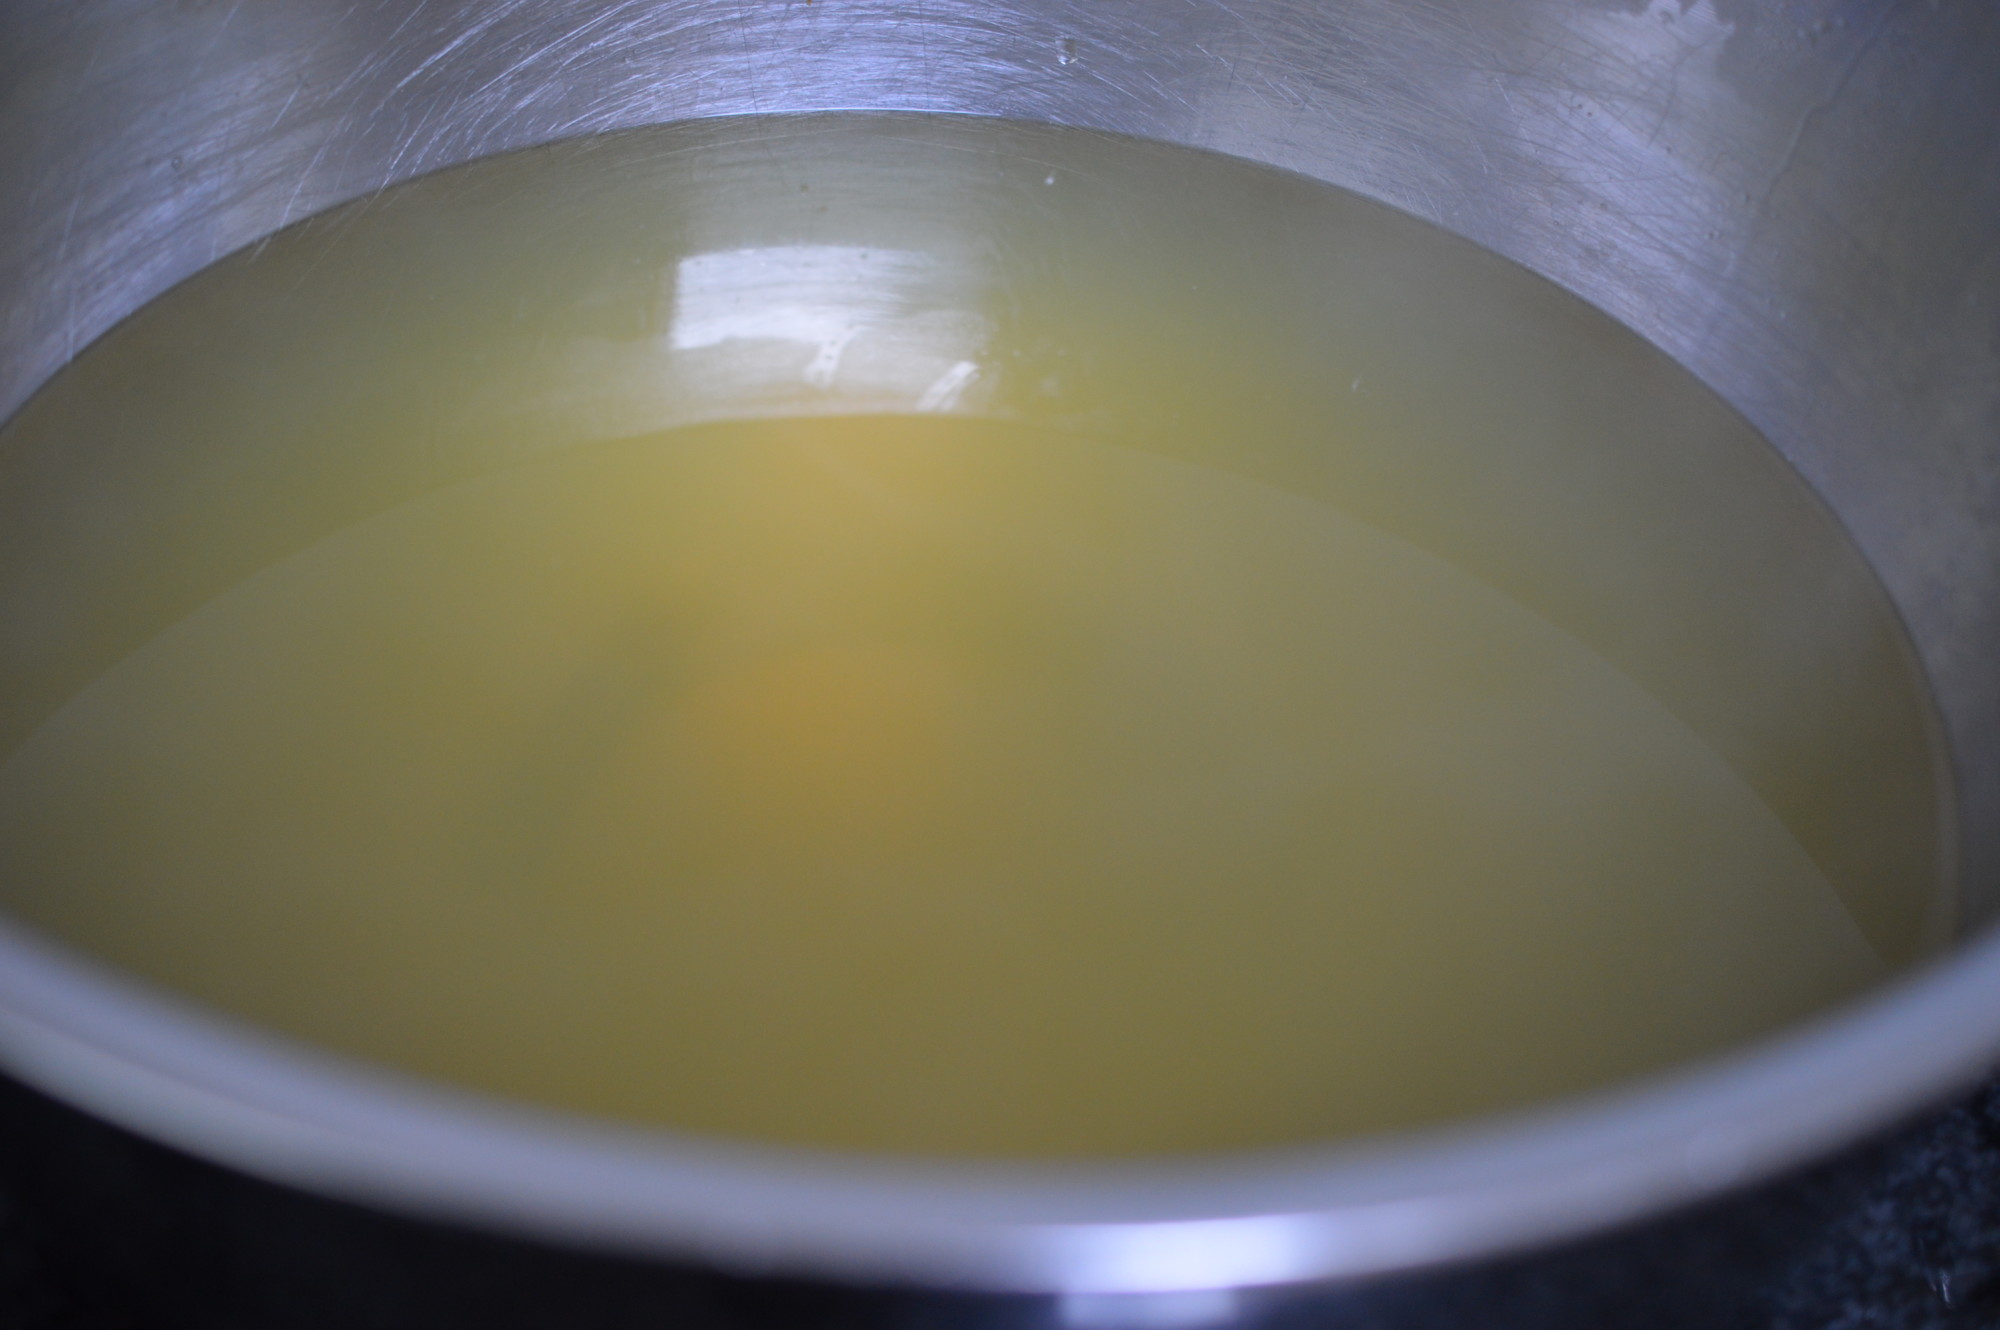
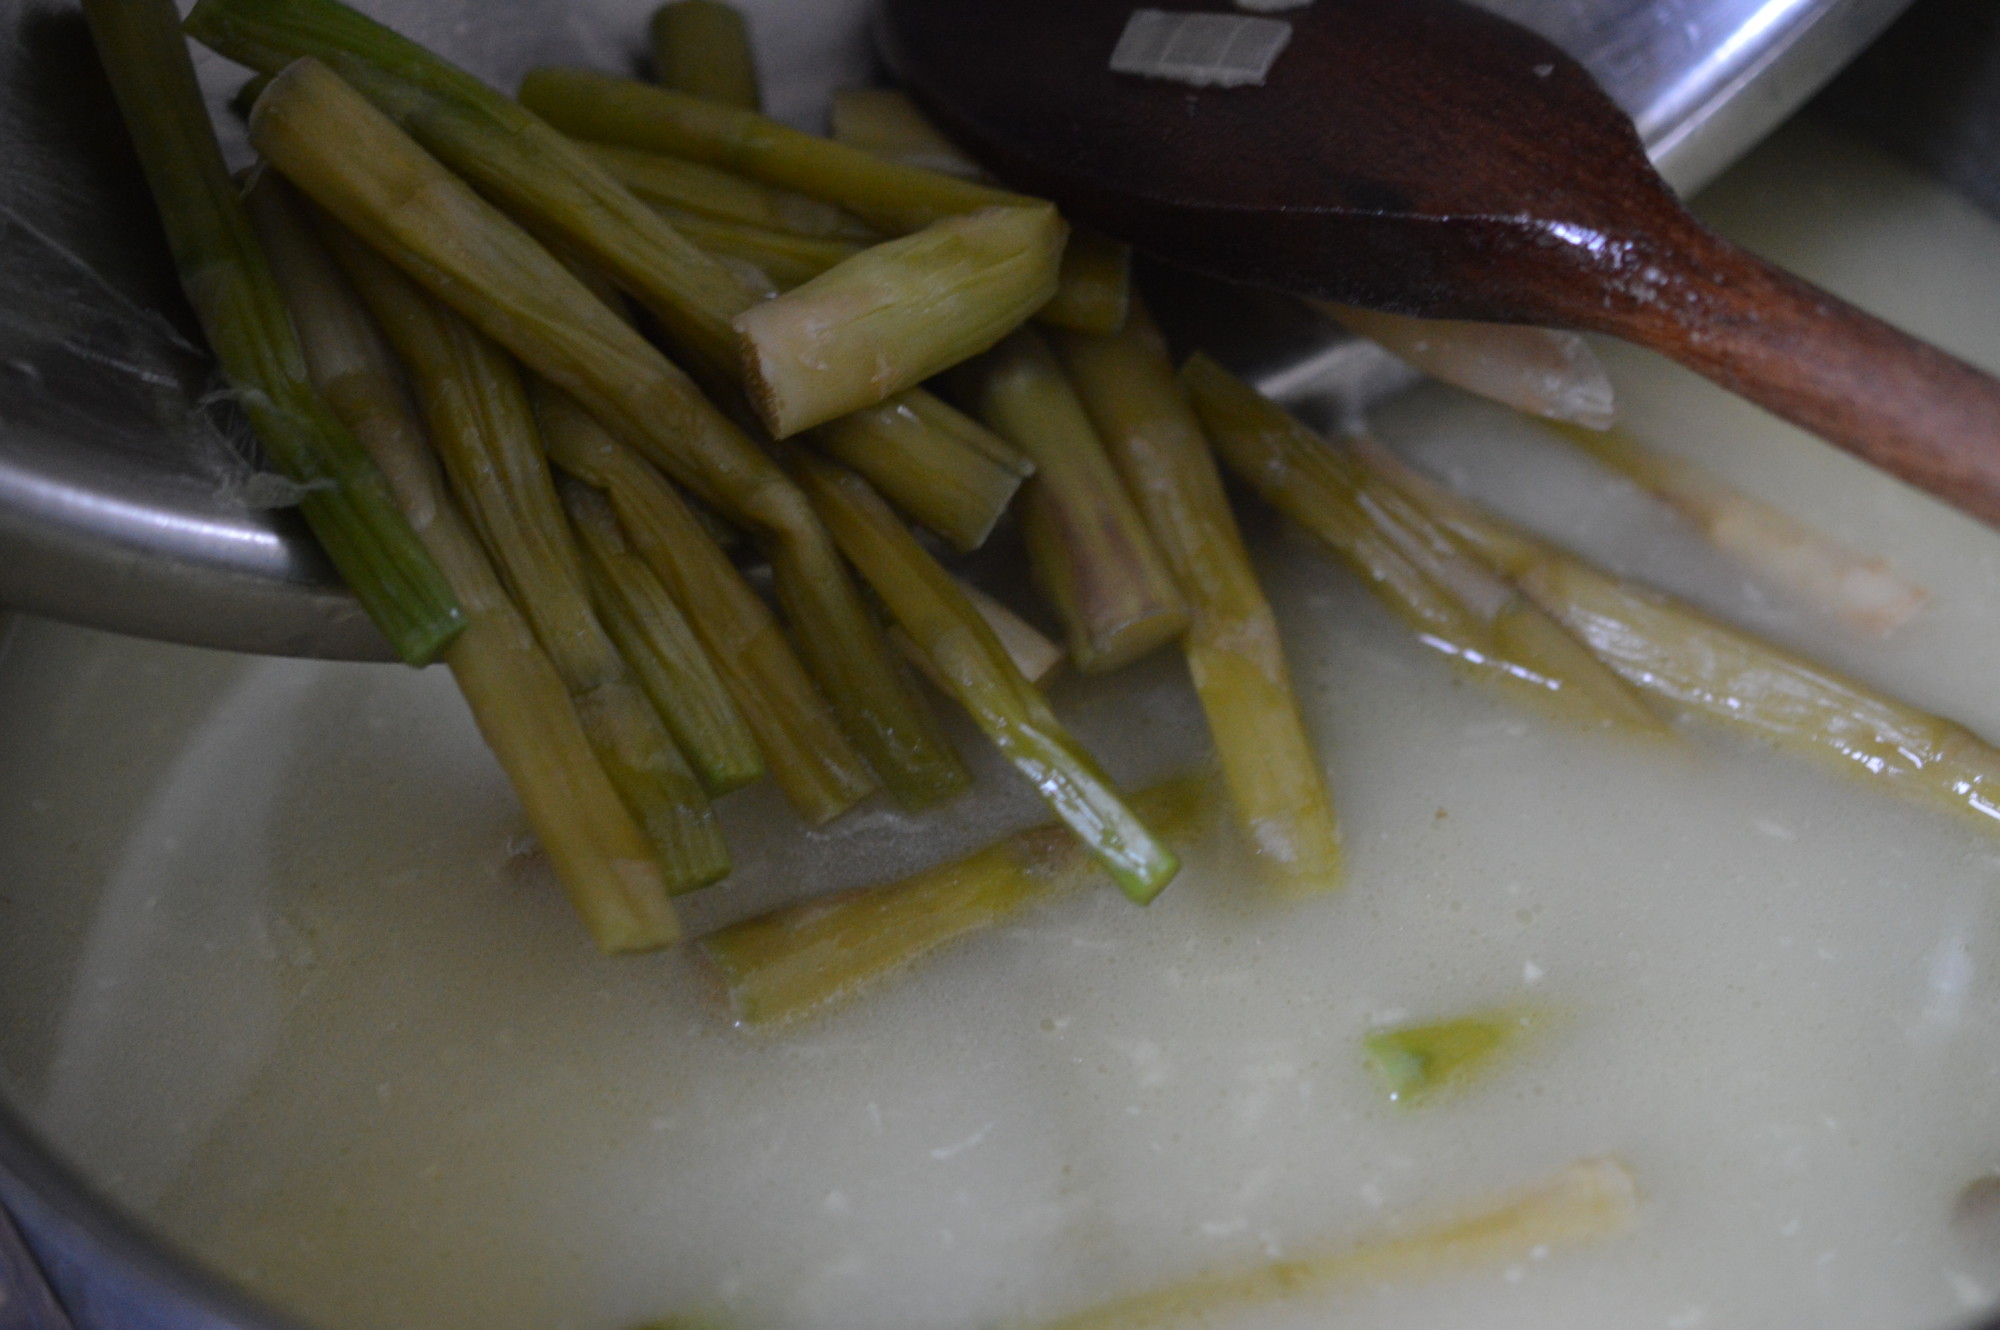
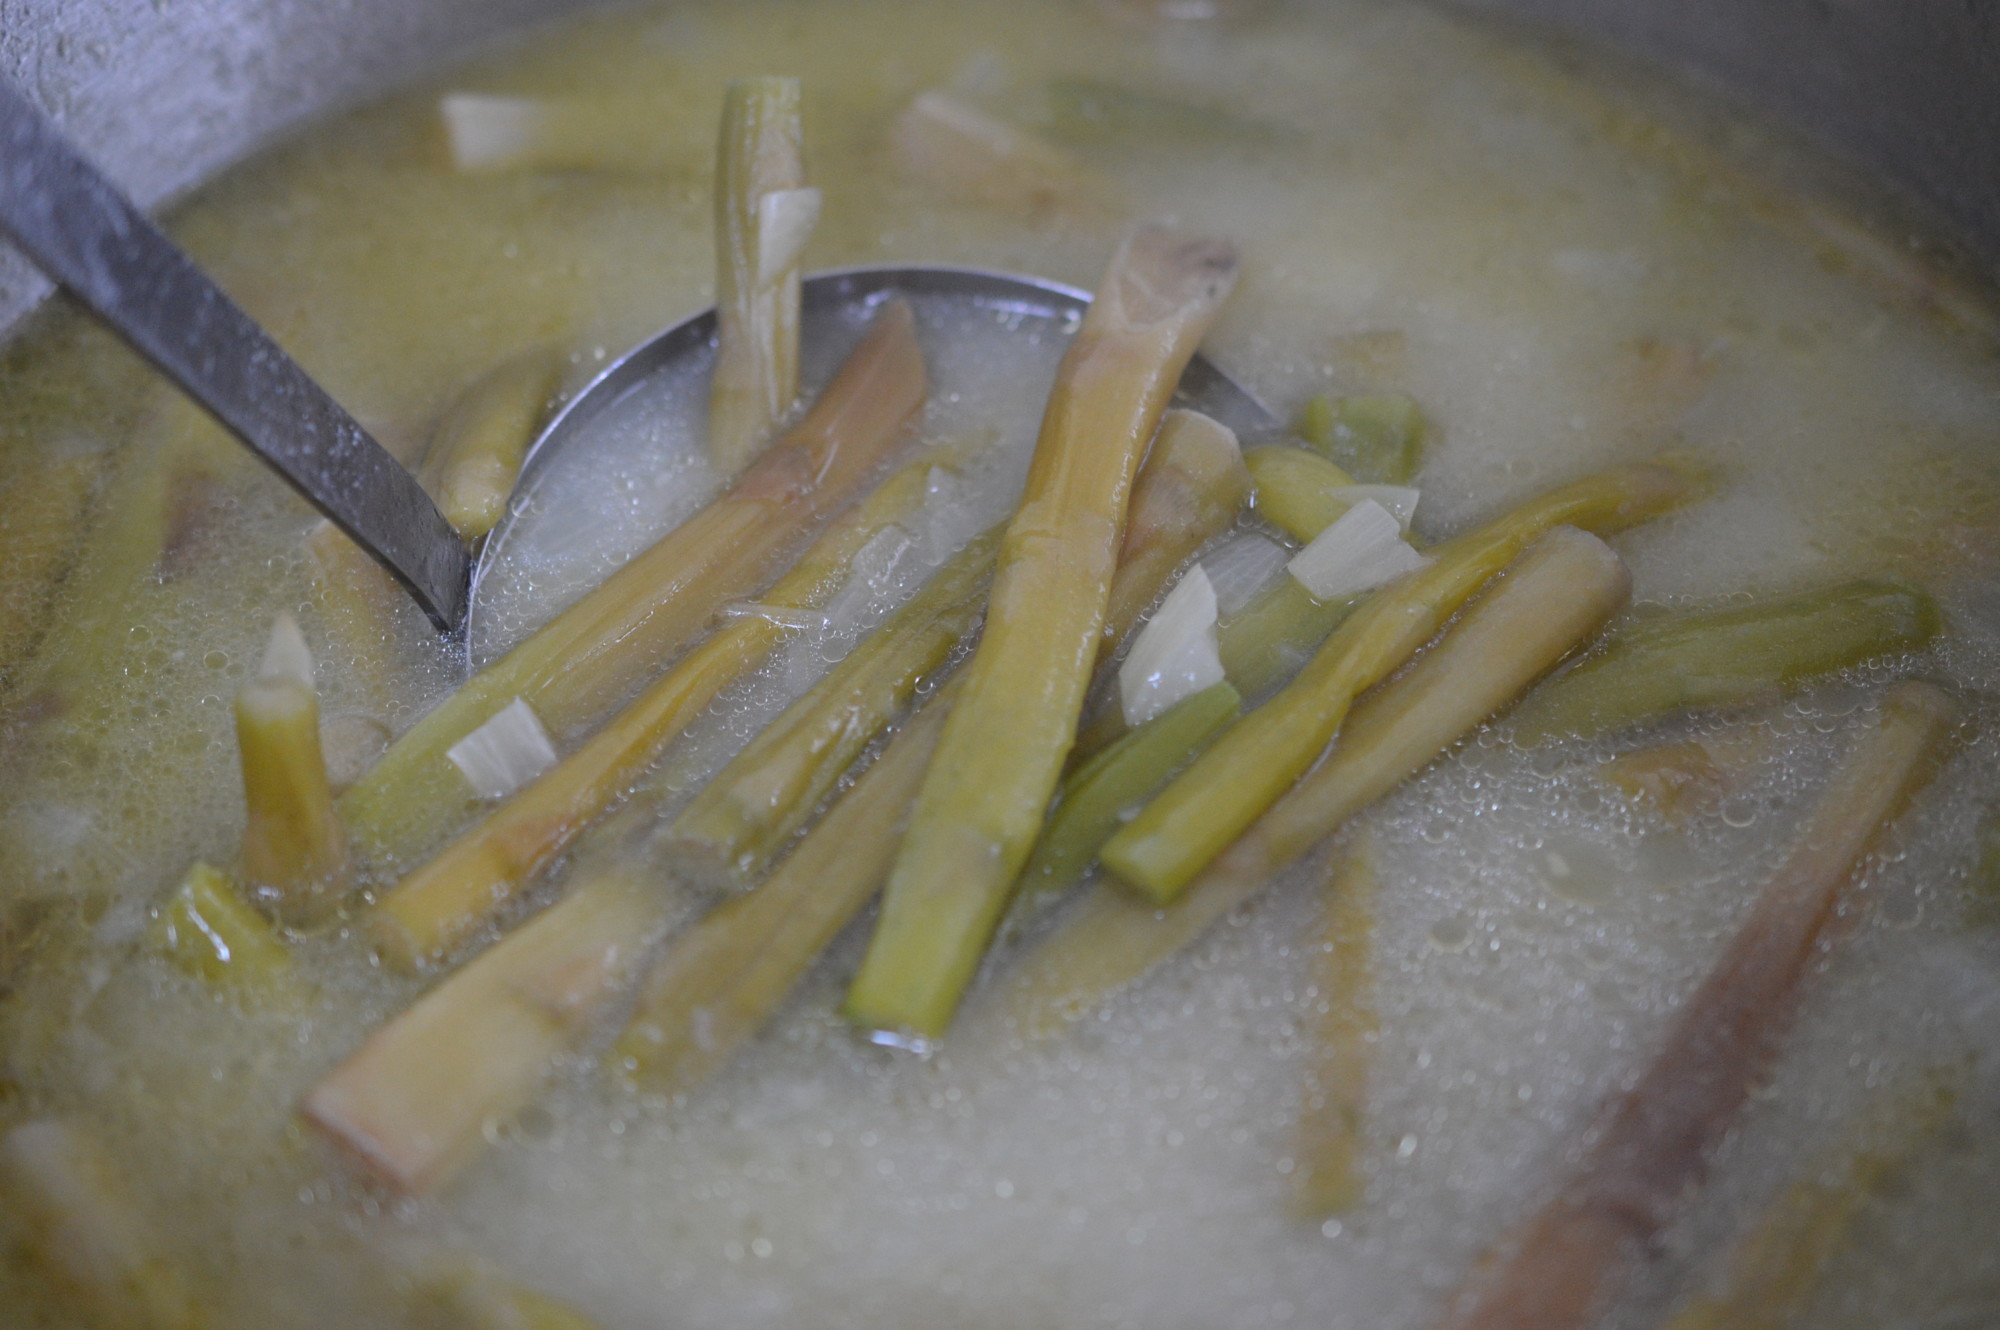
When they’re pink, remove from the water with a slotted spoon.  Don’t drain the water away because you’re going to use it for the pork.

vietnemese style fresh spring rolls 8

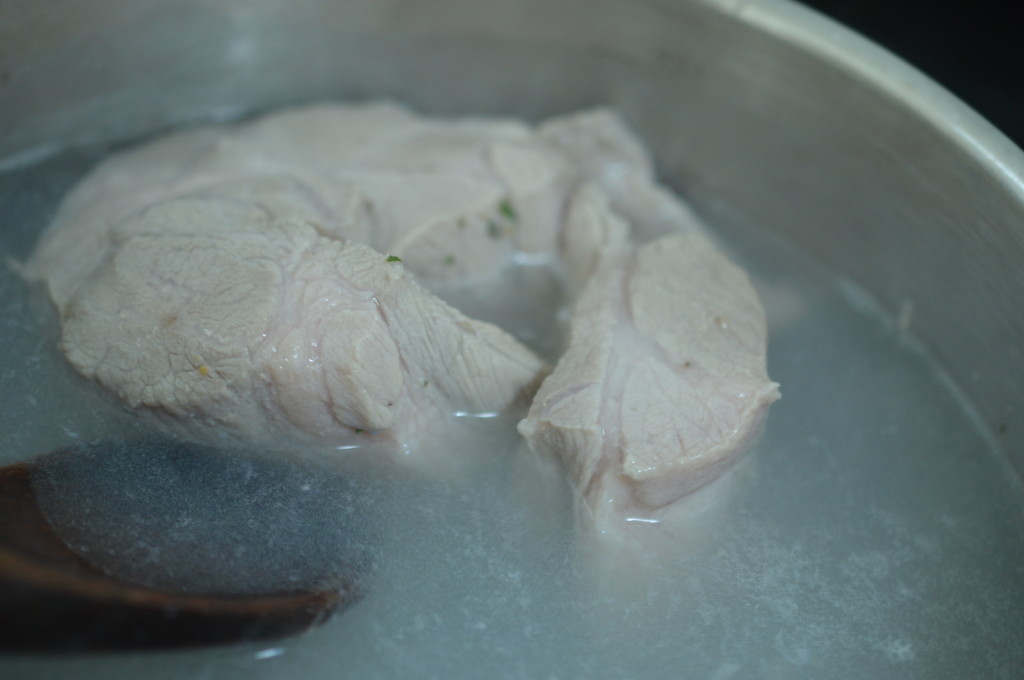
The same weight of pork shoulder. You don’t have to be exact.  This is a fairly fatty cut, but everything else is so utterly lean …

It’ll take about 20-25 minutes.  A longer and thinner piece will take less time than a shorter fatter bit.  You need to cook to an internal temperature of 62ºC/145ºF.

vietnemese style fresh spring rolls 9

Whilst the pork is cooking, slice the prawns in half.  Firstly, it makes an expensive ingredient go further.  Secondly, I prefer it.  Cut lengthwise and the end result will be much prettier.

vietnemese style fresh spring rolls 11

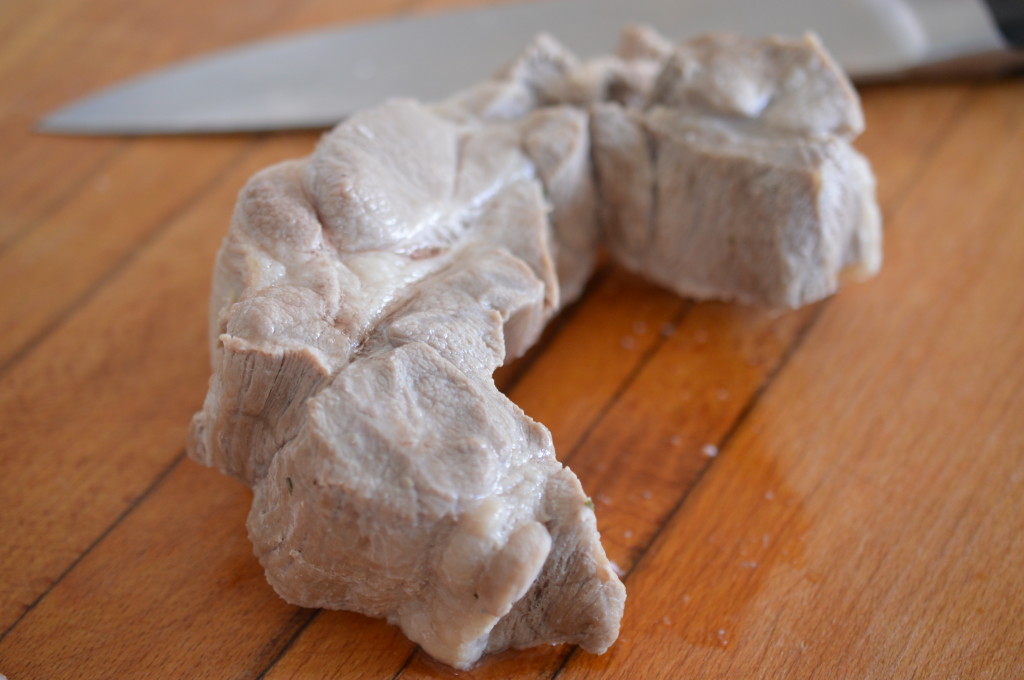
My poached pork looks anaemic.  Trust me.  A really sharp knife and the patience of a saint is what is needed here.

vietnemese style fresh spring rolls 13

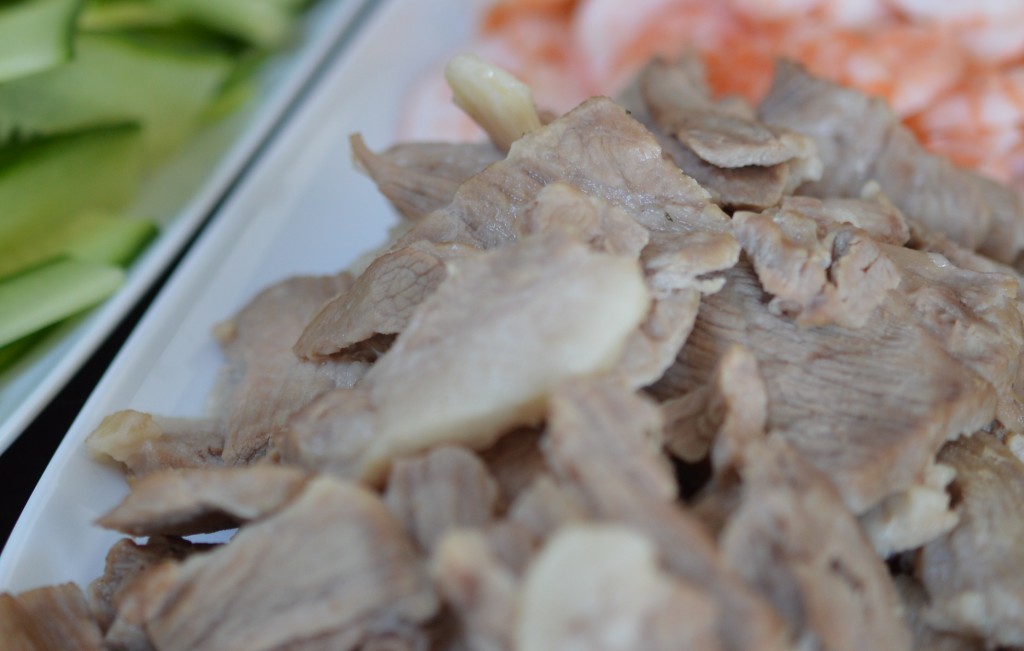
As soon as it’s cool enough, slice thinly.

vietnemese style fresh spring rolls 10

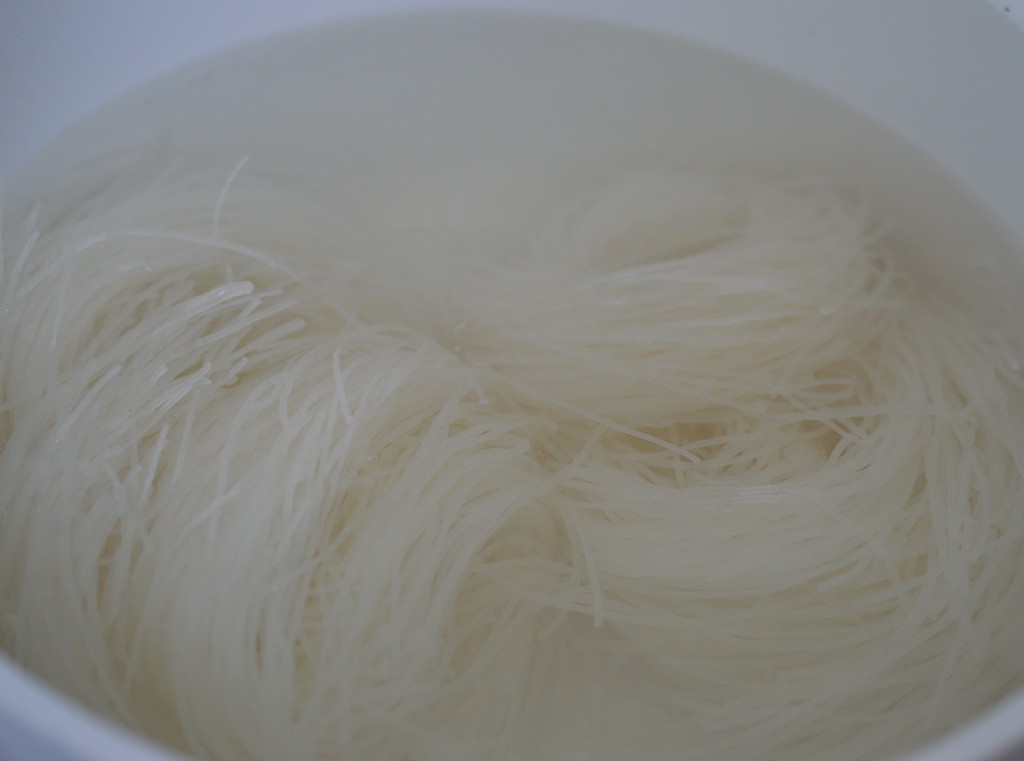
Rice vermicelli noodles are embarrassingly easy to prepare.  Put them in a bowl and pour boiling water over them.  Add 1tsp of salt and, contrary to the packet instructions, leave them for 4 minutes.  You are looking for ‘al dente’.  That’s cooked through but with enough resistance to feel you’re biting something.

vietnemese style fresh spring rolls 12

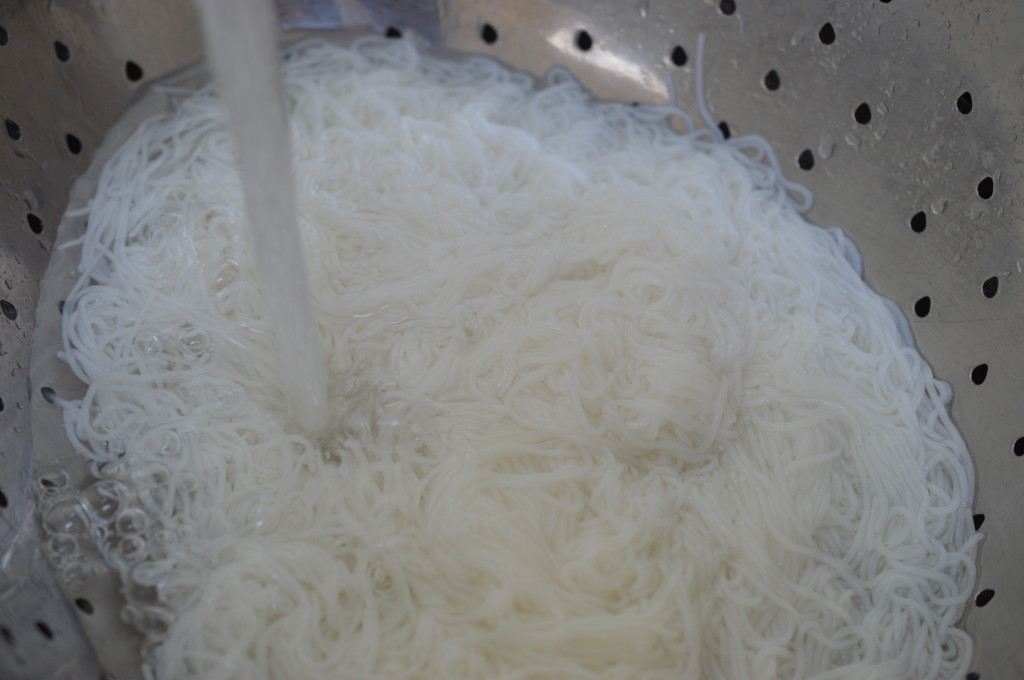
Rinse in cold water – and drain thoroughly.

vietnemese style fresh spring rolls 13

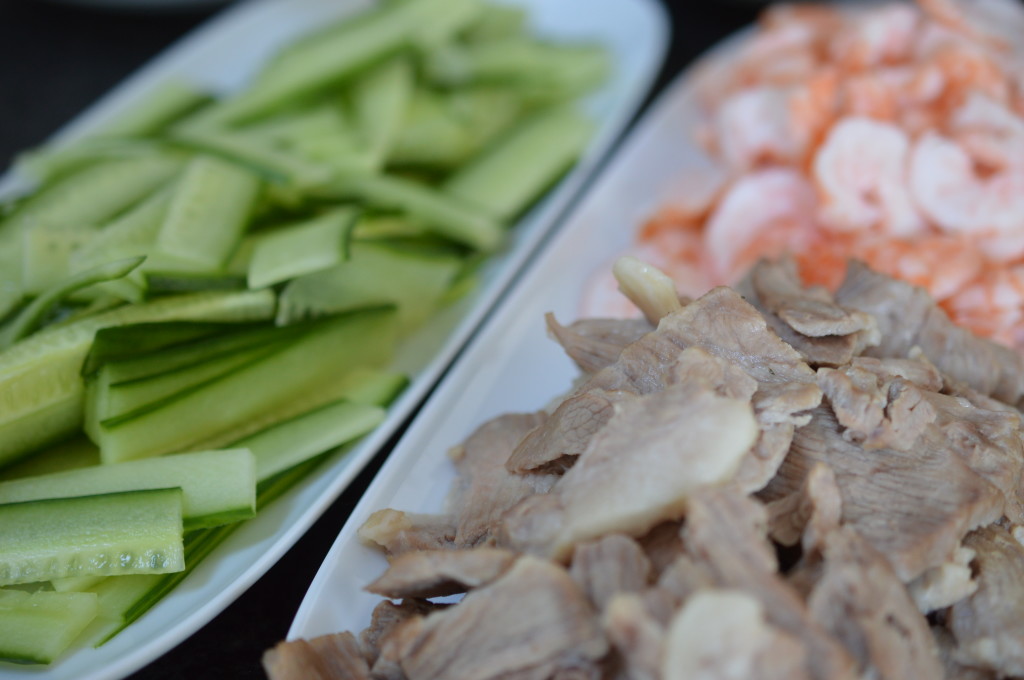
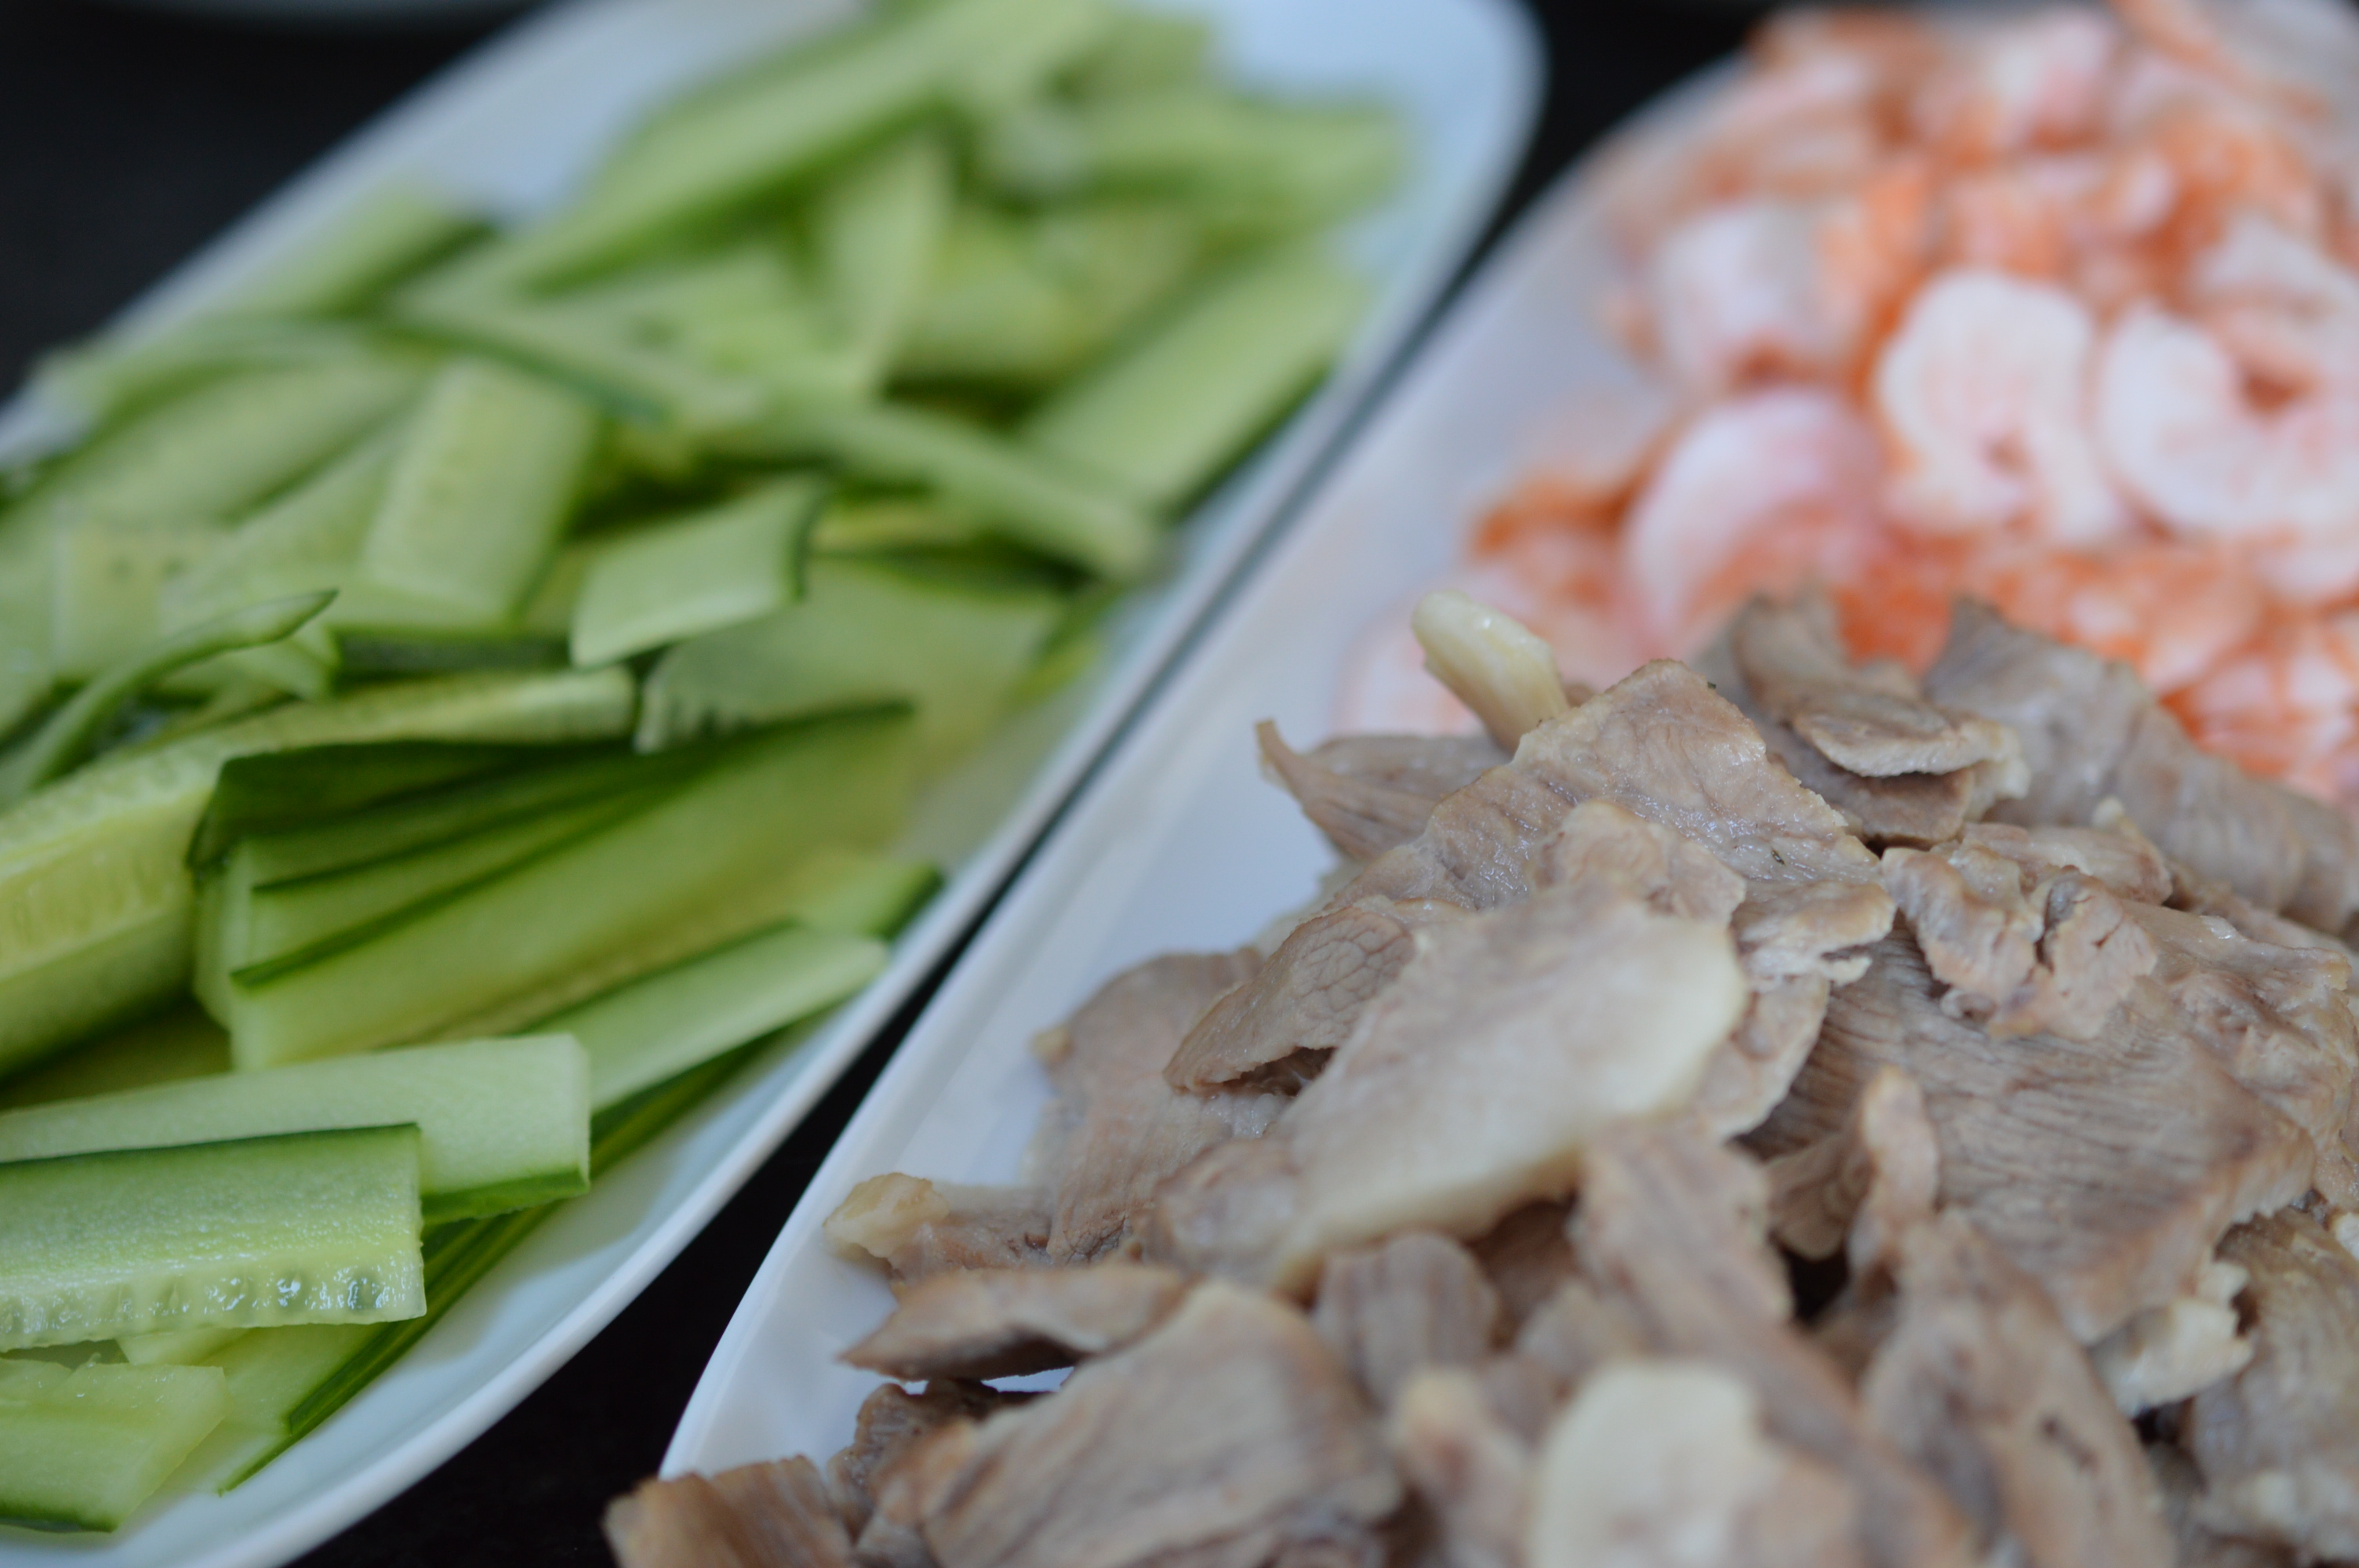
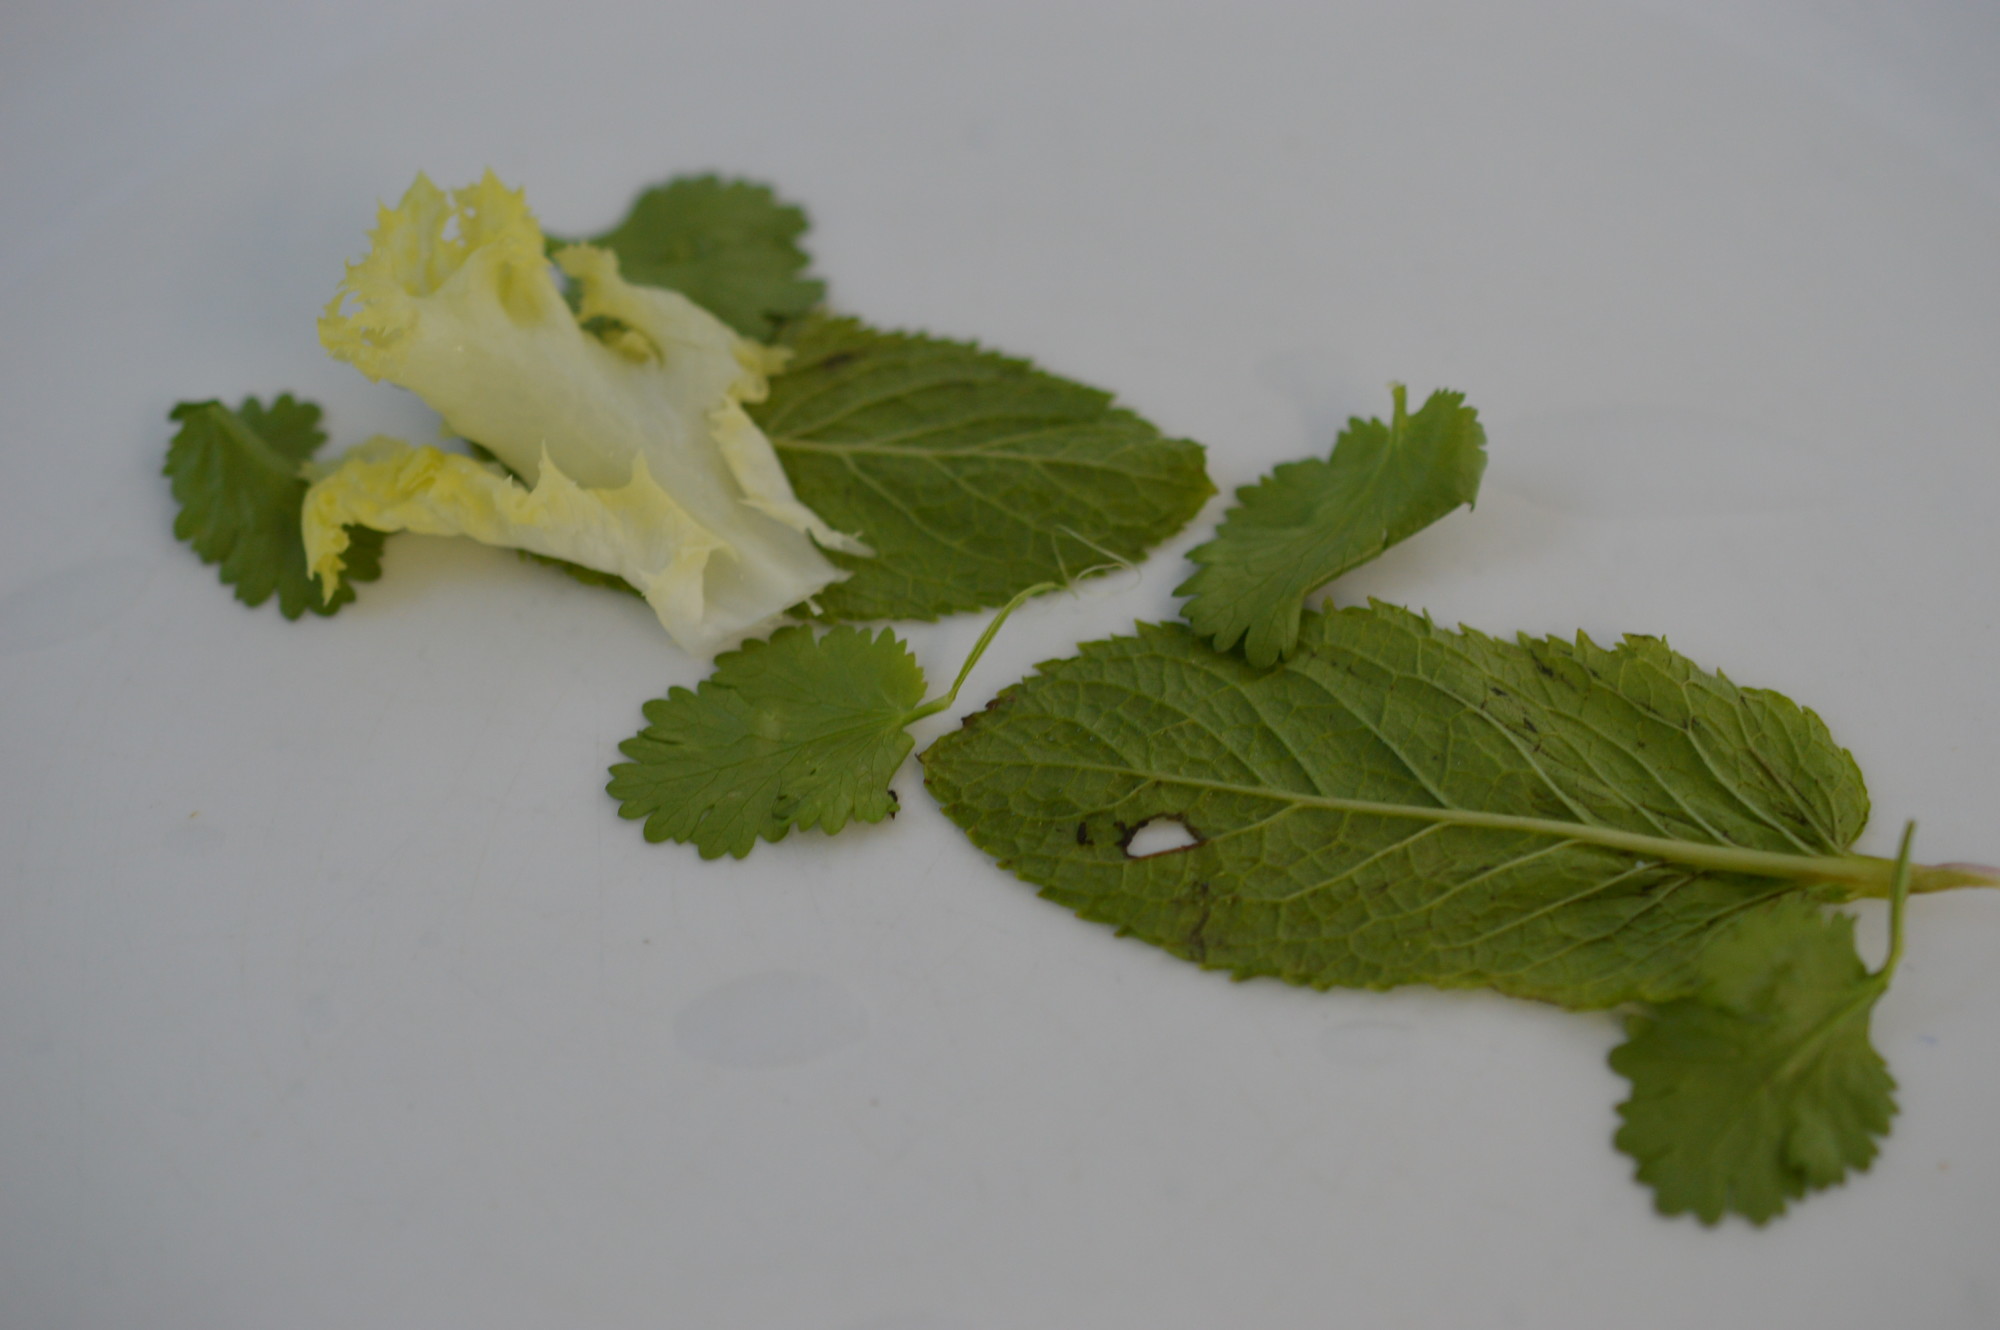
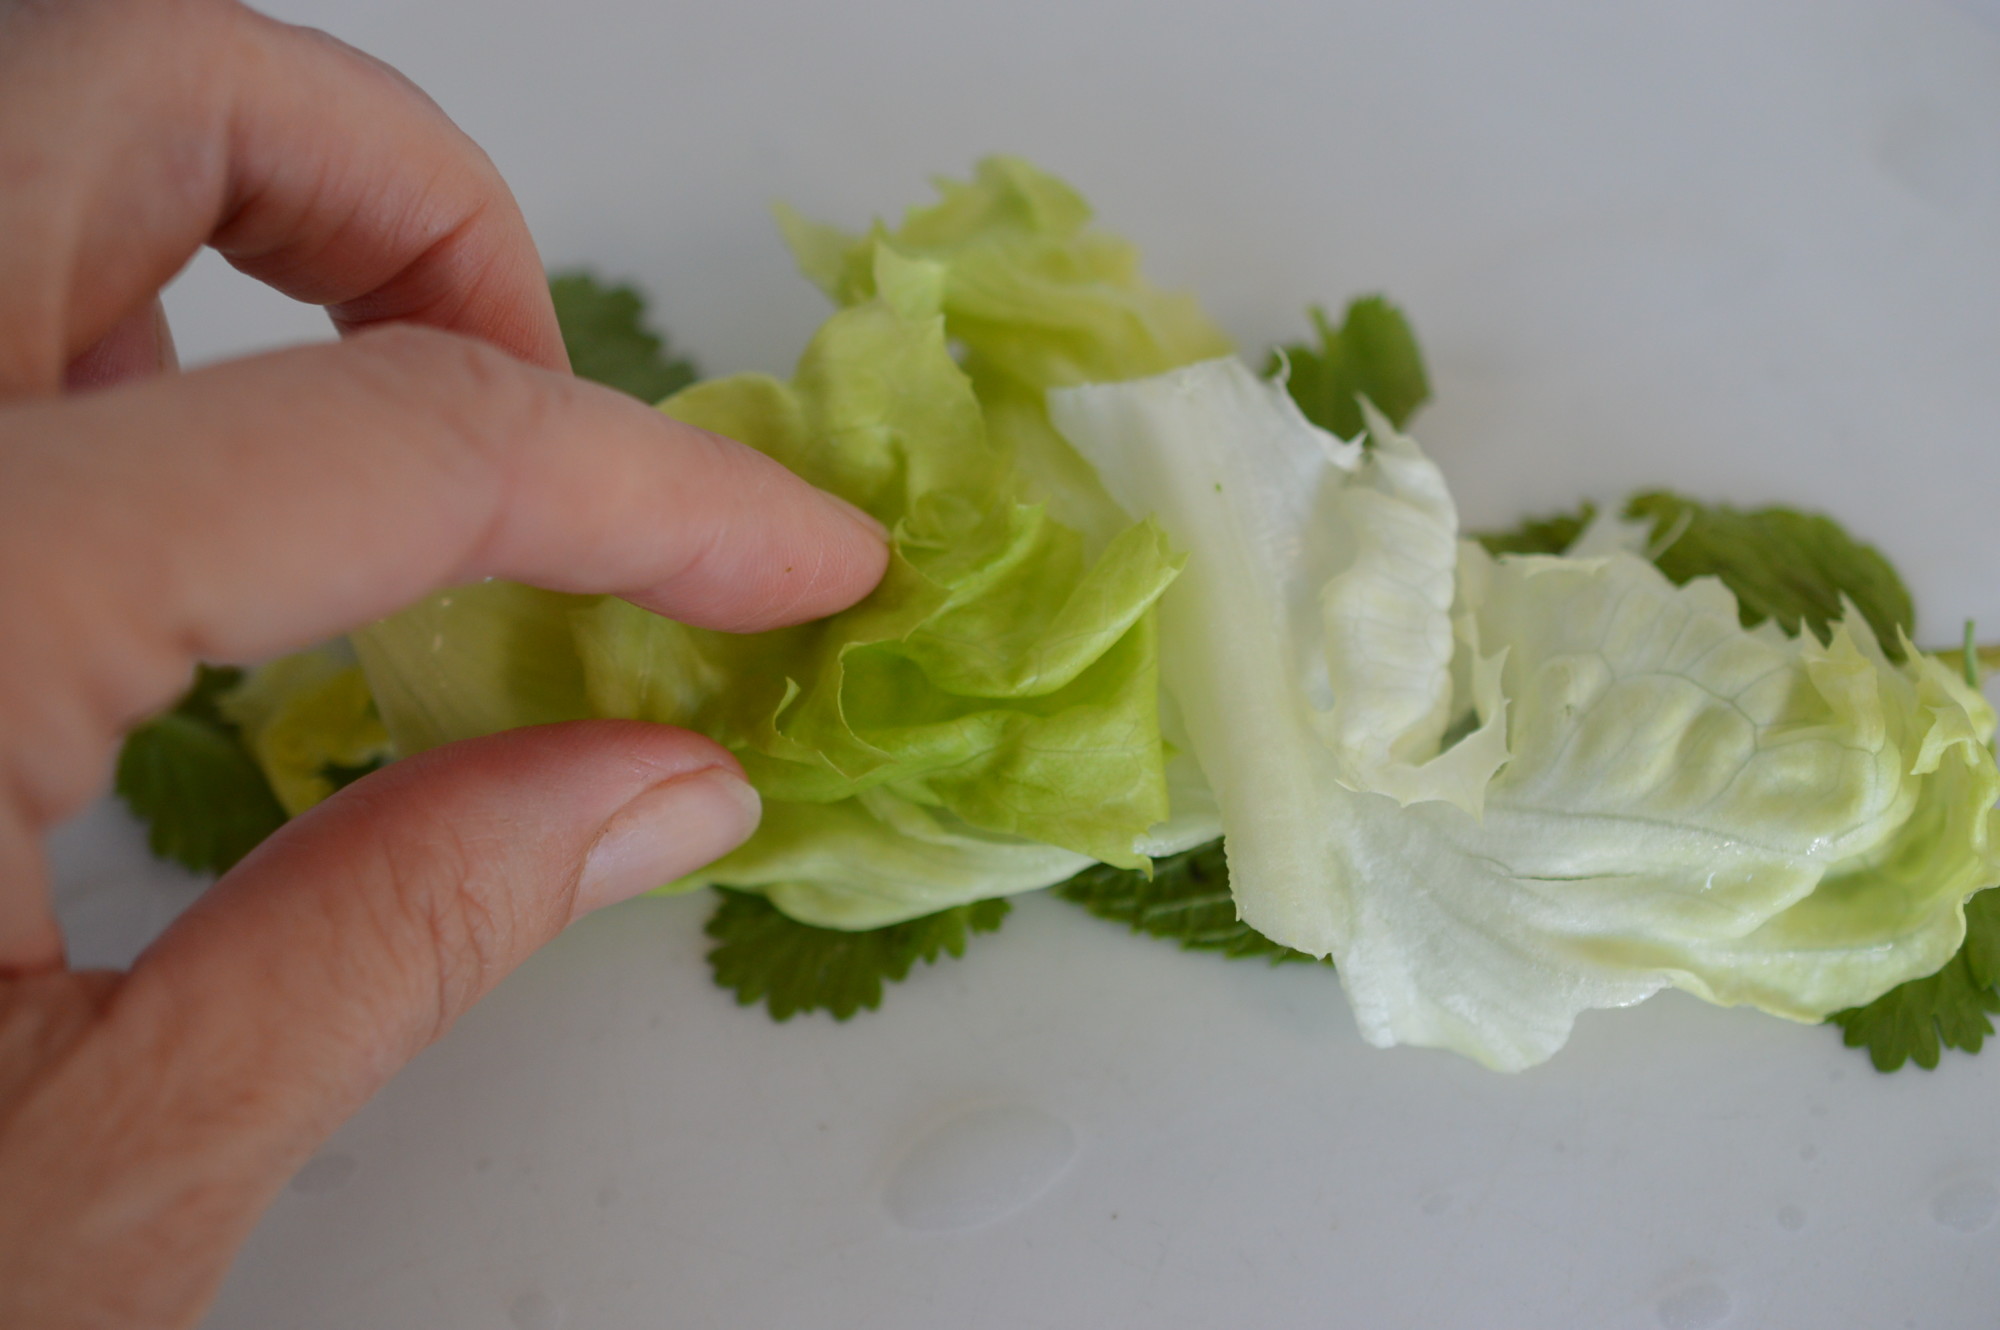
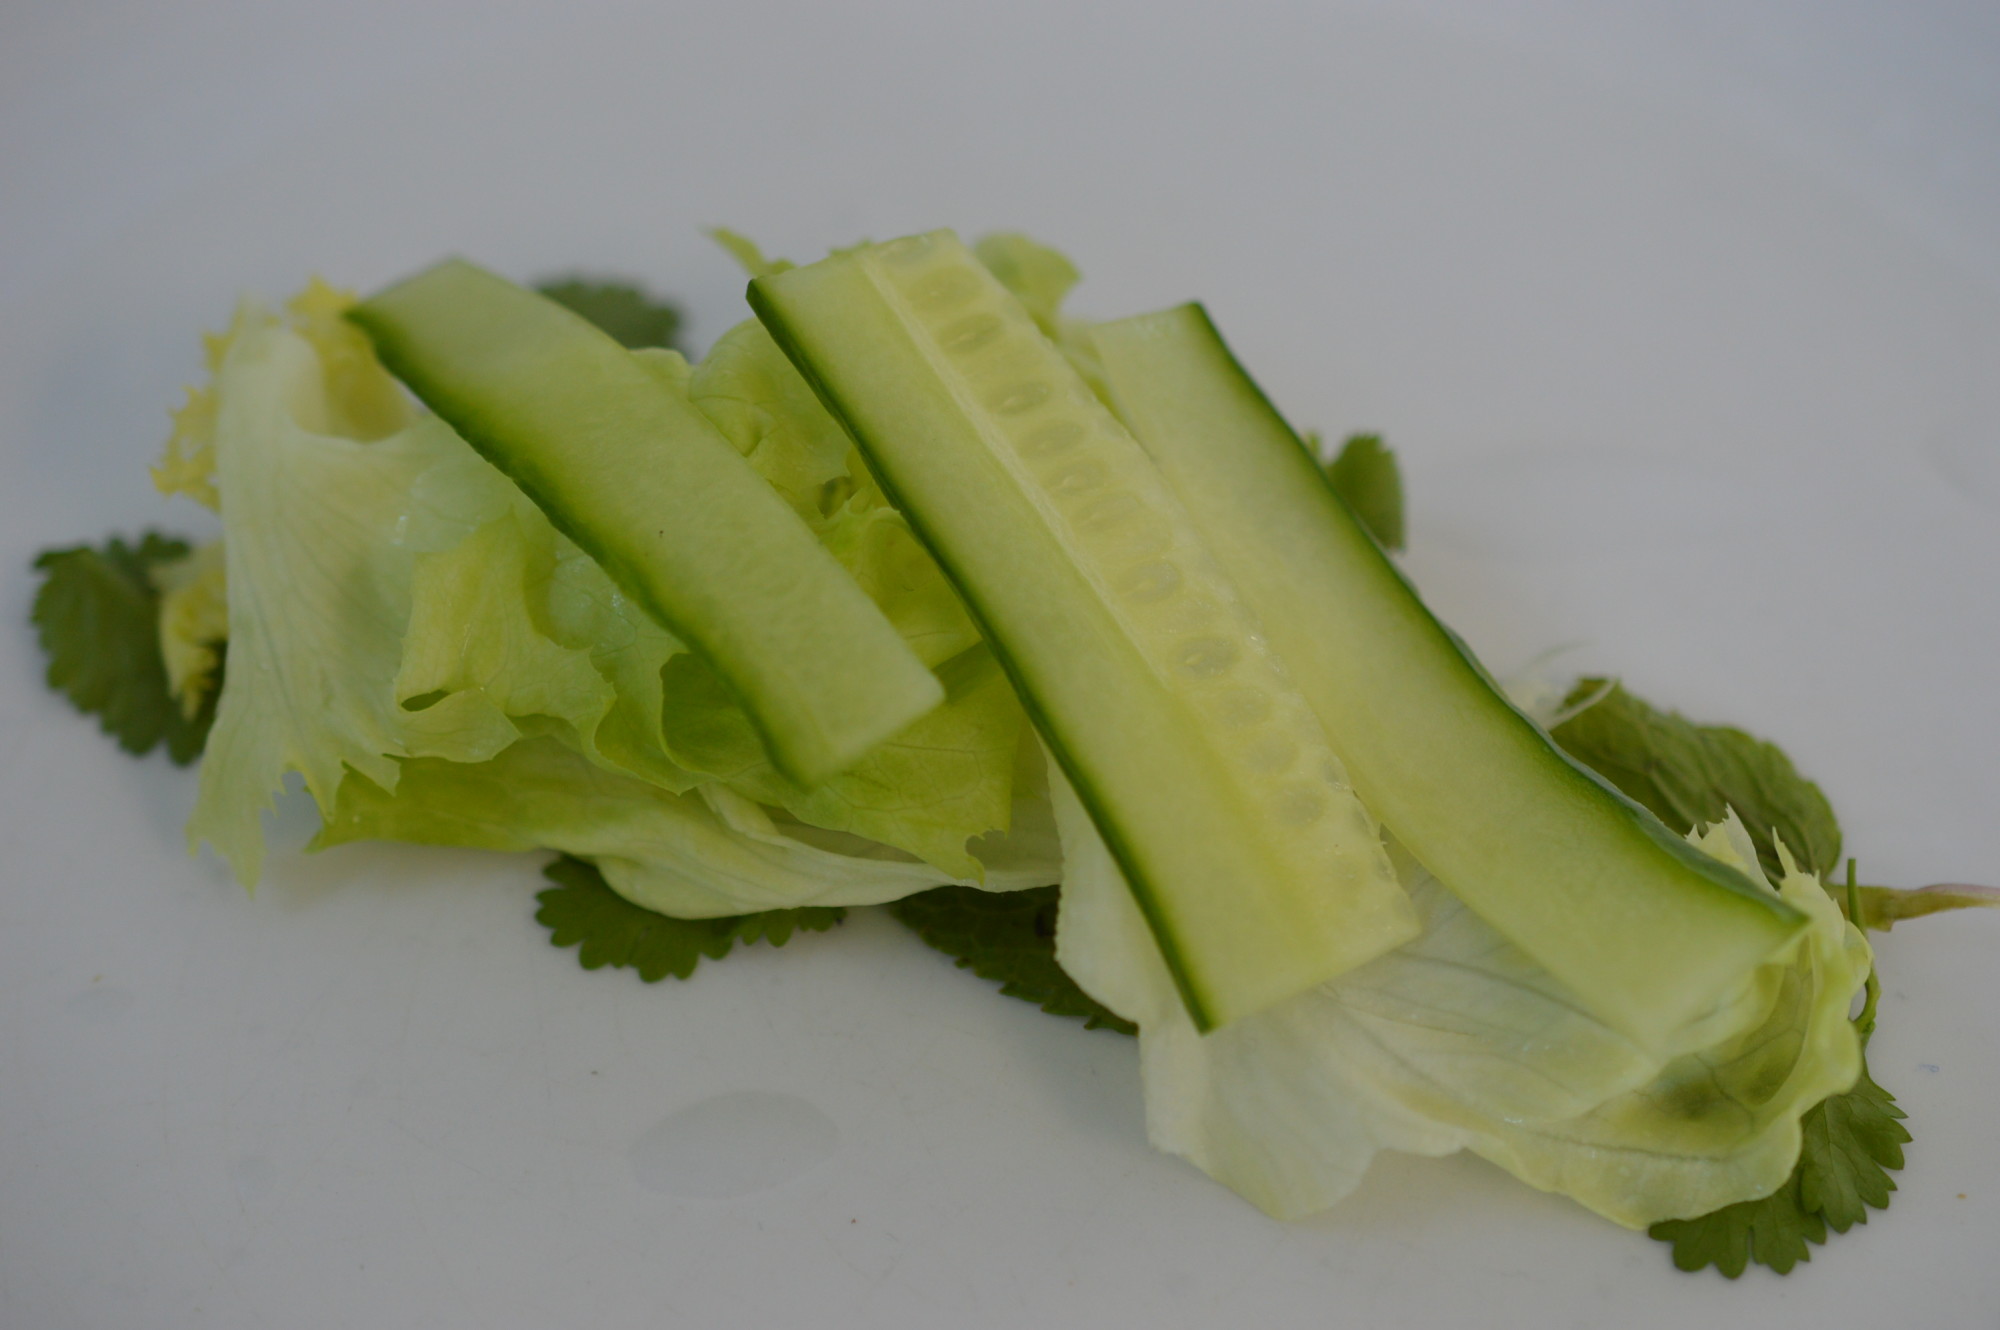
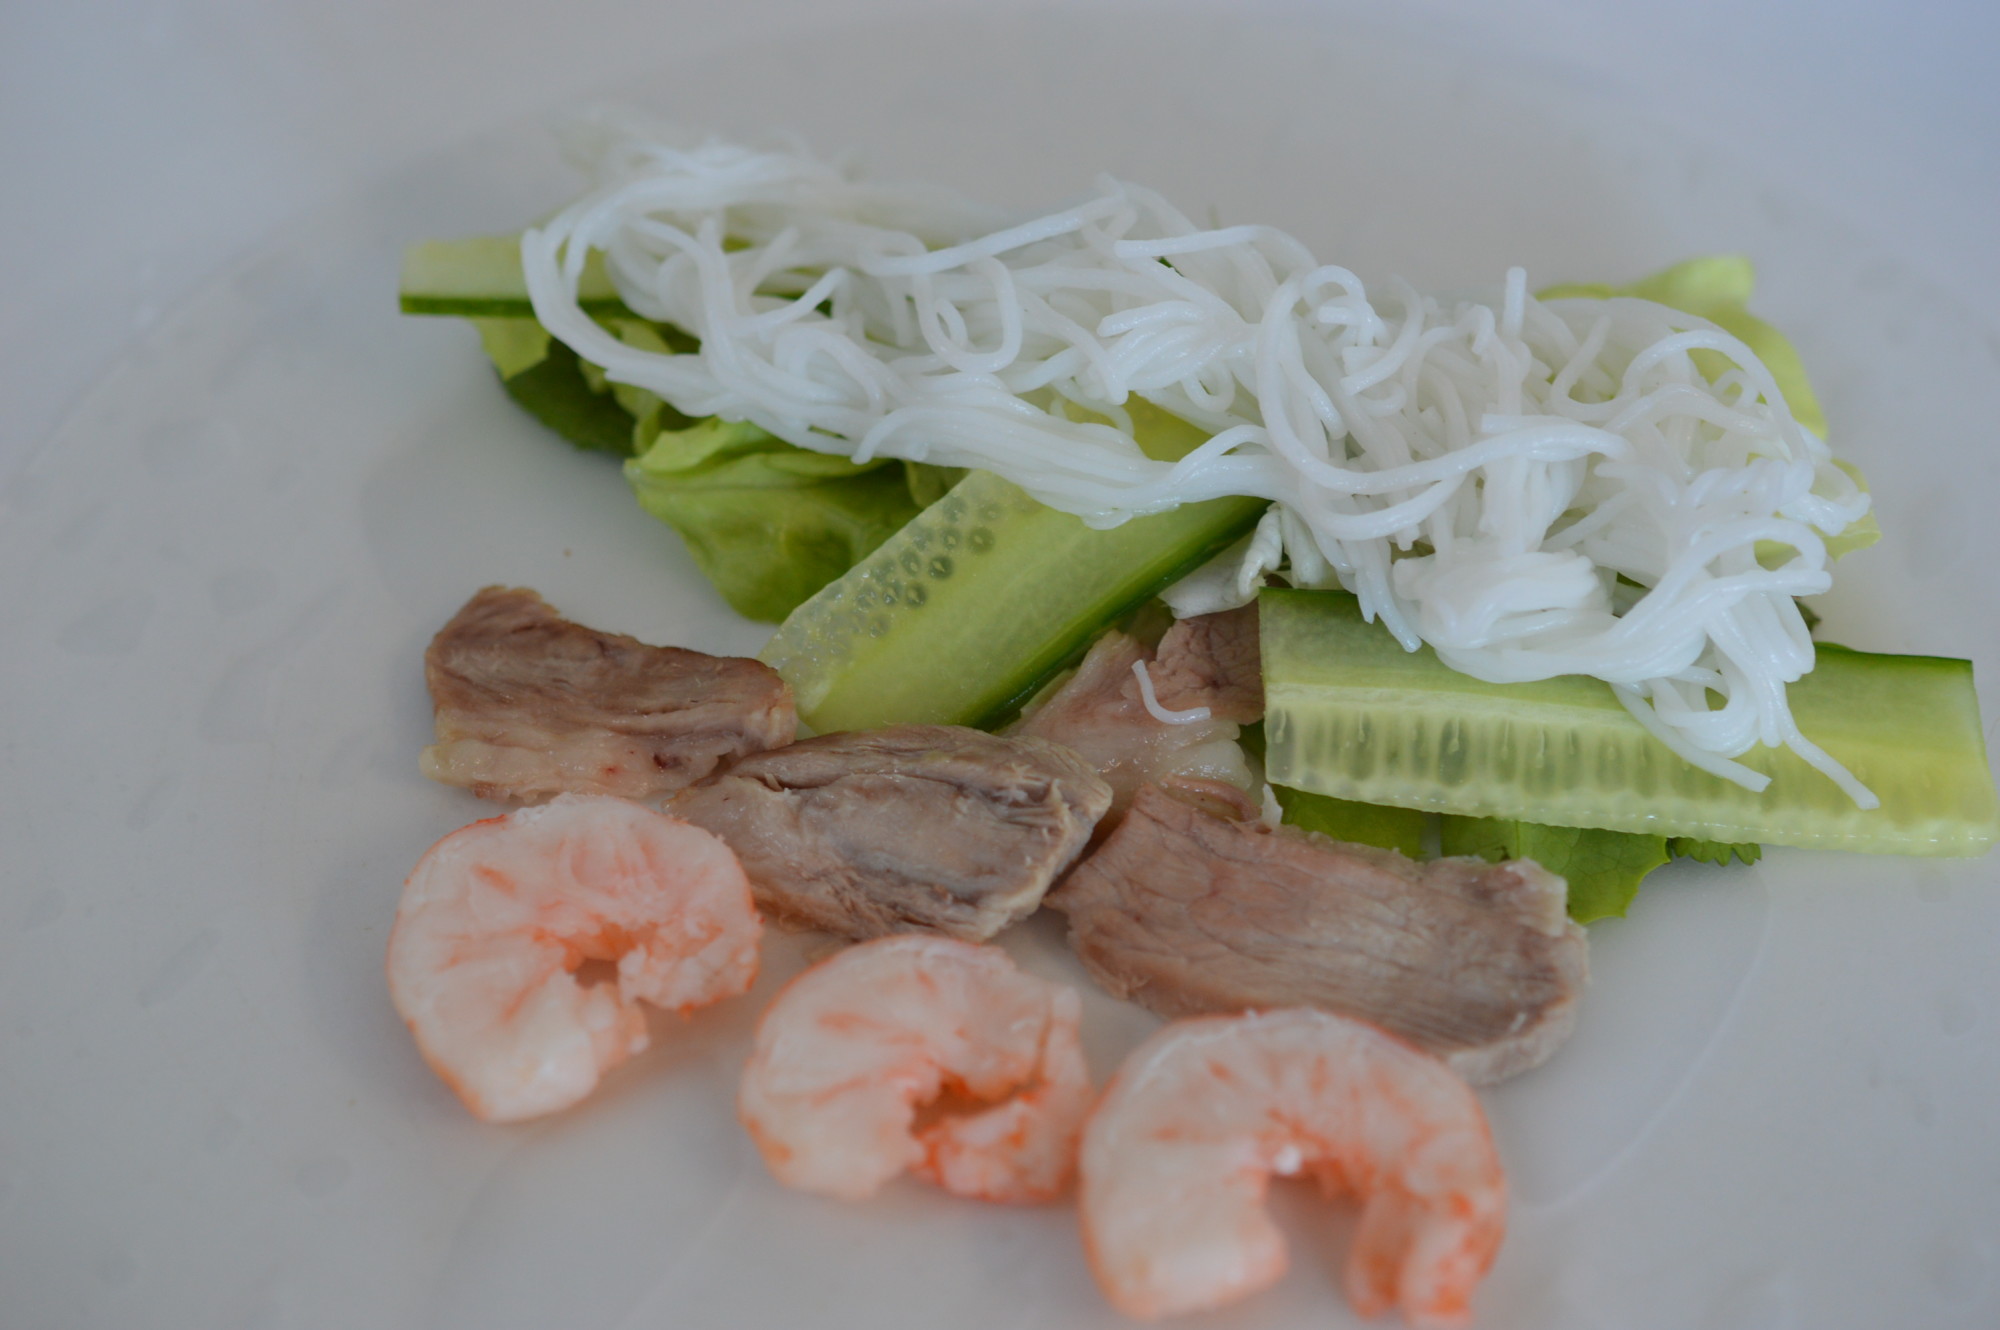
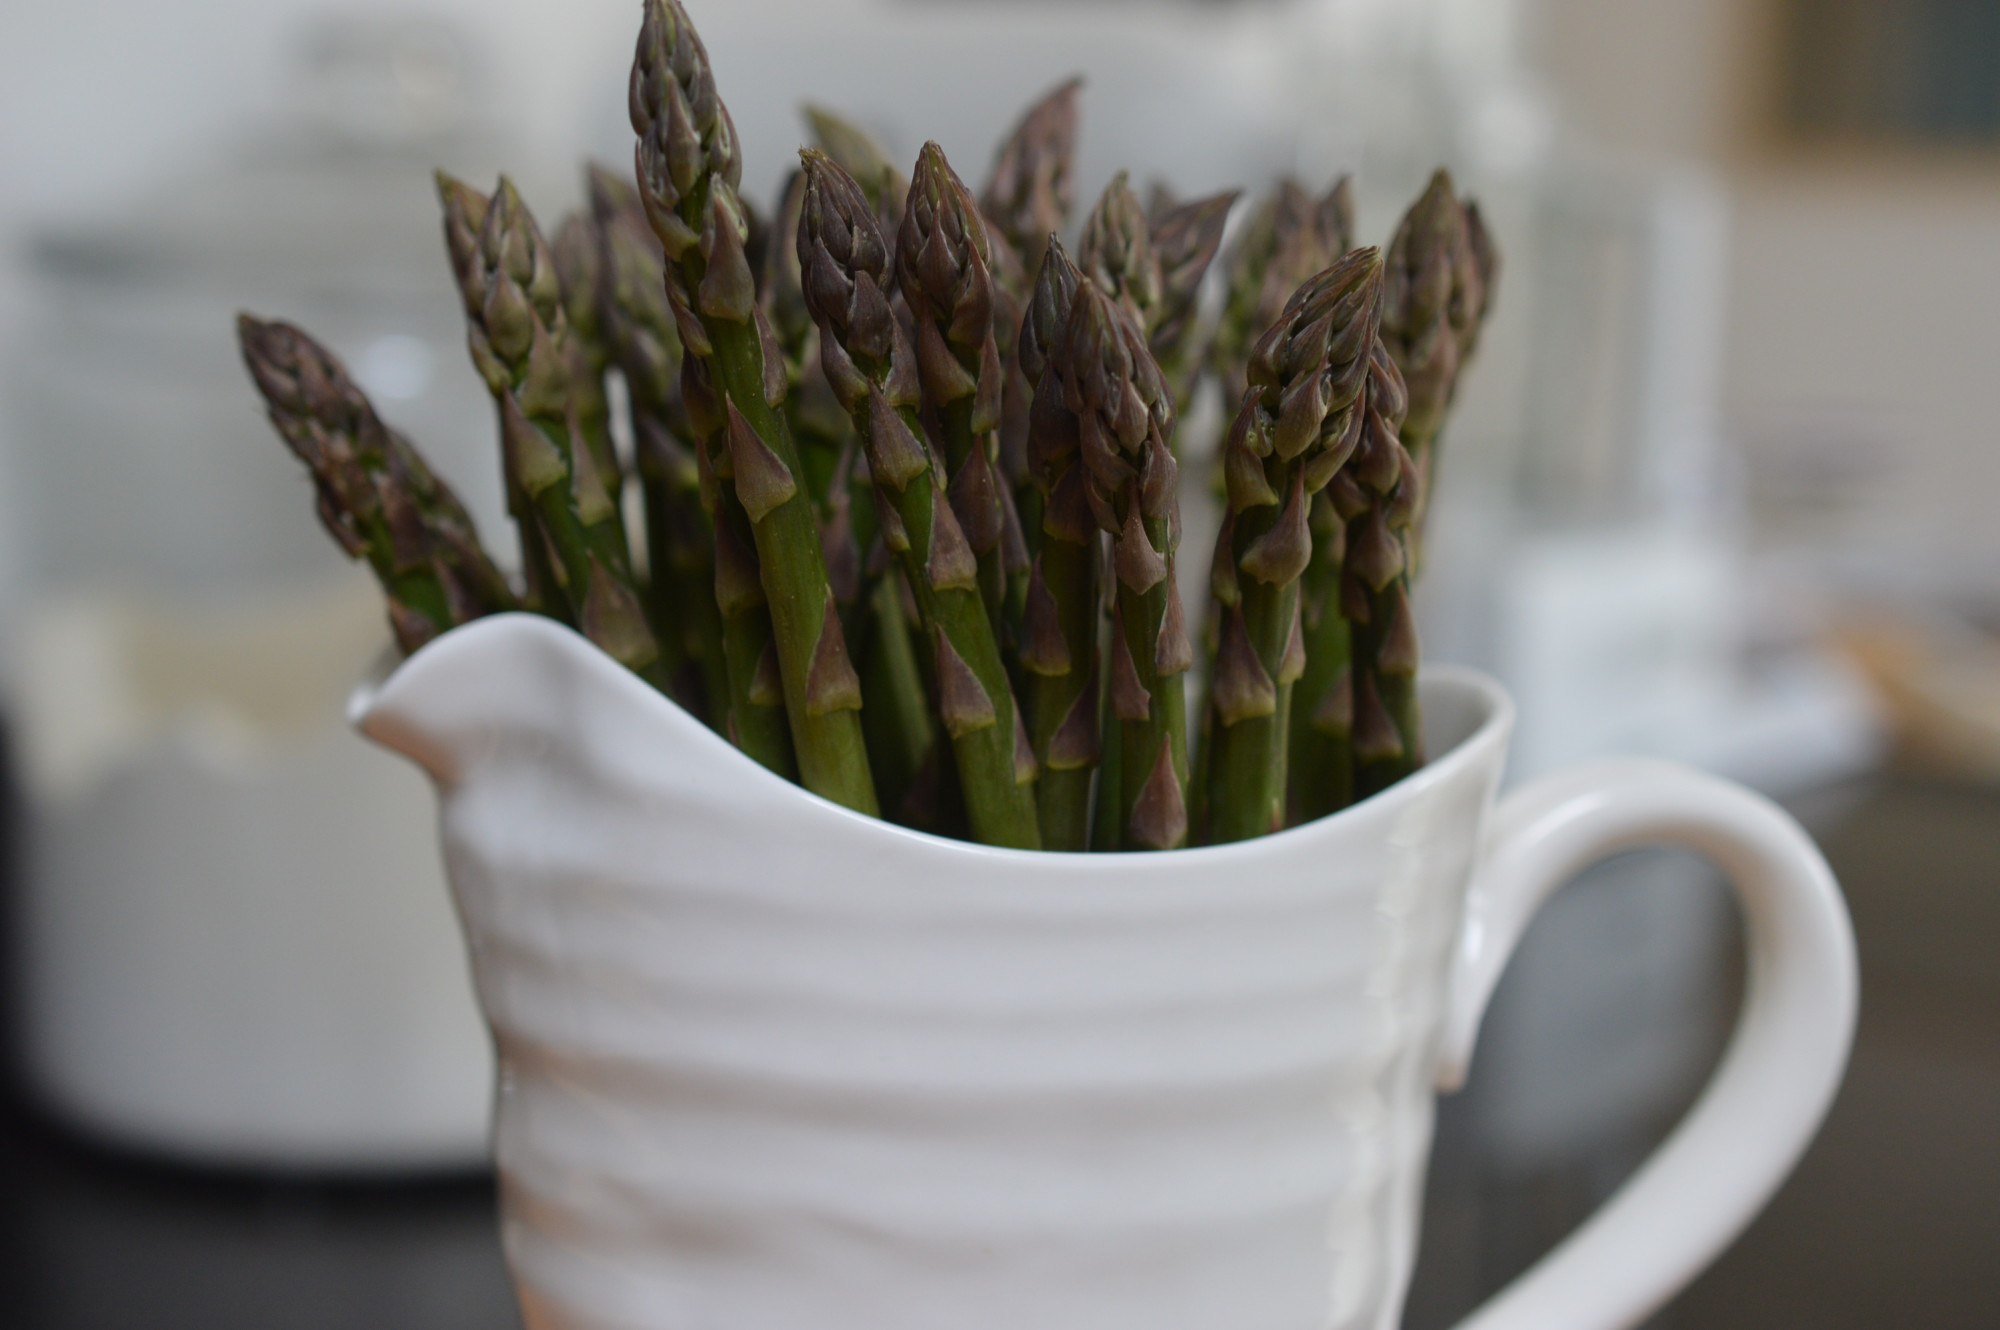
Thinly slice cucumber.  There’s no need to peel or de-seed, but you want them about finger-length.  Soft lettuce, washed and torn into useable sized pieces.  Mint sprigs, leaves picked.  Coriander, leaves picked.

You’ve got other tasty options.  Grated carrot, thai basil, peanuts ..  Get it all laid out in a production line kind of thing.  It makes everything so much easier.

vietnemese style fresh spring rolls 23

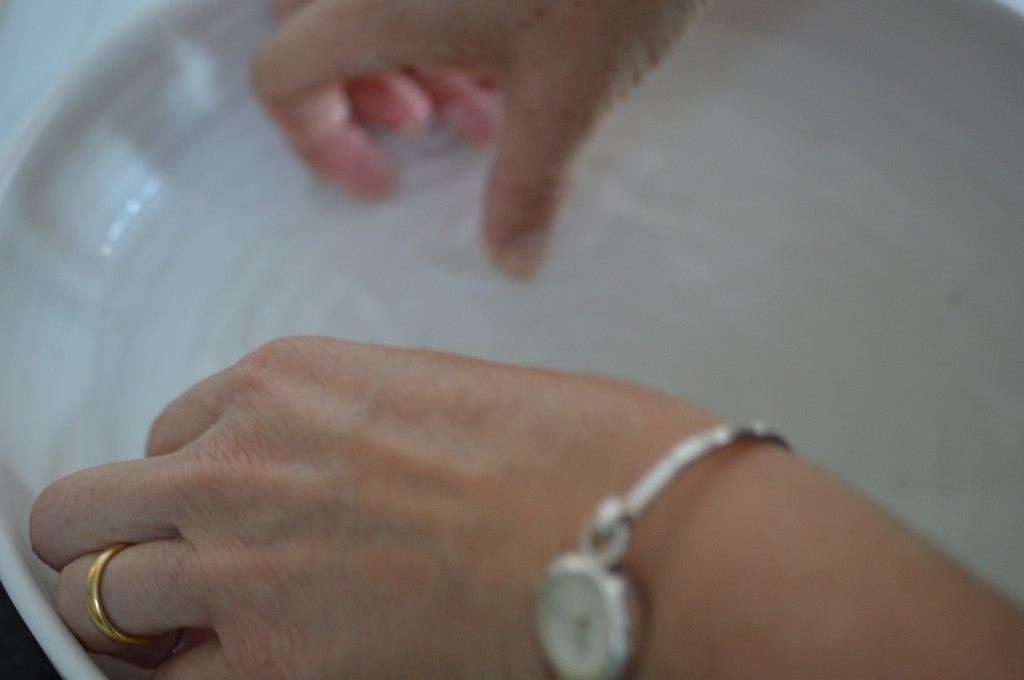
I like this bit.  Disregard the packet instructions.  I get out a big flat white plate and fill my Sophie Conran Roasting Dish (you want something shallow and large enough to lay a rice paper wrapper flat) with warm tap water.  Zero fuss.

I find the rice paper wrappers crack if they are left exposed to air.  So have a clean tea-towel to one side and flick them over your unused pile while you are working on the first one.

Dunk the wrapper in the water.  It’ll immediately start to soften.  It’s quick.  Pull it out before it’s ready to roll because they carry on softening out of the water.  By the time you’ve got it laid out on your plate it’ll be perfectly rollable.

vietnemese style fresh spring rolls 16

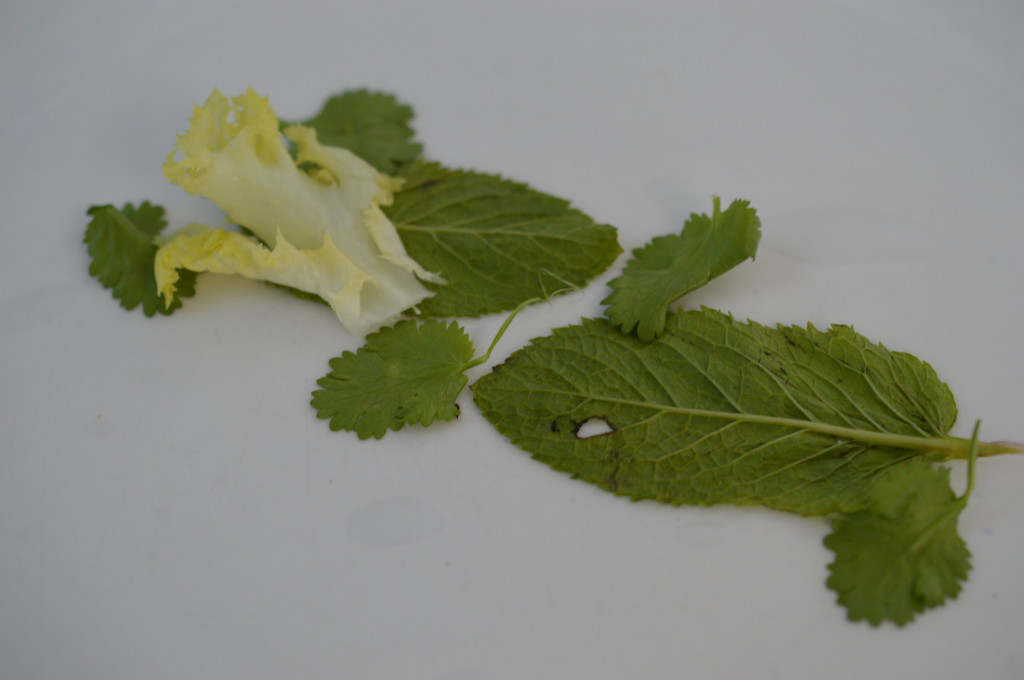
Now, it’s the pretty stuff.  Arrange a few mint leaves on the top third of the wrapper, leaving an inch either size.  A few coriander leaves.

vietnemese style fresh spring rolls 17

Some soft lettuce.

vietnemese style fresh spring rolls 18

The thinly sliced cucumber.

vietnemese style fresh spring rolls 19

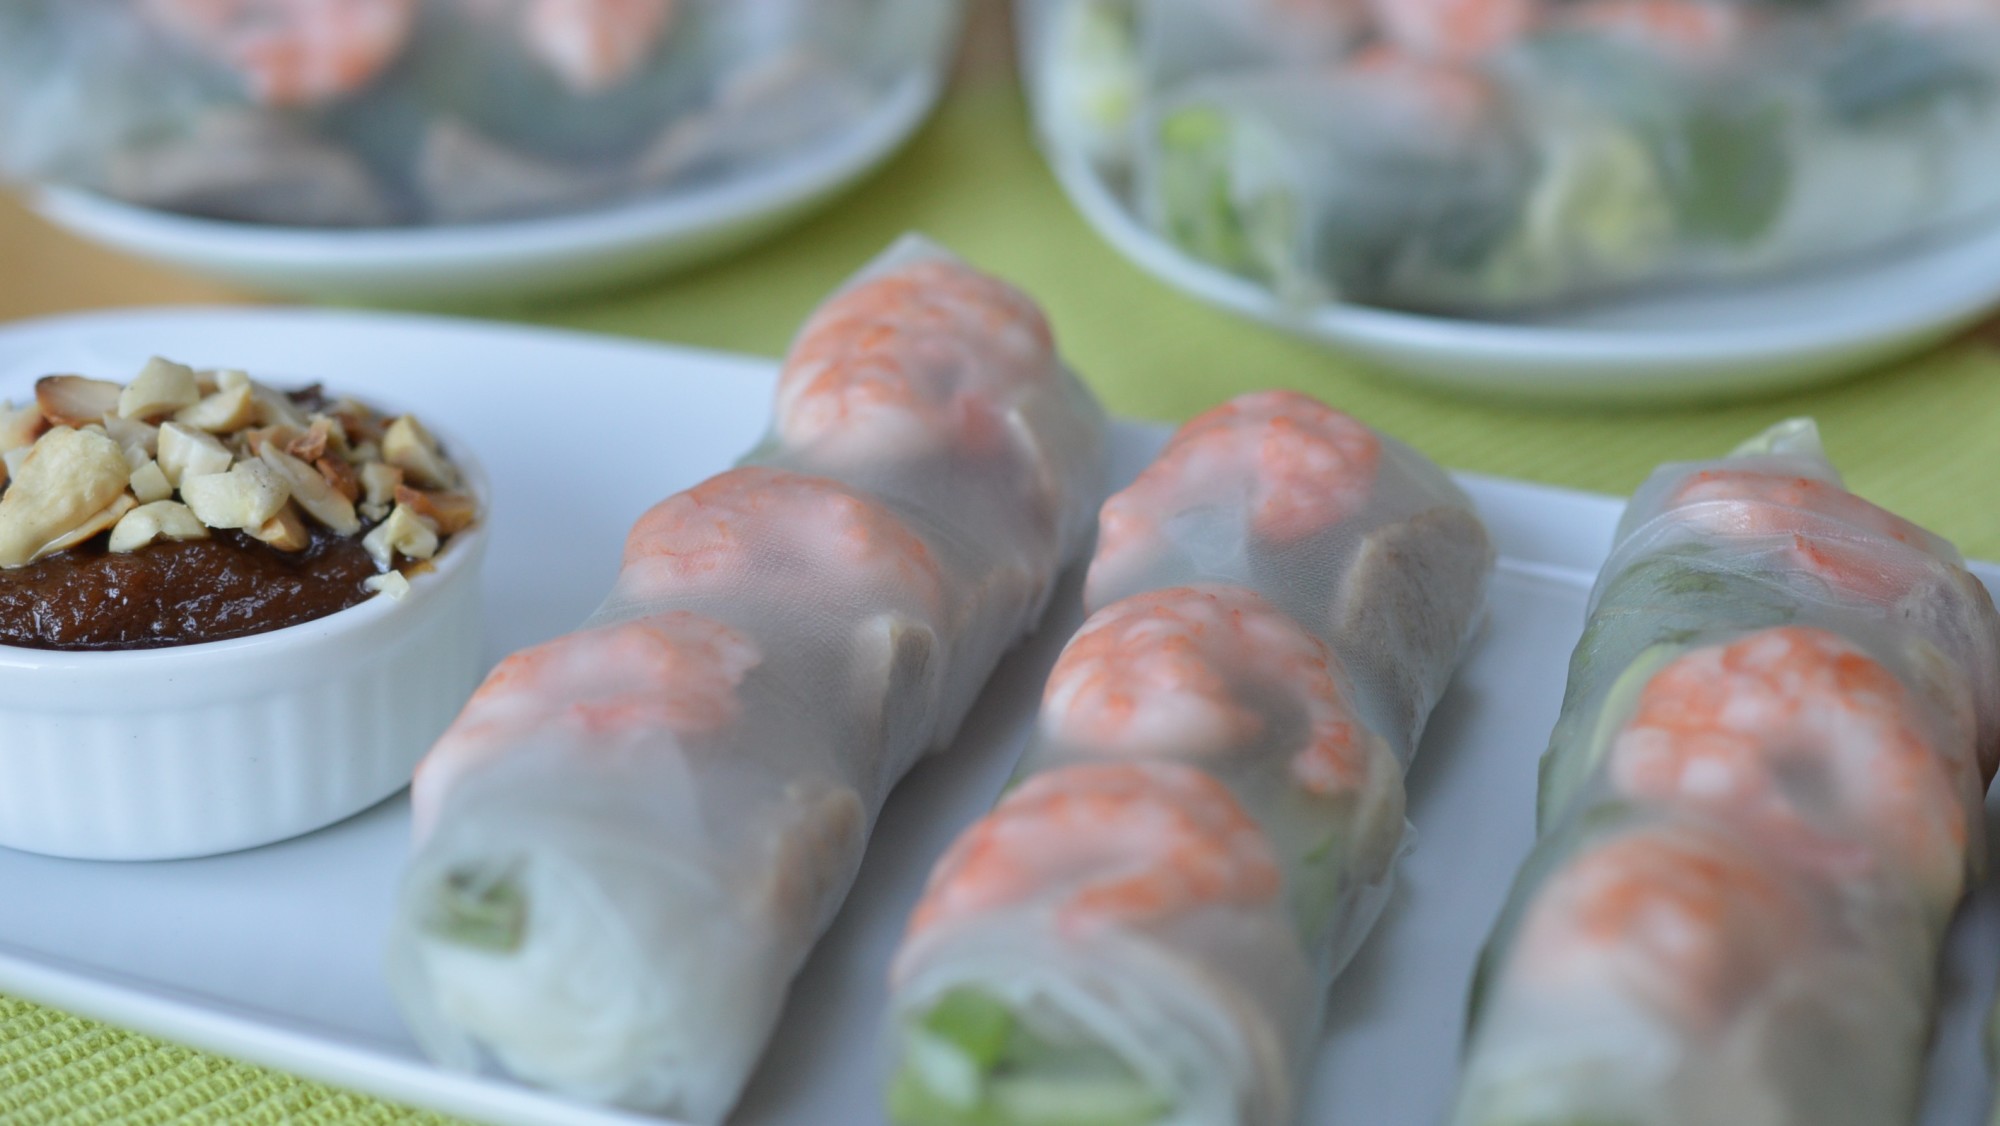
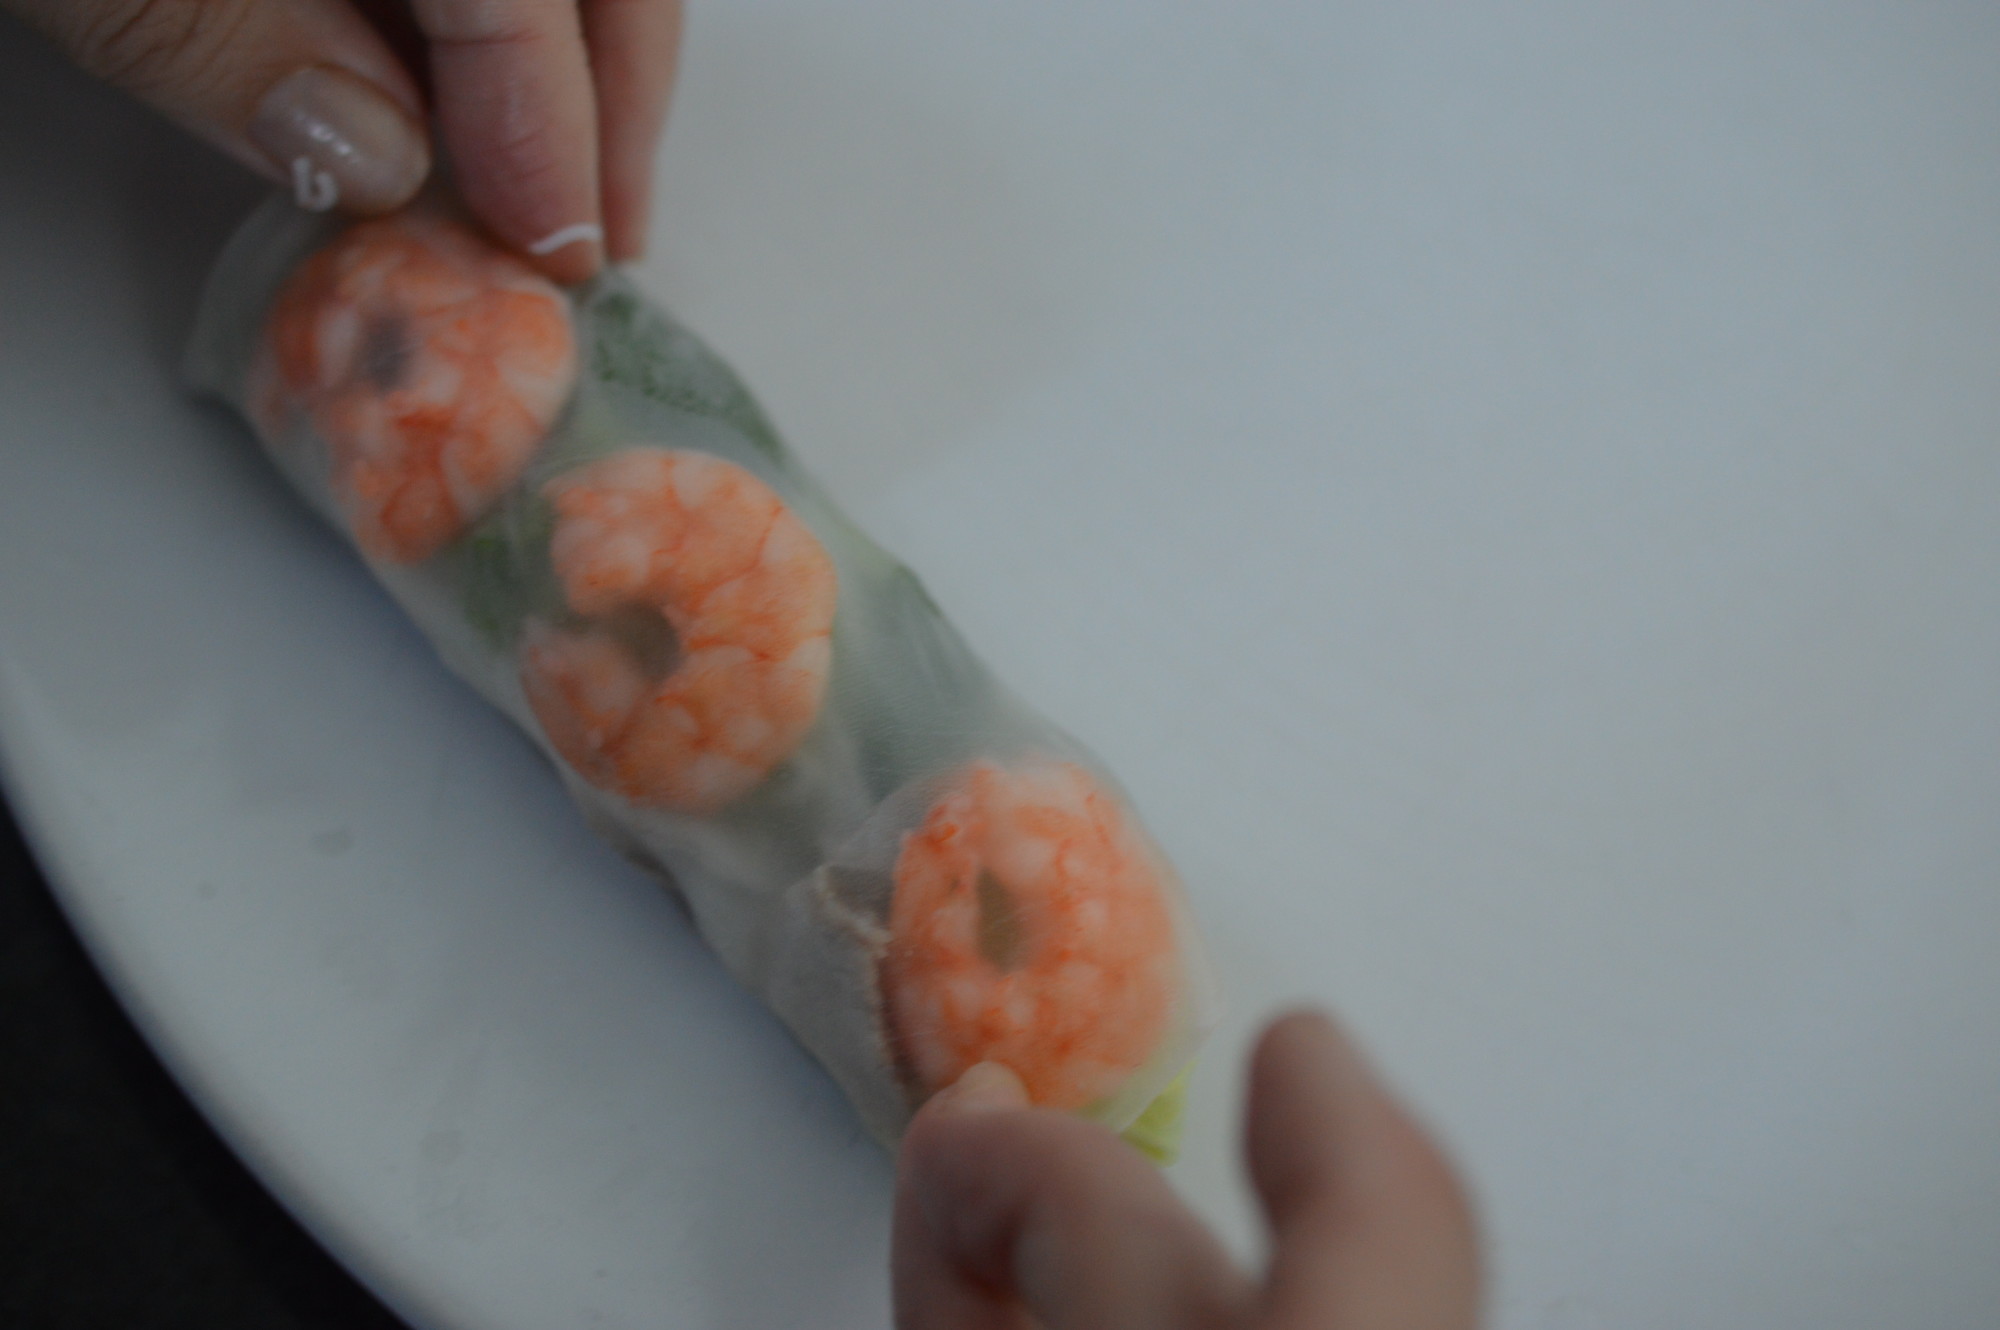
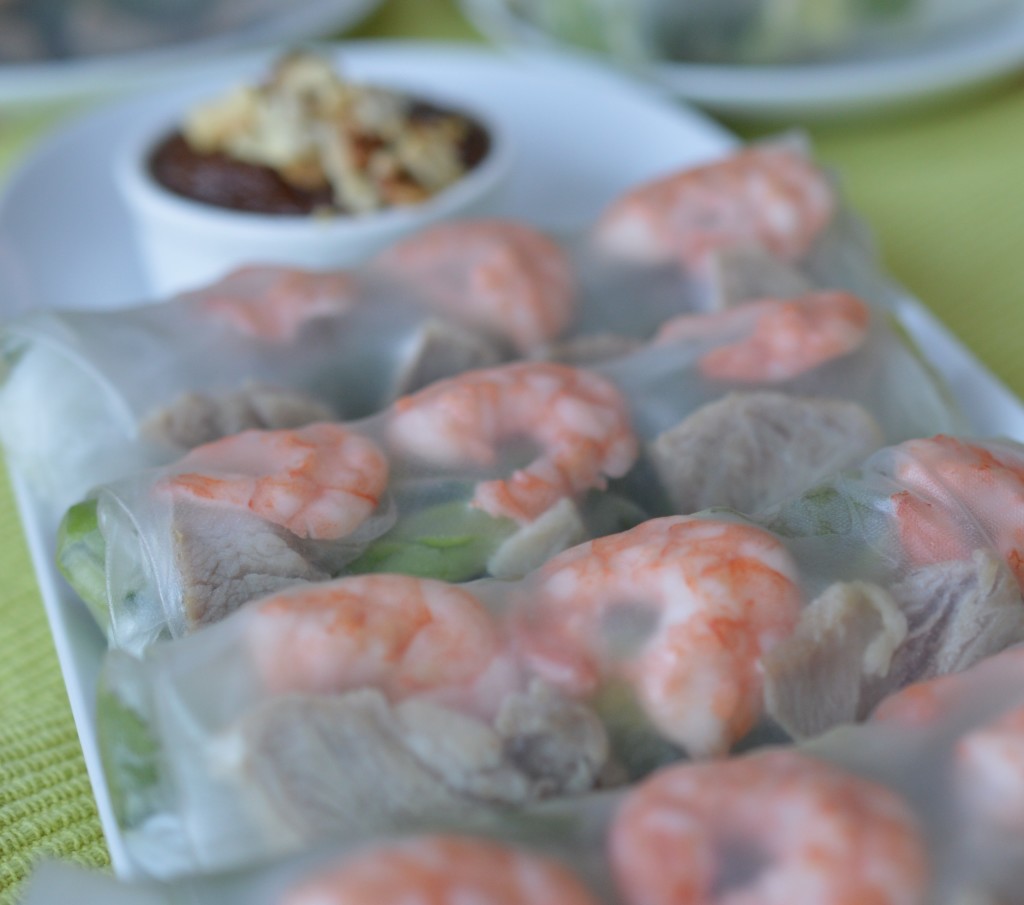
A straggle of vermicelli noodles.  And then the pork and prawns.  Rather than pile everything up burrito style, it’s far simpler to roll if you tuck the pork slices up against the pile of ‘salad’ and the halved prawns in front of that.  With the prawns, keep the cut side uppermost.  That’ll mean your end result will look pretty!

vietnemese style fresh spring rolls 20

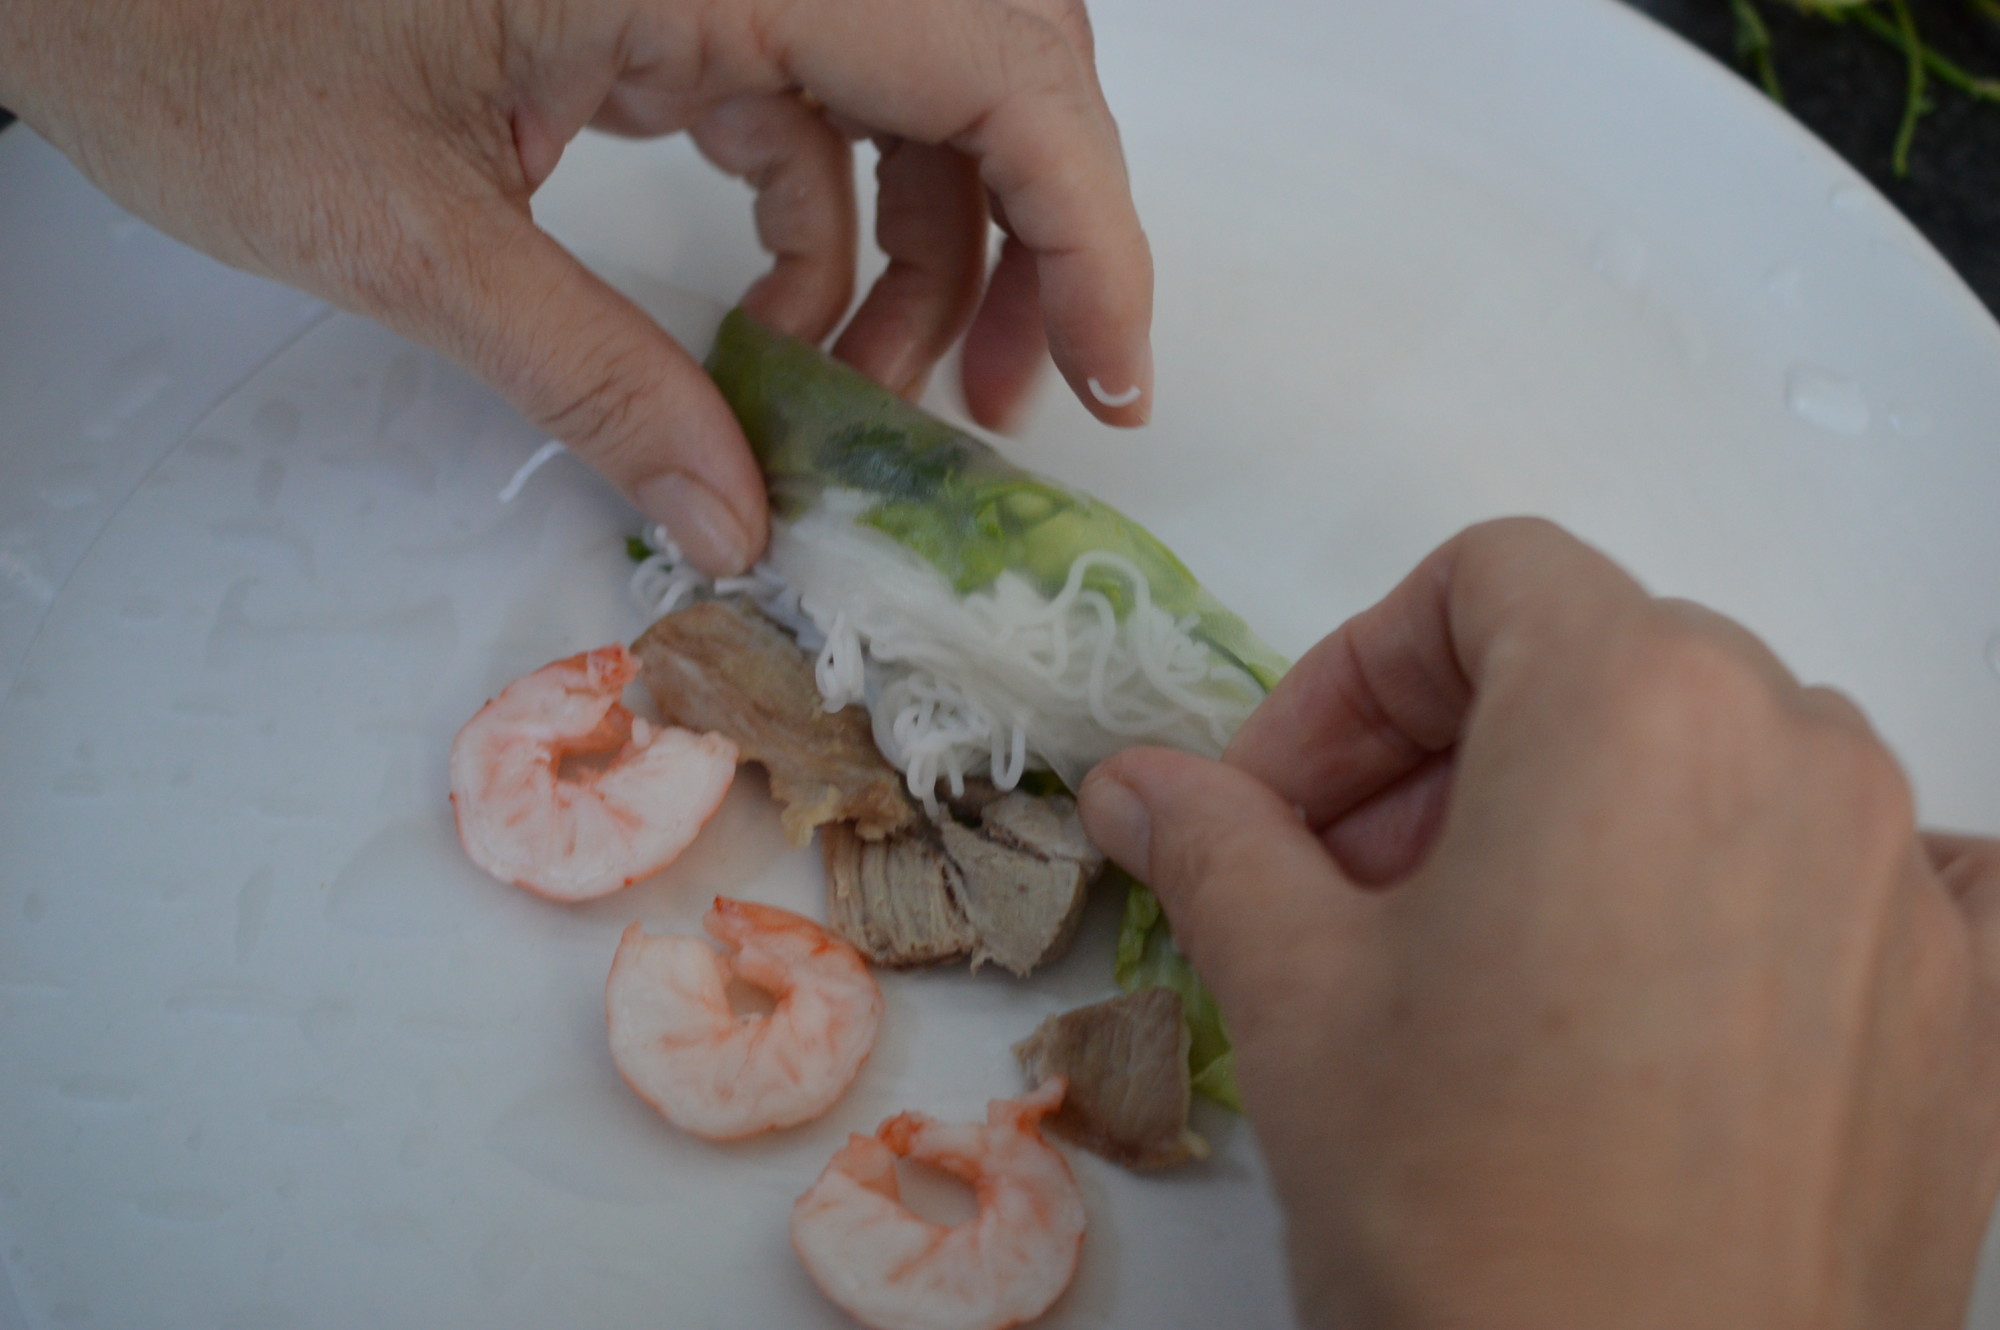
The first roll needs to be tight.  Tuck all that lovely crunch firmly inside the rice paper.

vietnemese style fresh spring rolls 21

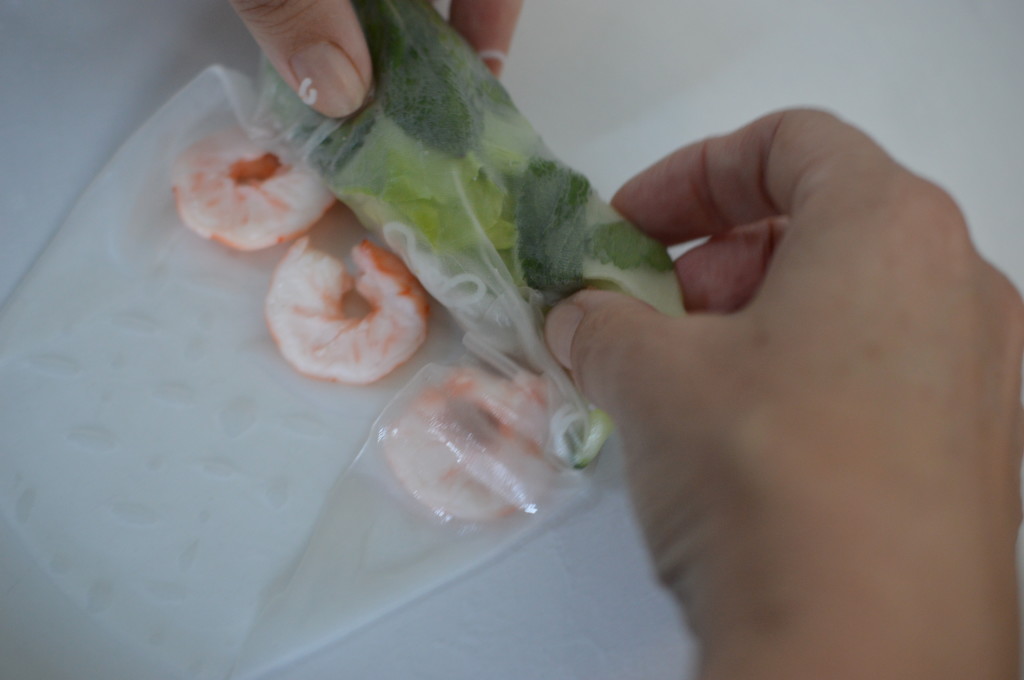
Then the sides.  Fold the sides over to stop everything falling out.  The rice paper wrappers are ‘sticky’ so this is far easier than I’m making it sound.  Then roll to the end.

vietnemese style fresh spring rolls 22

Et voilà!

vietnemese style fresh spring rolls 32

My top tip – don’t stack these.  They’re still sticky.  If you want to store these for any length of time – lay them in a single layer, cover with some large lettuce leaves, cling-wrap and pop into the fridge.

vietnemese style fresh spring rolls 25

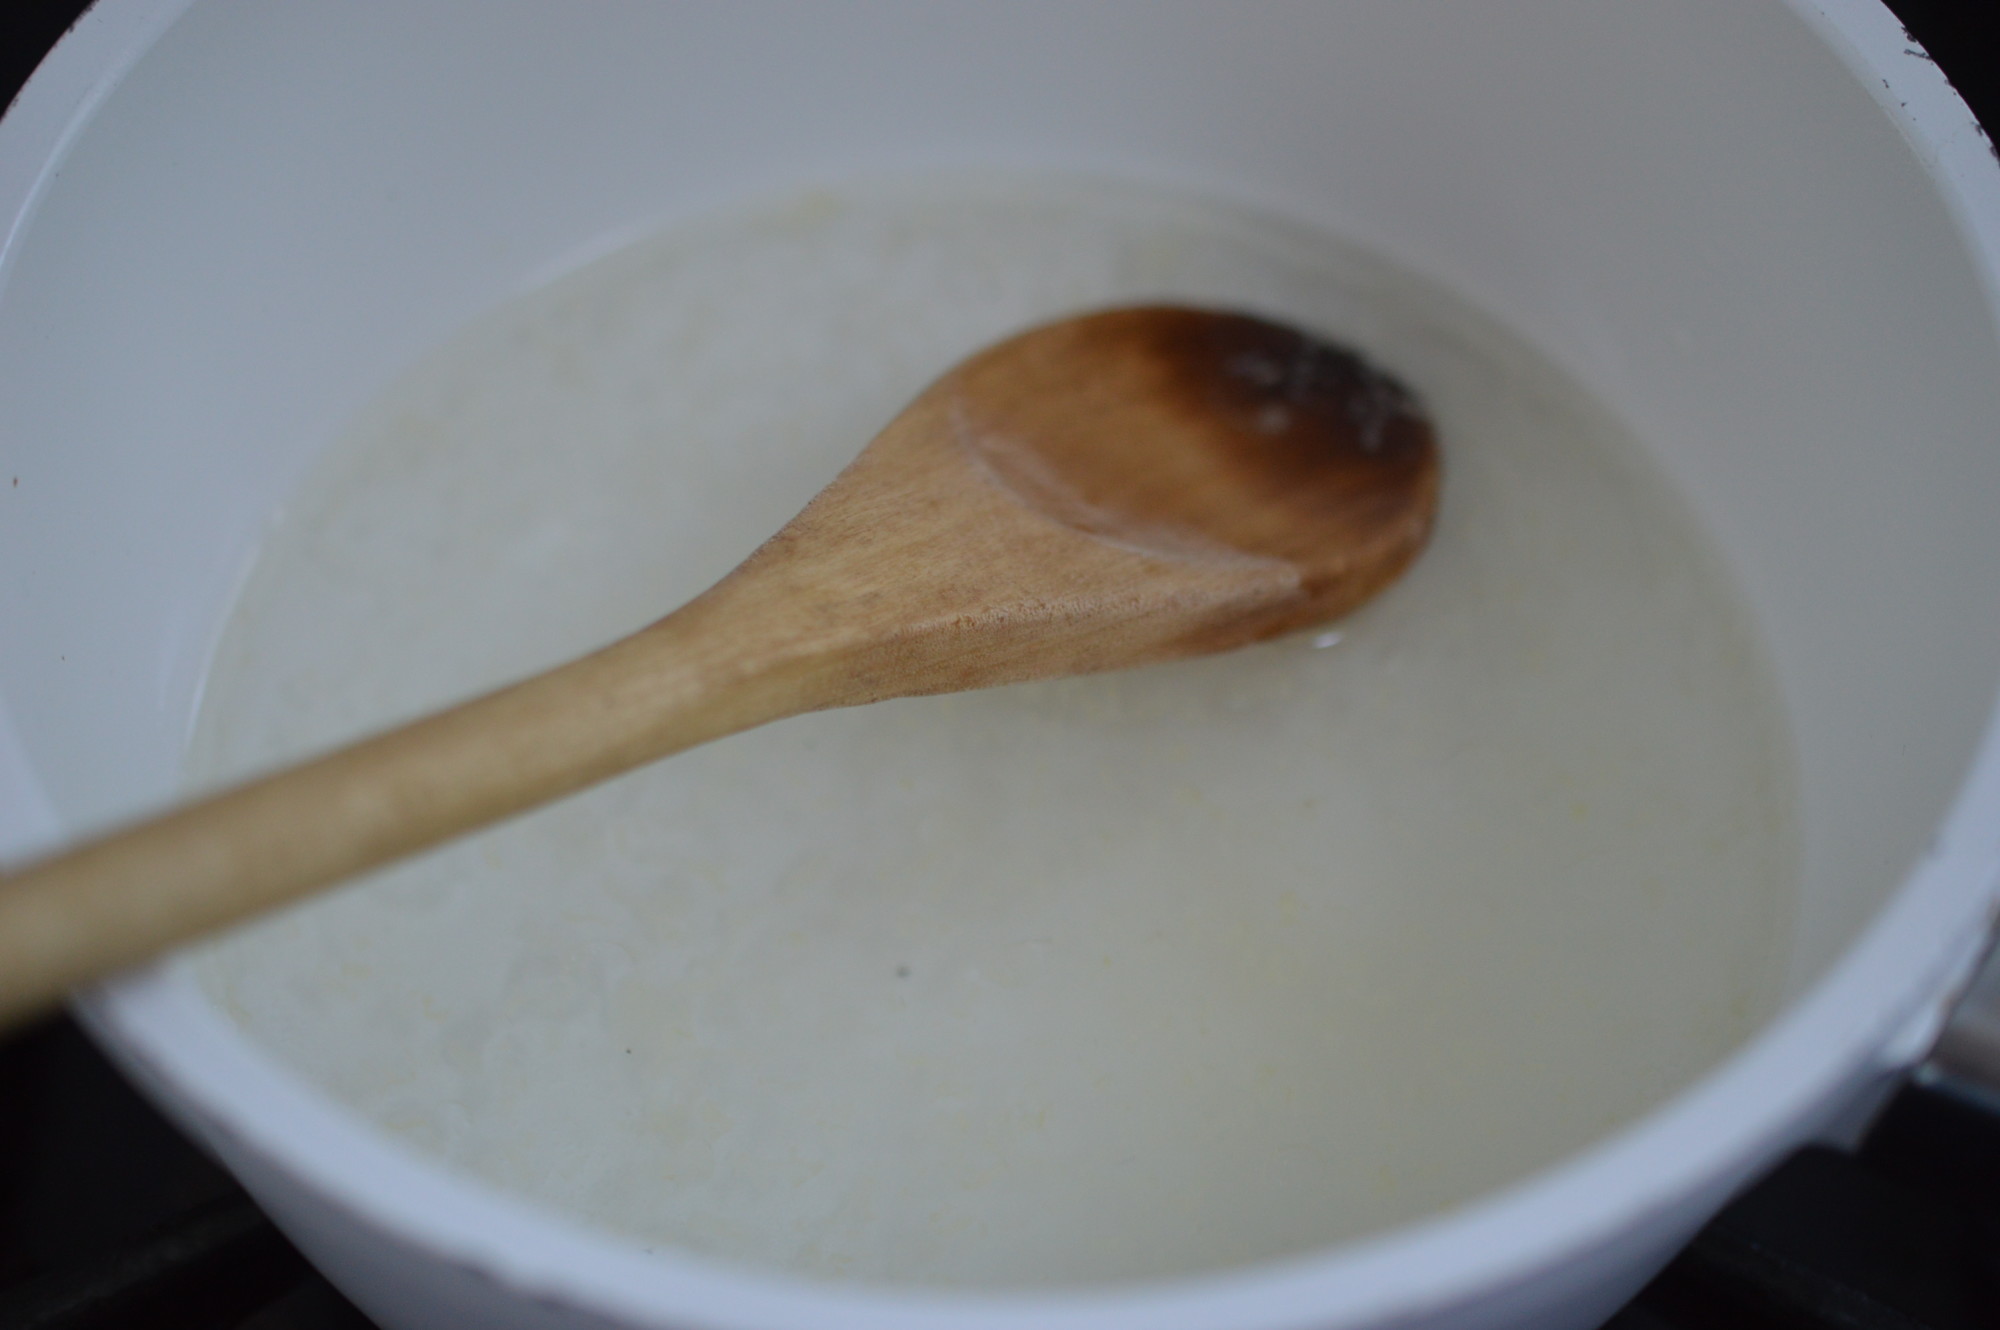
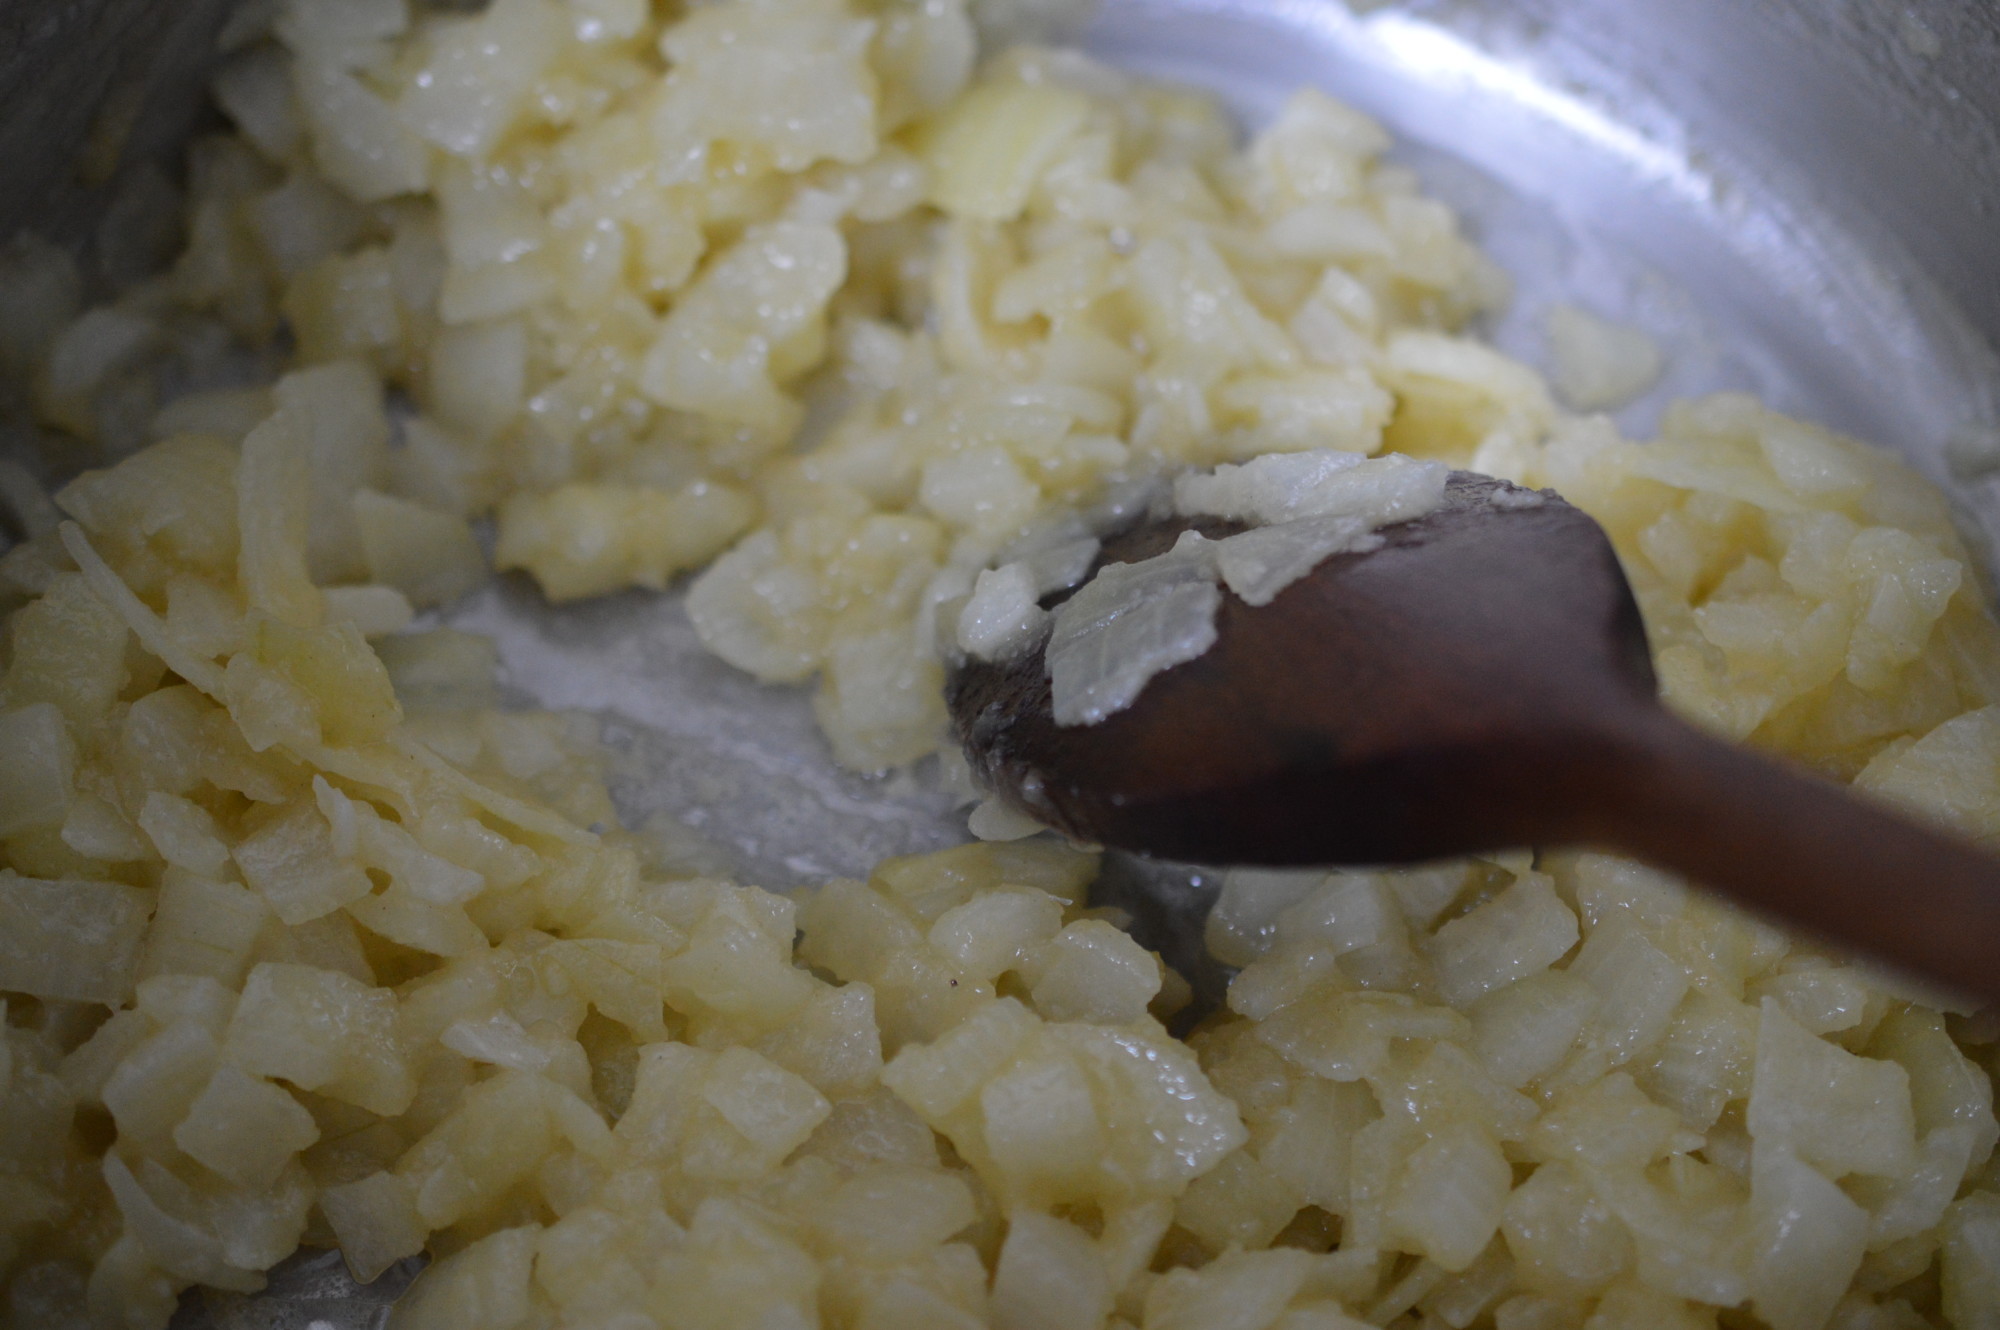
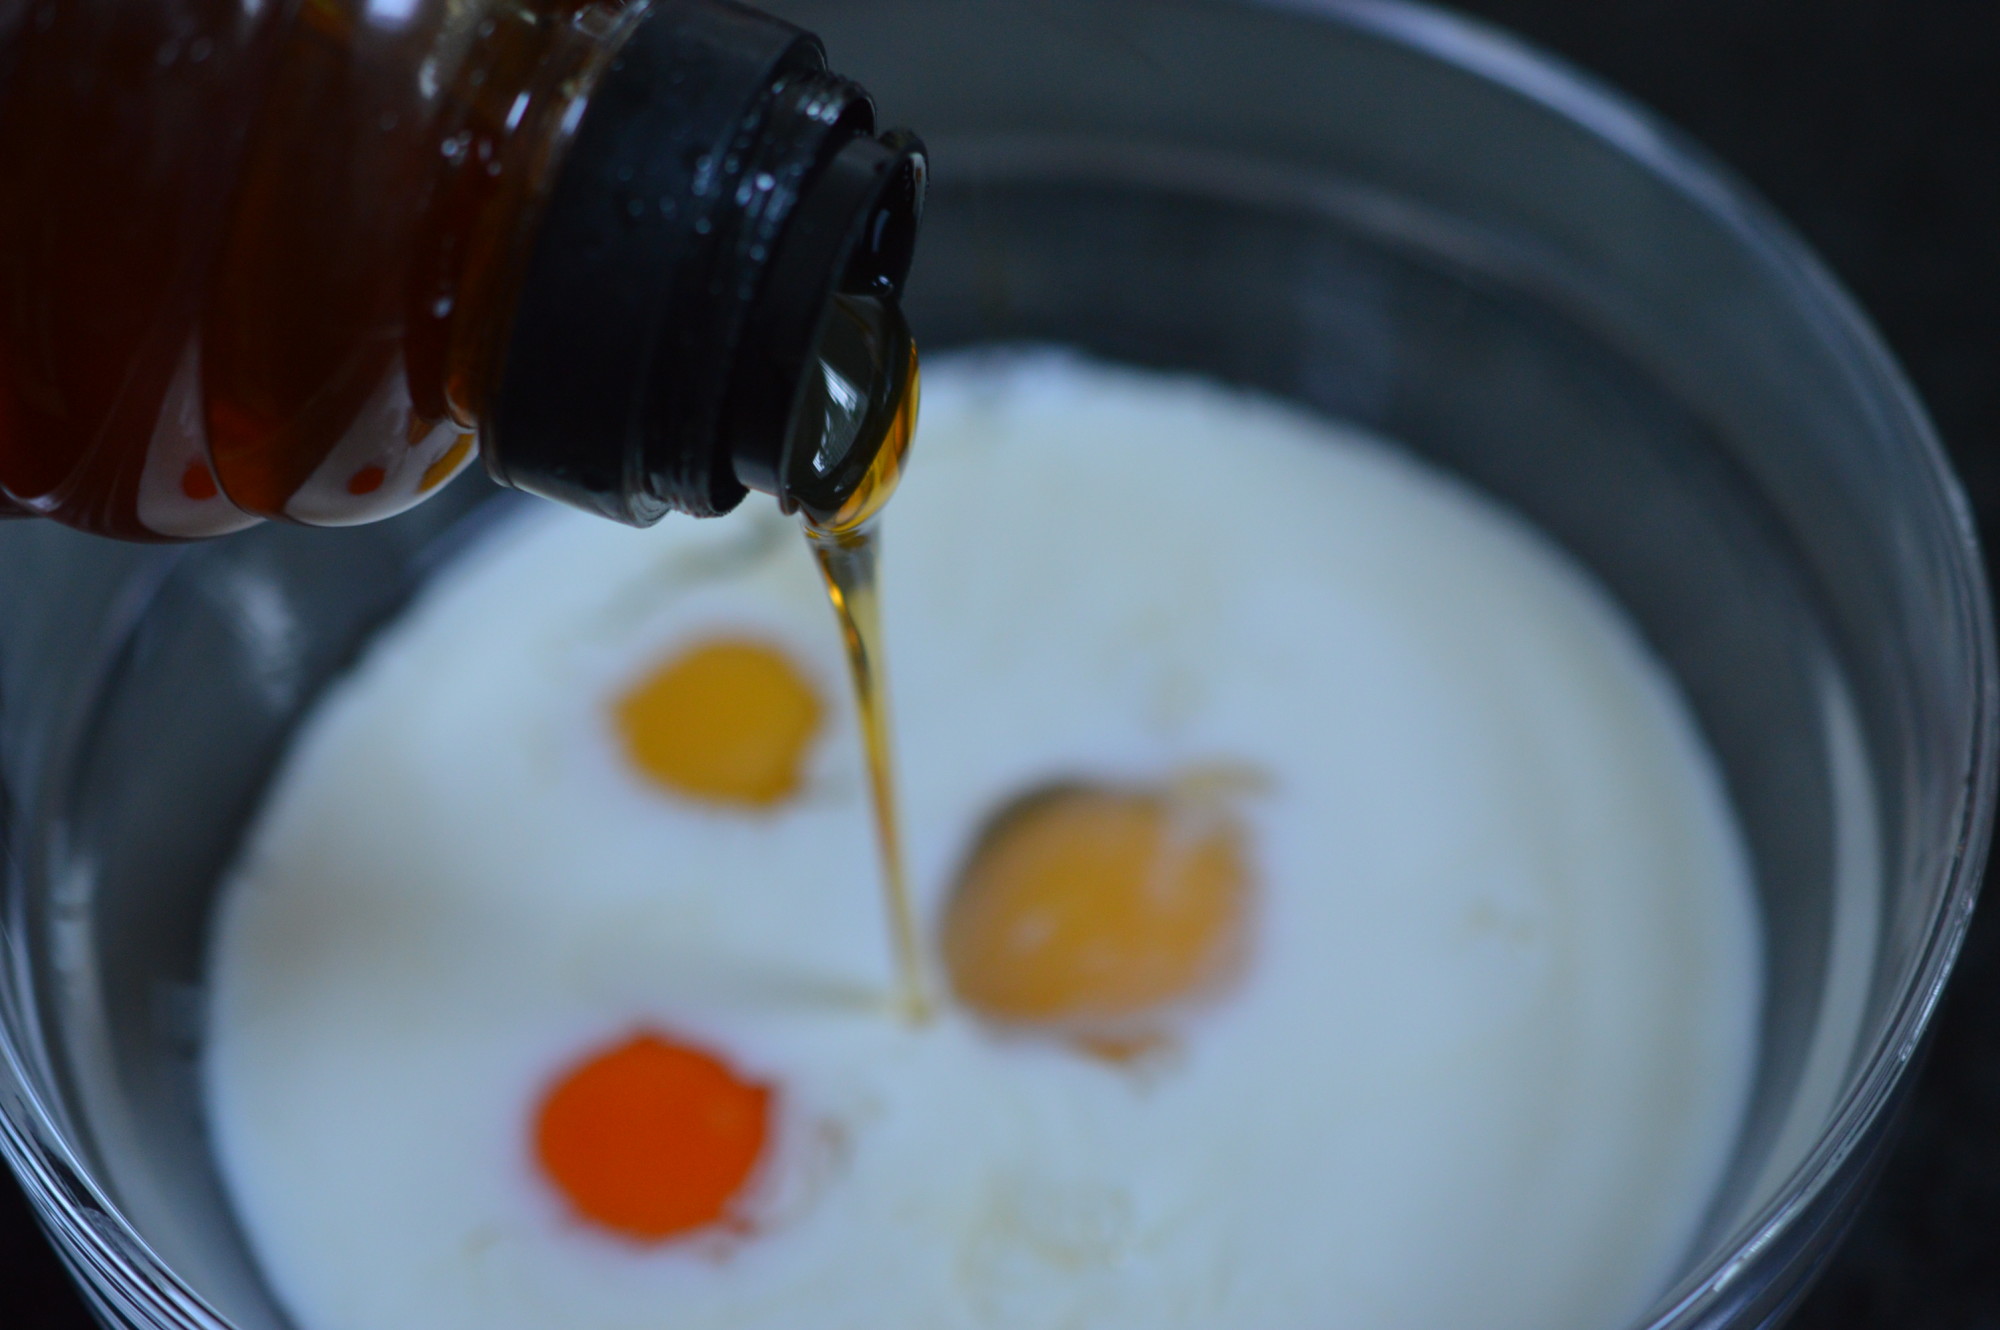
Now the dipping sauce.  Have everything ready – that’s sunflower oil, microplaned garlic, water, sugar, hoisin sauce and smooth peanut butter.  This is super-quick.

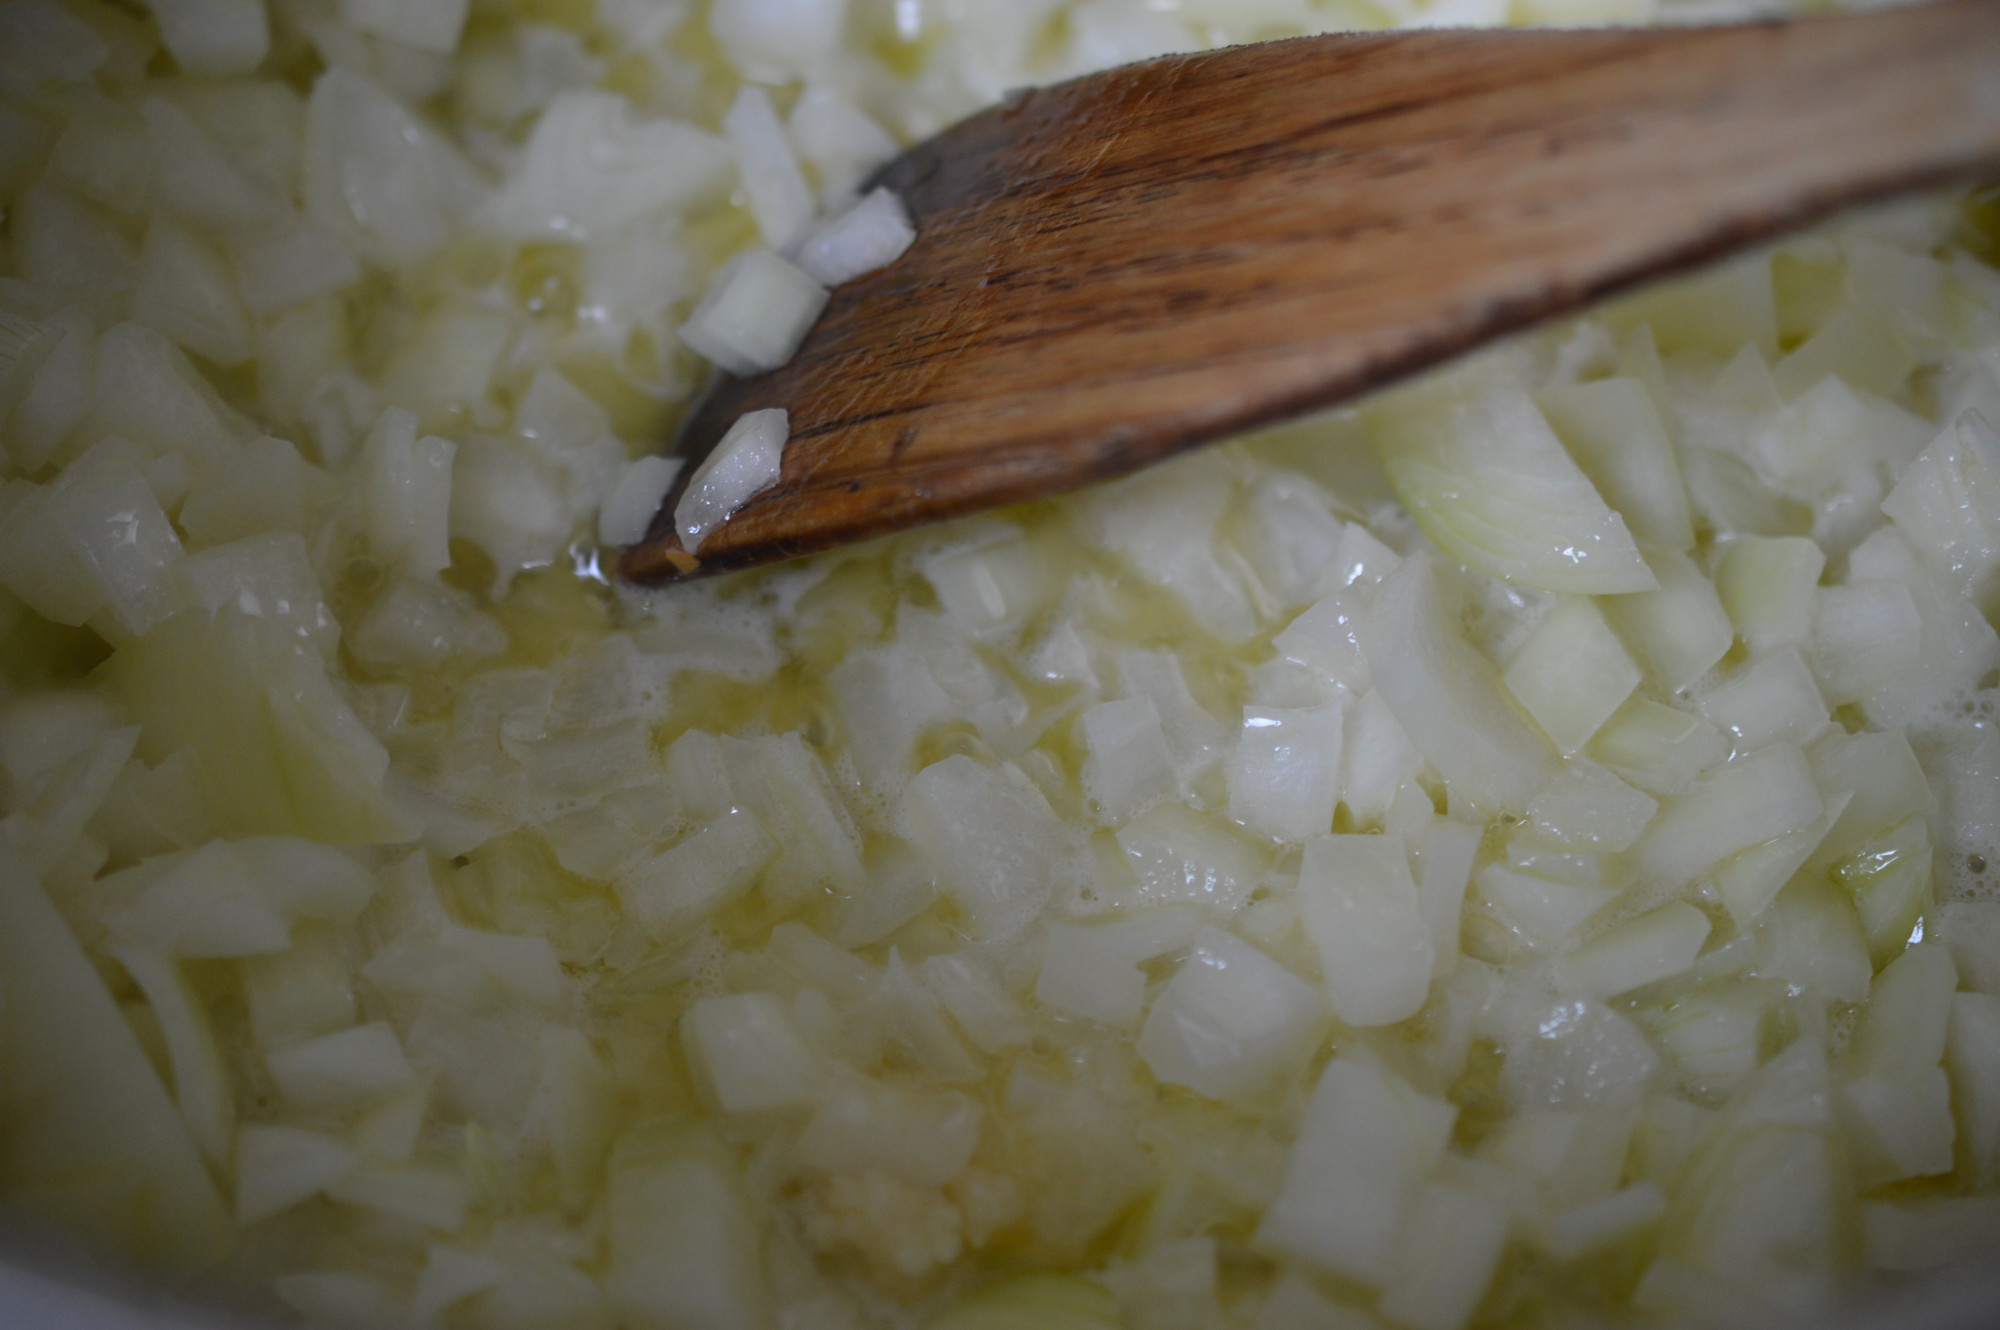
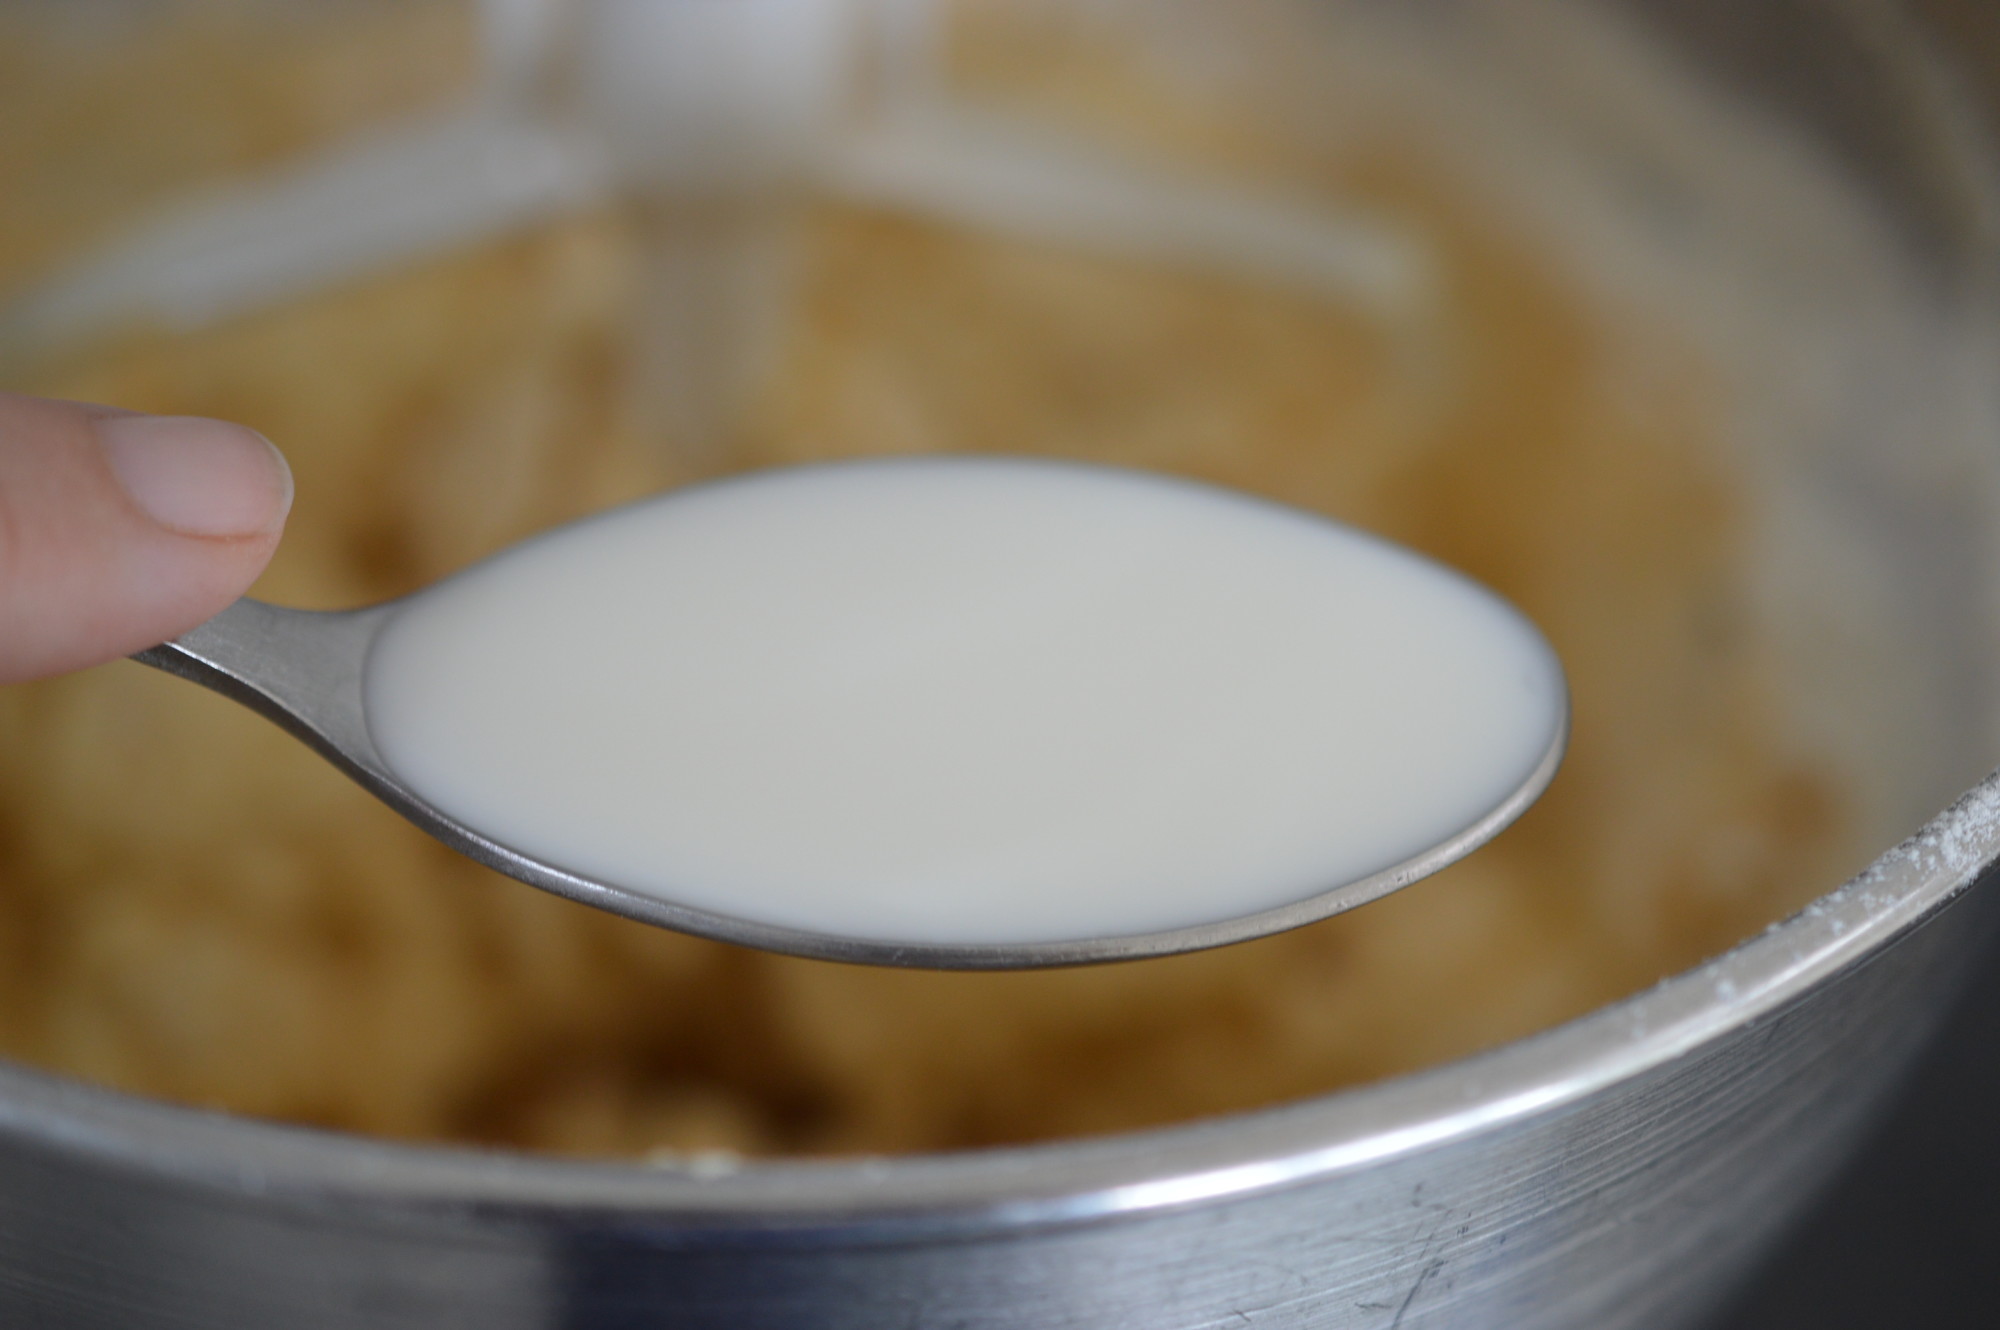
Over a medium heat, cook the microplaned garlic in 4 tablespoons of sunflower oil.  You want to cook out the raw-ness, but make sure it doesn’t catch.  Add the water and sugar.

vietnemese style fresh spring rolls 26


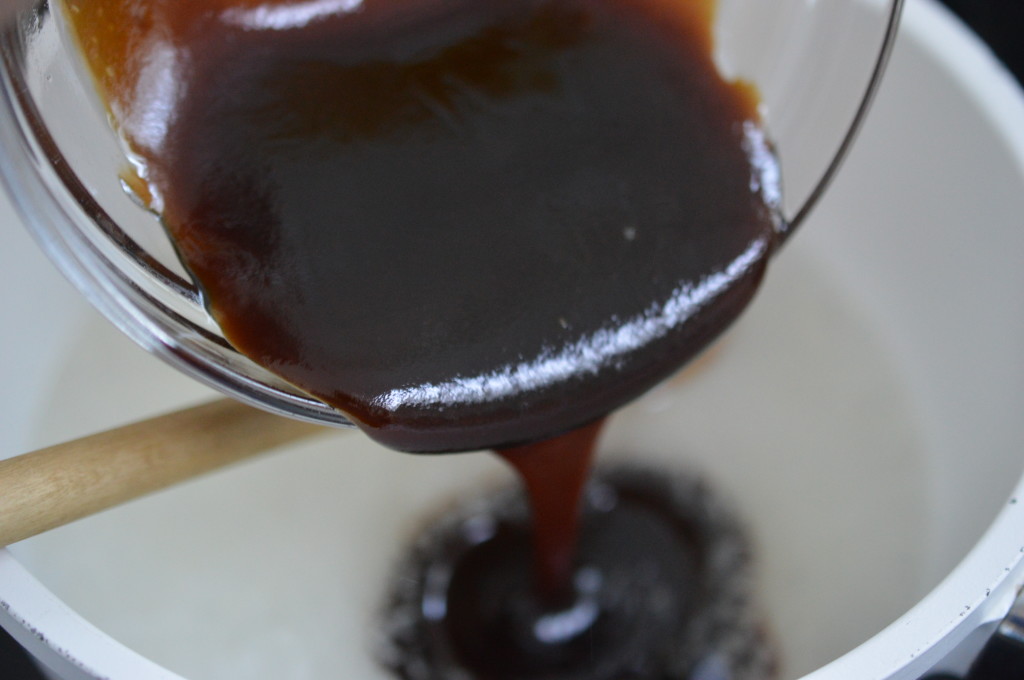
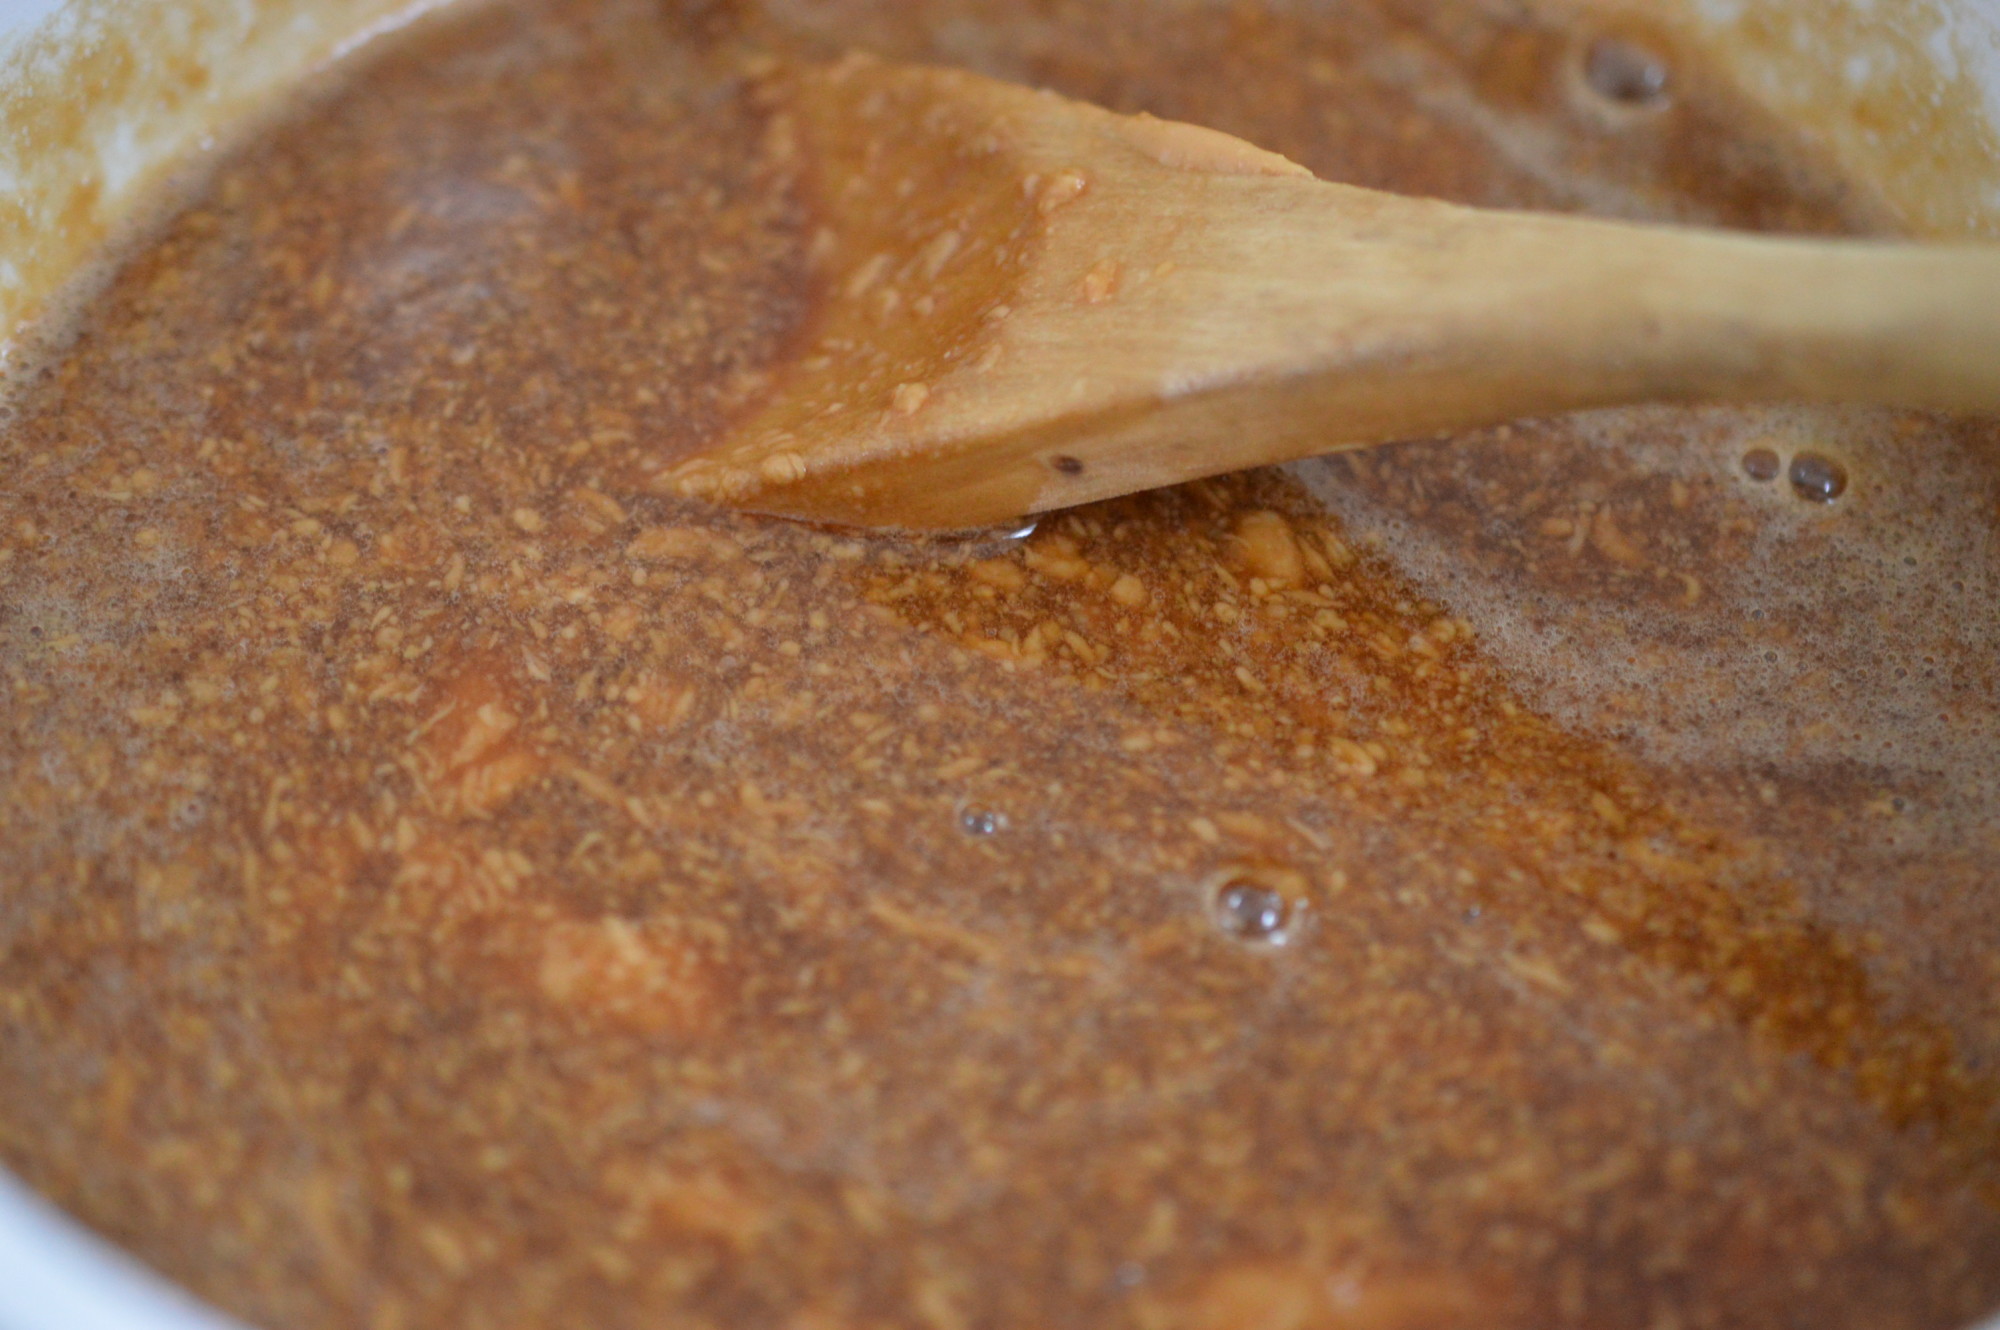
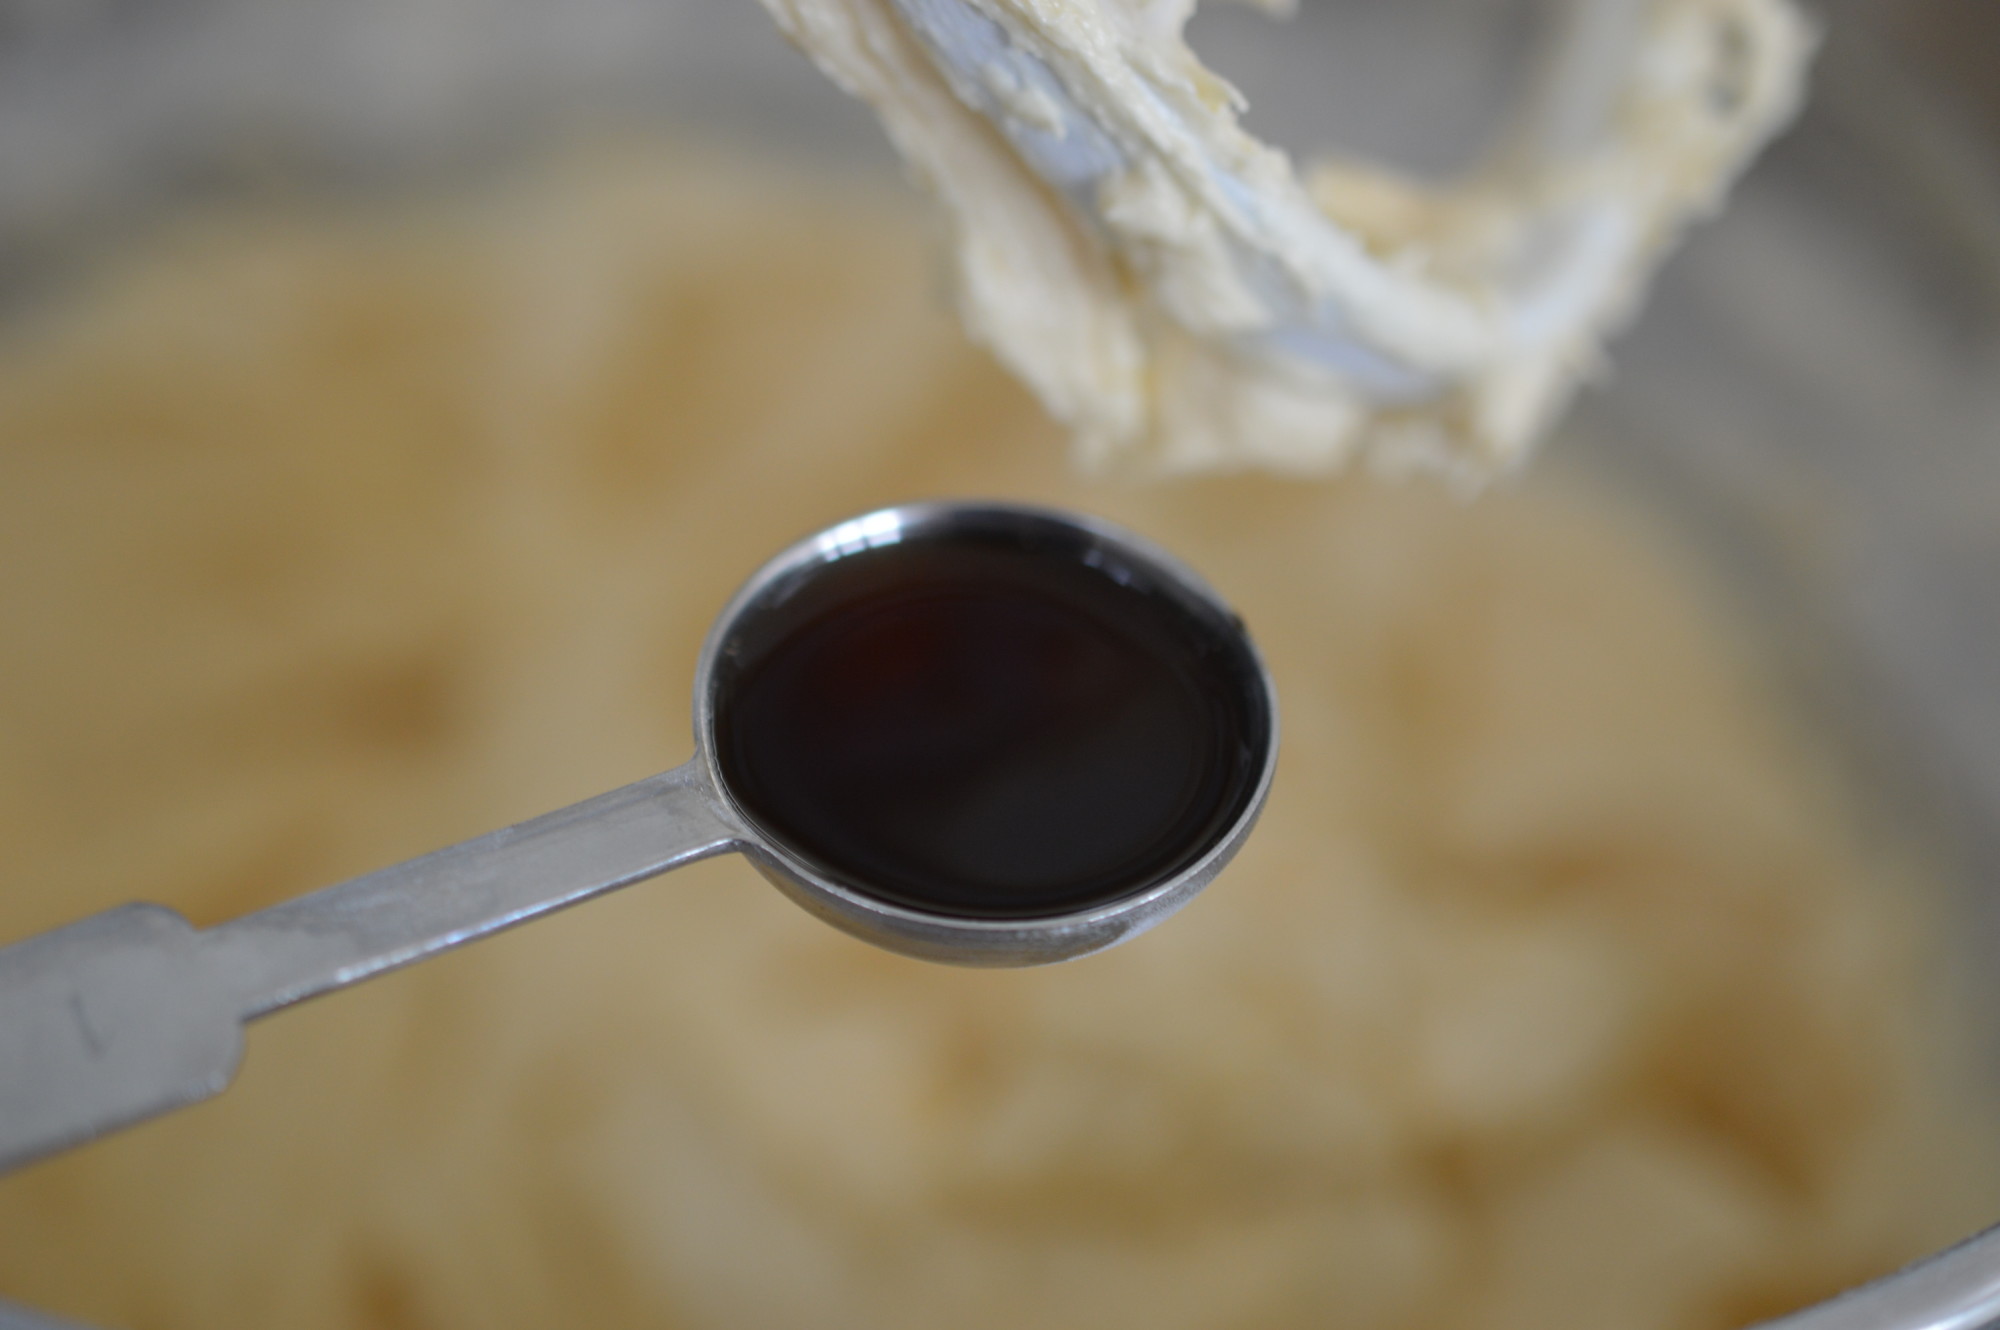
Then it’s the Hoisin Sauce.

vietnemese style fresh spring rolls 27

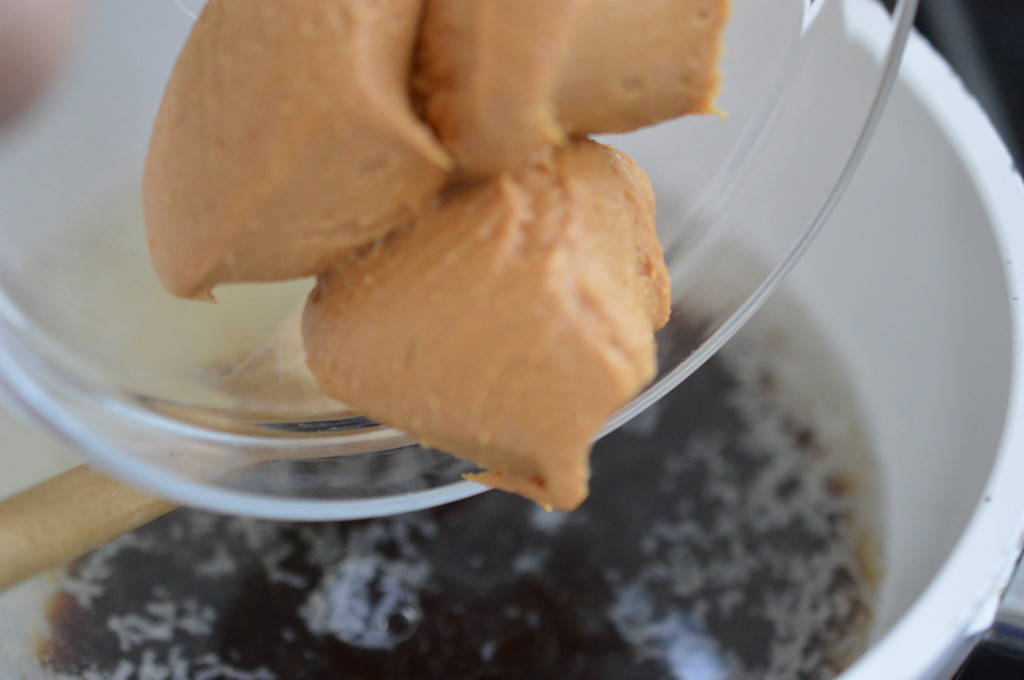
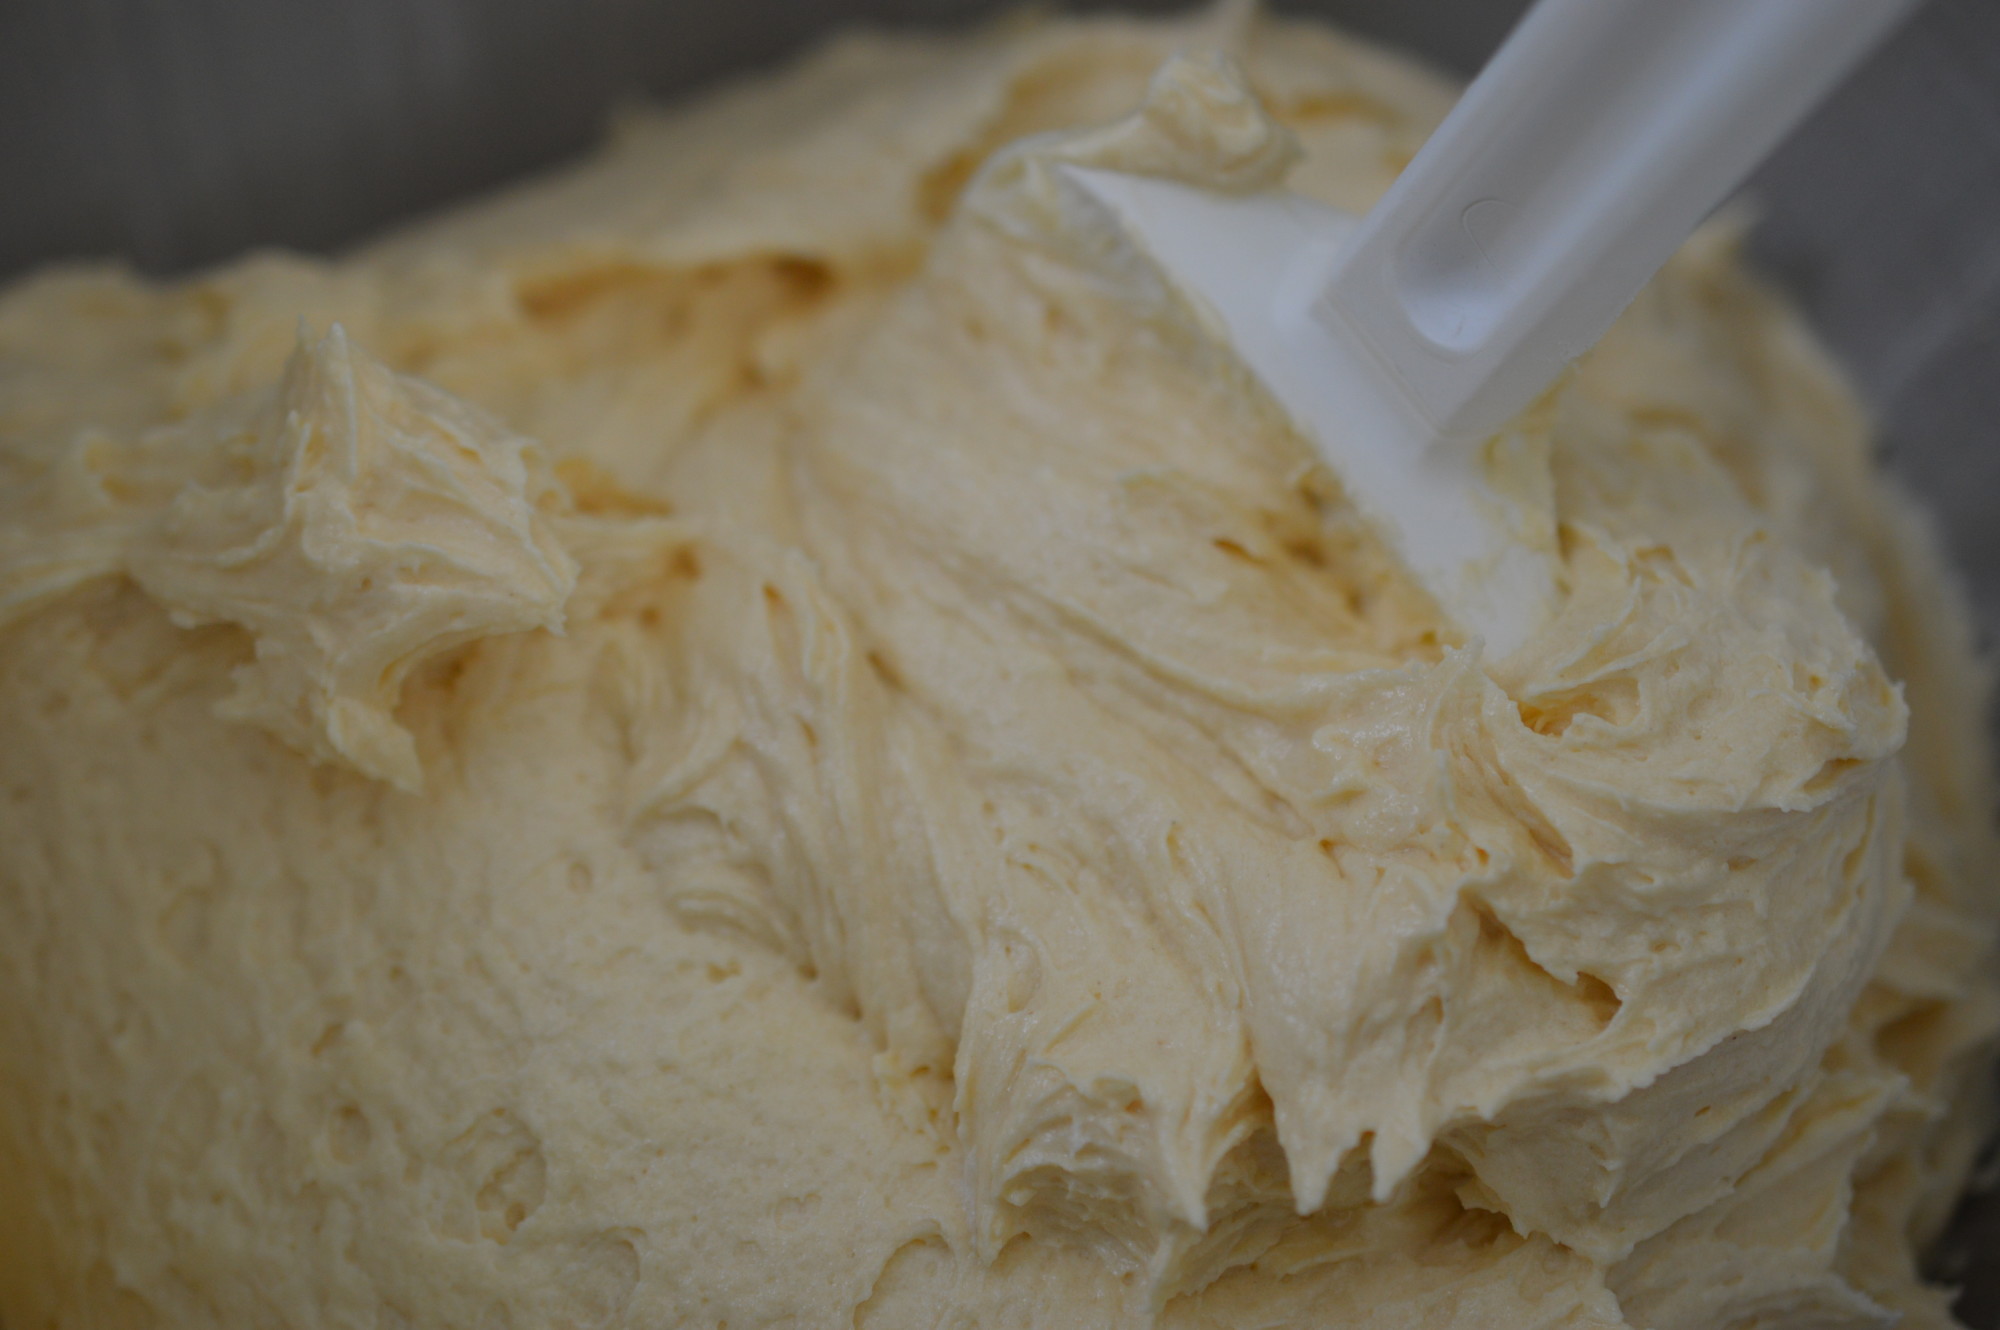
And the smooth peanut butter.

vietnemese style fresh spring rolls 28

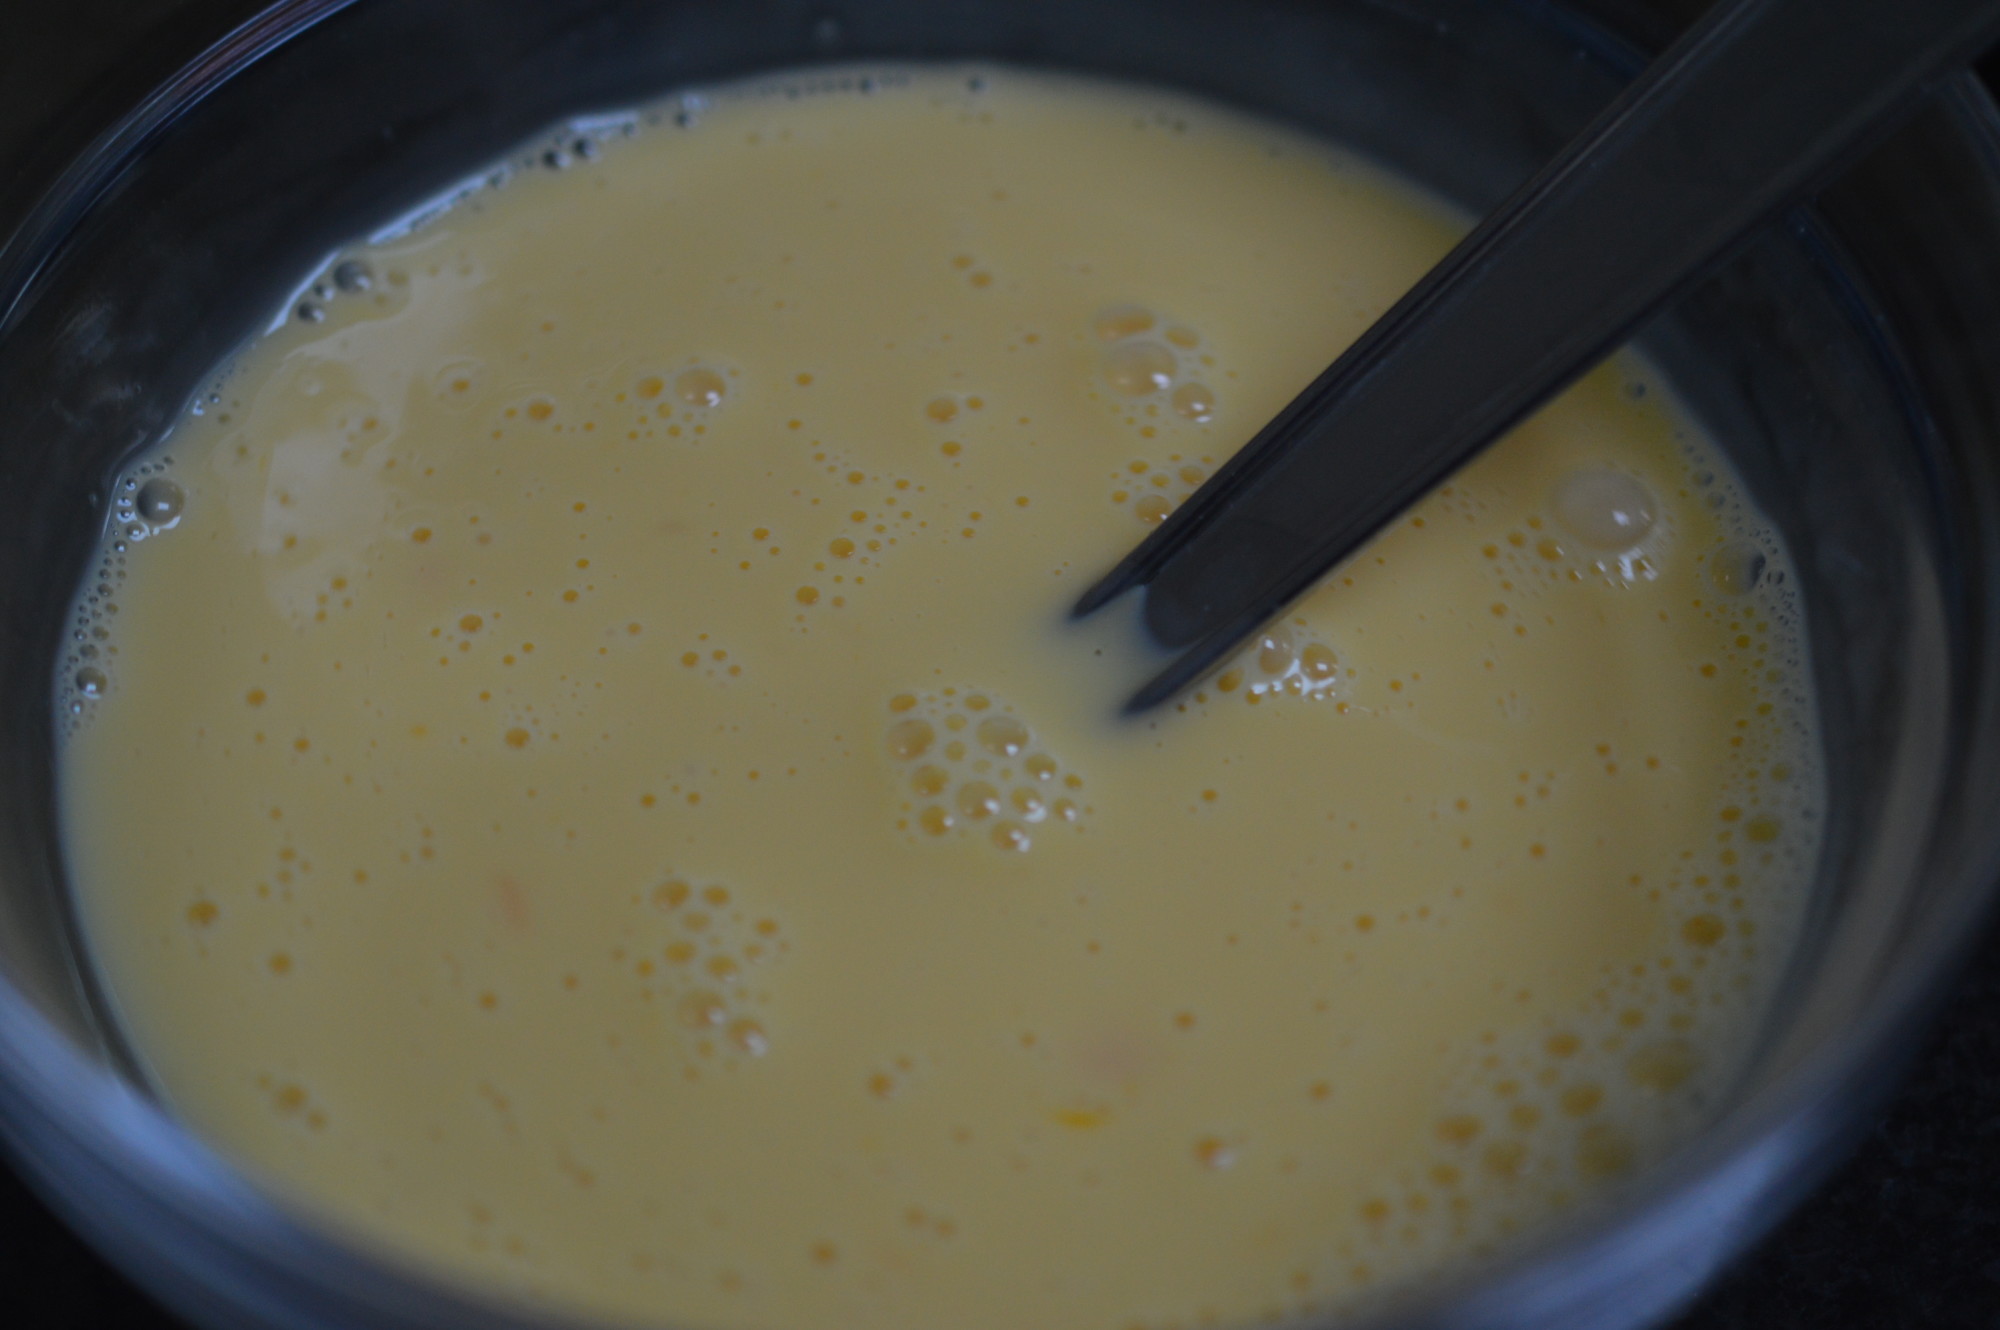
Give everything a stir.

vietnemese style fresh spring rolls 29

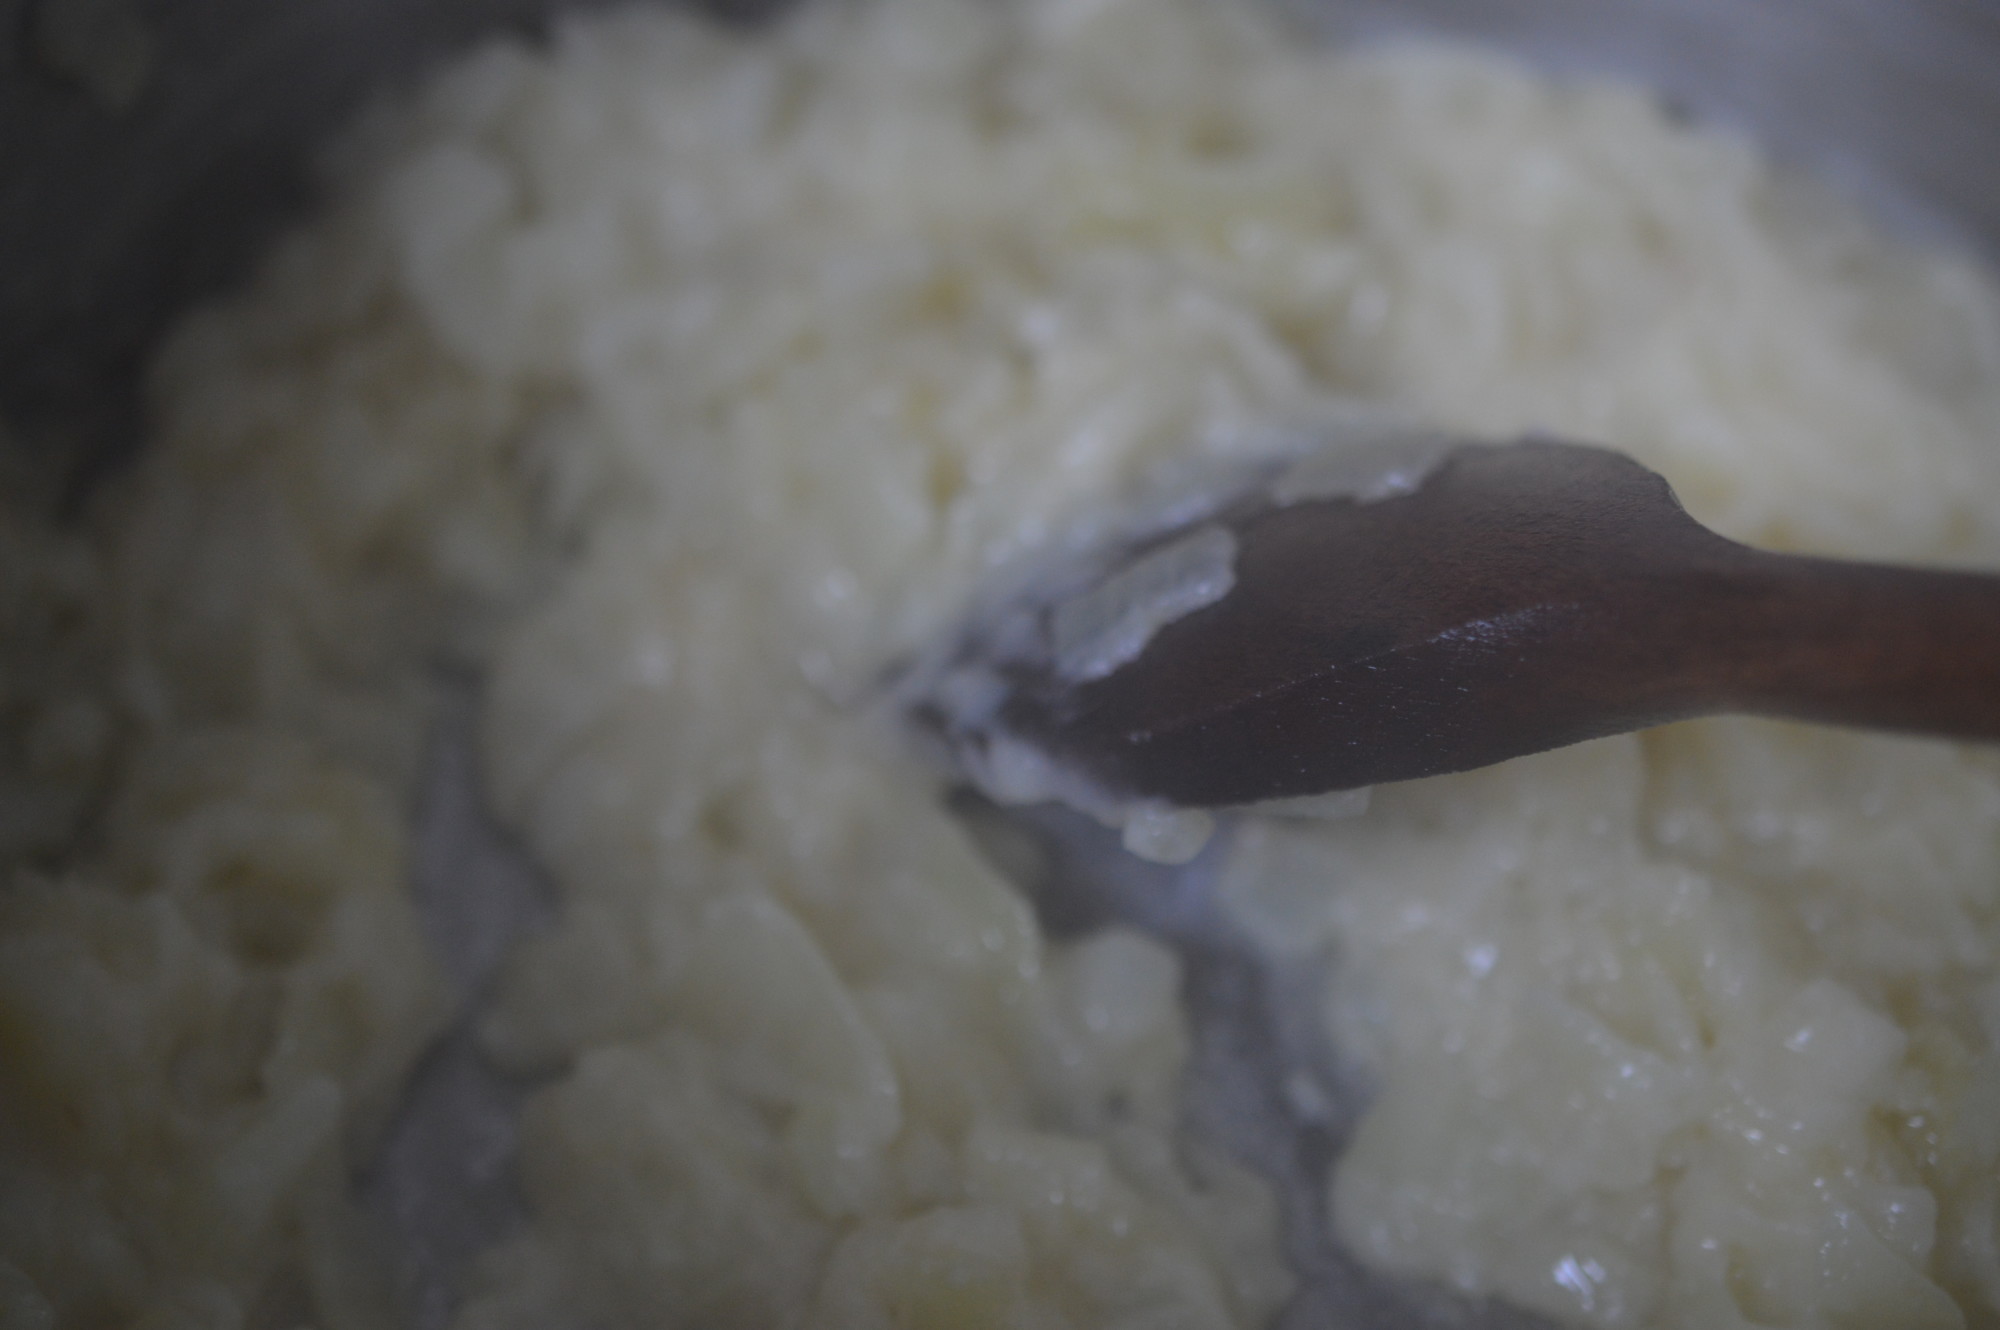
Miraculously, it becomes smooth.

vietnemese style fresh spring rolls 34

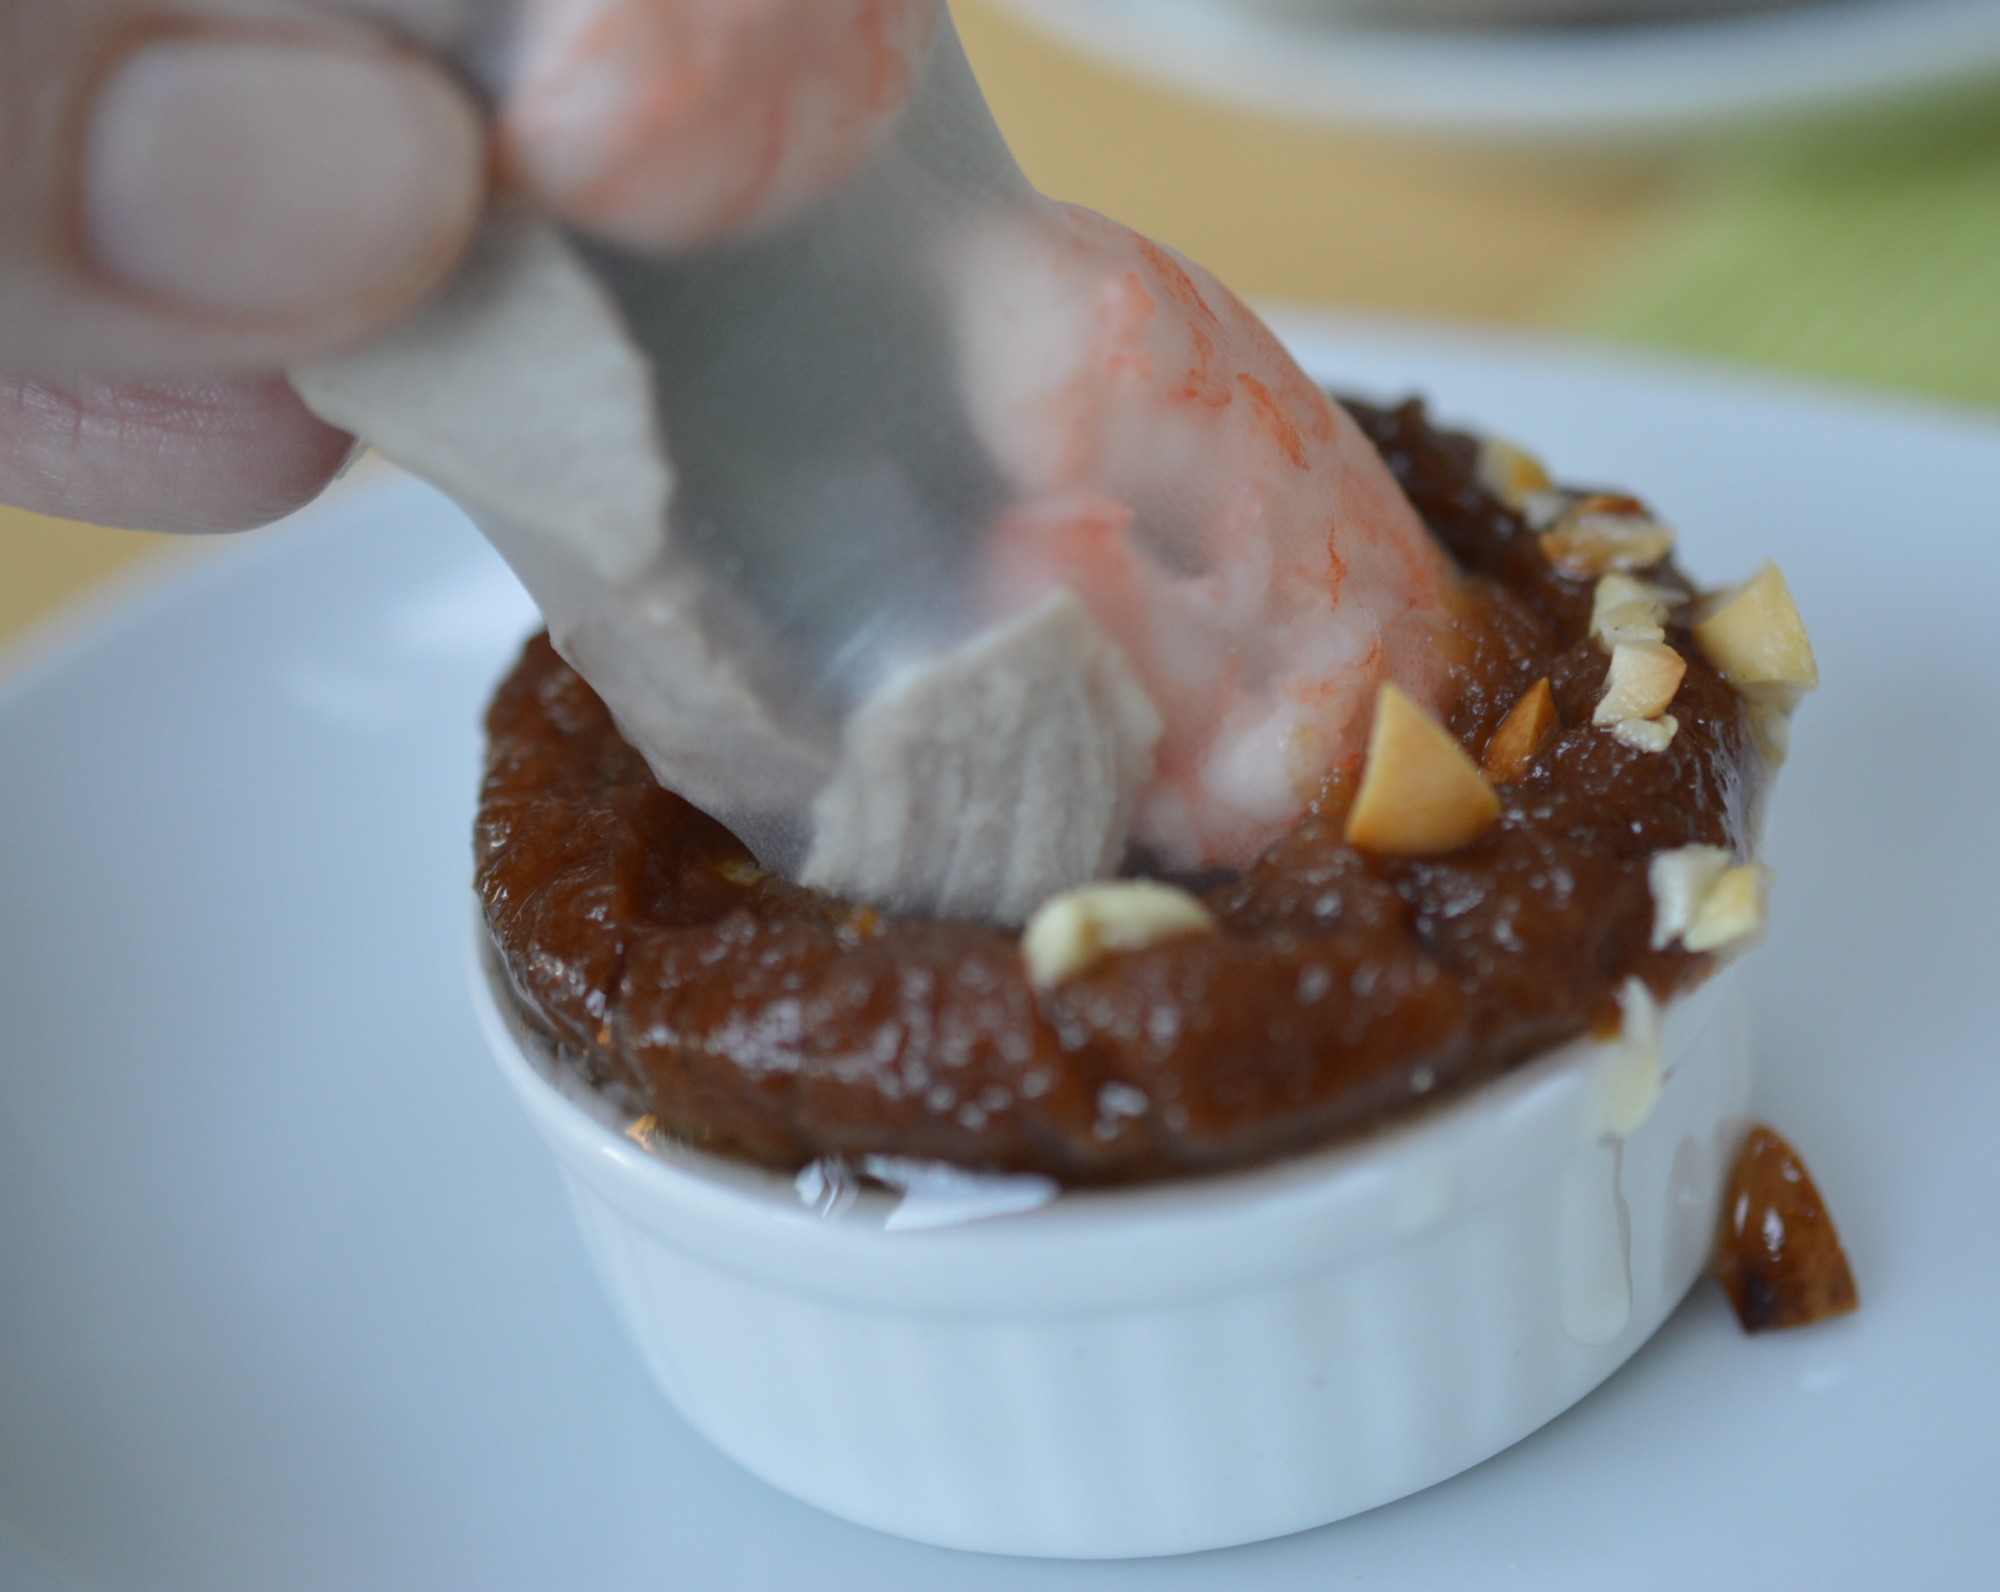
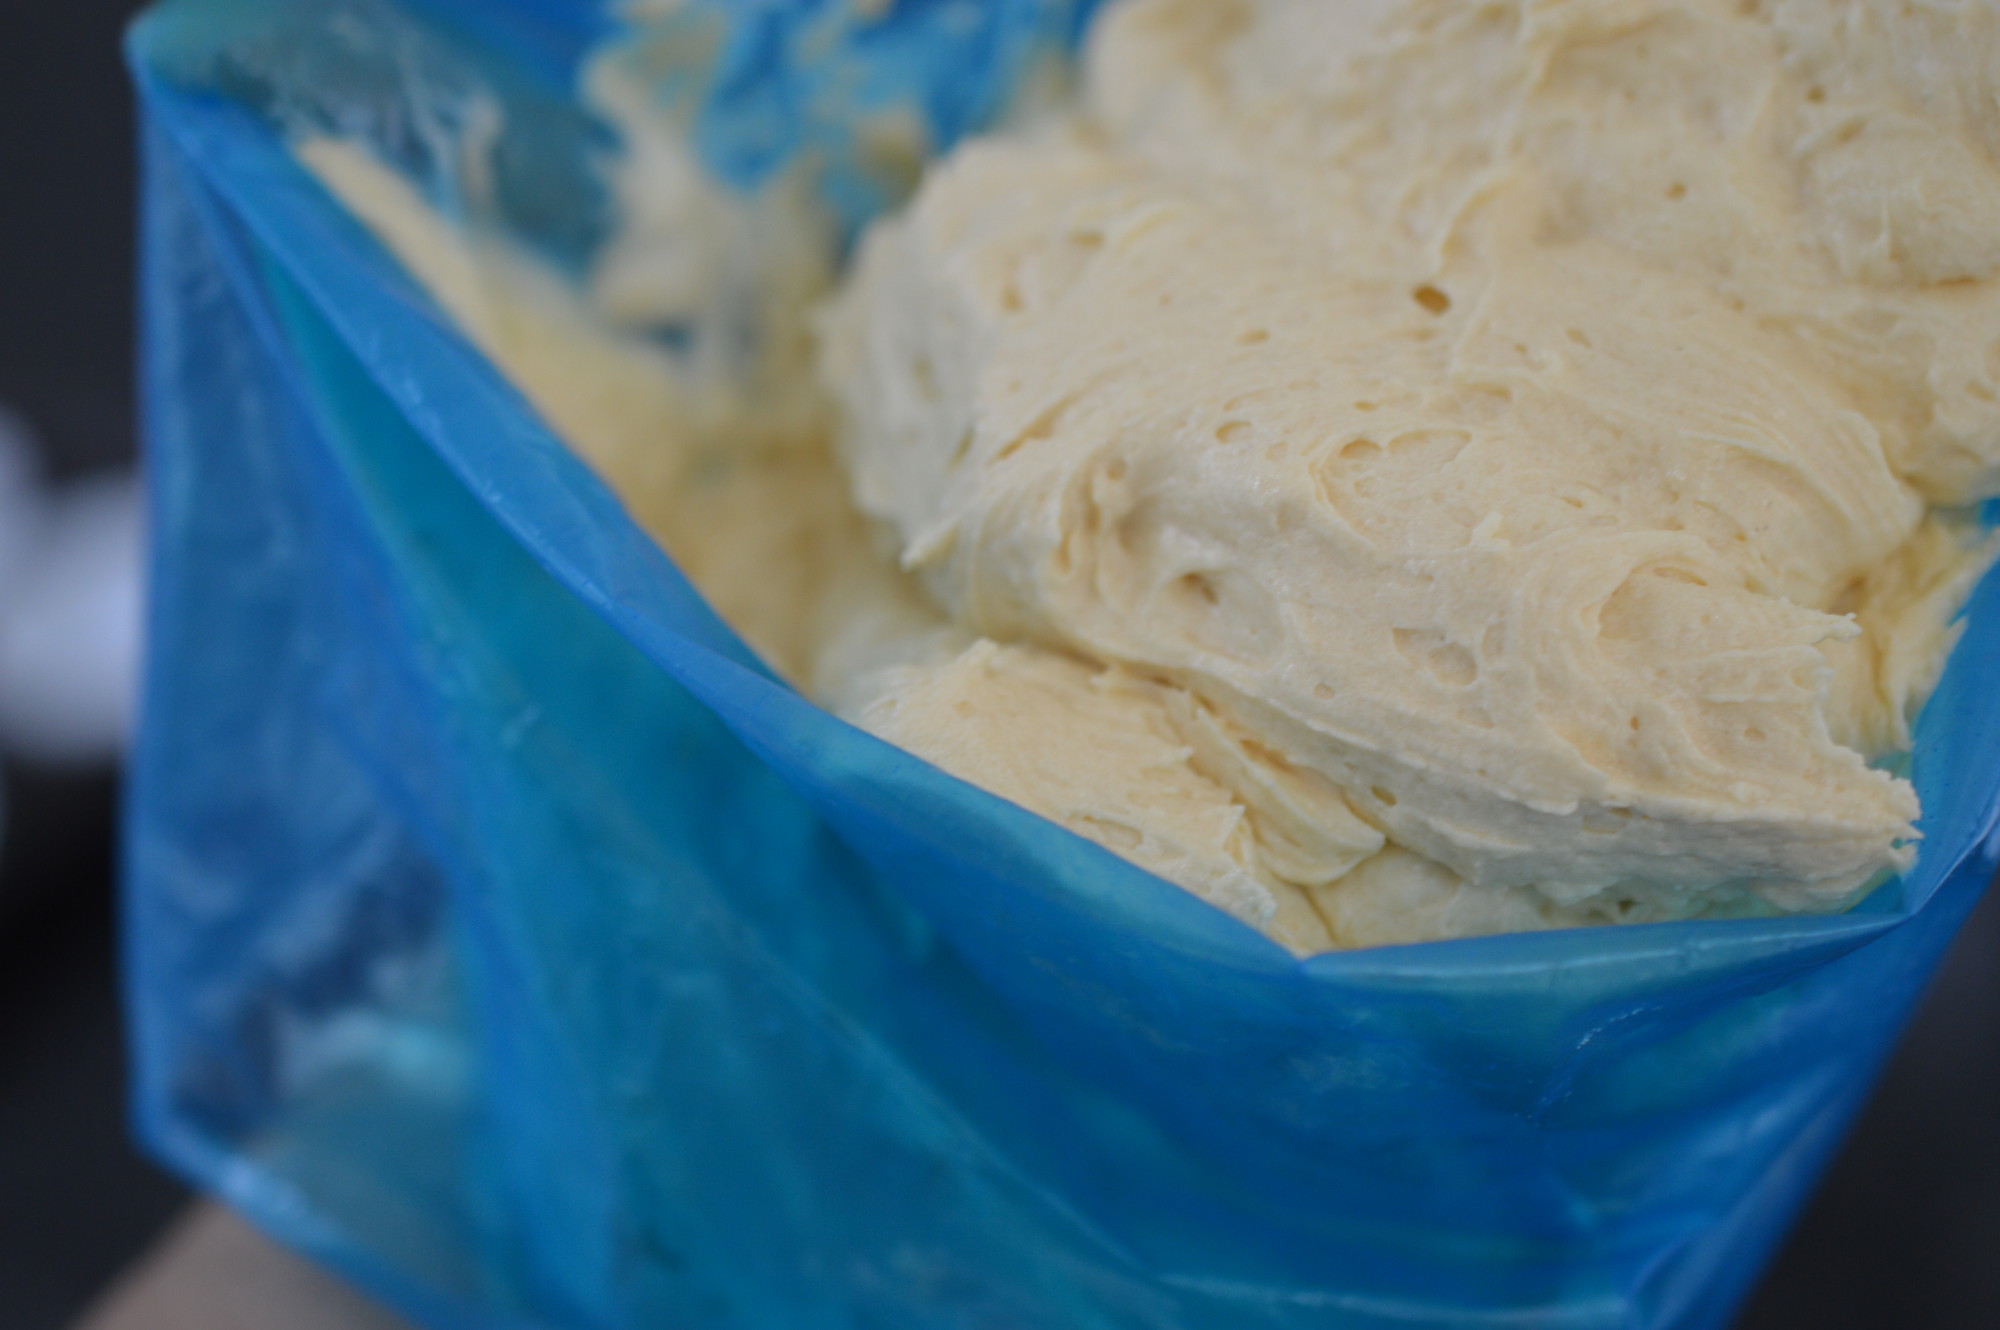
And, that’s it.  Pour into your dipping bowls.  A few lightly chopped roasted peanuts sprinkled on the top is a good indicator there are peanuts involved.  If I’m serving these at a platter, I cut my spring rolls in three.  No double-dipping in my kitchen!

vietnemese style fresh spring rolls 31

Eat.

vietnemese style fresh spring rolls 31Vietnamese Style Fresh Spring Rolls

Makes 20

For the Spring Rolls:

  • 300g pork shoulder
  • 300g large raw, peeled prawns
  • Salt
  • 3 litres/5 pints water
  • One block of rice vermicelli noodles
  • Fresh mint, leaves picked
  • Fresh coriander, leaves picked
  • ½ cucumber, cut into finger-length pieces and thinly sliced
  • 1 soft lettuce
  • 20 rice paper wrappers

For the Peanut Dipping Sauce:

  • 4 tablespoons of sunflower oil
  • 2 cloves of garlic, microplaned or finely chopped
  • 100 fl oz water
  • 2 tablespoons caster sugar
  • 8 tablespoons of Hoisin Sauce
  • 6 tablespoons of smooth peanut butter
  • Roasted peanuts, roughly chopped

Bring 3 litres/5 pints of water to a boil.  Meanwhile, de-vein the prawns.

When the water is boiling, add 2 teaspoons of salt.  Turn the heat down to medium and add the raw prawns.  Simmer for about 3 minutes.  They are cooked through when they have turned pink.  Remove with a slotted spoon and leave to cool.

Now poach the pork.  Turn the heat up again and bring the water back to a boil.  Add the pork shoulder.  It will take about 20 minutes, but there’s some variation depending on whether you are using a long, thin piece or a shorter, fatter one.  You need to cook to an internal temperature of 62ºC/145ºF.

While the pork is cooling, slice the prawns in half lengthways.

Place a block of vermicelli rice noodles in a bowl and cover with boiling water.  Add 1 tsp salt and leave to soften for 4-5 minutes.

Slice the pork as thinly as you can.

Rinse the vermicelli rice noodles in cold water and drain thoroughly.

Now, set everything out in a production line – the pork, prawns, noodles, coriander leaves, mint leaves and cucumber.  Fill a shallow bowl with warm water and open the packet of rice paper wrappers.  Cover the remainder with a clean towel and dip the first one in the water.  It’ll soften beneath your fingers.  Ignoring the packet instructions, remove before it feels entirely roll-able.  It will continue to soften.  You want pliable but not limp.

Lay flat.  Arrange the herbs, lettuce, cucumber and noodles on the top third of the wrapper.  Tuck the pork slices up against the salad.  Then the prawn halves in a third row.  Make sure the cut side is facing upwards.

Tightly roll the wrapper over the salad.  Tuck the sides in and continue rolling.  Place the finished Spring Roll on a plate with the seam facing downwards.  If you need to store – lay in a single layer, cover with large salad leaves and cling-wrap.  Overnight in the fridge is fine.

For the dipping sauce – place 4 tablespoons of sunflower oil in a saucepan and soften the microplaned garlic.  Then add the water and sugar.  When the sugar has dissolved, add the Hoisin Sauce.  Then the smooth peanut butter.  Stir everything together over a low heat until it is smooth and shiny.

Pour into a serving dish and top with roughly chopped roasted peanuts.

Eat.

Print.


Asparagus Soup with a Goats’ Cheese and Asparagus Giant Crouton

Monty Don, he of ‘Gardeners’ World’, said something along the lines of ‘If cut-and-come-again salad is the one night stand of gardening, asparagus is a ten year marriage.’  To be absolutely truthful, he left me at the point he demonstrated the amount of digging in of grit required.  I buy my asparagus.

Asparagus - in jug

The season runs from about the 24th April to about the 21st June.  Depending on the year, it’ll vary.  British asparagus is a truly lovely thing.  All the things that make UK weather so .. annoying makes for great tasting asparagus.  There’s a reason why we don’t export any of it!

Asparagus snapped

The downside is, it’s expensive.  That’s because it’s a fairly difficult crop to grow, it has a short season and each spear is harvested individually.  Whilst the price is entirely understandable, I really hate throwing any of it away.  Those tough stalks you snap off are not getting discarded in my kitchen.

Aspragus woody ends - frozen

My ‘ends’ get popped into a freezer bag until I have enough to do something with.  Today, I reached the 1kg stage.  I know this because I weighed it.  I have never done it before and I strongly suggest you don’t bother.  More or less, it doesn’t matter in the slightest.

Asparagus soup 1kg woody ends 6 pints water

Give your asparagus ends a quick rinse.  Then into a big pot and just cover with cold water.  Bring to a boil and simmer for 10 minutes.

Asparagus soup onion

While that’s happening, chop up a couple of onions.

Asparagus Soup onions softened

Soften in butter.  Lots of butter.  Since the asparagus itself is virtually fat-free, high in vitamins A, B and C, full of fibre and folic acid – I’m thinking the butter is permissible.  The onion needs to be soft, but not coloured.  Add in 4 cloves of microplaned garlic cloves.

Asparagus soup - drain and reserve everything

When the asparagus ends have been simmering for 10 minutes – drain.  KEEP THE WATER!

Asparagus soup - the cooking water

I can’t deny the asparagus cooking water doesn’t look the most encouraging thing you’ve ever seen.

Asparagus Soup heaped tablespoon flour

Add flour to the onions.  For two onions and 100g of butter, I used two heaped tablespoons.

Asparagus Soup stir in flour

Stir until all the butter is absorbed by the flour and the onions are coated.

Asparagus Soup mix in water

Then add the asparagus cooking water.

Asparagus Soup add softened woody ends

Return the softened ends to the saucepan.

asparagus Soup simmer for 10 mins

Bring to the boil, and simmer for another 10 minutes.

Asparagus Soup - leave to cool

Leave to cool.

Asparagus Soup - Puree

Purée.

Asparagus Soup - sieve

Sieve.  Use the back of a ladle to push it through.  The most fibrous bits of the asparagus ends will stay in the sieve.

Asparagus Soup - for freezing

This is the point at which it will freeze brilliantly.  I reckon 300ml/2 ladles/10fl oz is a portion.

Asparagus Soup - add milk

There were three of us for lunch today, so 6 ladles went into a saucepan with 150ml of full-fat milk.  As of now, your soup has absolutely no seasoning.  If you want to prove to yourself how vital salt is, taste.  Bland doesn’t even begin to describe it.  So, season to taste.  In my case, 2 tsp of malden sea salt and 1 tsp of freshly ground white peppercorns.

Asparagus Soup - oil

Meanwhile, I got on with making some photographically appealing croutons.  I oiled six asparagus spears and wiped up the remaining oil with three pieces of French bread.  Then, I griddled them.

Asparagus soup -goats cheese

A generous dollop of goats cheese is lovely.  Mine is ‘Moody’s Rosary Ash’ which is made on the edge of the New Forest from pasteurised goat’s milk.  The black is an edible ash coating.  (New to us.  Dom and Jem aren’t wild about goats’ cheese, but they finished off the last bit of this one.)

Asparagus Soup - spread with cheese

Top with a couple of spears of asparagus.

Asparagus soup with crouton

A swirl of cream and a light sprinkling of parsley looks nice.  Chervil is also good, but you have to grow it.  As is, crispy bacon.

Asparagus Soup in Bowl 4

Eat.

Asparagus Soup in bowlAsparagus Soup with Goats’ Cheese and Asparagus Giant Crouton

Makes 10 portions/3 litres, approximately

  • 1kg/2lb-plus of woody asparagus ends
  • 2 onions, chopped
  • 4 cloves of garlic, microplaned
  • 100g/1 stick/4oz butter
  • 2 heaped tablespoons of plain flour
  • 500ml/17fl oz full-fat milk
  • Malden sea salt and freshly ground white pepper
  • Garnish:  Double cream/chopped parsley or chervil/slices of griddled French bread topped with goats’ cheese and asparagus spears

Place the woody asparagus ends in a saucepan and cover with water.  Bring to the boil and simmer for ten minutes.

Melt the butter in a large saucepan and soften the onion and garlic.

Drain the asparagus, reserving both the woody ends and the cooking liquid.

Stir in the flour and cook for a couple of minutes.  Gradually blend in the asparagus cooking water.  Then add the woody ends and cook for a further ten minutes.

Allow to cool, then purée in a blender.  Push through a sieve until you have an ultra smooth soup.  If you’re getting ahead, this is the time to freeze.

To finish:  Place 300ml/2 ladles/10 fl oz of the pureé per person in a saucepan with 50ml/¼ cup of full-fat milk.  This is entirely flexible.  Add milk to create the soup consistency you prefer.  Heat gently.

Griddle three slices of french bread and six asparagus spears.  Spread a generous dollop of goats’ cheese on the griddled bread and top with the asparagus spears.

Pour the soup into bowls, swirl on some double cream, top with chopped parsley or chervil and serve the goats’ cheese croutons on the side.

Eat.

Print.


Cheese Soufflé Jacket Potatoes

Soufflé-ish.  I’ve made up a bit of a fancy name for what is really a cheesy baked potato.  It’s my solution to the fact Dom isn’t excited at the prospect of a baked potato and Liddy thinks they are the food of the gods.  I make these in all kinds of incarnations.  I feel sure if I keep blogging for any length of time they will be in your destiny.

Cheddar Souffle Potatoes 20

Marauding teenagers, giving every appearance of being prepared to eat you if not given an alternative, can be a frightening thing.  It’s reassuring to have a stash of these tucked away in the freezer.  Open freeze on a tray, uncooked.  Once frozen they can be transferred to a more convenient box.  Ideally, thaw before cooking.  In real life, I have good results straight from frozen.

Cheddar Souffle Potatoes 1

It begins with the potato and you want a ‘floury’ one.  The same type you’d use for chunky chips and mashed potatoes.  In the UK the most easily available are Maris Piper and King Edward.  Size-wise it depends on what you can find.  Is it just me or are the ones in ‘bags’ universally small now?  I try and pick mine up at the market and have a rummage.  Give them a good scrub under running water to get all the mud off.

Since I am the woman who, early in my married life, managed to set fire to the microwave by not remembering to prick my potato skin before setting it to zap … PIERCE the skin.

Cheddar Souffle Potatoes 2

Then, because I like my potato skins crisp, I rub my potatoes with rapeseed oil and Malden sea salt.  Fortunately, for the safety of my family, I no longer own a microwave and mine go in the oven.

If you are in a hurry a metal skewer pushed through the centre will speed the cooking up.

Cheddar Souffle Potatoes 3

Meanwhile, I get on with the fancy bit.  With Seb away at university there is nothing to stop me including spring onions.  Wash and finely slice.

Cheddar Souffle Potatoes 5

Then, into a saucepan with butter and full-fat milk.  Truthfully, I don’t weigh any of this.  But – for 8 potatoes (weighing about 1.8kg/4lb) I’ve used 100g/4oz butter and 300ml/½ pint of milk.  I used one spring onion per potato for no other reason than I’d have had to buy another packet if I wanted any more!

Cheddar Souffle Potatoes 6

Over a medium heat, melt.  When small bubbles appear at the edge, turn the heat off and put on the lid.  Let it sit and infuse until the potatoes are cooked.

Cheddar Souffle Potatoes 7

How long depends on the size of potato you’re using.  It’s somewhere between 1-1¼ hours at Gas Mark 7/220ºC/425ºF.

Cheddar Souffle Potatoes 8

Cut them in half.

Cheddar Souffle Potatoes 9

As soon as you can, and I seem to have asbestos fingers, scoop out the soft potato leaving the potato skins behind.

Cheddar Souffle Potatoes 10

Pass the cooked potato through a potato ricer.

Cheddar Souffle Potatoes 11

Then add sea salt and freshly ground black pepper, to taste.

Cheddar Souffle Potatoes 12

Now it’s time to add the infused milk.  I scoop out the spring onions with a slotted spoon and add them all.  Potatoes vary in size and you may not need all the buttery milk.  Add as much as is needed to create a soft mashed potato.

Cheddar Souffle Potatoes 13

One large handful per potato – plus one for the pot.  Give it a taste.  I’m using a cheese called ‘Sussex Charmer’ which is a cross between a mature Farmhouse Cheese and Parmesan.  There are all kinds of truly fabulous cheeses being made in the UK today and I’m on a mission to try them all.

There’s a whole lot of history behind that – in 1939 anyone making cheese was required by Wartime Law to make one type of Cheese.  It was called ‘Government Cheddar’, and was rationed.  My Grandparents absolutely loathed it.  That law wasn’t repealed until 1954 and, even then, the Milk Marketing Board only allowed Stilton, Red Leicester, Lancashire and Wensleydale.  If you wanted to experience great cheese, you went to France.  The Milk Marketing Board was abolished in 1994, the year my daughter was born – and it was the beginning of the cheese revolution.  By 2010 there were more than 700 named varieties of cheese produced in the UK, that’s 100 more than there are in France.  Fun.

Cheddar Souffle Potatoes 14

I use 1 egg yolk for every two potatoes – roughly.  Stir them in.

Cheddar Souffle Potatoes 15

Whisk the egg whites until they are billowy.

Cheddar Souffle Potatoes 16

Stir one large tablespoon into the cheesy mash to loosen it slightly and then gently fold in the rest.

Cheddar Souffle Potatoes 18

Pile it into the empty potato shells.  I, of course, can’t waste any of it ..!

Cheddar Souffle Potatoes 19

A sprinkle of cayenne pepper and a finely sprinkle of cheese.  Then, it’s into the oven for 15-20 minutes until it is golden and slightly risen.  Again, Gas Mark 7/22oºC/425ºF.

Cheddar Souffle Potatoes 23

Fresh green salad.  Roasted tomatoes.  Chutneys.

Eat.

Cheddar Souffle Potatoes 20Cheese Soufflé Jacket Potatoes

Serves 4

  • 4 baking potatoes
  • Rapeseed oil
  • 4 spring onions, finely sliced
  • 50g butter
  • 150ml/¼ pint) milk
  • 2 eggs
  • 120g/4oz strong cheddar-like cheese, grated
  • Cayenne Pepper
  • Sea salt and freshly ground black pepper

Pre-heat the oven to Gas Mark 7/220ºC/425ºF, if necessary.  Aga:  Cook in the Roasting Oven – directly on the grid shelf on the third set of runners.  Wash and scrub 4 baking potatoes.  Prick all over.  Rub in rapeseed oil and sea salt.  Bake for 1hr-1¼ hours.

Meanwhile, place the finely sliced spring onions in a saucepan with the butter and milk.  Bring to a boil, then cover and remove from the heat.  Leave to infuse until the potatoes are cooked.

As soon as you can handle the cooked potatoes, split in half.  Scoop out the soft potato, leaving the skins intact.  Pass the potato through a potato ricer.  Then add the butter, milk and spring onions.  Season to taste with sea salt and freshly ground black pepper.

Add the grated cheese, leaving a little behind to sprinkle on the top.

Separate two eggs.  Add the egg yolks to the potato mix and stir everything together.

Whisk the egg whites until they are ‘soft peaks’.  Stir a heaped tablespoon into the potato mix to loosen.  Gently ‘fold’ in the rest.

Return the potato mix to the skins.  Sprinkle with cayenne pepper and a final grating of cheese.

Bake at Gas Mark 7/220ºC/425ºF (Aga:  Roasting Oven) for 15-20 minutes until golden and slightly risen.

Eat.

Print.


Vanilla Butterfly Cakes

Butterfly Cakes are a little piece of nostalgia for me.  I was thinking .. I’d never seen them outside of a home kitchen when I decided to make these on Friday, but there’s clearly something in the air at the moment.

On Saturday, Nigel and I happened upon a new-to-us garden centre/food hall.  There they were.  Butterfly cakes (£3.00 for six), along with the first of the English strawberries and asparagus.

Butterfly Cakes plate

Then, this Sunday, one newspaper stated ‘Jamie Oliver slams schools who let pupils get away with making fairy cakes’.  I imagine he’s being taken somewhat out of context since, of course, you want people to cook healthily but with tight school budgets and a chronic lack of equipment I think they’re a good starting point.  Anything that builds confidence in the kitchen.  Besides, I think balance is worth teaching too.  A life of unremitting self-denial would be extremely dull .. and not achievable for most of us.

Butterfly Cake Icing Rack 2

Butterfly Cakes are probably the first things I learnt to make.  My brother had the disgusting habit of always eating the wings first and then licking out the buttercream.  Is that over-sharing???  It’s an image which haunts me.

Butterfly Cakes - weighing eggsButterfly Cakes 1

The cake batter is a Victoria sponge ‘sandwich’ cake mixture.  That’s an equal quantity of butter, caster sugar, eggs and flour.  Most recipes ask for 3 eggs for a ‘Victoria’ sponge which is only possible because supermarket eggs come ‘sized’.  Even so, there can be significant differences.

I always weigh my eggs – in their shells.  It doesn’t matter if you prefer imperial or metric – just stick to the same unit of measurement.  You want the eggs at room temperature and not fridge cold.  A fresh egg will give you better results than one that’s been hanging around.

Butterfly Cake - softened butter

Then it’s that weight in softened butter.  Imagine you are going to cream your butter and sugar with nothing but a wooden spoon.  It needs to be soft.  Even with the help of an electric mixer, cold butter will result in a ‘heavier’ cake.

DSC_0065

Put the butter and the same weight of caster sugar in your bowl.  With an electric mixer it’s entirely possible to use an all-in-one method.  That’s everything into the bowl and mix.  Or a food processor.  By hand, you have to separate out the stages.

Is there a difference in the finished cake if you separate out the stages?  Yes.  I think there is, but it’s tiny.  If I were challenged to a blind tasting I might look like a twit.  Do what seems easiest to you.  Just don’t pay £3.00 for six!

Butterfly Cake - mix 1

I ‘cream’ the butter and sugar together.  You can’t overdo this stage.  You want pale, light and fluffy.  It will also increase in volume.

Butterfly Cake - mix 2

The same weight of self raising flour, whisked or sieved, will be waiting in a bowl.  I sieve over a couple of tablespoons of that before adding the eggs.  It’s my insurance policy against the mixture curdling.  That’s when the eggs have given the butter/sugar mix the appearance of cellulite.  The reason will be not ‘beating’ an egg in sufficiently well before adding the next one and/or your ingredients not being at room temperature.  If it happens, just add a little bit of your flour and ‘beat’.  Your cake won’t be as light as it might have been otherwise, but ….  Really, it’s just cake!  Let’s not worry.

Butterfly Cake - add eggs

Then it’s the three eggs – one at a time.  I find it easiest to break the eggs into a jug.  In the normal run of things (i.e. when you aren’t trying to take sequential pictures) it means you don’t have to stop the mixer.

Butterfly Cake - egg 1

Beat the first egg in thoroughly before adding the second.

Butterfly Cake - egg 2 mixed

Then add the second.  Beat.  And then the third.  Beat.

Butterfly Cake - vanilla extract

Now it’s the vanilla.  1 tsp of good vanilla extract.

Butterfly Cake - finished mix

And then the flour.  At this point you don’t want to over-mix.  I continue with my paddle attachment and beat just enough for everything to be incorporated.  Traditionally, it’s a metal spoon and a light folding.

Butterfly Cake - milk

Loosen with a couple of tablespoons of milk.  You are looking for ‘dropping consistency’.  That’s when the mixture will fall off your spoon with a sharp tap on the side of the bowl.

Butterfly Cake - into piping bag

Older recipes will ask you to place two heaped teaspoons into each paper case, but I prefer to pipe mine in.

Butterfly Cake - cases

The cases you need are labelled ‘Fairy Cases’ in the UK and they fit neatly into a shallow bun tin (patty tin).  It’s worth buying good quality cases because the paper used is thicker and will hold their shape better.  Also try and get them in a protective tube as a mis-shapened case means it’s already flattening out and ultimately likely to pull away from your finished cake.

Butterfly Cake - pipe

Pipe the mixture in.  You’ll get between 18 and 24, depending on the size of the eggs you’ve used and whether or not you want a flat or peaked top to your cakes.

Butterfly Cake - piped in cases

This amount – halfway – and you end up with a flatter top.  Two-thirds full gives a slight ‘muffin’ top which is prettier if you are serving your fairy cakes plain.

DSC_0114

Victoria ‘sandwich’ cakes are notoriously temperamental when it comes to oven temperature.  They are the perfect thing to test a new oven with.   Fairy cakes are supposed to be more resilient but, oddly, I find the Aga doesn’t do them well.  That and 2 lb loaf cakes.

You’d think with all the technological advances it would be possible to manufacture conventional ovens which heat, evenly, to the temperature it says on the dial, but no.  They all vary and there is no way round it – you are on your own with yours.  Even the best of them will vary depending on how old a model and how much you have cooking in it at any one time.  My conventional oven is a disaster.  They only way to come close to my desired temperature is to use an oven thermometer and there’s no hope of getting good results if I put two trays in at the same time because the variation top-to-bottom is ridiculous.  Plus I also have to turn anything two-thirds through the cooking time as it’s hotter on the left-hand side.  This breaks the cardinal rule of ‘do not open the oven door whilst your cake is cooking’.  The rush of cold air causes the cake mixture to deflate.

(You can put it’s presence in my life down to the fact I was focussed on convincing my husband it was worth buying a cooker which cost the price of a small car (Aga) whilst still needing a back-up …!  It was a tough sell.)

Navigate it all as best you may.

Butterfly Cakes - cooked

Fifteen minutes later, having done battle with the blasted thing, I have this.  If you’re in any doubt they are cooked, a wooden cocktail stick will come out clean.

It’s really important to take them out of the shallow bun tin immediately you remove them from the oven. Transfer them to a cooling rack.  If you leave your fairy cakes in the tin the cases will start to peel away as the steam flattens out all those pleats.

Butterfly Cakes - Icing Sugar

Now the buttercream.  This is the traditional ‘English’ buttercream.  That’s one part unsalted butter to two parts icing sugar, with milk to loosen.  The icing sugar needs sieving to get rid of all the lumps.  No airy wafting or you’ll be covered in sugar.  Push it through the sieve with the back of a spoon.

Butterfly Cakes - Sieved Icing Sugar

If you are making your buttercream by hand – beat the butter until it is soft and add the icing sugar a couple of tablespoons at a time.

Butterfly Cakes - mixing buttercream

If you are using a stand mixer … this is my top buttercream tip – wrap your mixer in a clean tea towel and you can keep everything in the bowl.  Resist the temptation to peak or you will be engulfed in a white cloud.

You want super-smooth buttercream.  Beat far longer than you believe necessary.  Once everything is together, you can add any colour or flavouring.  For my Vanilla Butterfly cakes I’ve added .. vanilla.  It’s nice to have the flecks of vanilla so I’ve used a teaspoon of vanilla paste.  The seeds from a vanilla pod is the more expensive option.

The consistency is something like whipped double cream.  Transfer it to a piping bag (Wilton IB tip) if you want to play.

Butterfly Cake Take off Lids

Returning to the cooled fairy cakes, you need to cut a circle out of the top.

DSC_0124

Which leaves room for the buttercream.  Pipe in a swirl.  Or simply spoon in a blob.

Butterfly Cake cut wings

Cut the circle lid in two.

Butterfly Cake wings

And place like butterfly wings on top of the buttercream.  They are best eaten ‘fresh’, but will store for a couple of days.  Use a non-airtight tin or the moisture in the cakes will have the paper cases peeling away.

Butterfly Cake icing sugar

Just before serving, dust with icing sugar.

Butterfly Cake close-up

Eat.


Butterfly Cake Icing Rack 2Vanilla Butterfly Cakes

Makes 18-24

For the Fairy Cakes:

  • 3 eggs at room temperature, weighed in their shells
  • unsalted butter, softened – preferably the same weight as the eggs.  Default 175g/6oz.
  • caster sugar – preferably the same weight as the eggs.  Default 175g/6oz.
  • Self-raising flour – preferably the same weight as the eggs.  Default 175g/6oz.
  • 2 tablespoons milk
  • 1 tsp vanilla extract

For the English Buttercream:

  • 88g/3oz unsalted butter, softened
  • 175g/6oz icing sugar, sieved
  • 1-2 tablespoons milk
  • 1 tsp vanilla paste (or the seeds of one vanilla pod)

Pre-heat the oven to 200ºC/180ºC Fan/Gas Mark 6/400ºF

Line shallow bun tins with good quality ‘Fairy Cake’ paper cases.

Weigh your eggs, sugar, butter and flour.

‘Cream’ the unsalted butter and caster sugar together until smooth, pale and fluffy.  Then sift over a couple of tablespoons of the flour.

Break the eggs into a jug and add one at a time, beating well between each addition.

Sieve over the rest of the flour and incorporate it into the mix.  Scrape down the sides of the bowl and loosen the mix with a couple of tablespoons of milk, if necessary, to give a ‘dropping consistency’.

Pipe or spoon the mixture into the paper cases.  Bake for around 12-15 minutes until risen and springy to the touch.  Immediately transfer to a cooling rack.

Weigh the butter for the buttercream into the mixer bowl and lightly ‘beat’.  Then sieve over twice the weight of icing sugar.  Beat until super smooth, then add the vanilla paste.  Beat again.  Finally, beat in a little milk.

Cut off the tops of the fairy cakes, leaving a well for the buttercream.  Pipe or spoon into the cavity.  Split the ‘lids’ in two and arrange the ‘wings’ on top of the buttercream.

Just before serving, dust with icing sugar.

Eat.

Print.