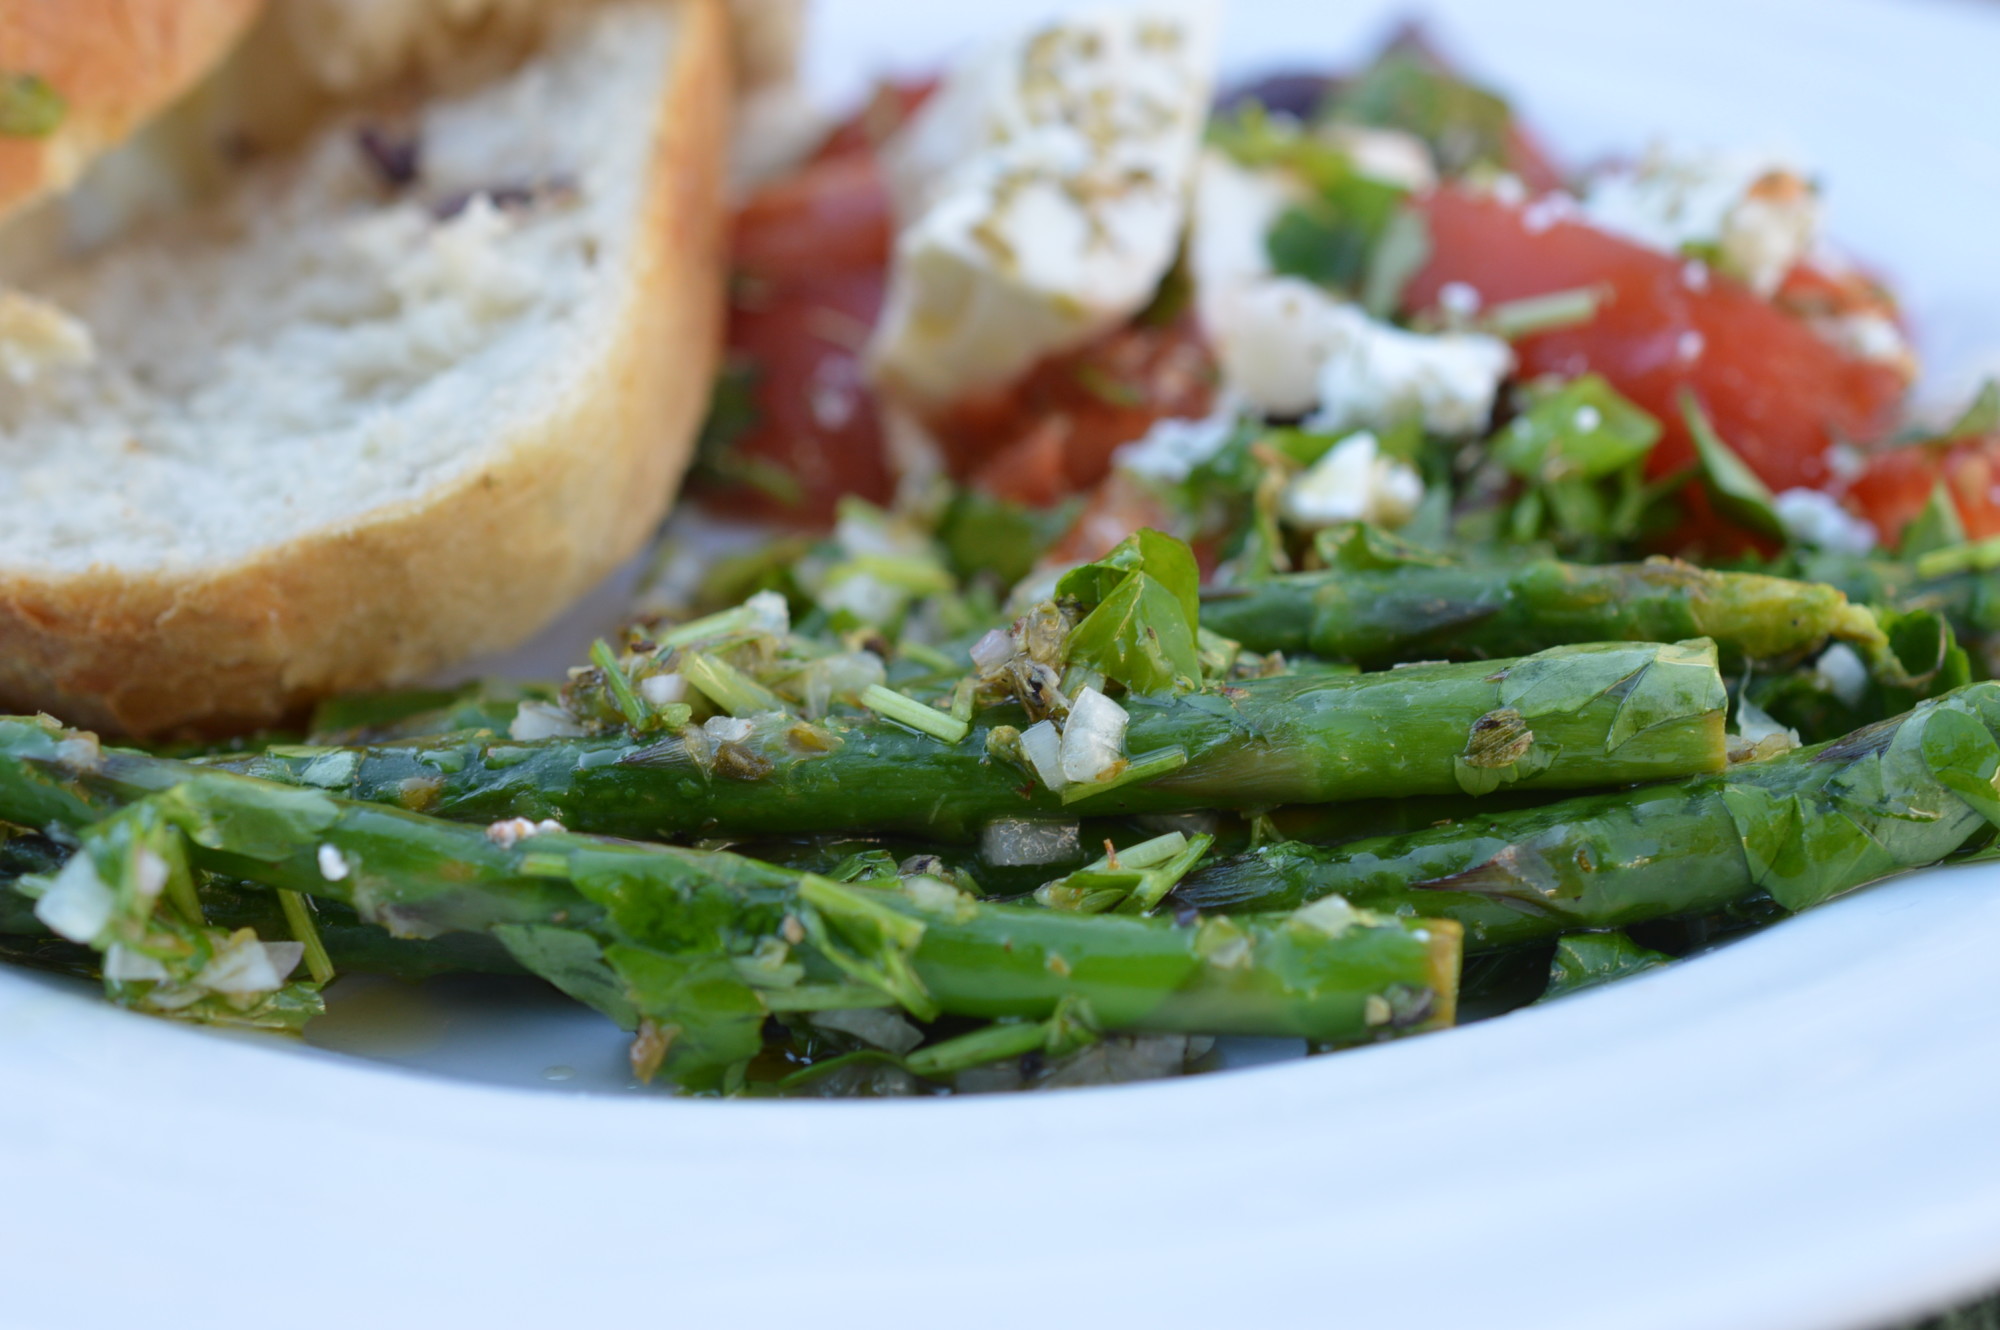
Yesterday was a record breaking hot day – and this was lunch. I made some olive bread and put together a Greek-Style Tomato Salad, too, but I’ll post them next week. I think I must be thinking ‘Greece’ because the news is so full of scenes from Athens. Tough times ahead for a lovely country whichever way they vote, I fear.
I love Greek food, but then I love the herbs that predominate in it – oregano, mint, dill, bay leaves, Greek basil, thyme and fennel are the ones that spring to mind. Being a home cook, I have to use what I can buy. My oregano is not the evocative rigani, as far as I’m aware. It’s Bart’s. Greek basil, I can get. The bitter salad leaves don’t taste quite as bitter as they do under Greek sunshine, but I probably would balk at so many unnecessary air-miles just to feed my children lunch.
Nothing for it, a visit to Greece is in my future.
In the meantime, we’re coming to the end of the British asparagus season. I have treated my early spears with utmost respect and I’m now putting them in tarts, wrapping in pancakes and making them into salads.
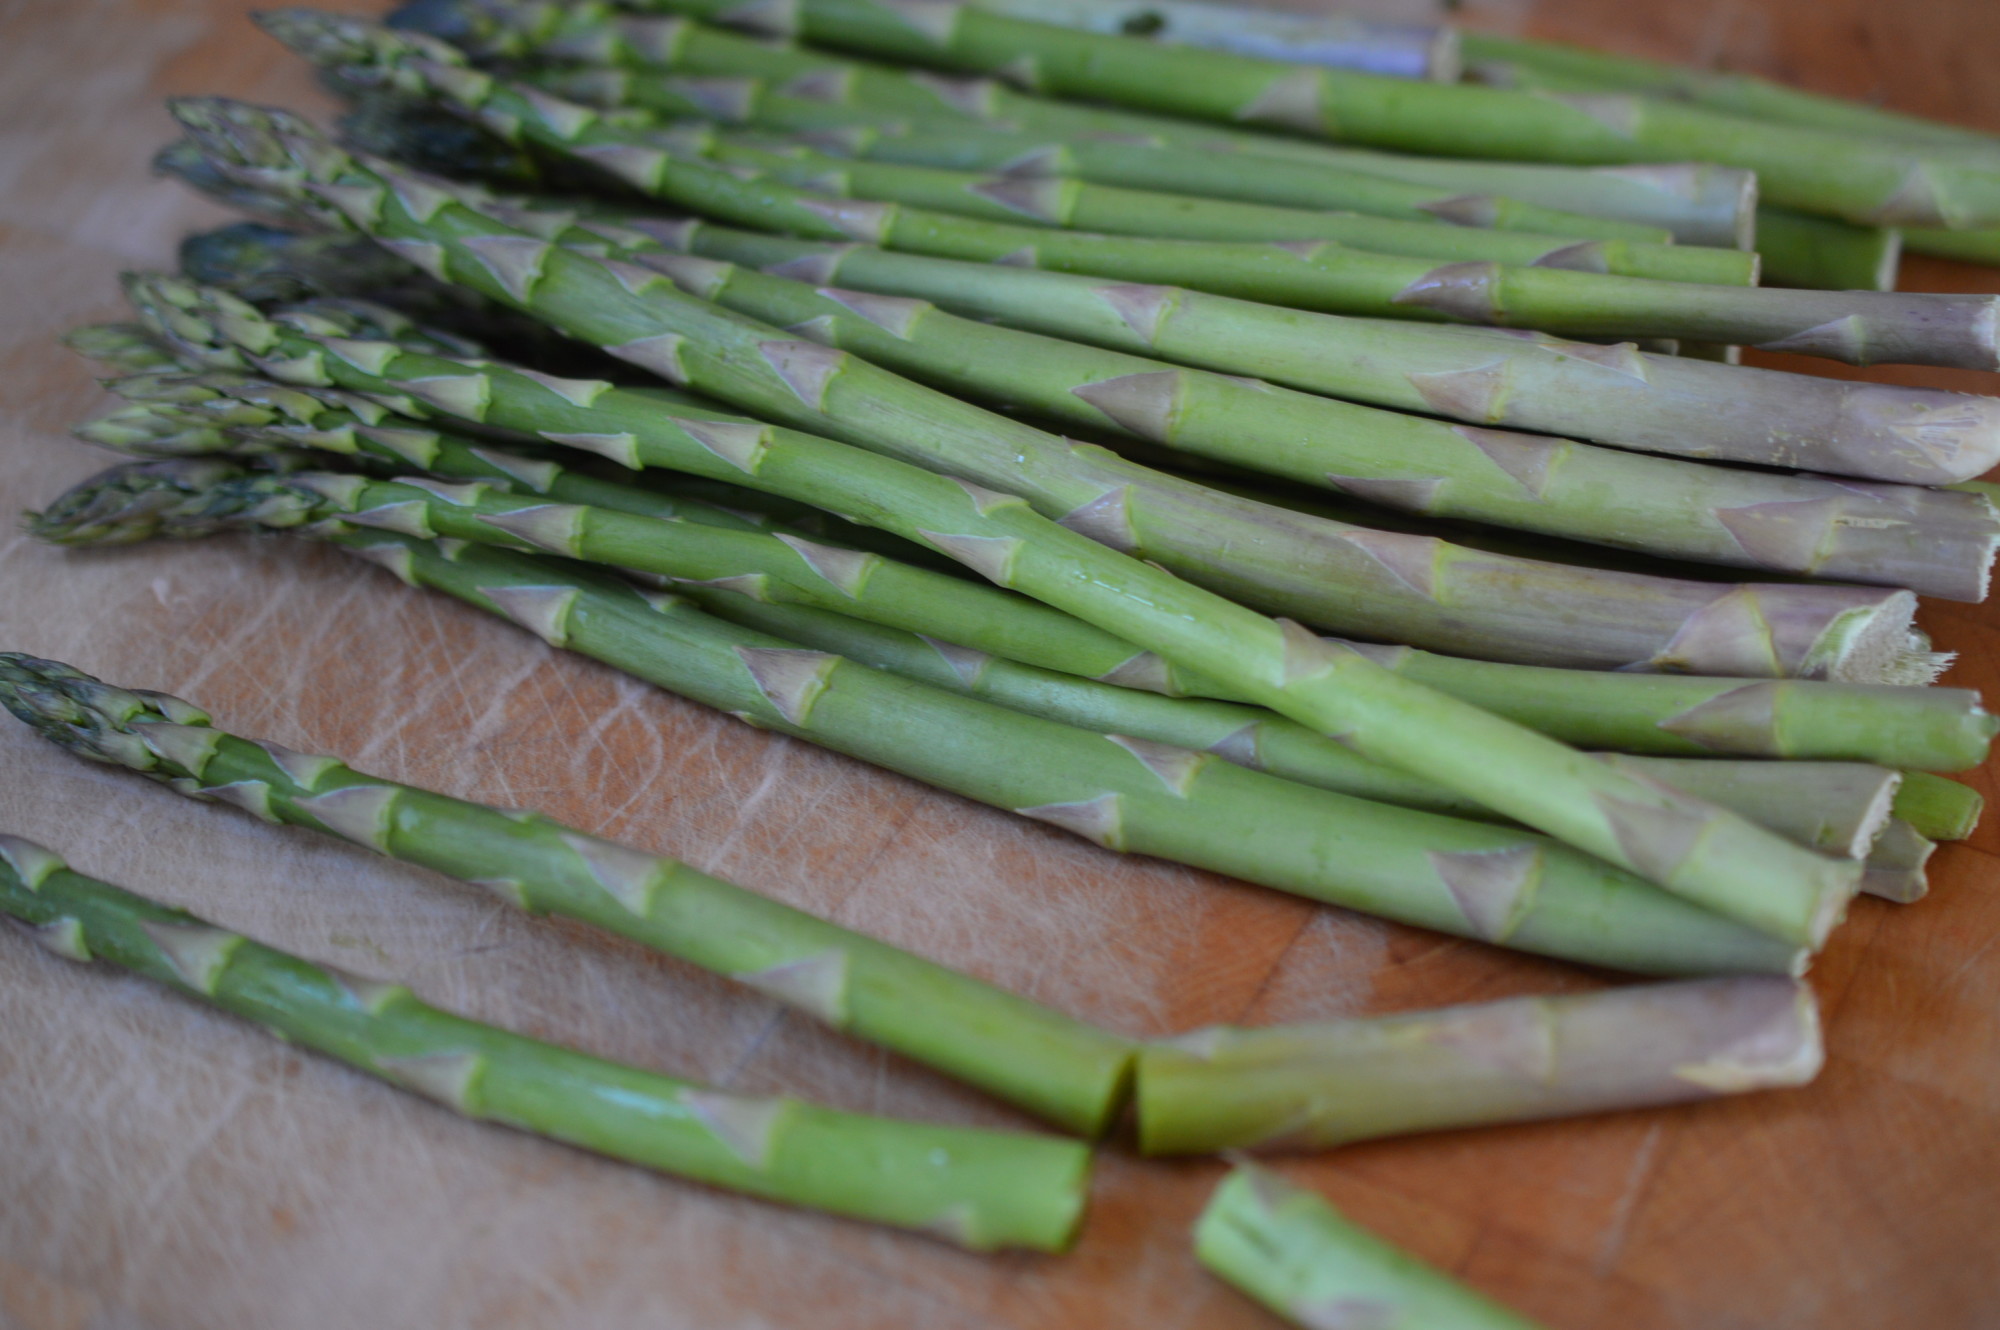
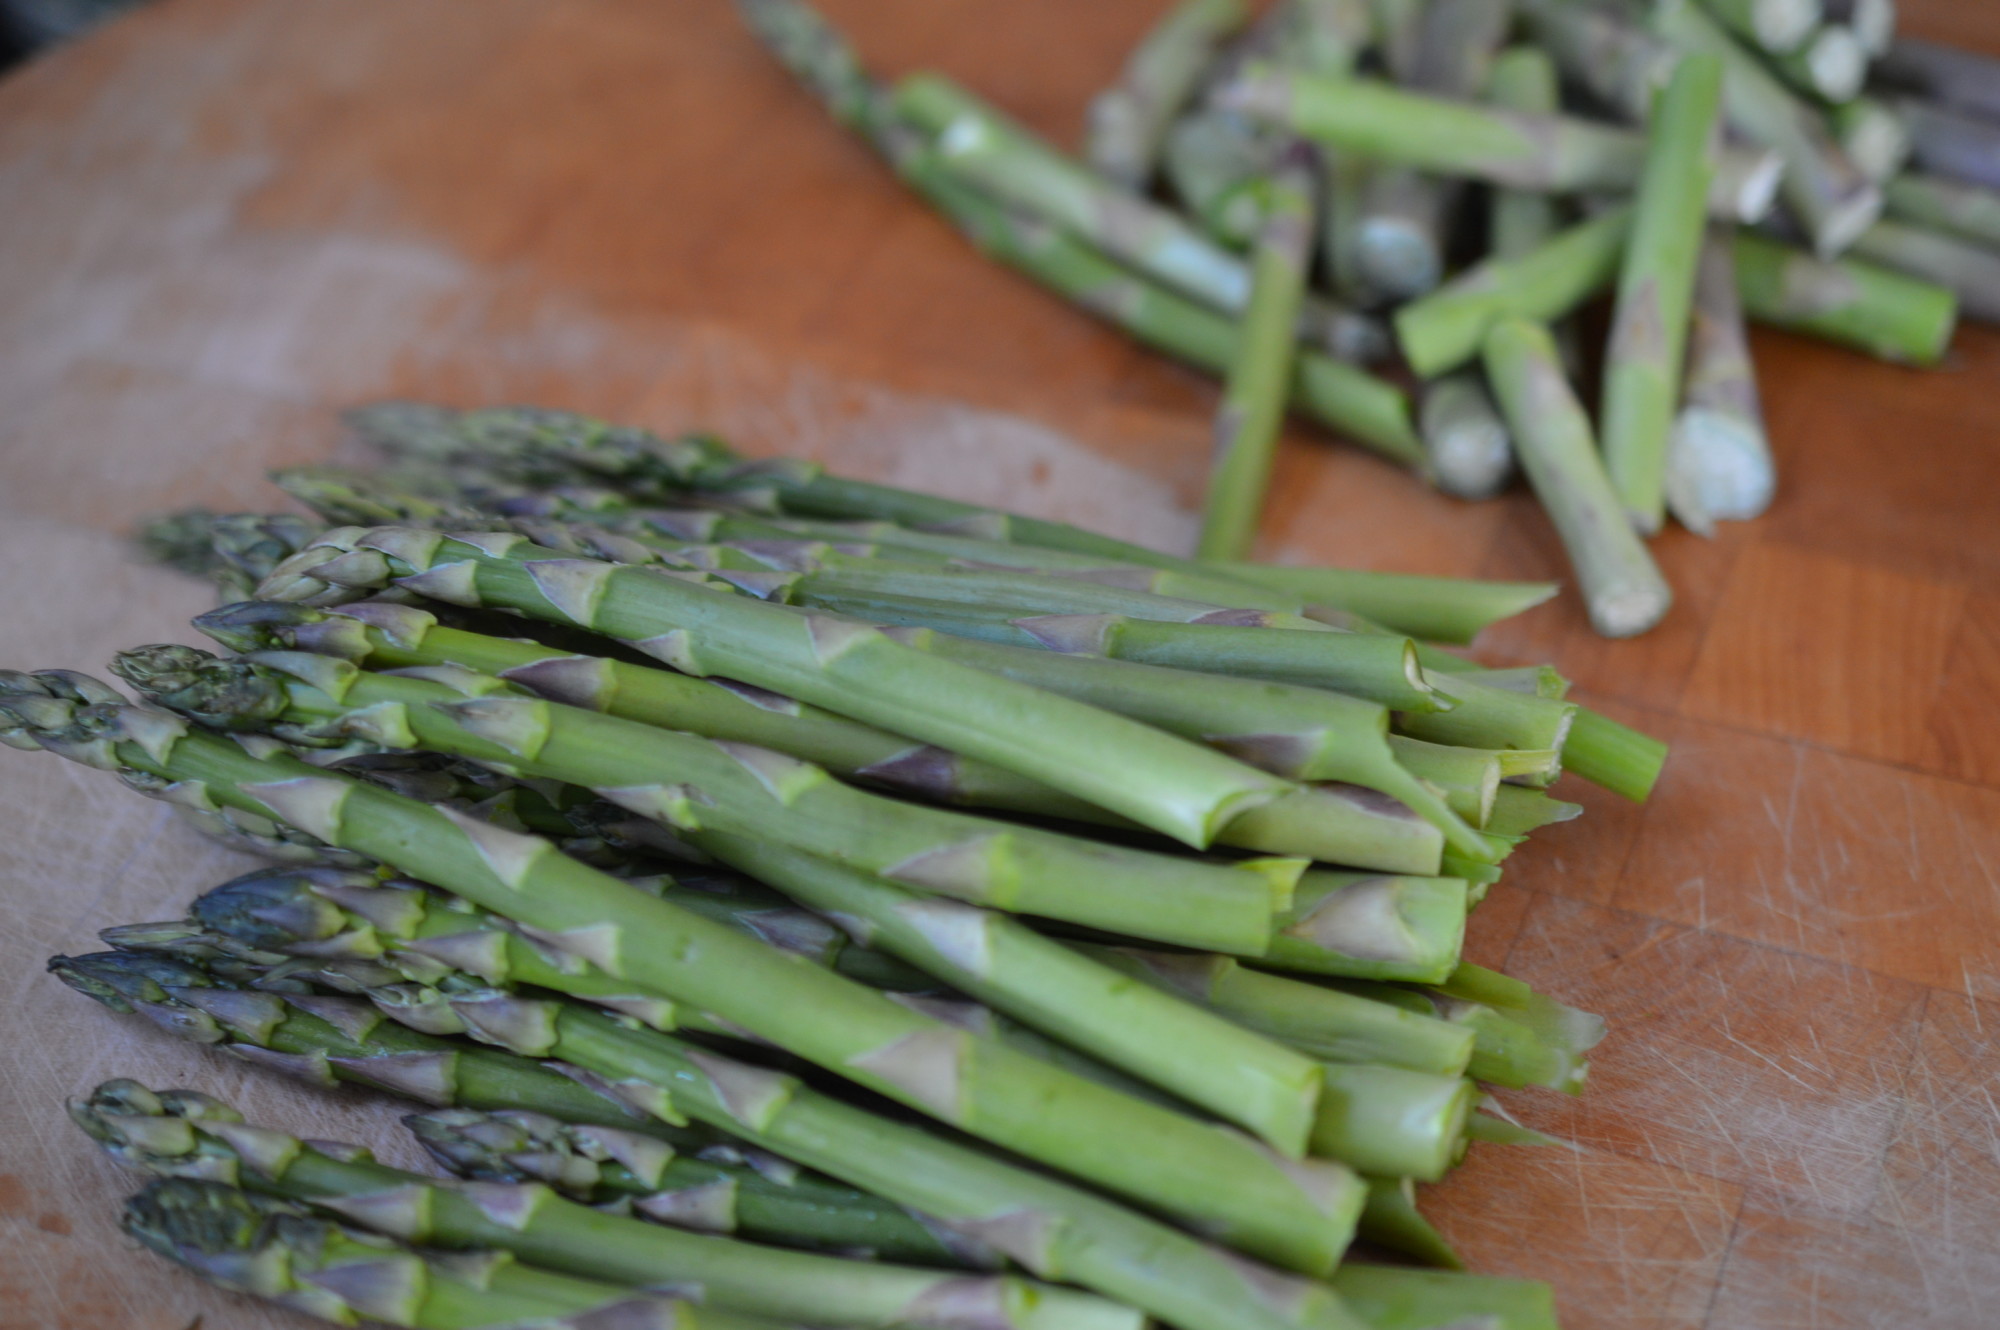
I picked up a couple of bundles – which was a little over 500g. There’s a point on an asparagus spear where it’ll snap naturally. That place marks the end of the fibrous bit and the start of the tender, delicious bit.
(Incidentally, I read something the other day about the English style of eating – and cooking – asparagus. Apparently, we steam the whole asparagus spear and then use the fibrous bit to hold. I will confess to eating with my fingers on occasion, but I’m afraid I eat the whole thing and would be irritated to get fibrous bits between my teeth. Plus, I am inclined to lick my fingers when no-one is looking rather than look for a finger bowl. I would be more disappointed in myself if the writer didn’t labour under the assumption all households own an asparagus steamer but I have never lived in a household which possessed one.)
If you are aesthetically fastidious, you can neaten up the ends with a knife. I do that. Sorry!
My asparagus I would classify as ‘medium’. What chefs call sprue asparagus (that’s the spindly ones) I’d use for something else. Fatter asparagus will need peeling. Just the lower part to make sure what you have in your salad is tender.
Whatever you are left with – pop the snapped off ends and any trimmings in a freezer bag. That’s asparagus soup in the making.
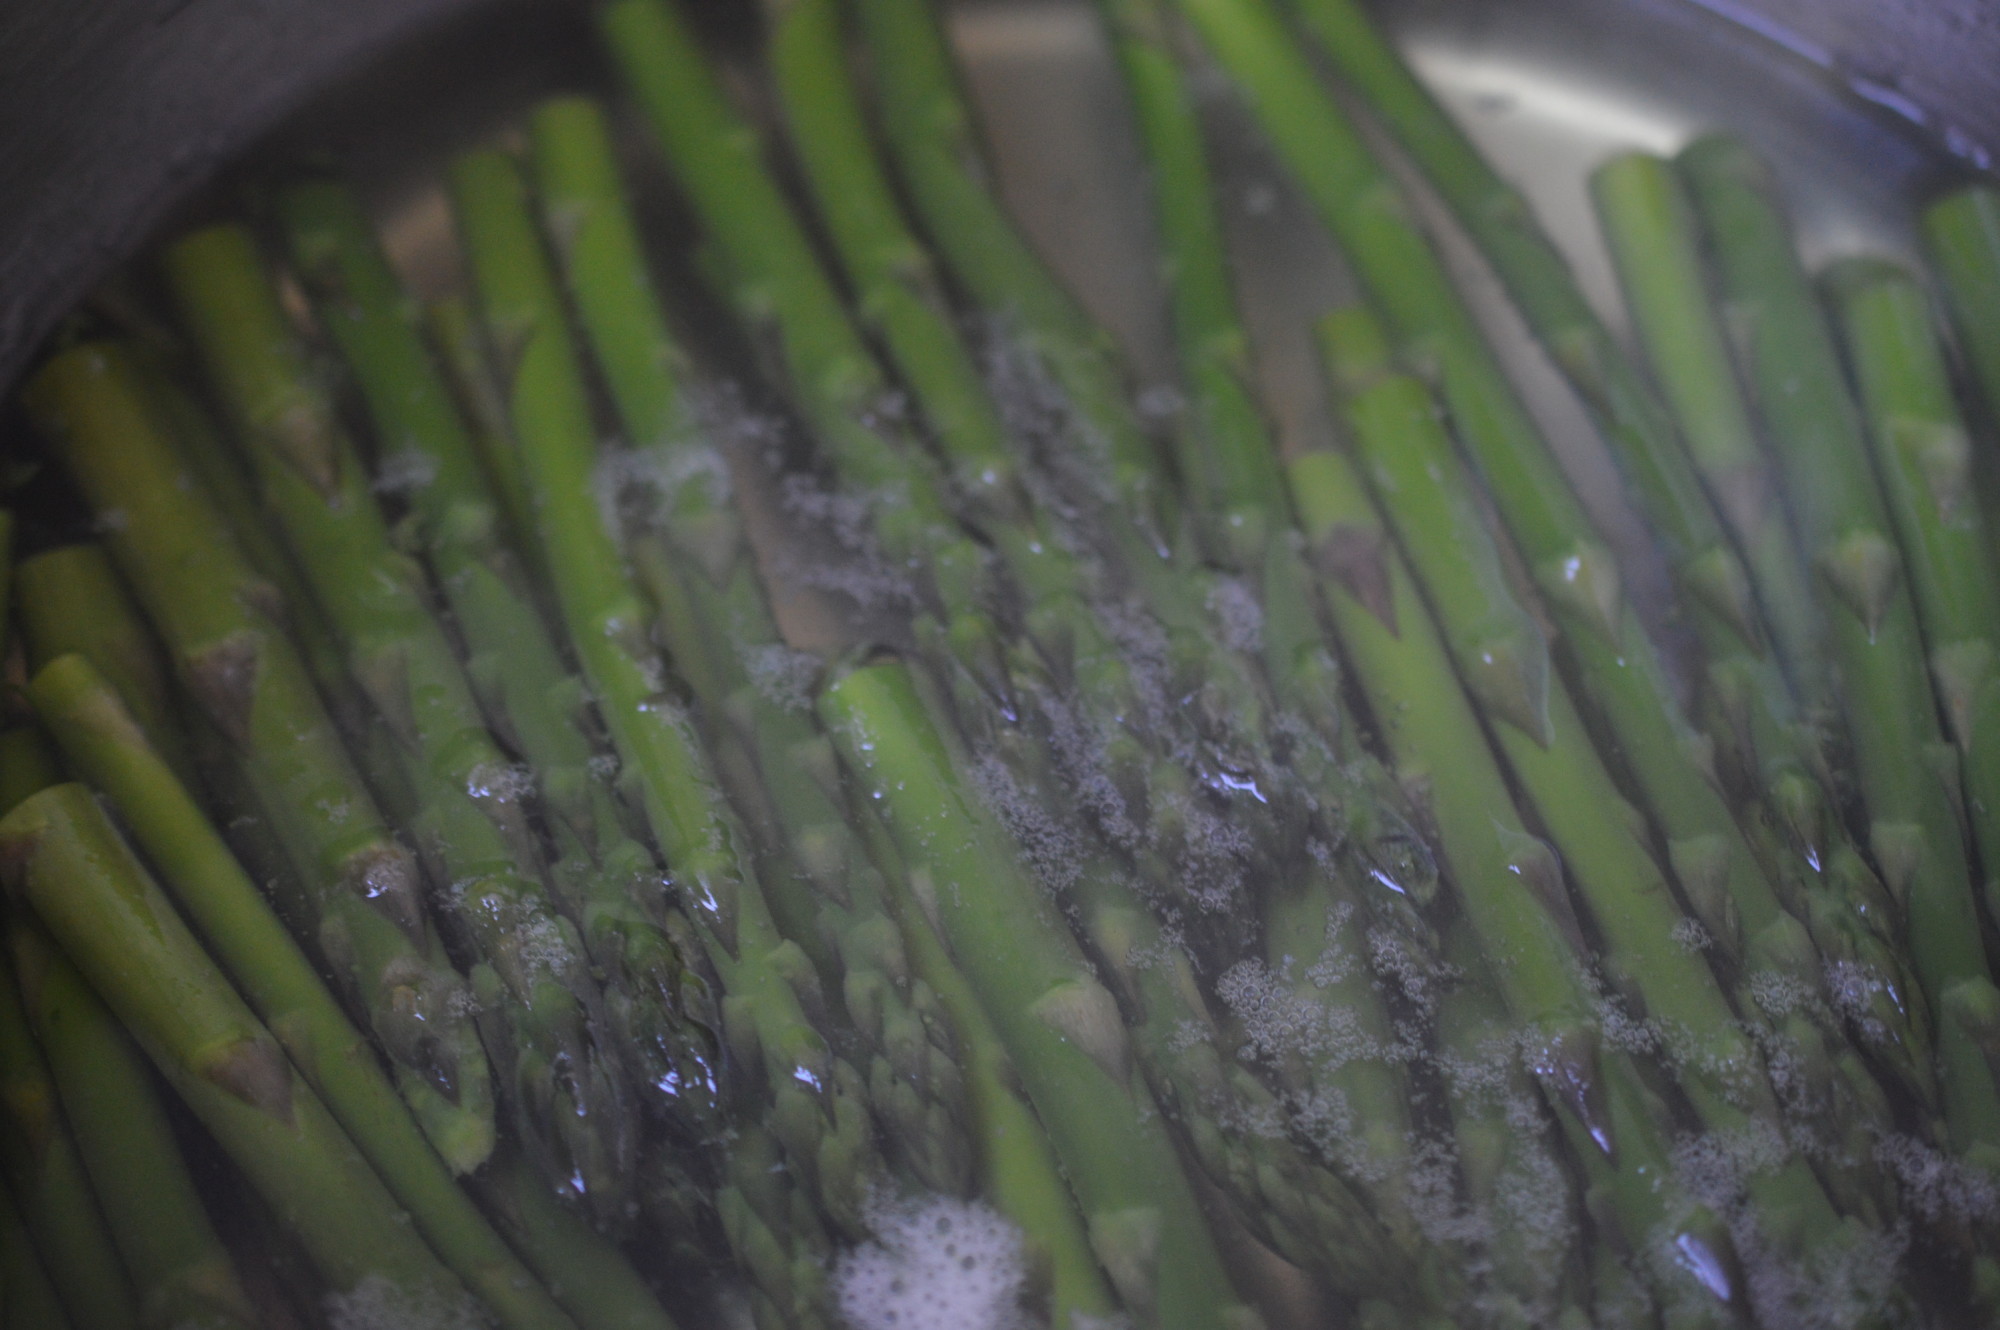
The asparagus spears I give a rinse under running water and fill a wide saucepan with about 5cm/2″ of water. Just enough to cover the asparagus in a single layer. Ish. You can be a little relaxed about it.
When the water is boiling add a little sea salt. I season lightly, partly because I’m going to save the asparagus water for soup and that will intensify the salt content and partly because these spears are going in a flavourful dressing.
Simmer for 3 minutes. It’s almost more of a blanch. Just tender. Then drain, reserving the water if you want to make soup. I put mine in a freezer bag for another day. Usually, I lay the spears on kitchen paper to dry .. but I’d run out.
And the dressing …
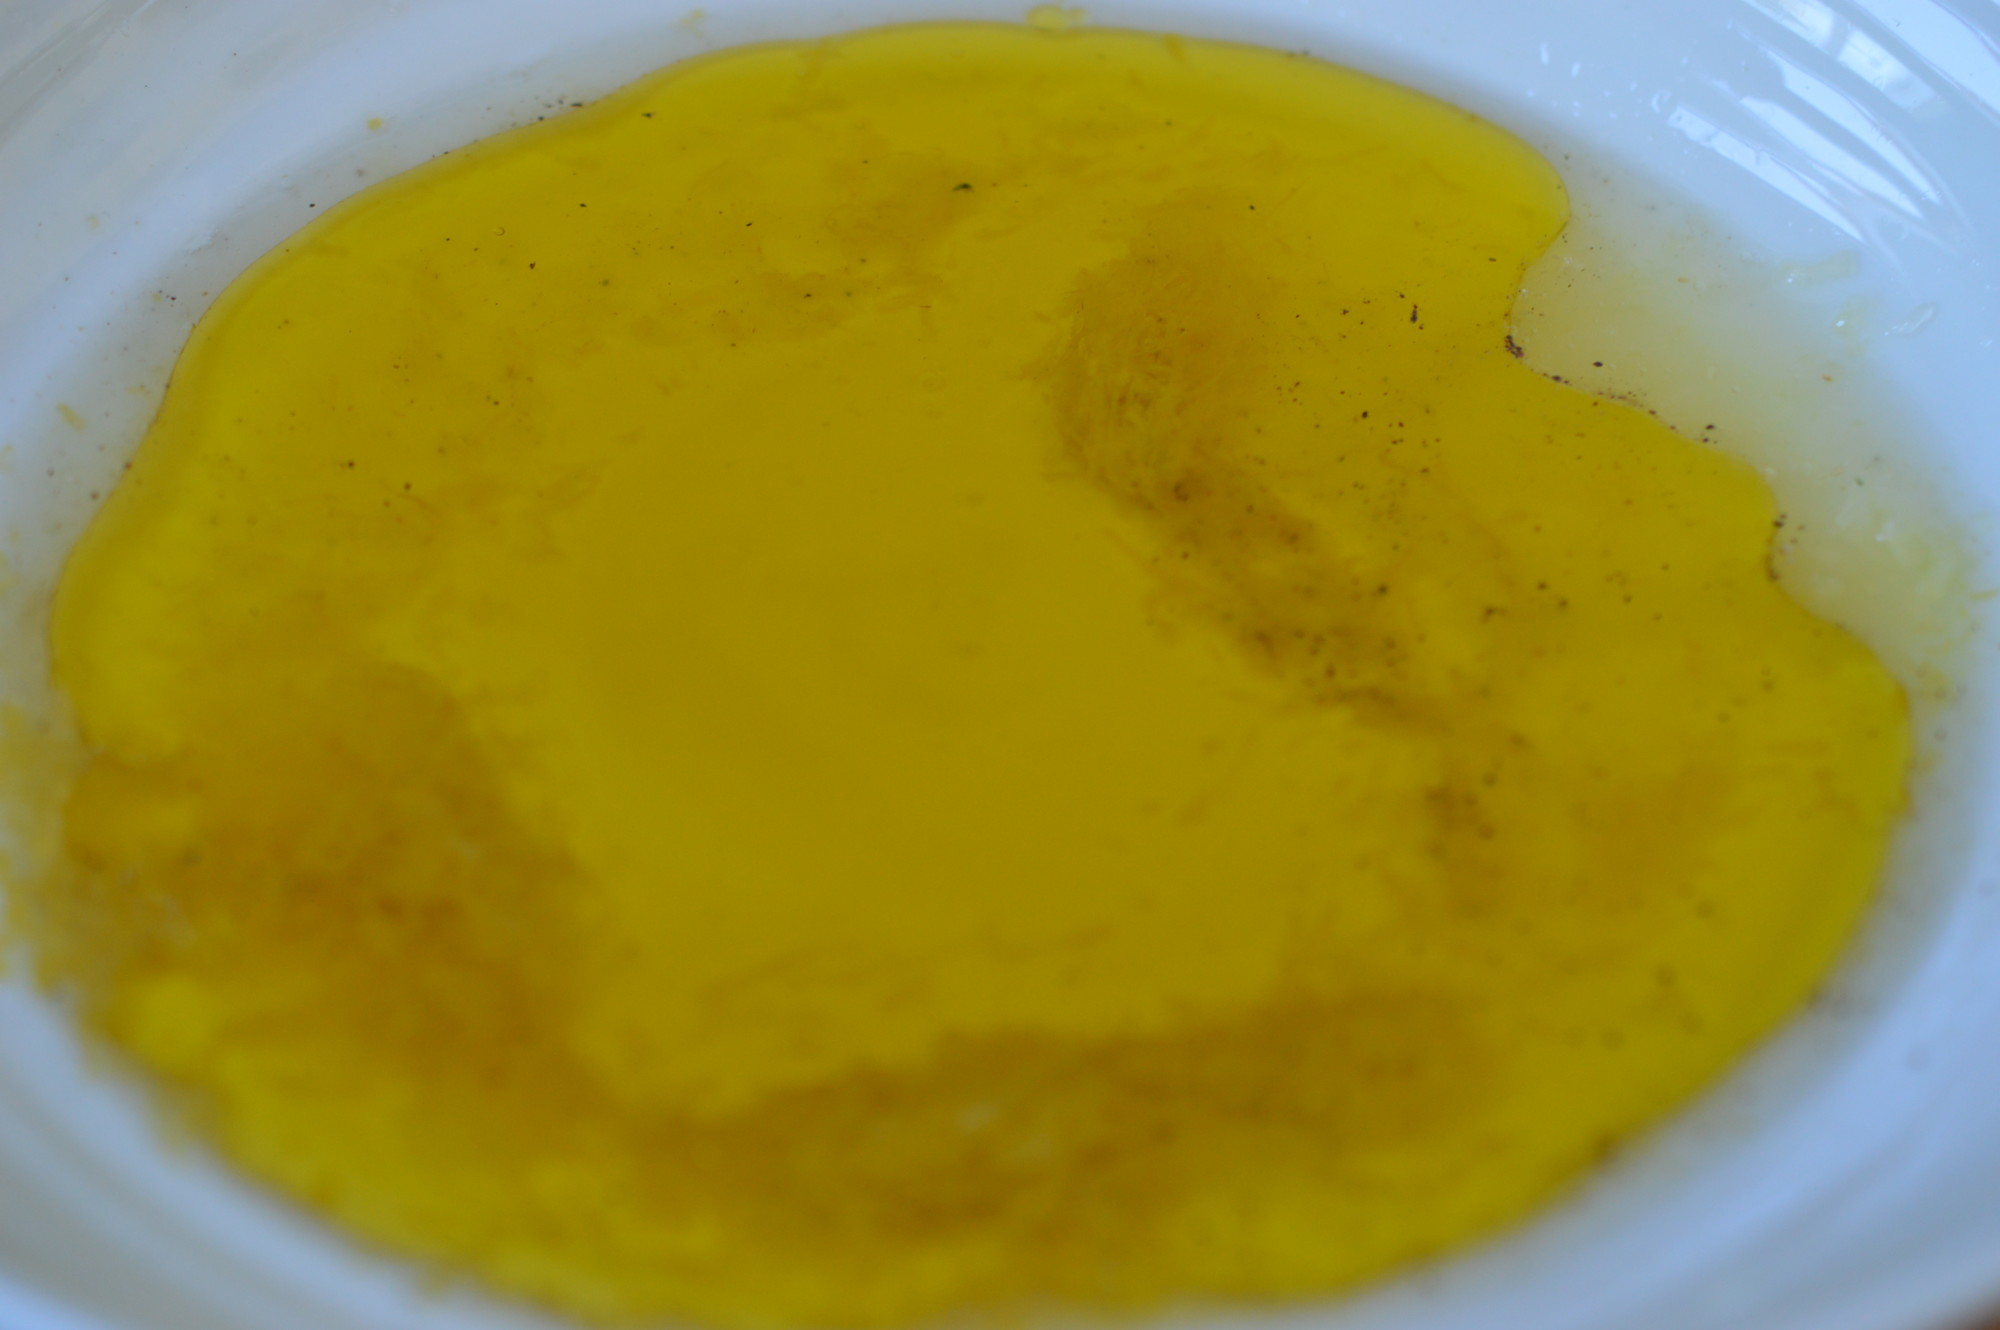
Finely zest one lemon. Put it and the juice into a bowl.
100ml/3½fl oz of cold-pressed Greek olive oil. Use one you like the flavour of.
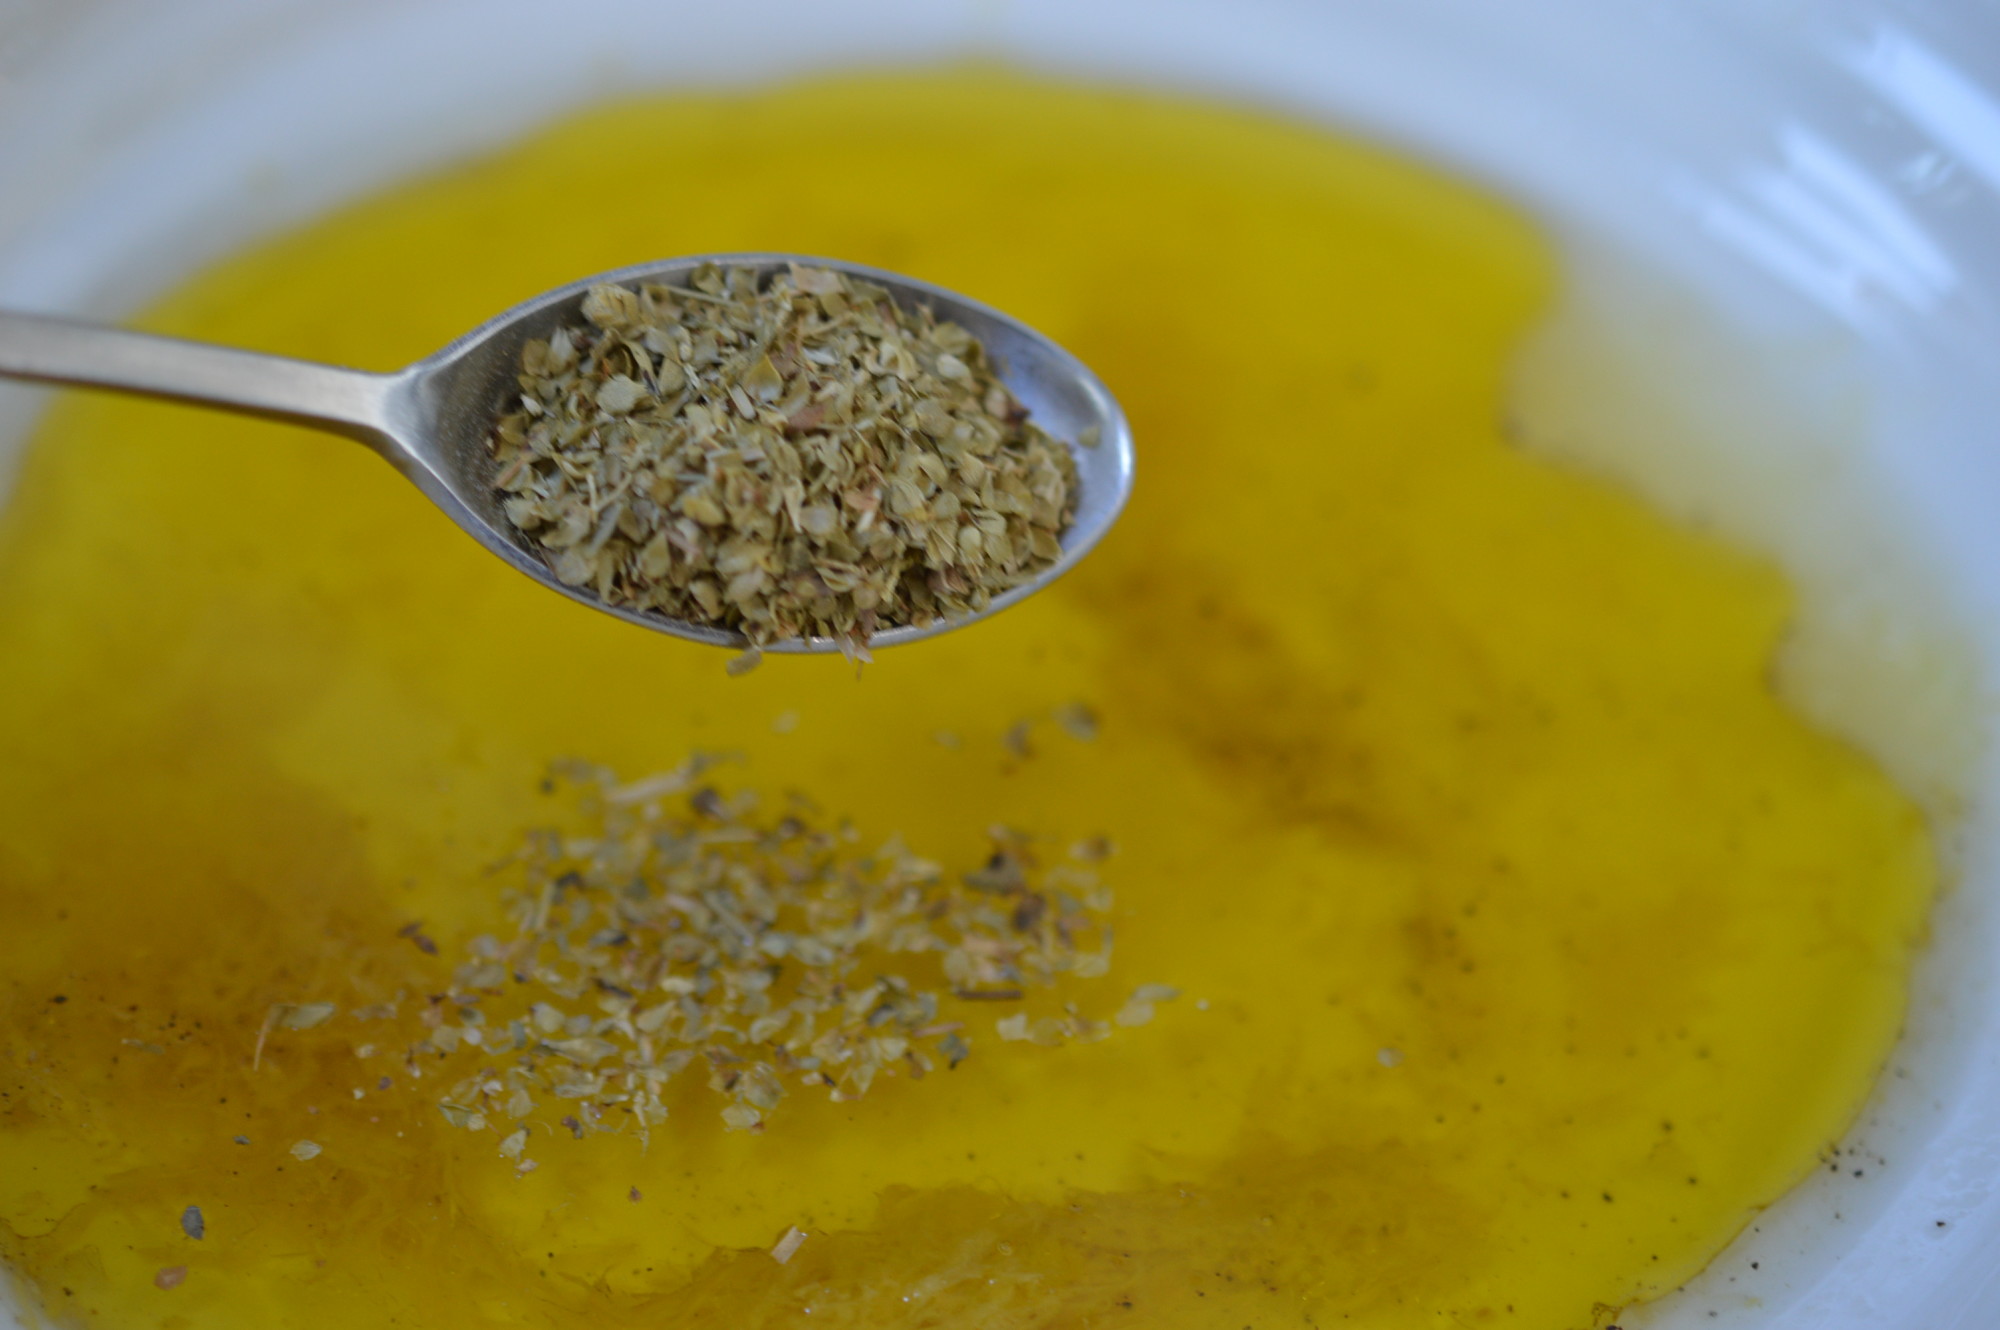
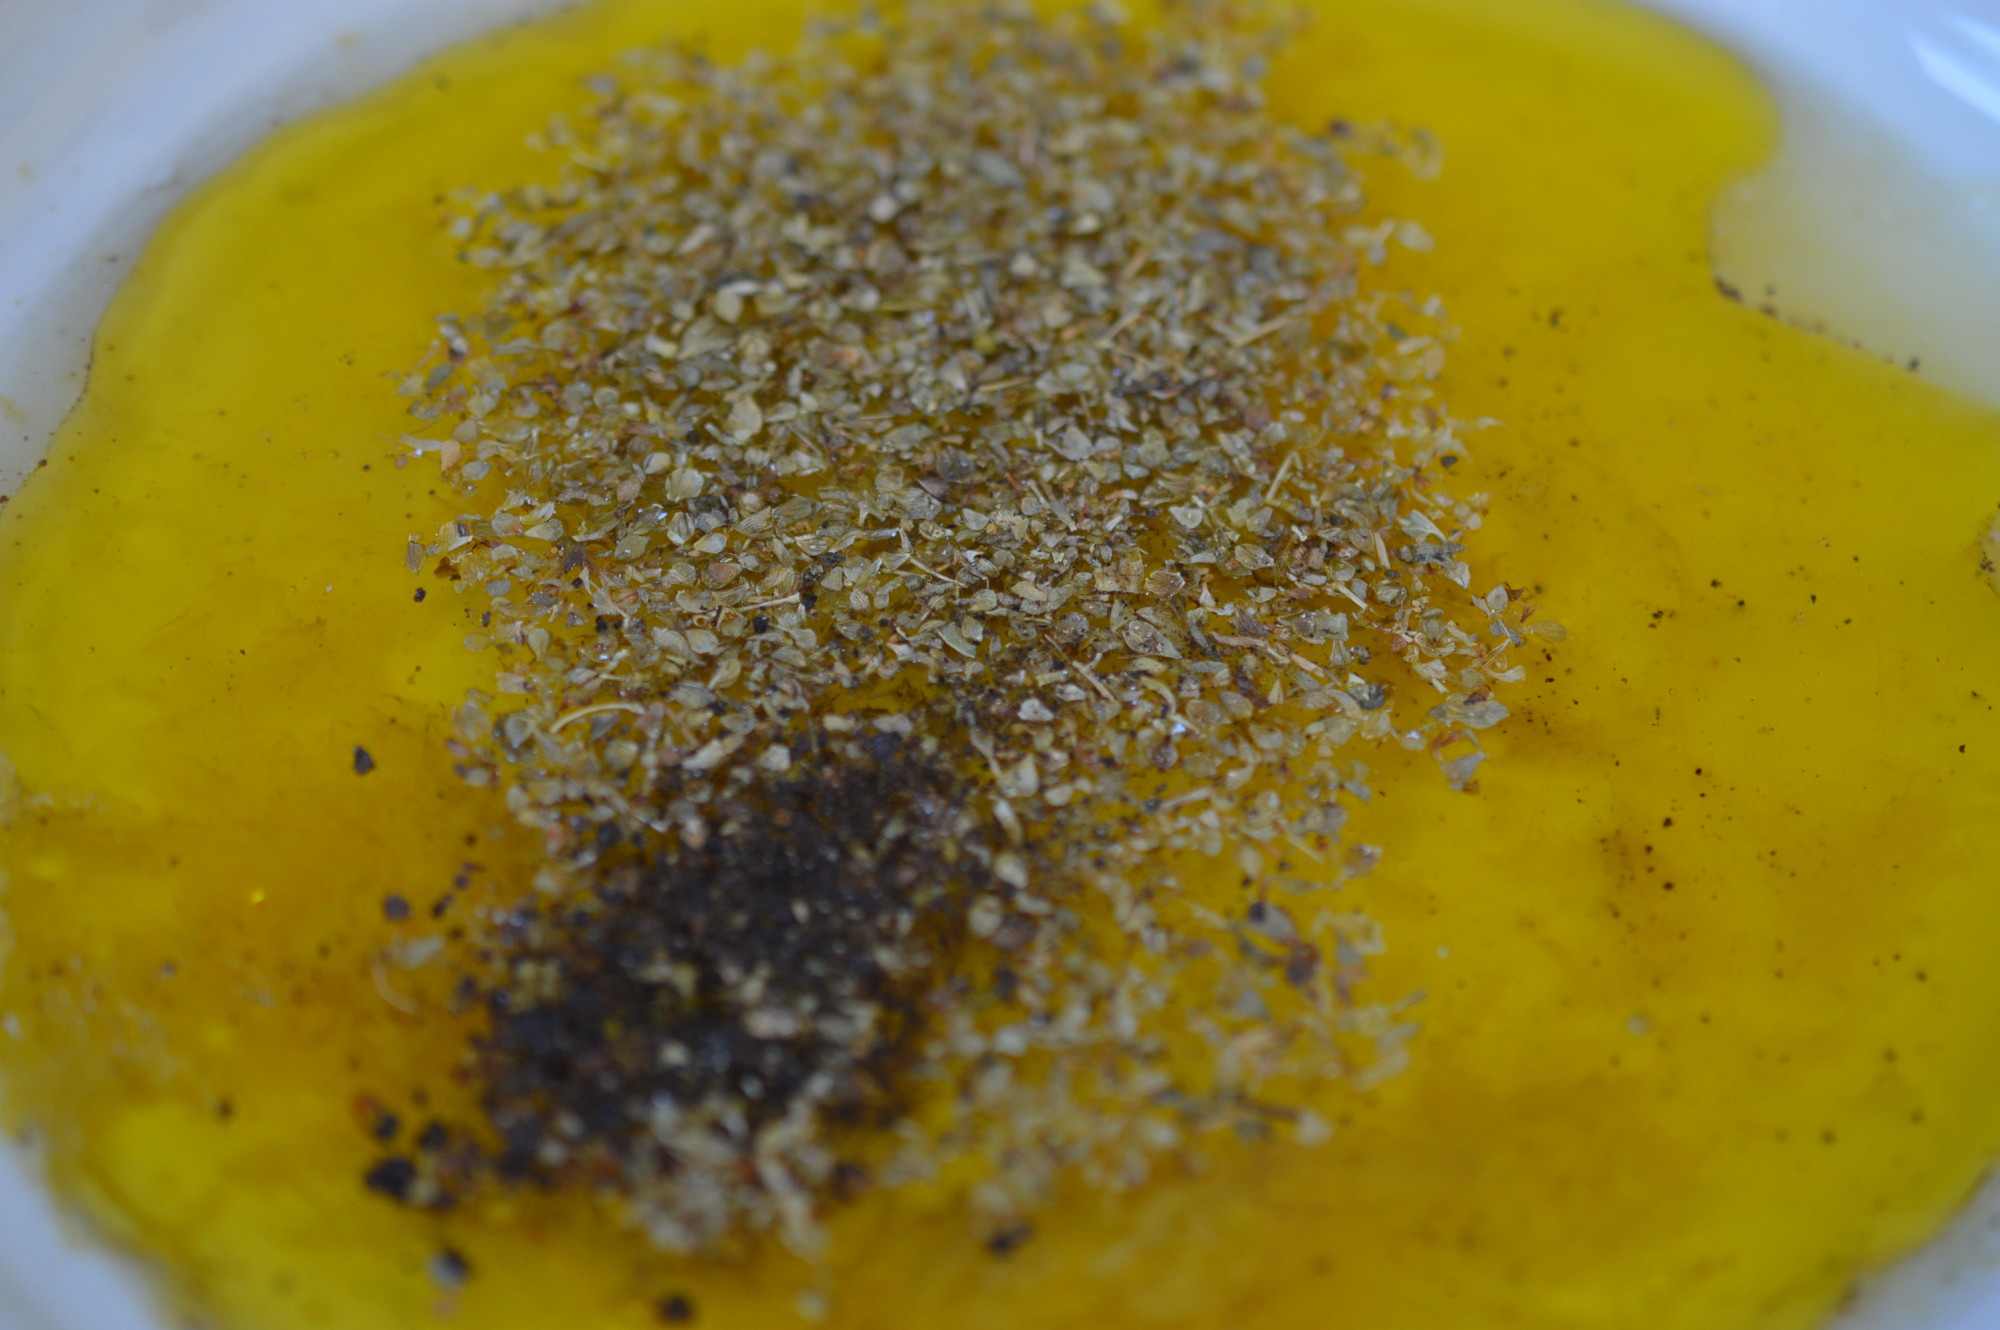
1 teaspoon of dried oregano.
Salt and pepper. This is such a subjective thing, but I used 2 scant teaspoons of coarse sea salt and crushed 1 teaspoon of black peppercorns in a pestle and mortar.
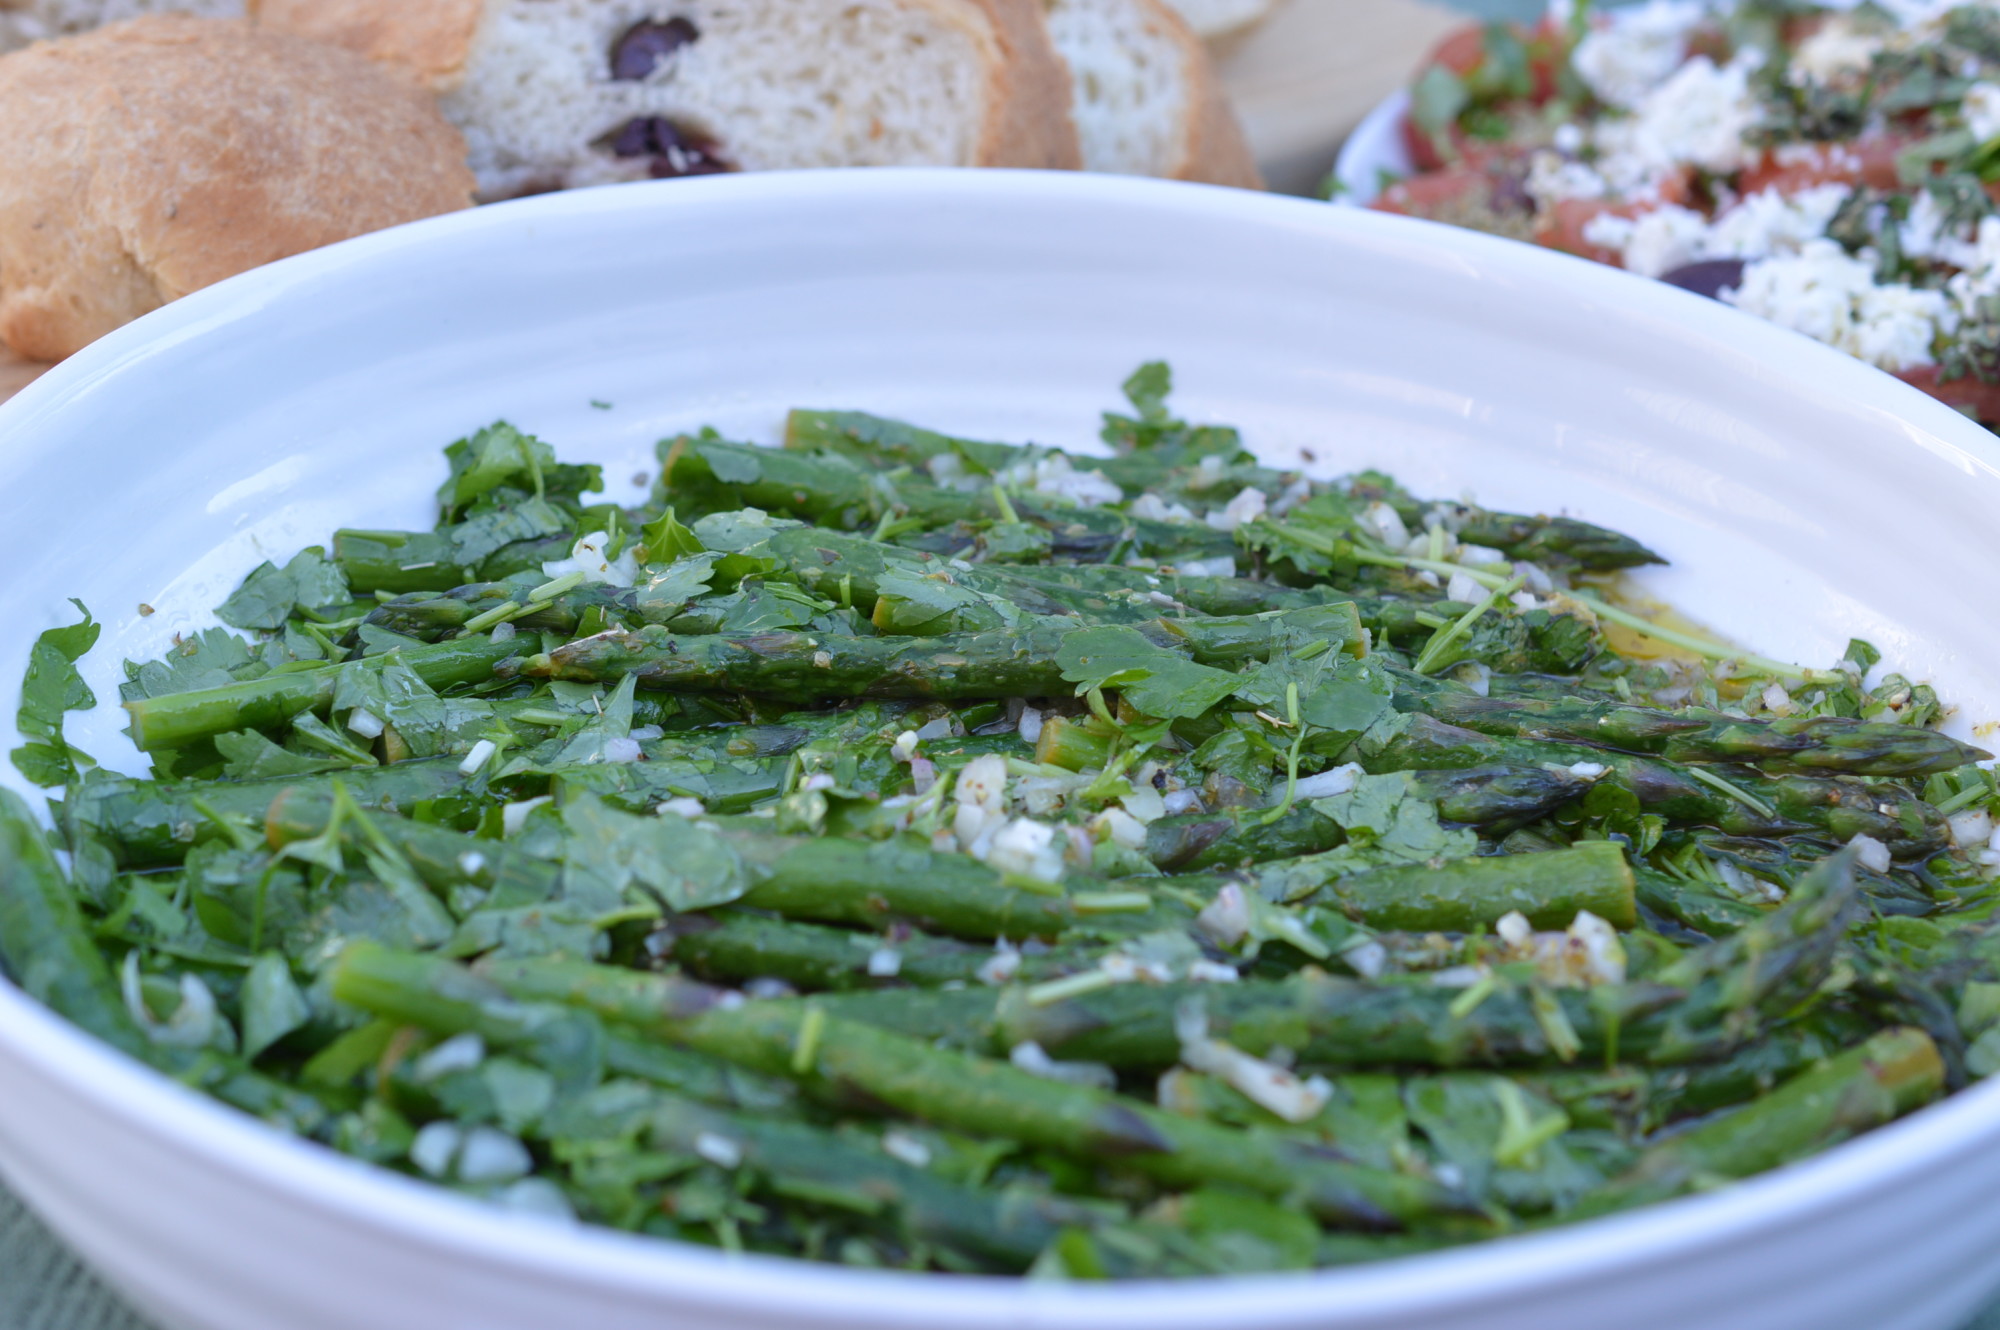
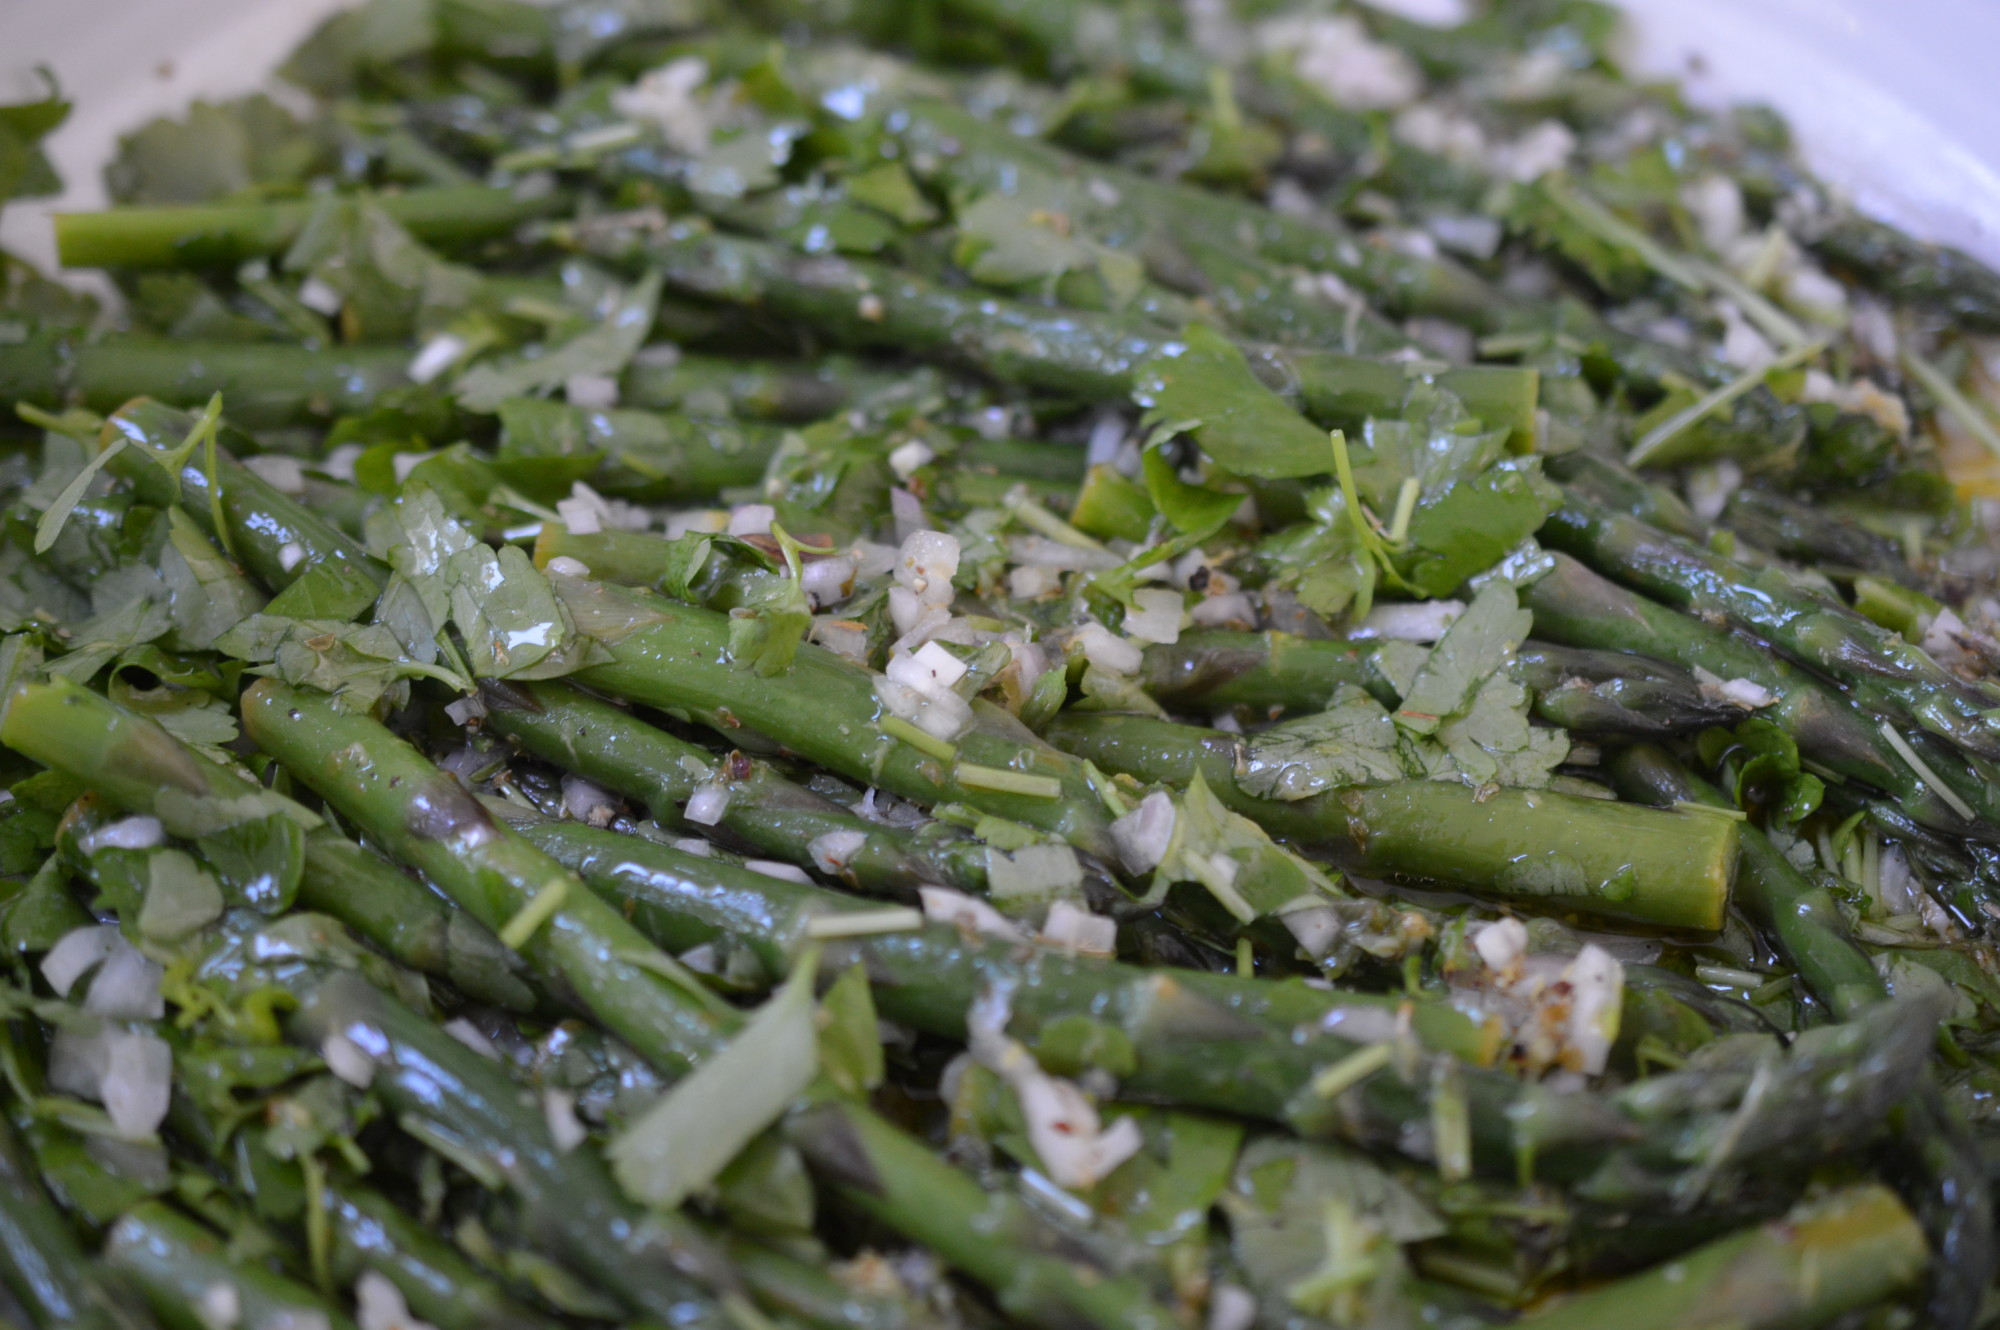
Give the drained – and still perky – asparagus a toss in the dressing.
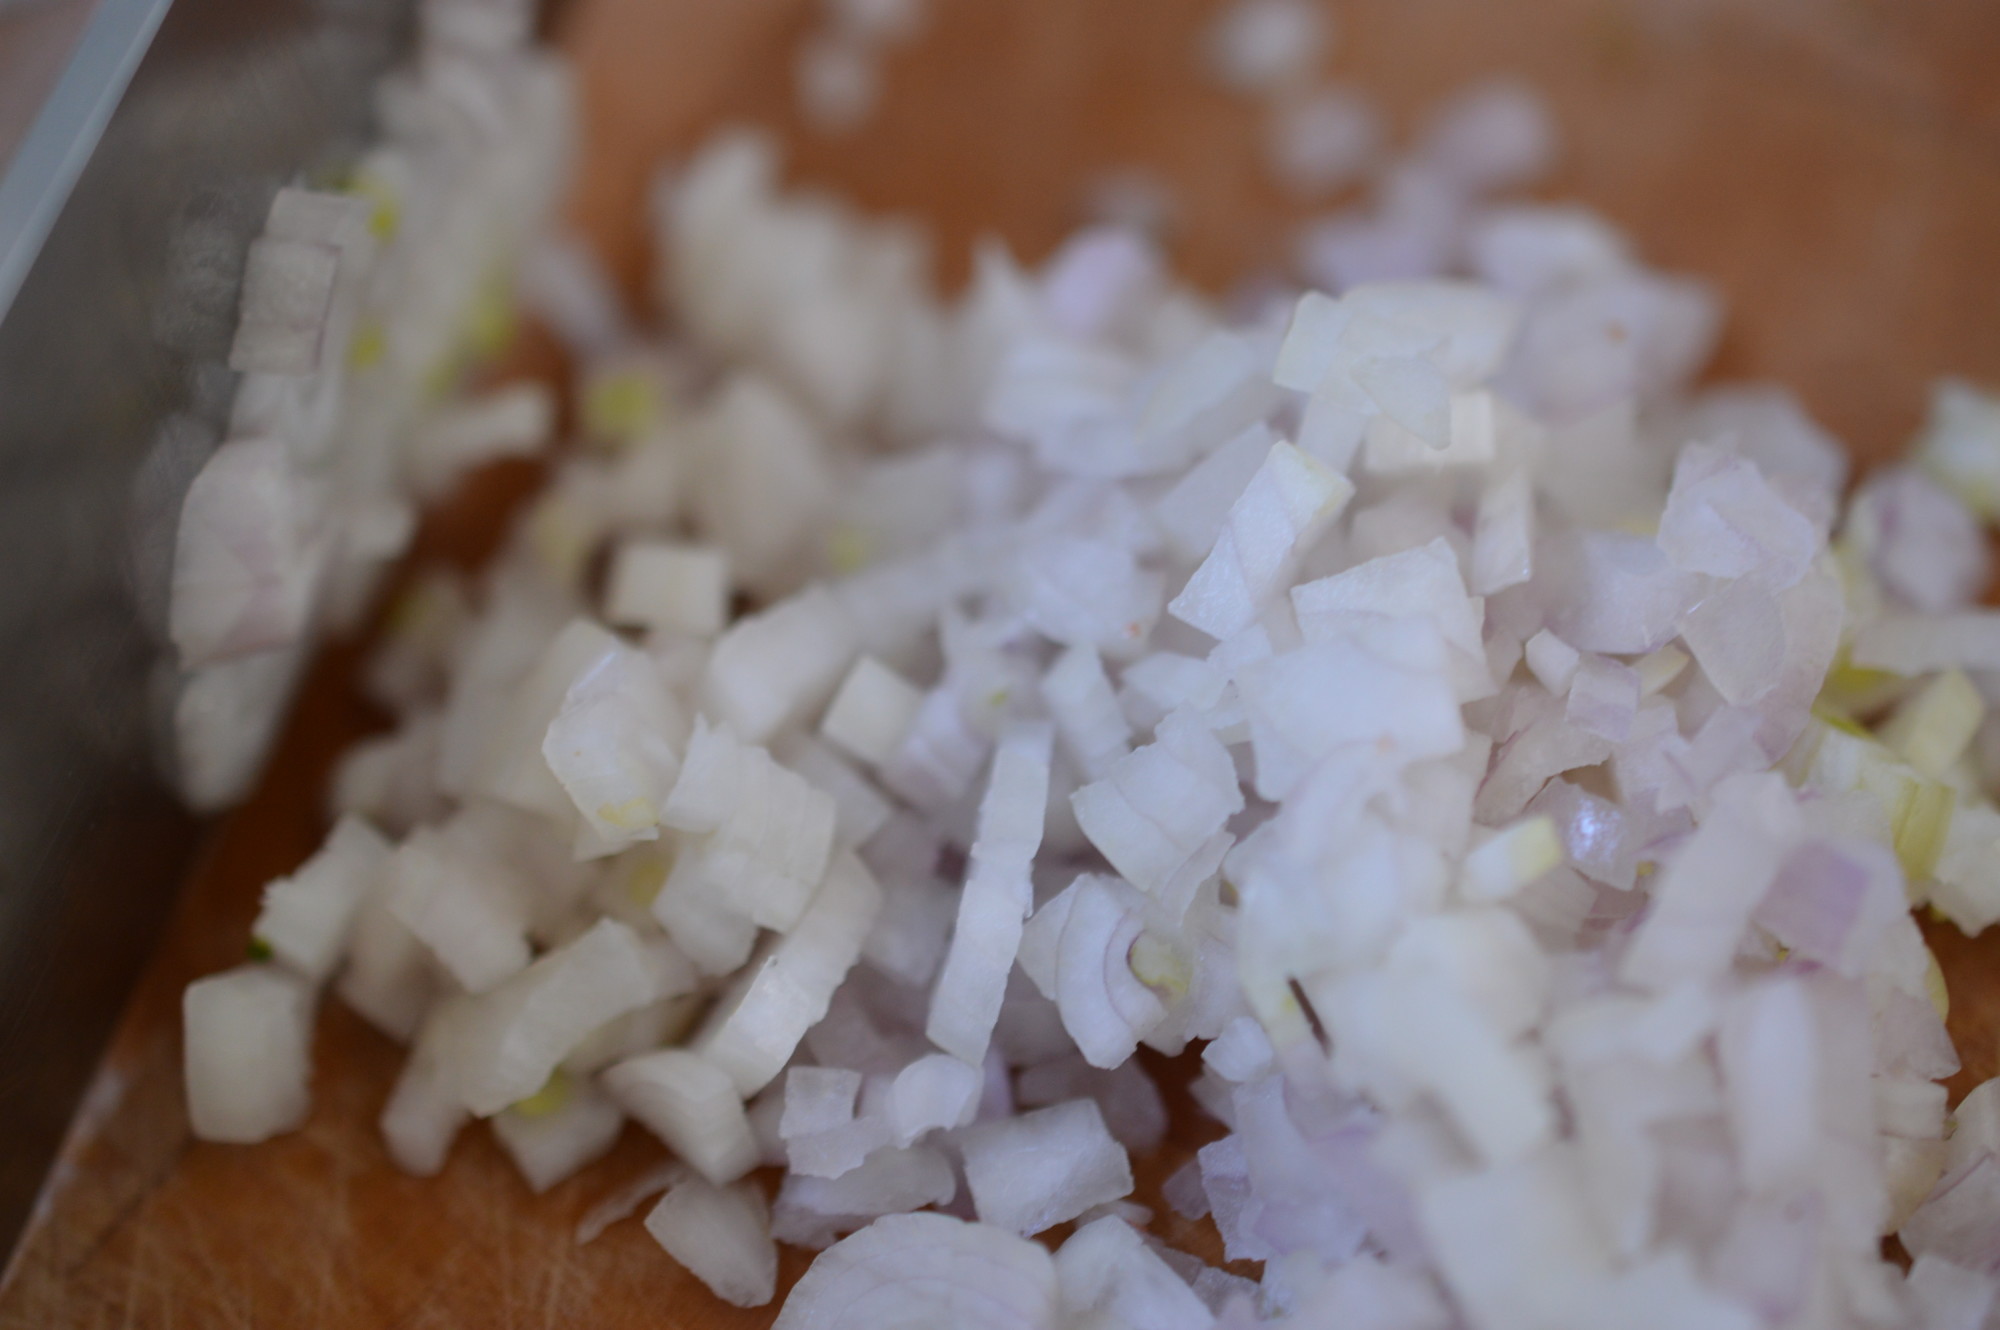
Finely chop three shallots and add those.
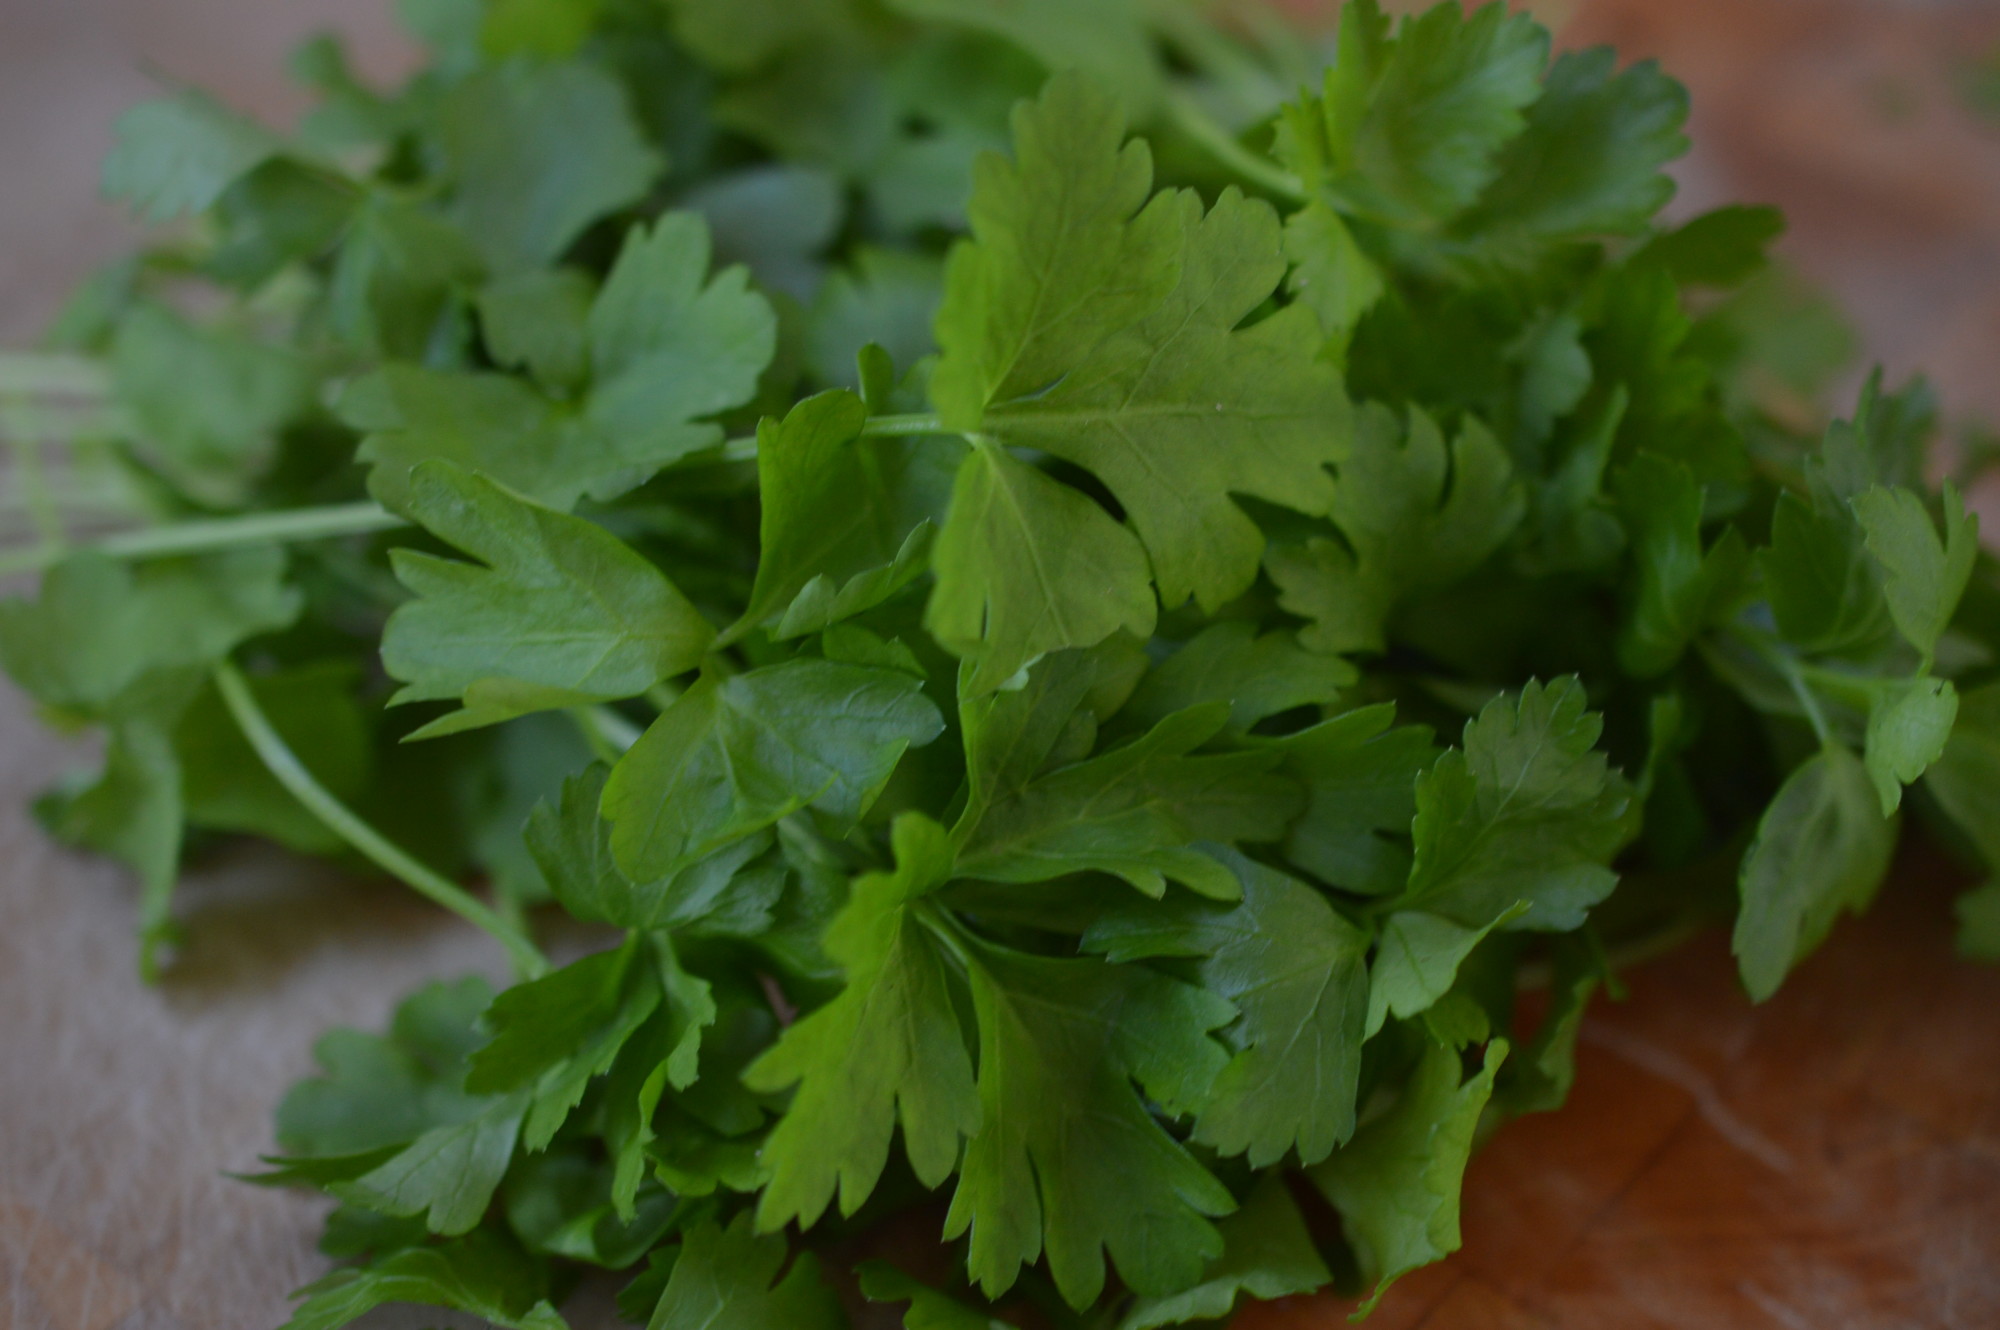
A small bunch of flat-leaf parsley. I had to use a small supermarket pot and I used it all. Roughly chop. It’s part of the salad so I like to see bits of parsley.
Give everything a light toss and leave it at room temperature for all the flavours to get acquainted. If you want to leave it longer than an hour, pop into the fridge and bring it back to room temperature before serving.
Eat.
Greek-Style Asparagus Salad
Serves 4-6 as a side.
2 bundles of medium asparagus spears (about 500g/1lb)
Zest and juice of 1 lemon
100ml/3½fl oz of cold-pressed Greek olive oil
1 teaspoon of dried oregano
3 shallots, finely chopped
small bunch of flat-leaf parsley, roughly chopped
1 teaspoon of roughly crushed black peppercorns
Sea-salt, to taste
Snap off the tough ends of the asparagus spears and freeze to use in stocks or soup. Rinse the spears under running water.
Bring 5cm/2½” of water to a boil in a wide saucepan. Season lightly and add the spears. Simmer for 3 minutes, or until the asparagus spears are just tender. Drain and spread on kitchen towel to dry.
Place the zest and juice of the lemon in a bowl. Add 100ml/3½fl oz of cold-pressed Greek olive oil, 1 teaspoon of dried oregano and season with salt and crushed black peppercorns.
Lightly toss the asparagus spears in the dressing.
Add the finely chopped shallots and the roughly chopped parsley. Give everything a final toss and serve at room temperature.
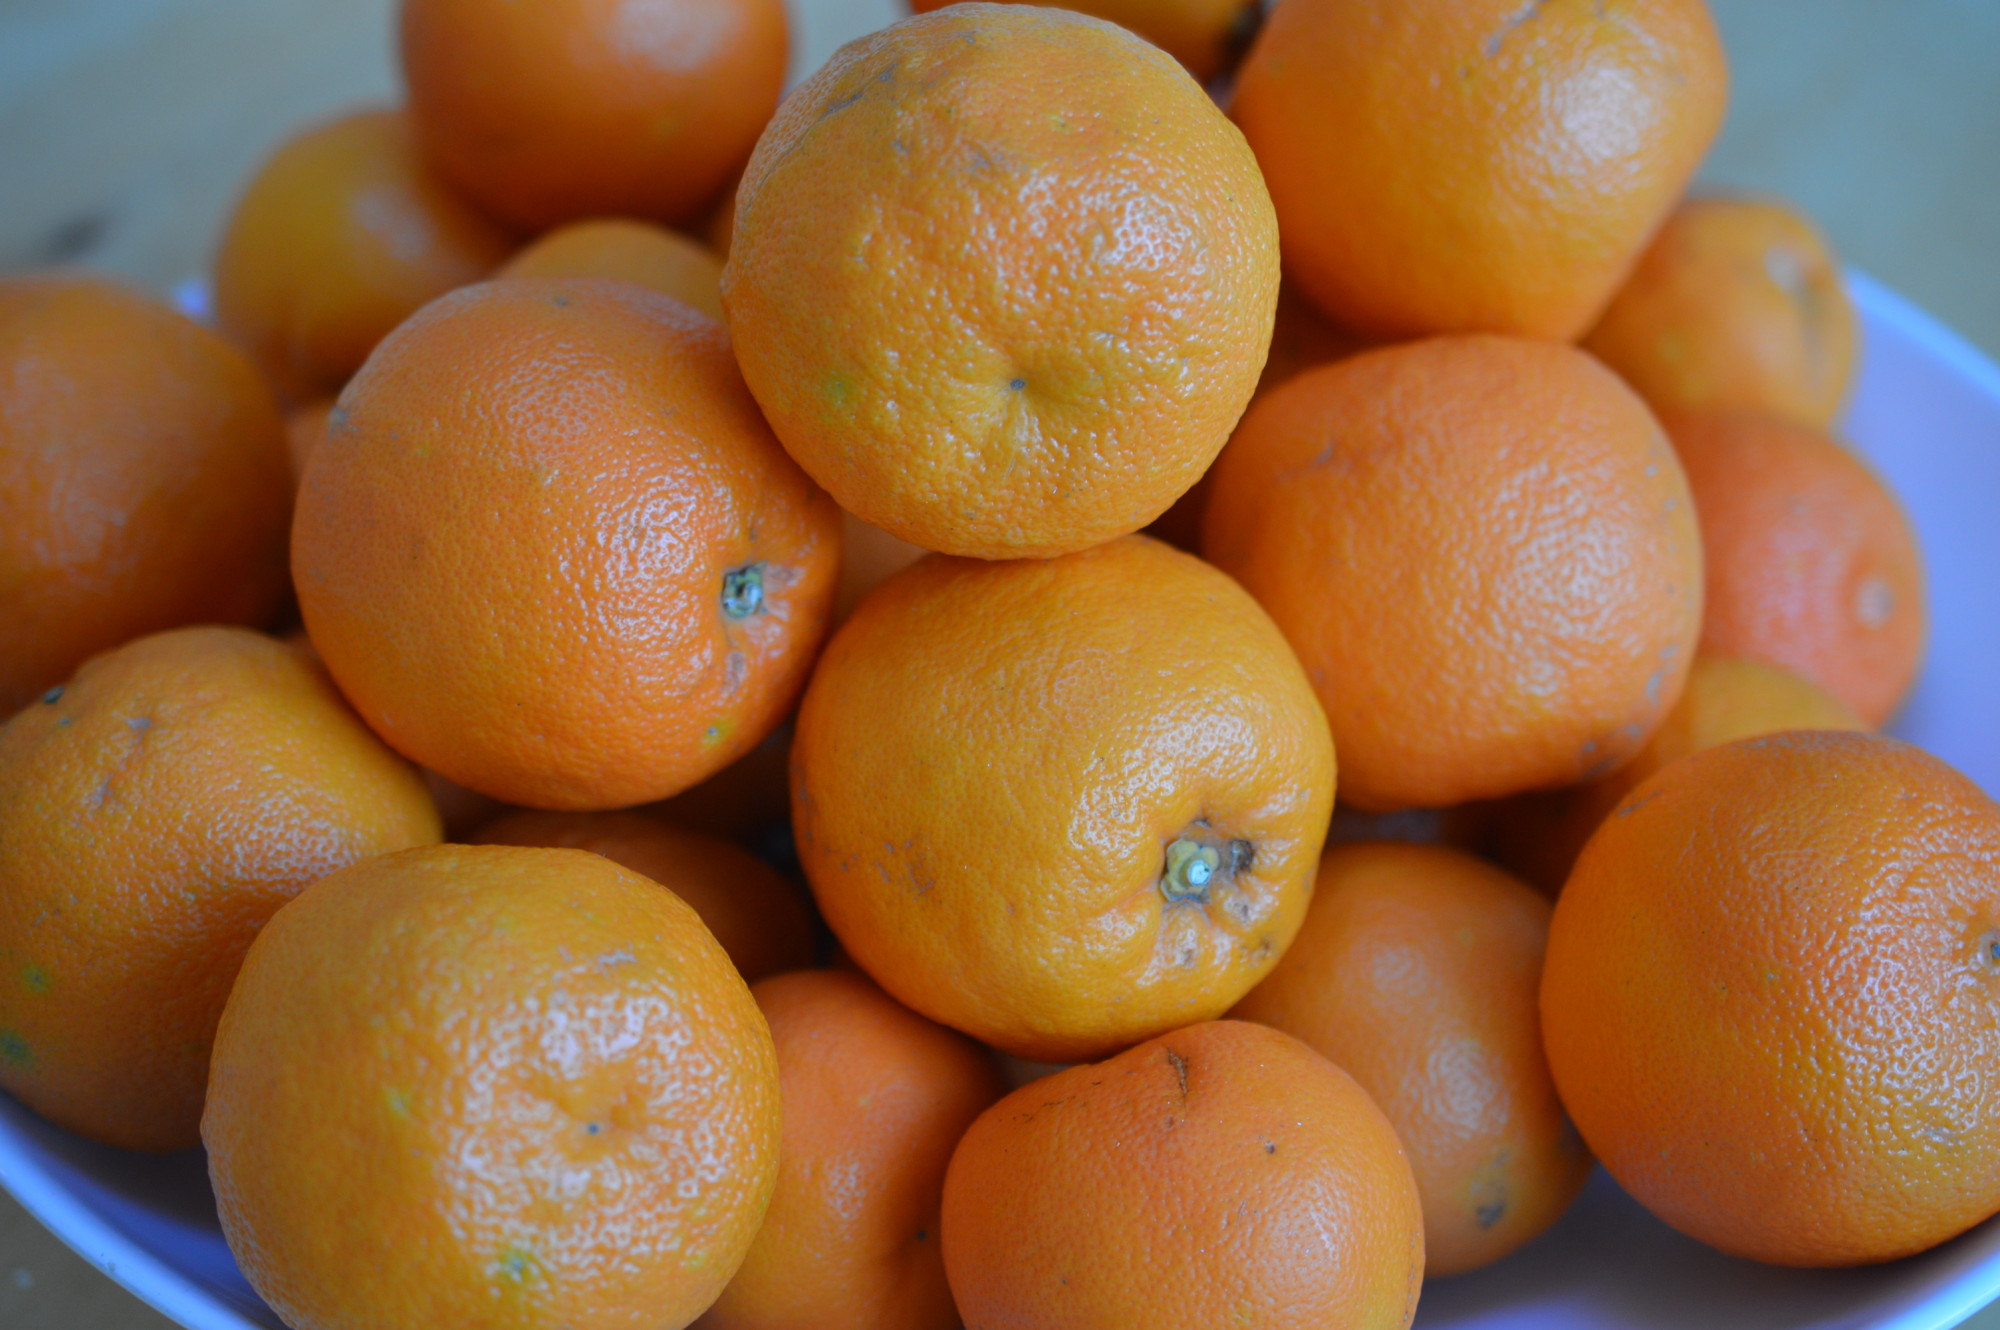
It’s been a cold and blowy week and I’ve hidden myself away making marmalade – which is a strange way to introduce Madeira Cake, but stay with me.
It all begins with Seville oranges – which are a ‘blink and you’ll miss them’ thing. Imported, obviously. You have to buy them when you see them. Aside from vats of marmalade I like to make a Seville Orange Tart. It’s a once in the year event, which is one of the things I love most about it. For that I need 55g of Madeira Cake.
So, that’s how I got here. Madeira cake for packed lunches and a ‘hidden-away’ slice for the Seville Orange Tart.
Madeira Cake is a really old fashioned cake. The first recipes appear in the eighteenth century, but I doubt my ancestors were eating it. It was luxury. At a time when genteel ladies offered their afternoon callers ‘some refreshment’ Madeira Cake might have been served with a glass of Madeira, which is a Portuguese fortified wine. That’s how it gets its name.
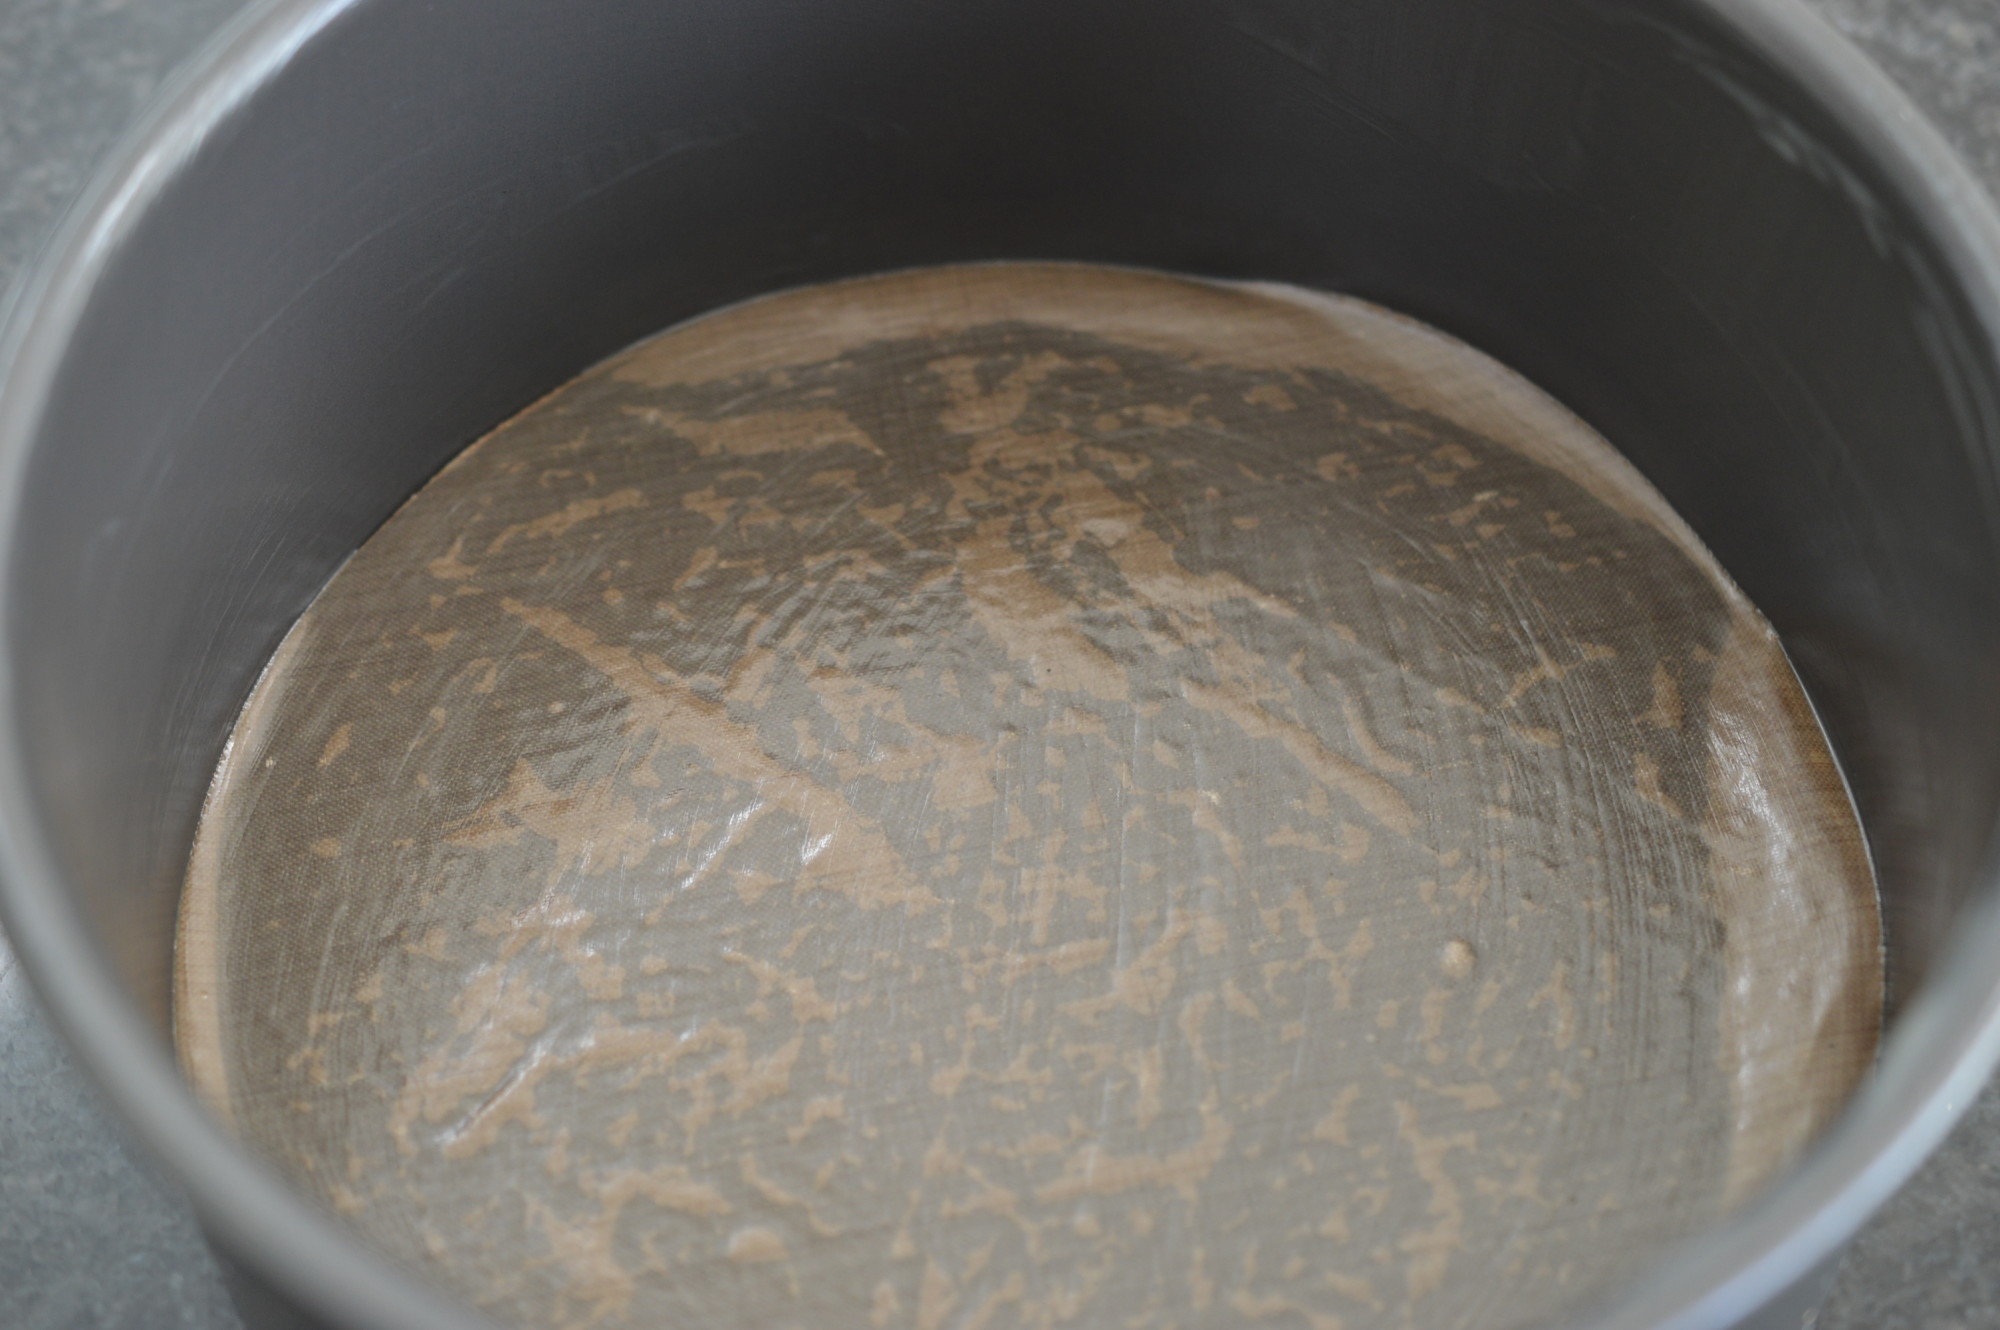
Start by preparing the 18cm/7″ cake tin. I use melted butter and place a circle of baking parchment at the bottom. Pre-heat the oven to 160ºC/325ºF/Gas Mark 3.
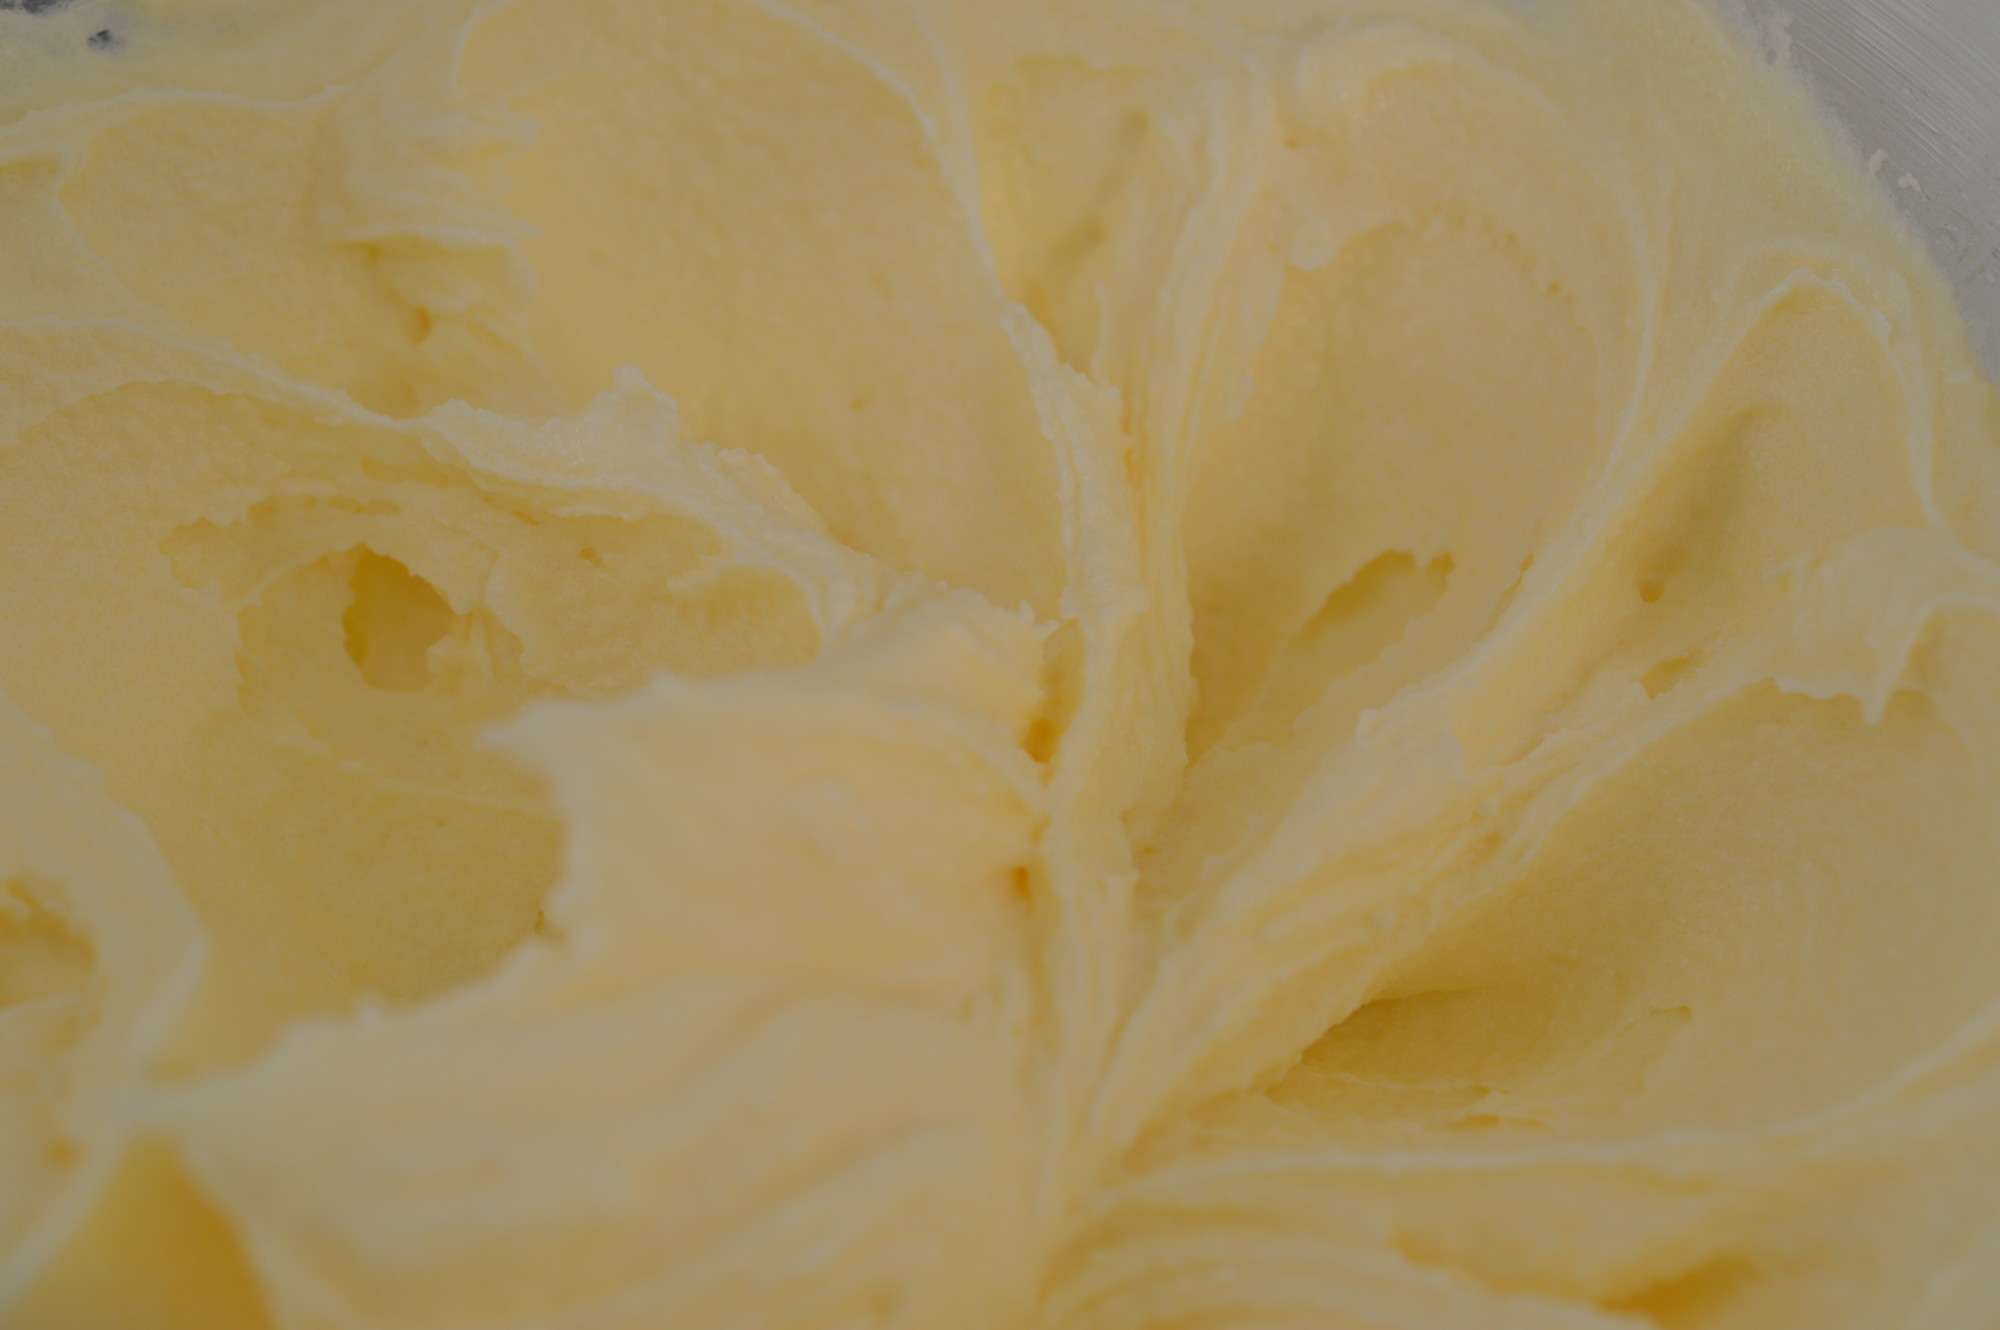
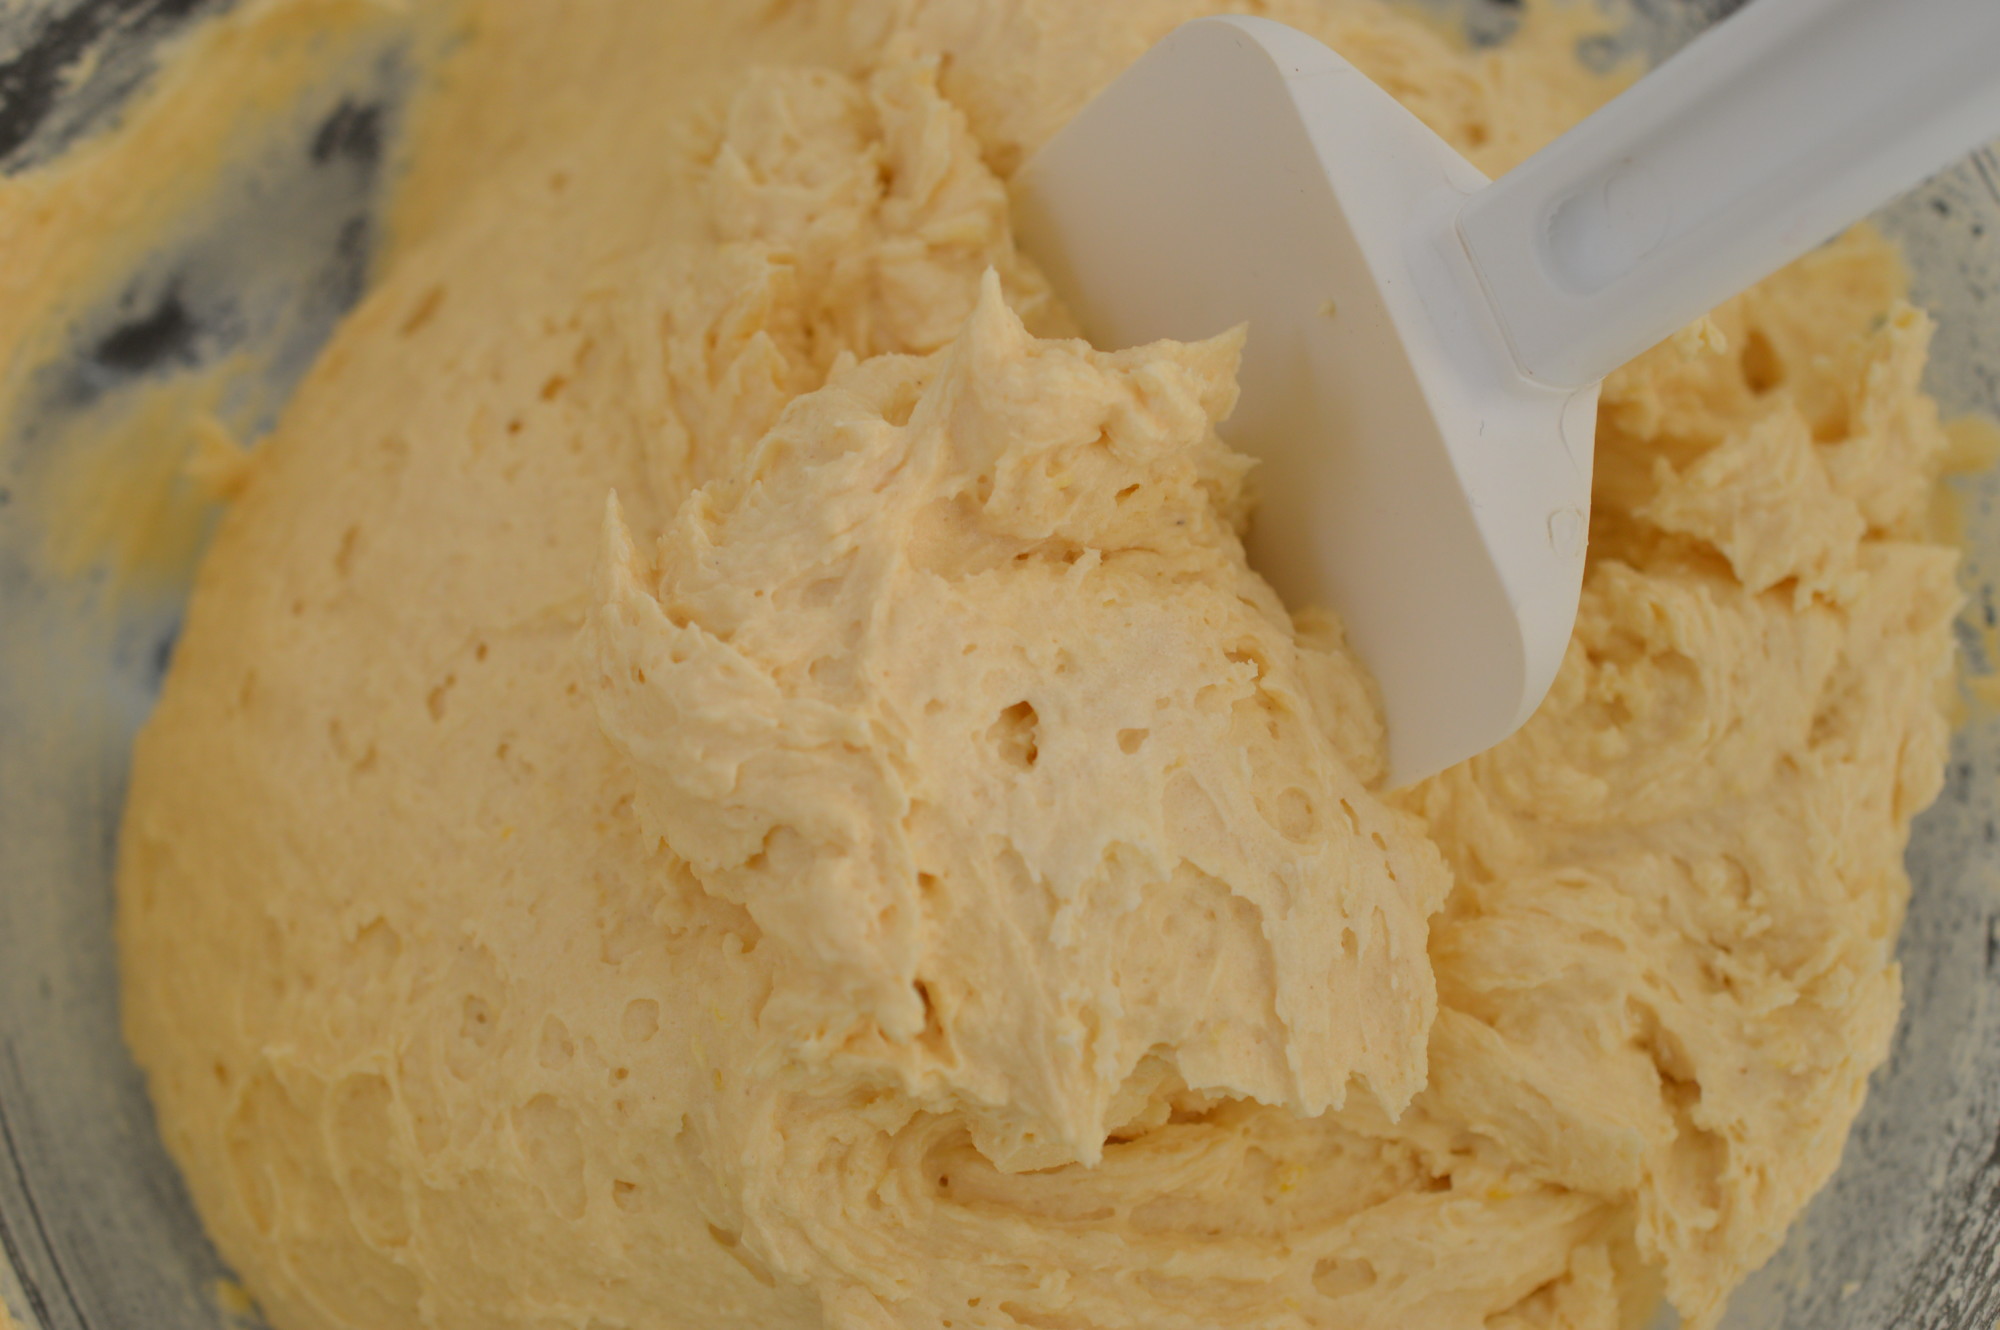
The cake mixture begins with softened butter. Give it a quick beat and then add the sugar.
This stage always takes longer than you think it should and the paler you can get it the better. Spare a minute to the poor souls who did it all by hand.
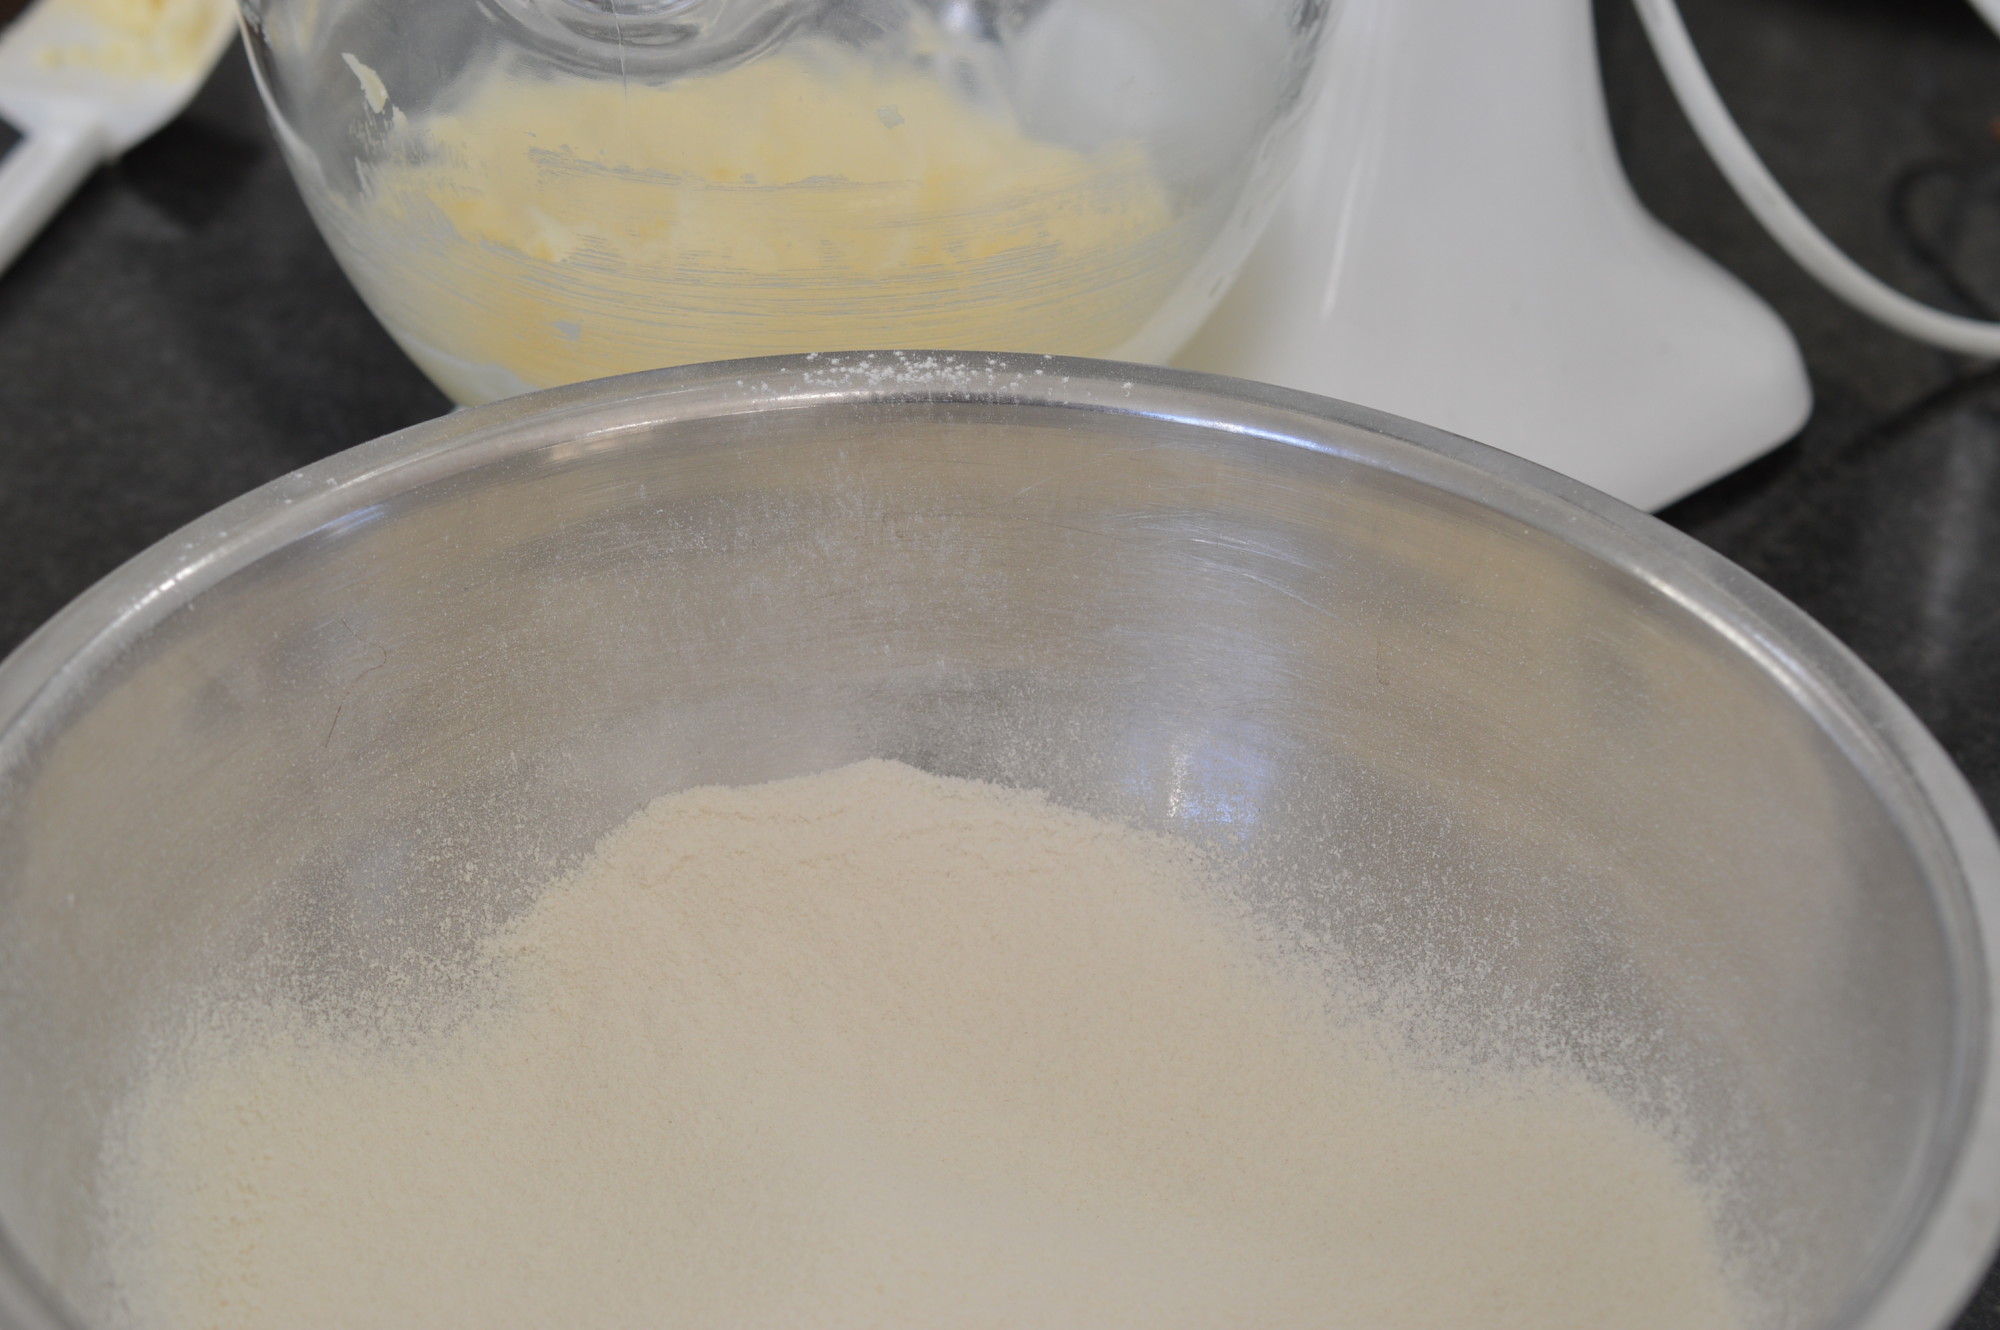
Have your flour ready. I sieve to get more air in and combine the two flours together.
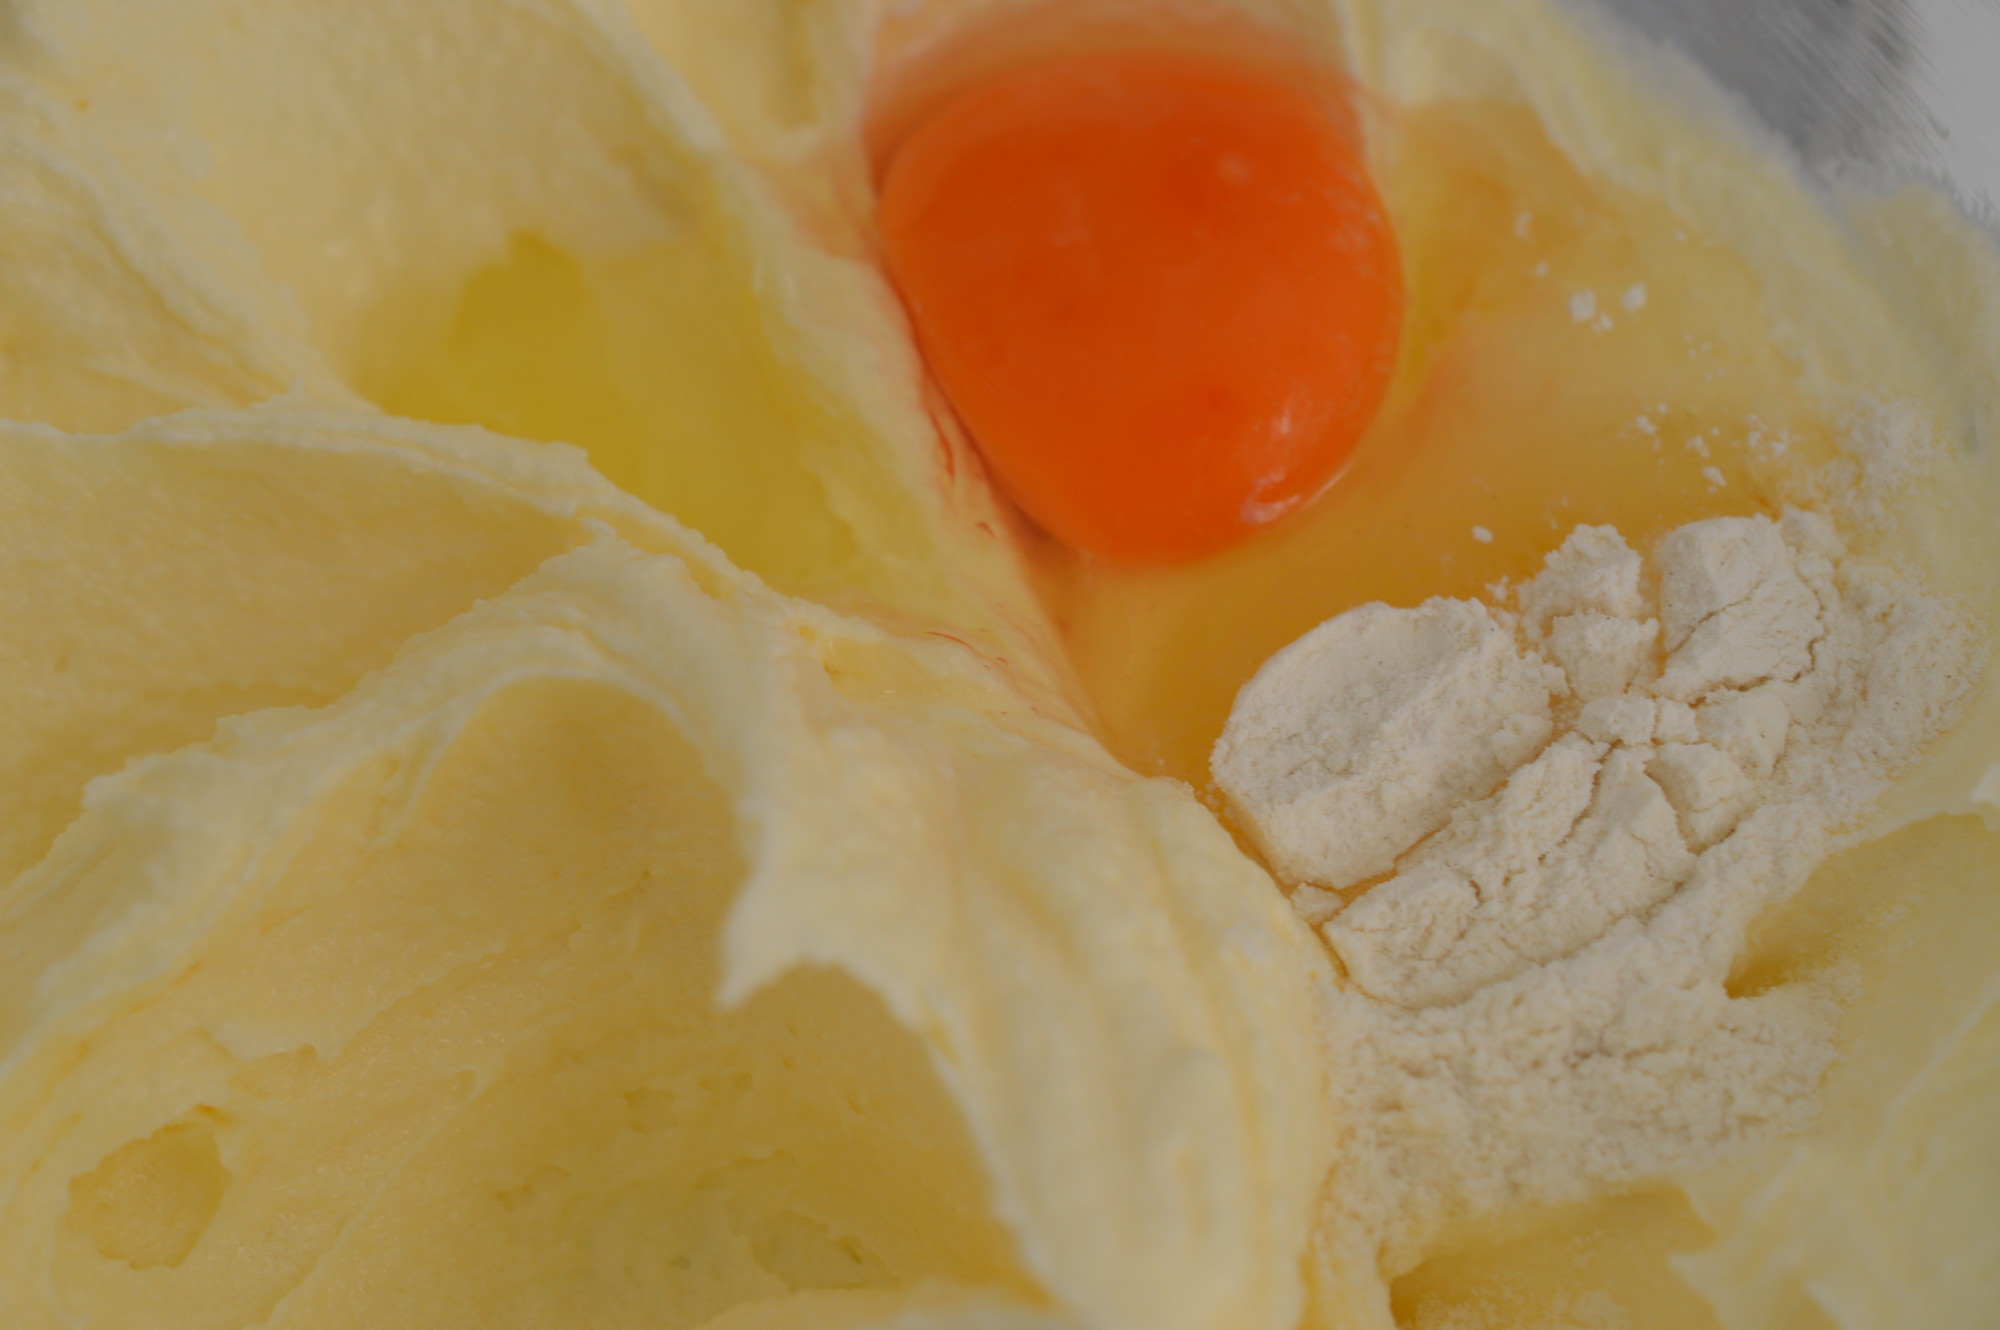
Now the room temperature eggs. Add them one at a time and beat in really thoroughly. A spoonful of the flour will also help stop the mixture curdling. Curdling is best described as a cake batter with cellulite. It happens for a number of reasons – if you add fridge cold eggs, don’t add them singly and/or beat them in enough. You can rescue a curdled mixture by adding more flour and beating it in but your cake will be a little ‘heavier’.
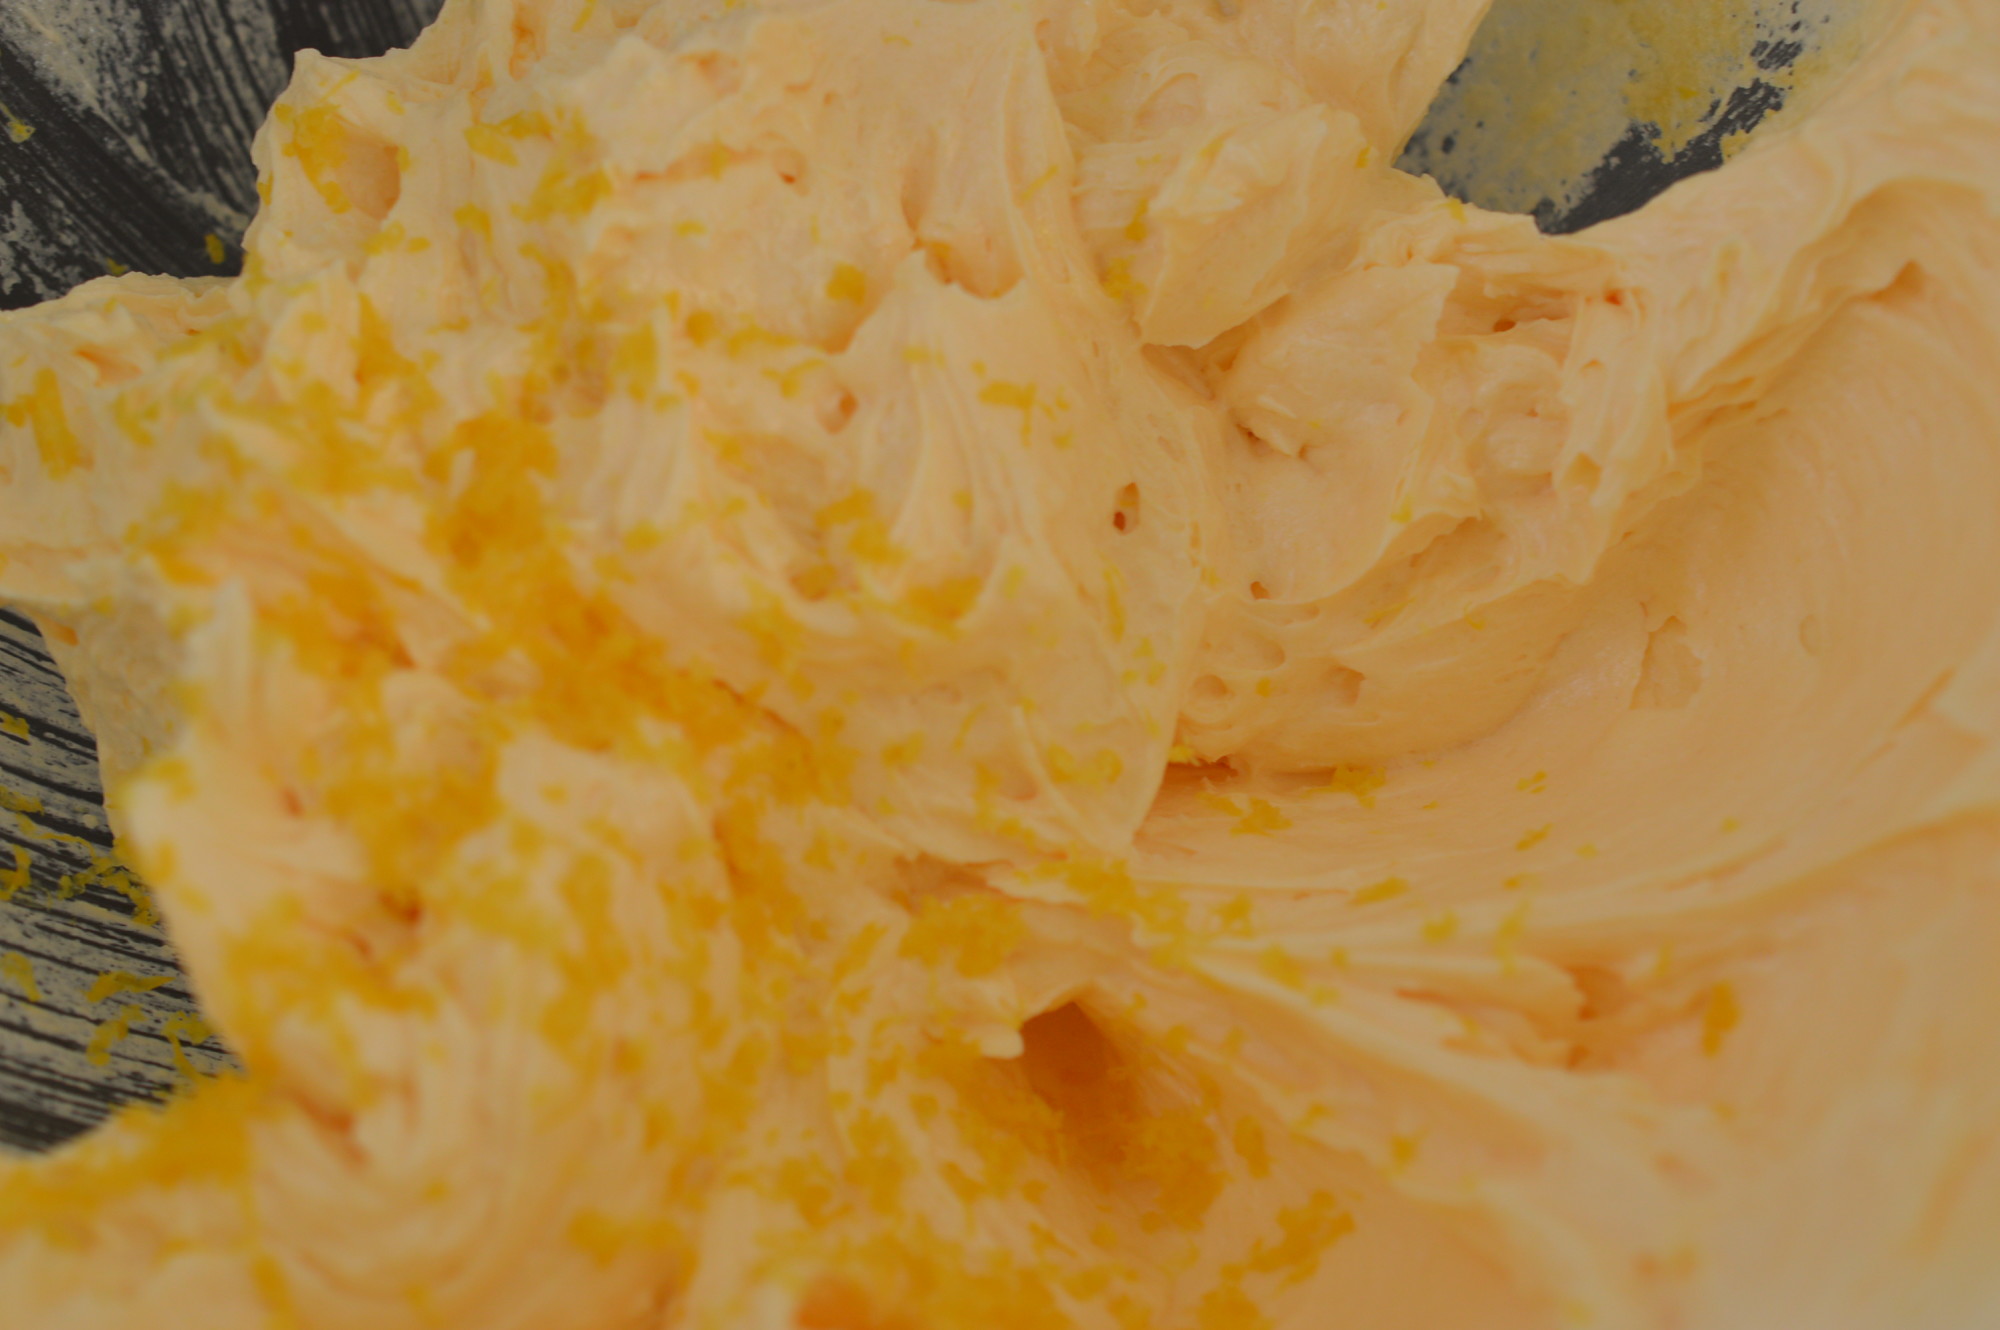
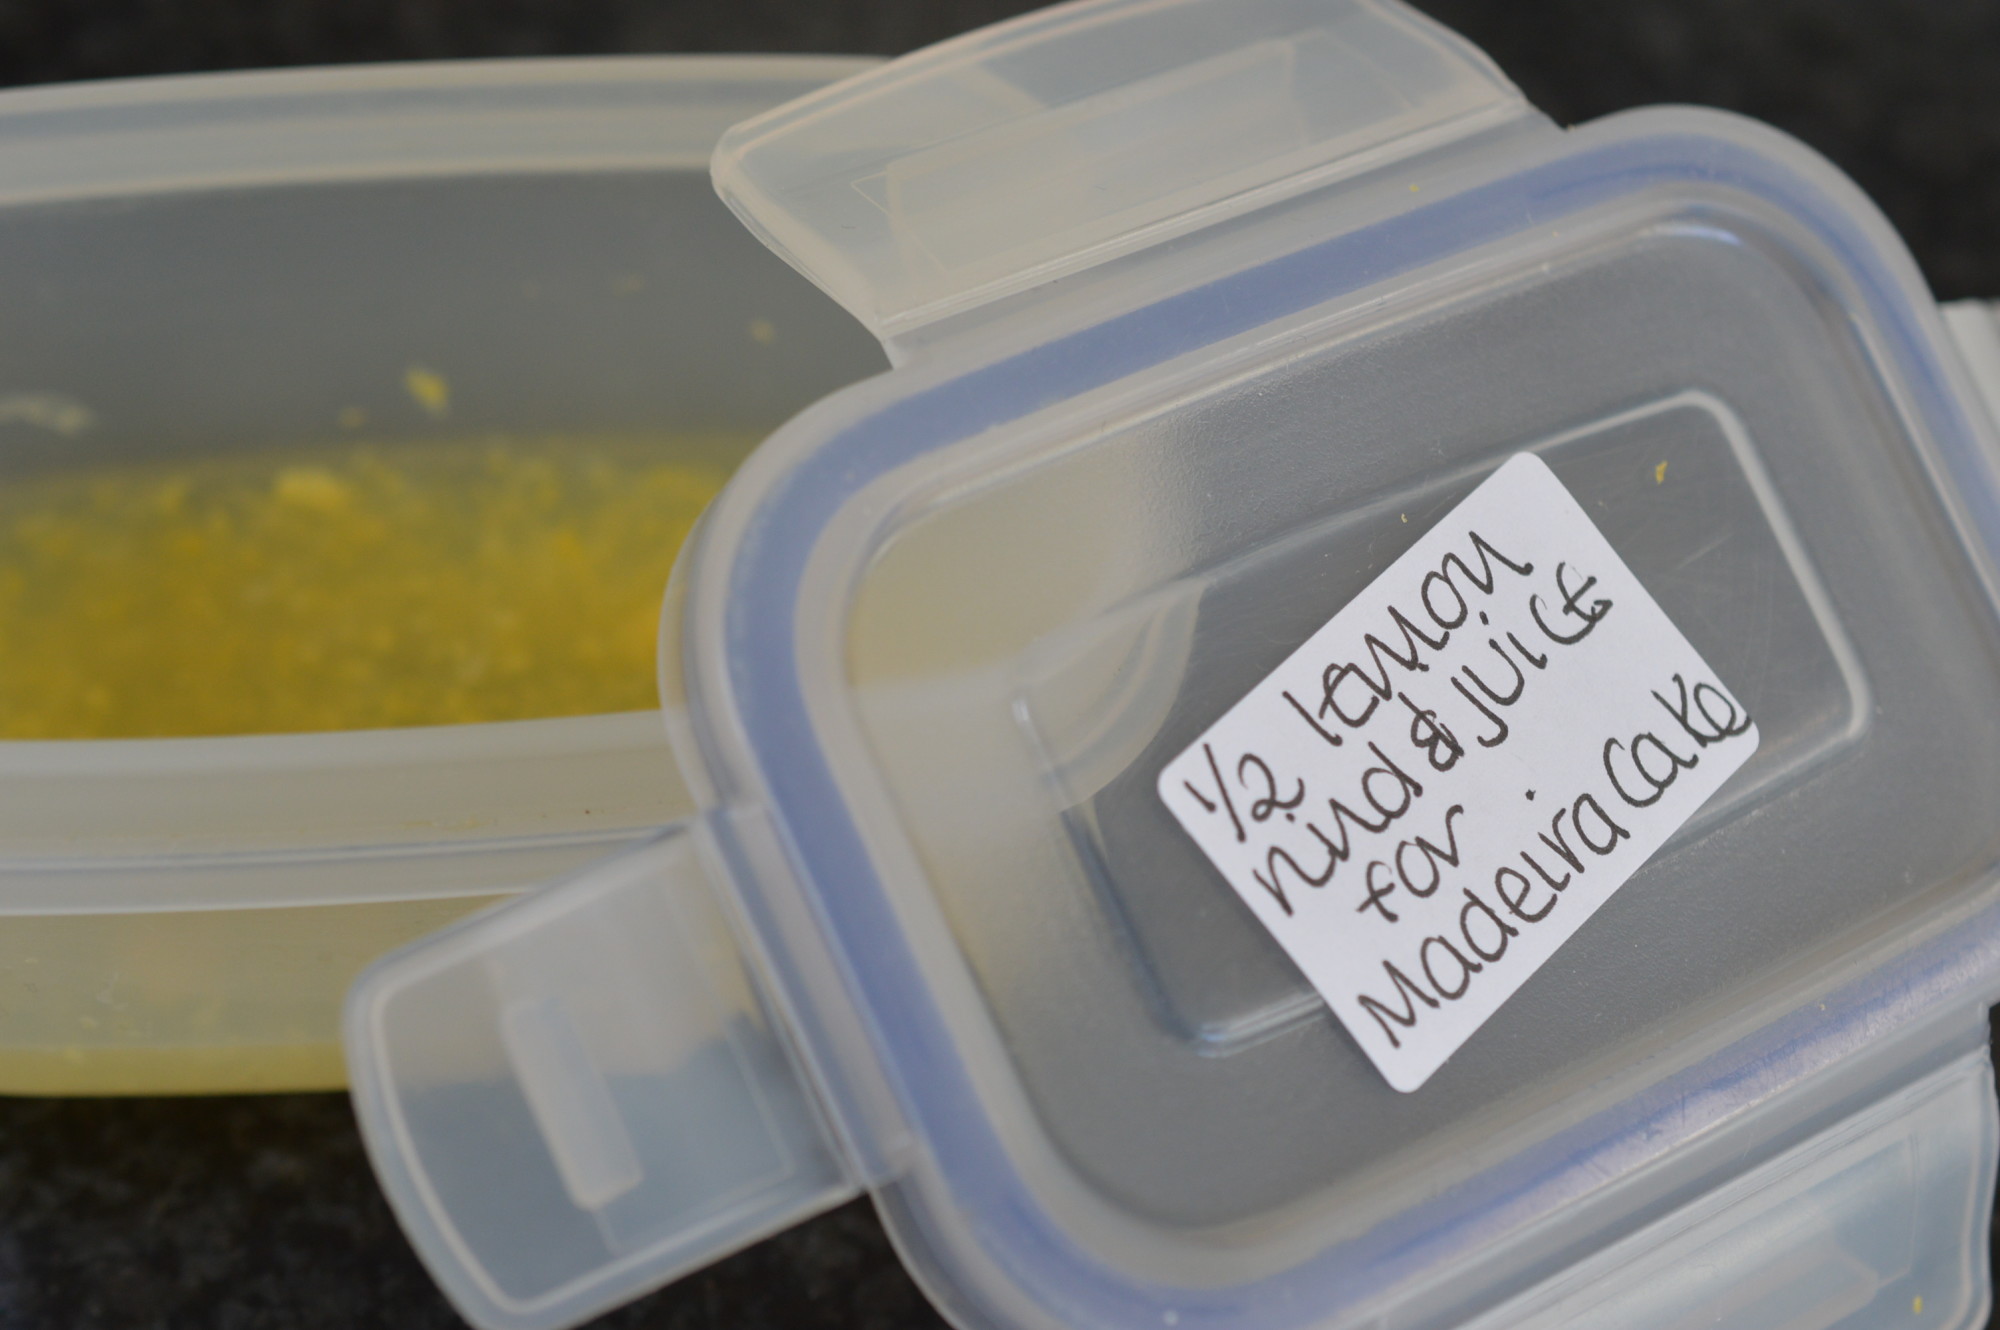
Then add the grated rind of half a lemon. (Save the other half.)
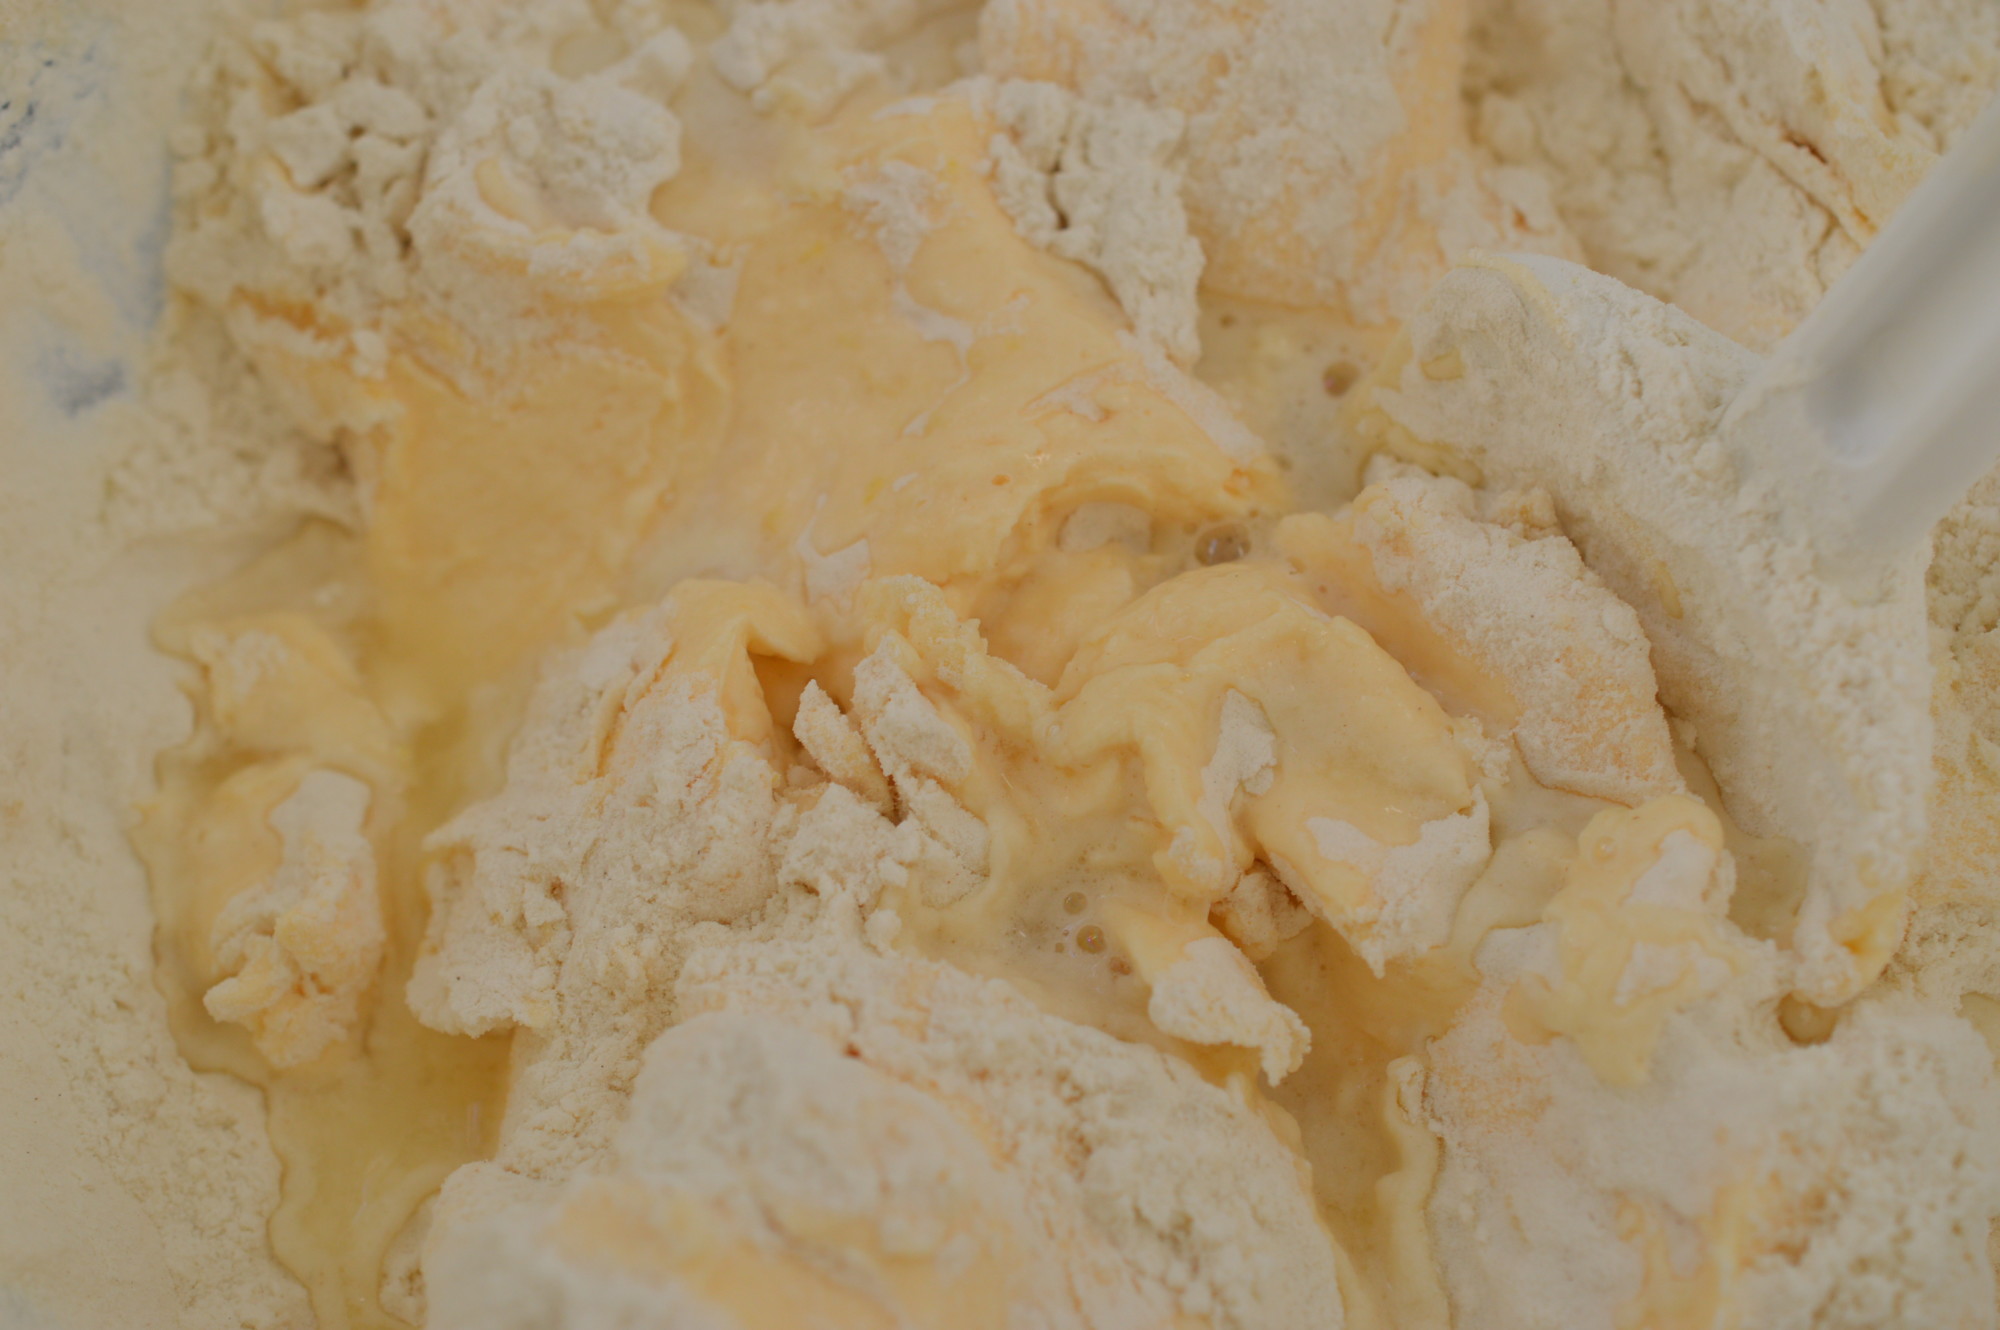
‘Fold’ in the flour. That’s a gentle cutting movement. Your aim is not to bash the air out of the mixture. Just imagine you’ve been beating with a wooden spoon and you’ll treat it with care.
Add the juice of half a lemon. You’ll get more juice from a warm lemon.
Combine the reserved lemon rind with the unused juice from the second half and freeze. There’ll be a next time.
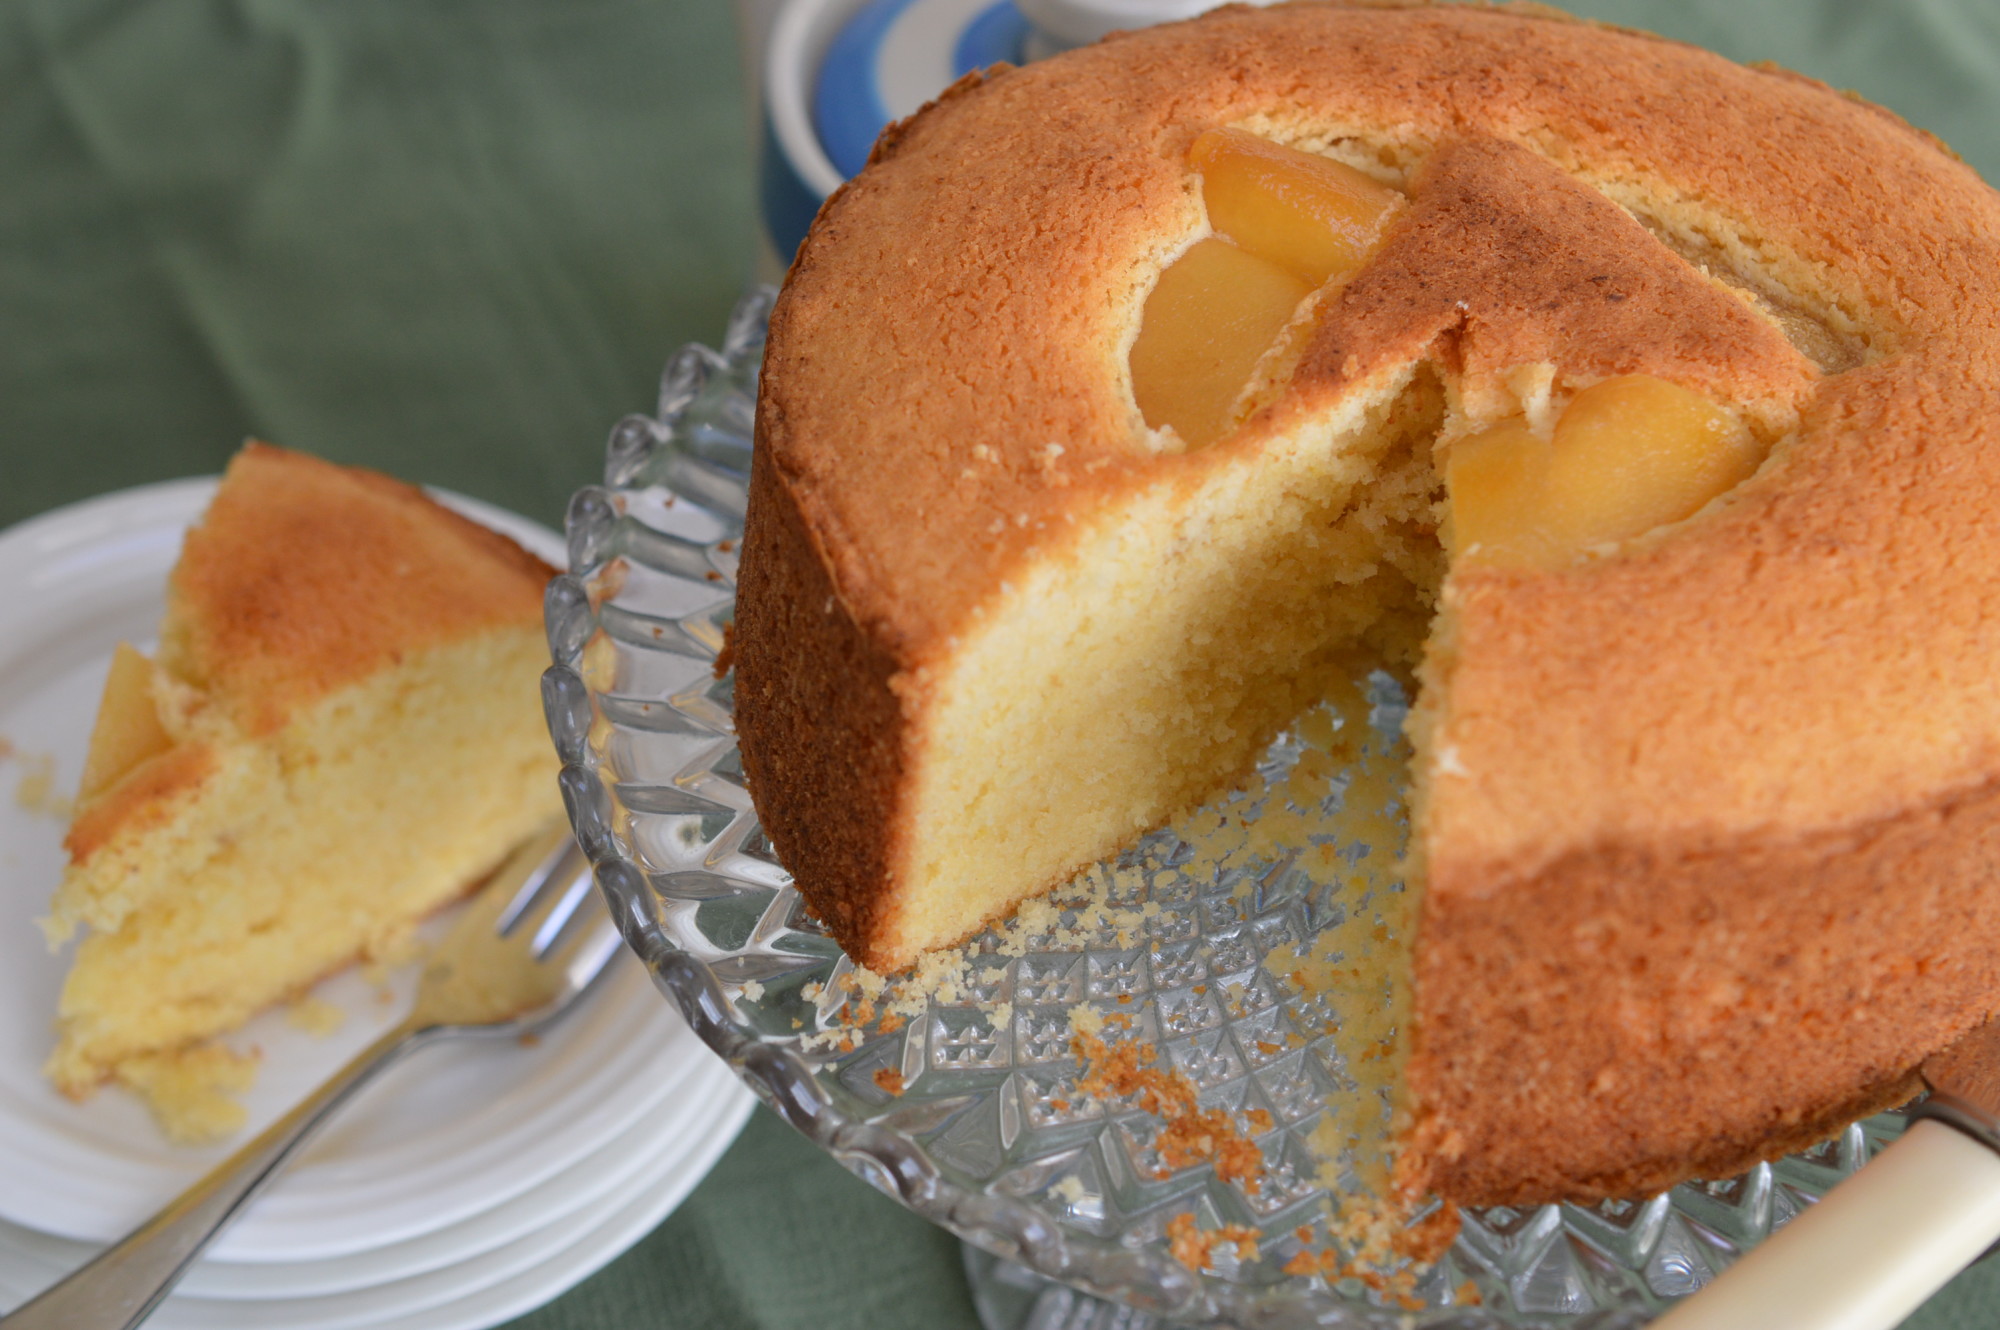
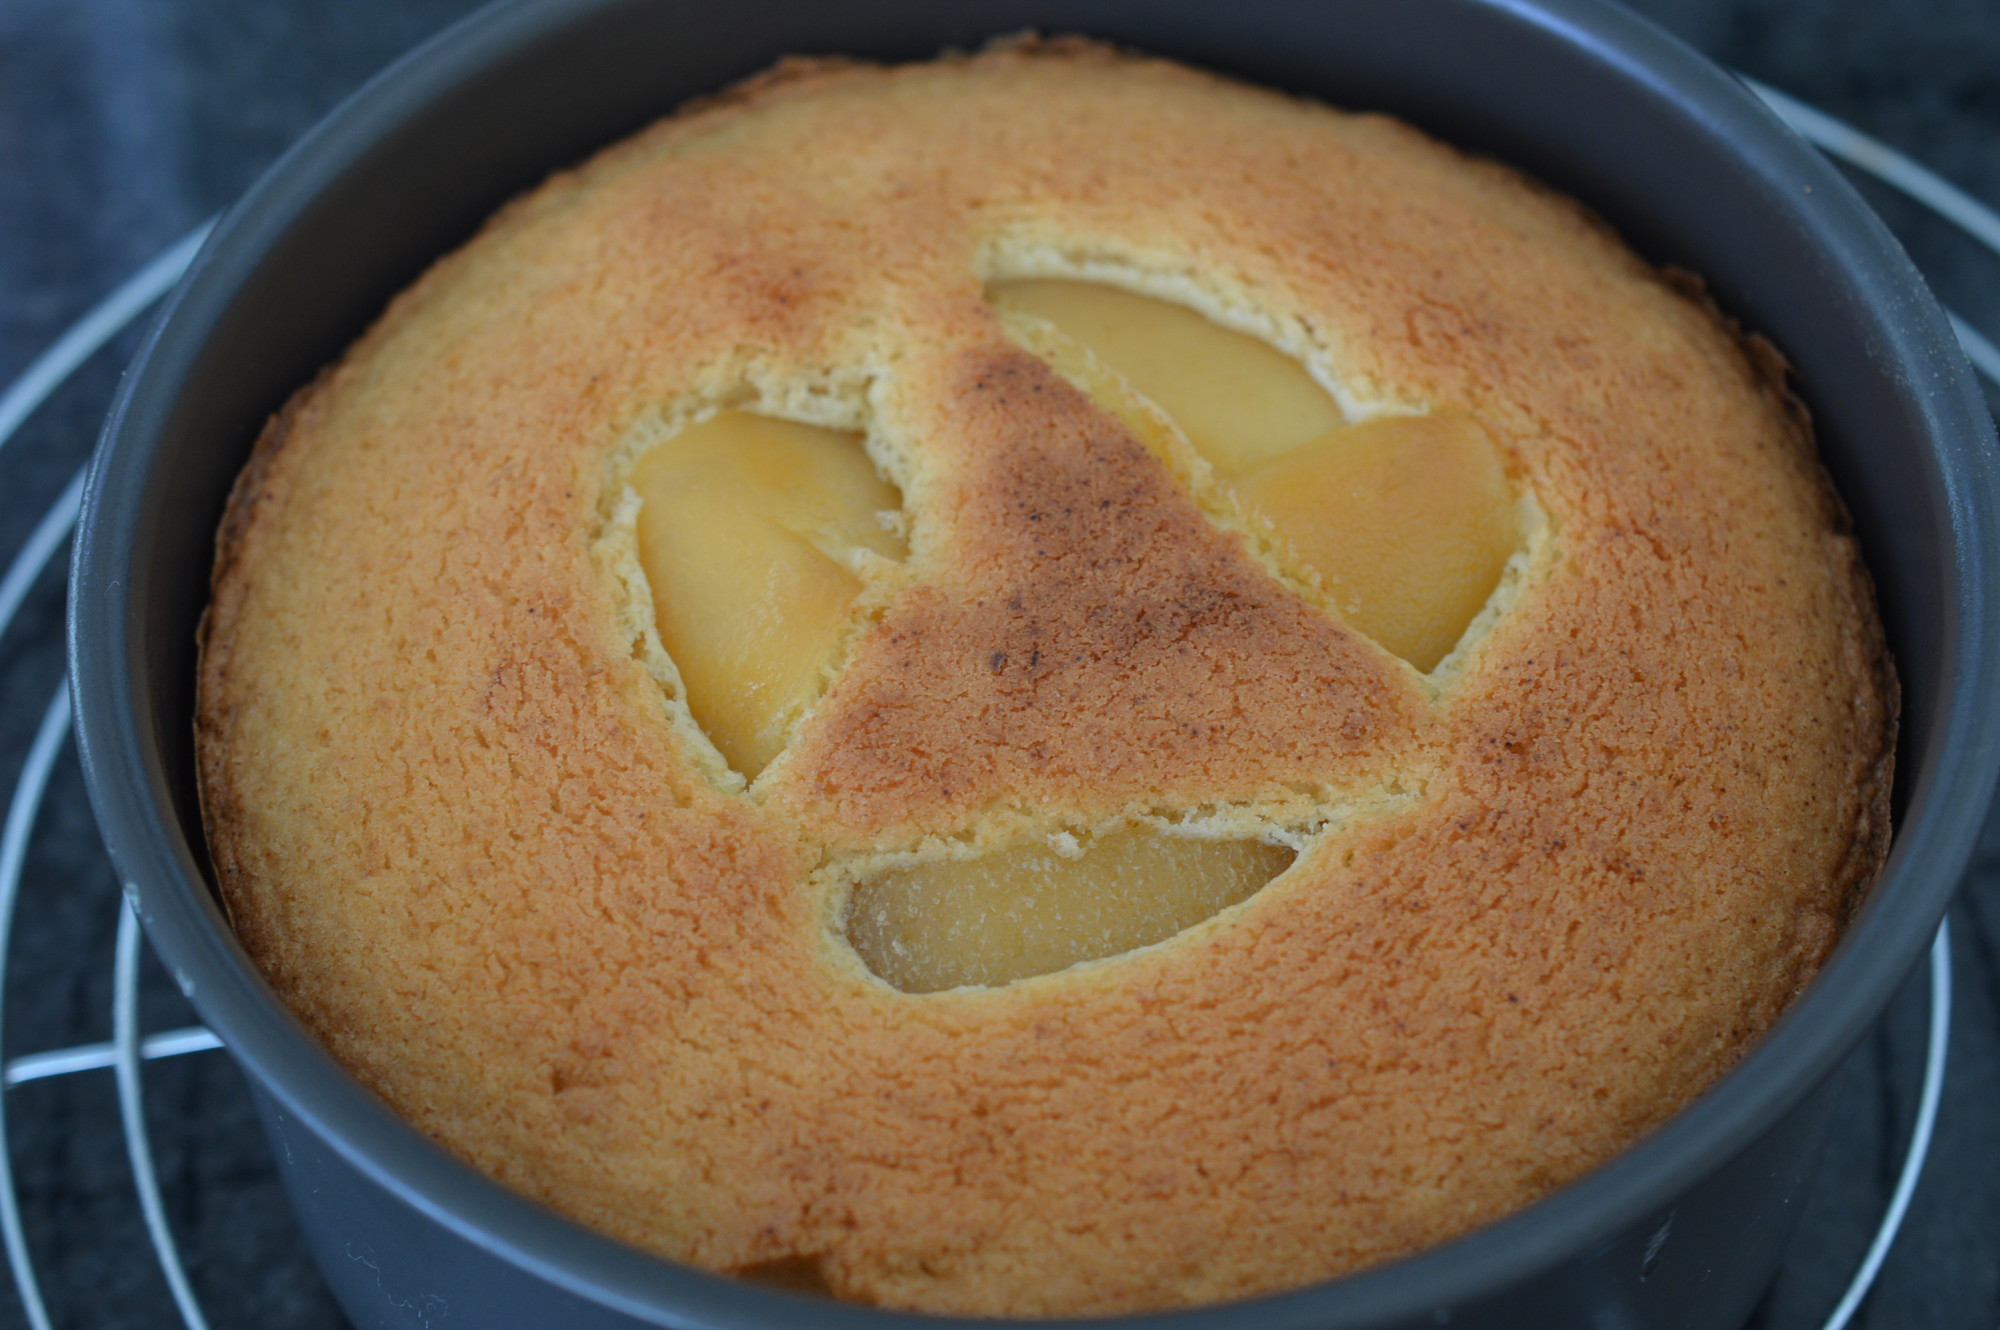
Put the cake mixture into the tin and smooth the top. I like to decorate my Madeira Cake with some pieces of candied orange peel, but it’s not necessary. Post Christmas I tend to have some handy. Then bake.
Leave the cake to cool in the tin for about ten minutes.
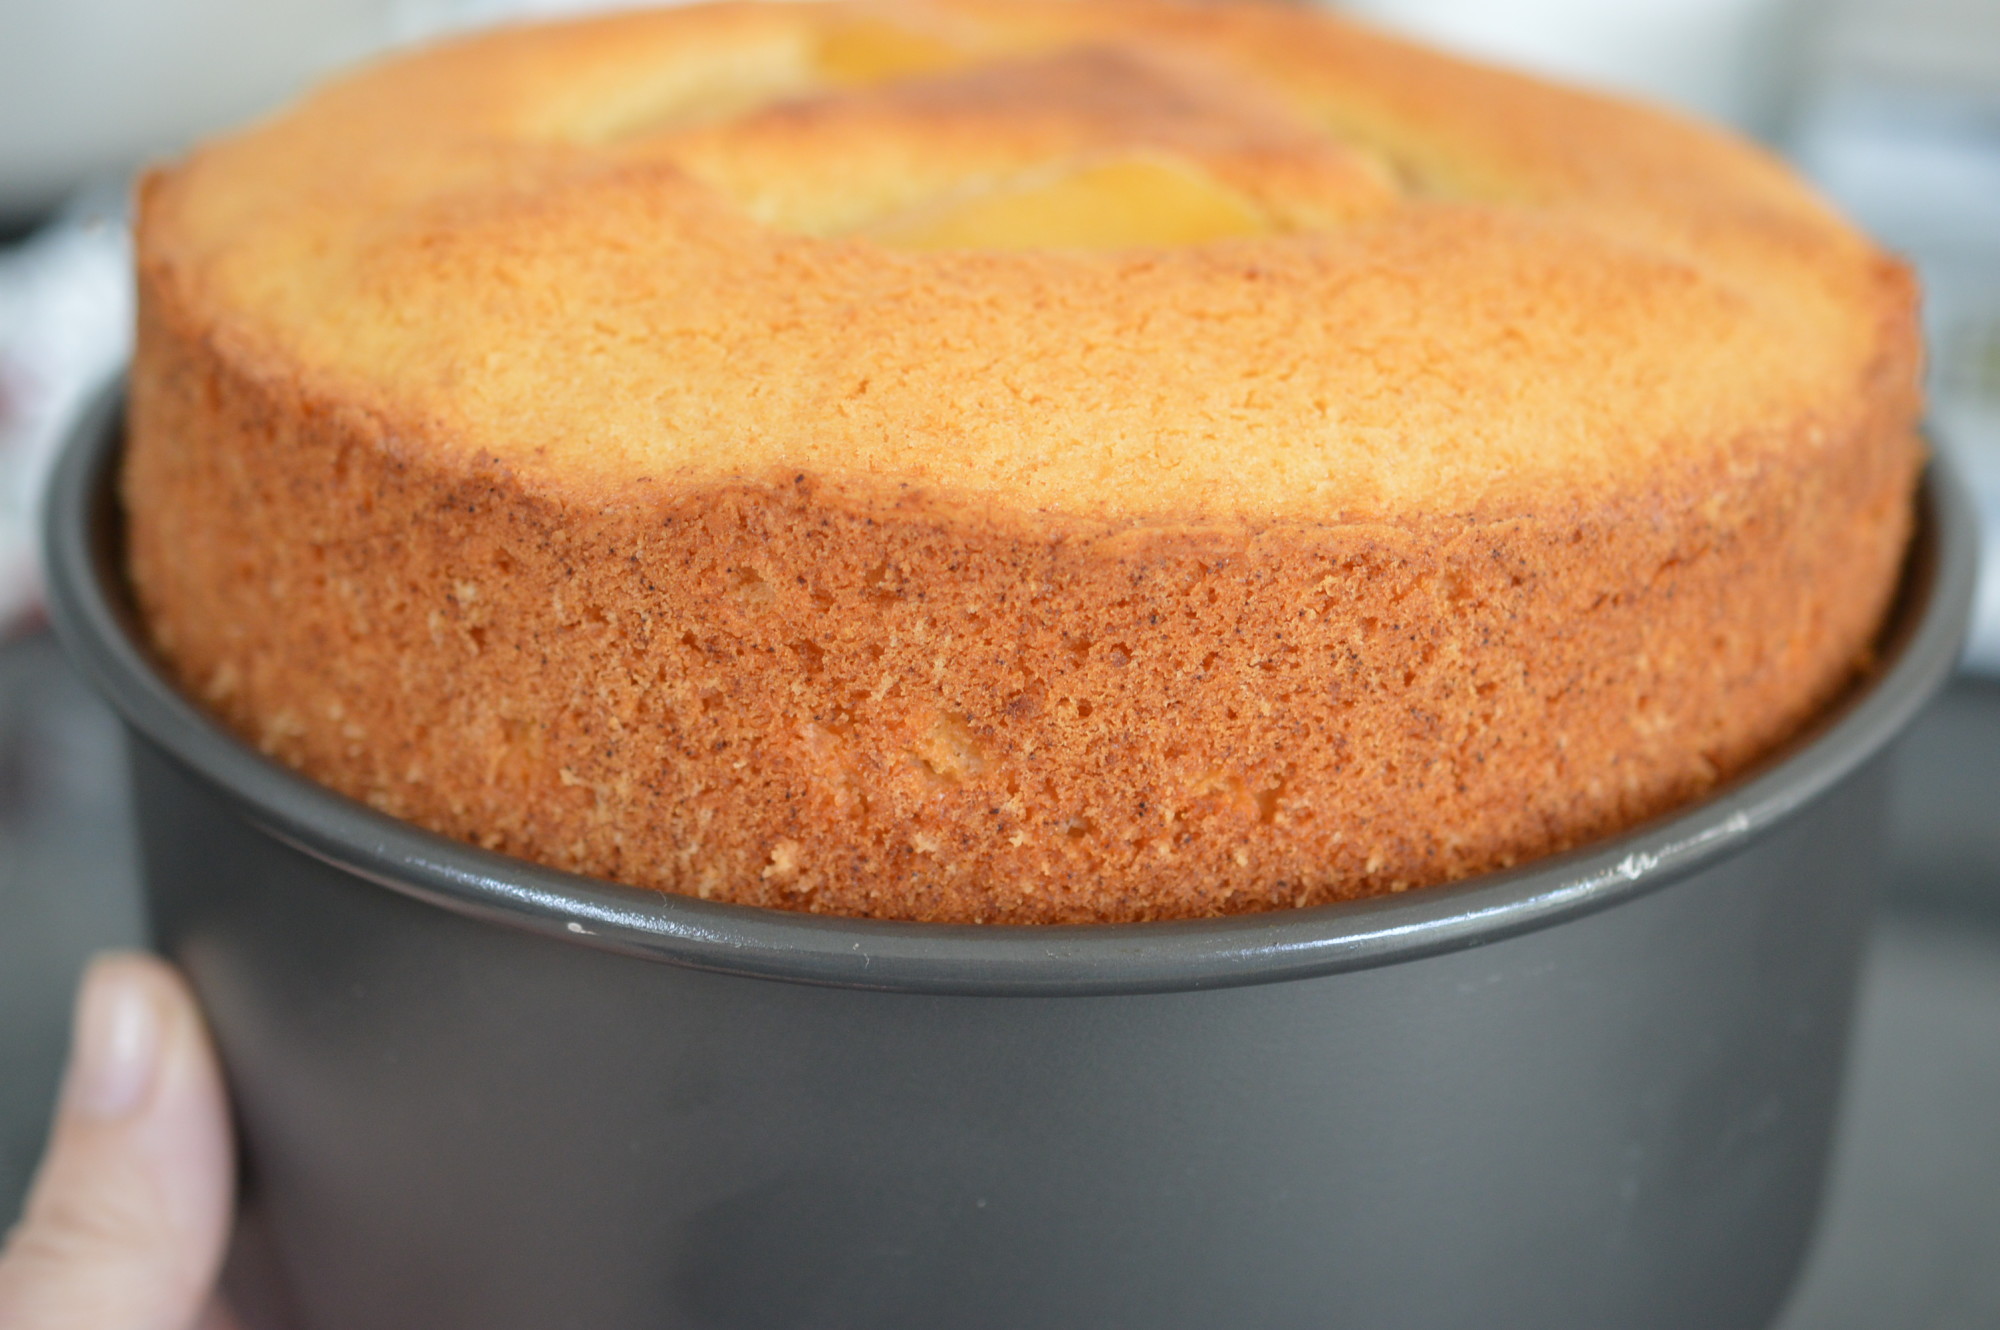
The easiest way to release the cake from the tin is to rest the tin on a can and ease the sides down.
Transfer to a cooling rack.
My mum’s pressed glass cake stand seems the right way to serve it. Maybe not Madeira wine? I like a cup of tea.
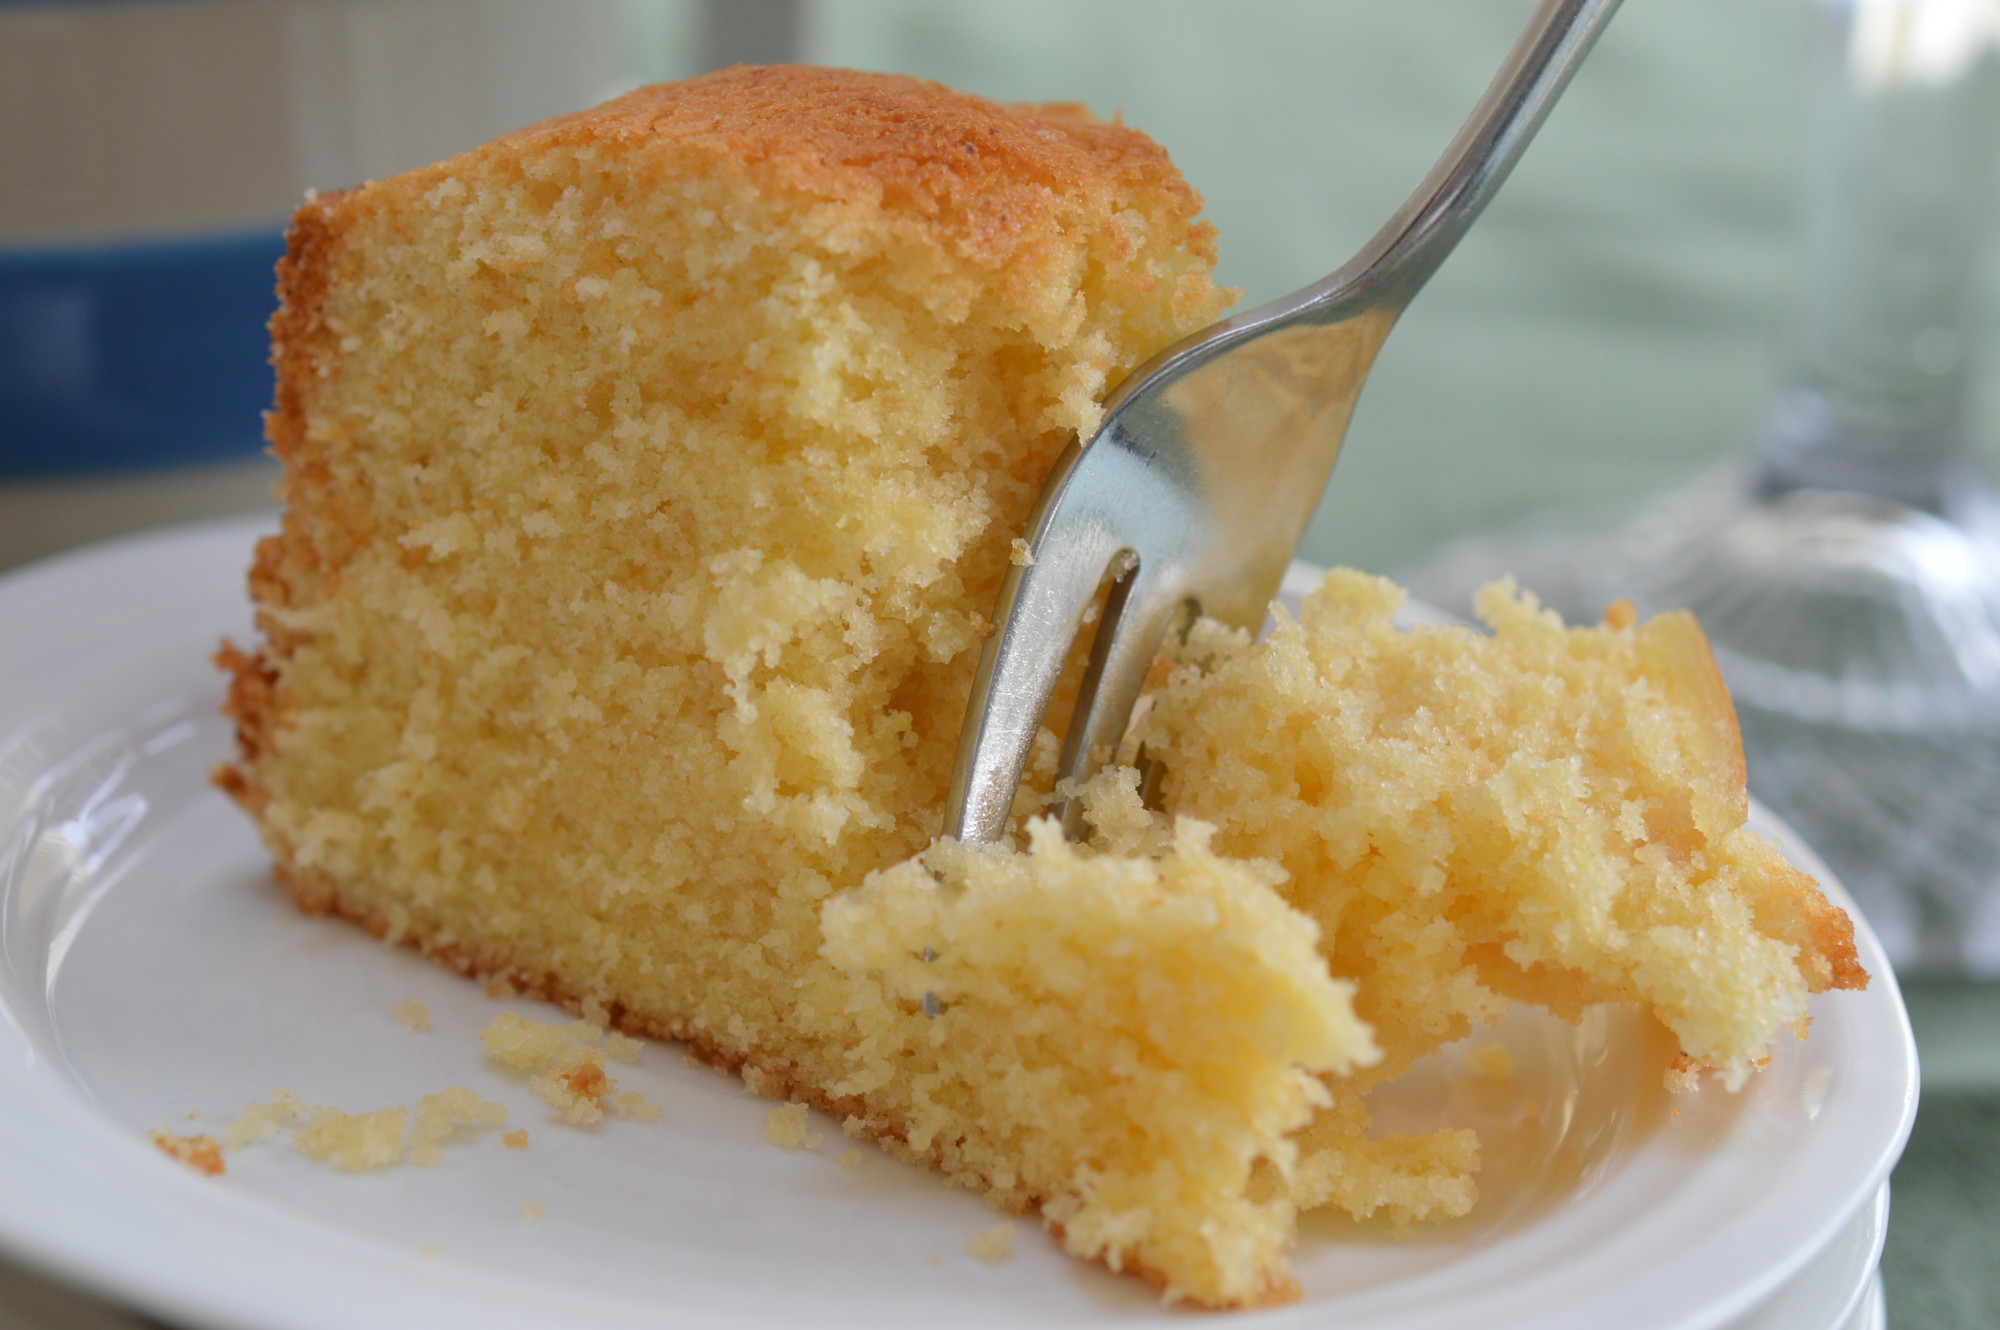
Eat.
Madeira Cake
Makes one 18cm/7″ round cake
175g/6oz butter
175g/6oz caster sugar
3 large eggs
150g/5oz self raising flour
100g/4oz plain flour
grated rind and juice of ½ unwaxed lemon
candied peel to decorate (optional)
Grease and line the base of an 18cm/7″ round cake tin and pre-heat the oven to 160ºC/325ºF/Gas Mark 3.
Beat the butter and sugar together until it is pale.
Add the room temperature eggs, one at a time. Beat well. A little flour added with each egg will lessen the risk of the mixture curdling.
Gently fold in the flours, then add the rind and lemon juice. Transfer the mixture to the tin and level the top. Decorate with candied peel if liked.
Bake in the pre-heated oven for 1-1¼ hours. Aga: Bake on the grid shelf on the floor of the Baking Oven with a sheet of bake-o-glide resting on top of the tin for 40 minutes.
Leave to cool in the tin for 10 minutes before removing to a cooling rack.
This weekend was all about family – and food. We had a big get-together. Nigel and I loved watching our five meeting up with their third cousins. That’s kind of special, isn’t it?
It begins with my Grandma ‘Dowton’ who, during the Second World War, took in the two children of one of her brothers. My Grandad always said he went to war with two children and came home to four. Of those four children it’s just my mum, the youngest, who is missing.
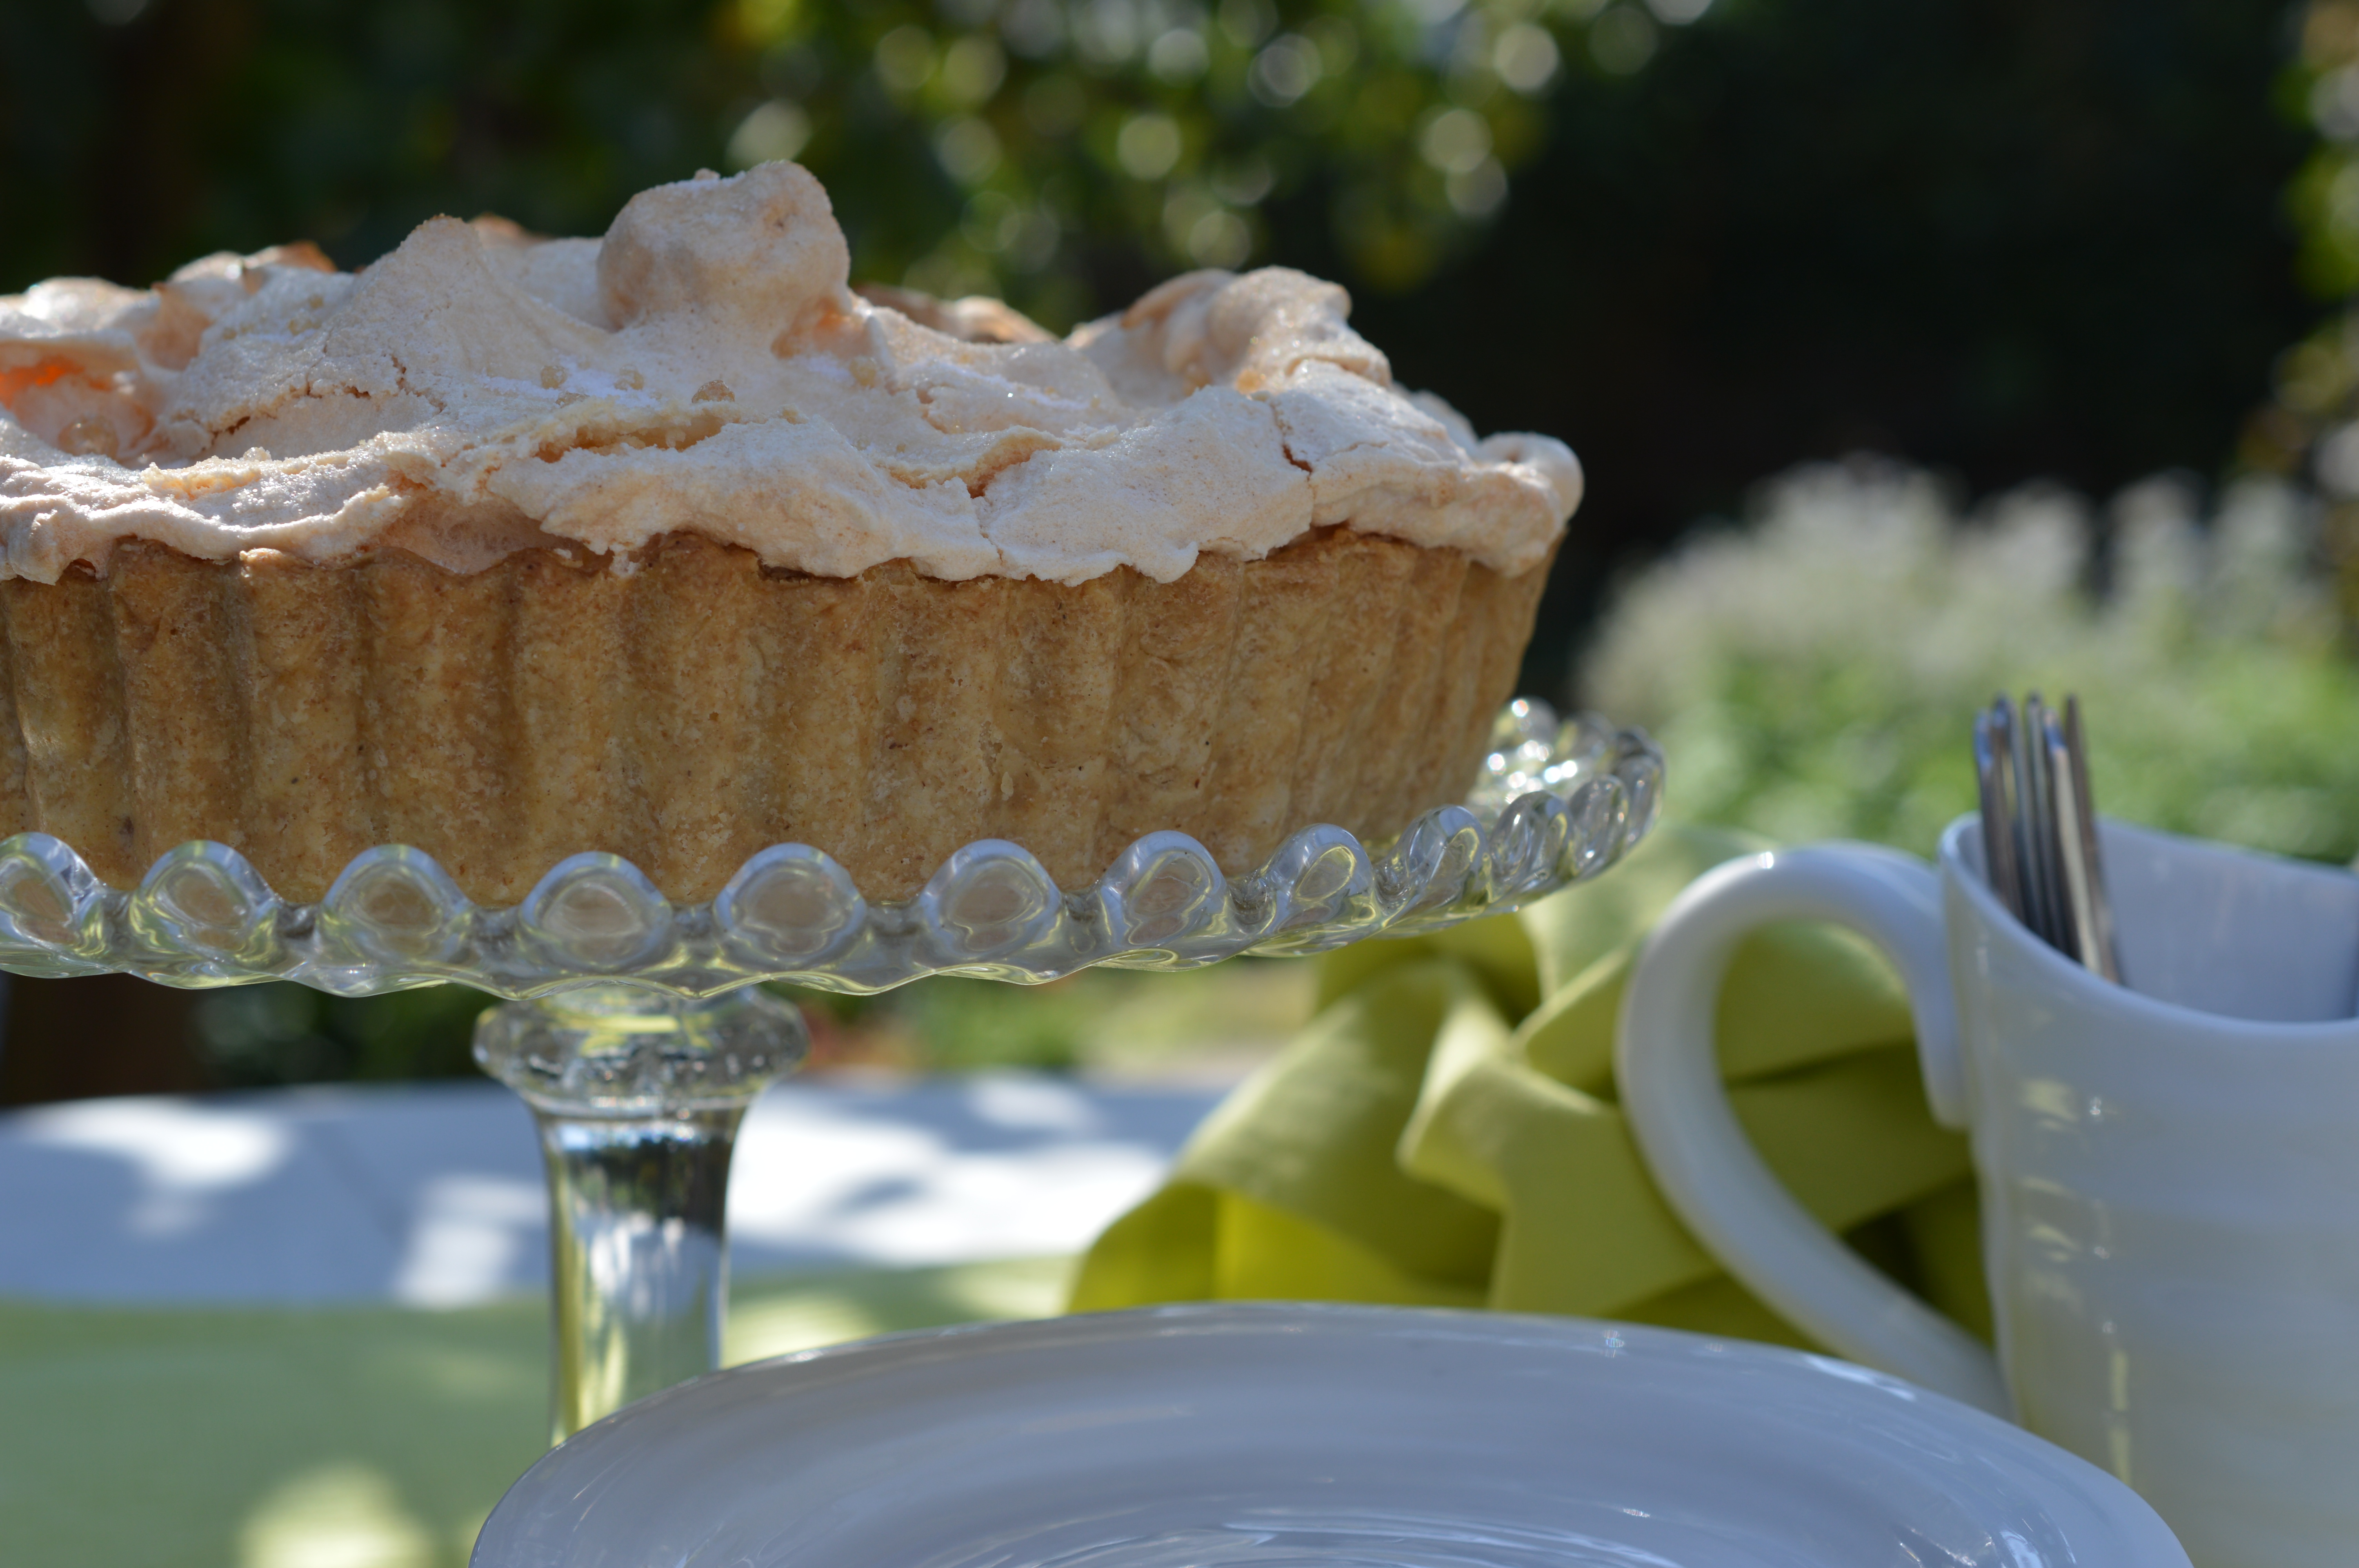
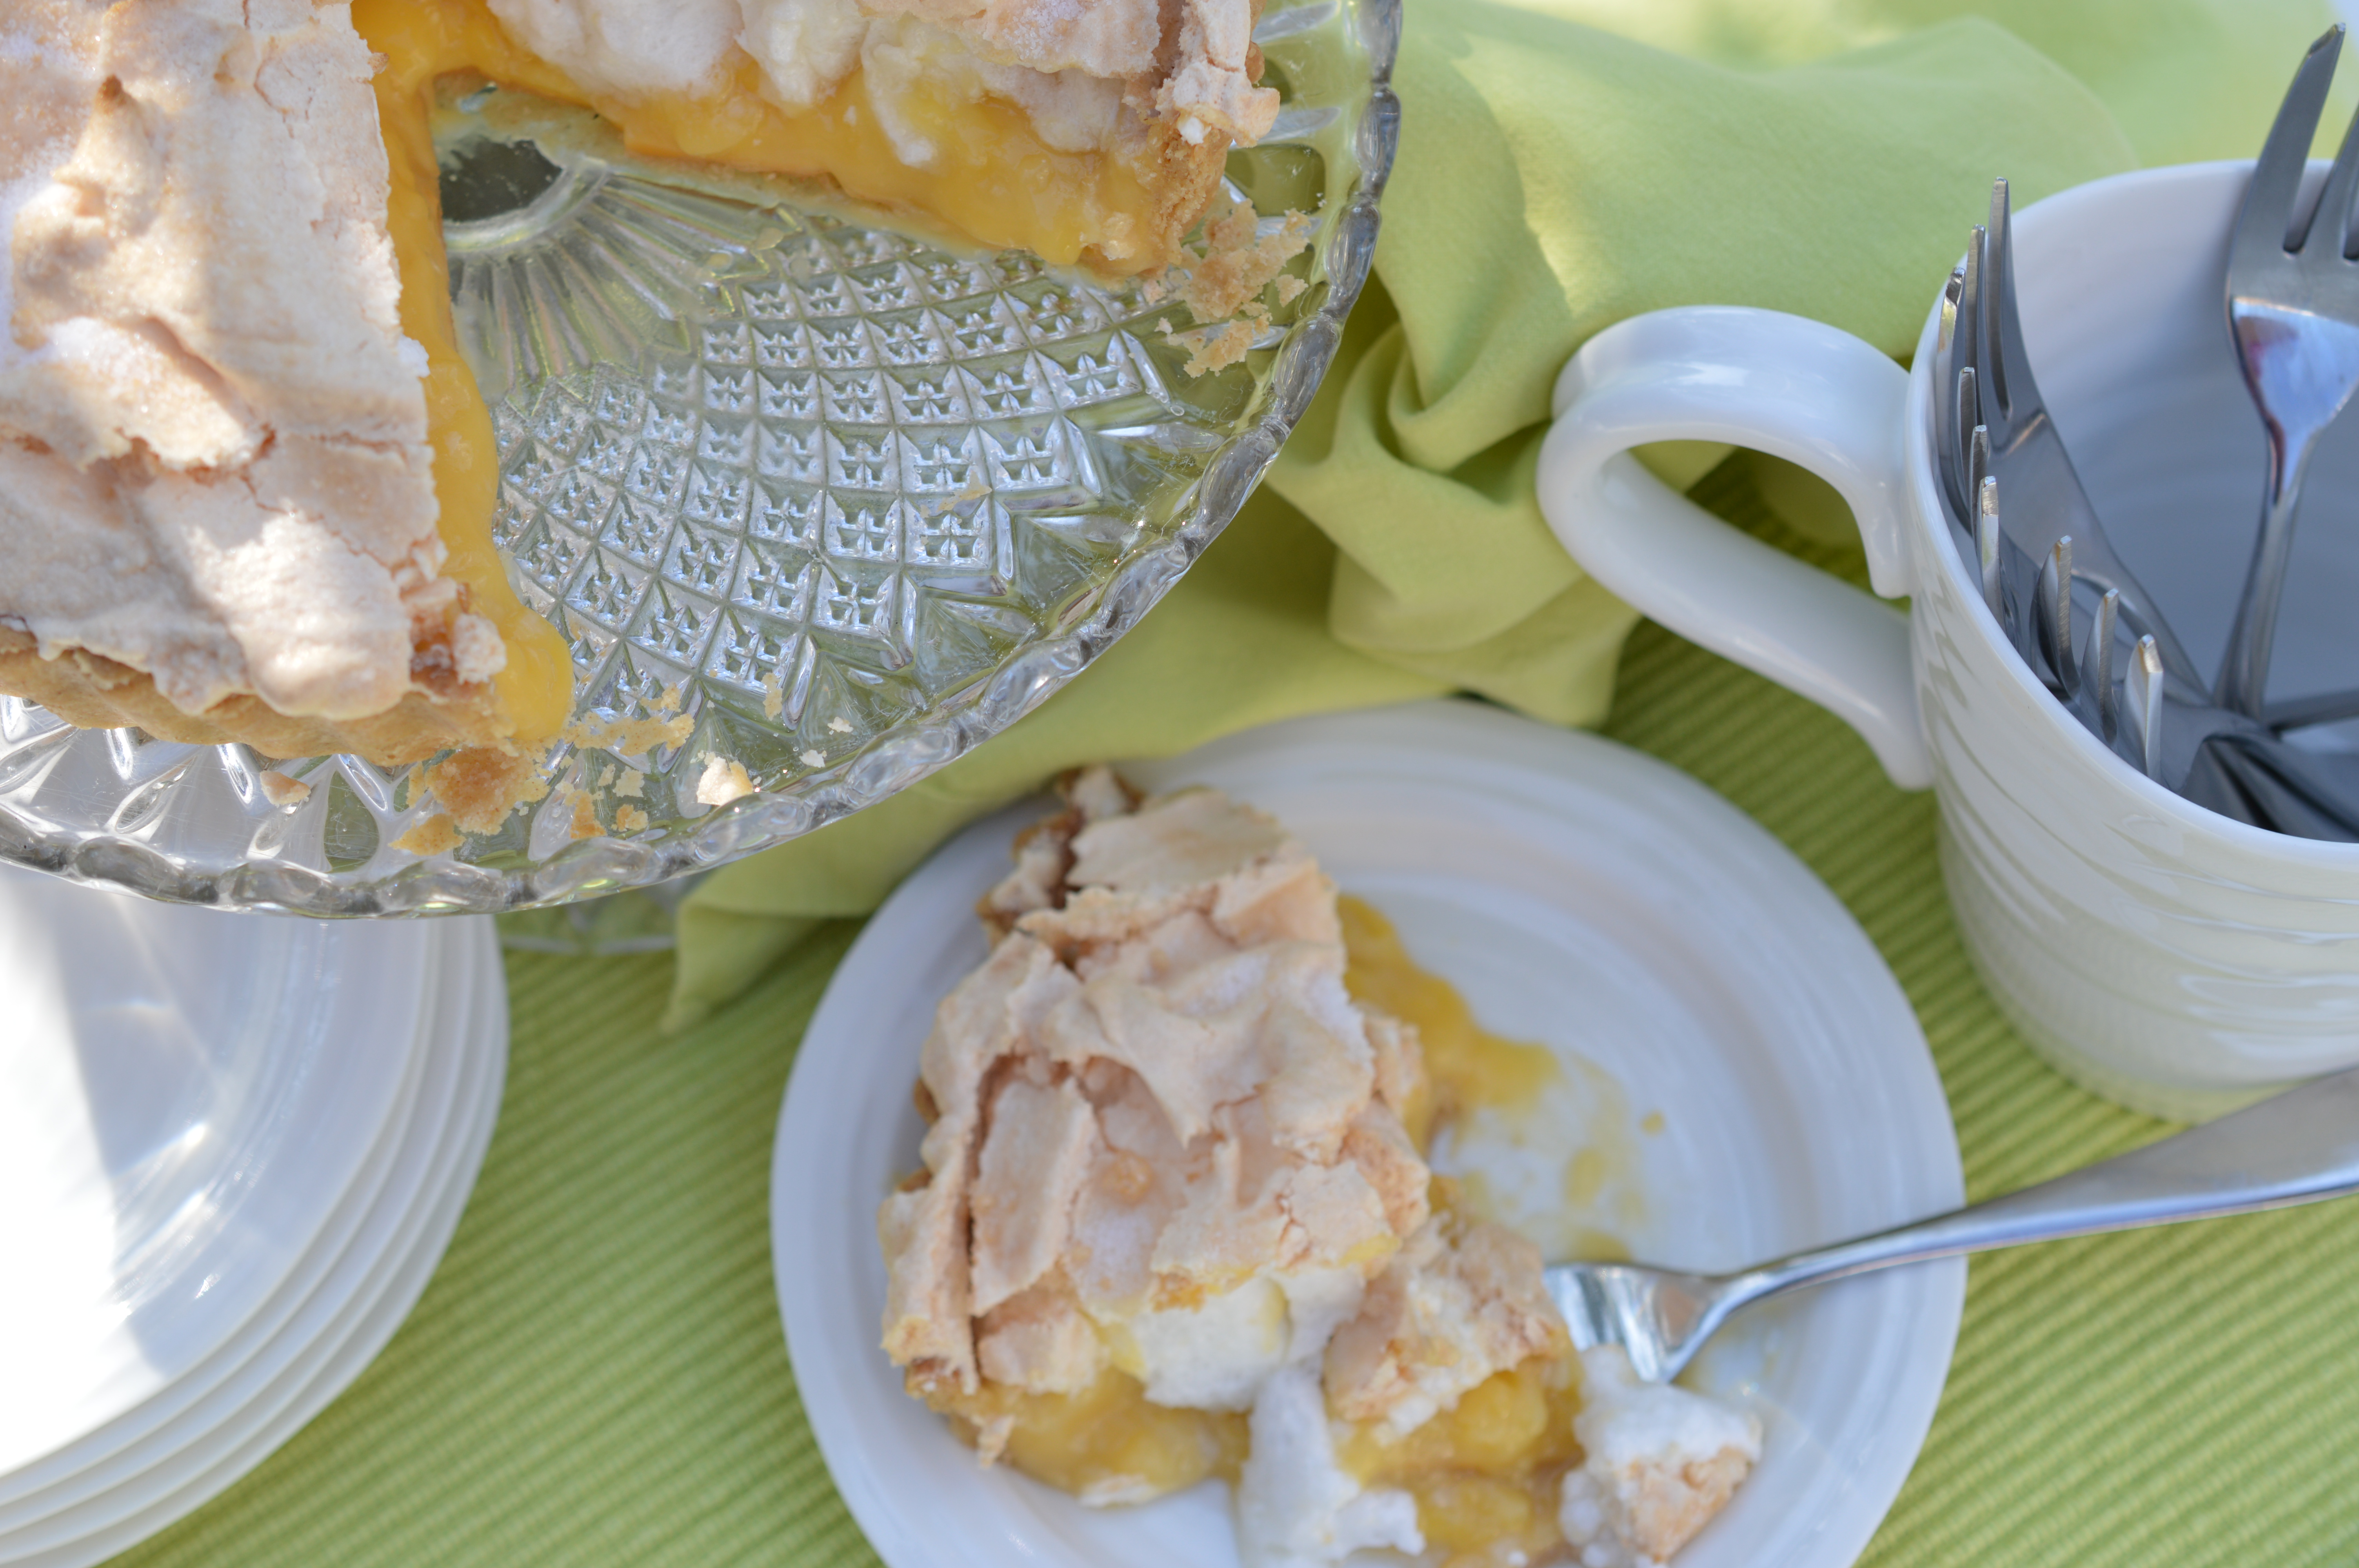
During my childhood whenever my mum asked what she should bring ‘food-wise’ to anything – the answer was invariably ‘Lemon Meringue’. She made the best and got thoroughly fed up with making them! So, in full nostalgia mode, I’ve been making Lemon Meringue Pie.
Naturally, as soon as I had my own kitchen, I tried to out-do her. Over the years I’ve tried adding orange juice for colour, messed about with the pastry (egg yolk, icing sugar ..), tried Italian meringue for the topping … and have given up. Her recipe is a piece of genius – and I have it. It’s in the neatly typed up, tucked in ‘wipeable’ plastic pockets and clipped into the ‘Sweet’ recipe lever-file she left me when she died.
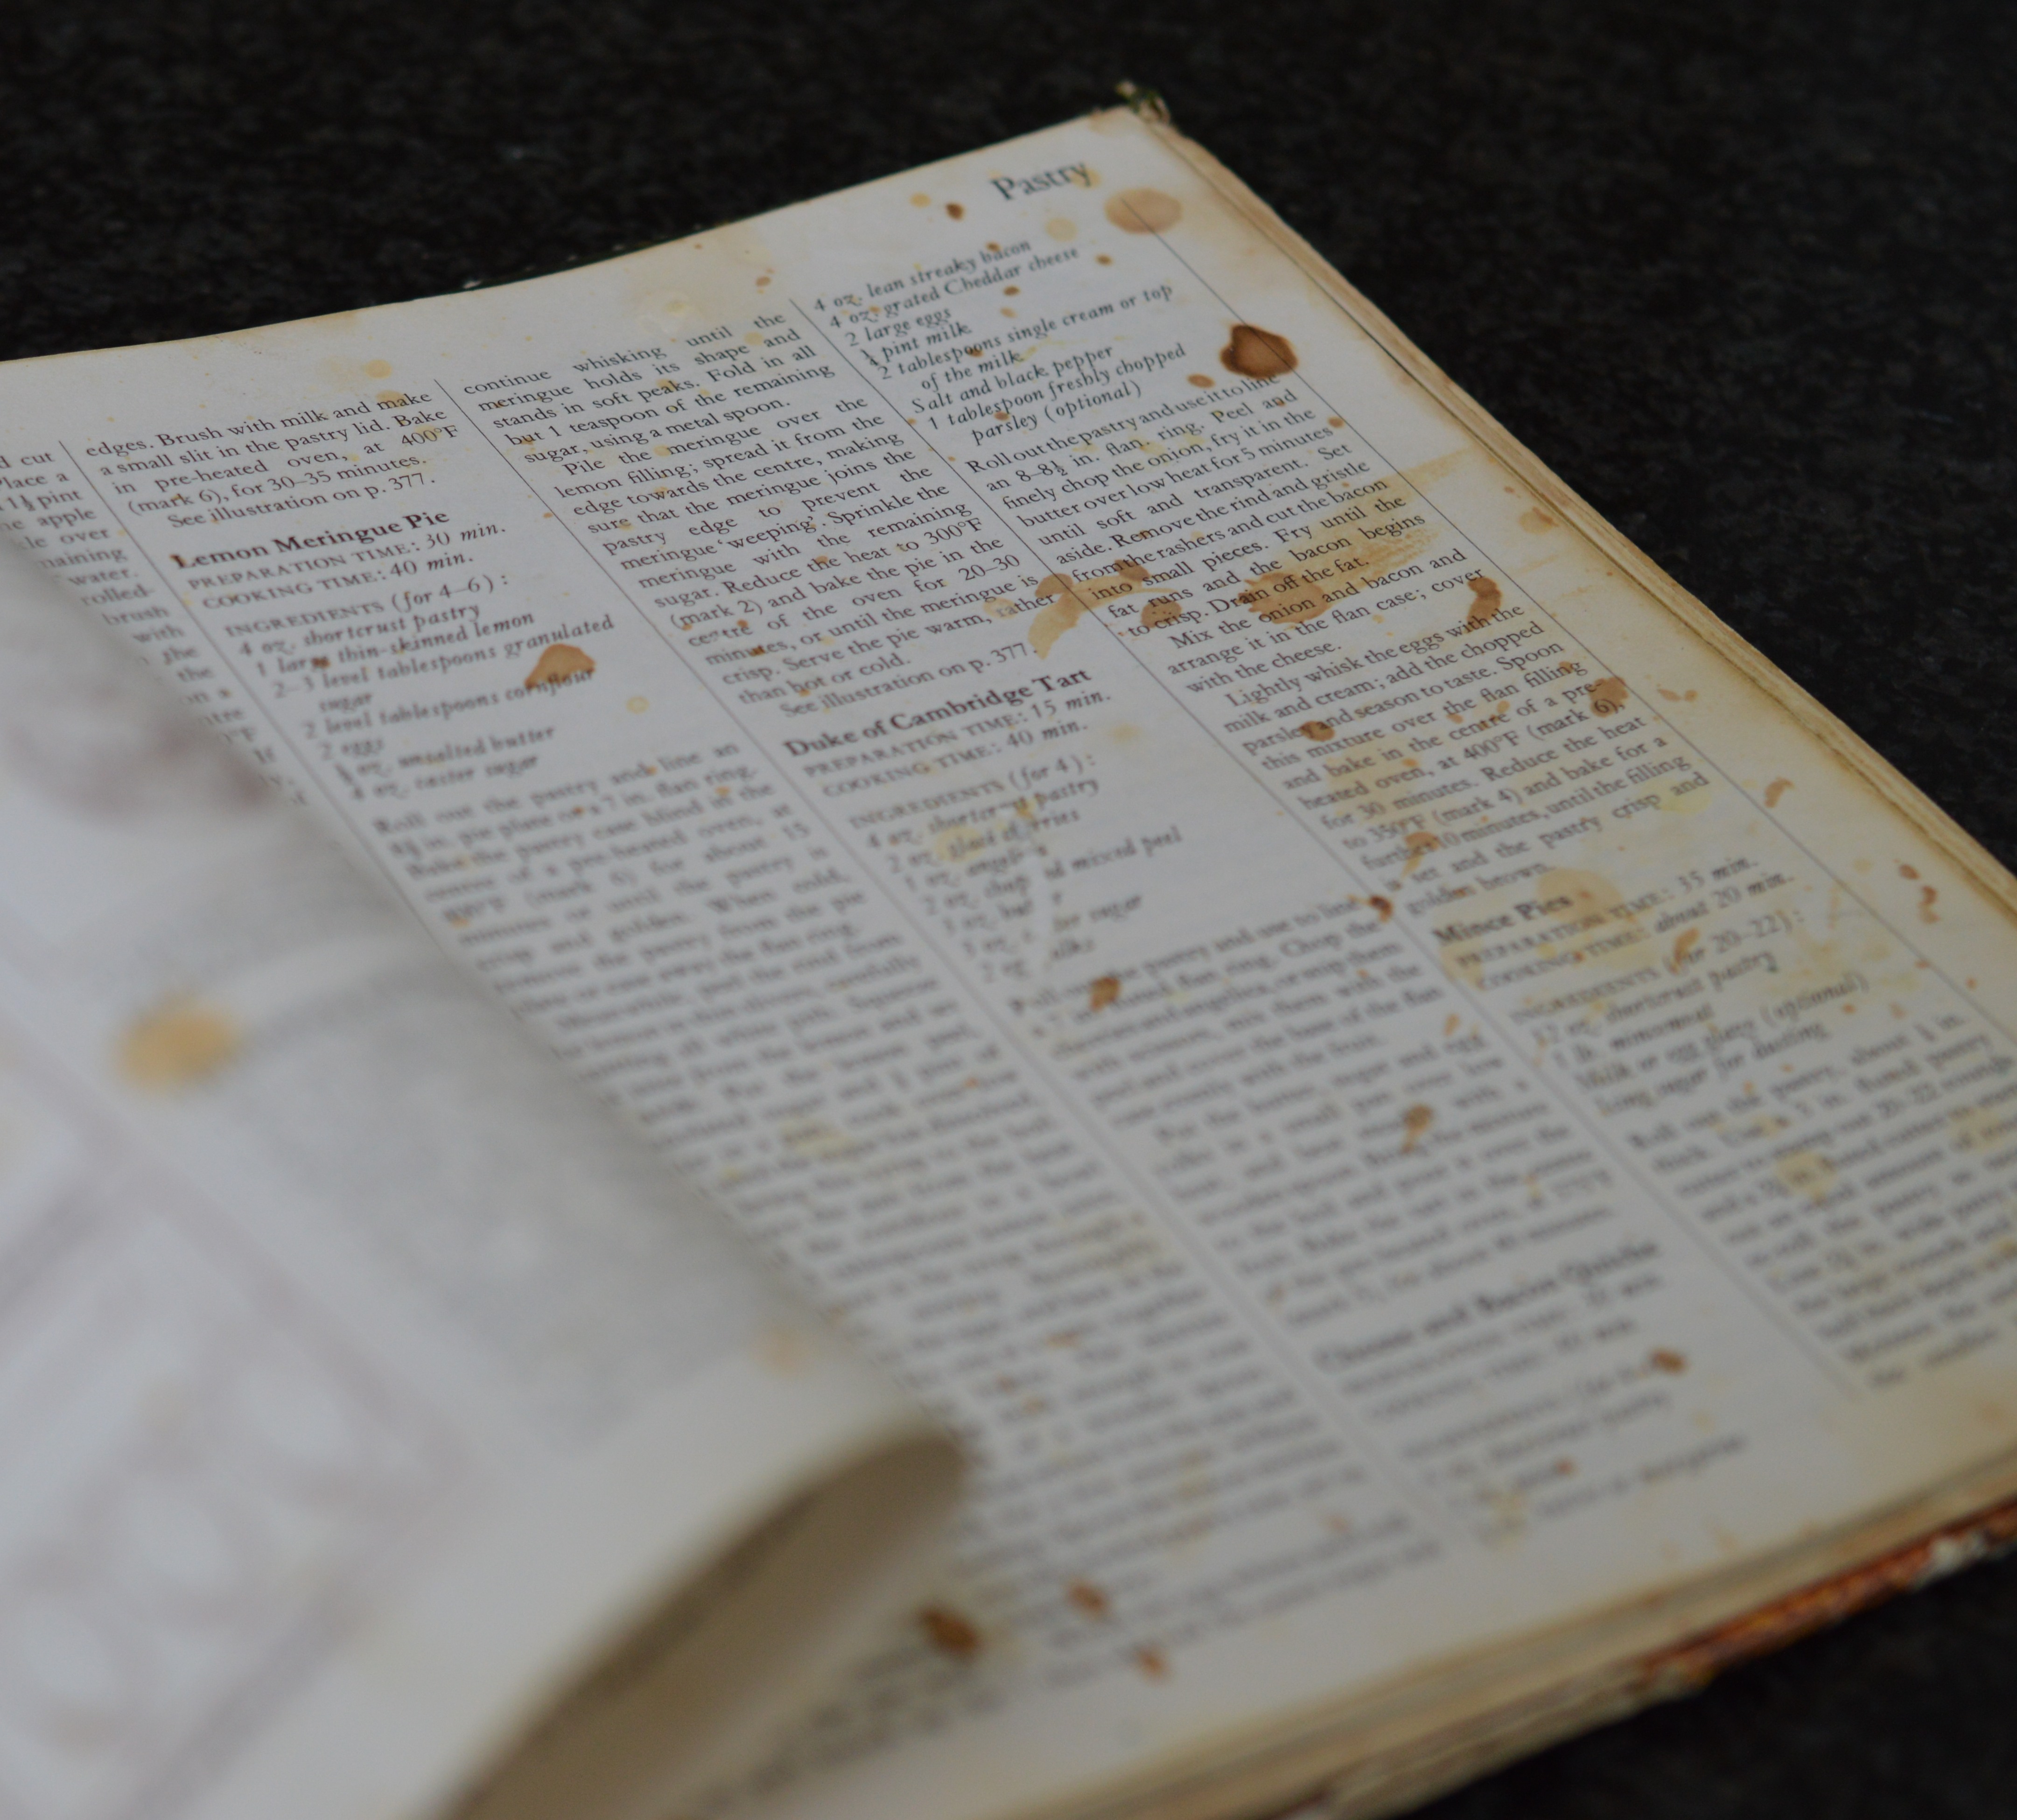
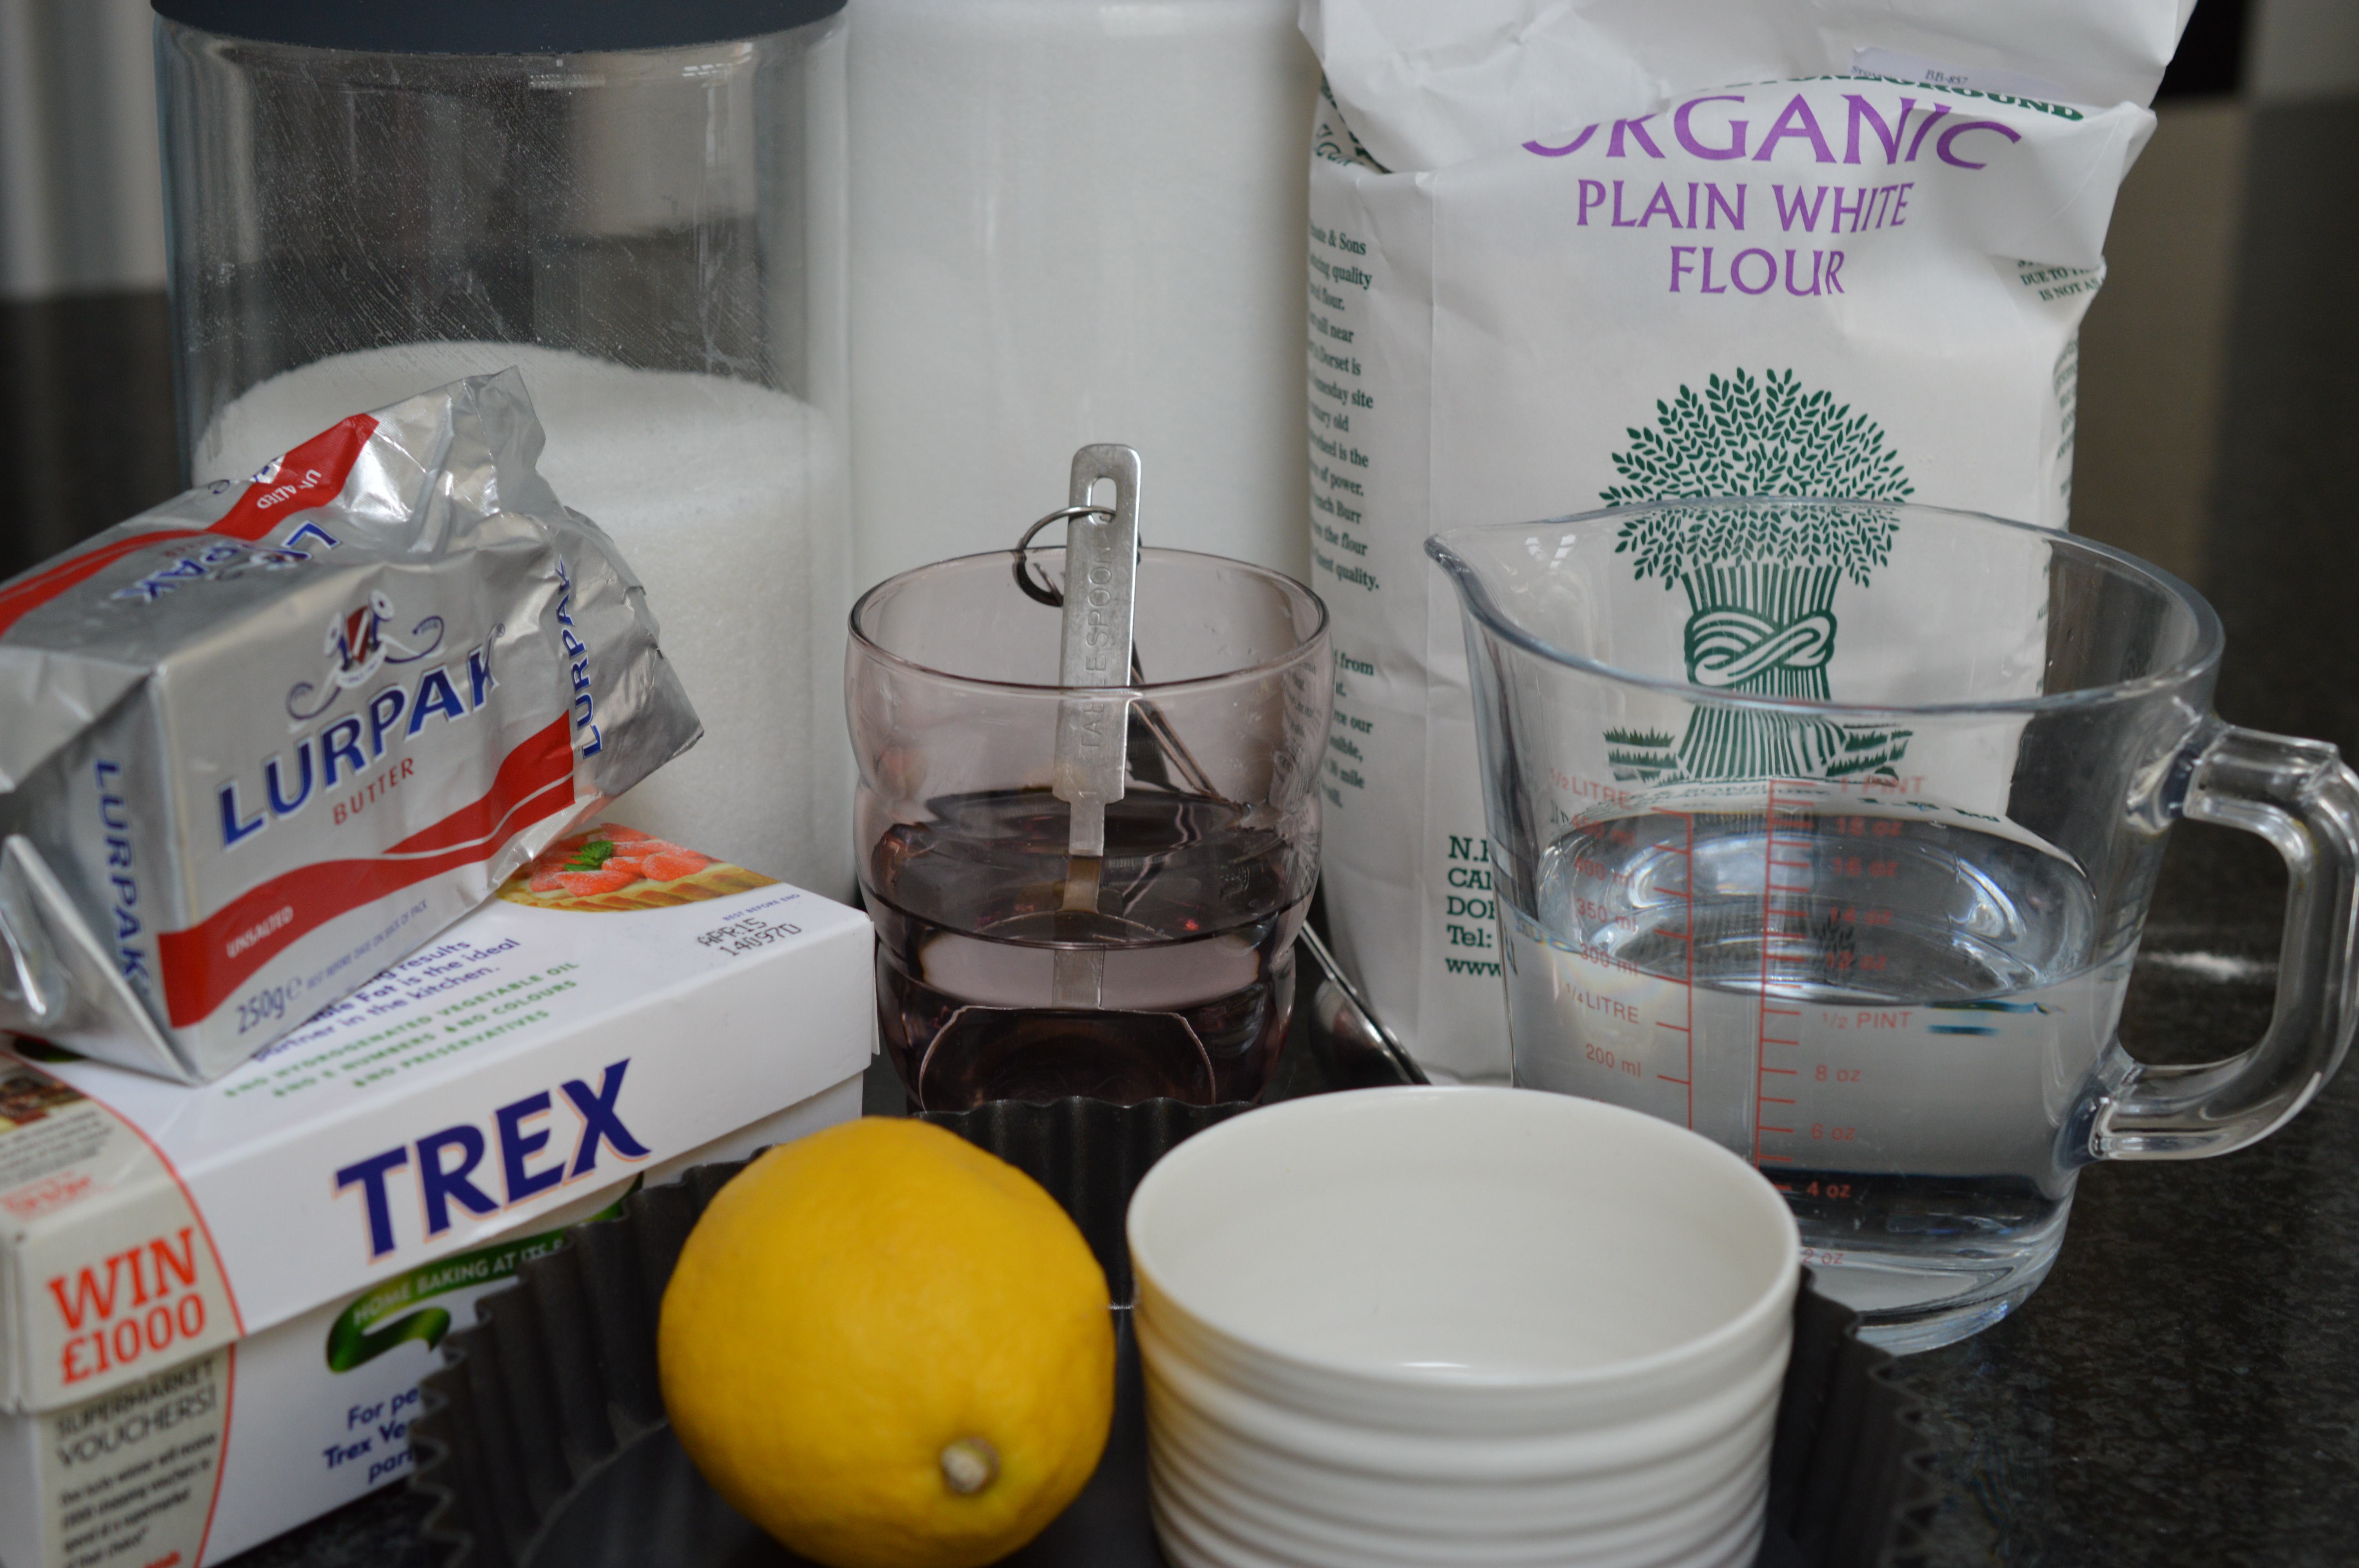
I was expecting it would be time consuming to discover where she found it, but no. There it was on a food splattered page in a battered copy of ‘The Cookery Year’, published by Readers’ Digest in 1973. We have both changed one thing, I realise. There’s no margarine in our pastry! (For those in the UK, my mum was an ‘Anchor and Cookeen’ girl and I’m definitely a ‘Lurpak and Trex’ one.)
What my mum particularly liked about this recipe was that it only uses one lemon. Now, for all I’m living in ‘austerity Britain’, I’m prepared to give any pie two lemons if needed. But it doesn’t. Really.
You begin with the pastry. There’s a whole heap of nonsense talked about making pastry, but there are really only two secrets to the business. The first, don’t over-handle it. The second, don’t skip the chilling. That said, put a glass of tap water in the fridge. Minimal effort, I feel.
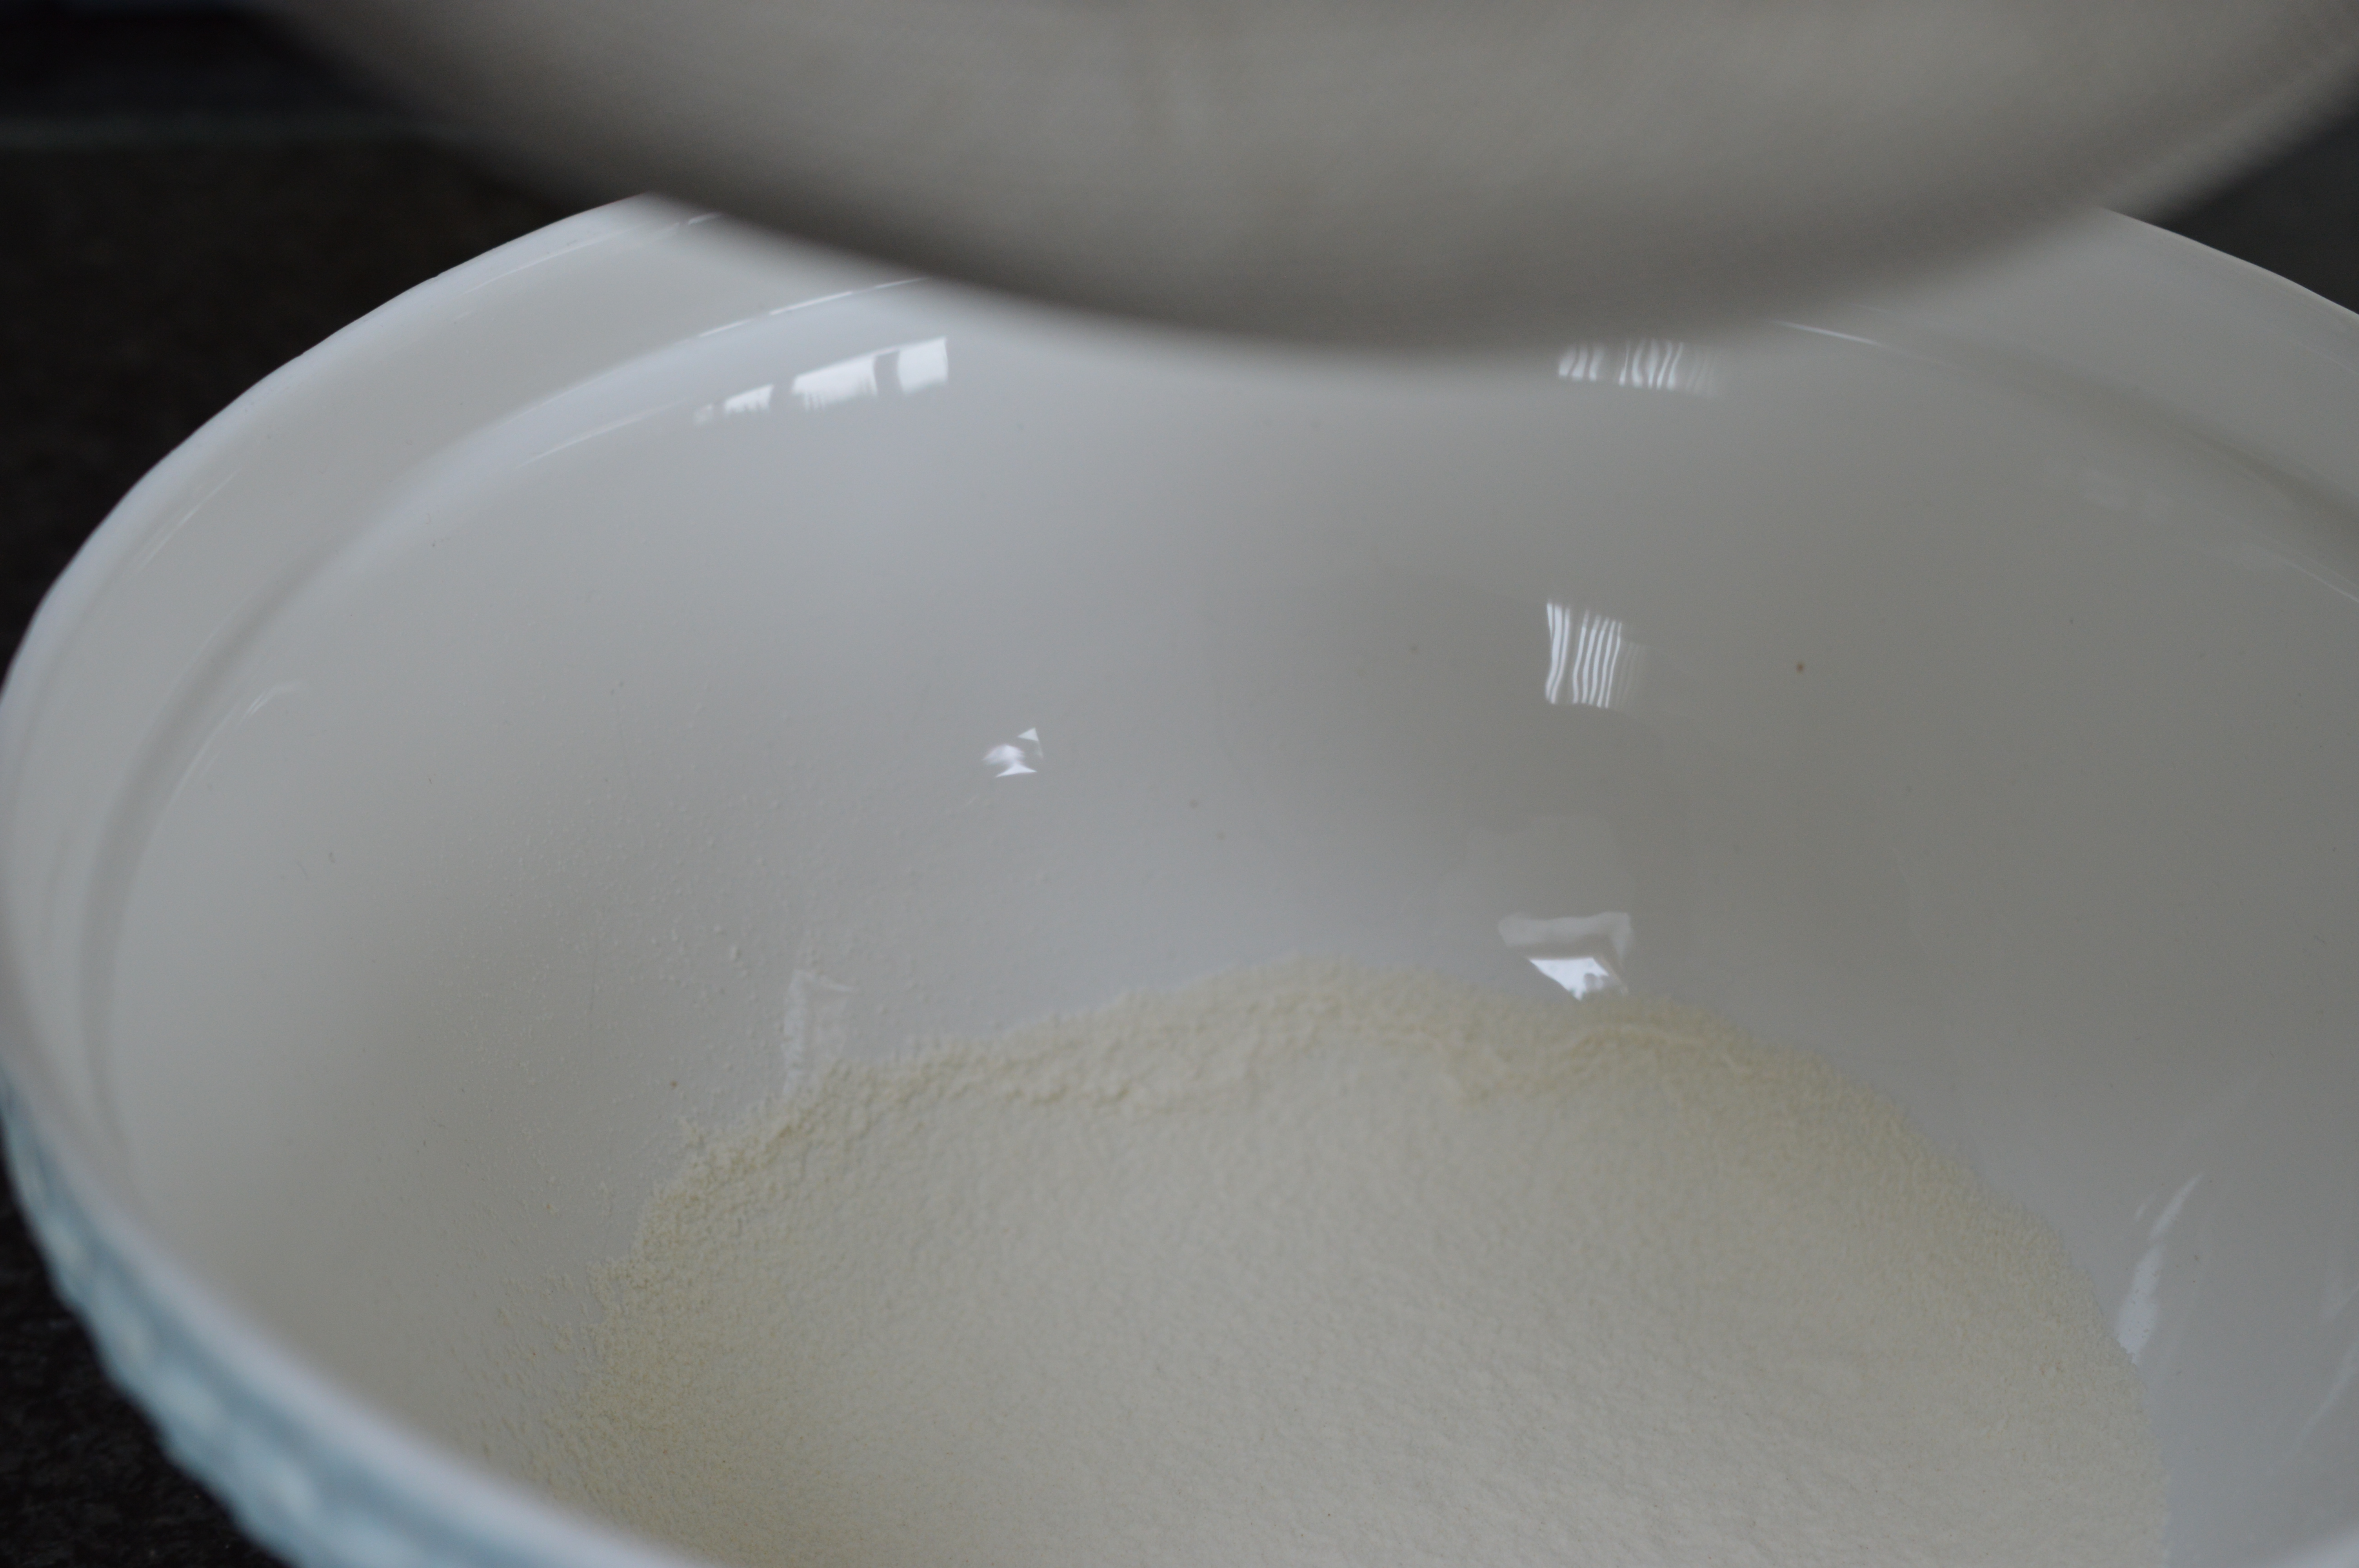
Sift your flour and salt into a large bowl. (It always confused me when recipes said that because the salt never does entirely go through the holes, does it? What you’re doing is adding air if your flour has compacted in the bag and getting the salt dispersed evenly through it. What’s left in the sieve, you can just add!)
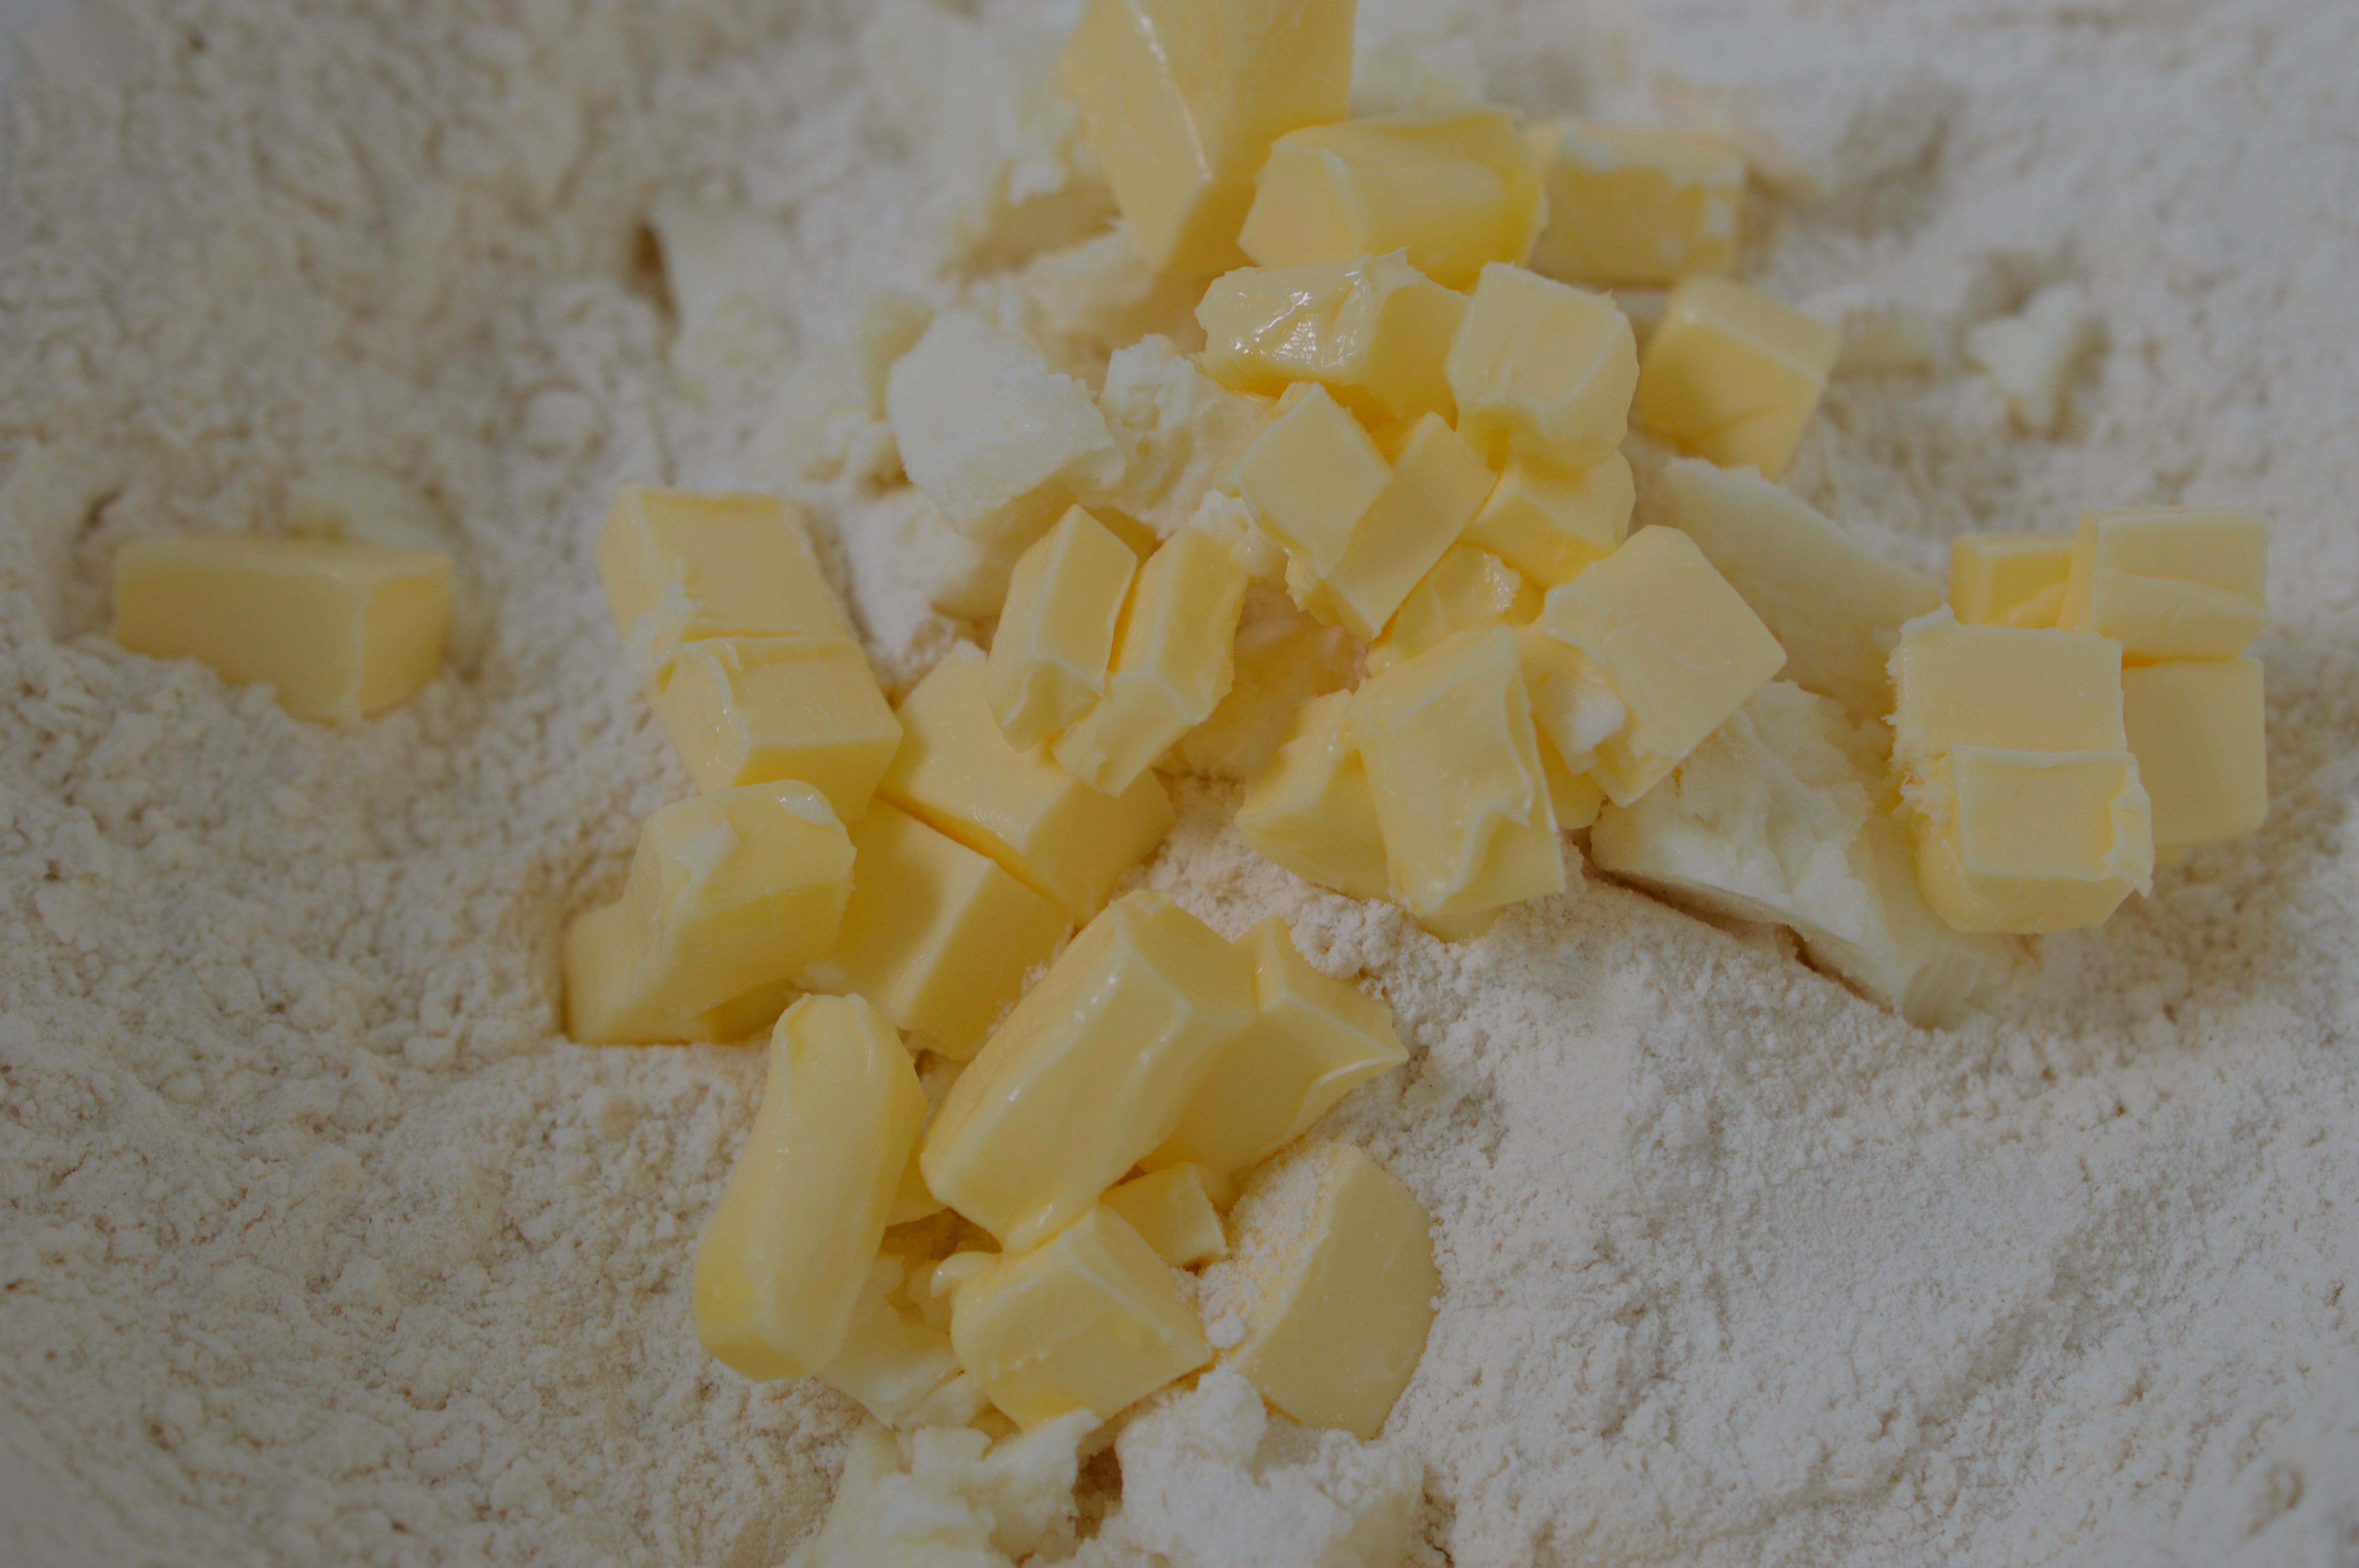
Then add the fat, cut into smallish cubes. I’m using a mixture of butter and vegetable shortening – a balance between butter for taste and lard for flakiness. You don’t want soft fats (that makes pastry difficult to work with), but you don’t want fridge hard either. Trying to ‘rub in’ icy little cubes isn’t much fun.
What you’re actually doing by ‘rubbing in’ is coating tiny bits of flour with fat – before you add any liquid. Think of it like a raincoat! It’s to stop liquid penetrating the flour. Liquid + flour = gluten proteins. And gluten proteins give you tough pastry. Roughly!! You can do the whole thing in a food processor, but it’s so easy to do it by hand and who likes washing up???
So clean hands, not cold. Butter and vegetable shortening cut into smallish cubes, at squeezable temperature.
Then it is this! (My first YouTube video. Am feeling disproportionately proud ..!!)
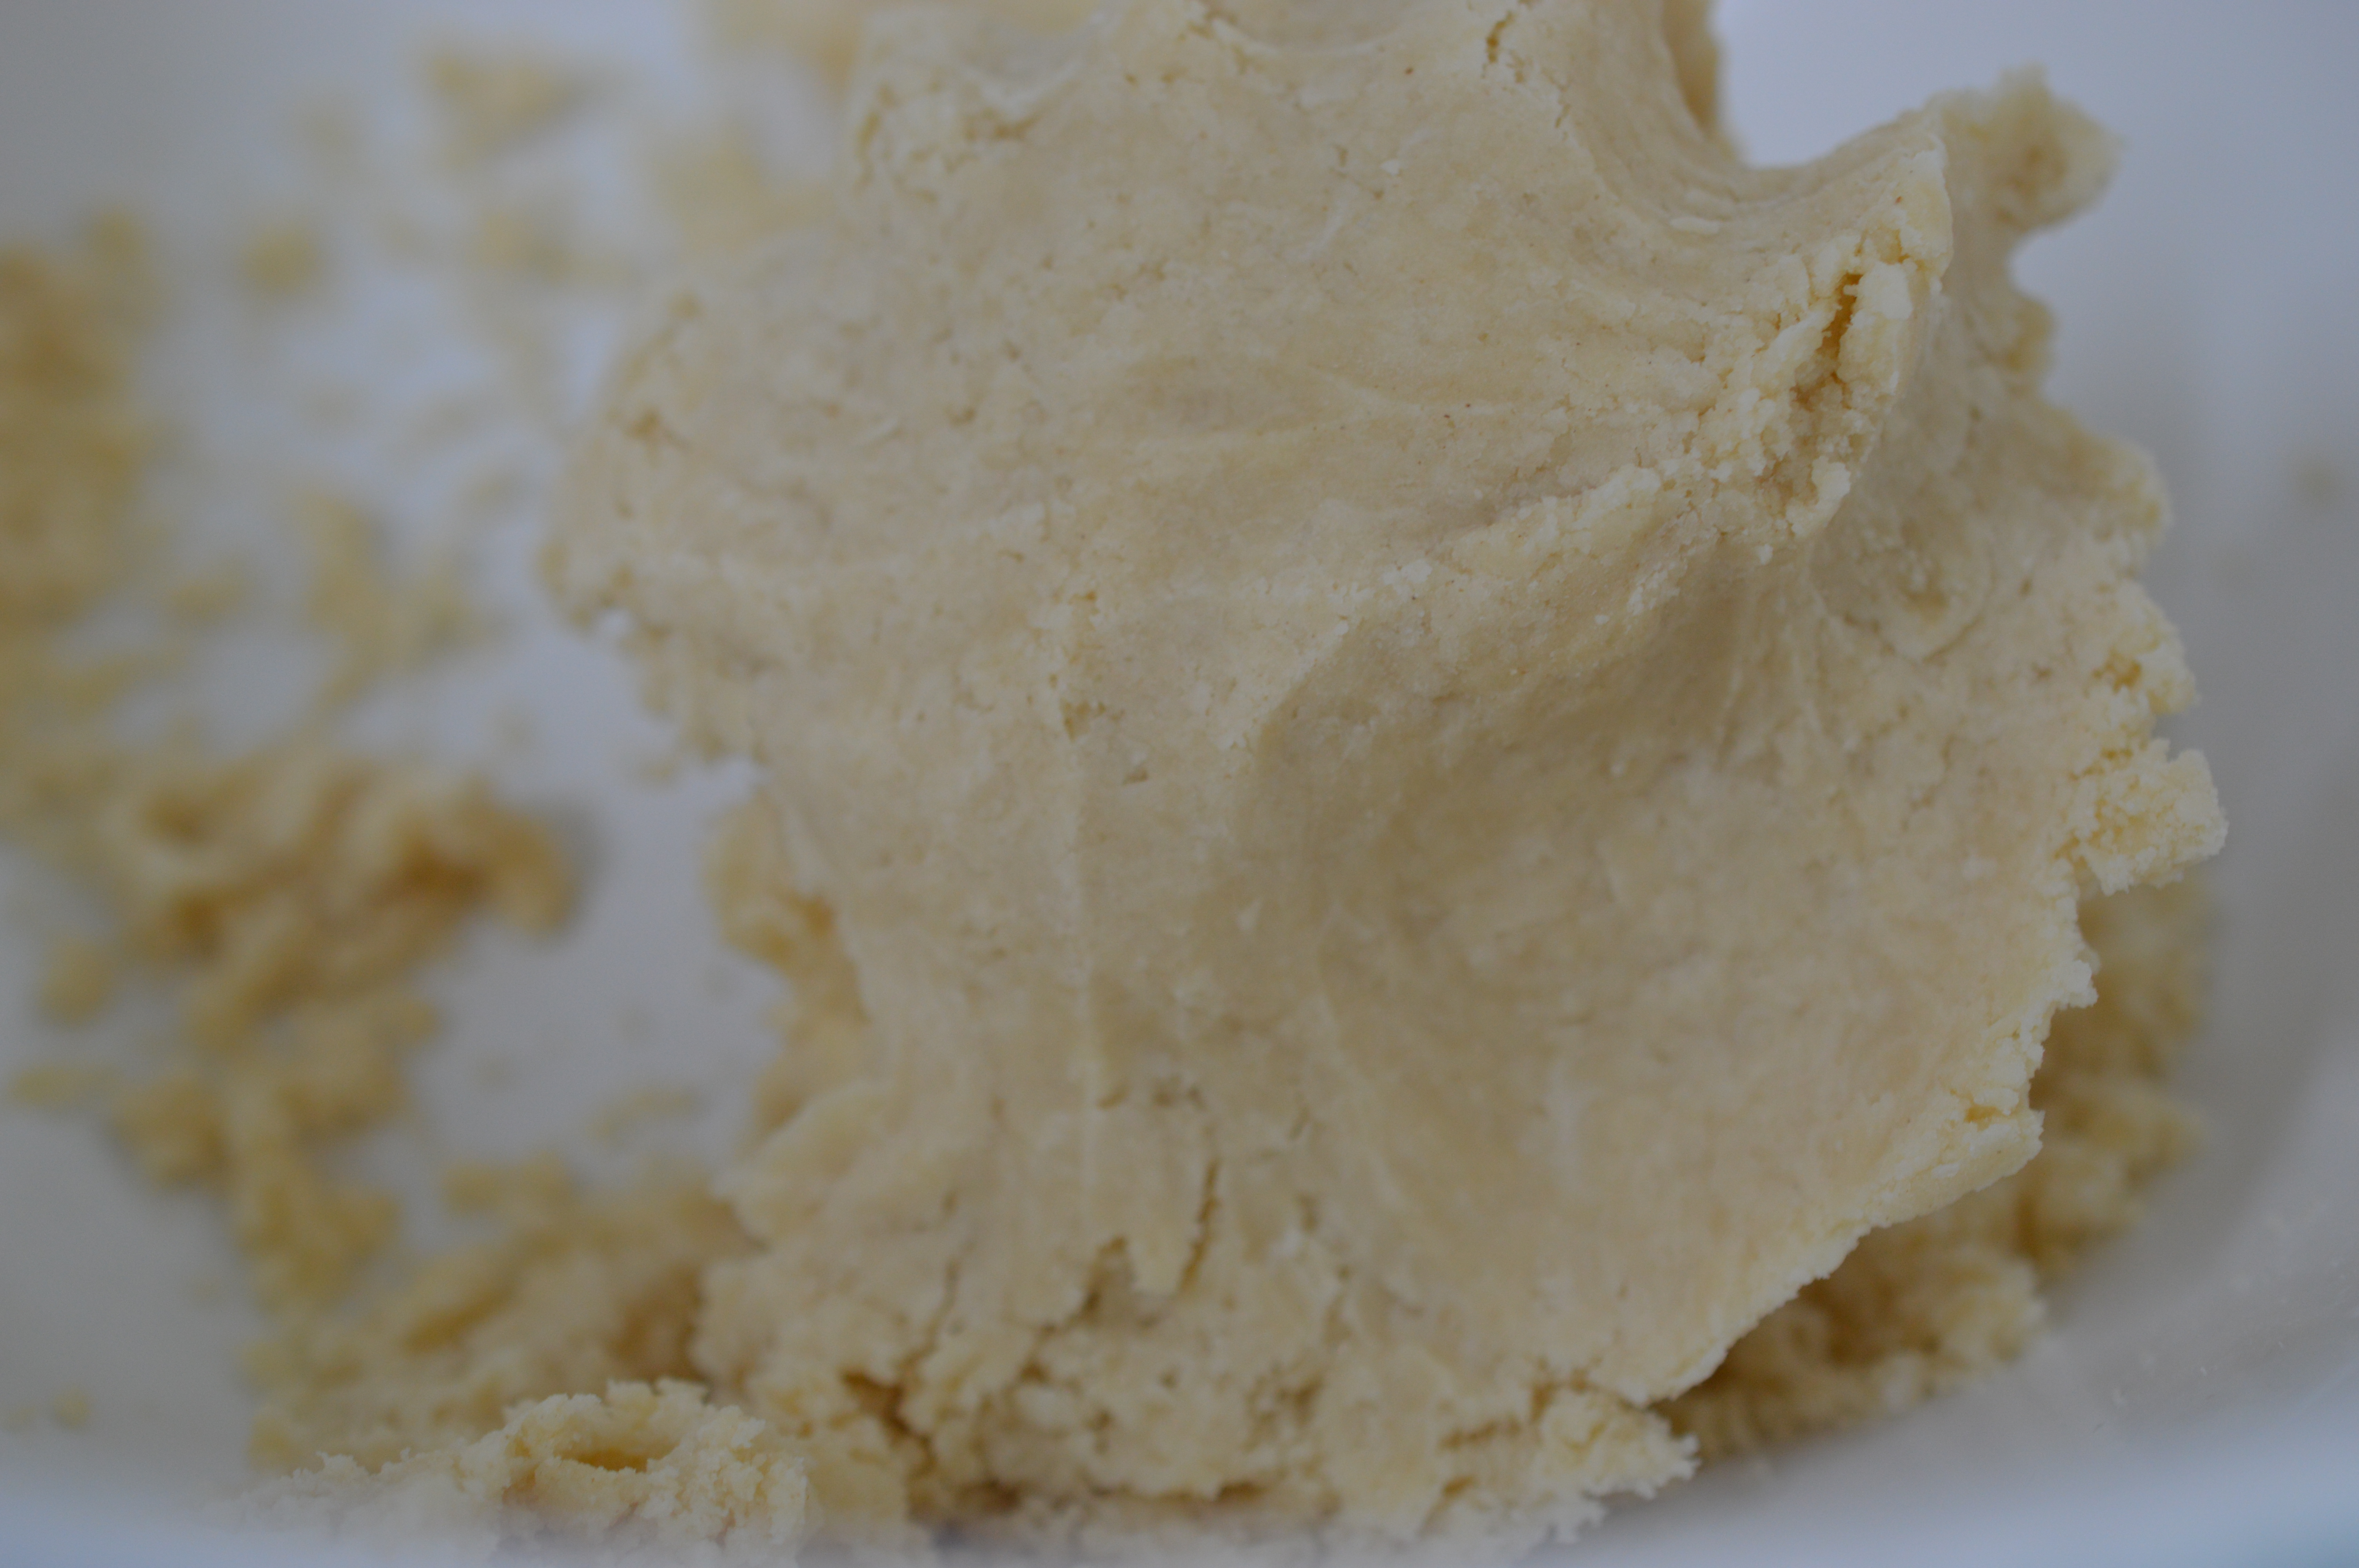
Stop when it looks like this. Breadcrumbs – ish. There are still little lumps of fat, but that doesn’t matter. This is the bit where you get better results if you don’t ‘over-work’ it. Light and cool is the mantra!
Retrieve the water from the fridge. How much you’ll need will depend on the absorbency of your flour and the weather. Annoying, I know. But – you can always add more … so start with a couple of tablespoons and try and sprinkle it over the entire surface. Then take a blunt knife and mix. Light touch rather than bingo wing work-out. Stop when it starts to form clumps.
Bring it together into a ball with your hand until it leaves the sides of the bowl clean. You are now done with the bowl.
On your worktop give the pastry a little knead. (Yes, really.) You want it free of cracks and smooth.
-If you’ve made a mistake with the water and the pastry is crumbling beneath your fingers – run your hands under the cold tap and lightly knead in the water on your hands.
-If it’s too wet you’ll have to sprinkle flour on your worktop. Go careful because you are altering the fat/flour ratio.
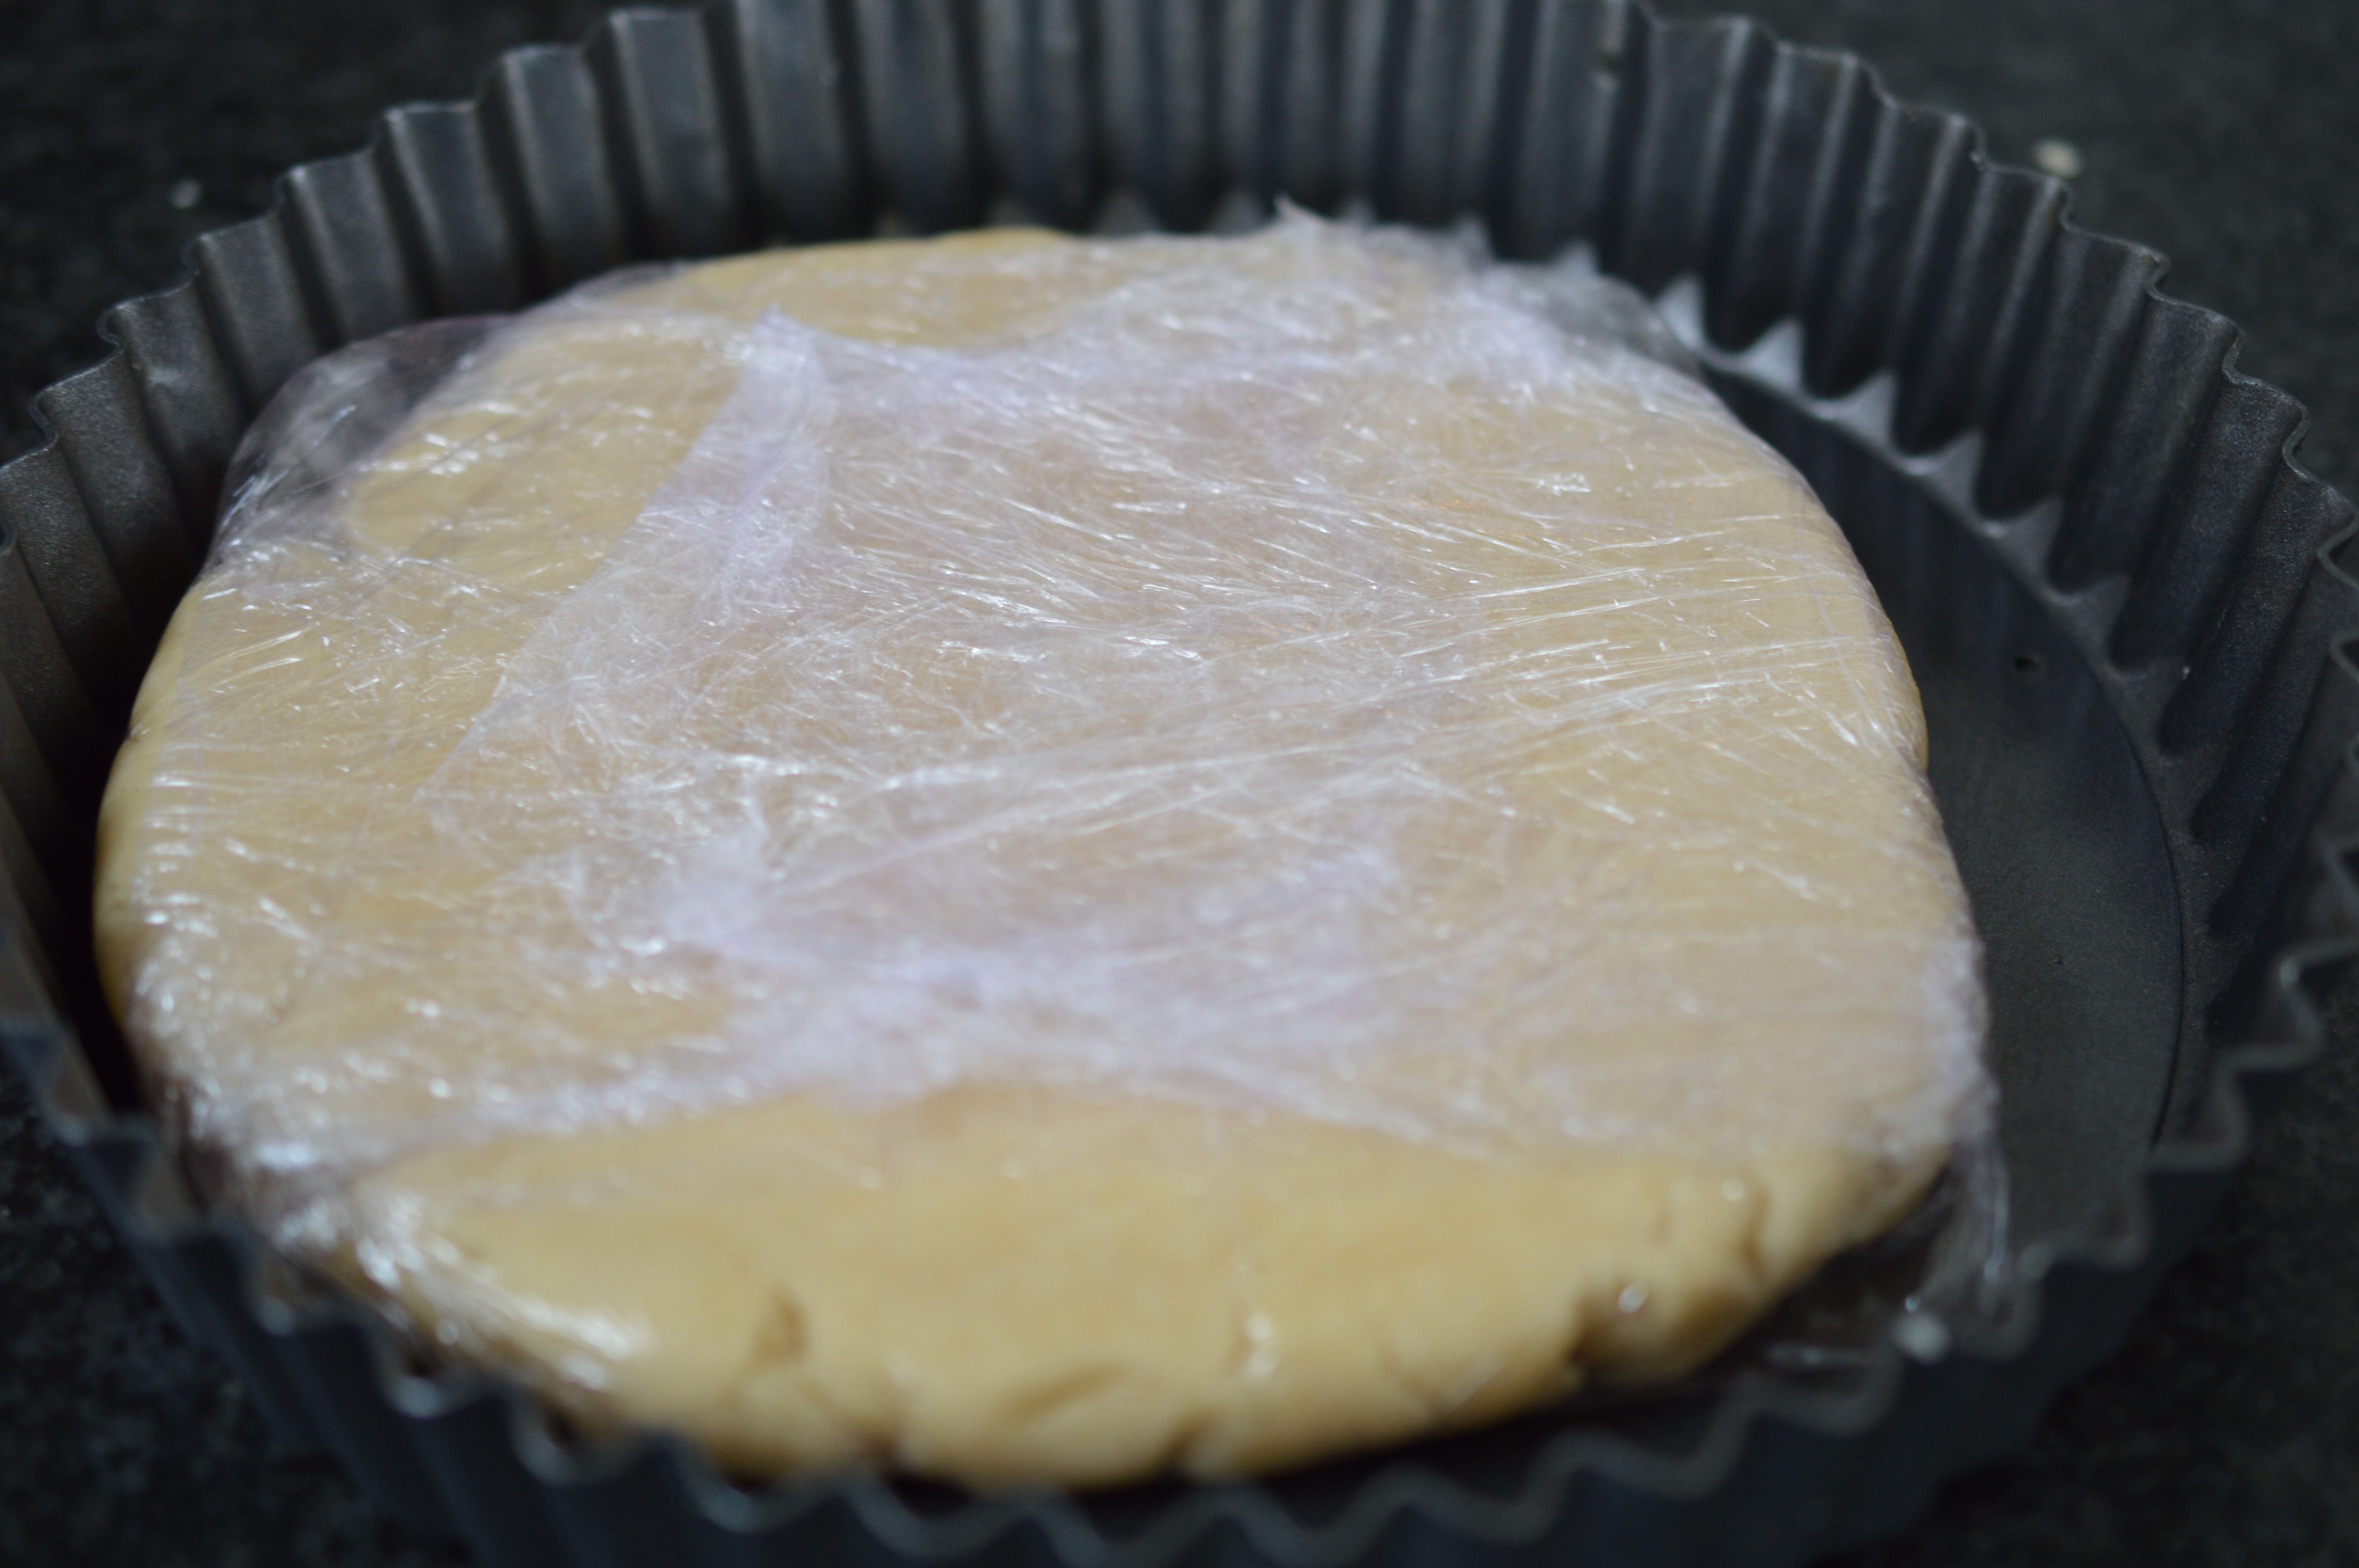
Form it into a flat disc and wrap in plastic cling. The flat is important. If you chill it as a ball the outside will come back to room temperature much quicker than the centre and you’ll struggle to roll it later. Put it – and the flan tin (why not?) – in the fridge. Chill for a minimum of 30 minutes. Longer is absolutely fine …
But assuming you are going to push on … turn on your oven to heat up to Gas Mark 6 or 400°F. Take the 7″/18cm flan tin from the fridge and grease it well. I brush melted butter on mine. My mum used old butter wrappers. Then return it to the fridge.
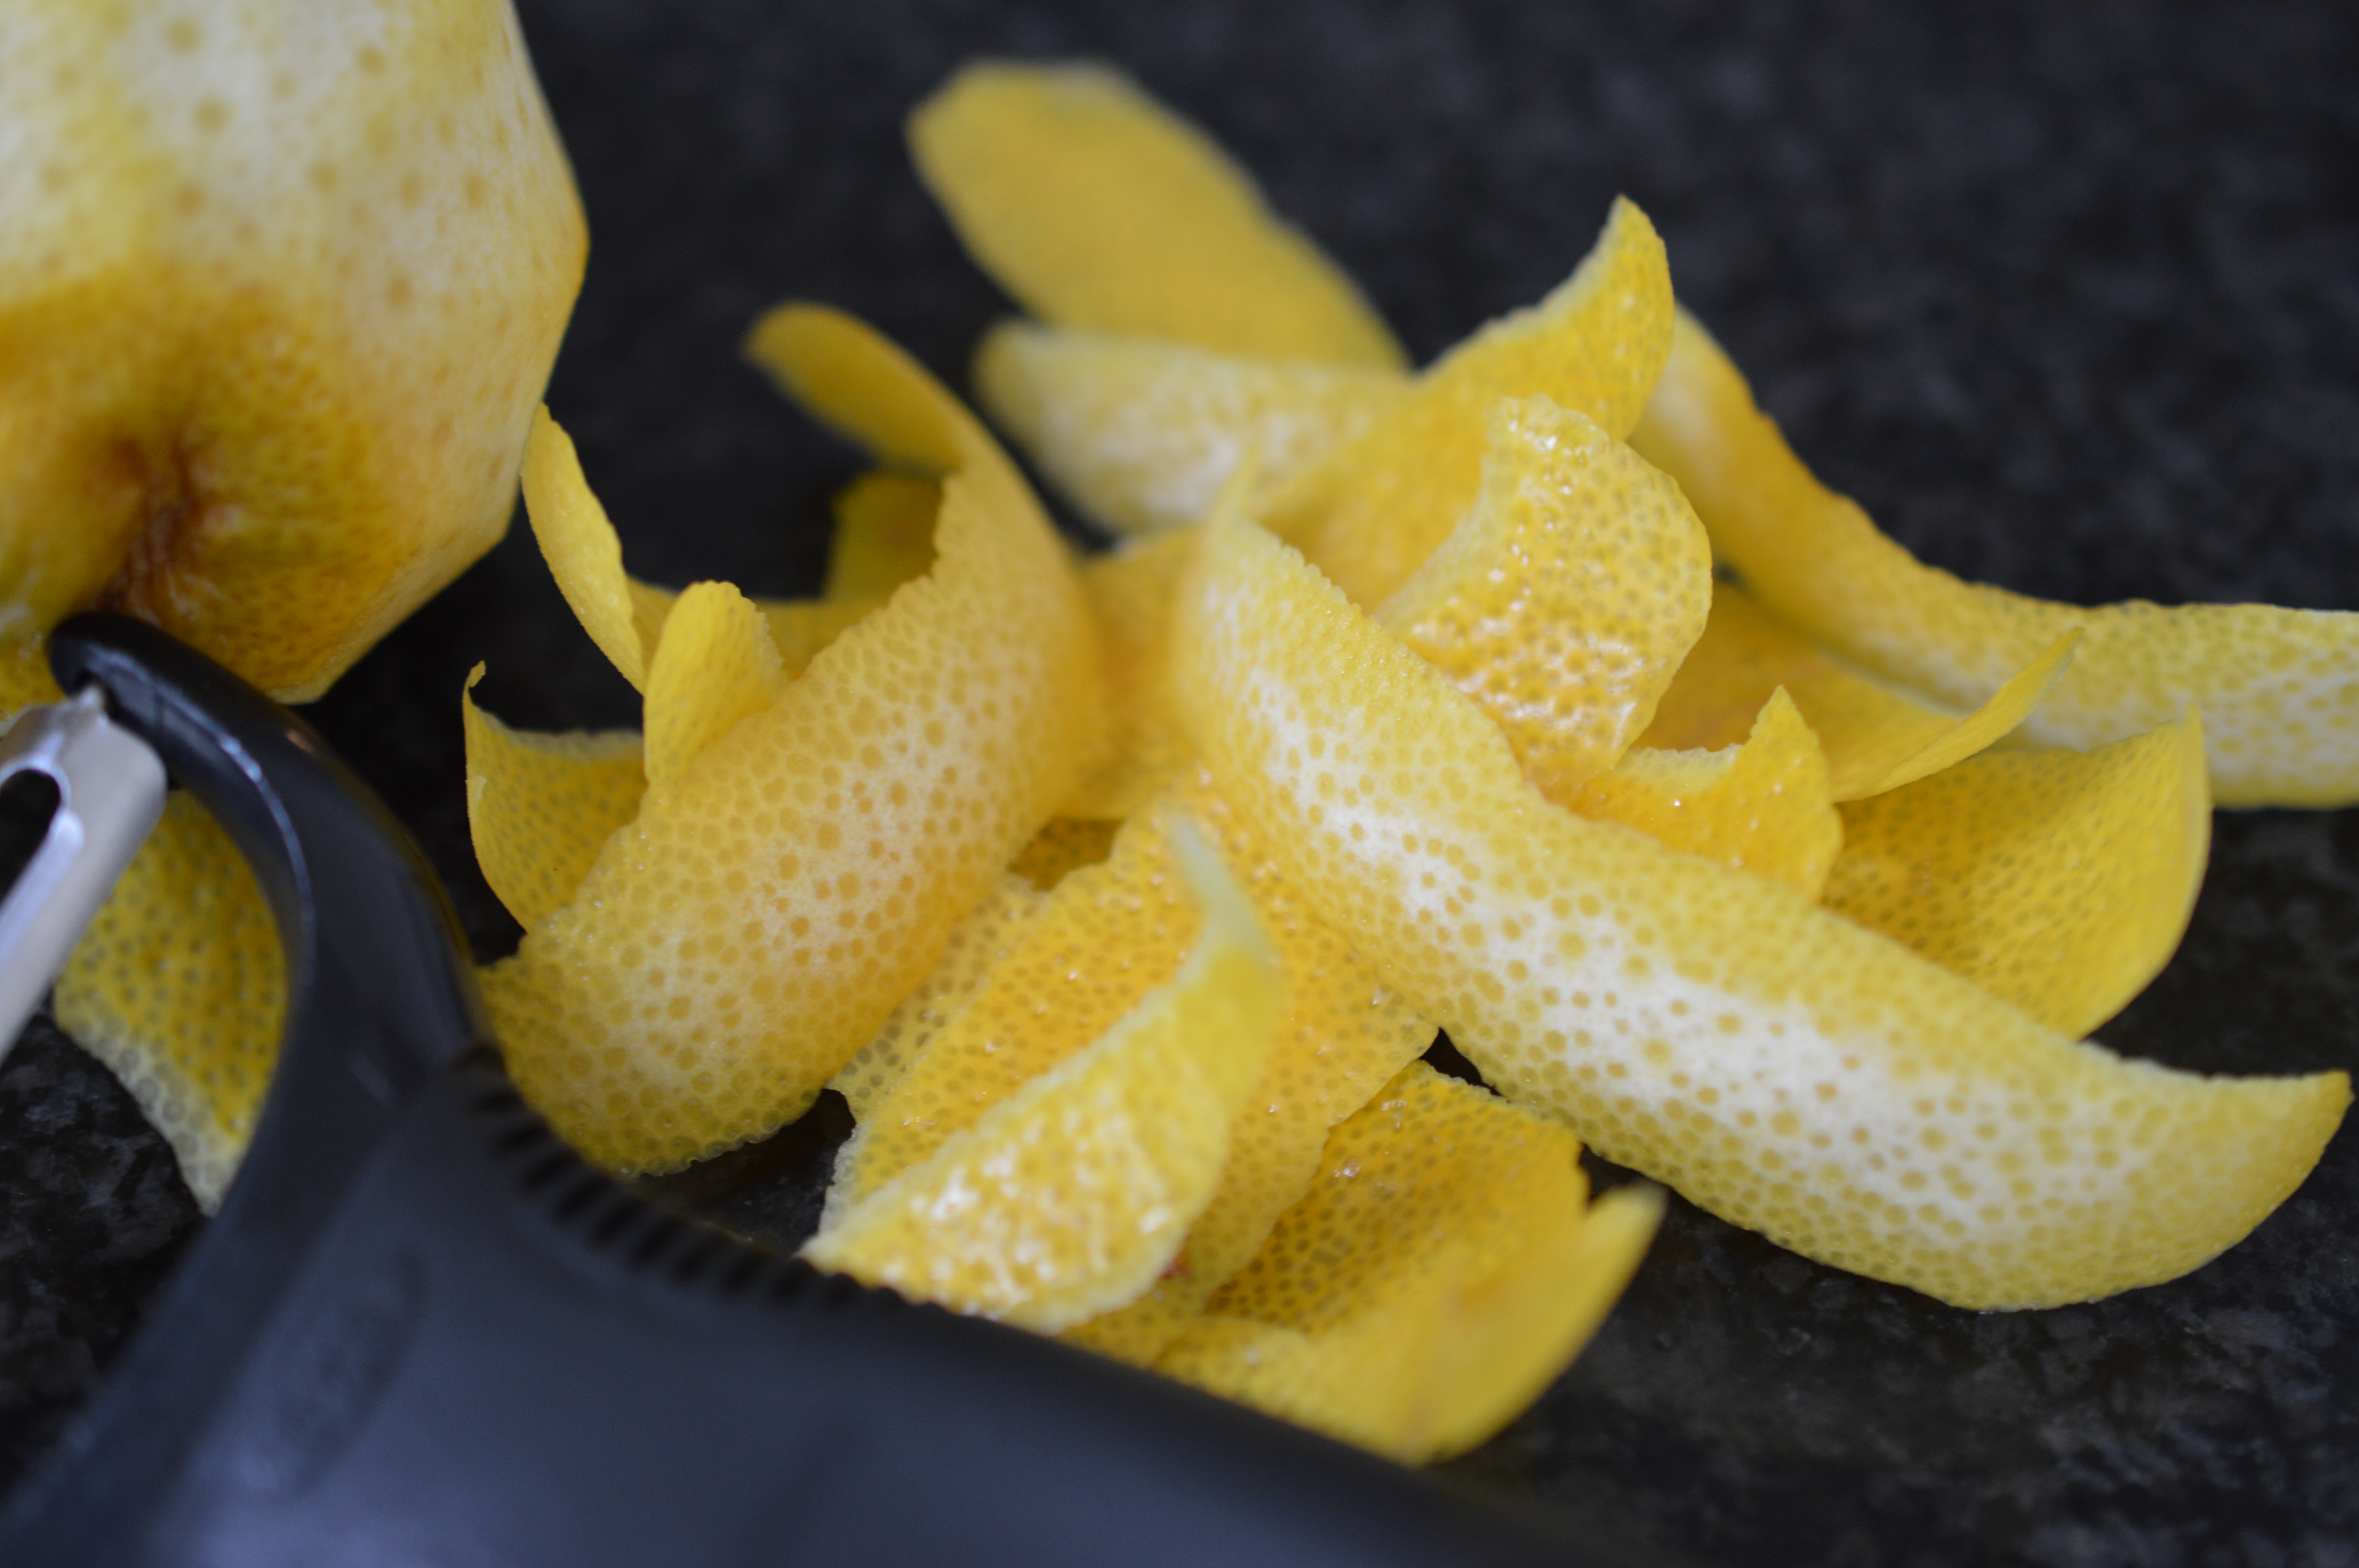
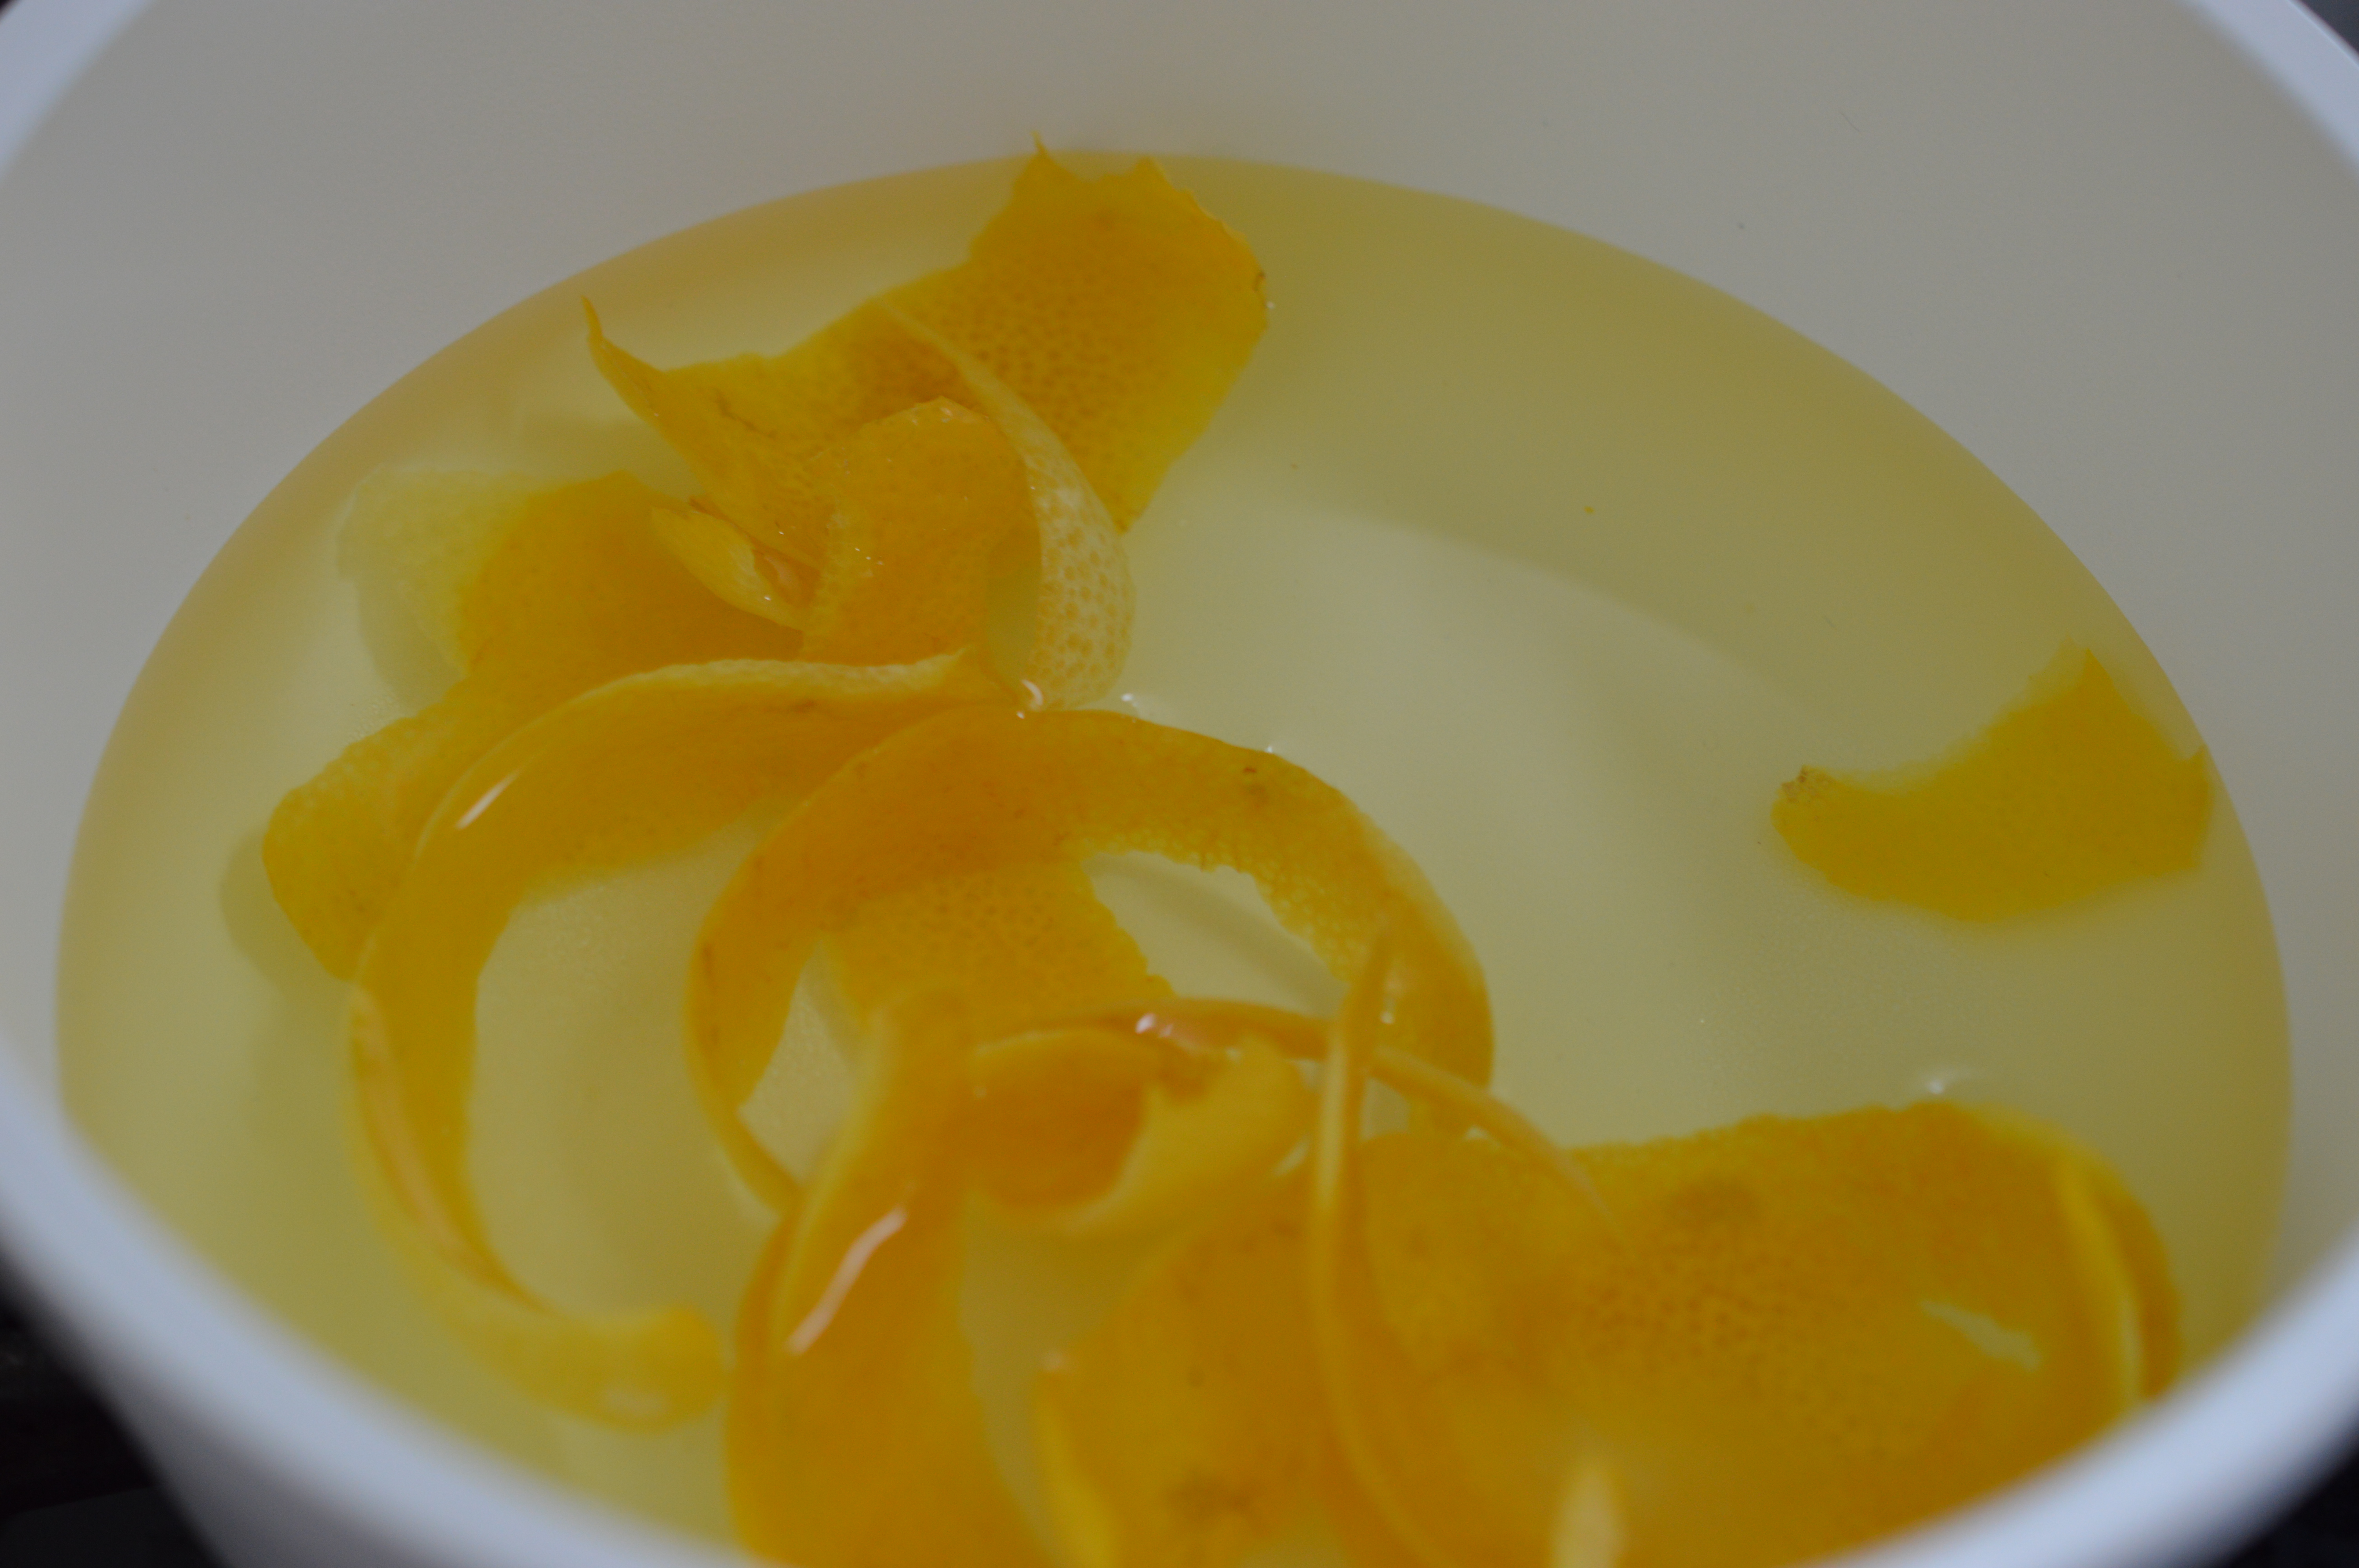
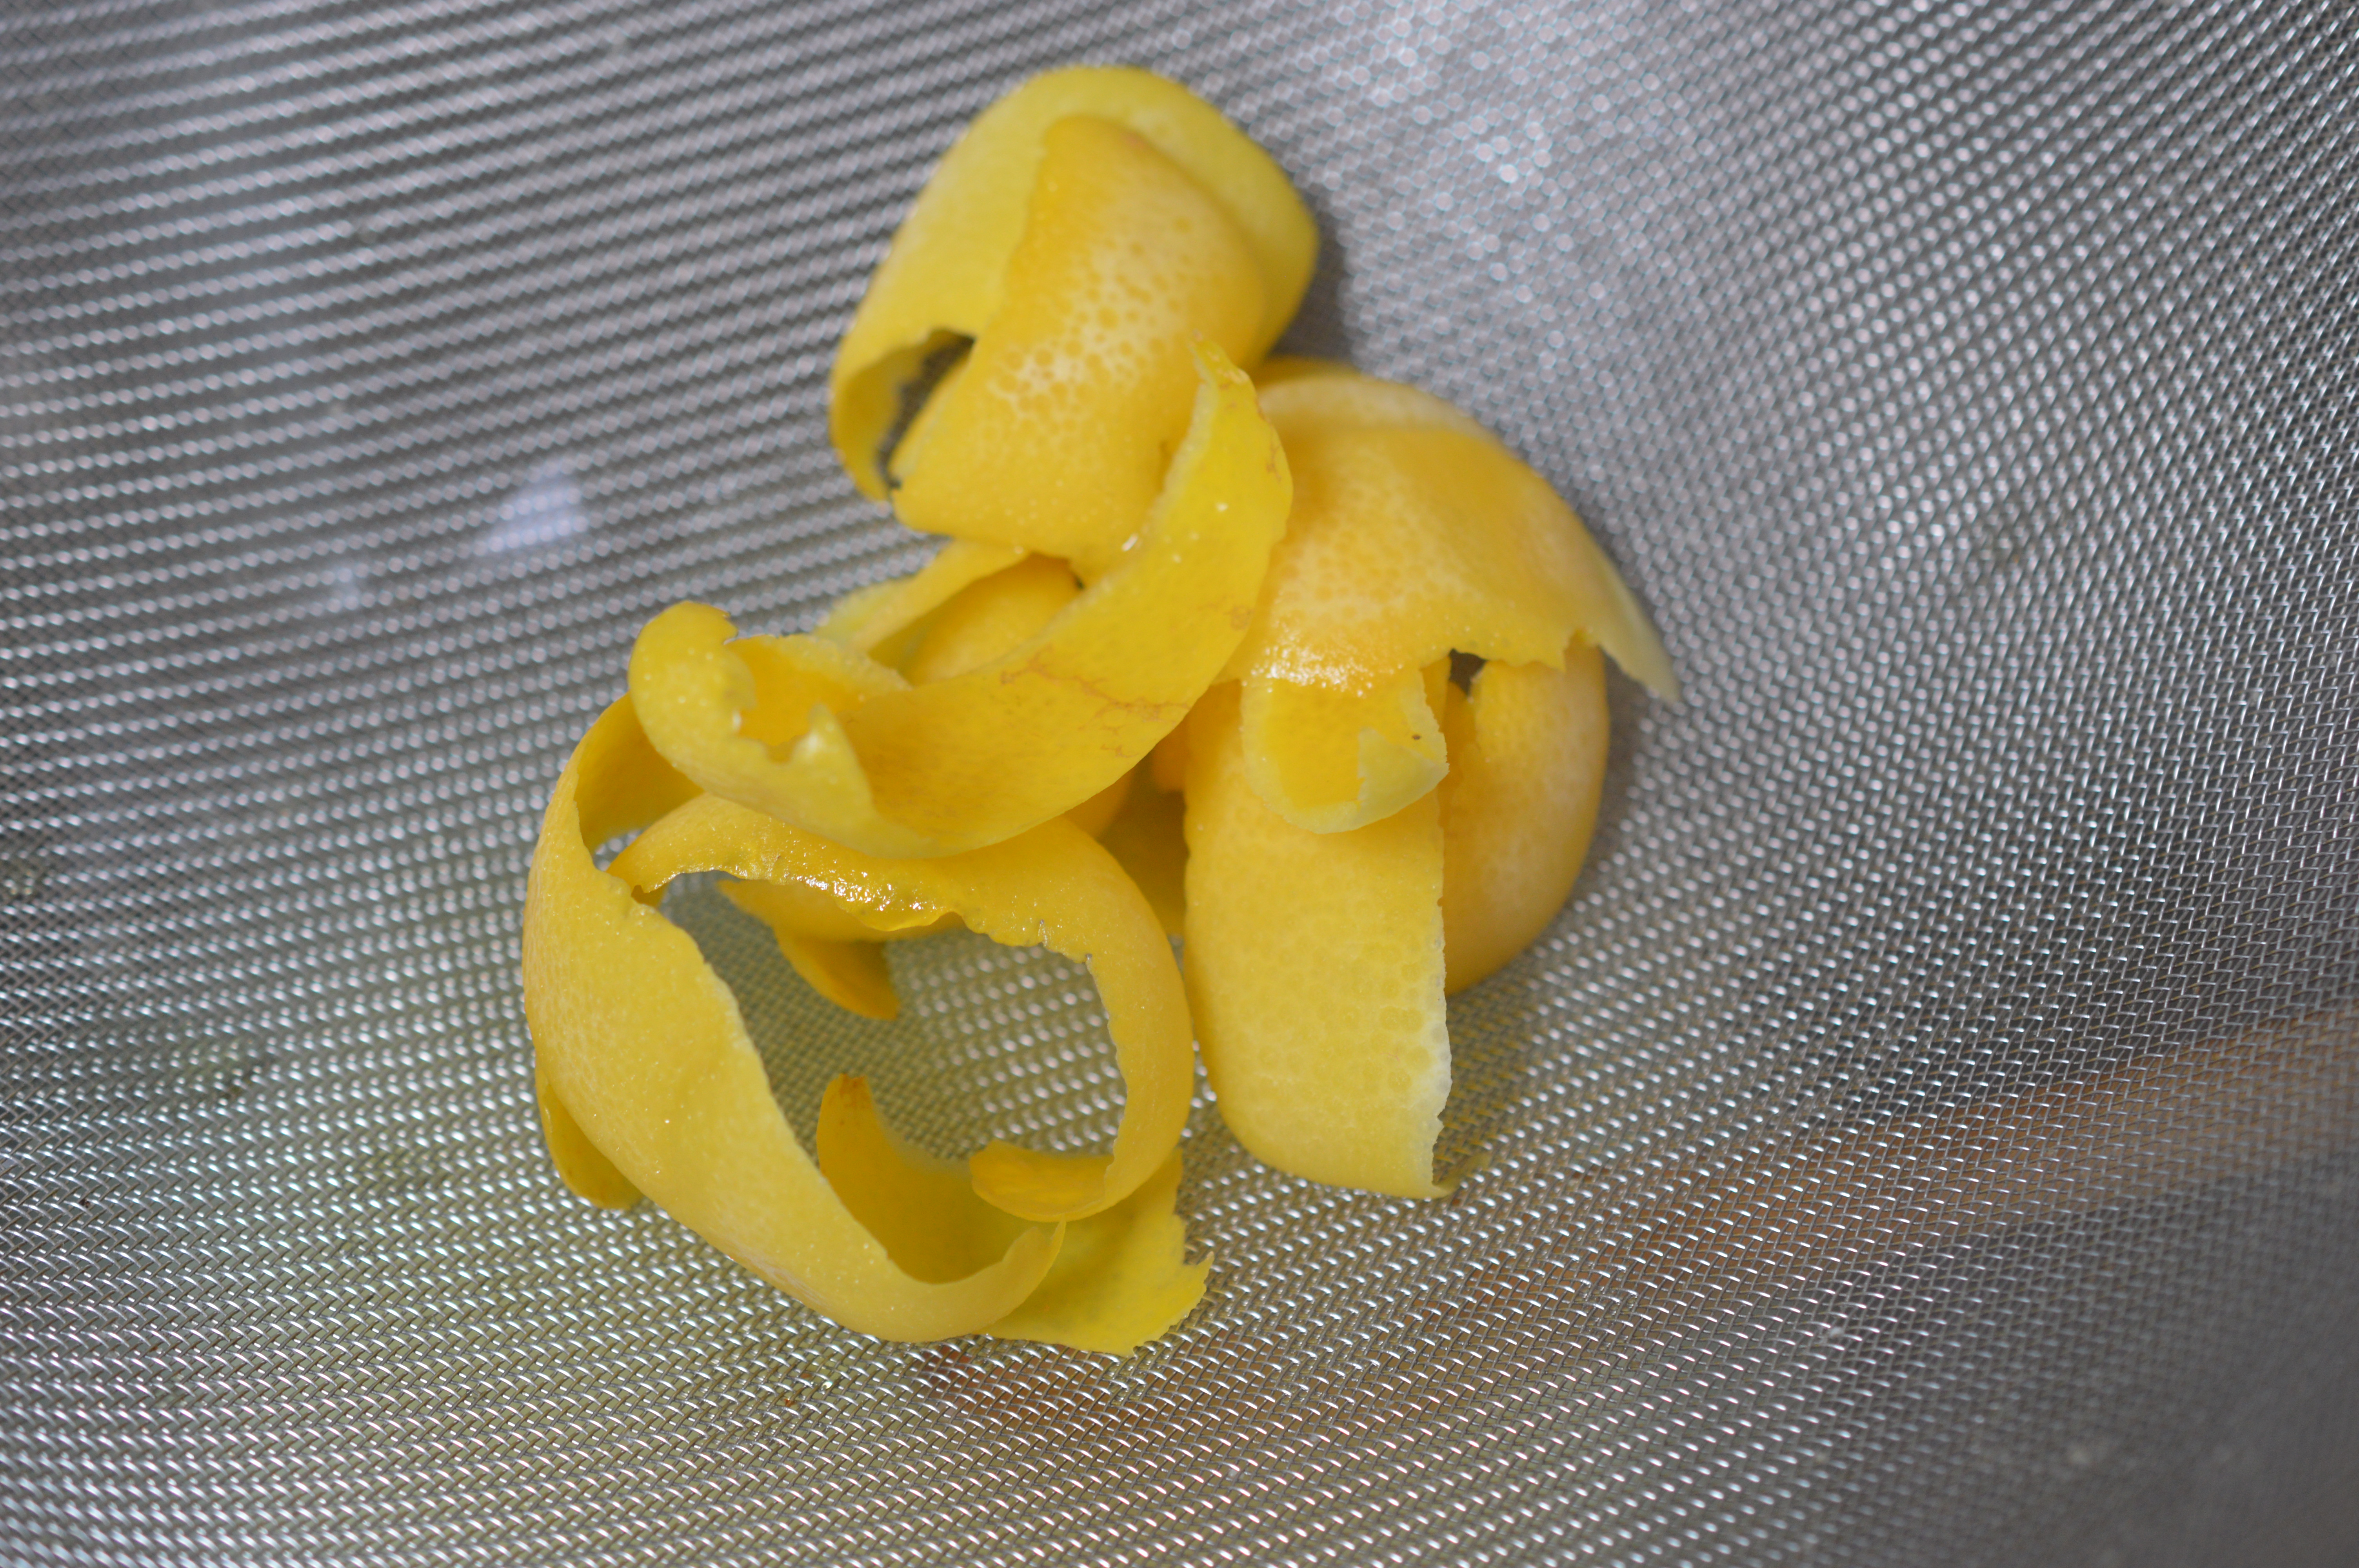
Now it’s the lemony filling. Peel your lemon.
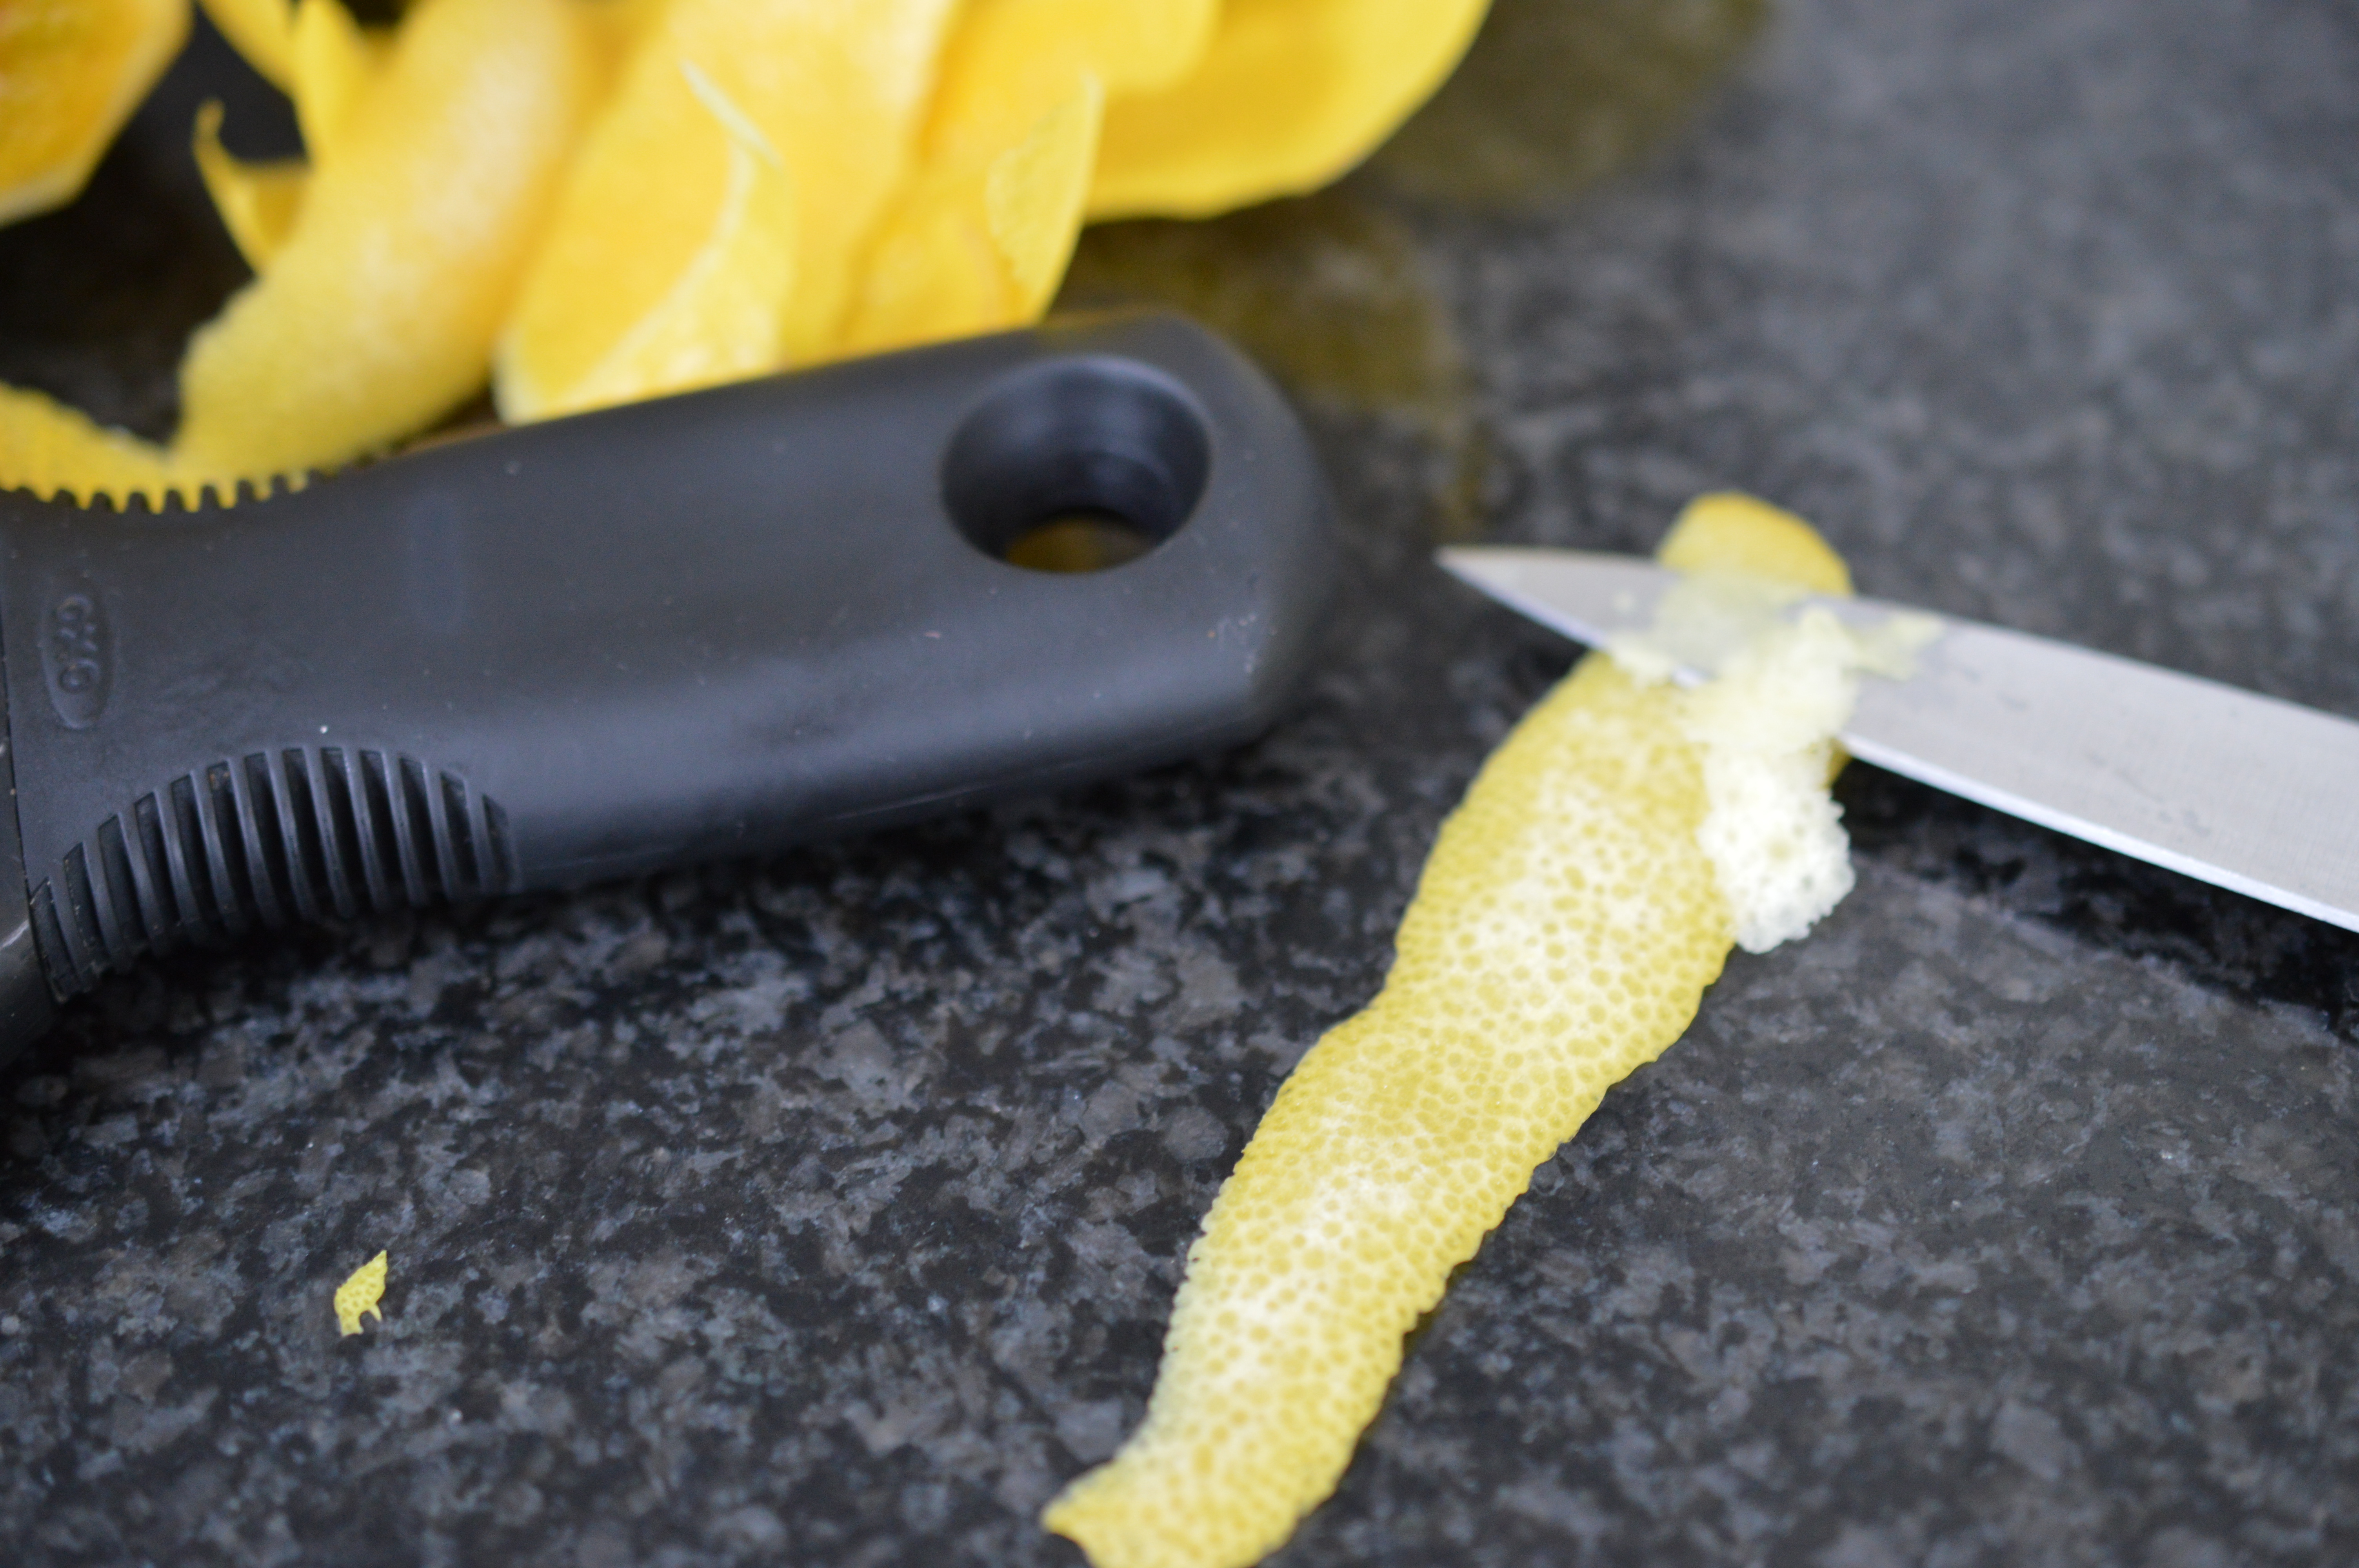
If you’ve got any pith (the white part) on your peel, get rid of it. It’s bitter.
Pop it into a saucepan with the water and granulated sugar. Keep the heat low until the sugar has dissolved, then turn it up and bring to a boil. When it’s reached boiling point, turn off the heat.
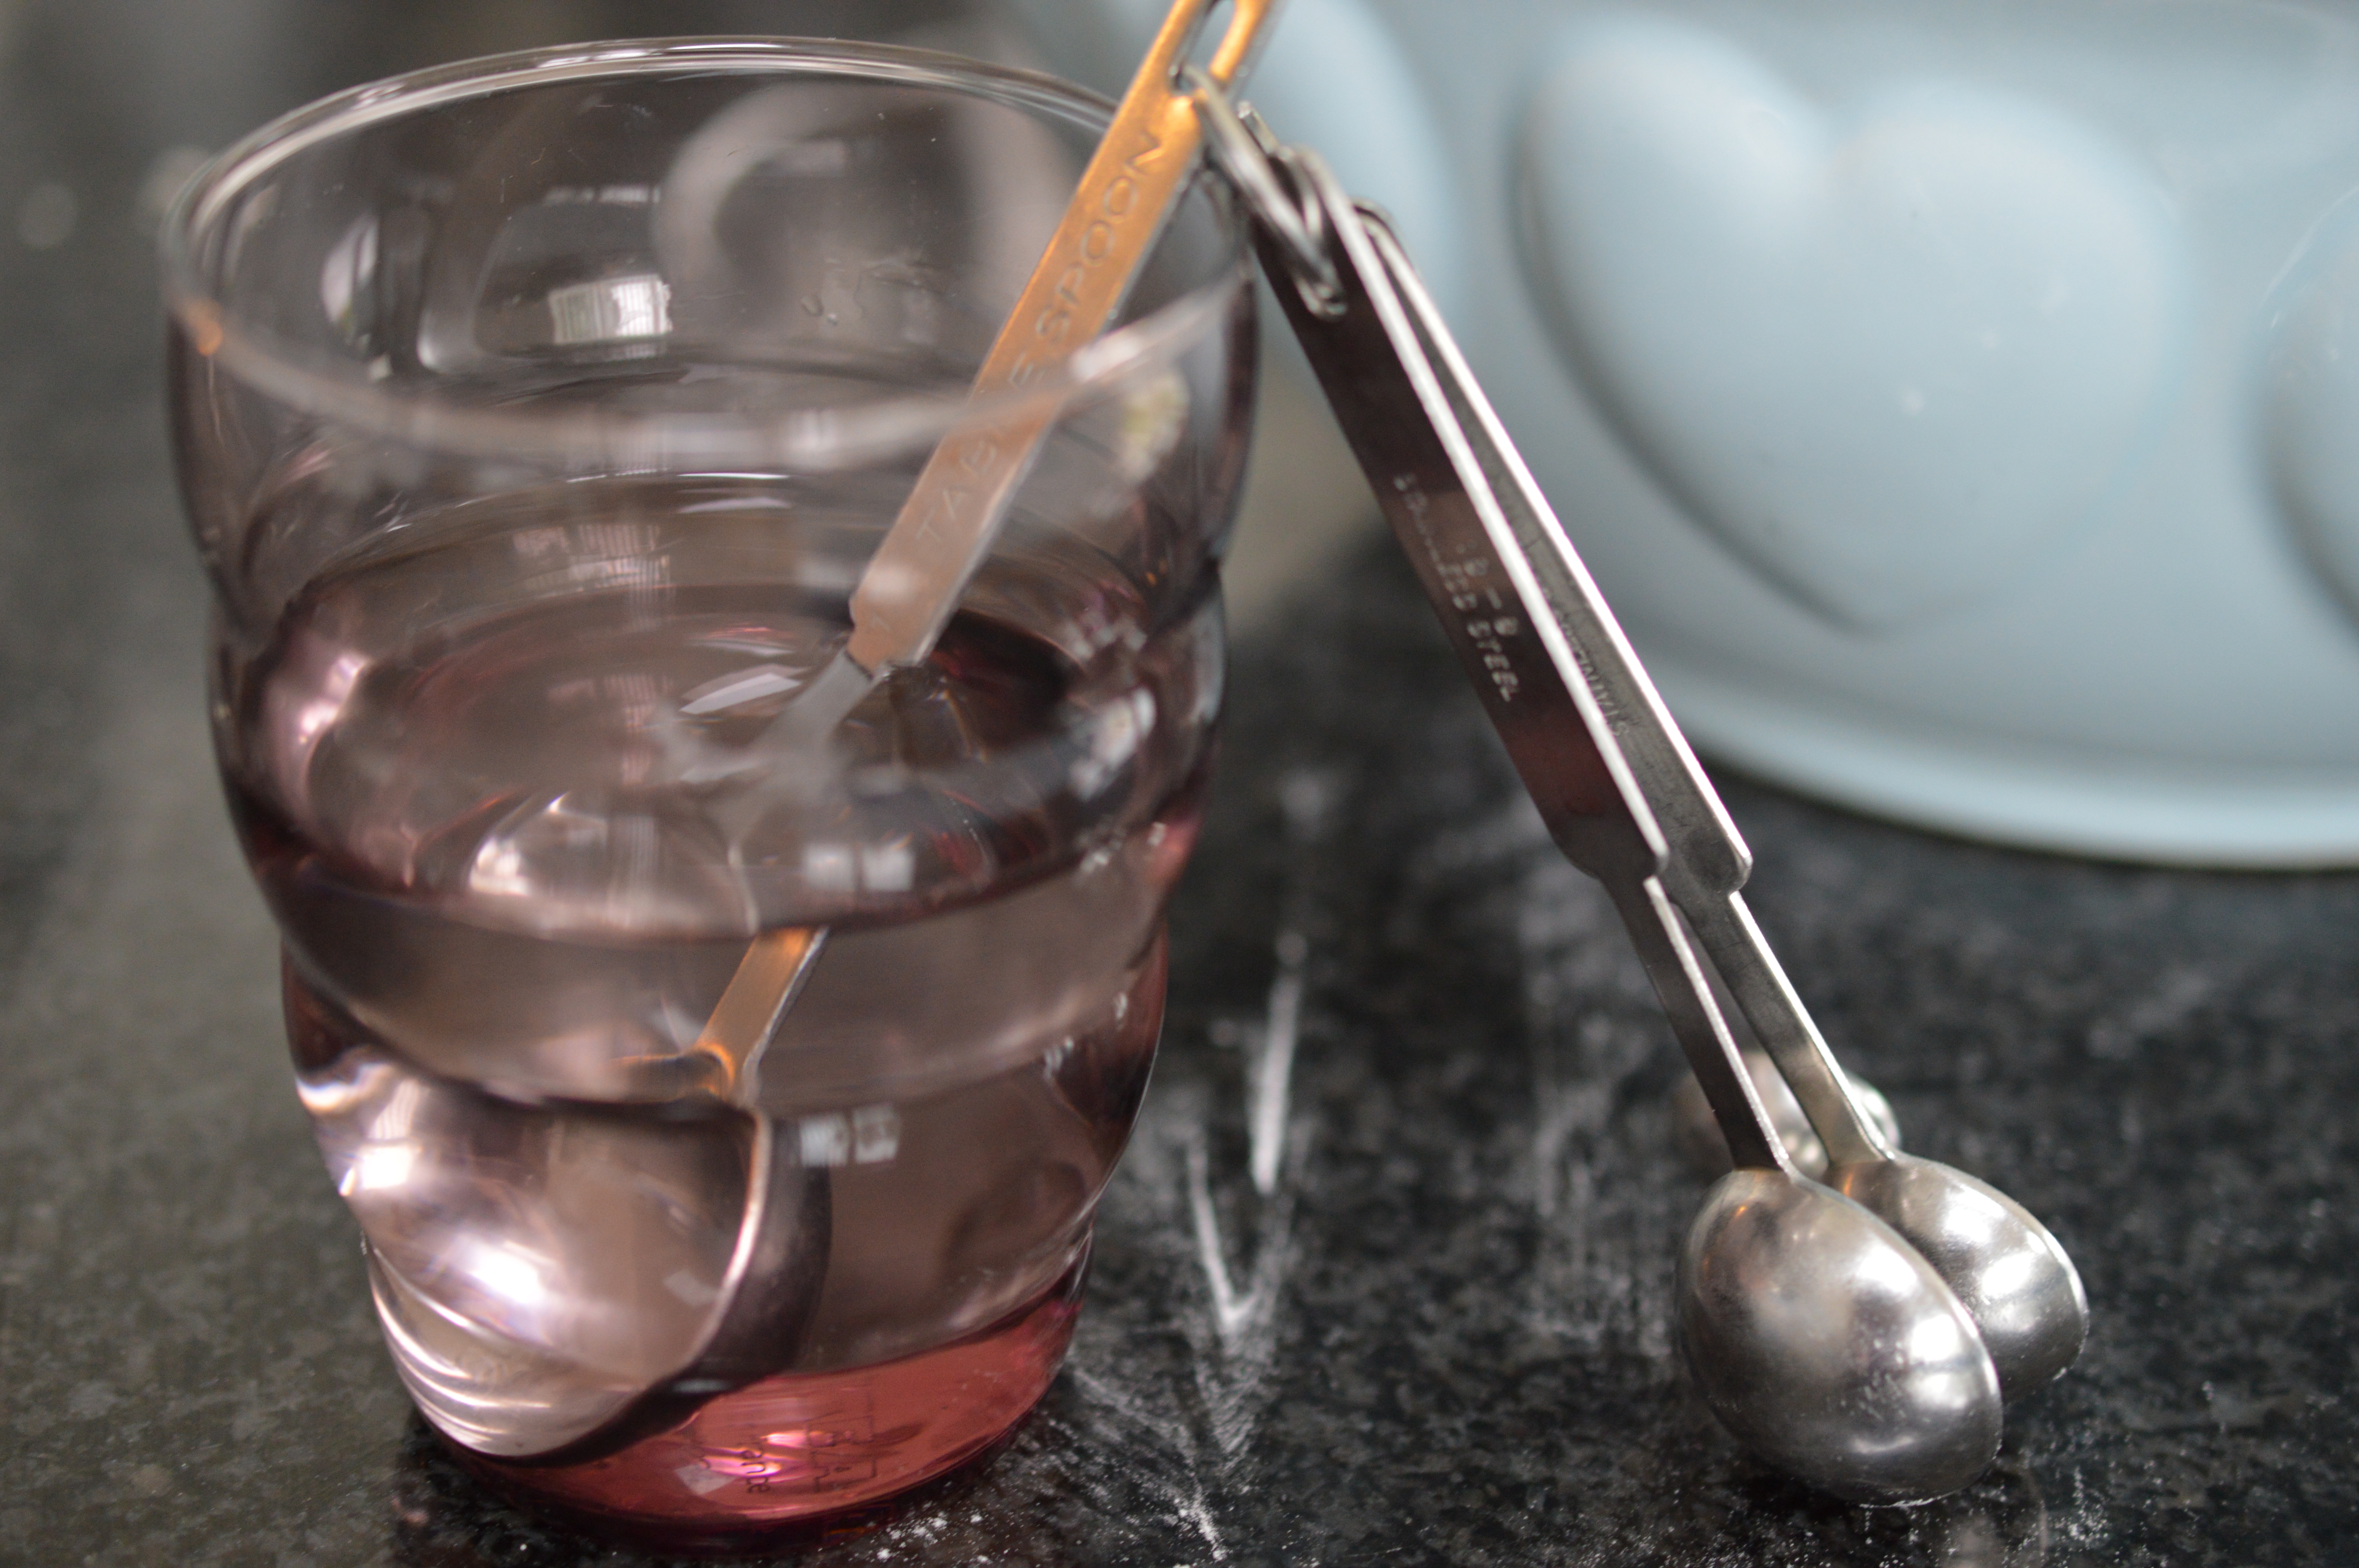
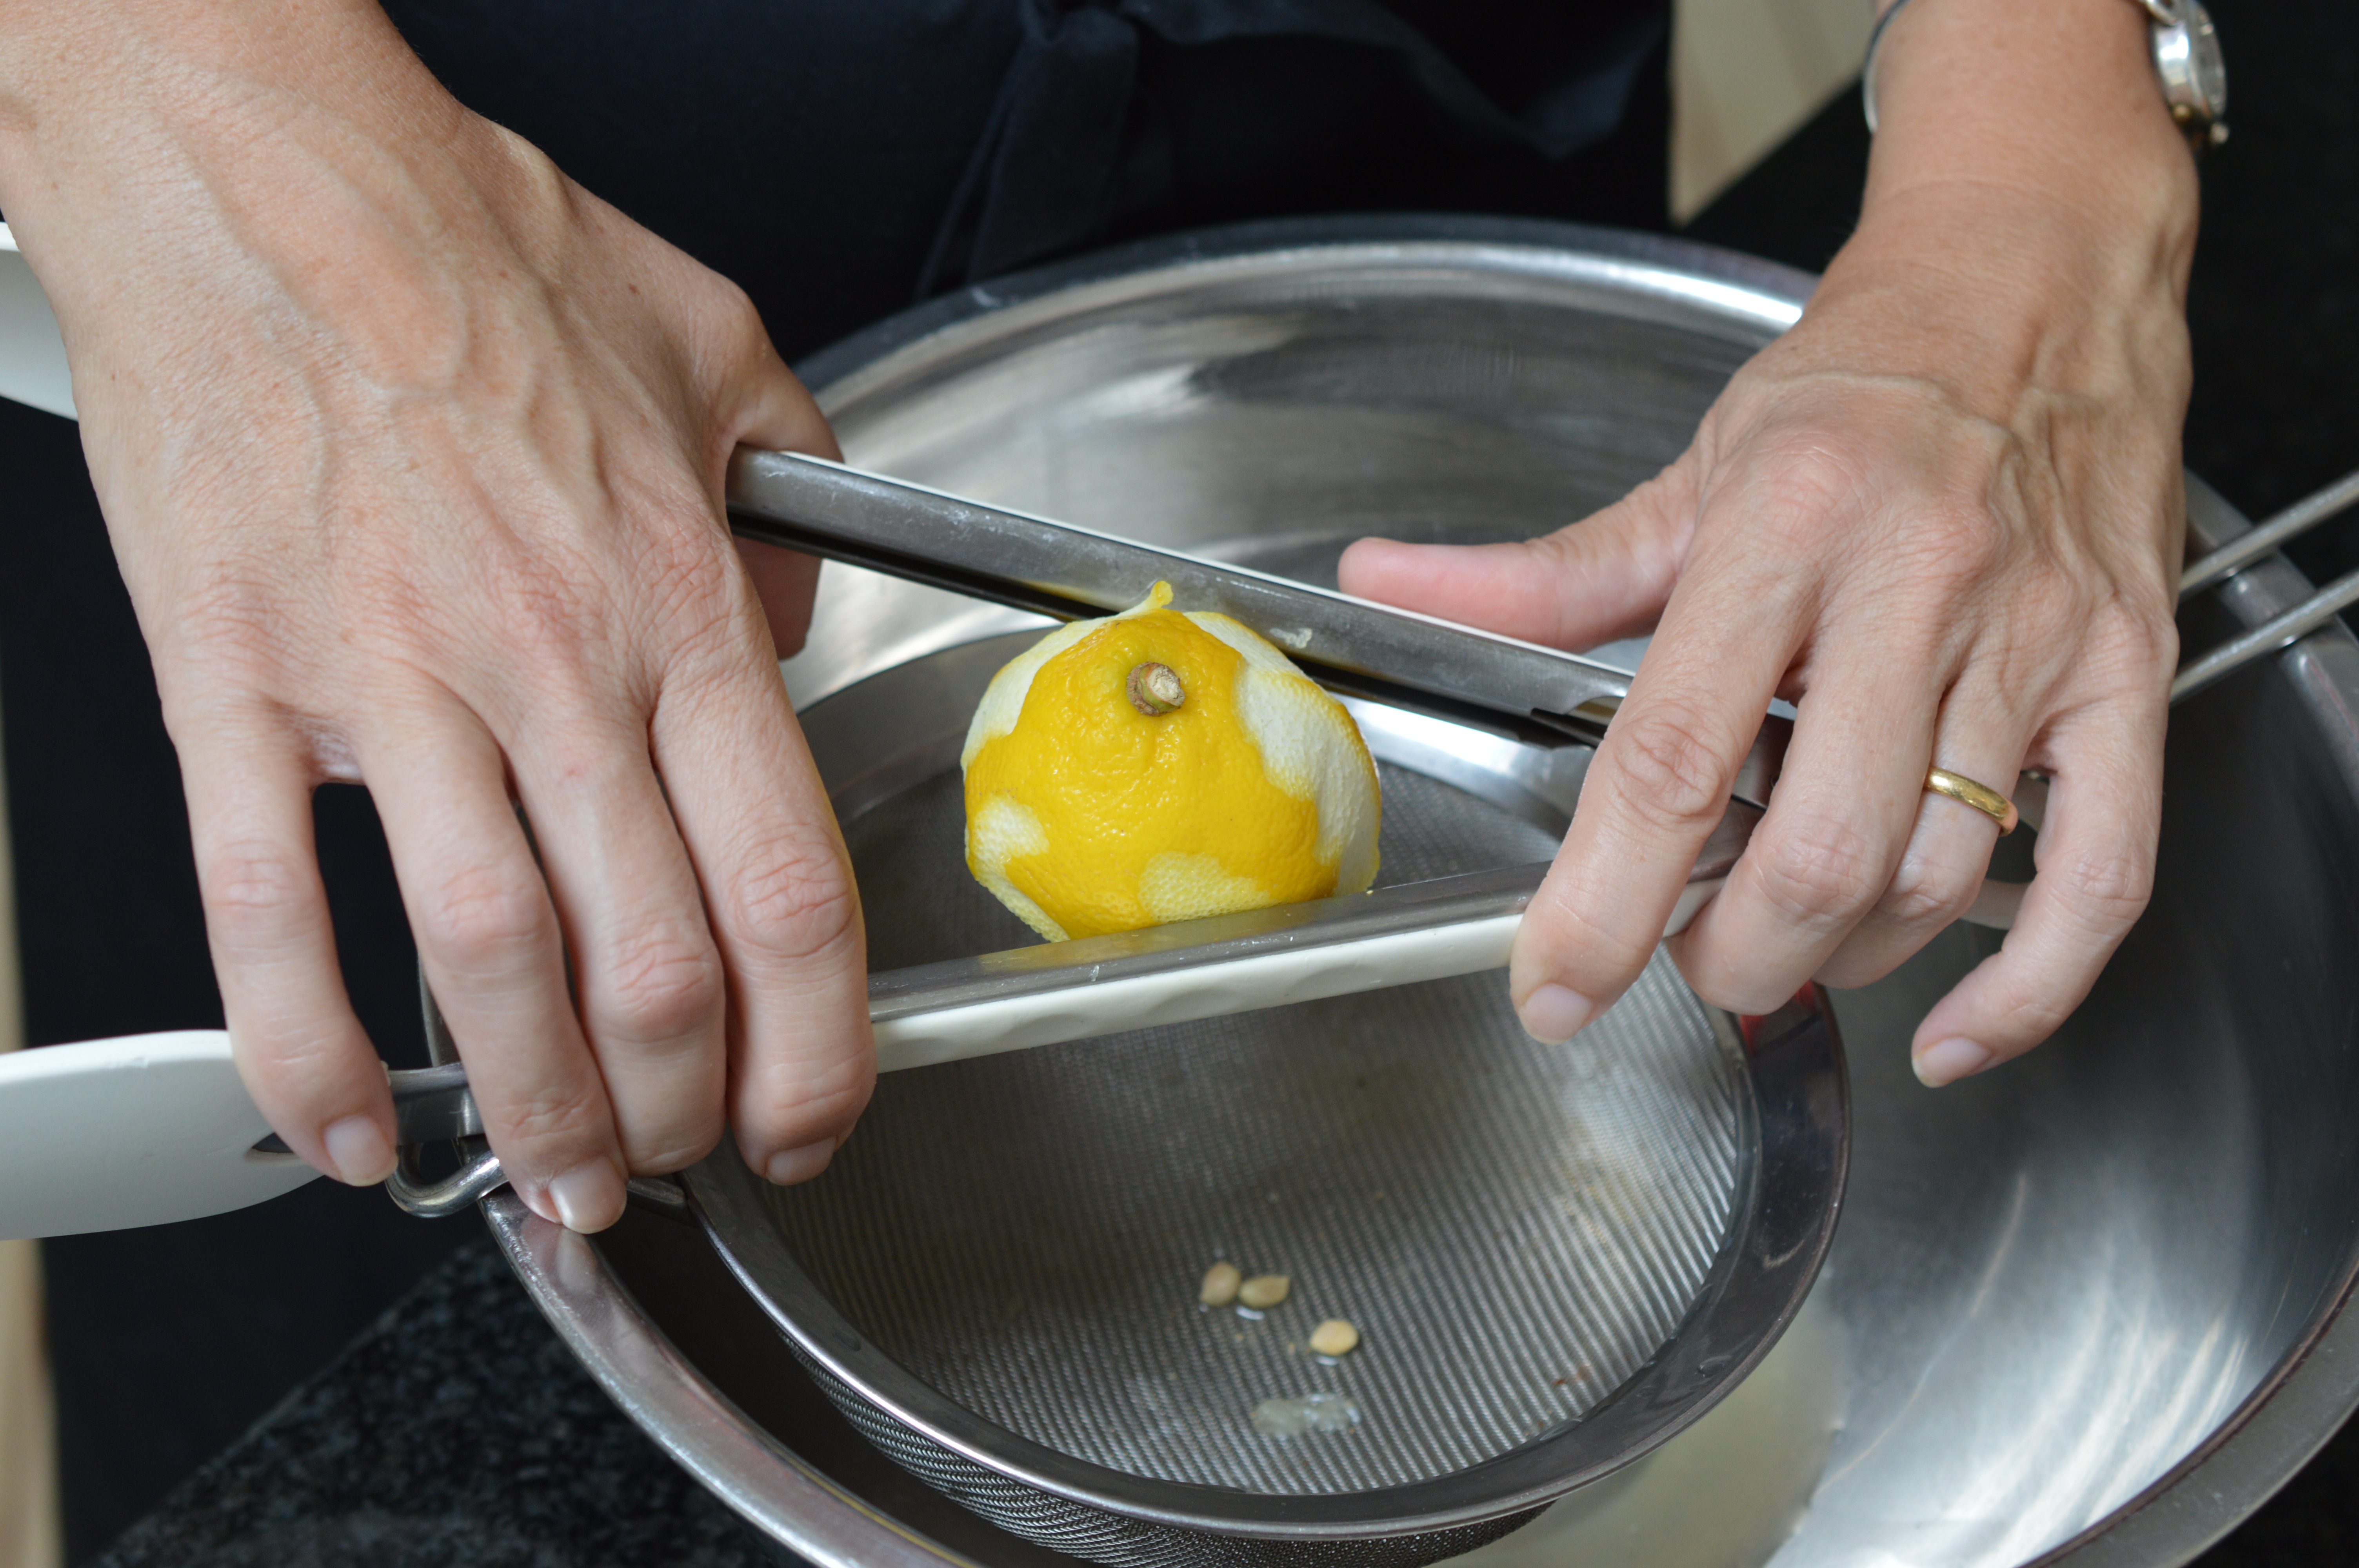
Meanwhile … squeeze the lemon.
You get more juice from a warm lemon so roll it on the your work-surface a few times. (I pop it in the Warming Oven of my Aga.) Assuming you don’t have the biceps of a chef and/or an appropriate gadget you can get much more juice by squeezing with your kitchen tongs.
Put 3 tablespoons of lemon juice in a large bowl and mix together with 2 level tablespoons of cornflour. (Australian cooks – see note at the bottom as your tablespoons measure differently from mine.)
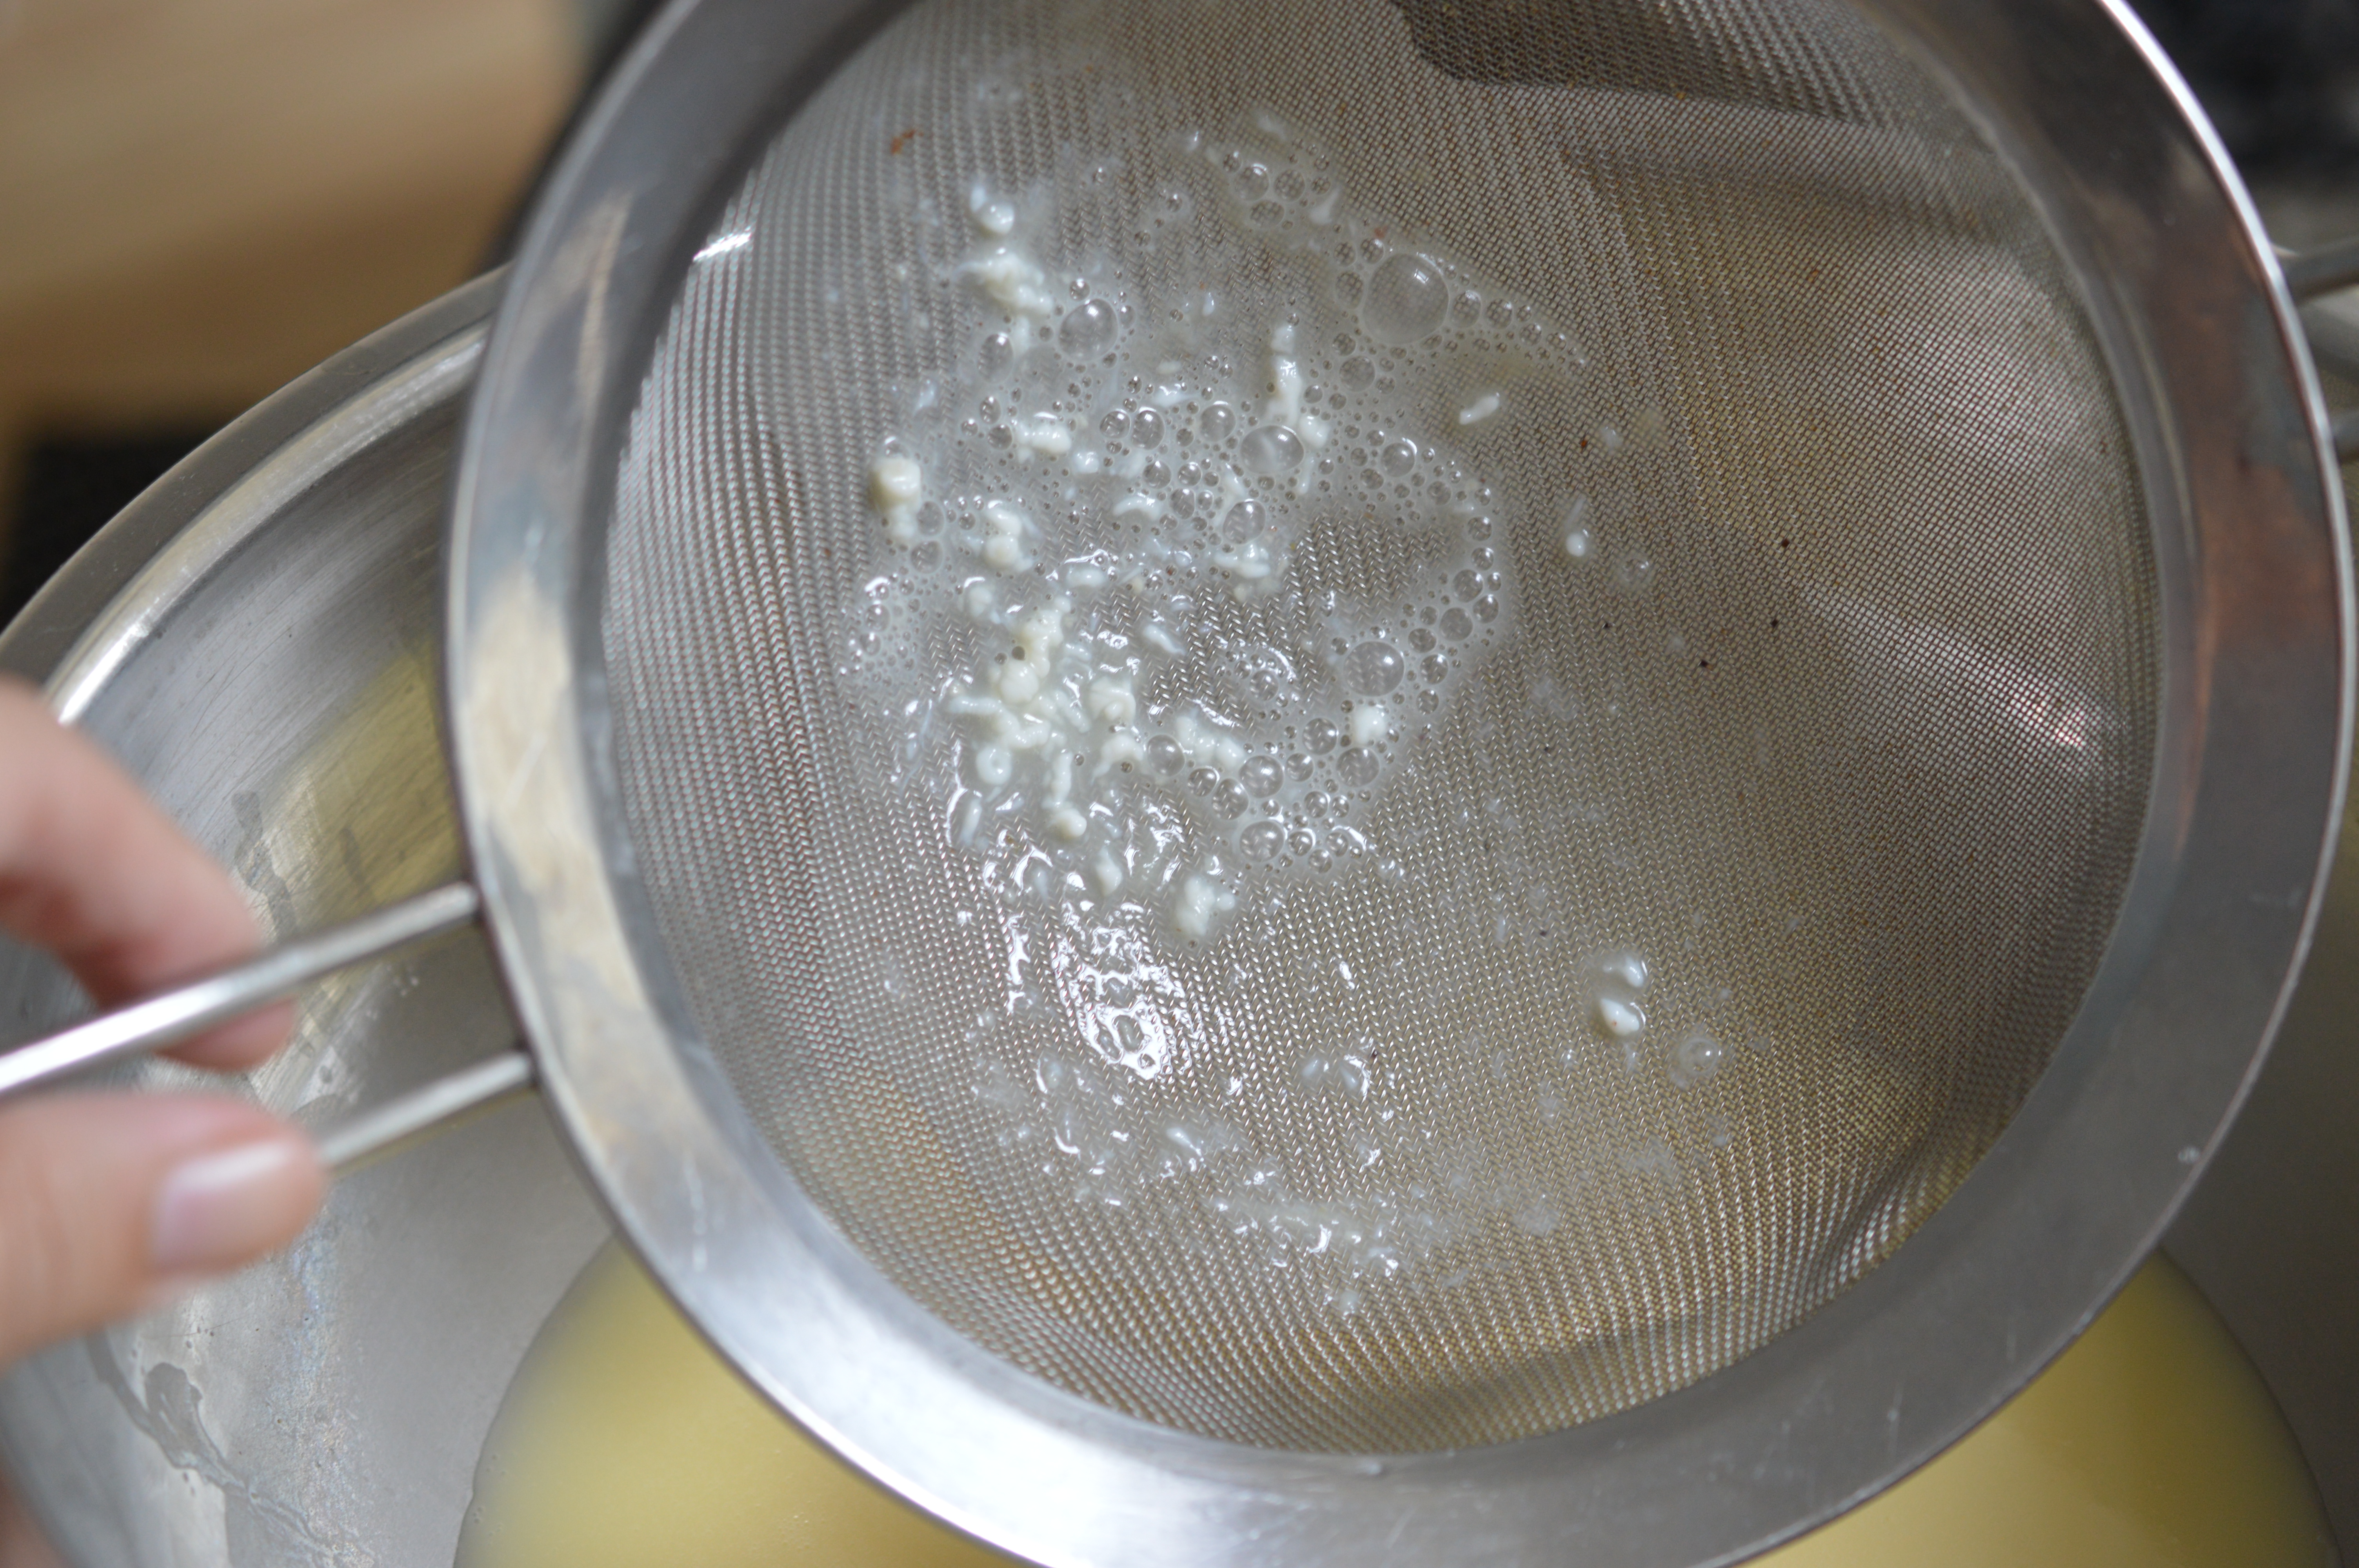
Pour the hot sugar syrup through a sieve into the cornflour and lemon juice mix and stir.
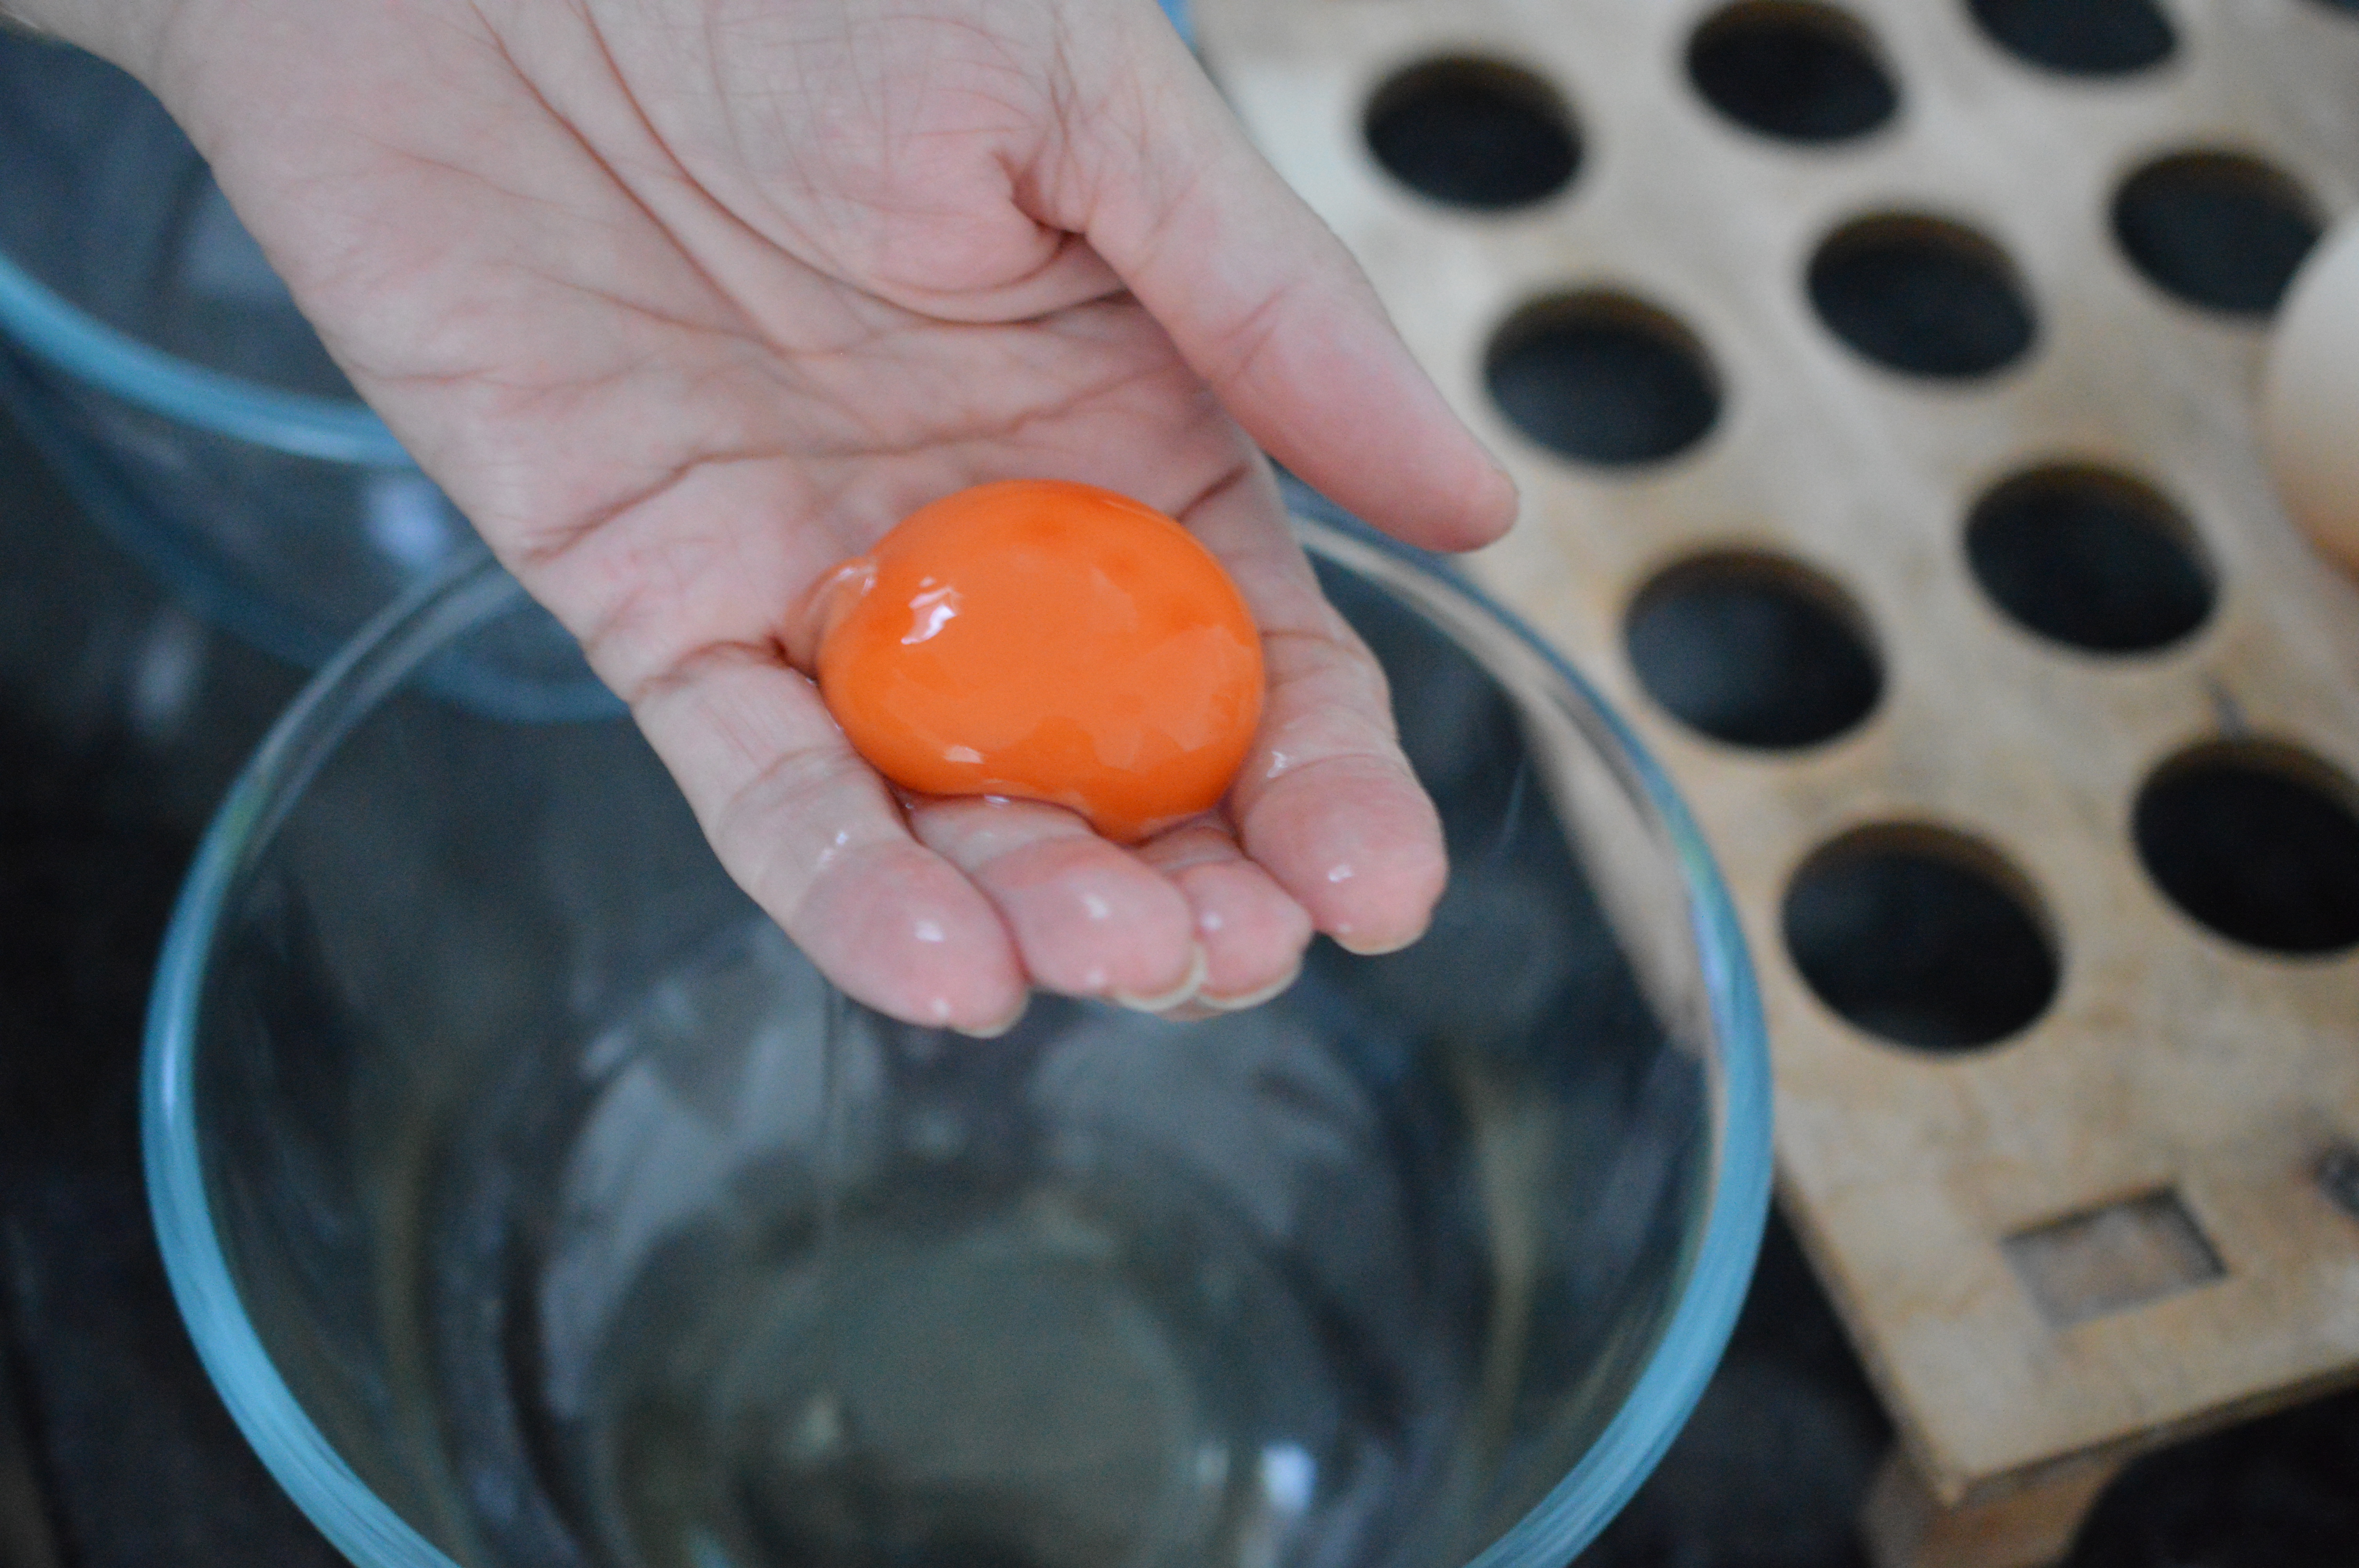
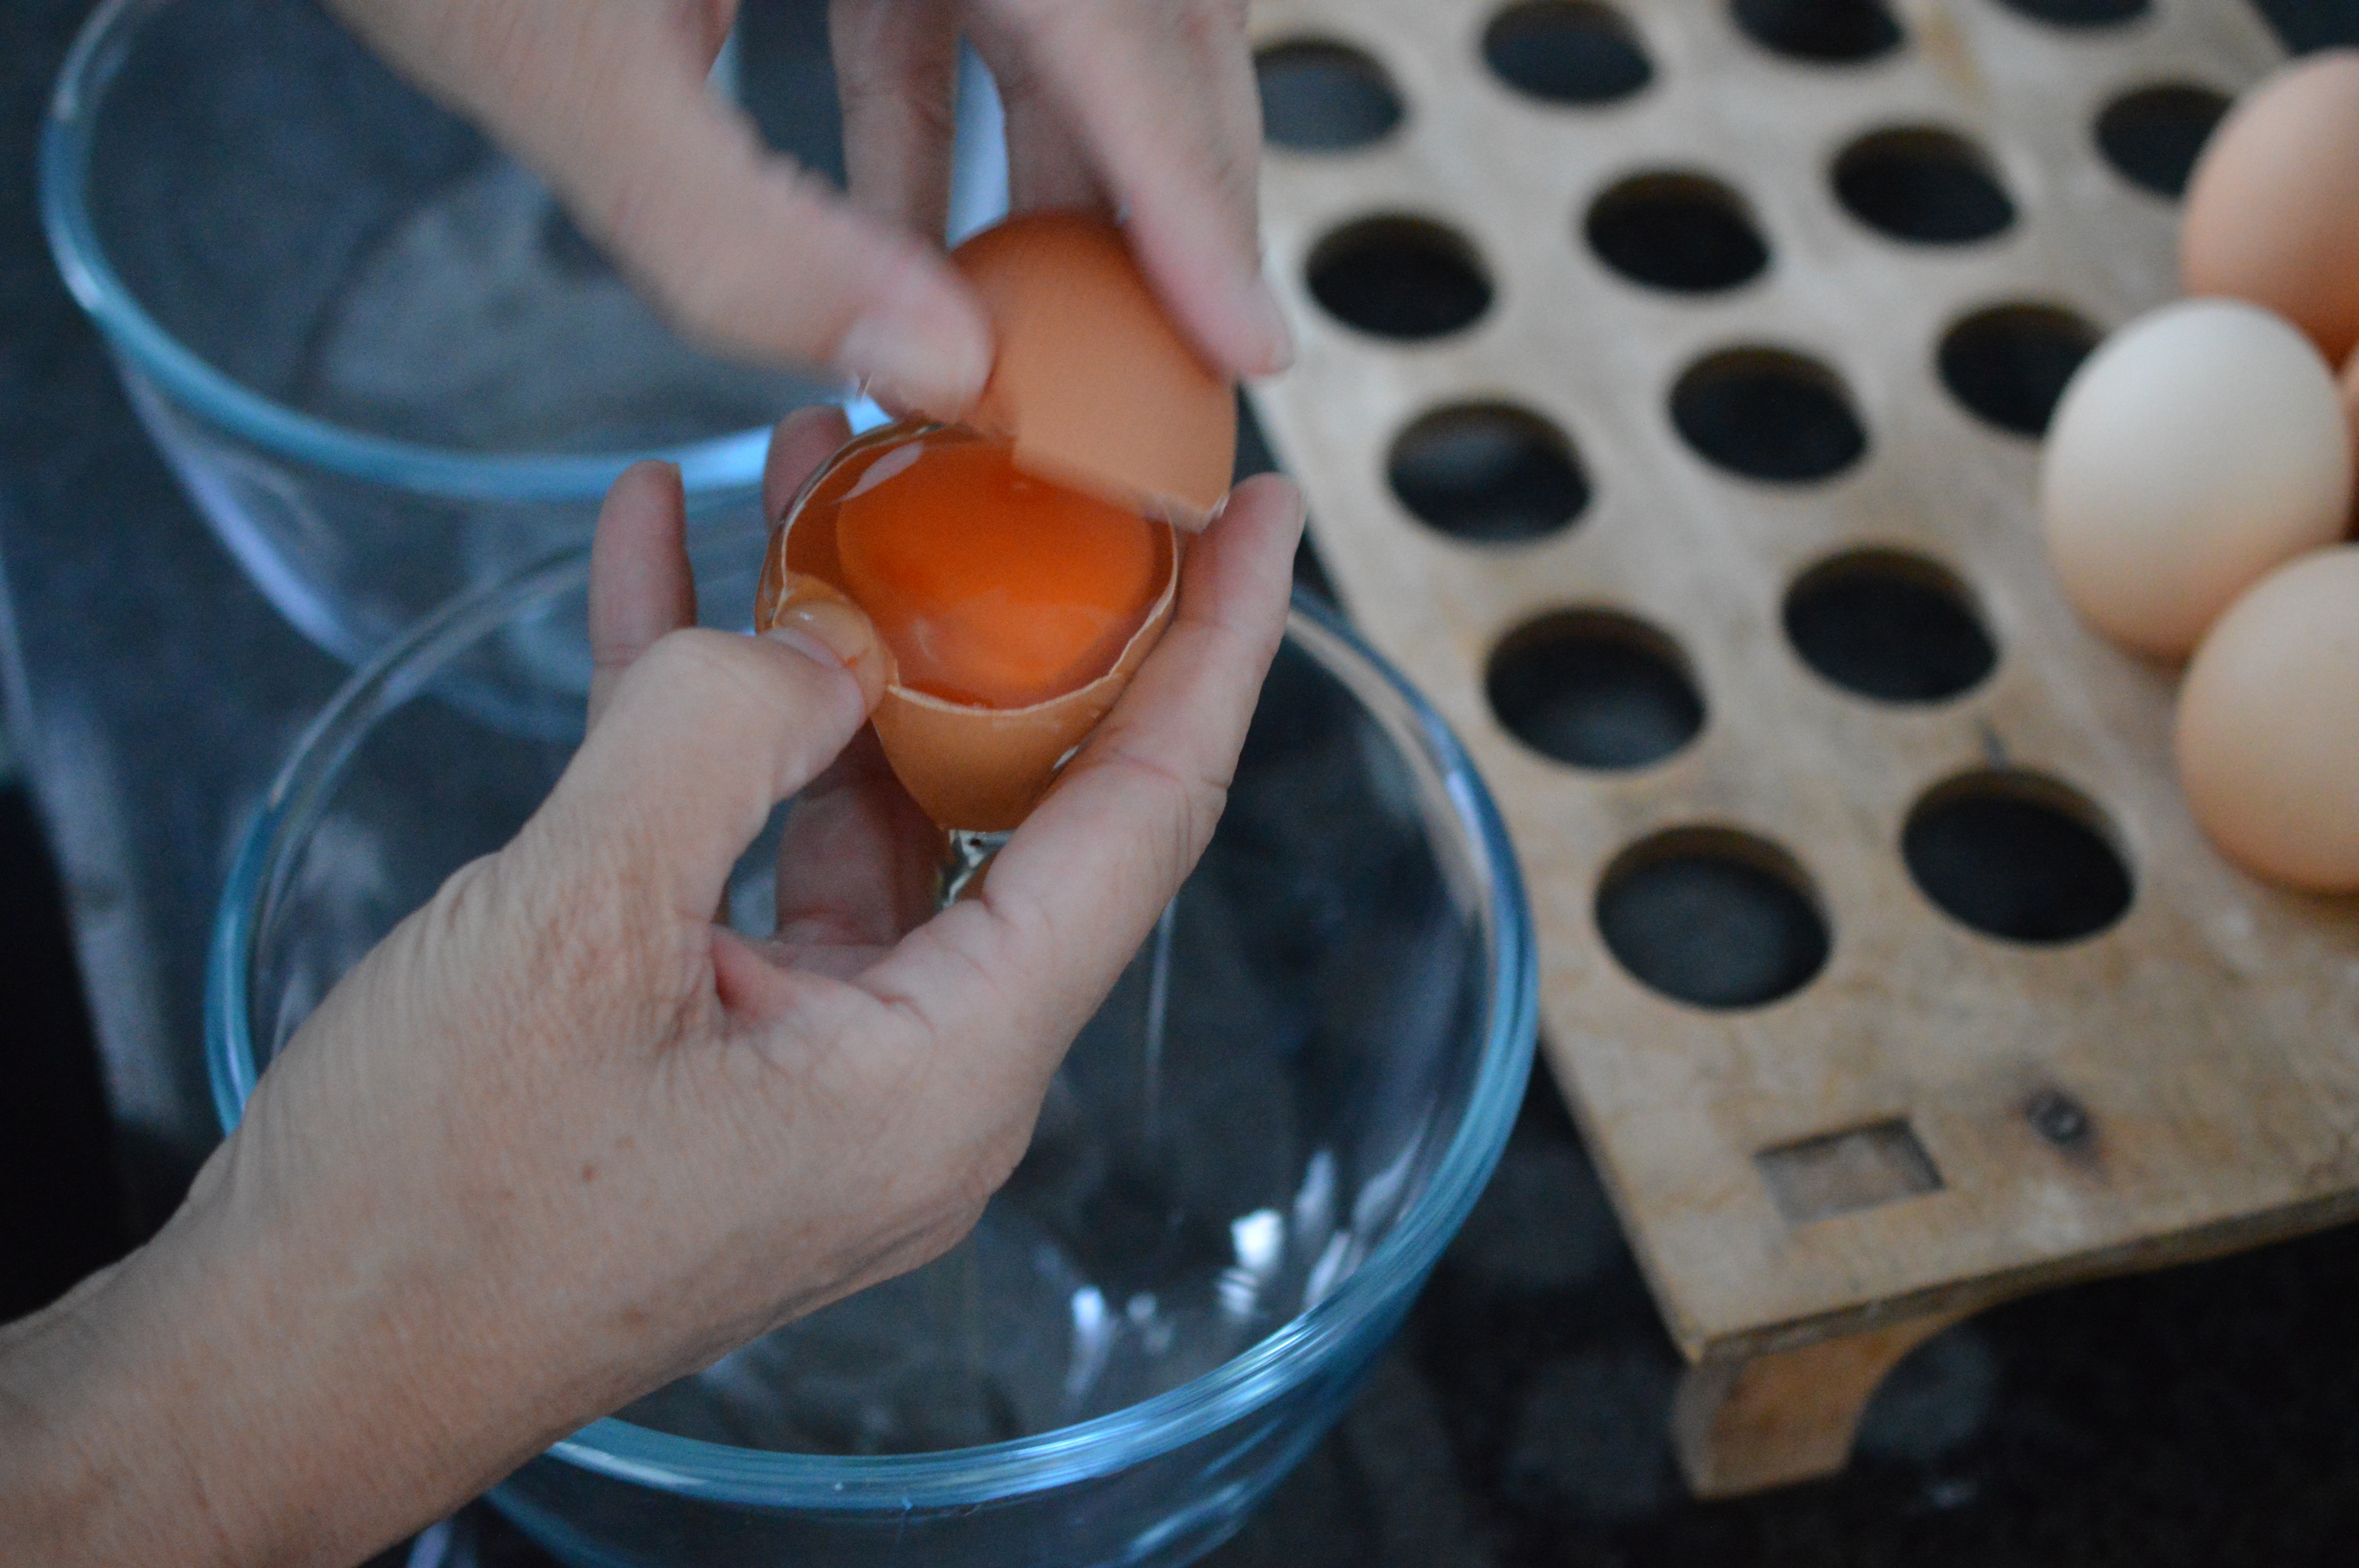
Now it’s the eggs. The colour of your egg yolks will determine how strong a colour your lemony layer has. Separate the yolks from the whites. This is one way, using your fingers as a sieve. (Feels quite nice!)
Or you tip the yolk from one half of the shell to the other. (Less messy!)
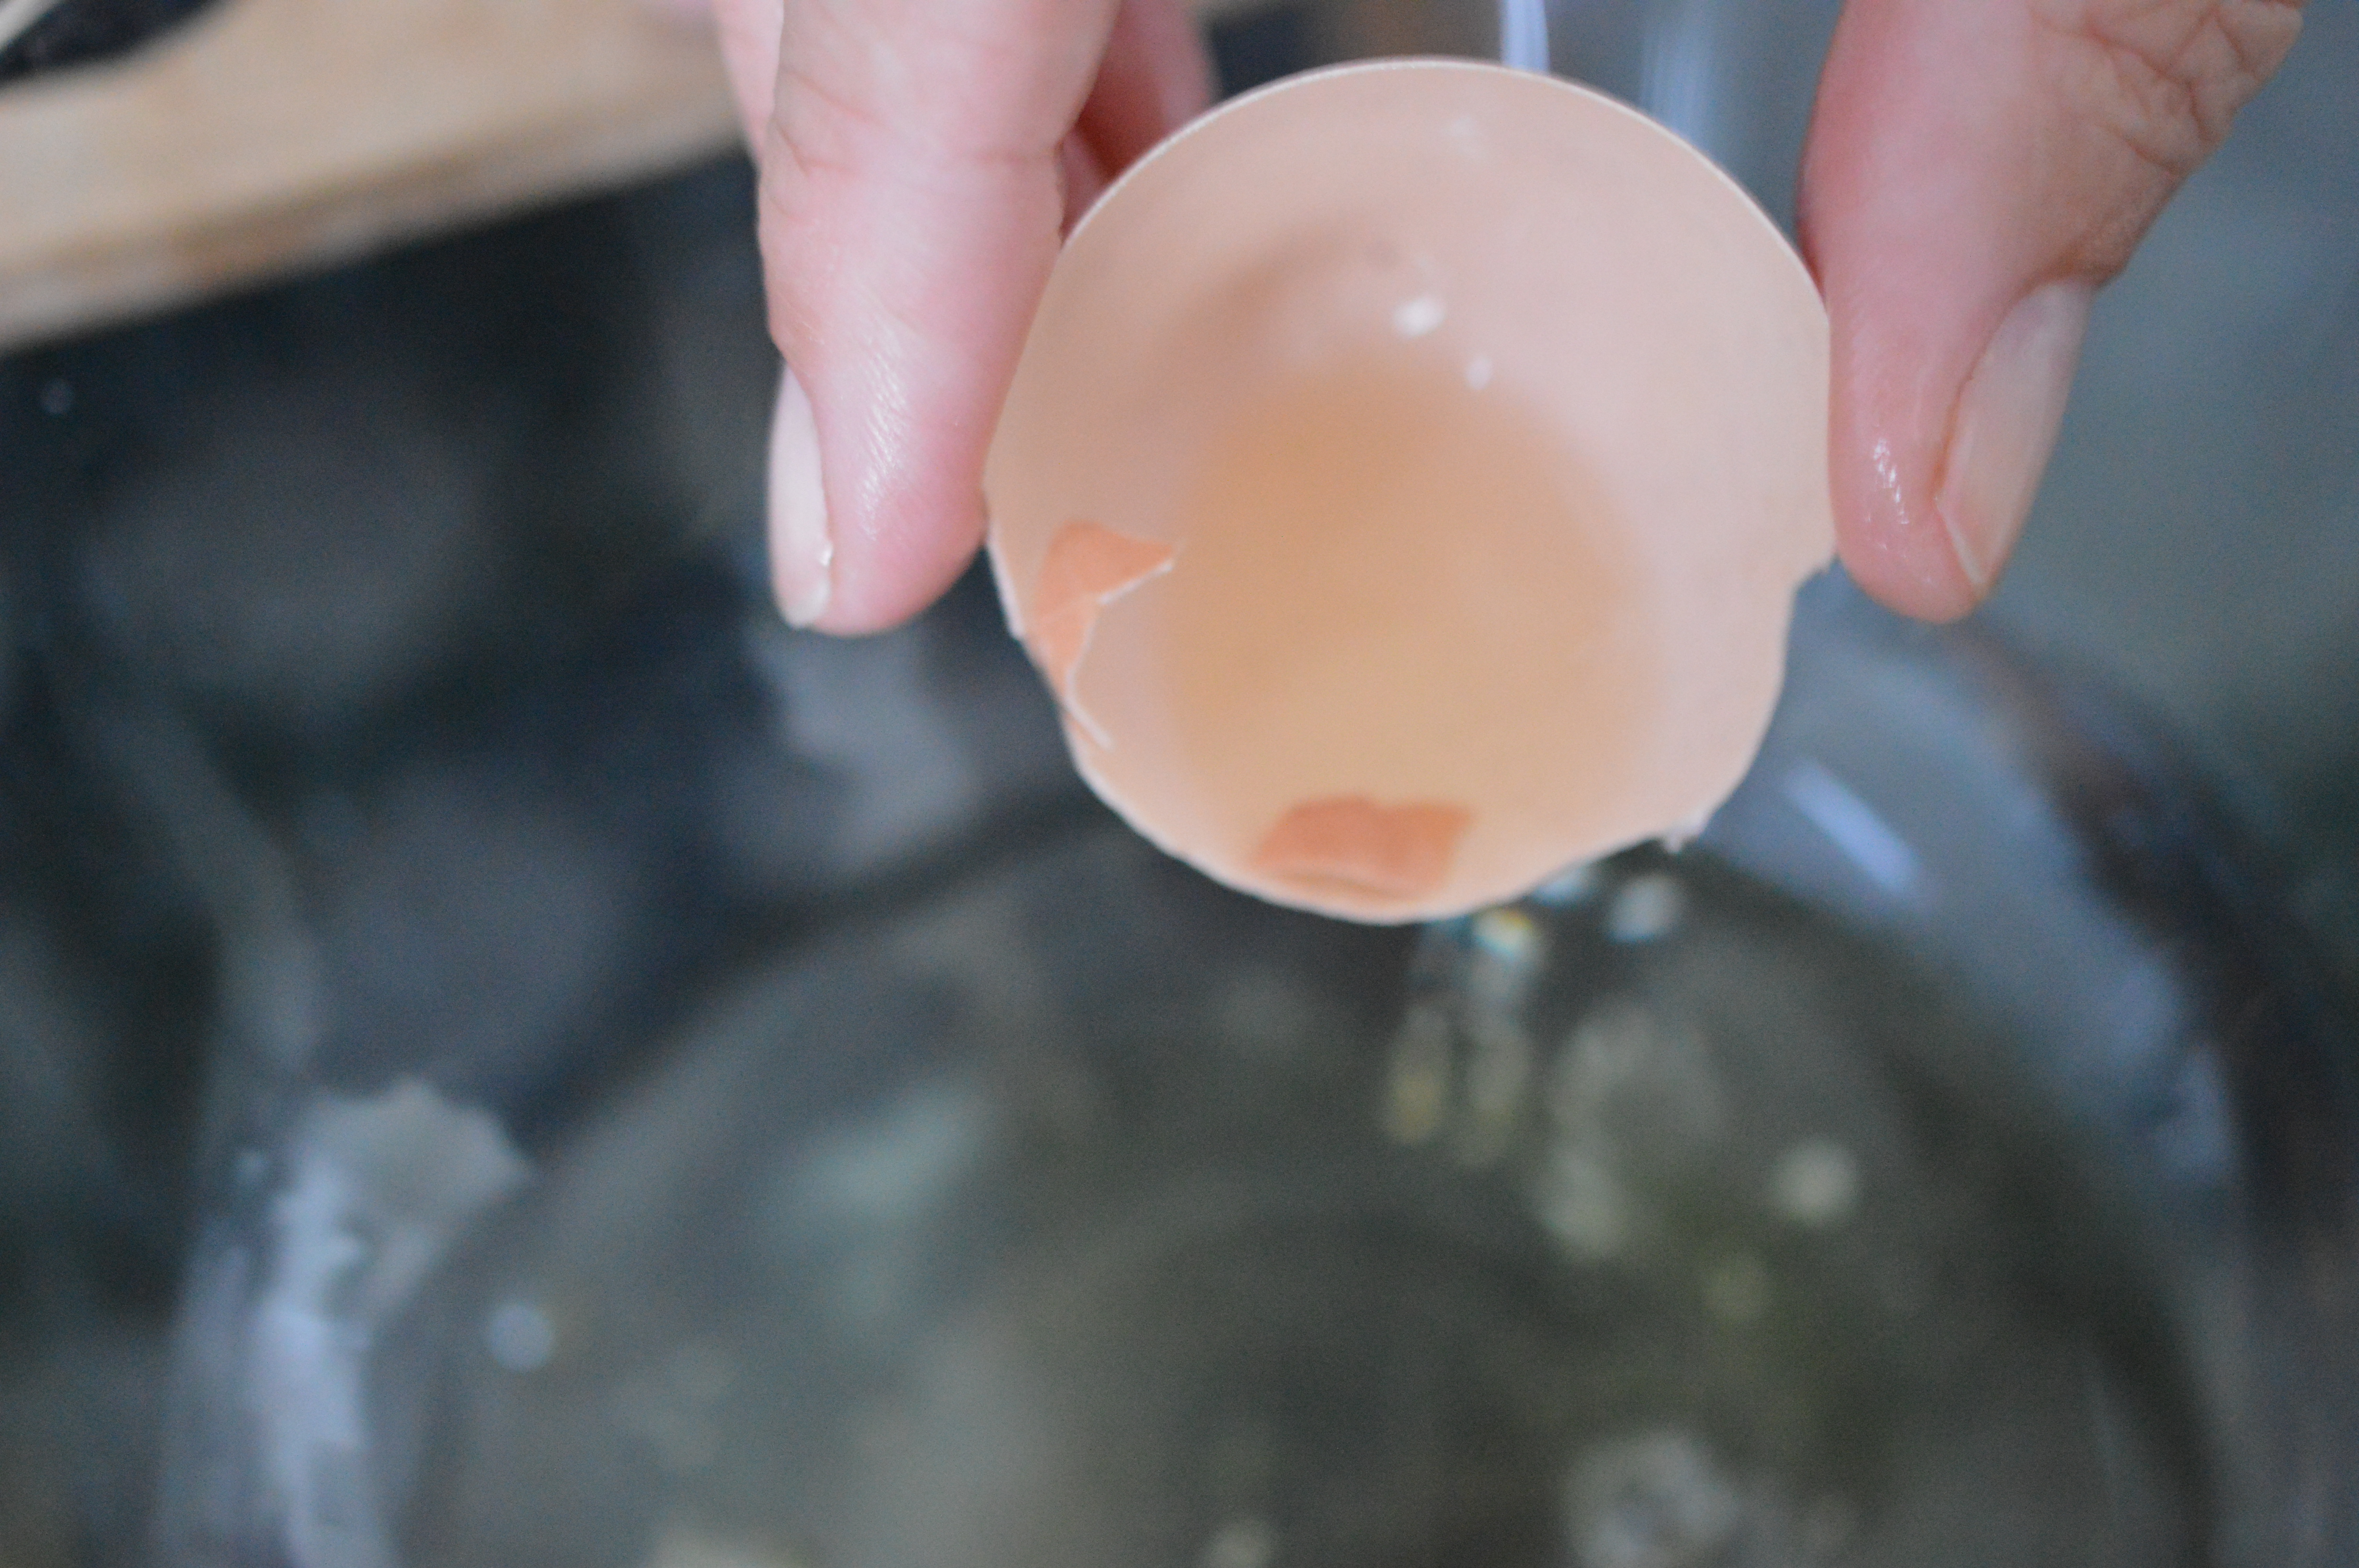
If any of the shell drops into the whites you do need to get it out. By far the easiest way is to lower an empty shell half into the bowl and, magically, the stray piece will be drawn back.
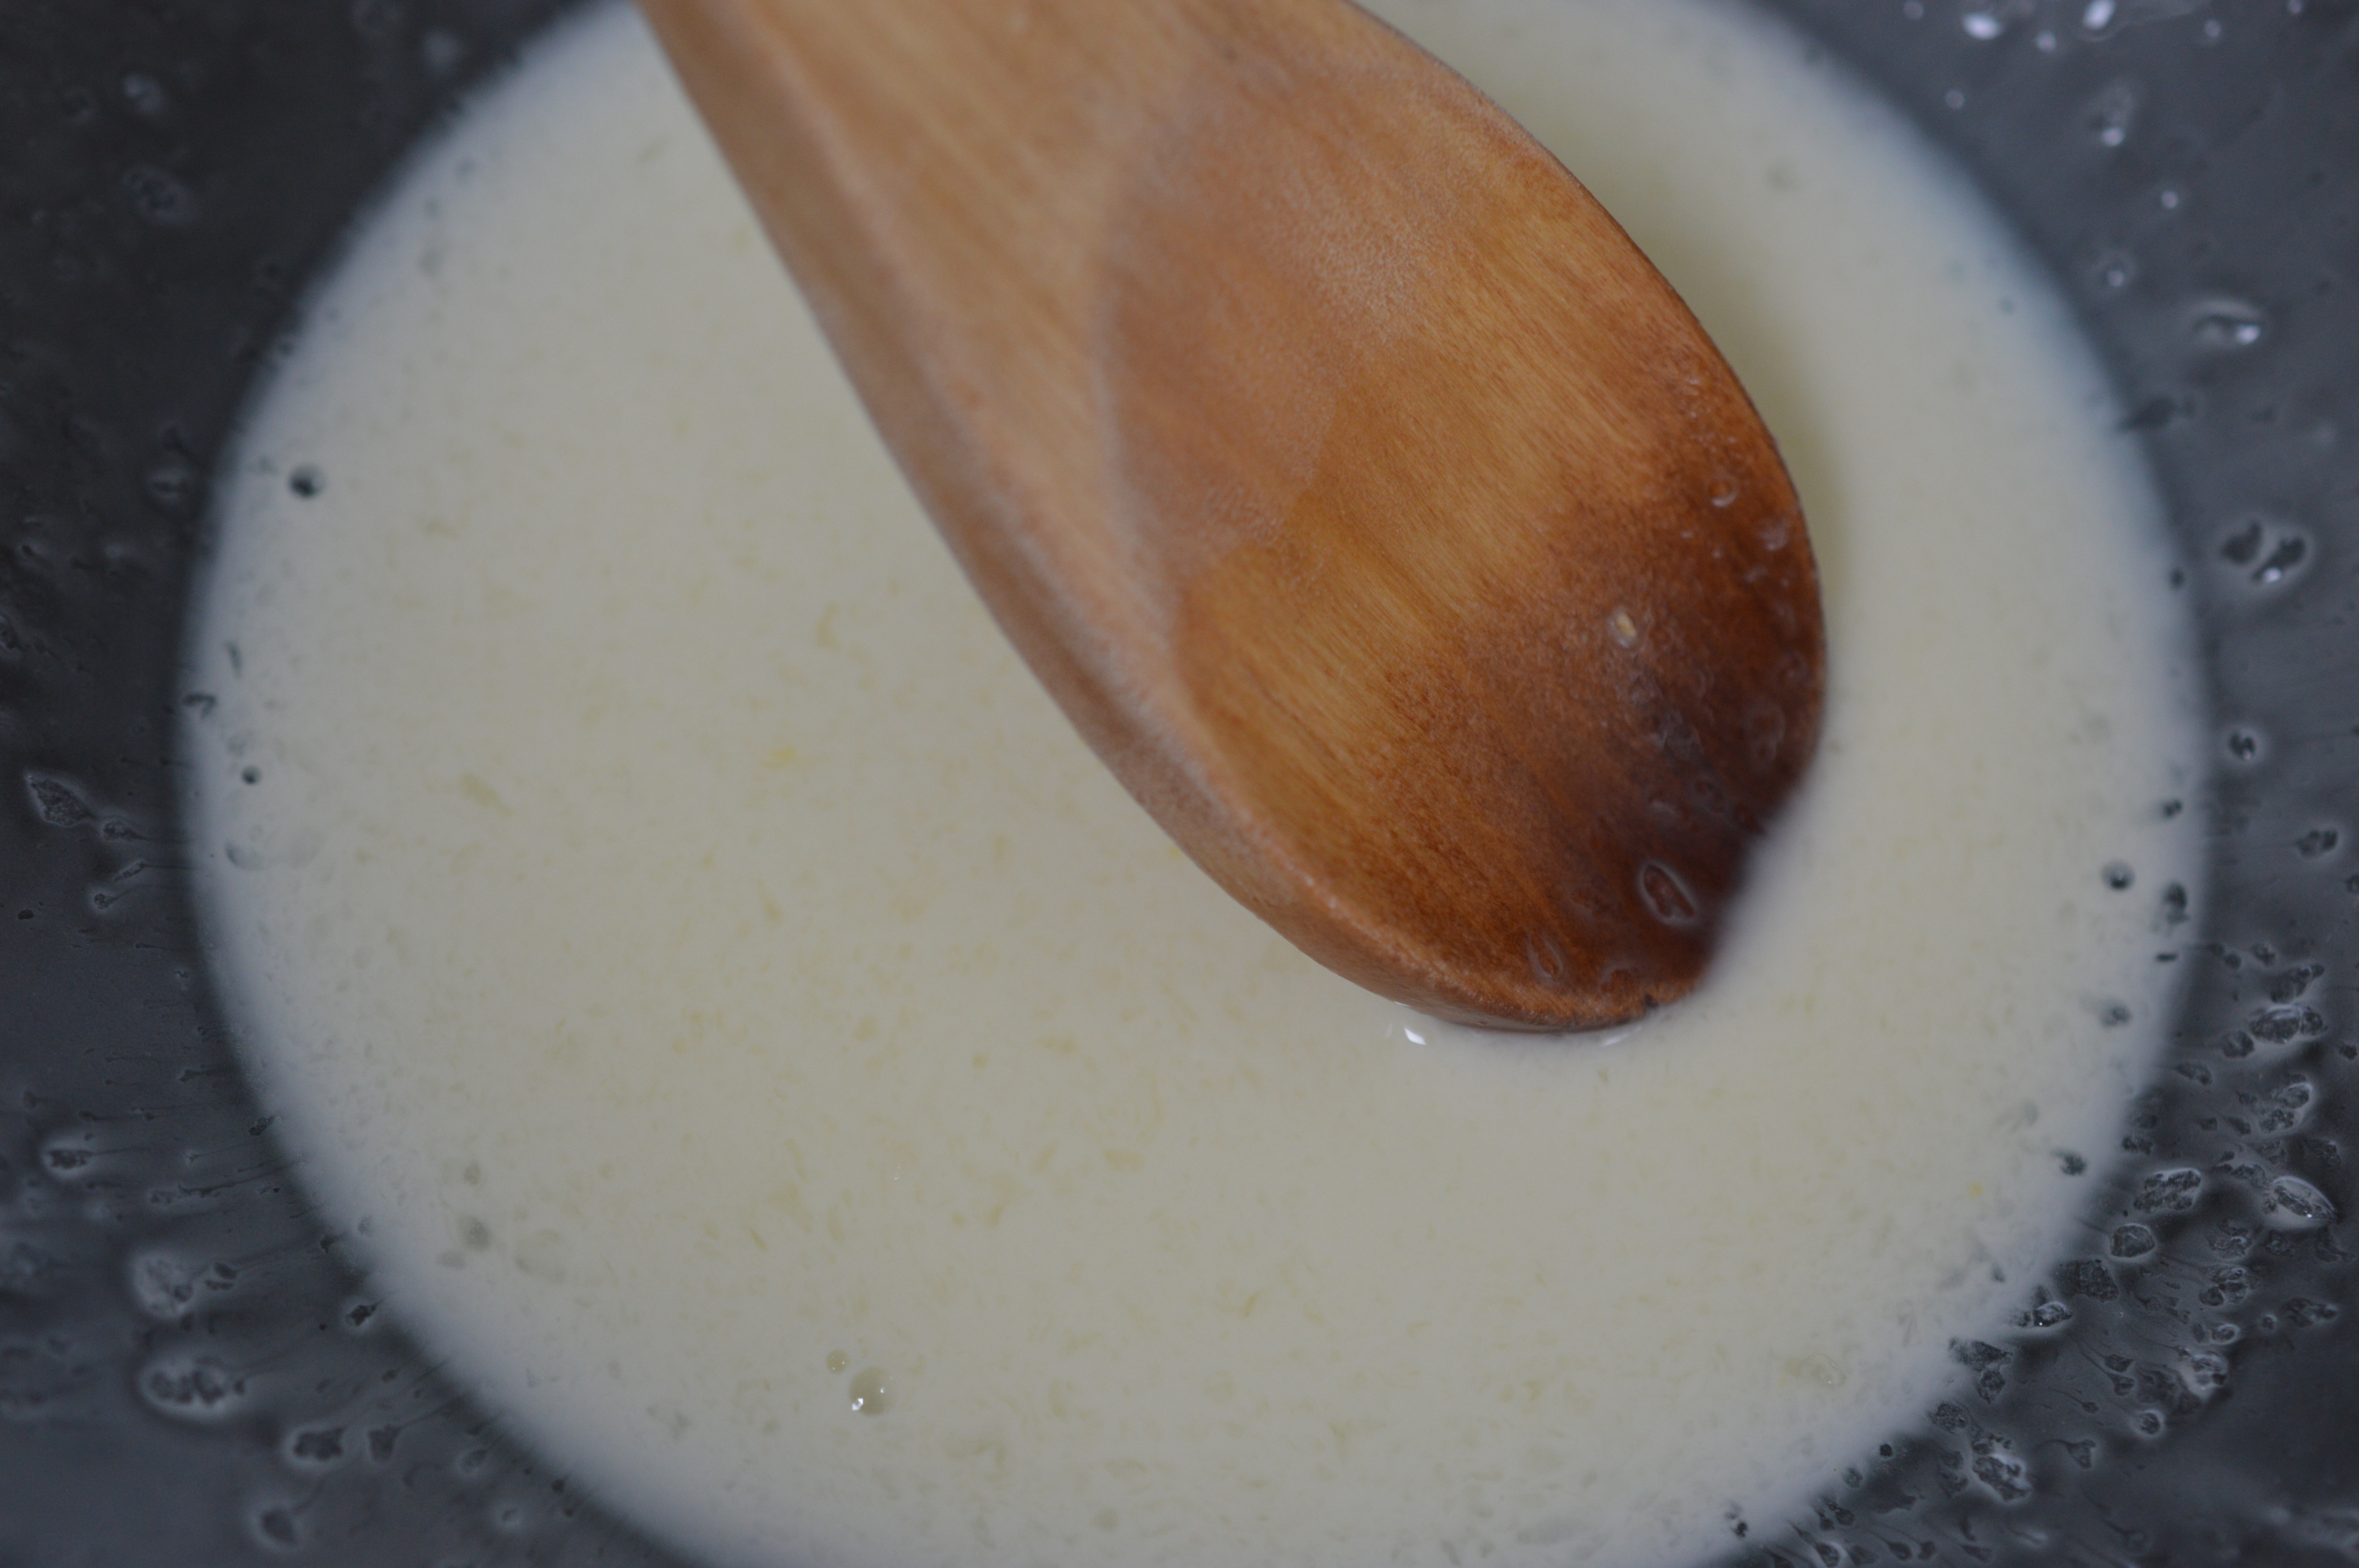
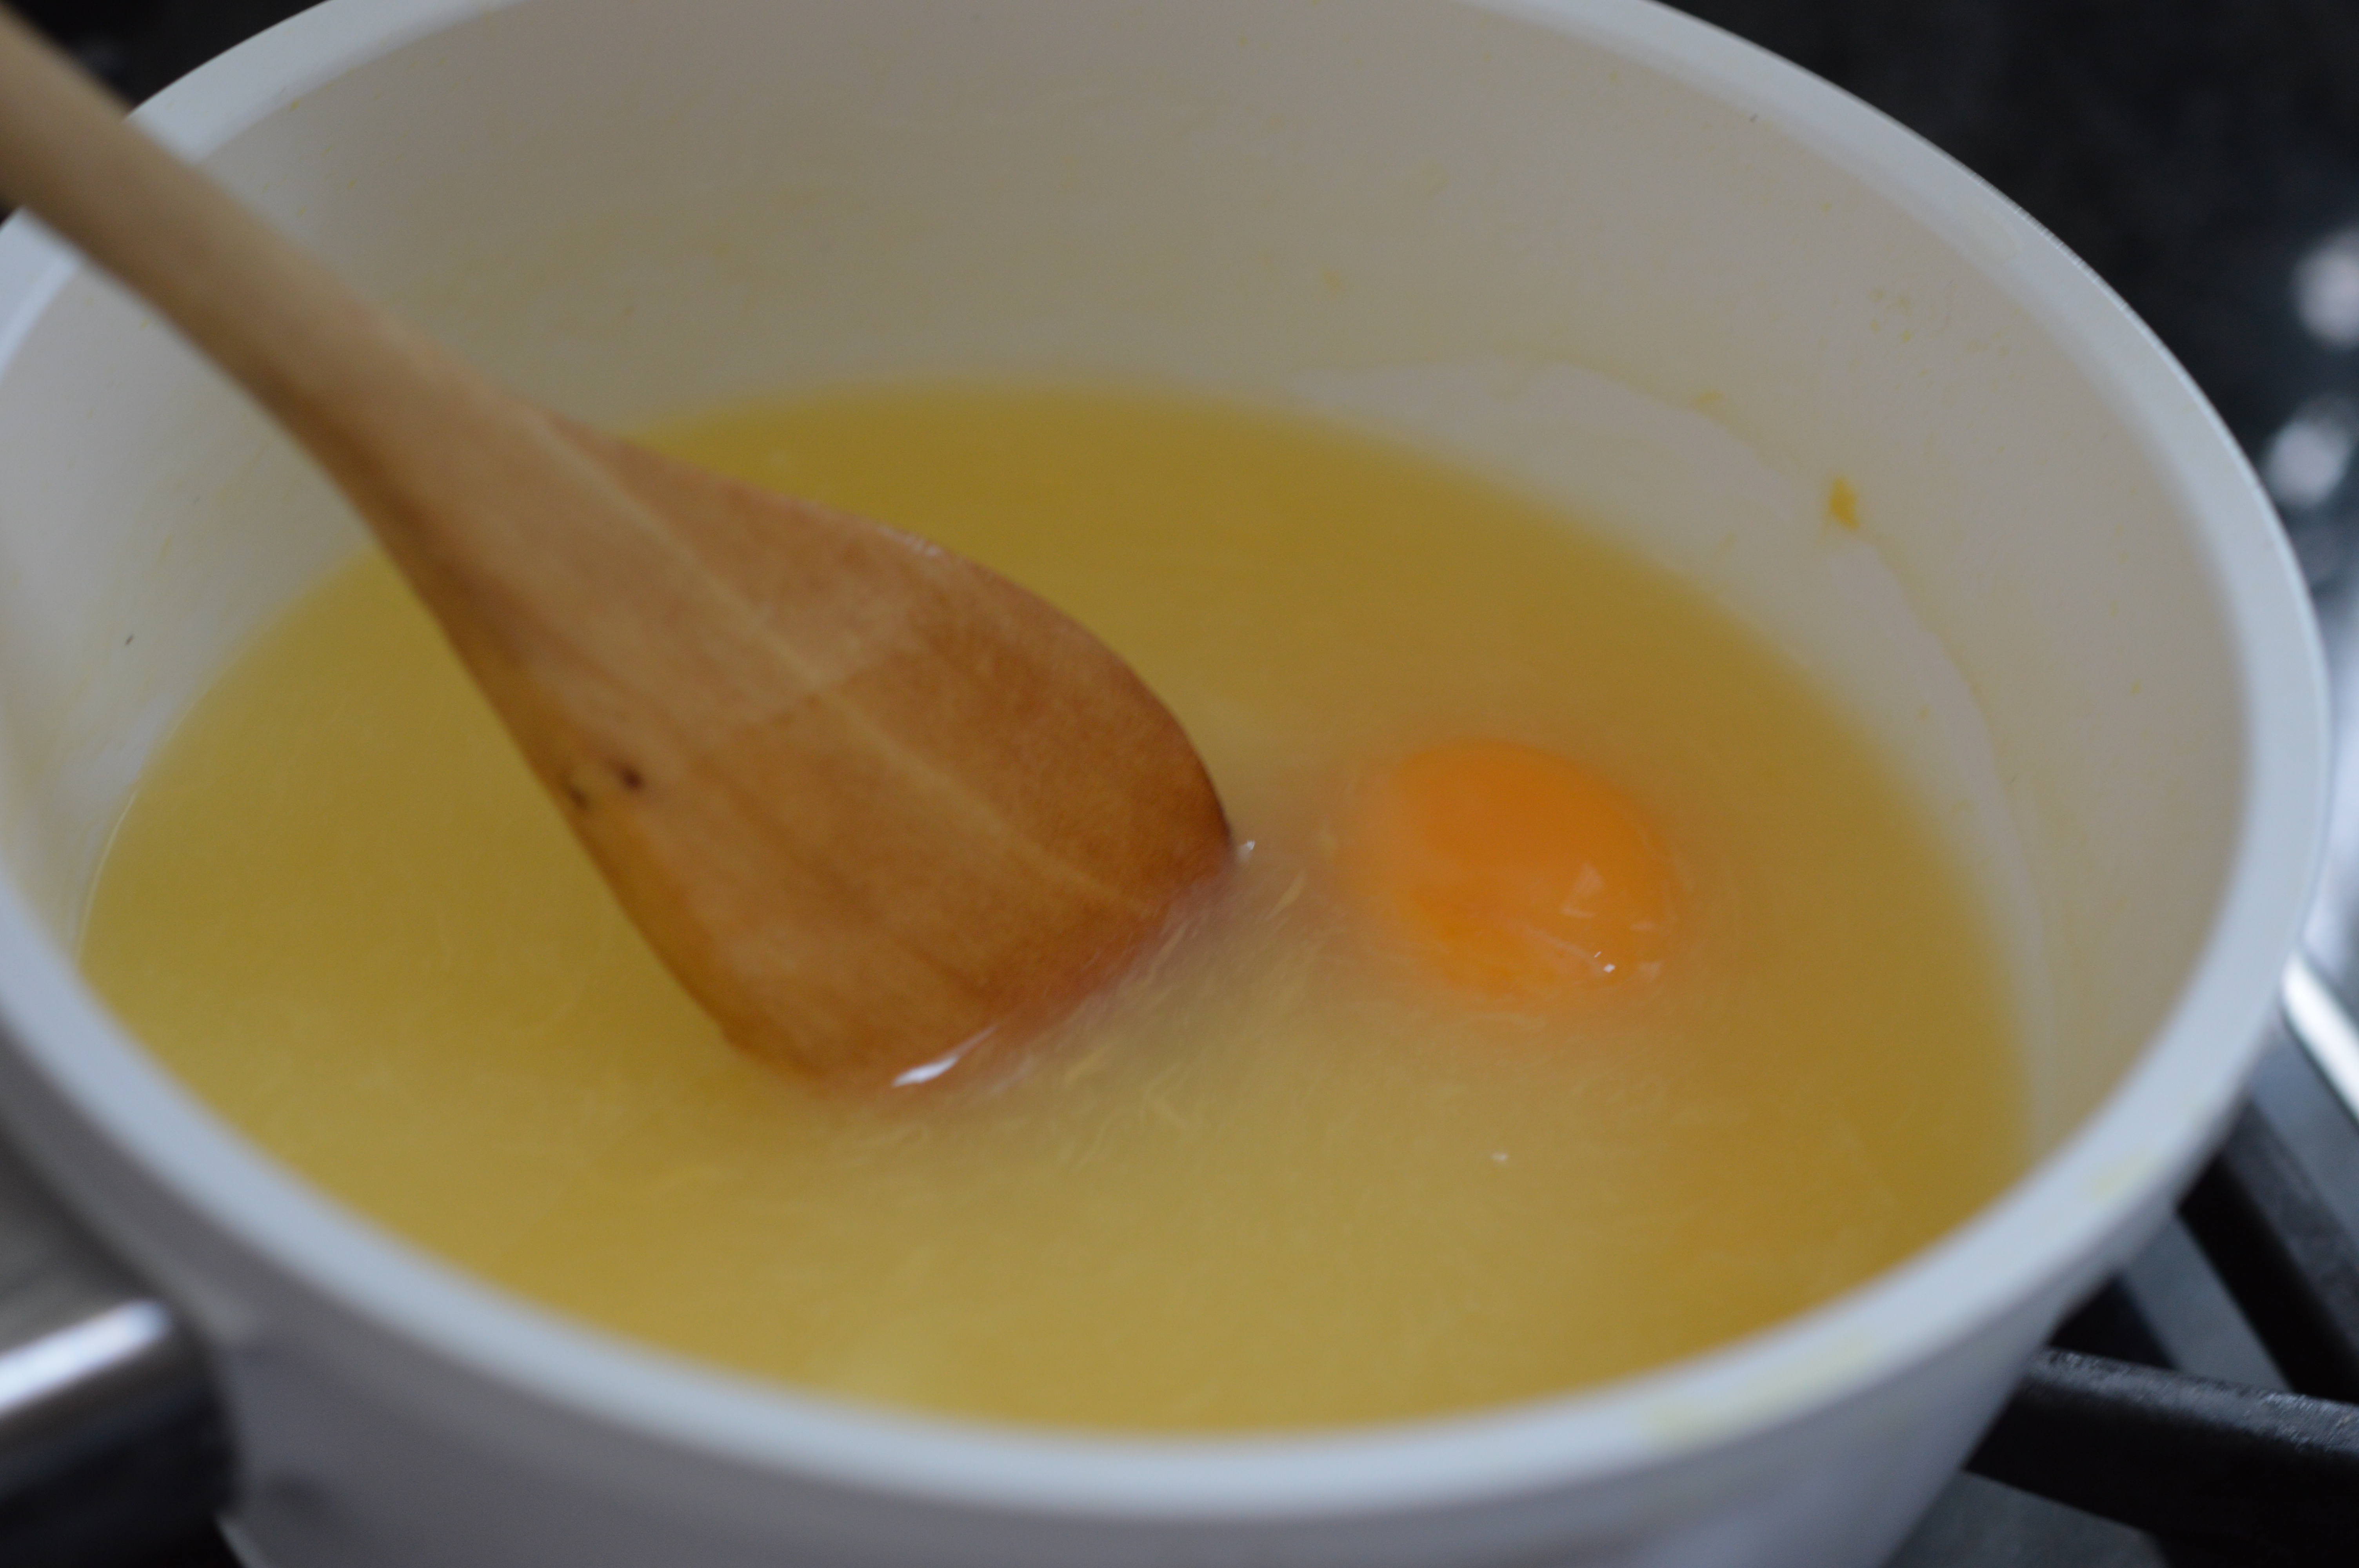
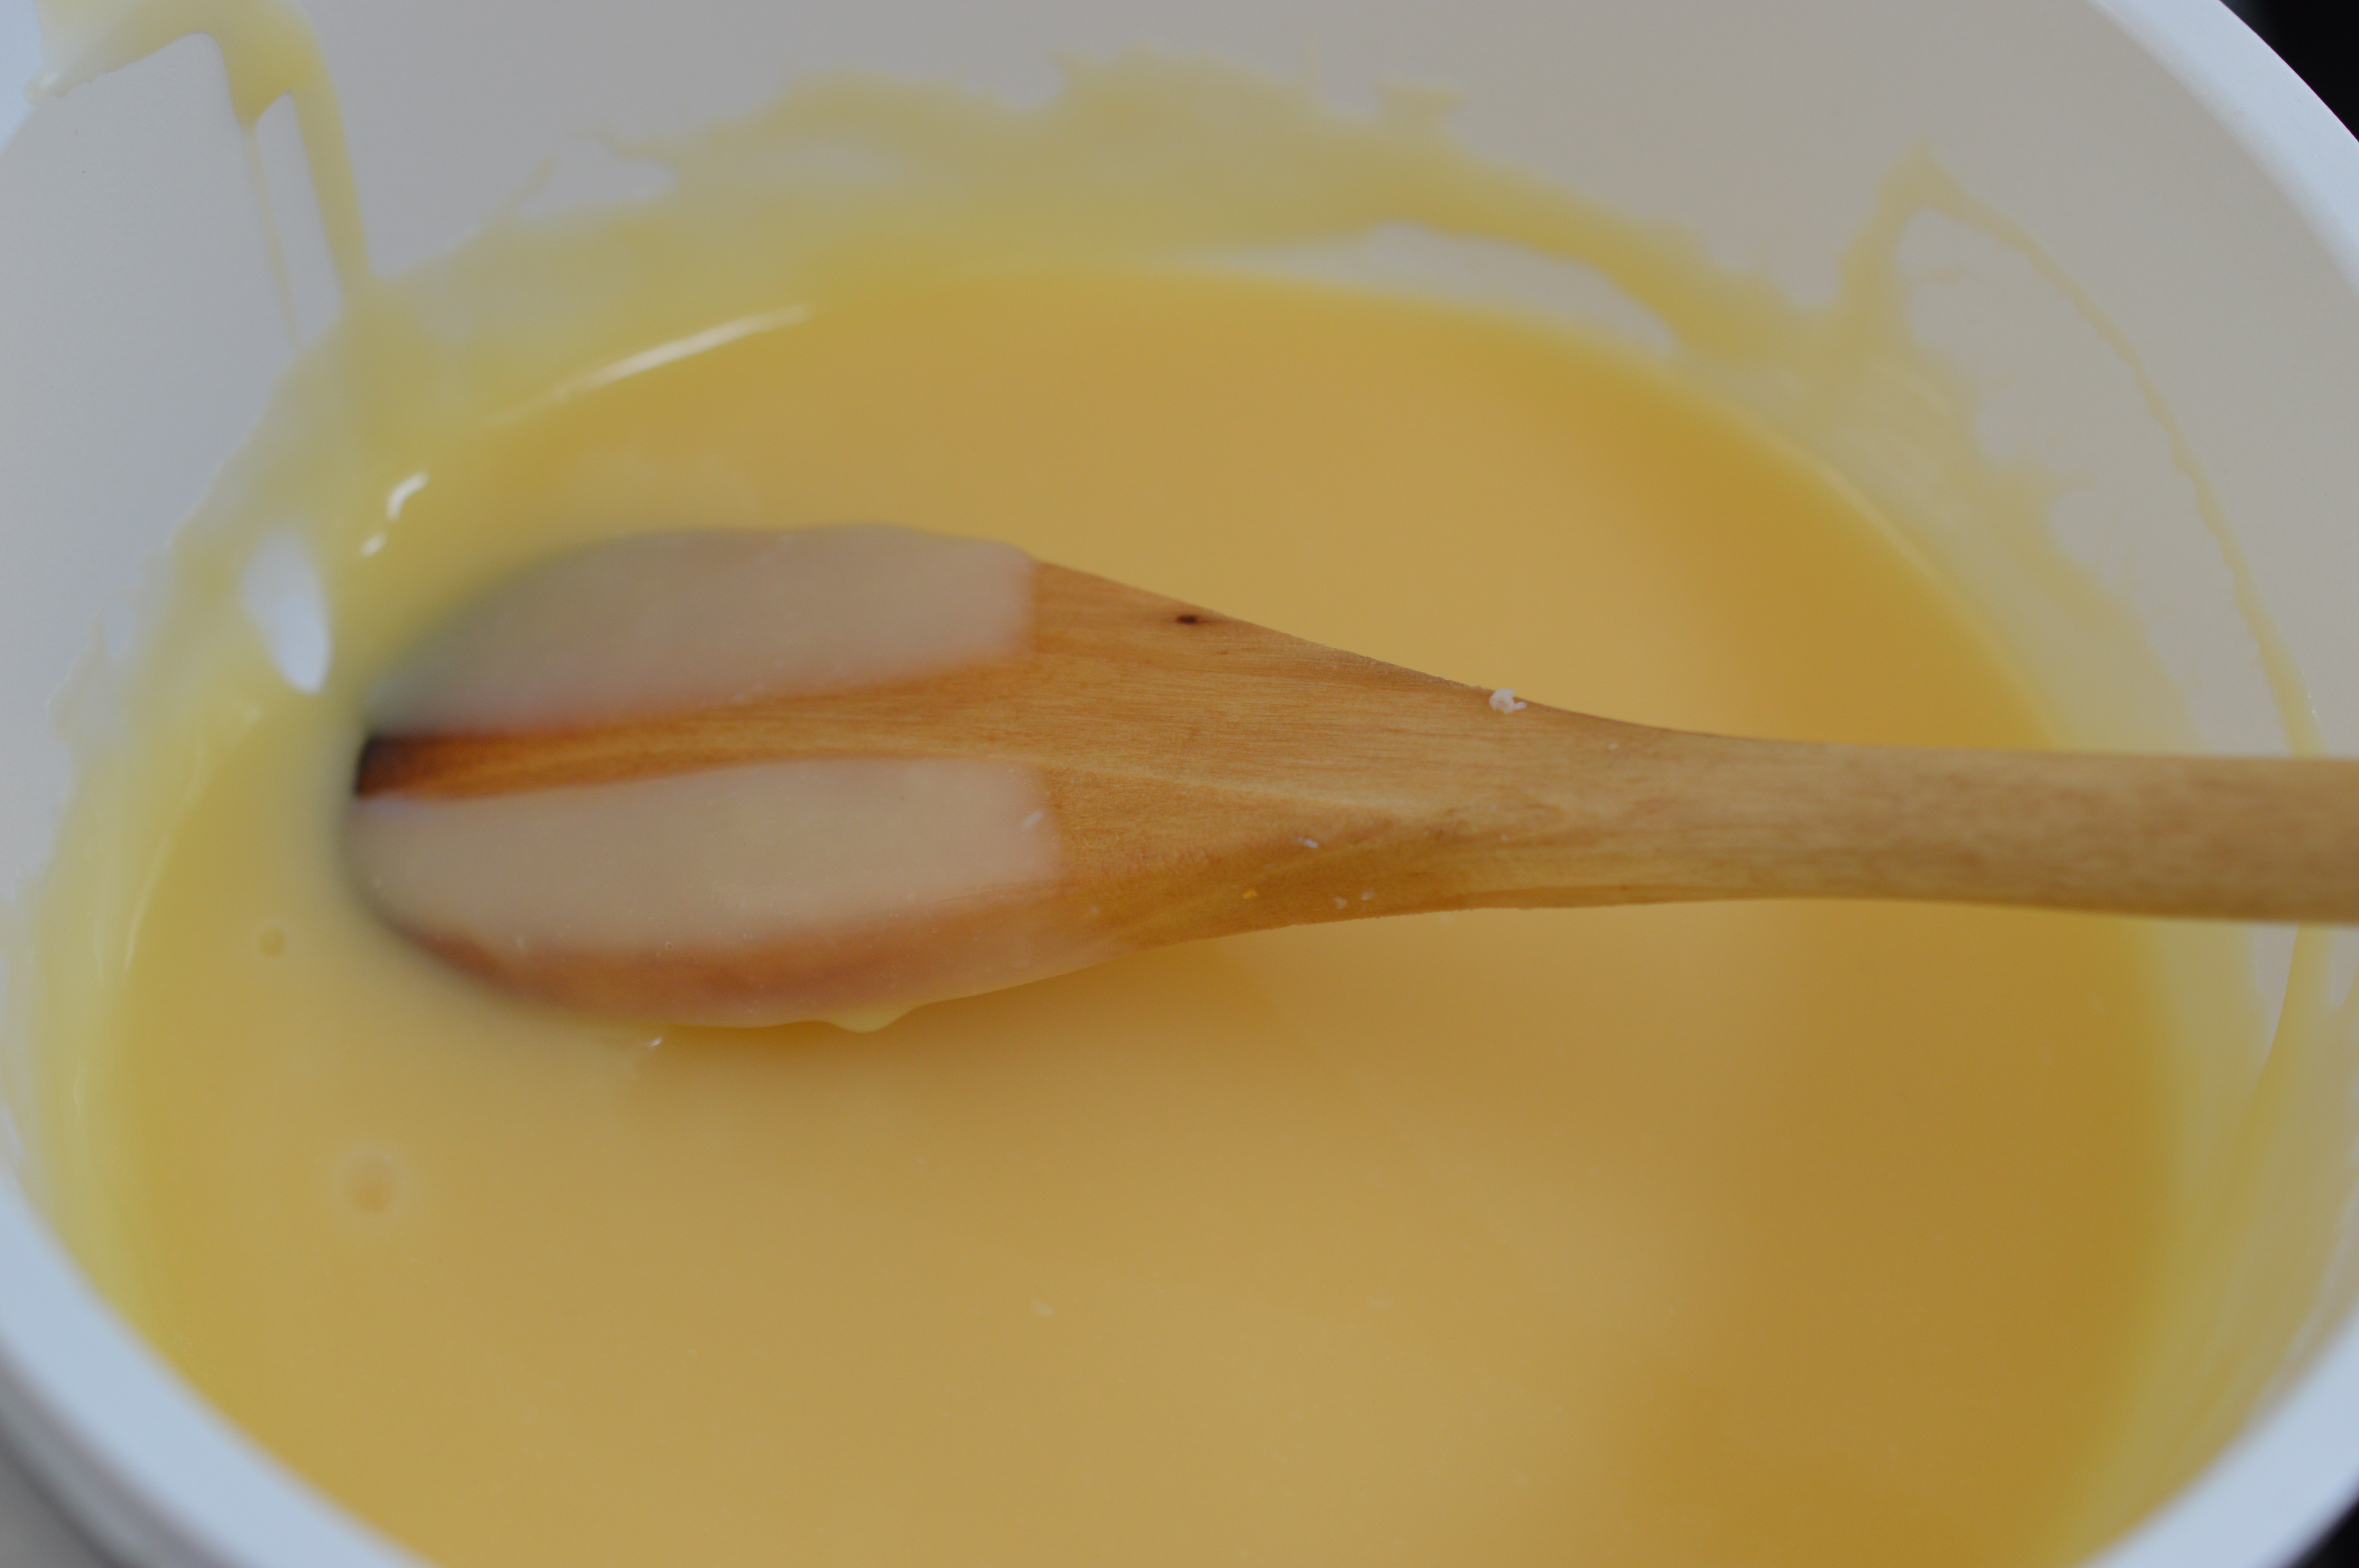
The sugar syrup, lemon juice and cornflour mixture now needs to go back into the saucepan. Add the egg yolks, one at a time, and stir. Then a knob of butter. Stir.
Turn on the heat and, without letting it boil, stir until it is thick enough to coat the back of a wooden spoon. This can sometimes take a while. Just keep going. It will thicken. Turn off the heat.
Now back to the pastry.
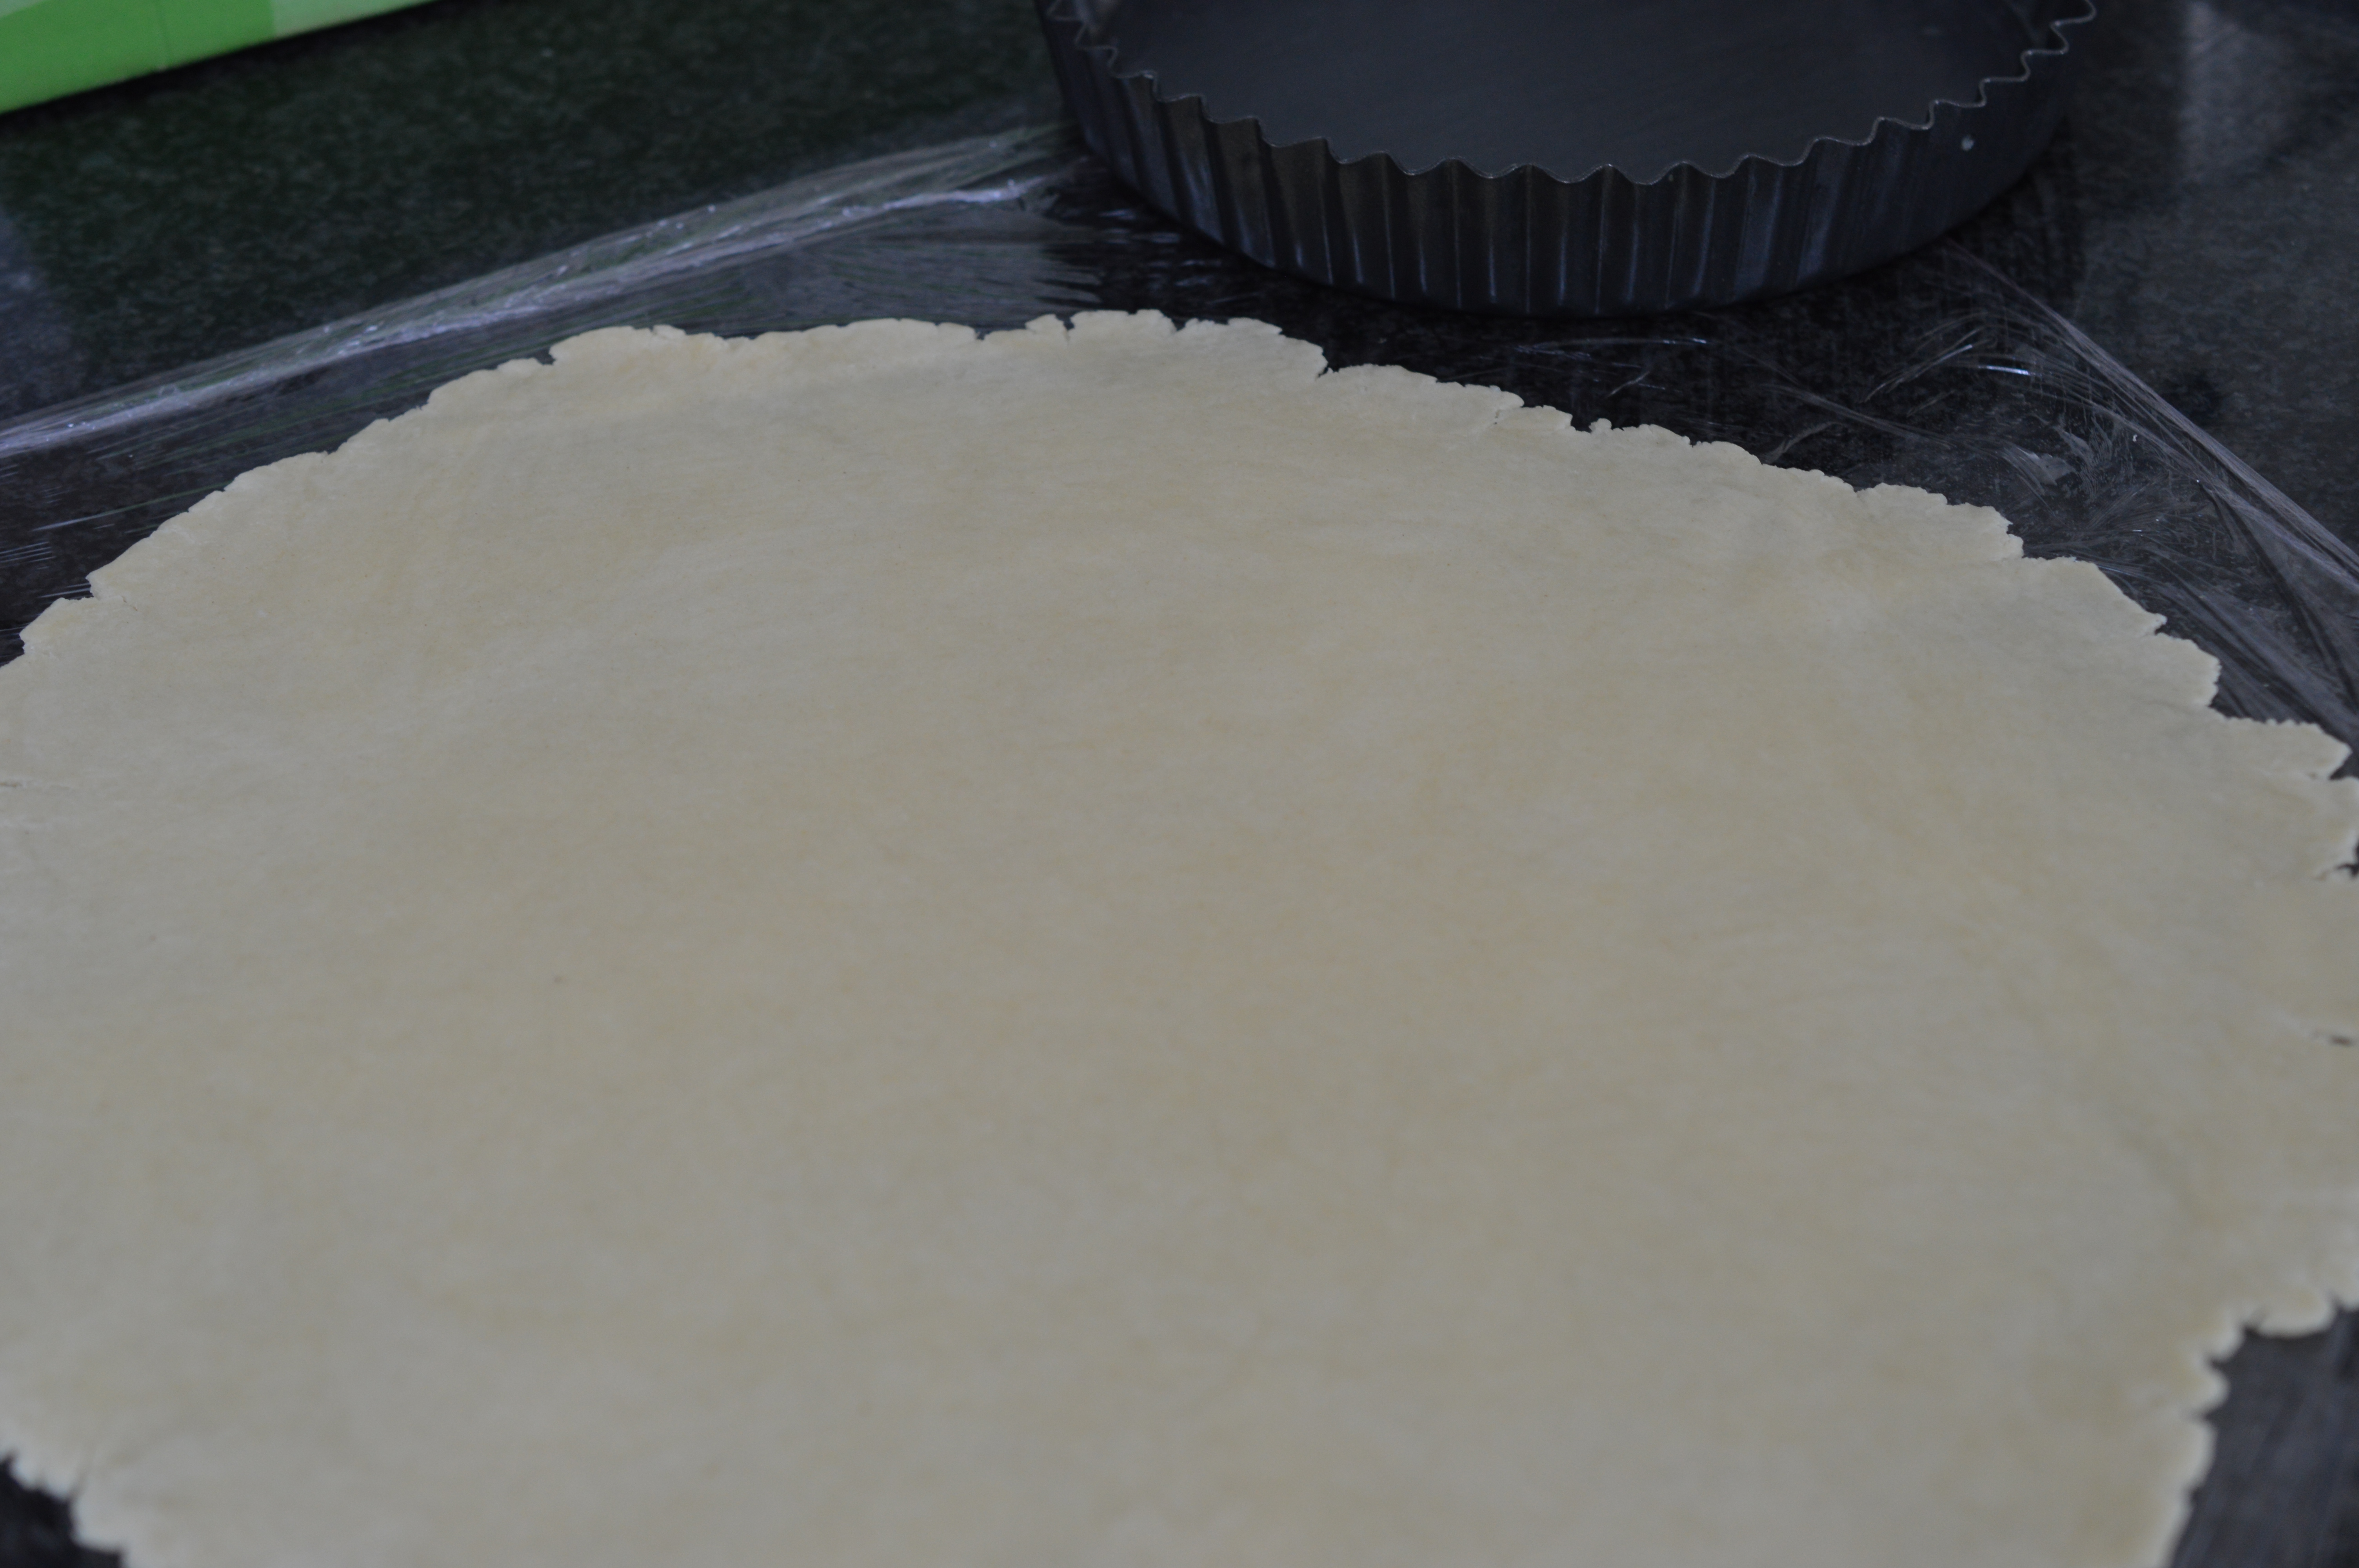
I tend to roll out my pastry between two sheets of plastic cling. Originally I did it because I had the tiniest work area you could imagine and got fed up with moving all the jars I had stored at the back of the counter top. Years later I saw TV chef Rachel Allen do the same thing and discovered I was more intelligent than I’d realised – by using cling wrap you avoid the need for additional flour which keeps your pastry exactly to the ratio you intended!!
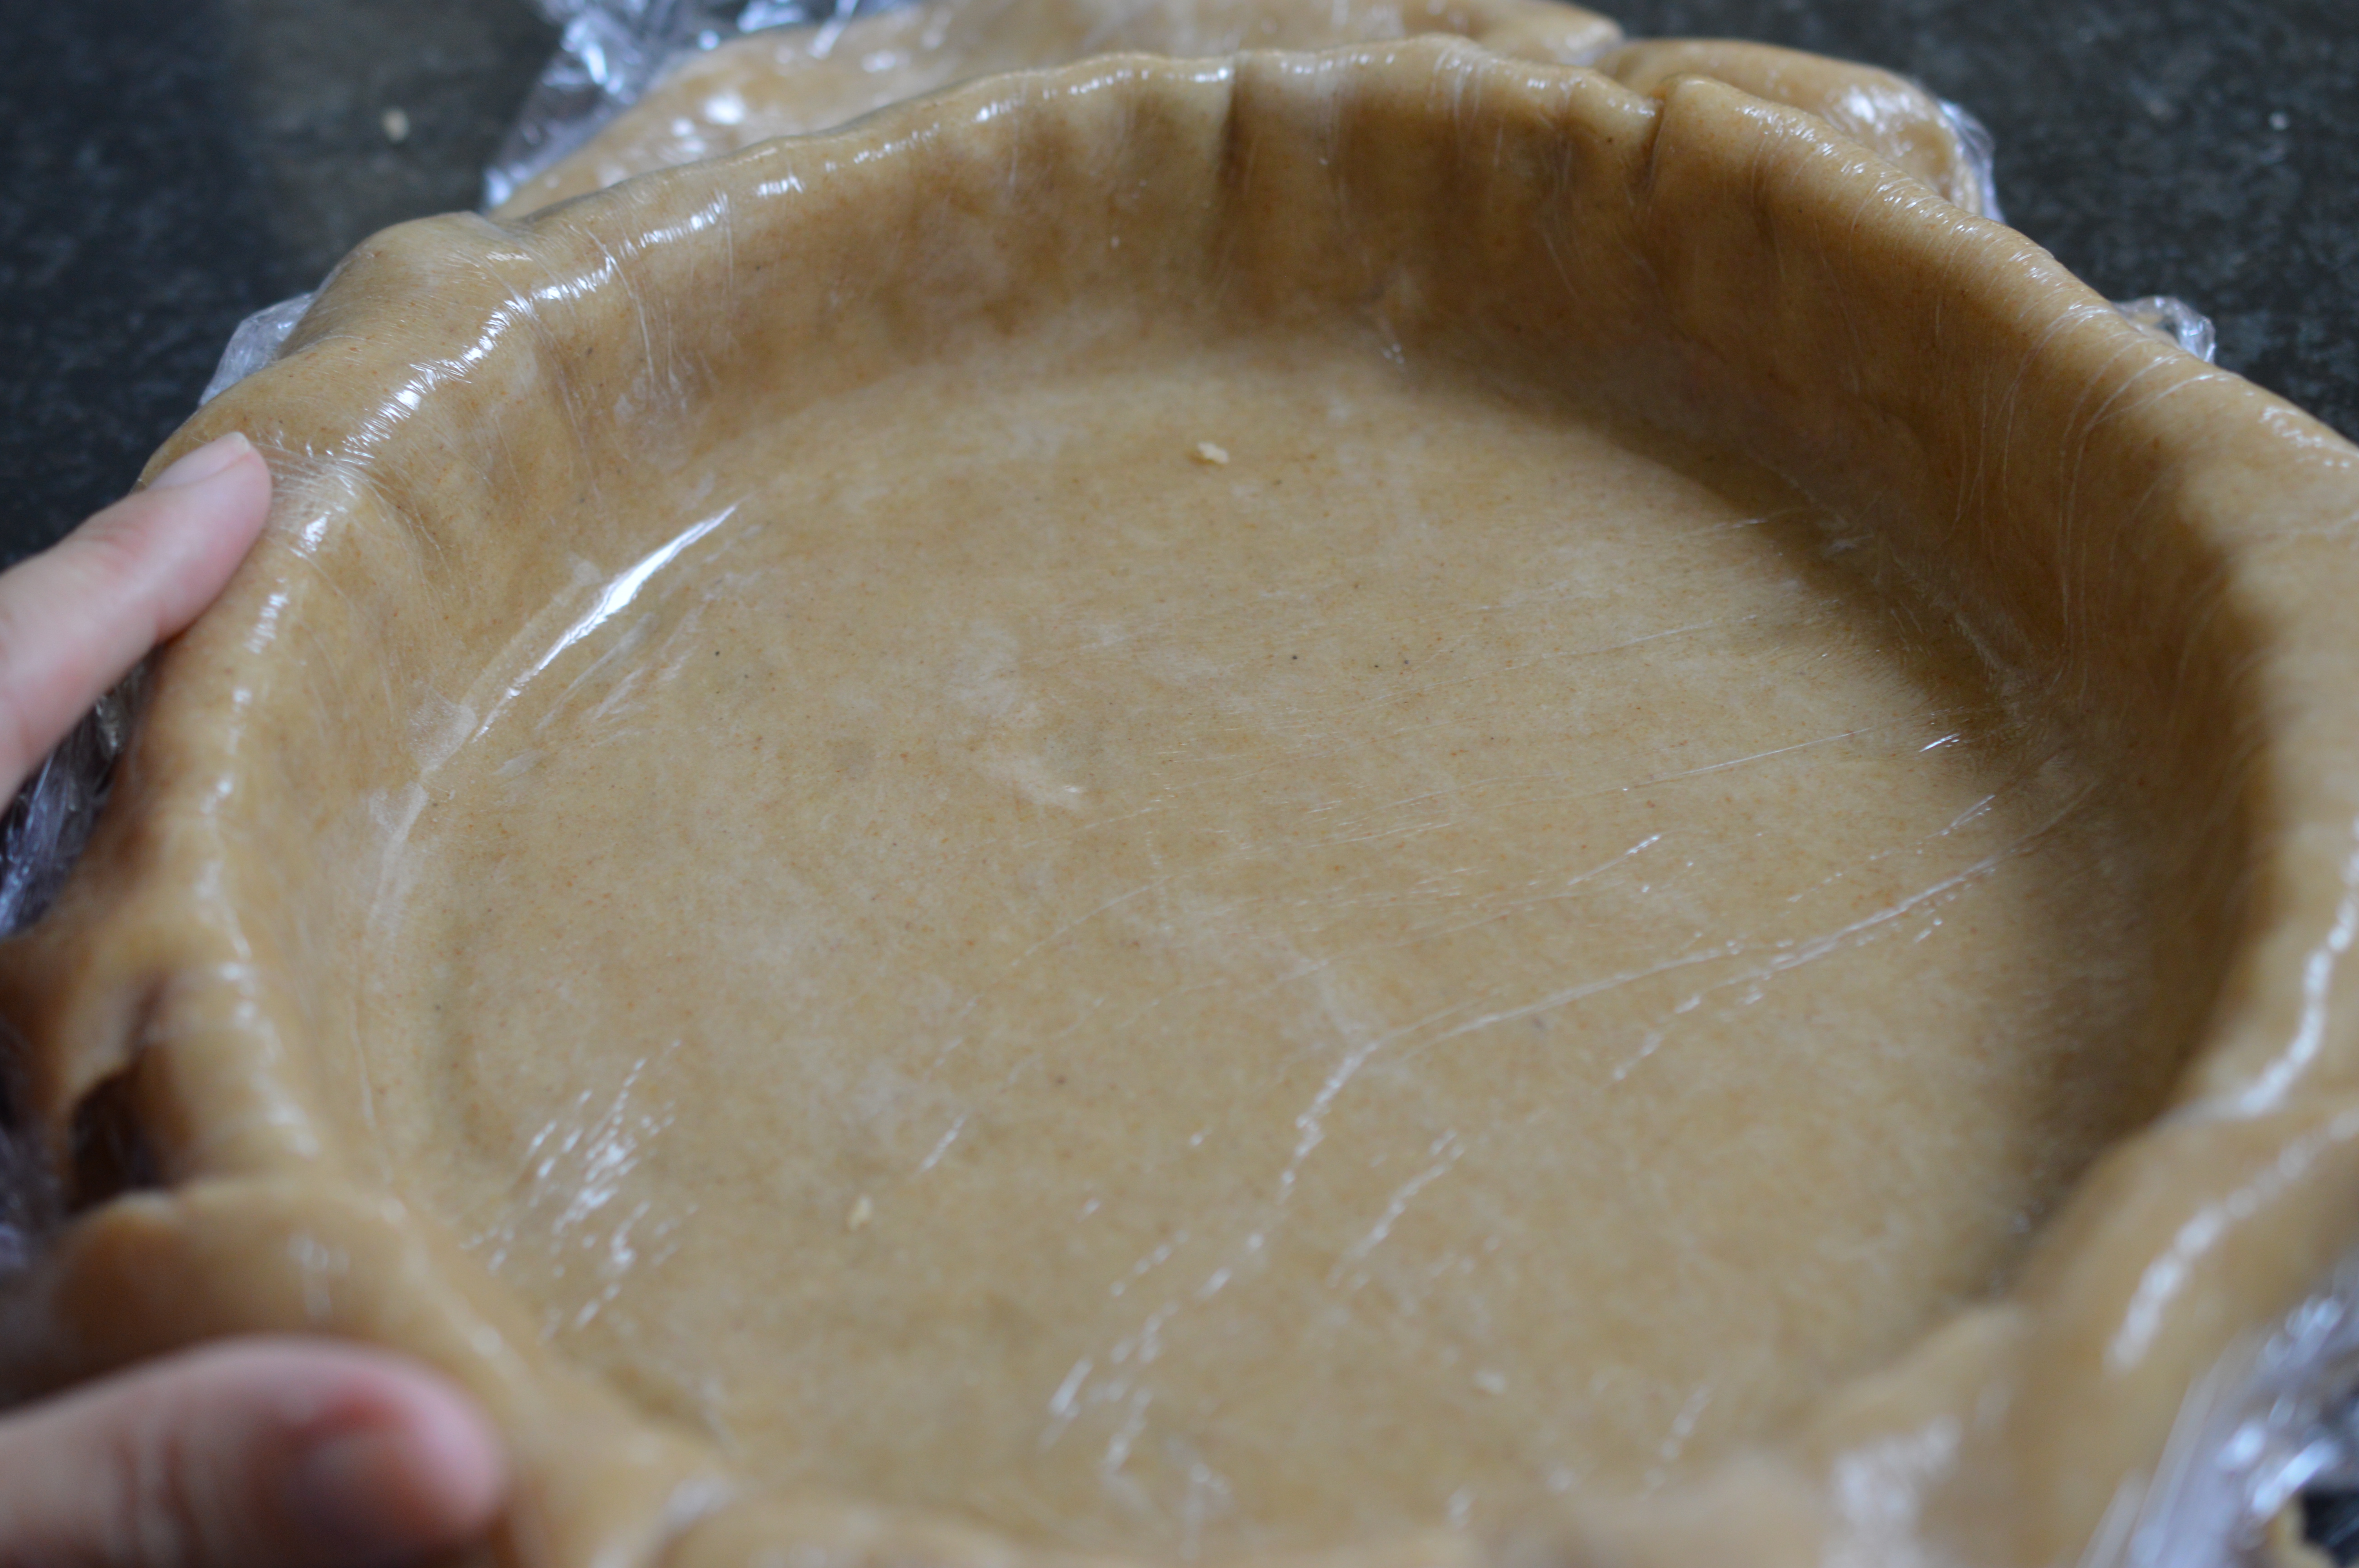
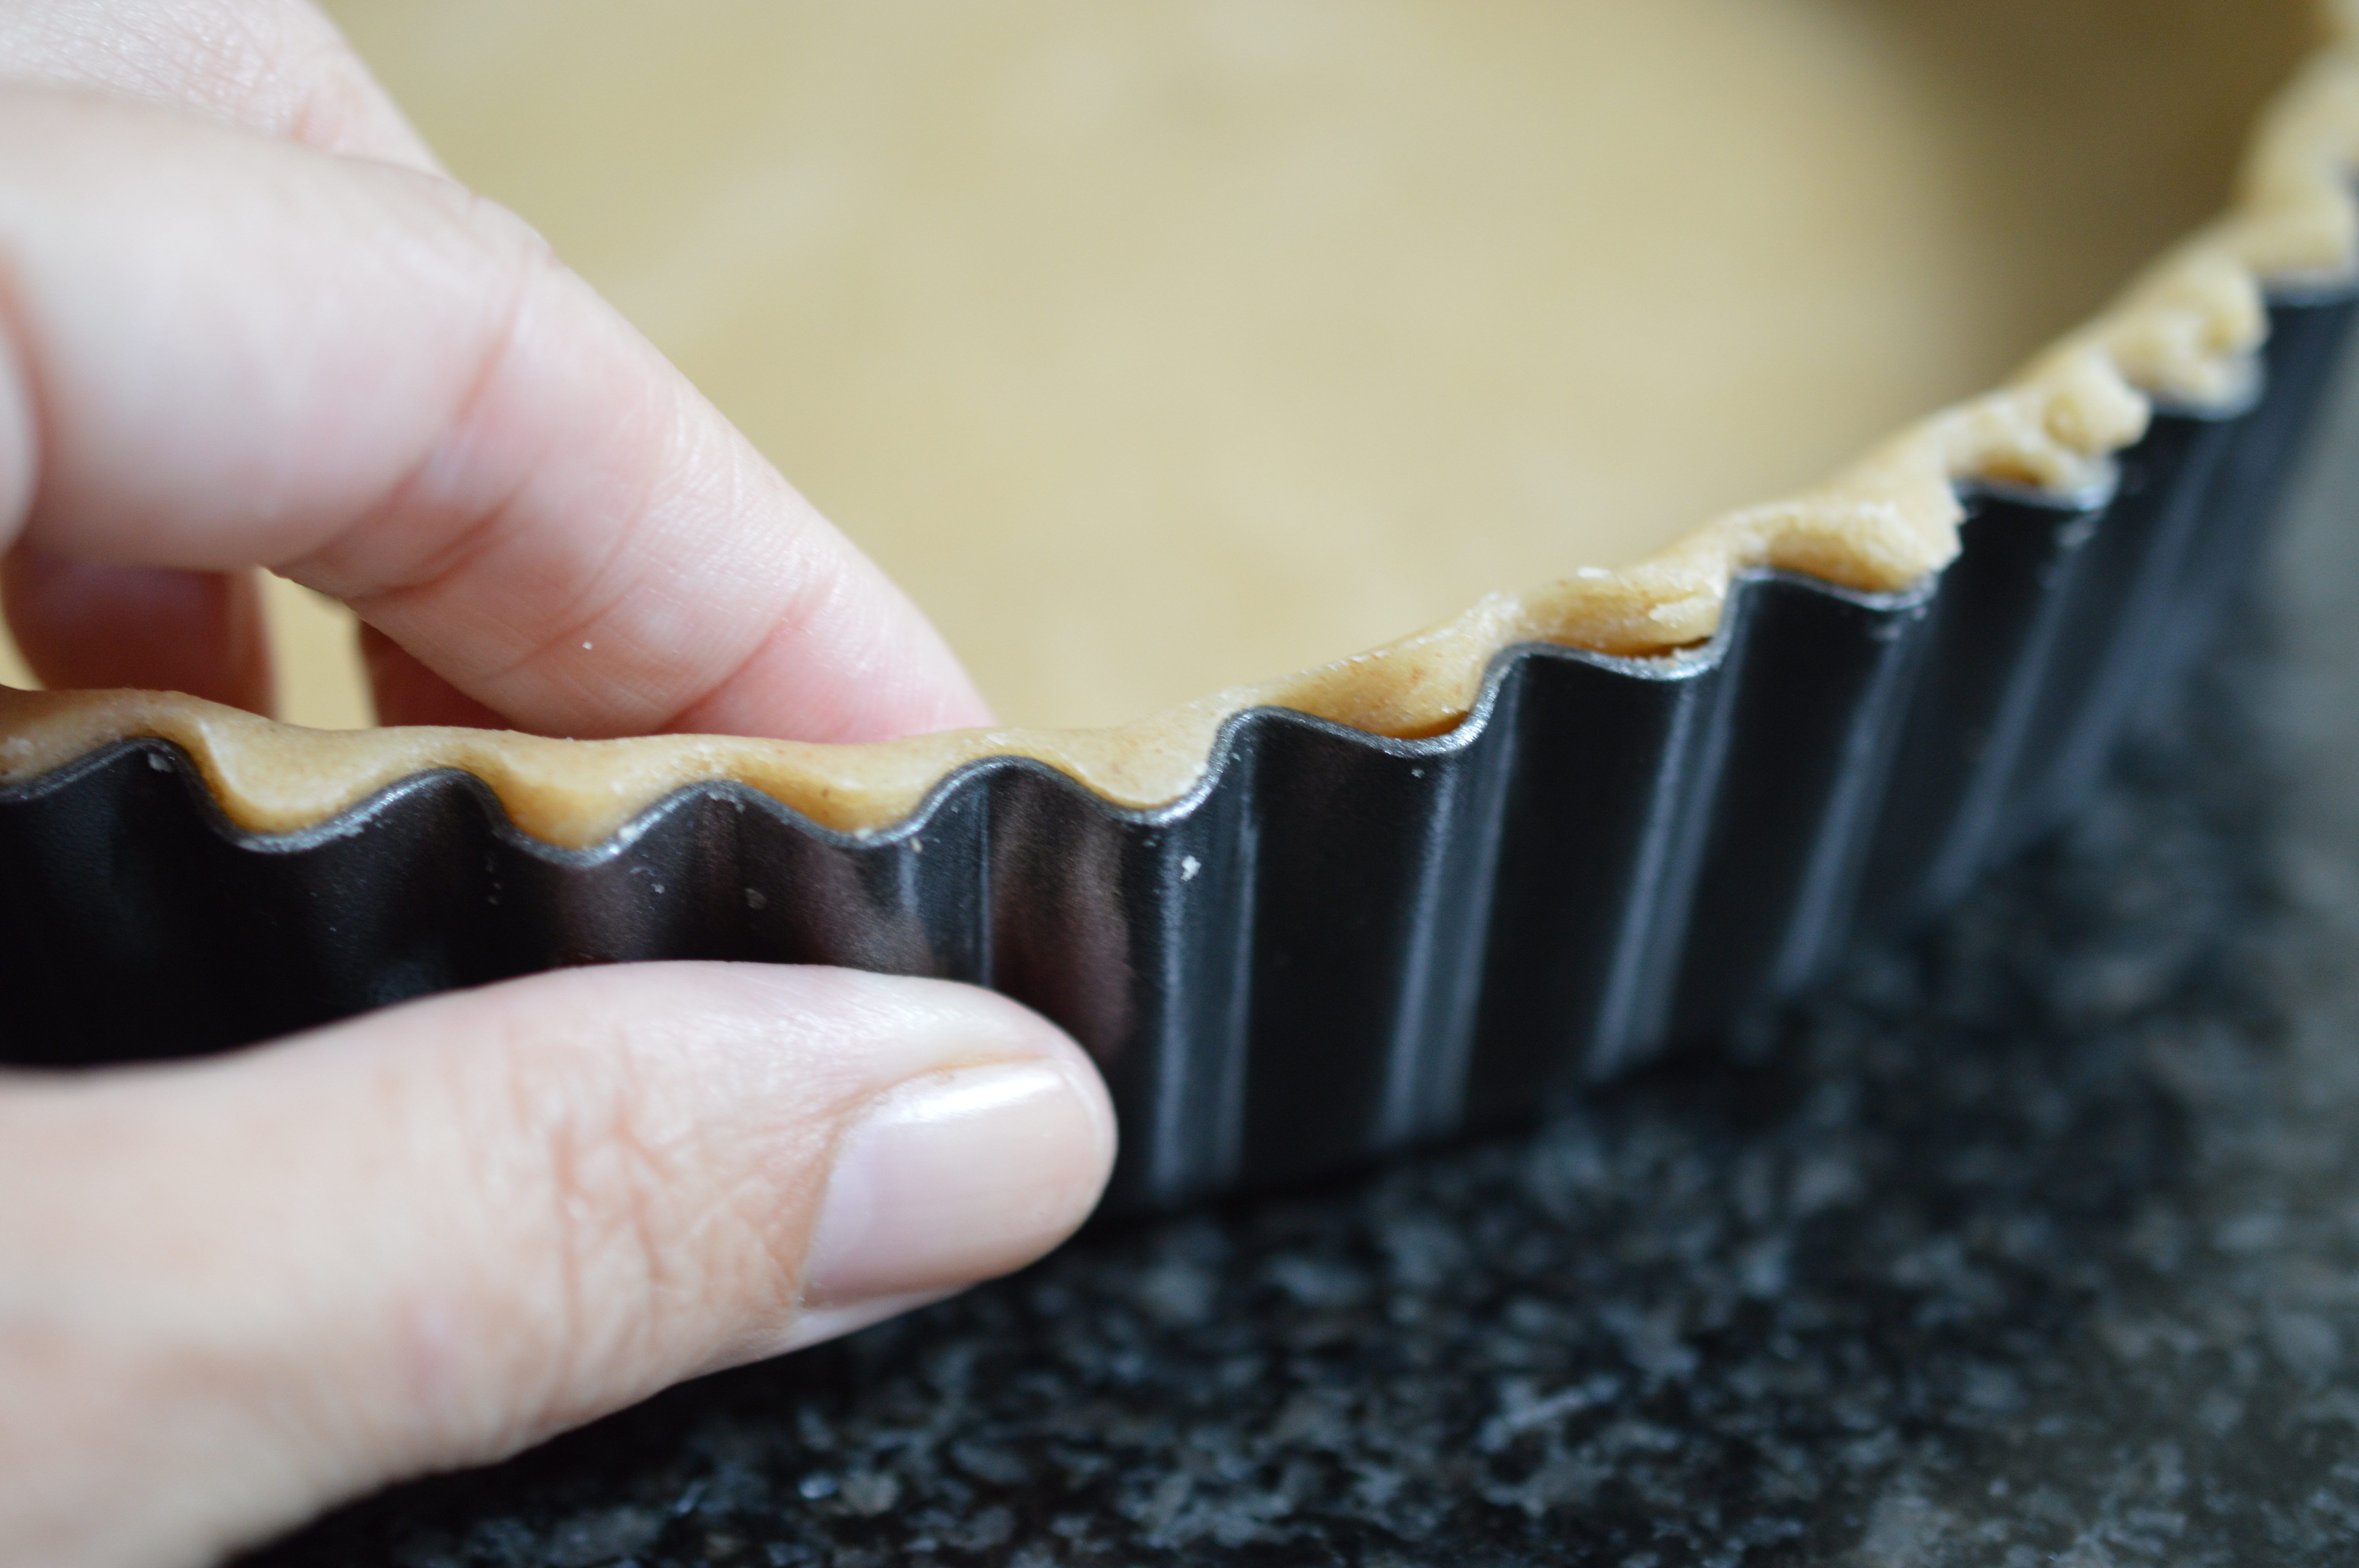
If you’ve gone for the cling wrap method, peel back the top sheet and you’ll find it easy to lift over the top of your flan tin. Otherwise, you gently fold the pastry over your rolling pin and lift over the top of the tin. Push down into the tin and don’t forget the edges.
Pass the rolling pin across the top of the flan tip and remove the excess pastry. (Don’t throw it away. Wrap it up and put it back in the fridge.)
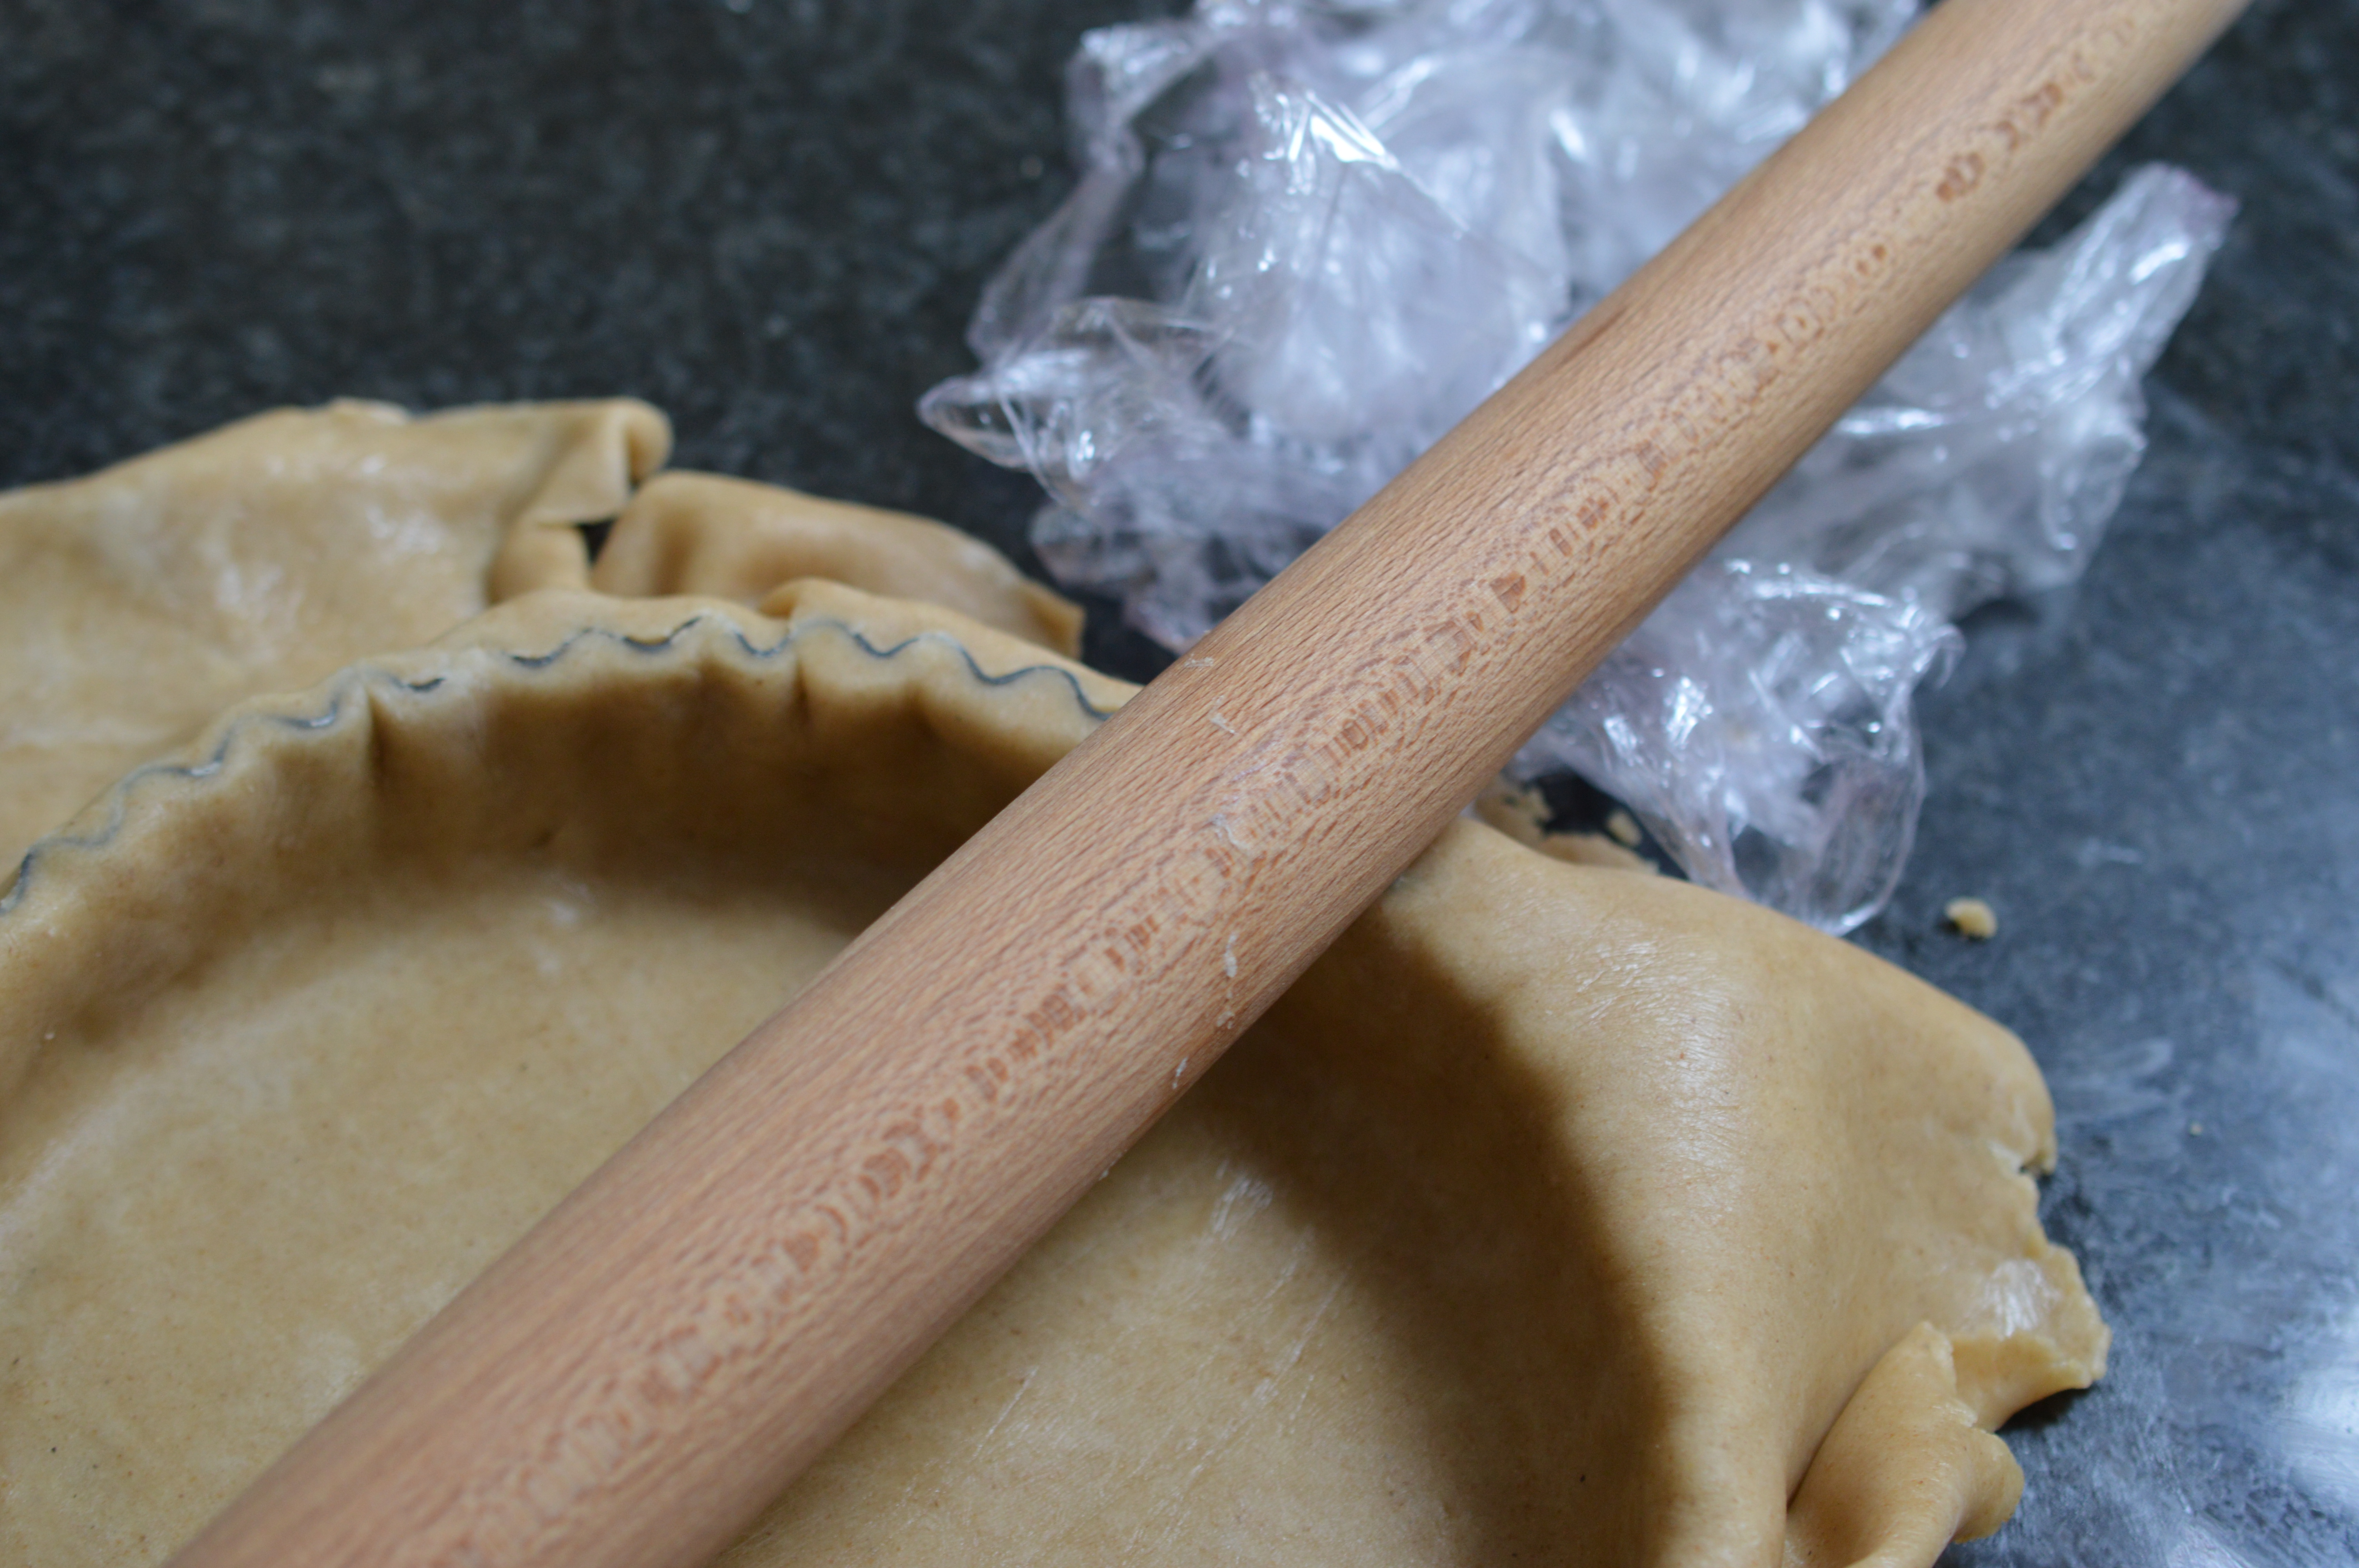
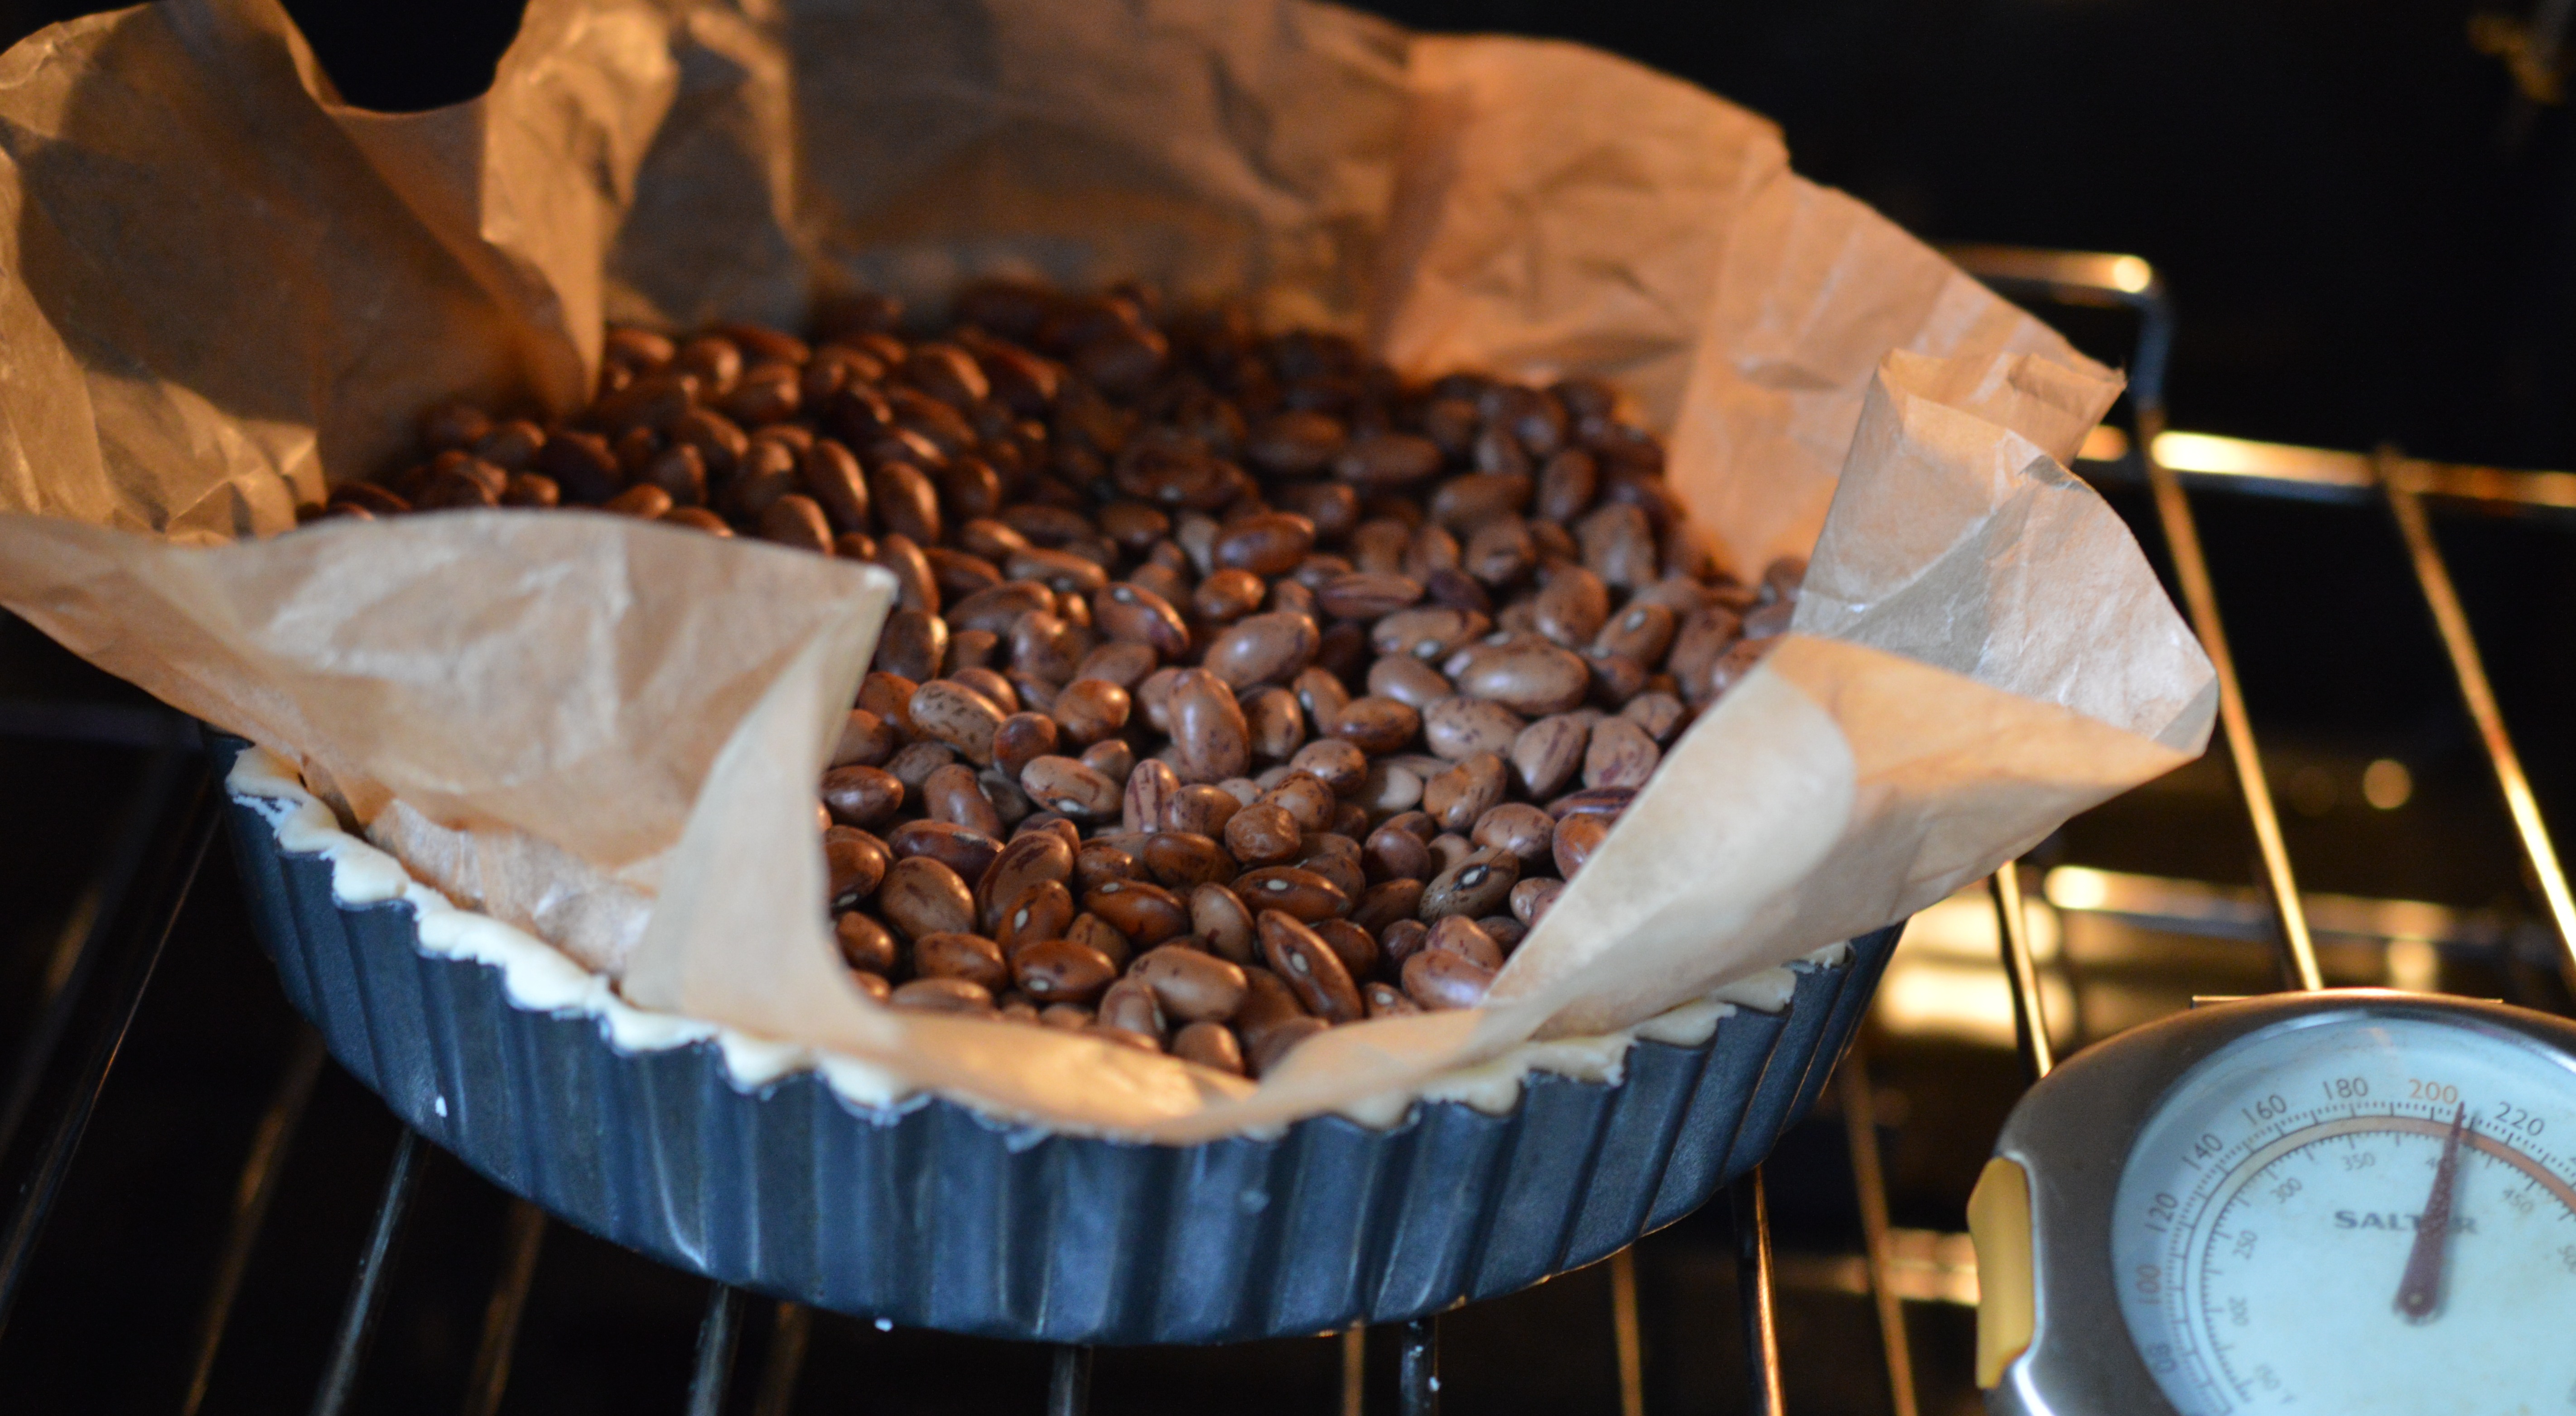
Gently push the pastry against the sides of the tin. Often there is a little shrinkage so I bring the pastry just slightly above the sides of the tin. Then scrunch up a square of greaseproof paper and place on top of the uncooked pastry case. Fill to the top with dried beans, so the sides are supported while the pastry is cooking.
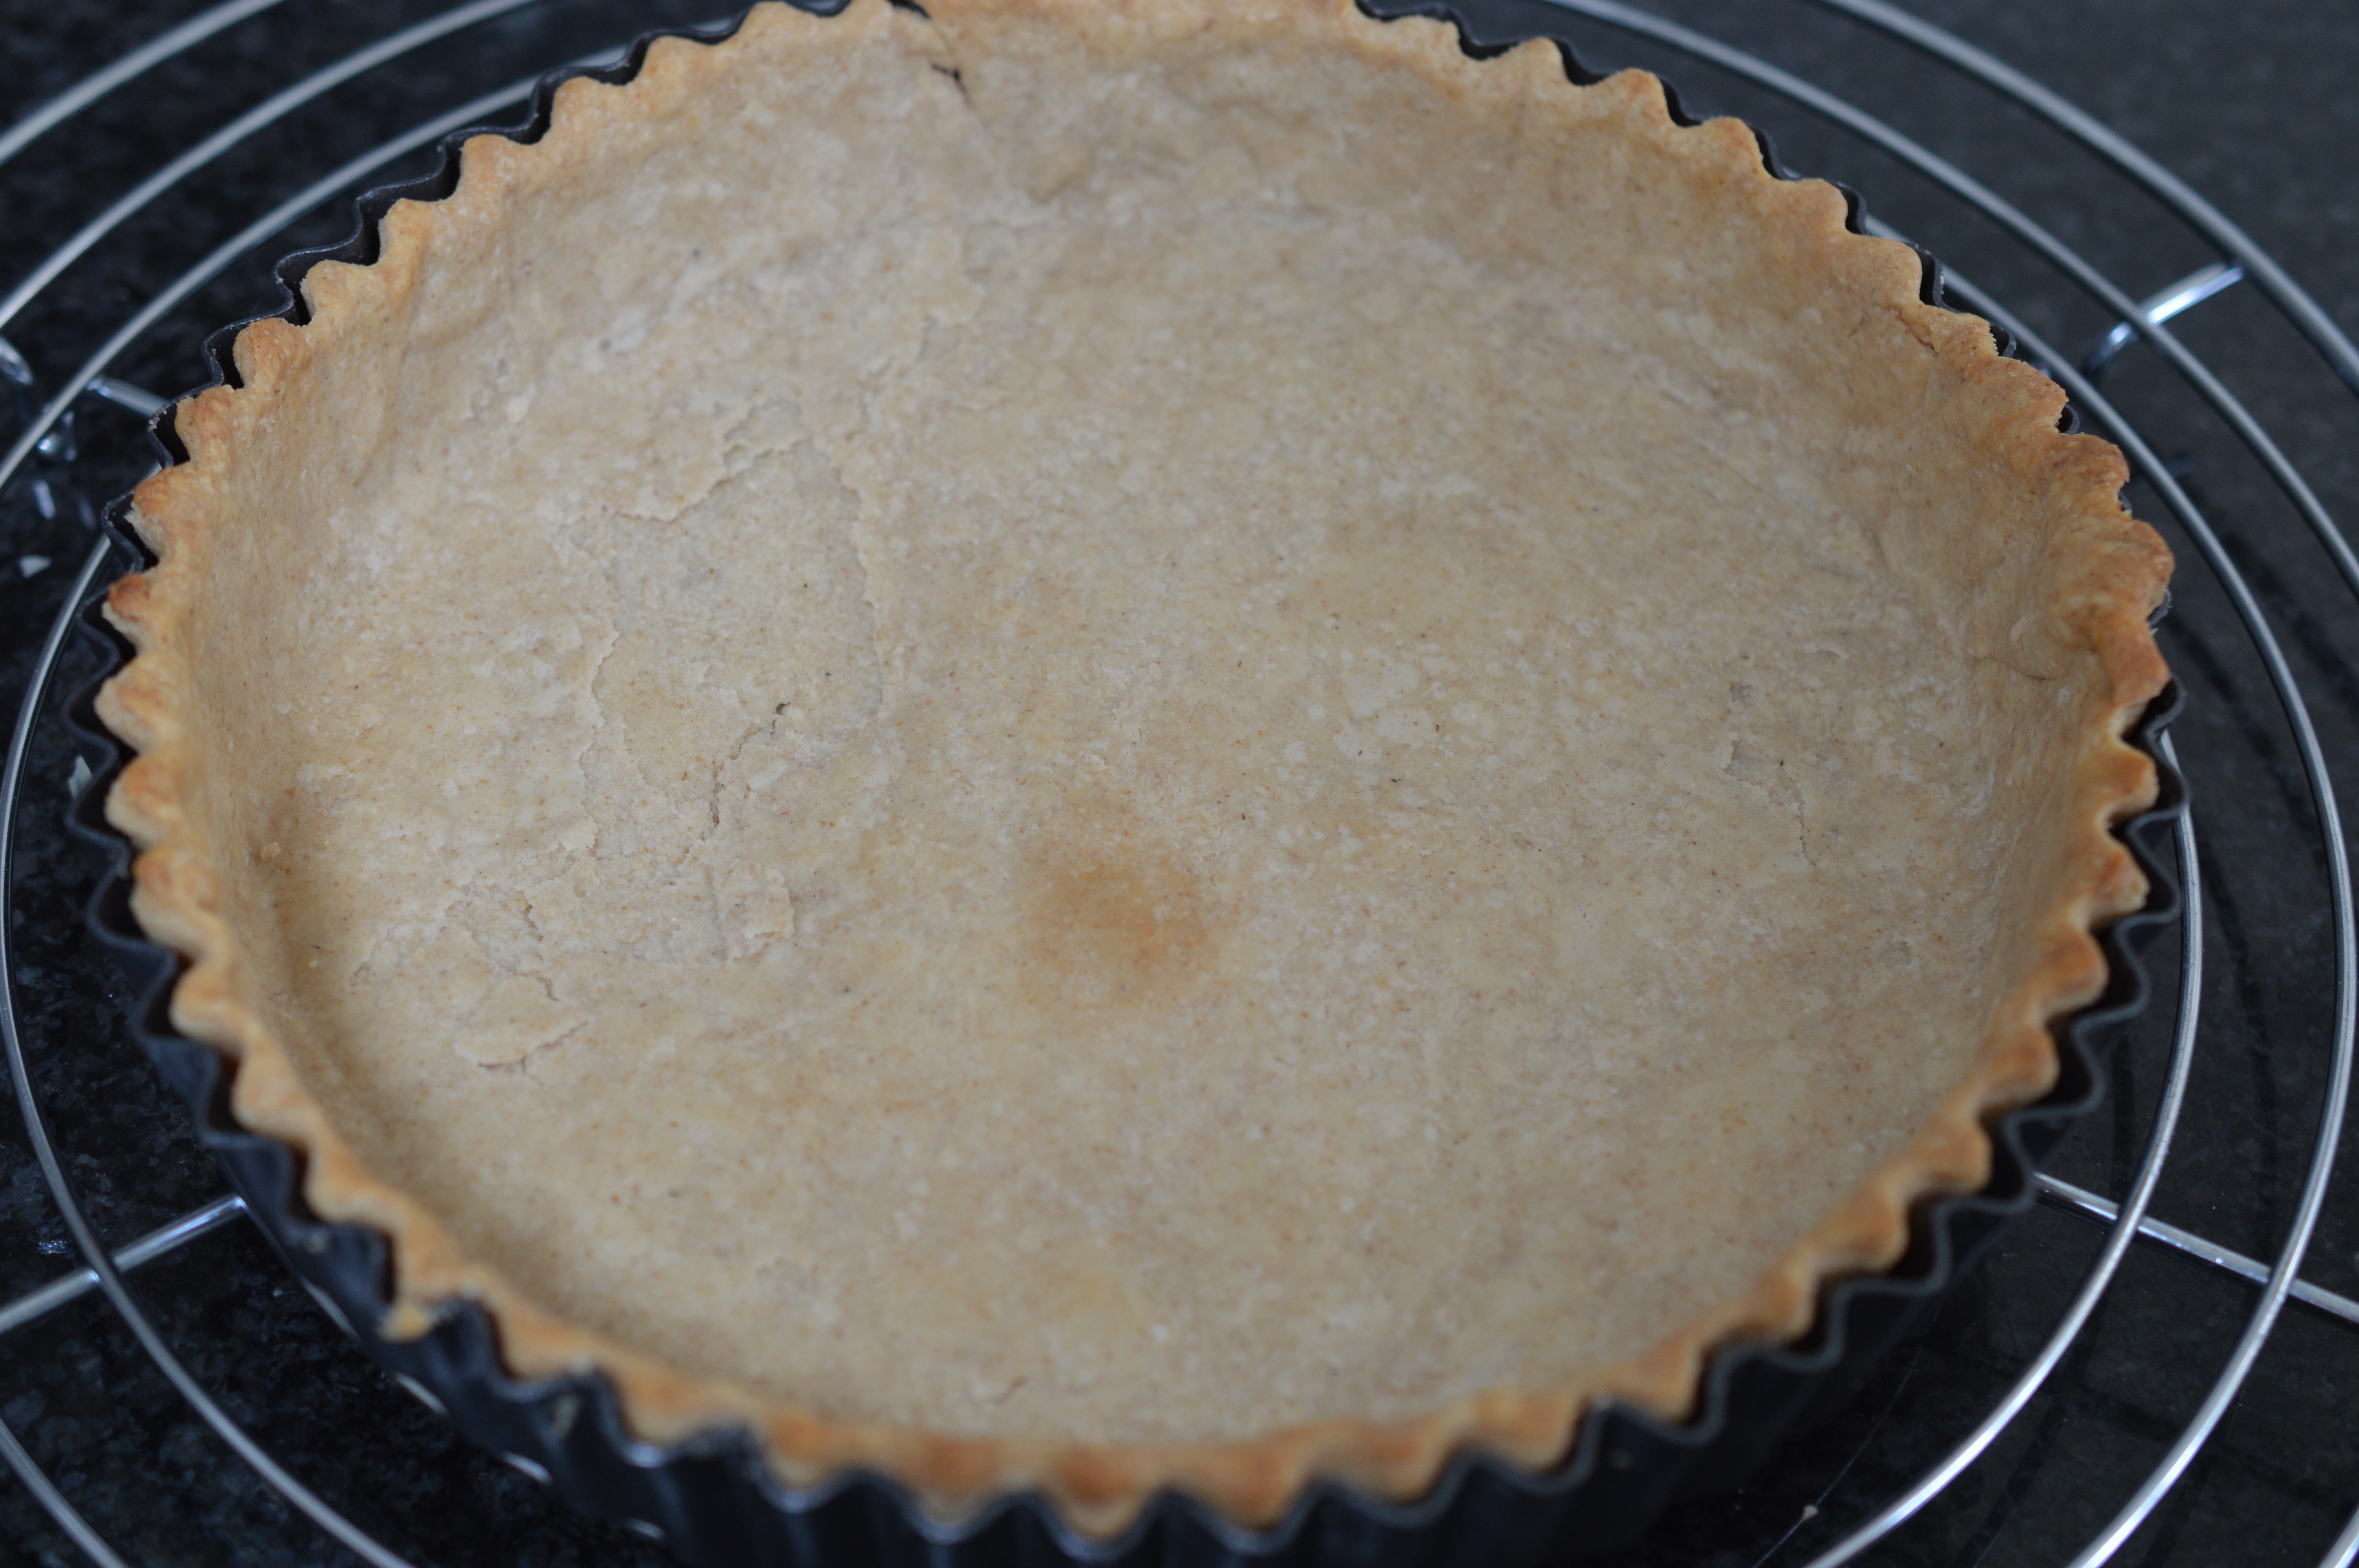
This is ‘baking blind’. Place in the oven. After 15 minutes remove the paper and beans and return for an additional 5 minutes. (Keep the beans. Once they’re cool, put them in a jar, label, and they’re ready for the next time.)
Give it 5 minutes.
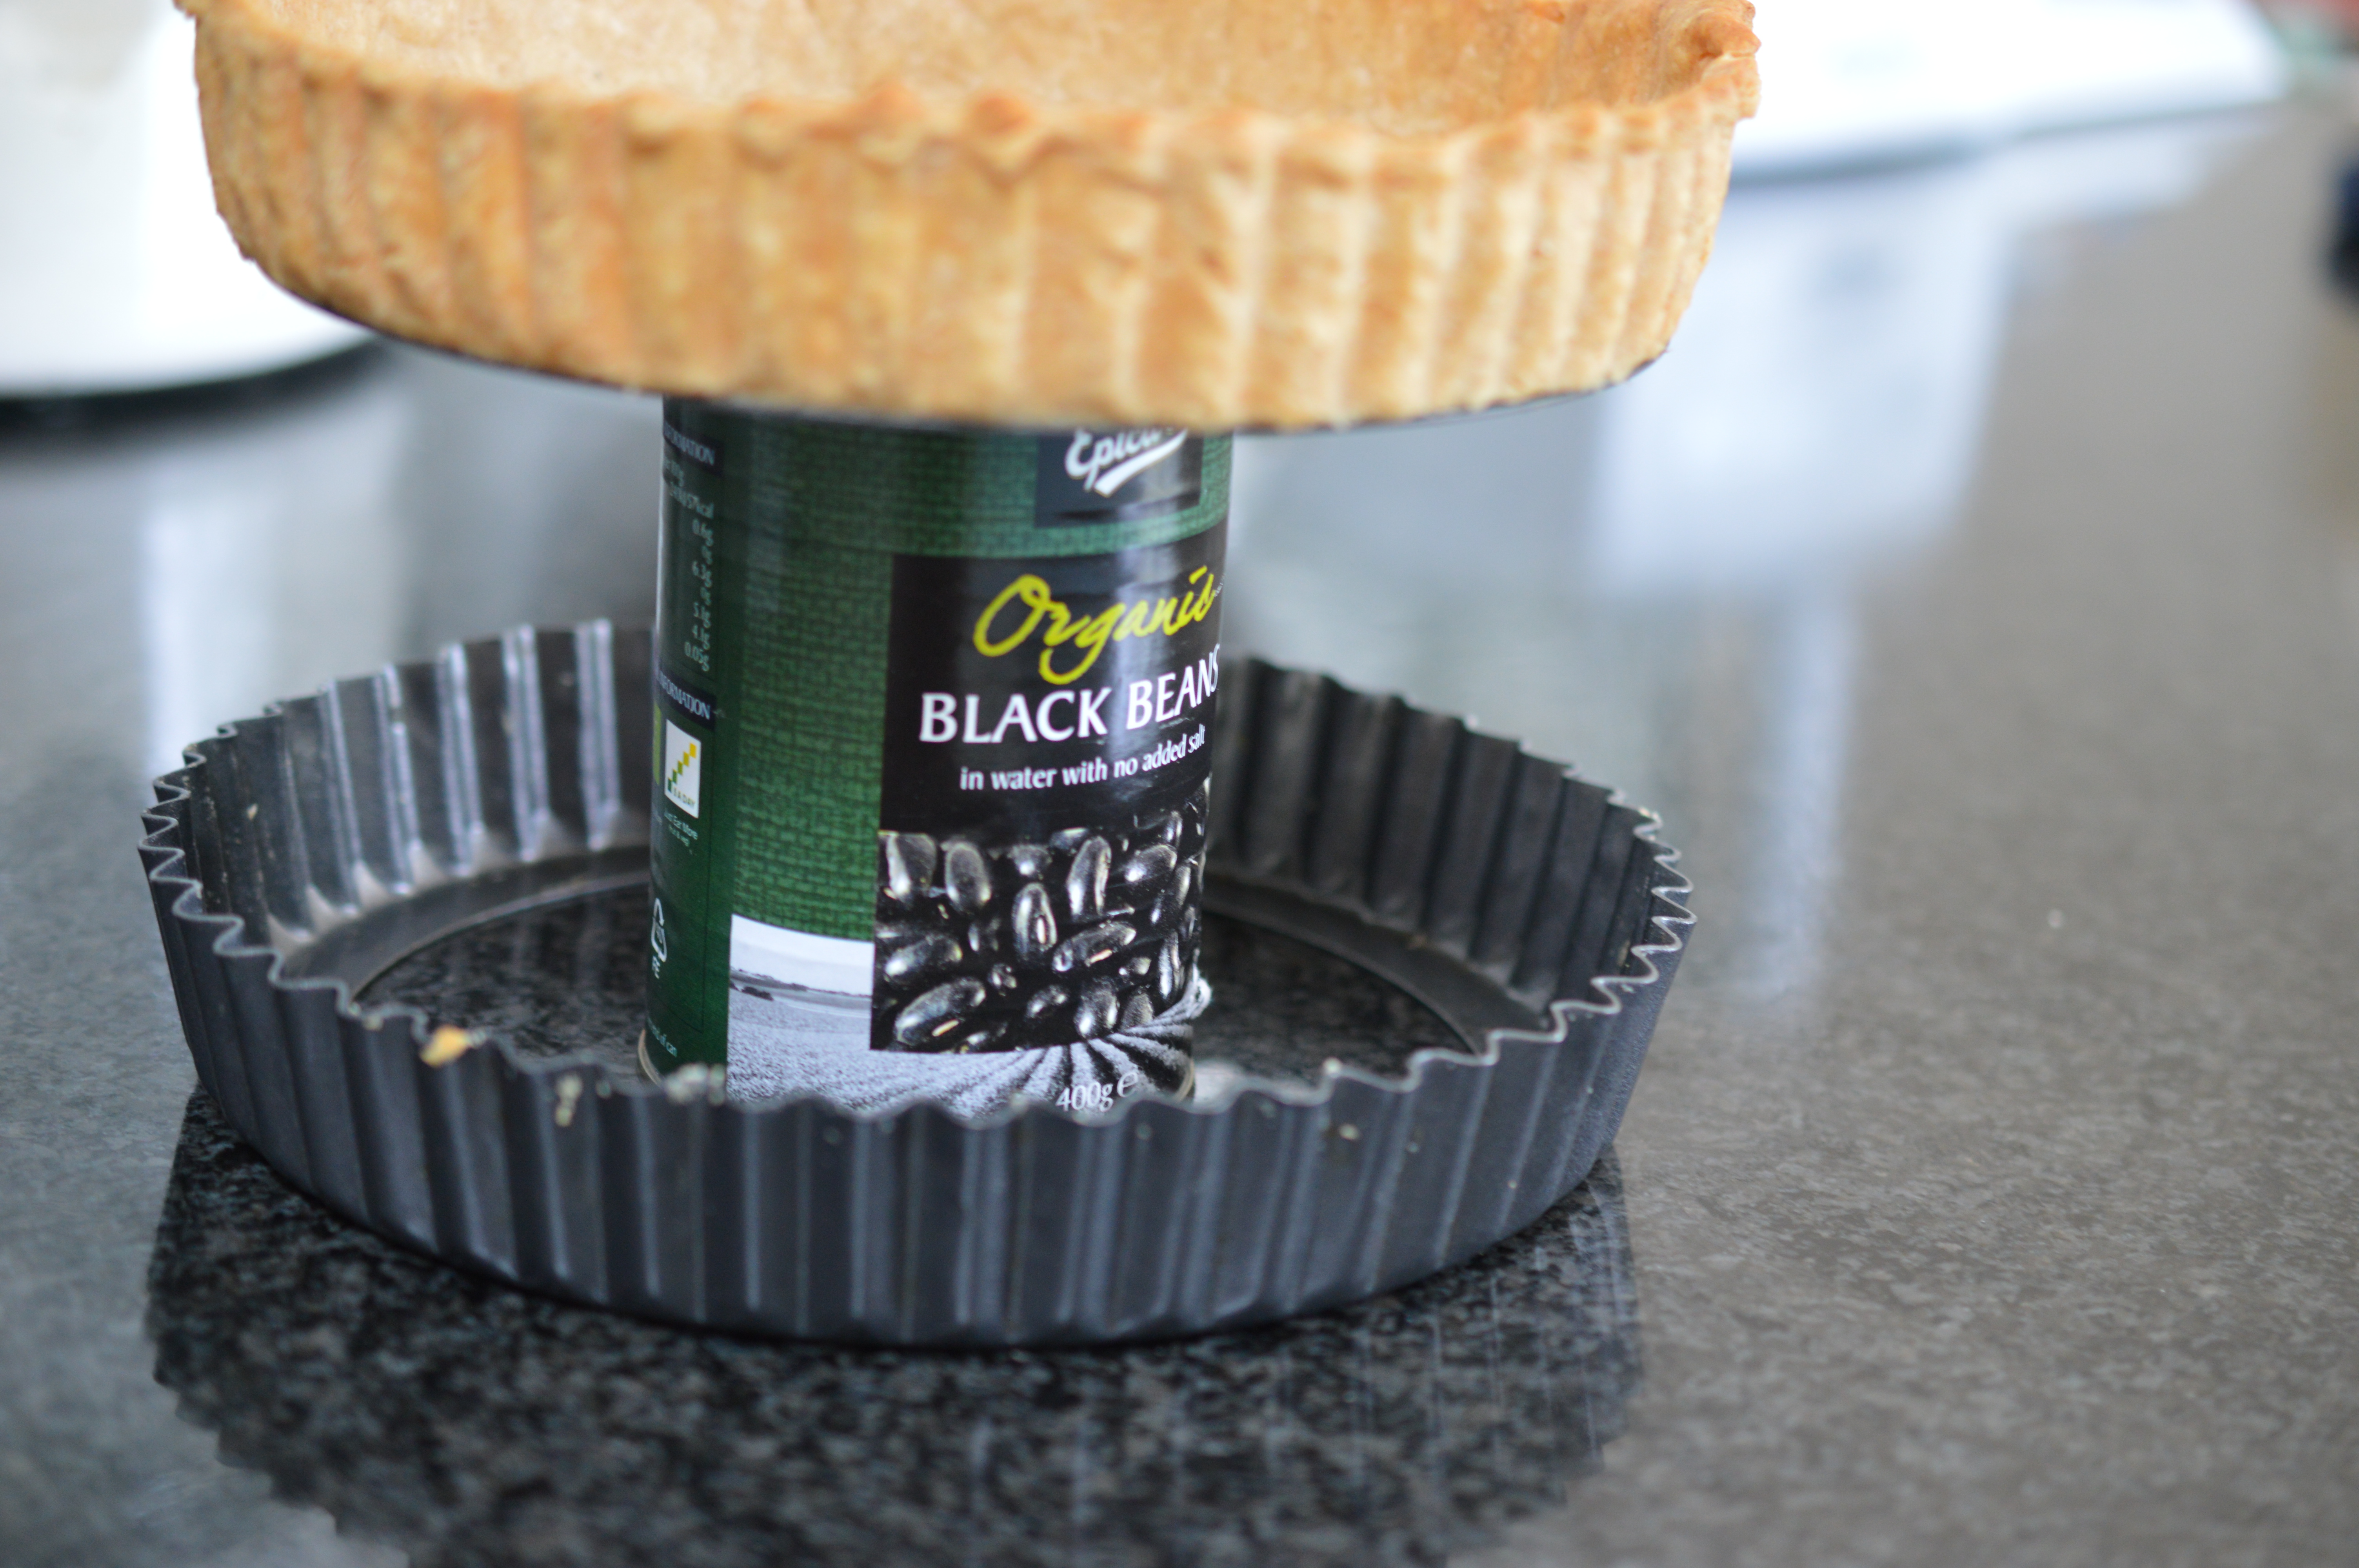
Then take it out of the flan ring. I tend to use a larger, 30 cm, flan tin base and slide it between the pastry case and the base. Already you have your pastry case on something you can return to the oven. Otherwise, place the pastry case on a baking tray.
Sieve the cooling lemony mixture into the pastry case. (It’s really worth sieving because you’ll catch the white membrane which held the white to yolk and have a lovely smooth sauce. I made two pies – and that is four eggs worth of debris.)
This is a break point, if you want one.
Some recipes reckon you need the liquid hot to cook the underside of the meringue. Some state you need to chill. Some have a seamless progression of stages ….
This recipe is written as a seamless process, and it works just fine. If you are doing that, turn the oven down to Gas Mark 2/300°F.
I often chill. The optimum serving temperature is ‘warm’ and if there are other things going on it makes the whole thing so much simpler if you have the lemony pie base sitting in the fridge just waiting for the meringue top …
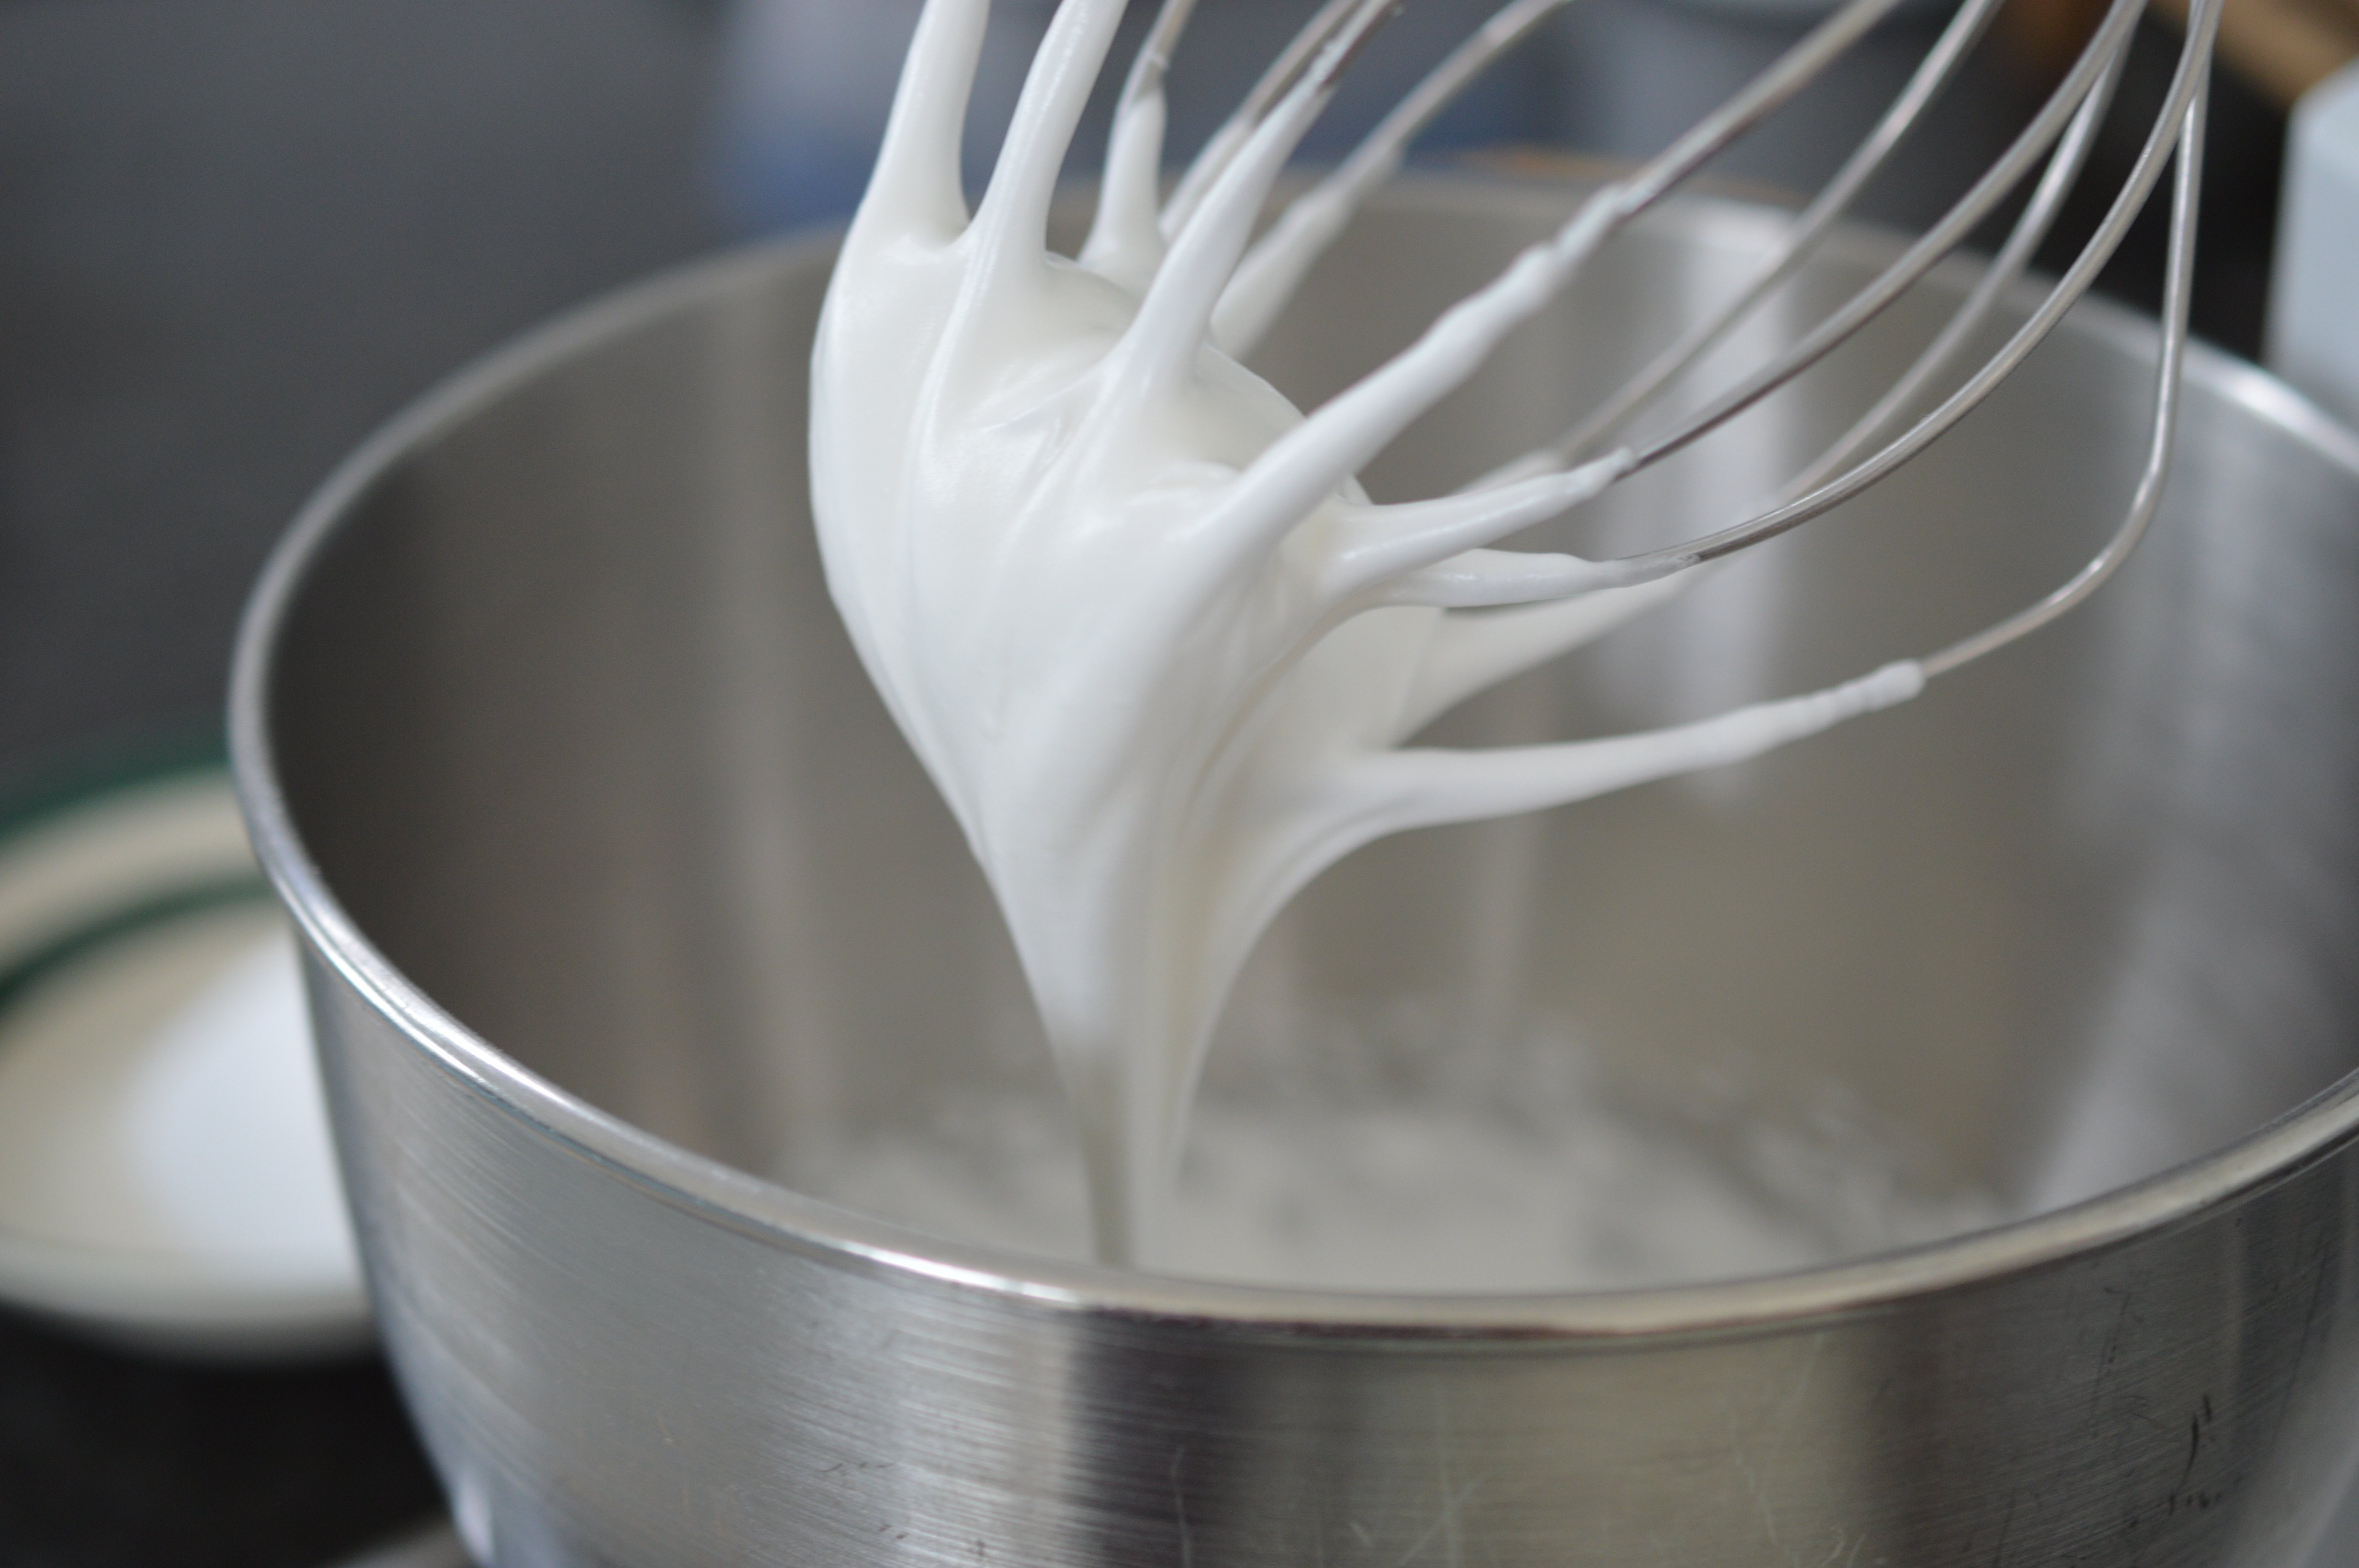
The two egg whites need to go into a scrupulously clean bowl. Whisk until it’s stiff. Add half the caster sugar and whisk again until it’s smooth and shiny and holds its shape. Tip in all but a dessertspoon of the caster sugar and gently fold in.
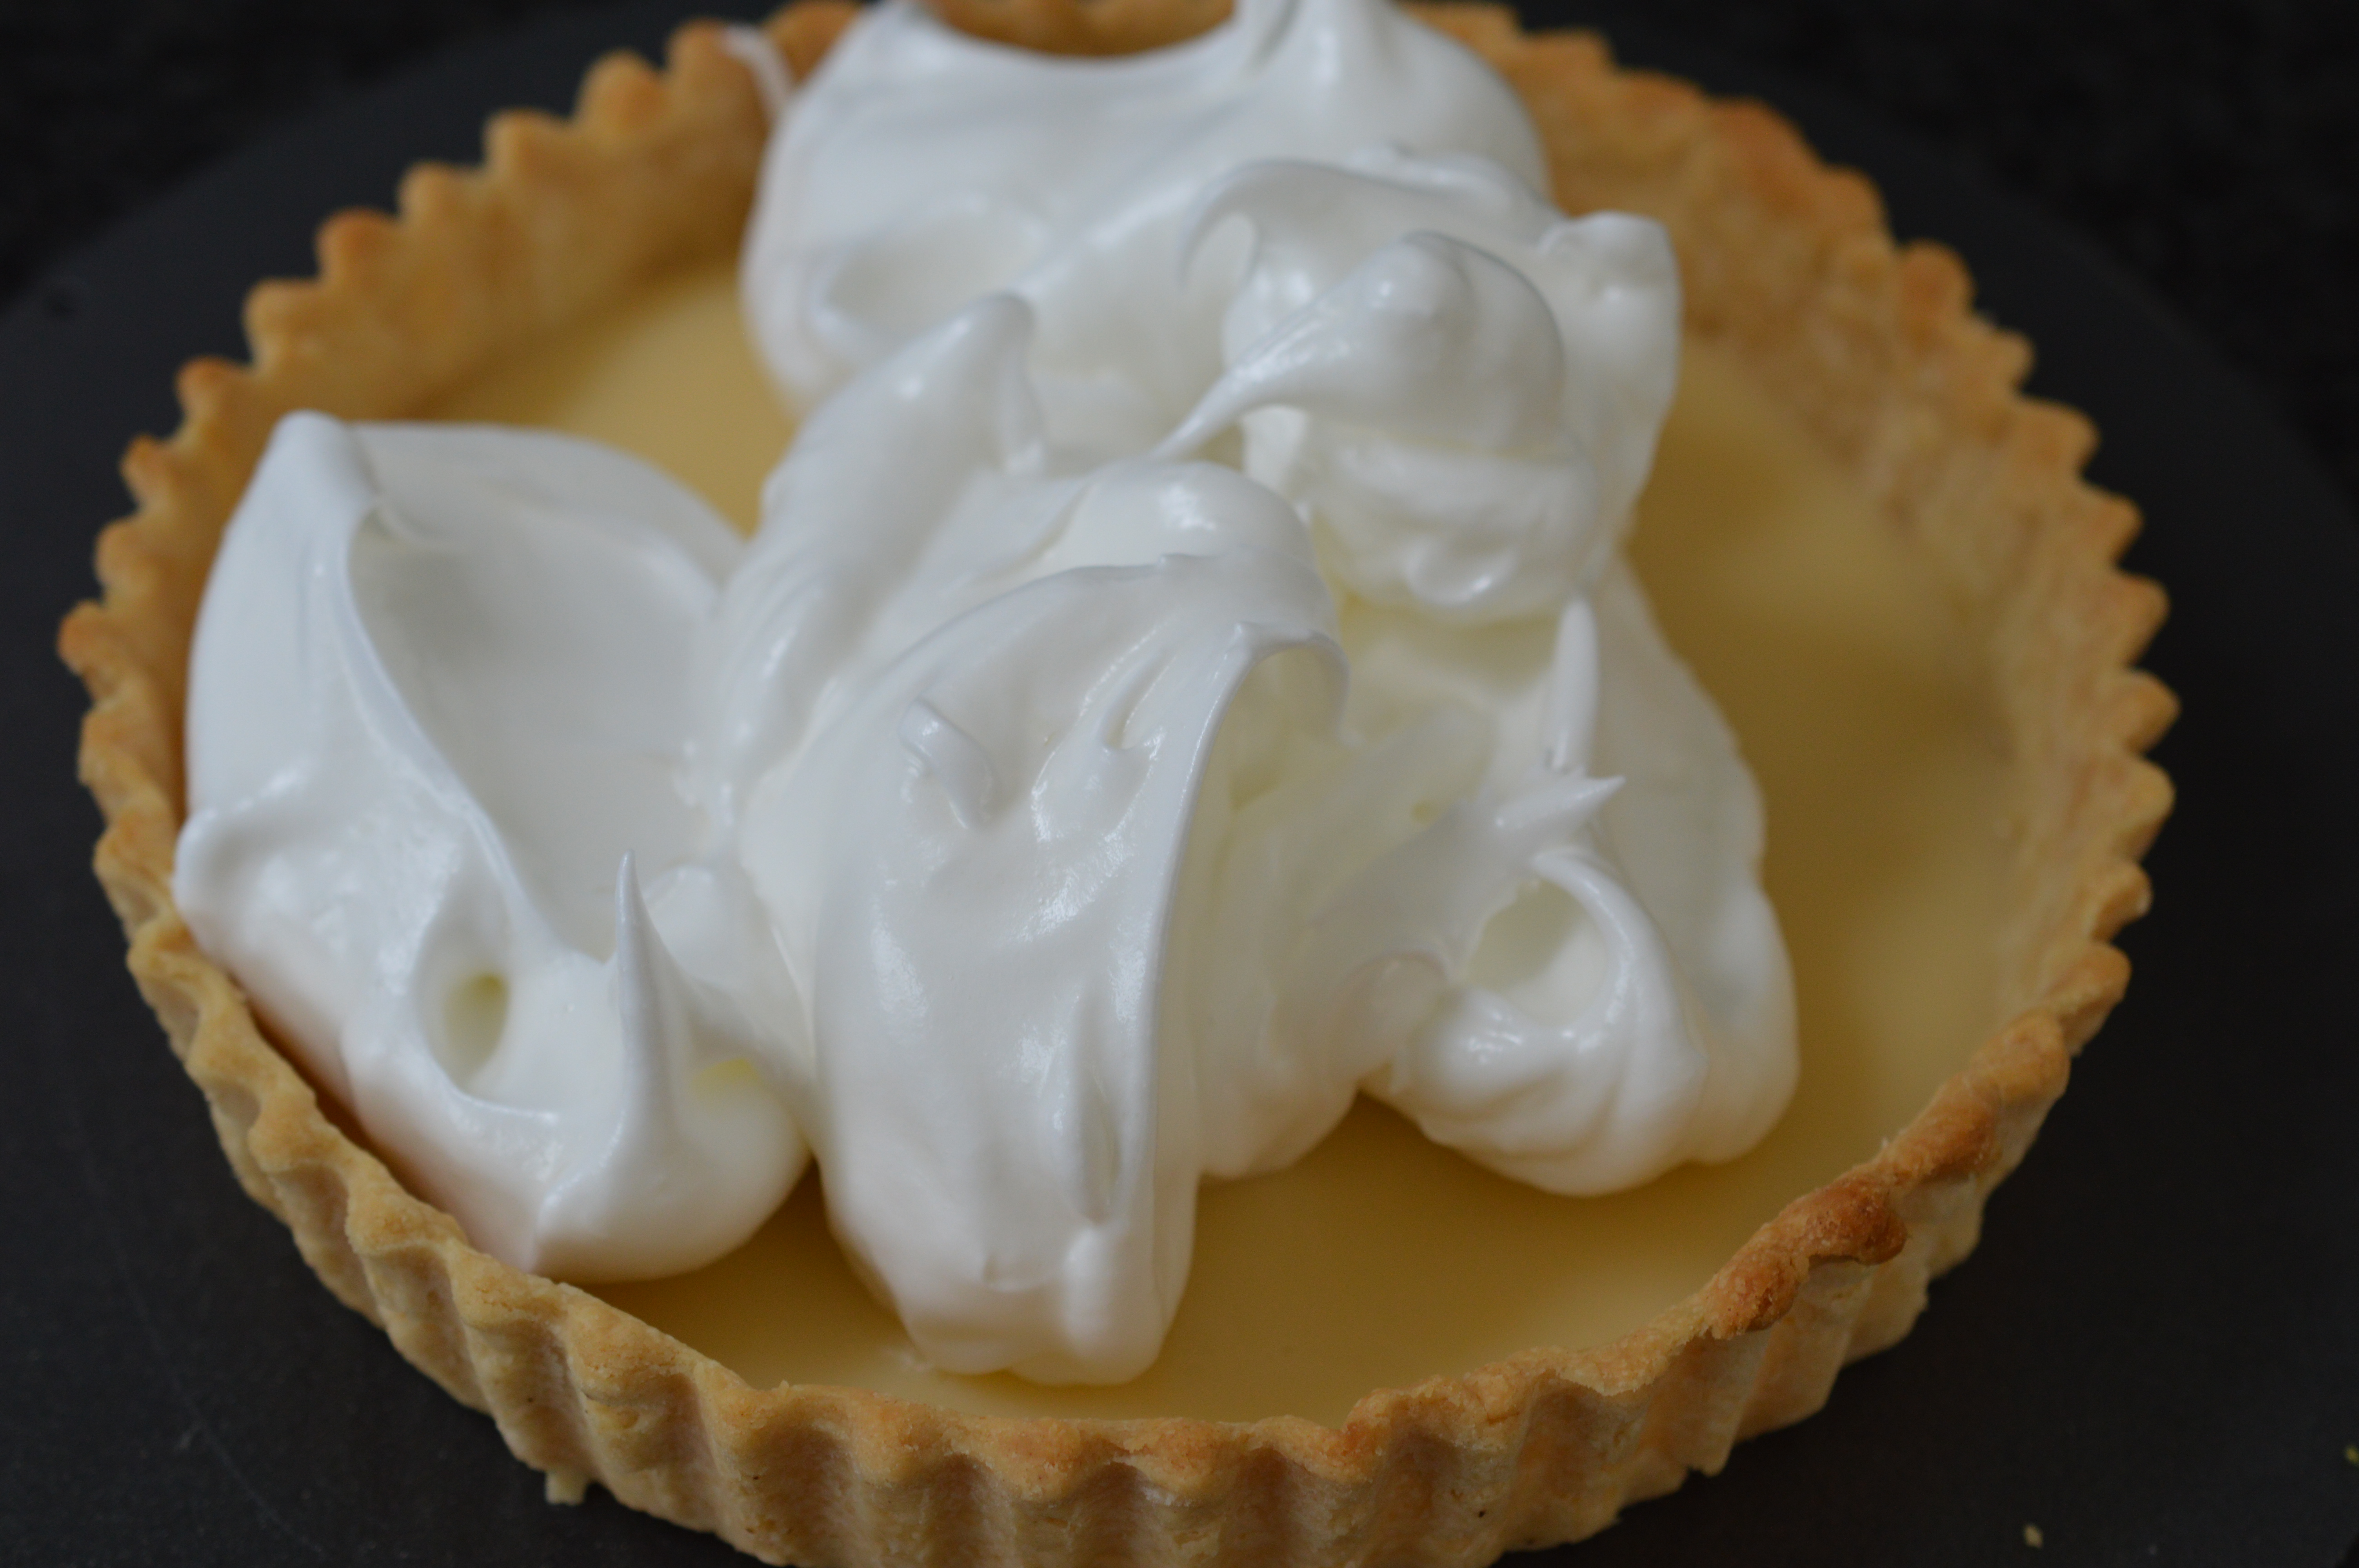
This next part is slightly easier if you’ve chilled the mixture. Gently spread the meringue over the top of the lemony mixture, starting at the sides and spreading to the middle. Make sure the meringue touches the pastry sides as that will make a seal and prevent any weeping.
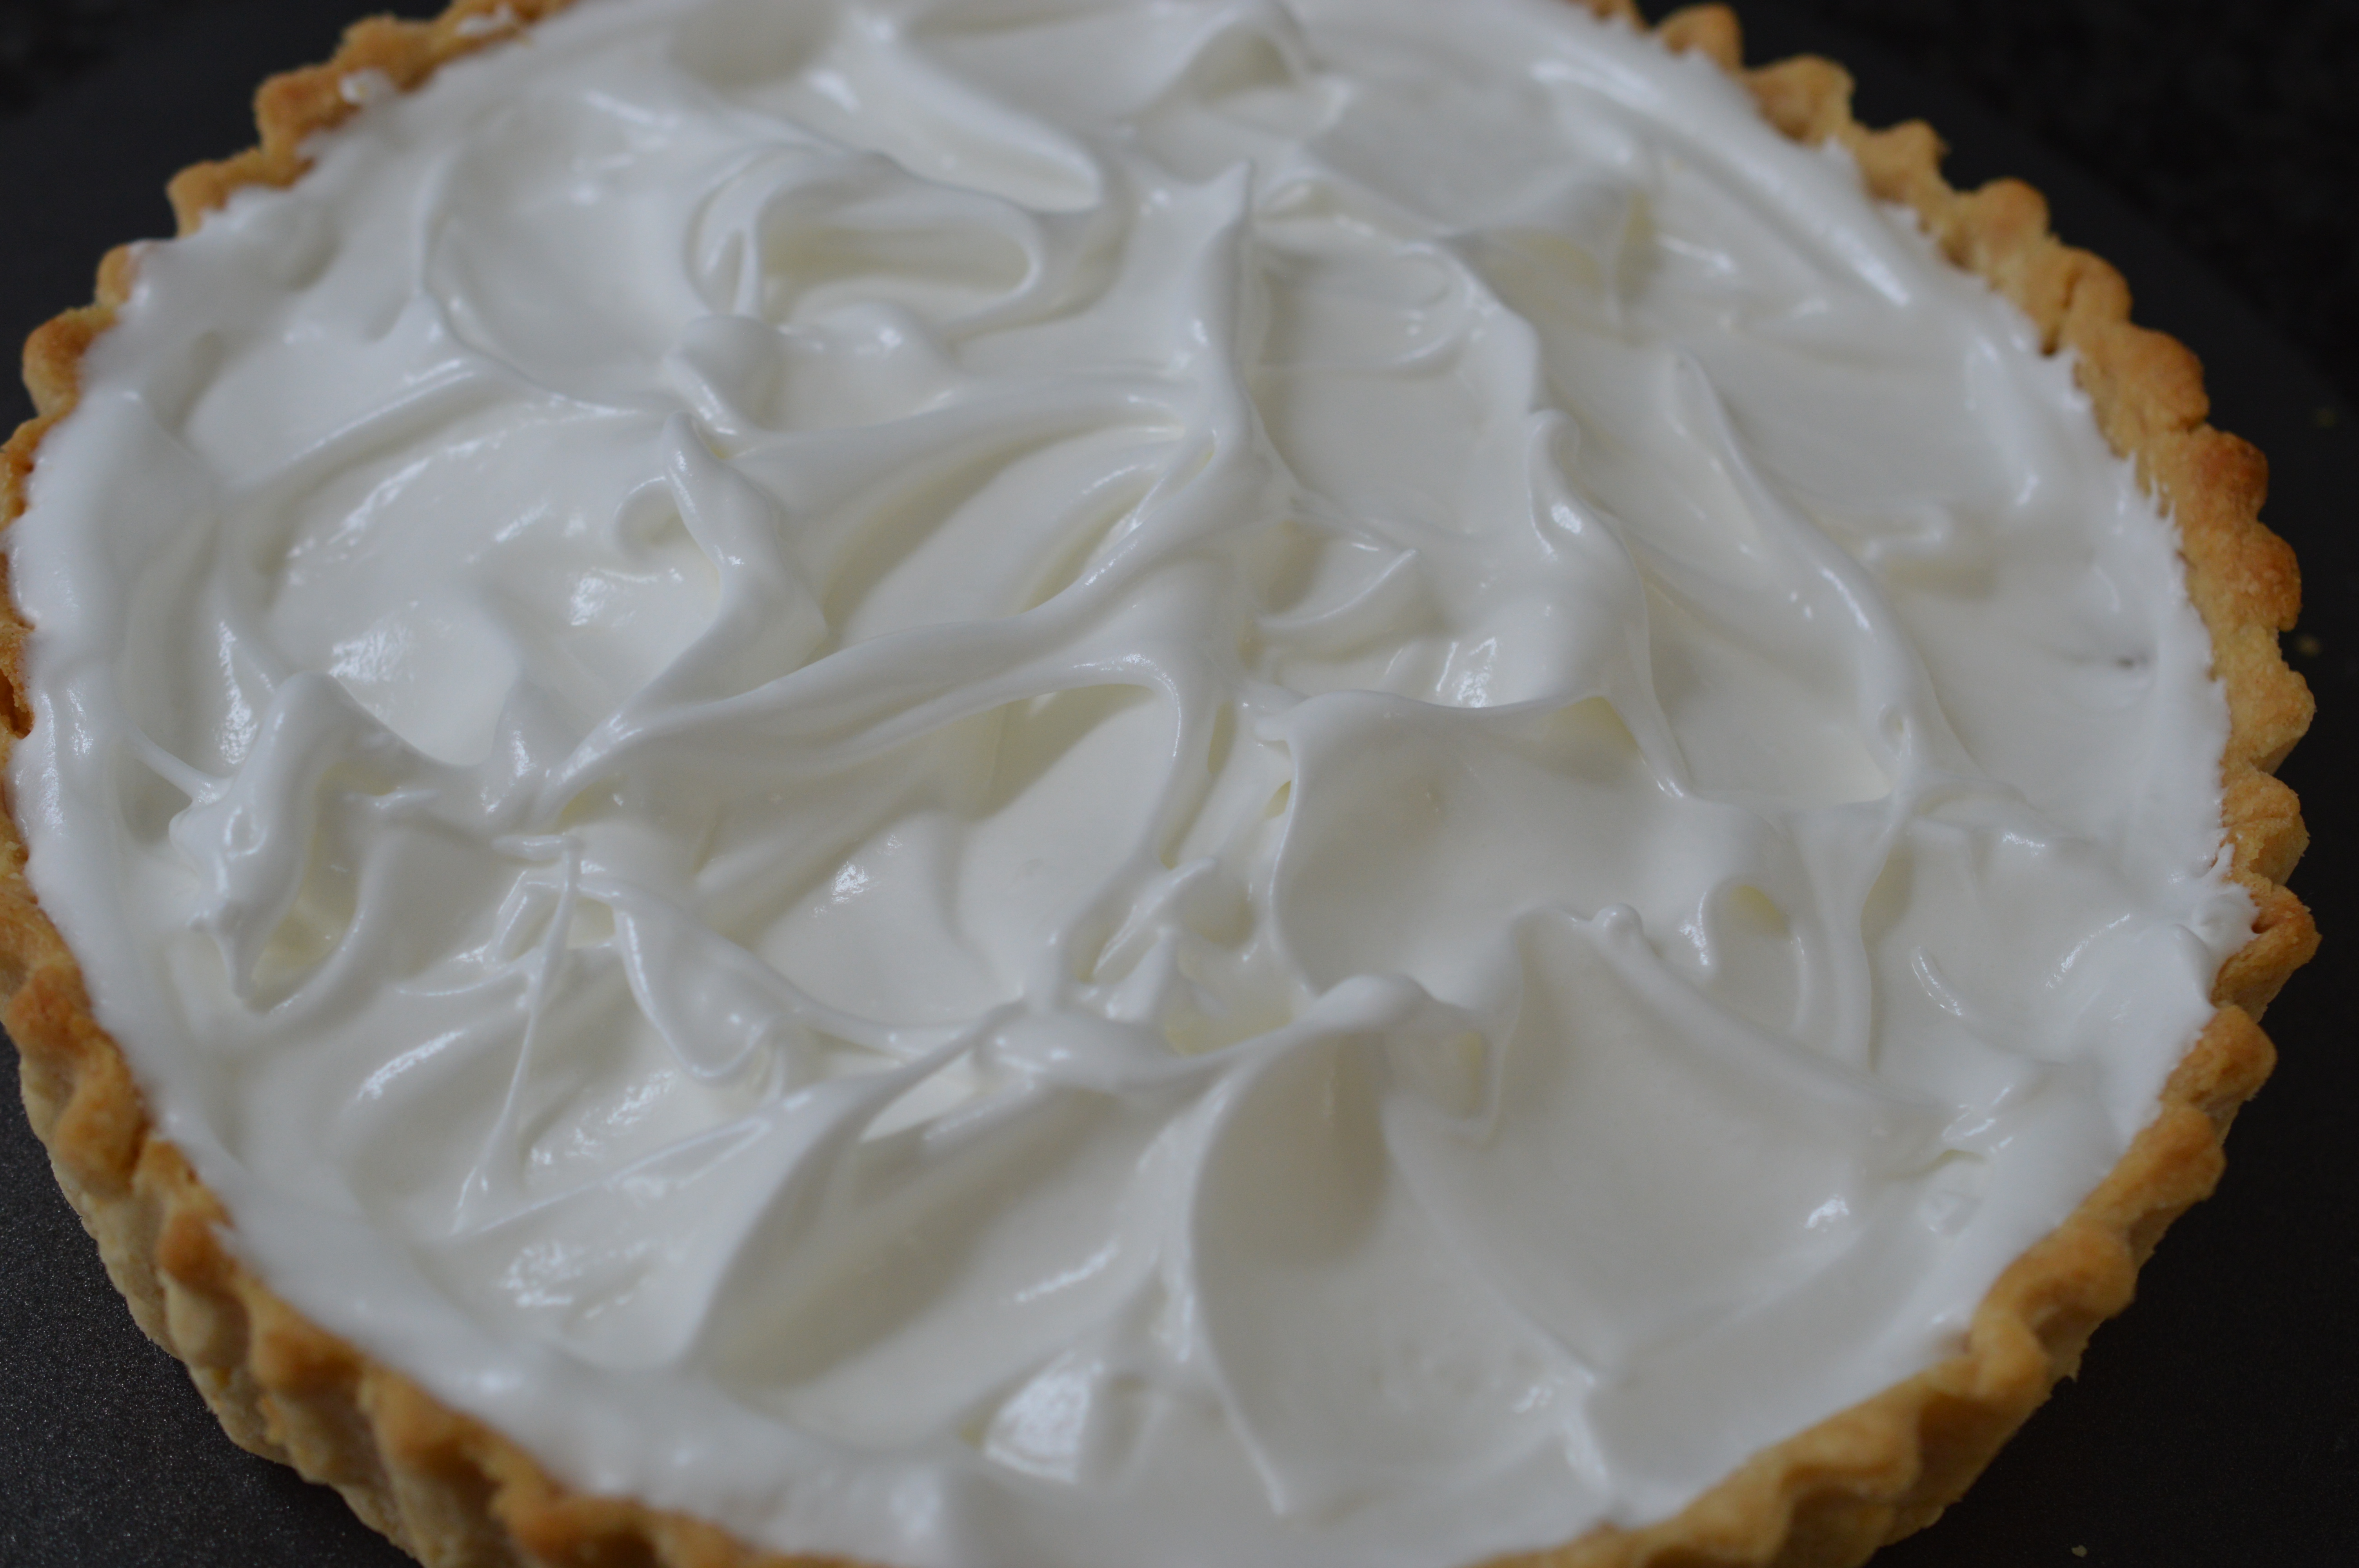
Sprinkle over the remaining caster sugar and immediately put it back into the now cooler oven for 25-30 minutes.
When the meringue is crisp, it’s ready. Leave until warm. Eat.
‘Cold’ might not be perfection, but it is still worth the calories!
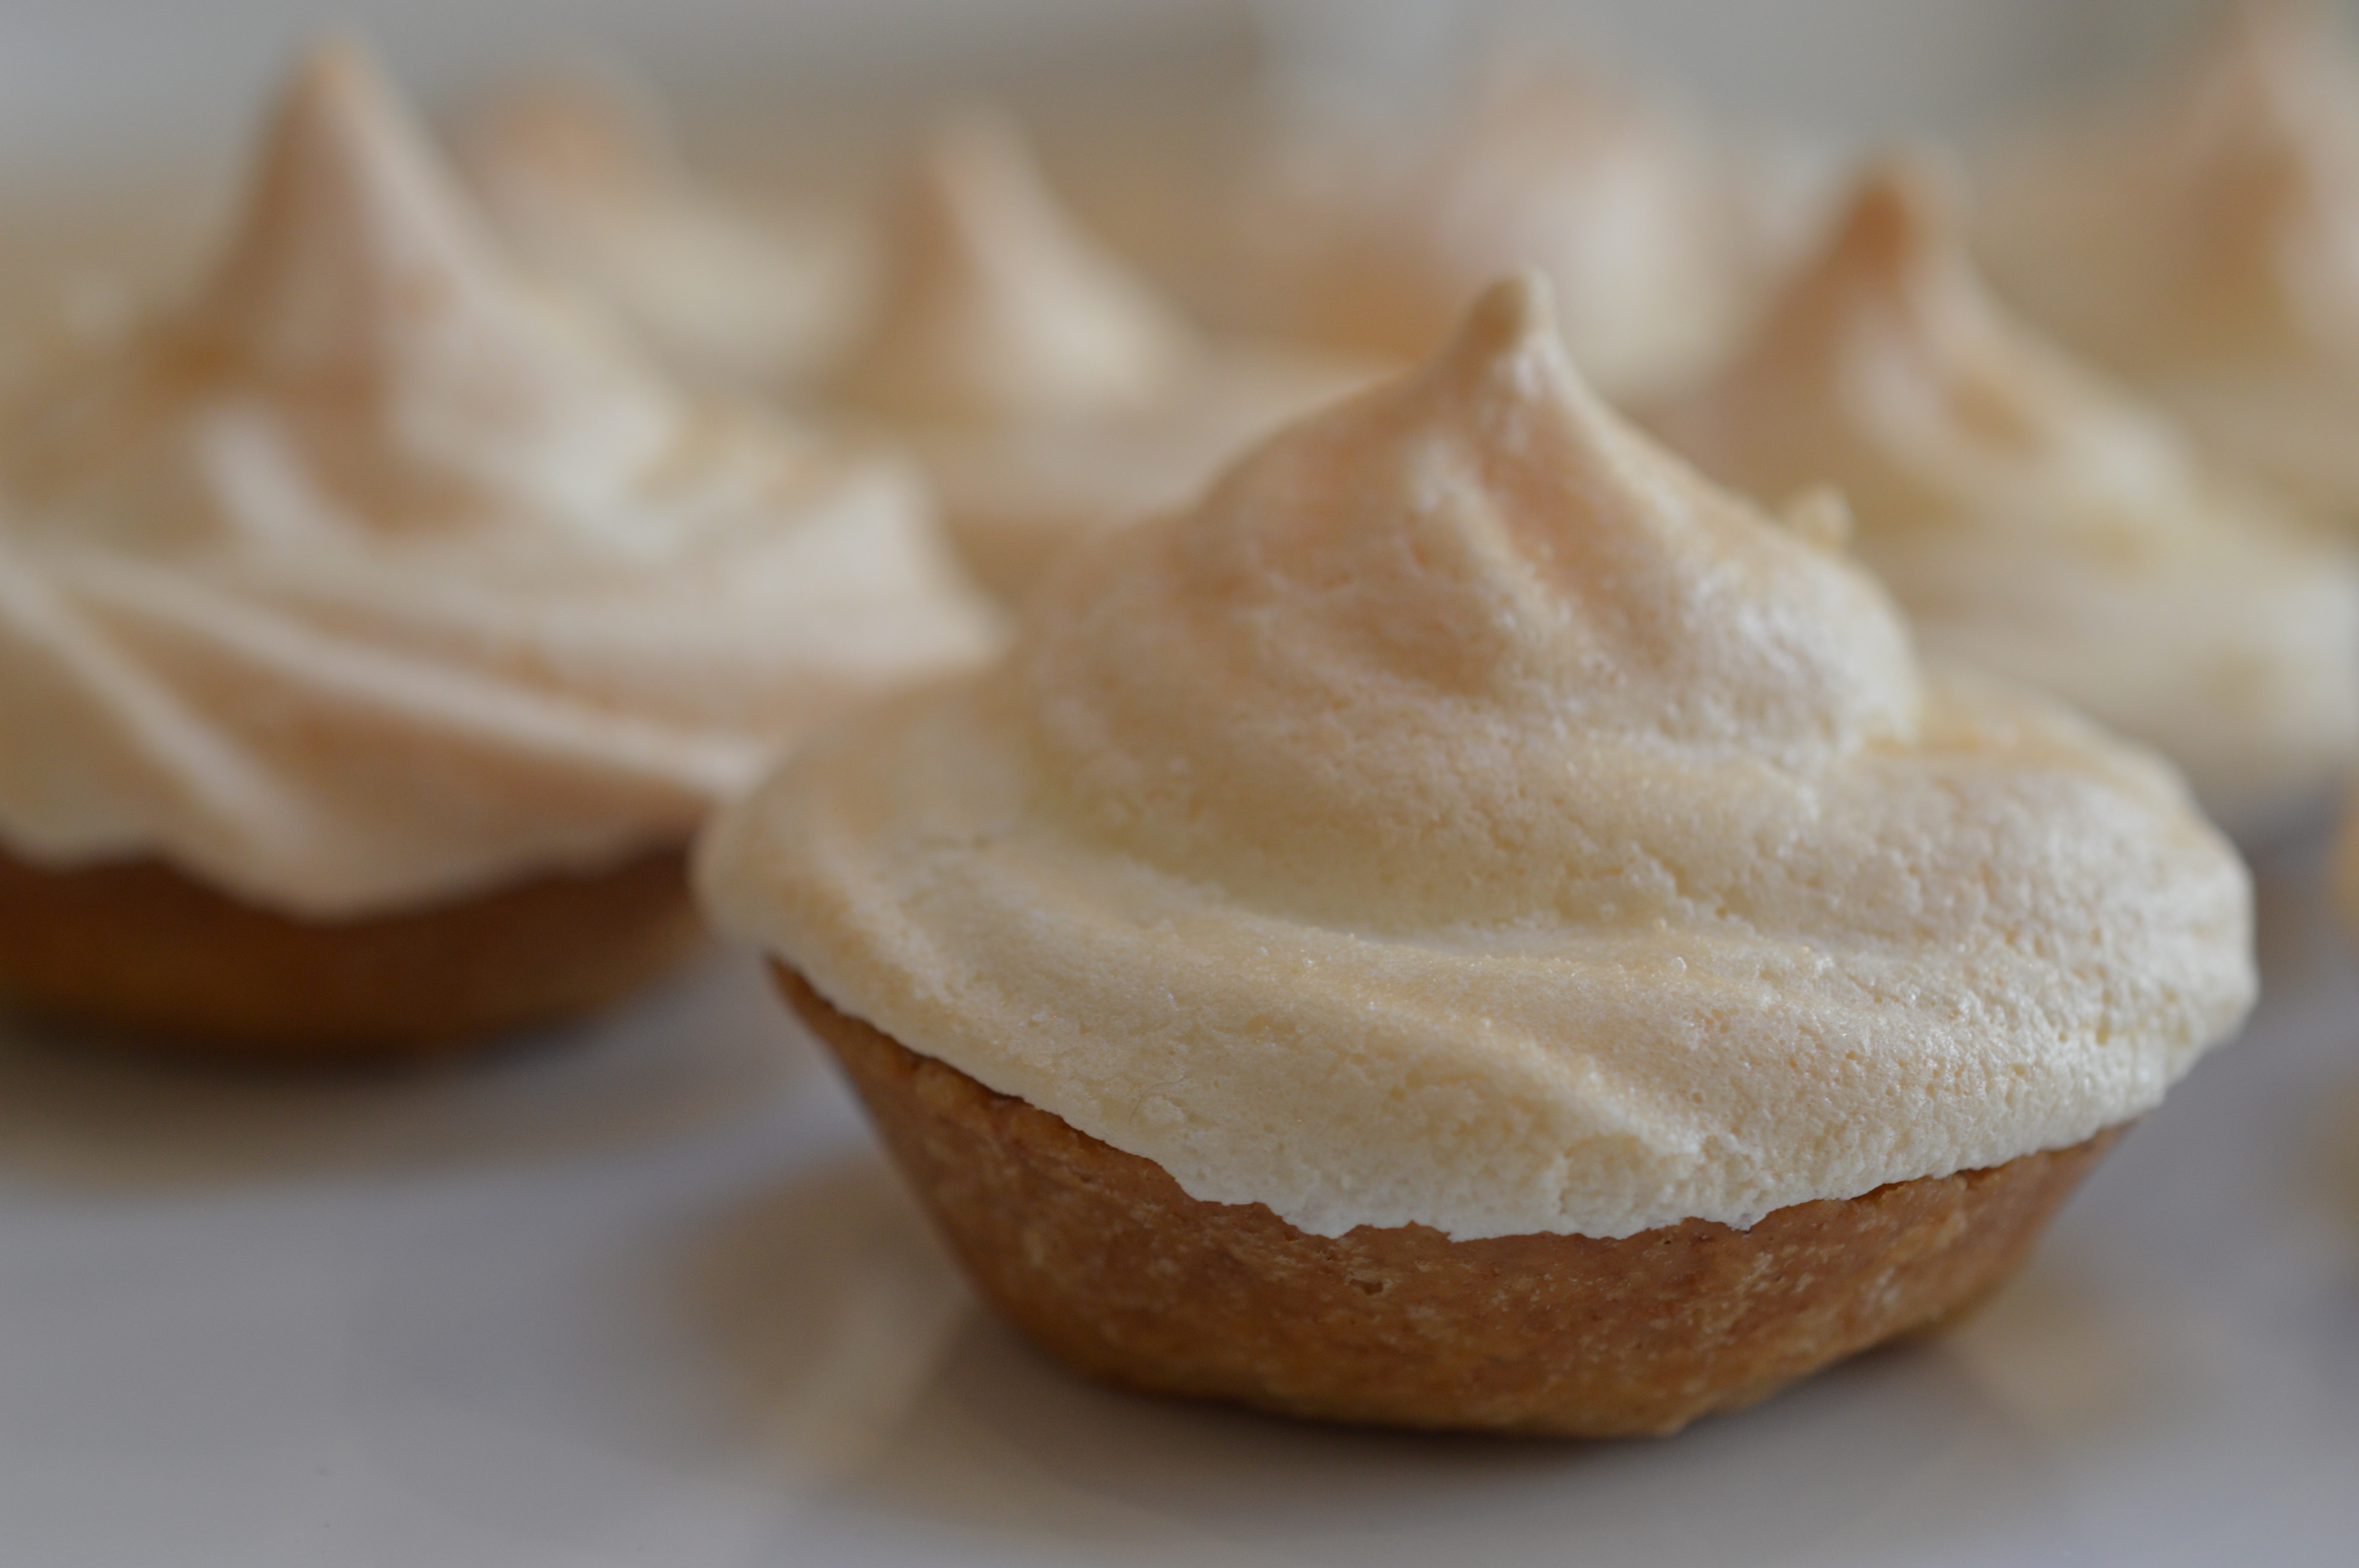
And that left-over pastry ..
Use it to line a 12 bun tin/12 patty tin. Either freeze for later. Or make jam tarts or mini lemon meringue pies now …! The first pastry rolling will always be the flakiest, but the second is still good. Roll evenly – and try not to stretch it.
Traditional Shortcrust Pastry – Makes 8oz/225g shortcrust pastry
(Isn’t that ‘half fat to flour’ Imperial ratio easy to remember! I flick the switch on my scales.)
8 oz/225g plain flour
½ level teaspoon fine sea-salt
2 oz/55g lard
2 oz/55g unsalted butter
2-3 tablespoons of cold water
Sift the flour and salt into a large bowl. Add the butter and lard and ‘rub in’ until you have something approaching fine breadcrumbs. Keep it all light.
Sprinkle the water over and mix the dough with a round bladed knife until it starts to form lumps. Bring together to form a ball. Lightly knead until it is smooth and flatten into a disc. Chill for a minimum of 30 minutes.
Roll out the pastry in even strokes and line a 7″/18cm flan tin and bake ‘blind’ for about 15-20 minutes, until the pastry is golden. Leave to cool and then remove from the tin. Place on a baking sheet.
Reduce the oven temperature to Gas Mark 2.
Peel the rind from the lemon, ensuring there is no white pith. Squeeze the juice from the lemon and put 3 tablespoons in a large bowl.
Put the lemon peel, granulated sugar and ½ pint/300ml water. Cook over a low heat until the sugar has dissolved, then bring up to a boil. Remove from the heat.
Blend 2 tablespoons of cornflour with the lemon juice in the bowl. Pouring through a sieve, add the sugar syrup. Stir.
Separate the eggs. One at a time, beat in the egg yolks and the butter. Return to the saucepan and heat until thickened. It’s ready when it’s thick enough to coat the back of a wooden spoon.
Pour the lemony mixture through a sieve into the cooked pastry case. Cool.
Whisk the egg whites until stiff and then add half of the caster sugar. Whisk again until the meringue is shiny and holds its shape. Fold in the remaining sugar leaving a little to sprinkle over the top.
Pile the meringue over the top, spreading from the sides to the middle and making sure the meringue makes a firm seal with the pastry case.
Sprinkle over the remaining caster sugar.
Bake the Lemon Meringue Pie for 30 minutes, or until the top is crisp. Best served warm.